500+bhp Mk3 Fiesta Project
Discussion


Fuel Filler Neck Part 2: Prototype
As often as not, these projects involve more time spent researching than they do wielding tools, and the filler neck was no exception. My intent was to utilise an existing part rather than fabricate an assembly from scratch, or a generic filler cap assembly. I also try to stick to one of my principles to use Ford parts where possible in order to simplify future maintenance requirements - though obviously that one often does not work out.
Several hours of visual research led me to the Mk7/2008 Fiesta filler neck. The material, form, and overall dimensions looked suitable. This type of research takes me so far but the next, and most enjoyable step is to order a used part to get an impression of the physical part. I liked the Mk7 generation as Ford appeared to switch to stainless - the previous generation (I know them as the Mk6) seem to rust terribly and its form appeared useless for my application. The Mk7 filler neck had sufficient tube length & bends to be useful as raw material to fashion something bespoke for my car.
The image below shows the Mk3 filler neck (top) and the Mk7 filler neck (bottom).
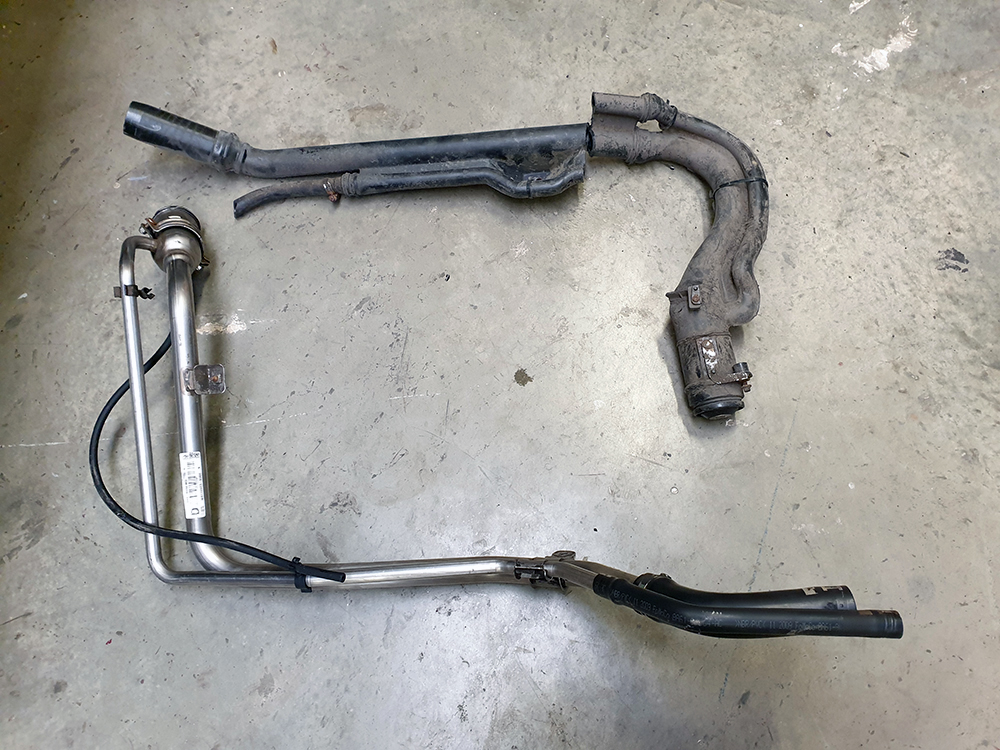
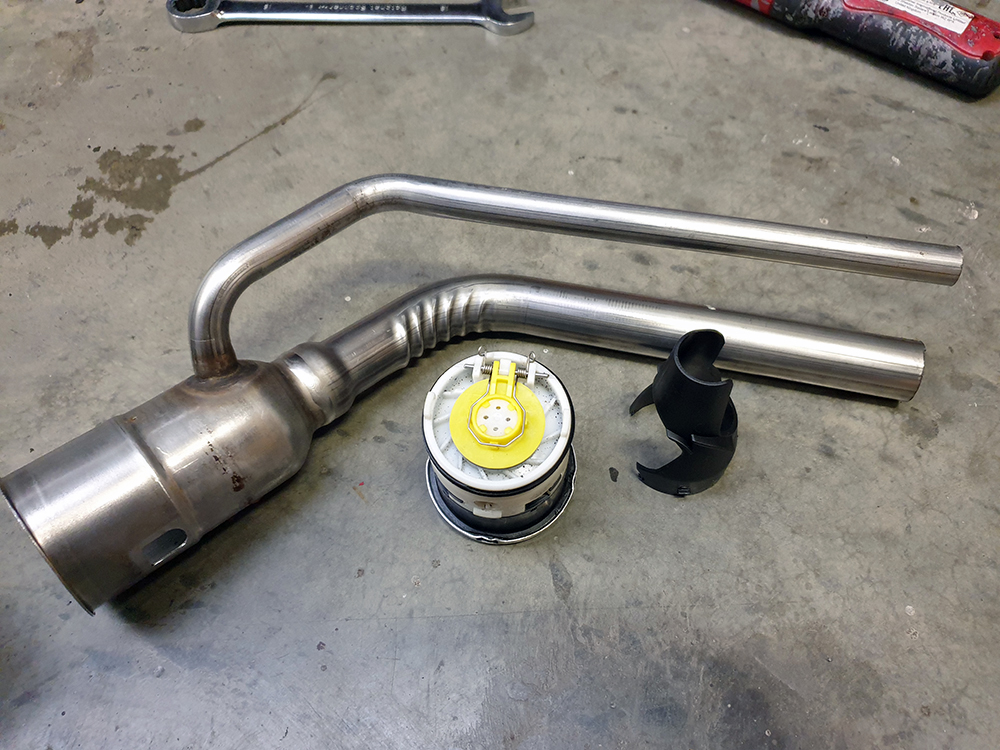
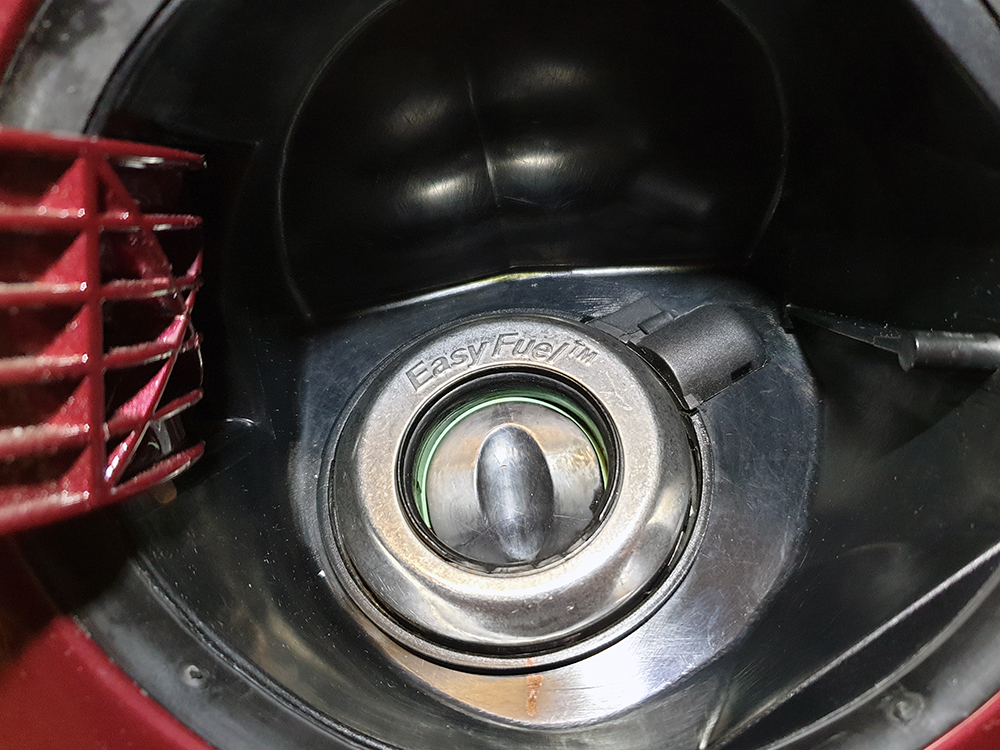
Dissection of the Mk7 part revealed an early incarnation of Ford's capless 'Easy Fuel' system, which is designed to increase convenience by preventing filling with the wrong fuel, and at the same time replacing the security provided by a locking cap with an internal mechanism. I measured the filler diameter with my verniers and found that the circumference was only 2-3mm less than the original Mk3 part - close enough.
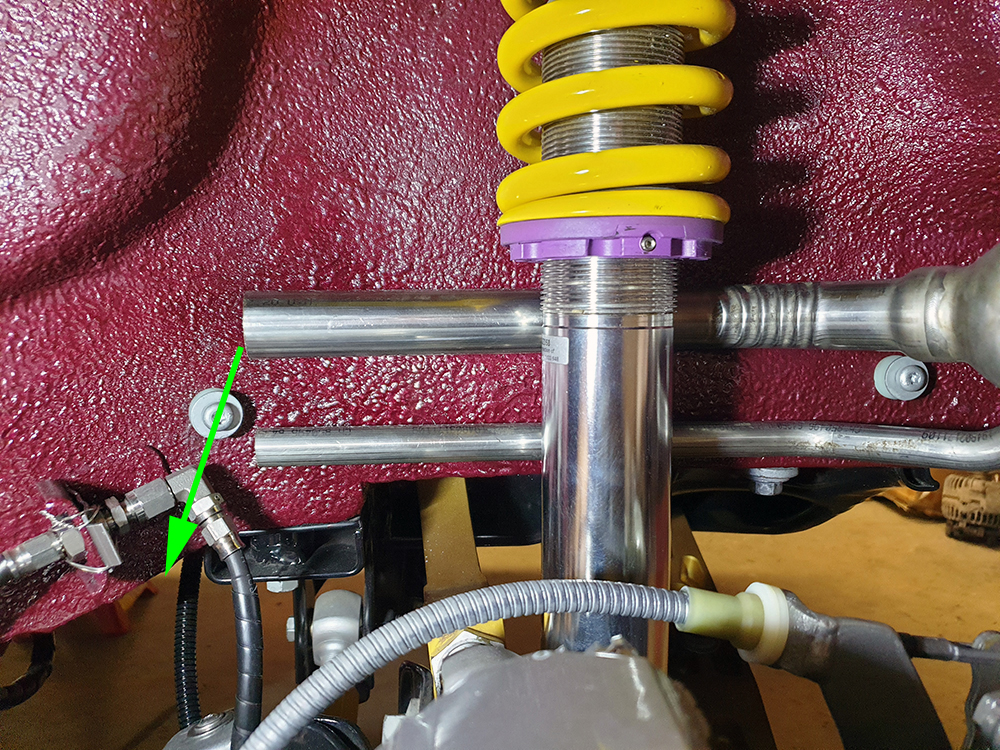
With a suitable candidate part found I could evaluate my idea in physical form. I had a number of constraints to work with: the boot floor was out - the pipes must pass within the wheelarch, I was using larger than the OEM KW coilovers, I had converted to Focus IRS which placed a suspension arm close to the leading inside edge of the wheelarch, and I had added fastenings for Mk4 Fiesta wheelarch liners. The only space left was behind the brake line brackets.
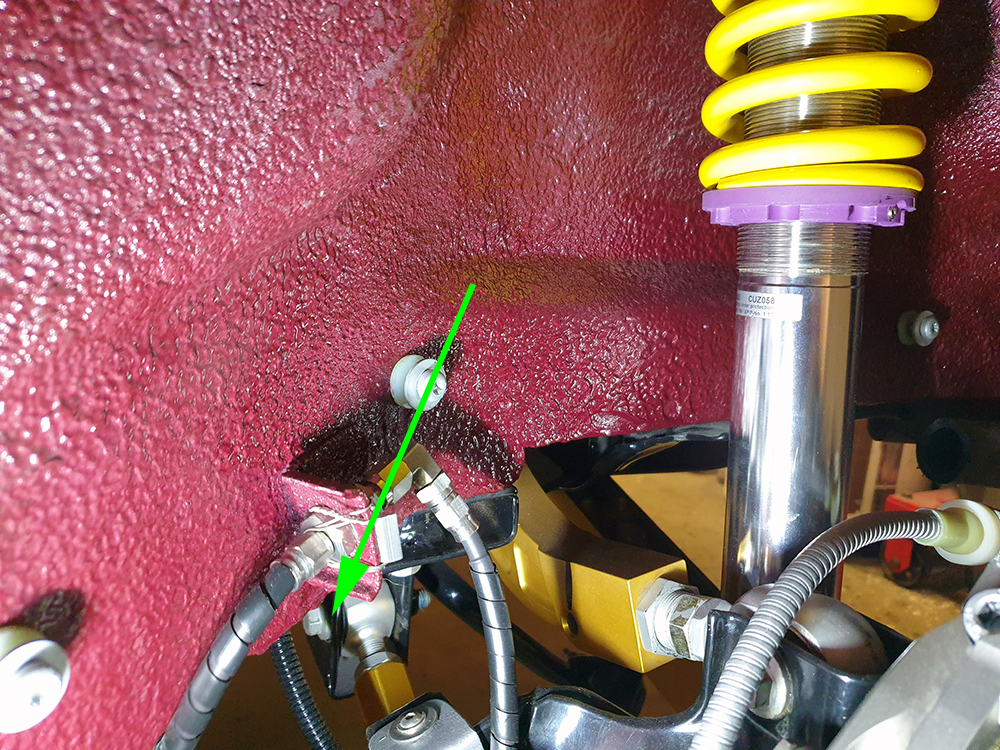
At this stage I was happy to proceed with a PoC. The suspension was at full droop with my set ride height, and I had confirmed clearance at full compression. It was tight, but feasible.
As often as not, these projects involve more time spent researching than they do wielding tools, and the filler neck was no exception. My intent was to utilise an existing part rather than fabricate an assembly from scratch, or a generic filler cap assembly. I also try to stick to one of my principles to use Ford parts where possible in order to simplify future maintenance requirements - though obviously that one often does not work out.
Several hours of visual research led me to the Mk7/2008 Fiesta filler neck. The material, form, and overall dimensions looked suitable. This type of research takes me so far but the next, and most enjoyable step is to order a used part to get an impression of the physical part. I liked the Mk7 generation as Ford appeared to switch to stainless - the previous generation (I know them as the Mk6) seem to rust terribly and its form appeared useless for my application. The Mk7 filler neck had sufficient tube length & bends to be useful as raw material to fashion something bespoke for my car.
The image below shows the Mk3 filler neck (top) and the Mk7 filler neck (bottom).
Dissection of the Mk7 part revealed an early incarnation of Ford's capless 'Easy Fuel' system, which is designed to increase convenience by preventing filling with the wrong fuel, and at the same time replacing the security provided by a locking cap with an internal mechanism. I measured the filler diameter with my verniers and found that the circumference was only 2-3mm less than the original Mk3 part - close enough.
With a suitable candidate part found I could evaluate my idea in physical form. I had a number of constraints to work with: the boot floor was out - the pipes must pass within the wheelarch, I was using larger than the OEM KW coilovers, I had converted to Focus IRS which placed a suspension arm close to the leading inside edge of the wheelarch, and I had added fastenings for Mk4 Fiesta wheelarch liners. The only space left was behind the brake line brackets.
At this stage I was happy to proceed with a PoC. The suspension was at full droop with my set ride height, and I had confirmed clearance at full compression. It was tight, but feasible.
Fuel Filler Neck Part 3: Fabrication
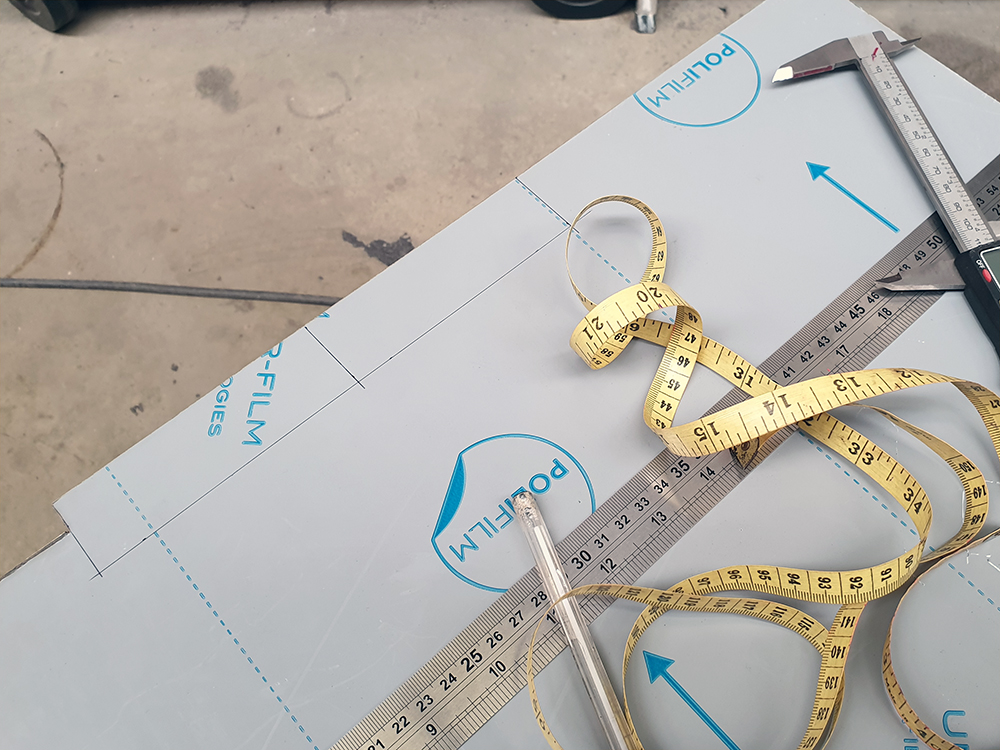
Without a doubt my new favourite tool is this hydraulic pipe expander which is used to create a sleeve joint on metal pipe. It comes with an adjustable pipe cutter, and a de-burring tool, all of which are ideal for this job. The best part was it was free: I received some Amazon vouchers at work as part of an award, so I went straight to the the tools section to order this. My plan was to chop up the Mk7 filler neck and use the new tool to create joints, as the tool would provide flexibility to create slightly more clearance than necessary, allowing the joints to meet at varying angles.
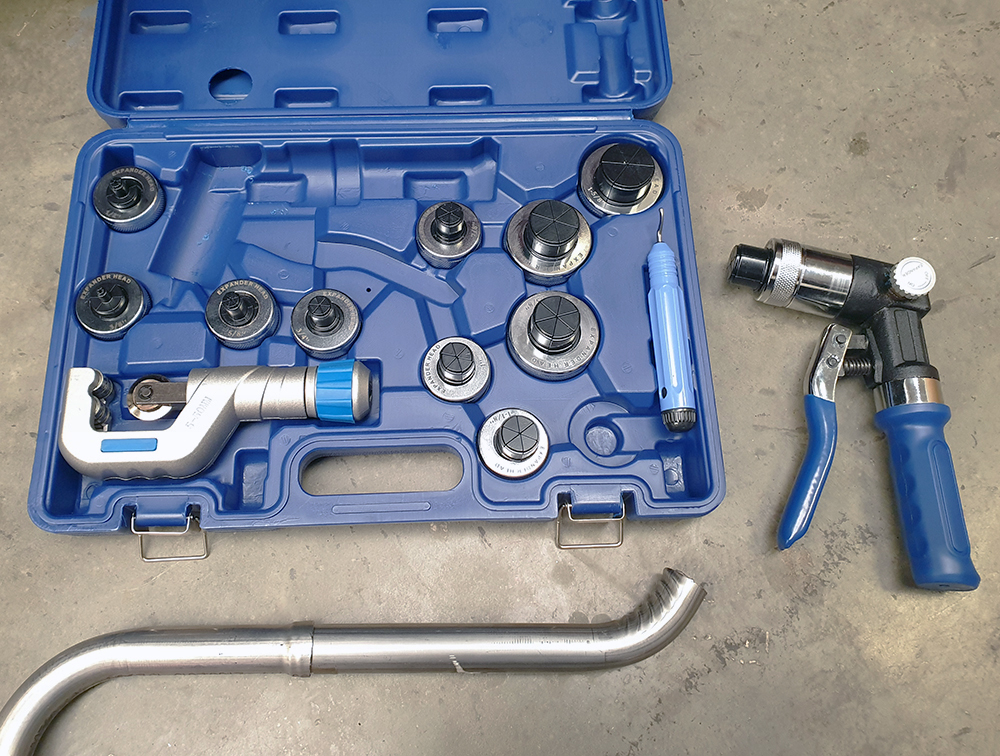
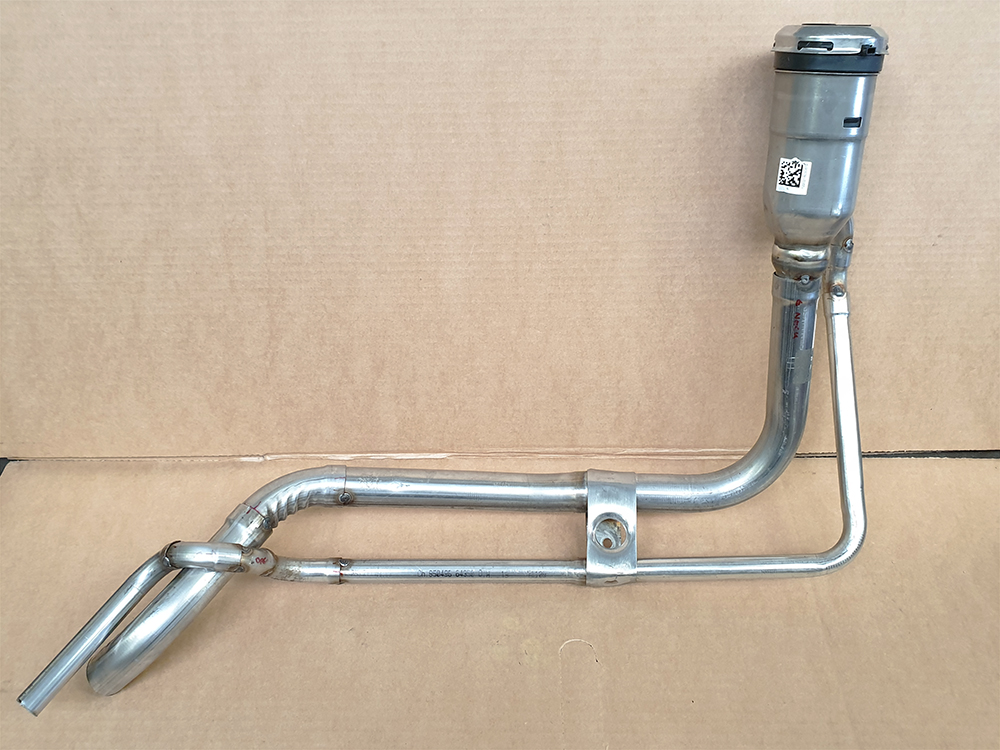
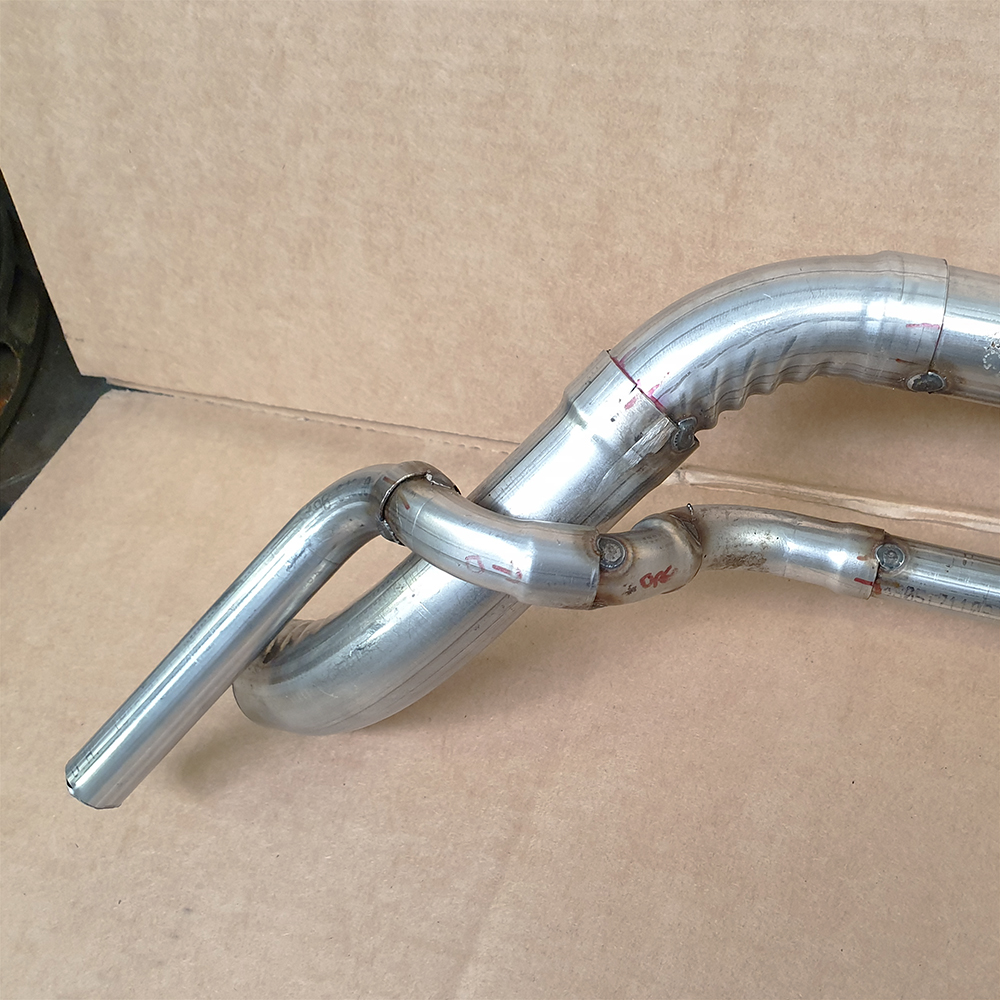
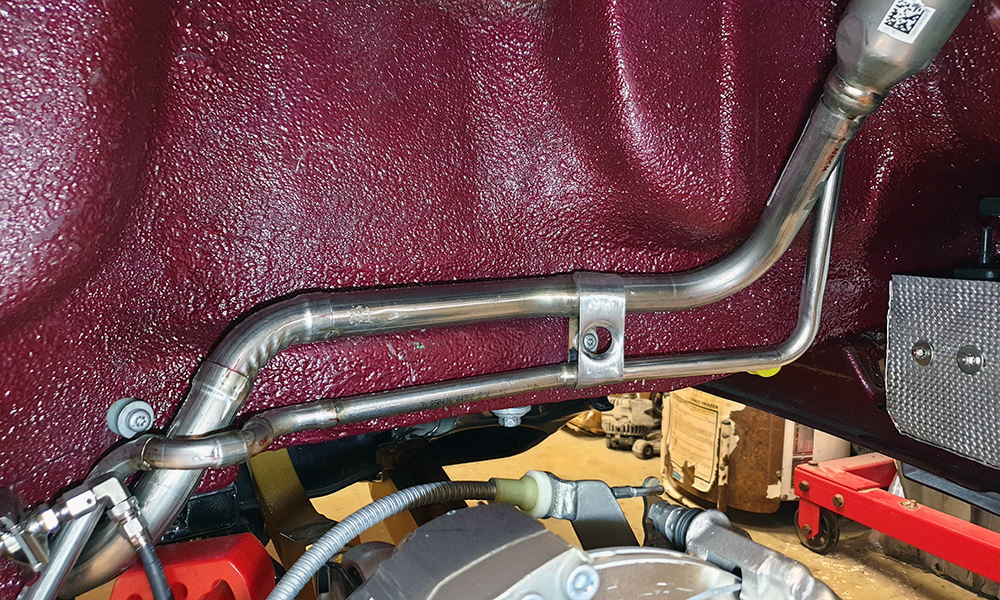
I started with the main filler pipe. I made an initial prototype, and decided that I could improve, so here is the second iteration - propped up by a red Powerflex exhaust mount until I fabricate a securing bracket. There are various angles in play inside the wheelhousing and reaching this point was more time consuming than it may appear.
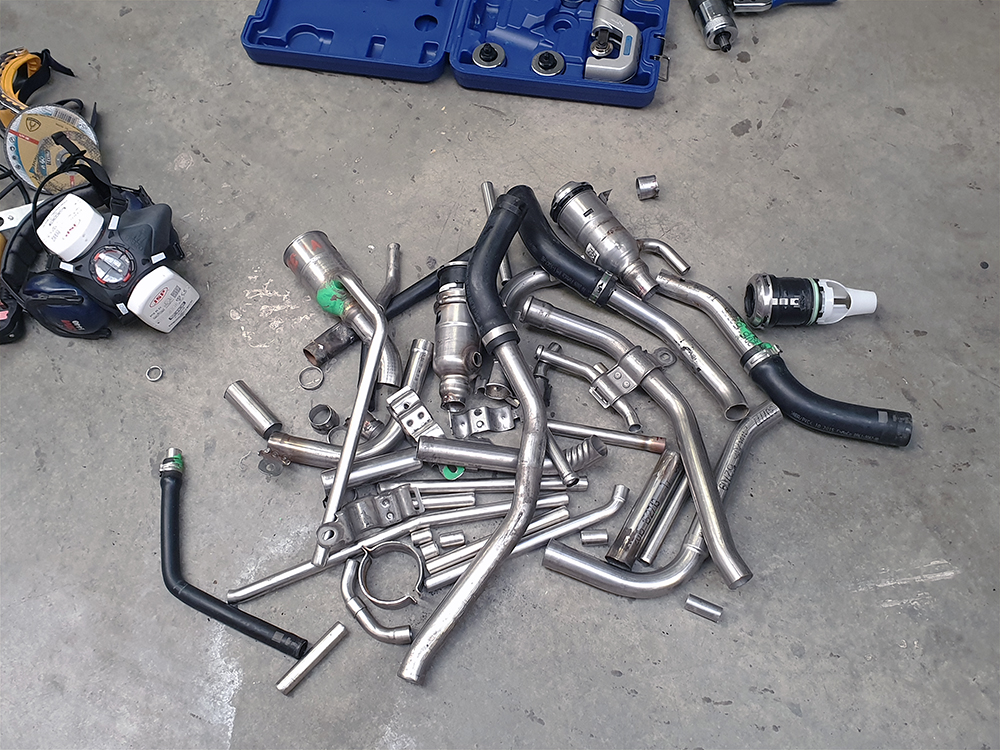
Here's the pile of bits I was left with. In the end I had used four Mk7 filler necks. If the need arises to make another then I could reduce that figure to two
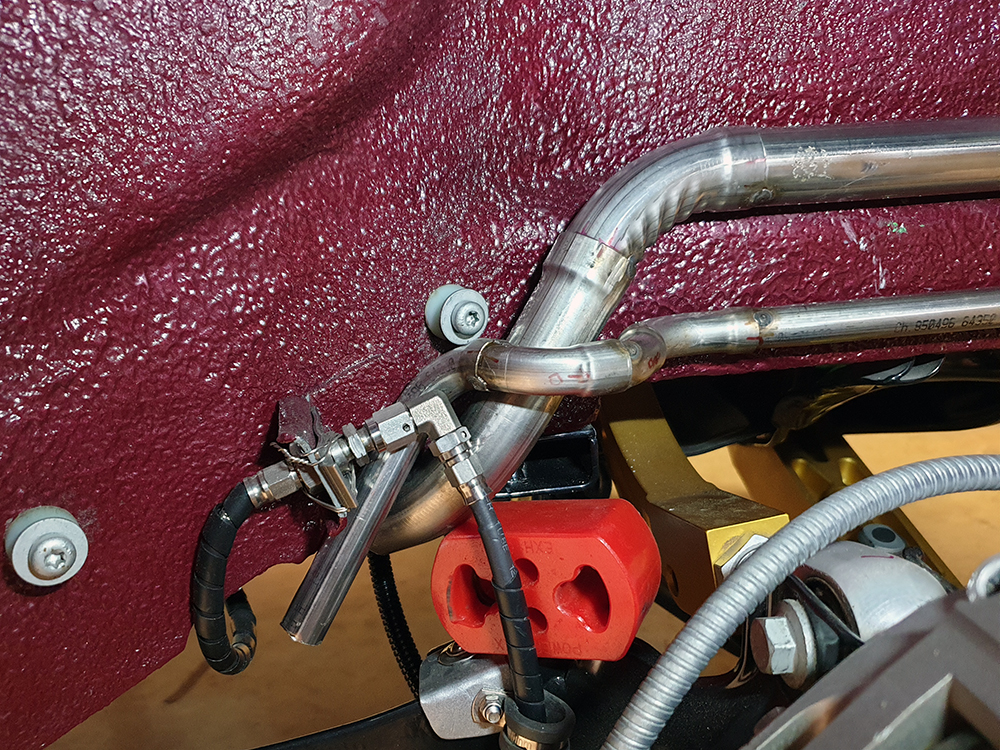
Here's the assembly with breather pipe and the first bracket. At this stage the joints are just tack welded in place, but when final welding takes place I will add a second bracket/strap, and make sure that the pipes are parallel.
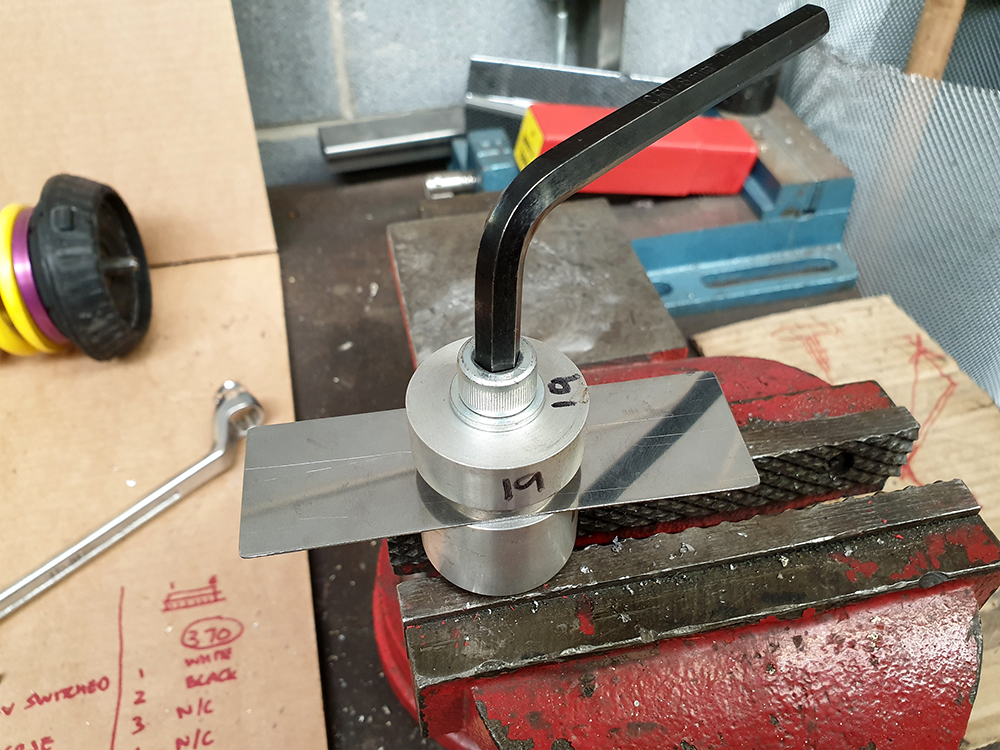
The following three photos show some of the fabrication process of the securing strap. The swaged hole adds strength, reduces weight, and provides clearance to the mounting fastening.
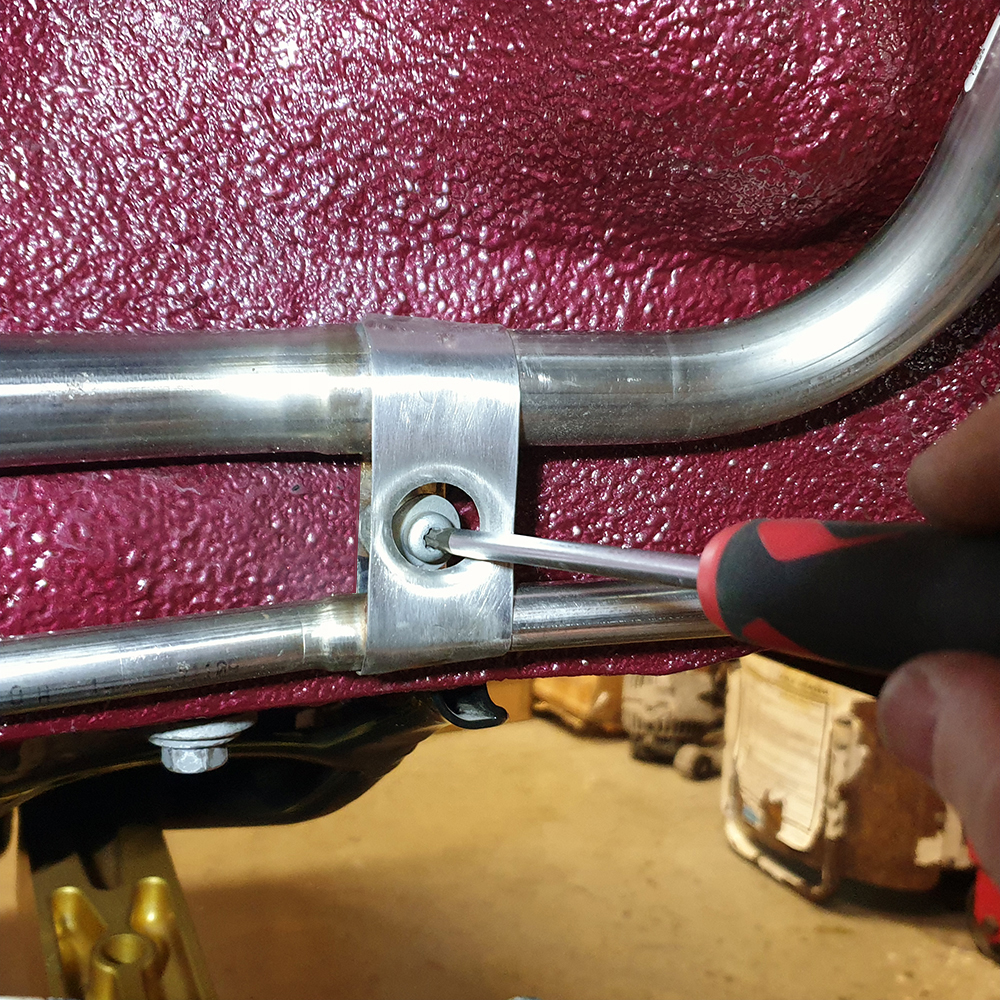
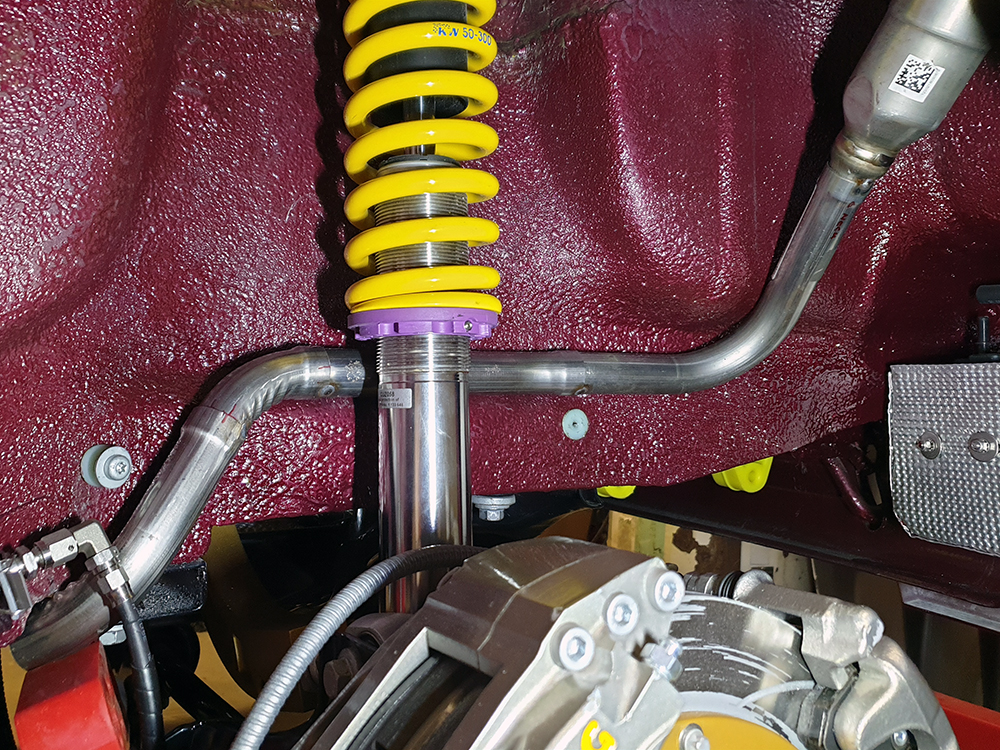
Here is the completed assembly fitted to the car. I'm pleased with the outcome.
It isn't quite finished: I'm waiting for some Argon to arrive so that I can TIG the joints together, I have a second swaged strap to add to the straight section in the wheelarch, another fastening at the front of the wheelarch, and finally the connection to the tank itself - which is being fabricated by a friend.
Without a doubt my new favourite tool is this hydraulic pipe expander which is used to create a sleeve joint on metal pipe. It comes with an adjustable pipe cutter, and a de-burring tool, all of which are ideal for this job. The best part was it was free: I received some Amazon vouchers at work as part of an award, so I went straight to the the tools section to order this. My plan was to chop up the Mk7 filler neck and use the new tool to create joints, as the tool would provide flexibility to create slightly more clearance than necessary, allowing the joints to meet at varying angles.
I started with the main filler pipe. I made an initial prototype, and decided that I could improve, so here is the second iteration - propped up by a red Powerflex exhaust mount until I fabricate a securing bracket. There are various angles in play inside the wheelhousing and reaching this point was more time consuming than it may appear.
Here's the pile of bits I was left with. In the end I had used four Mk7 filler necks. If the need arises to make another then I could reduce that figure to two
Here's the assembly with breather pipe and the first bracket. At this stage the joints are just tack welded in place, but when final welding takes place I will add a second bracket/strap, and make sure that the pipes are parallel.
The following three photos show some of the fabrication process of the securing strap. The swaged hole adds strength, reduces weight, and provides clearance to the mounting fastening.
Here is the completed assembly fitted to the car. I'm pleased with the outcome.
It isn't quite finished: I'm waiting for some Argon to arrive so that I can TIG the joints together, I have a second swaged strap to add to the straight section in the wheelarch, another fastening at the front of the wheelarch, and finally the connection to the tank itself - which is being fabricated by a friend.
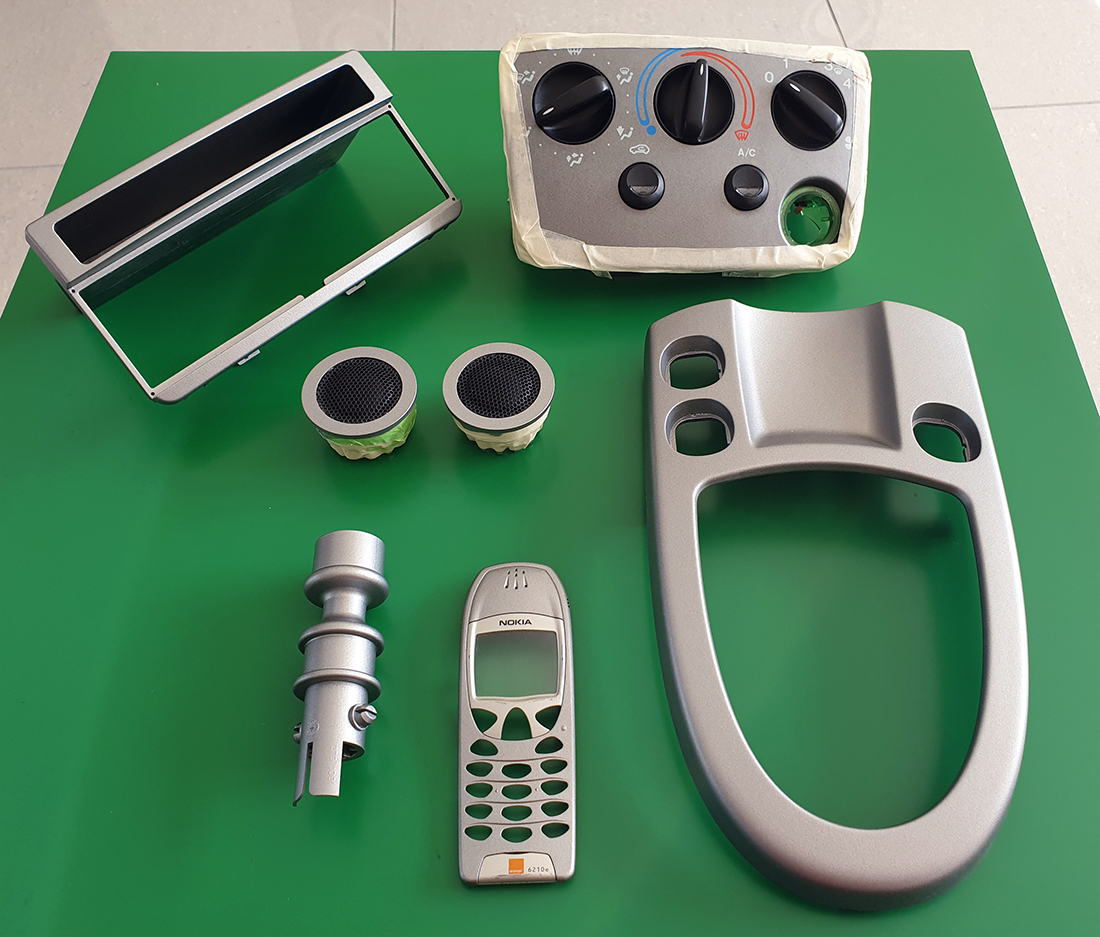
This morning I collected various interior trim pieces from the body shop. I've had them sprayed to match the Mk5 Fiesta HVAC panel & instrument cluster faascia.
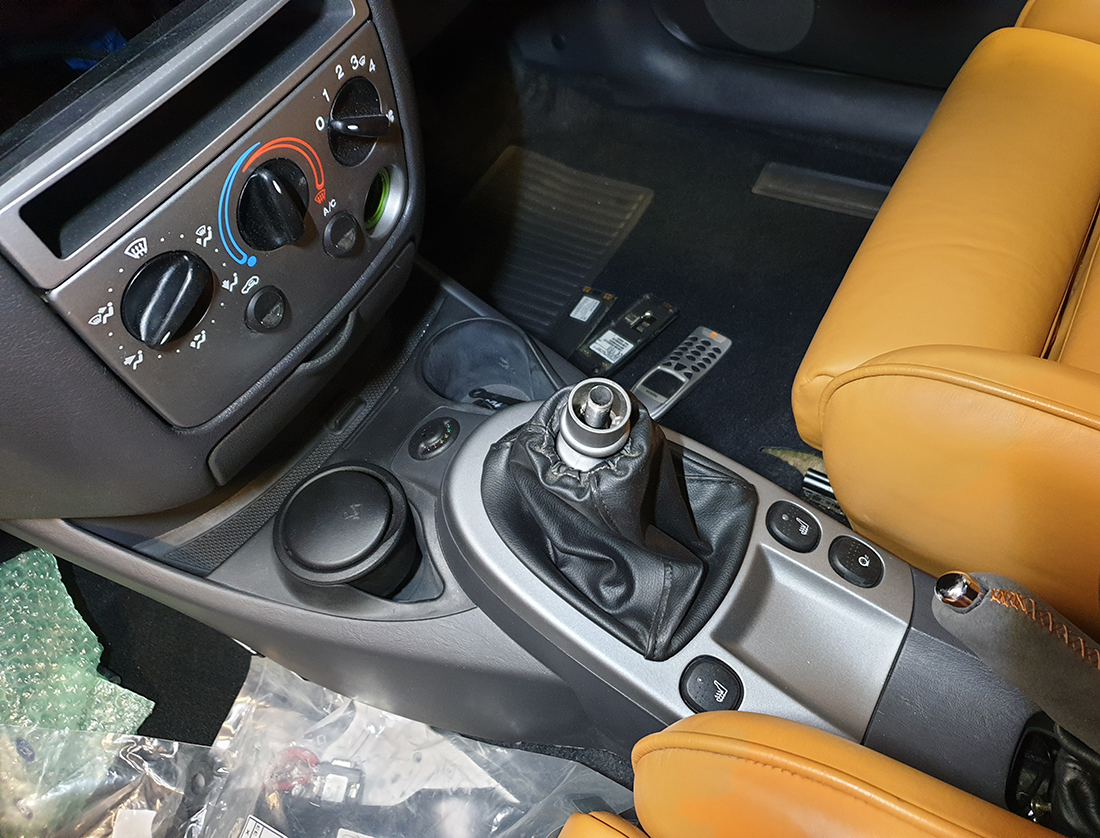
Fitted. Ford phone kit in passenger foot well awaiting fitment.
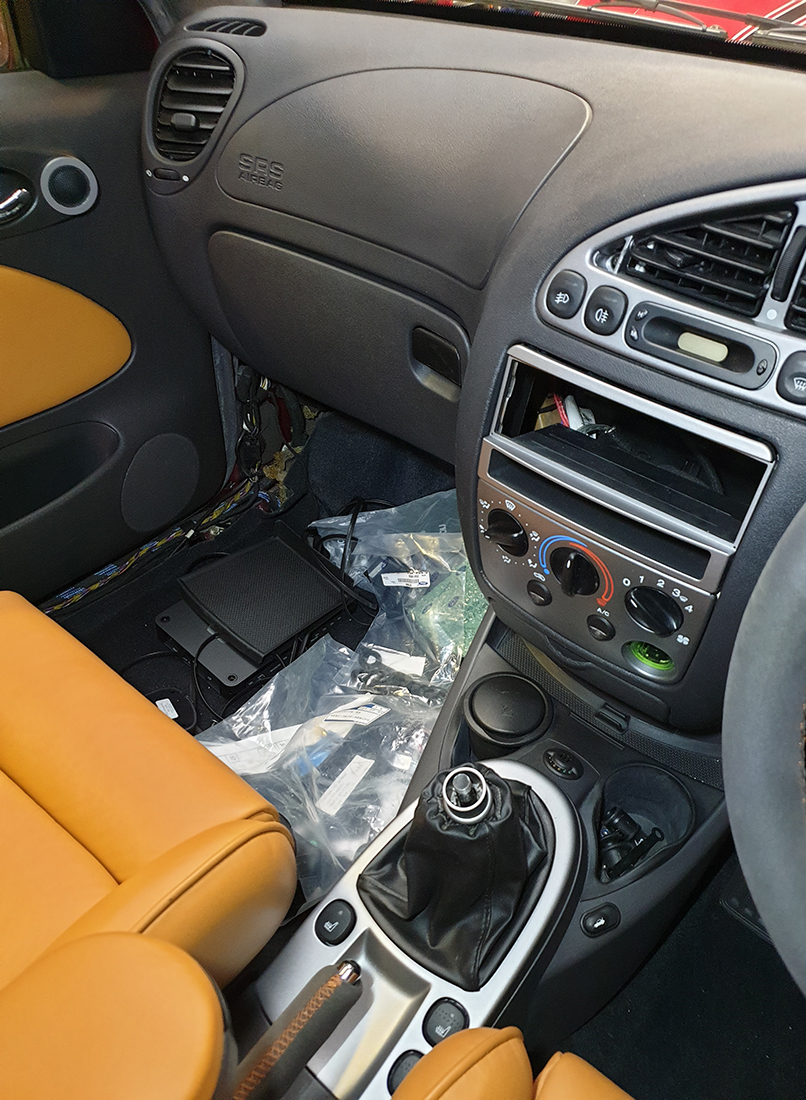
One thing I need to do is extend the gear lever to suit the Fiesta: it's a Mk1 Focus RS short-throw assembly and has a much shorter lever than the standard Focus. I will extend the shaft by 3".
- Focus gear lever surround: originally black
- Seas Lotus tweeters: originally silver
- Mk1 Focus RS reverse lever lock: originally chrome
- Single DIN radio adapter fascia: unacceptable colour match
- Period Nokia phone for the period Ford handsfree kit: dark grey
Fitted. Ford phone kit in passenger foot well awaiting fitment.
One thing I need to do is extend the gear lever to suit the Fiesta: it's a Mk1 Focus RS short-throw assembly and has a much shorter lever than the standard Focus. I will extend the shaft by 3".
My mock-up fuel tank was with a friend awaiting fabrication of a production version in alloy, and to a much higher standard than I am capable of. It wasn't a paid job - we did a swap for the Focus WRC Inconel exhaust manifold that I wasn't using - so I understandably the job would take longer than usual.
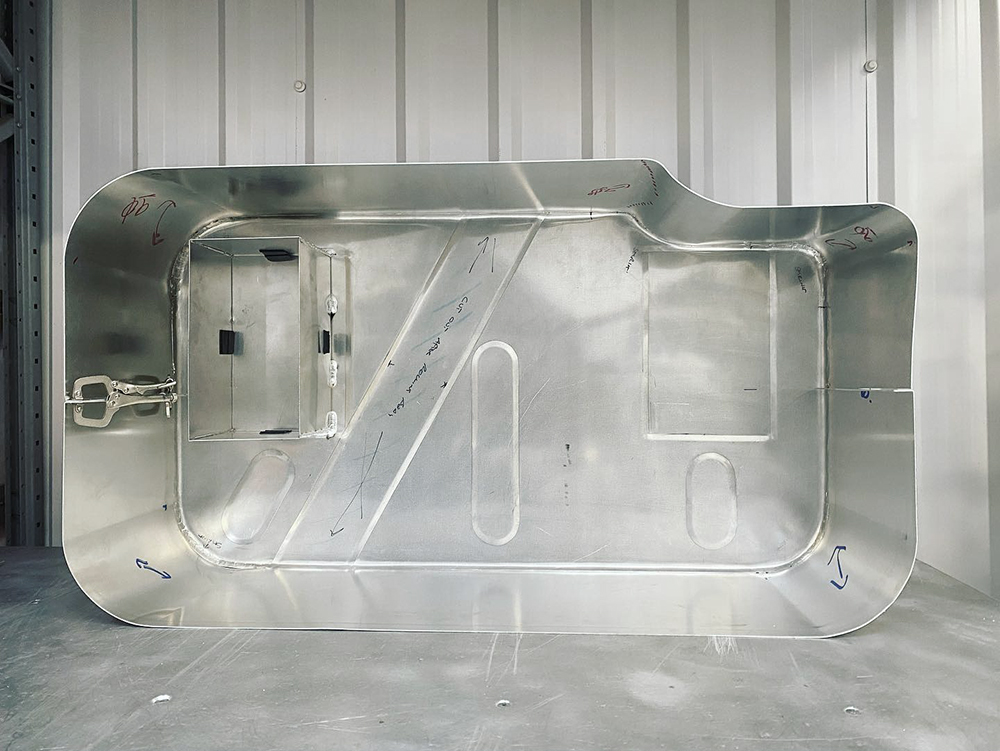
Fuel Tank - Base
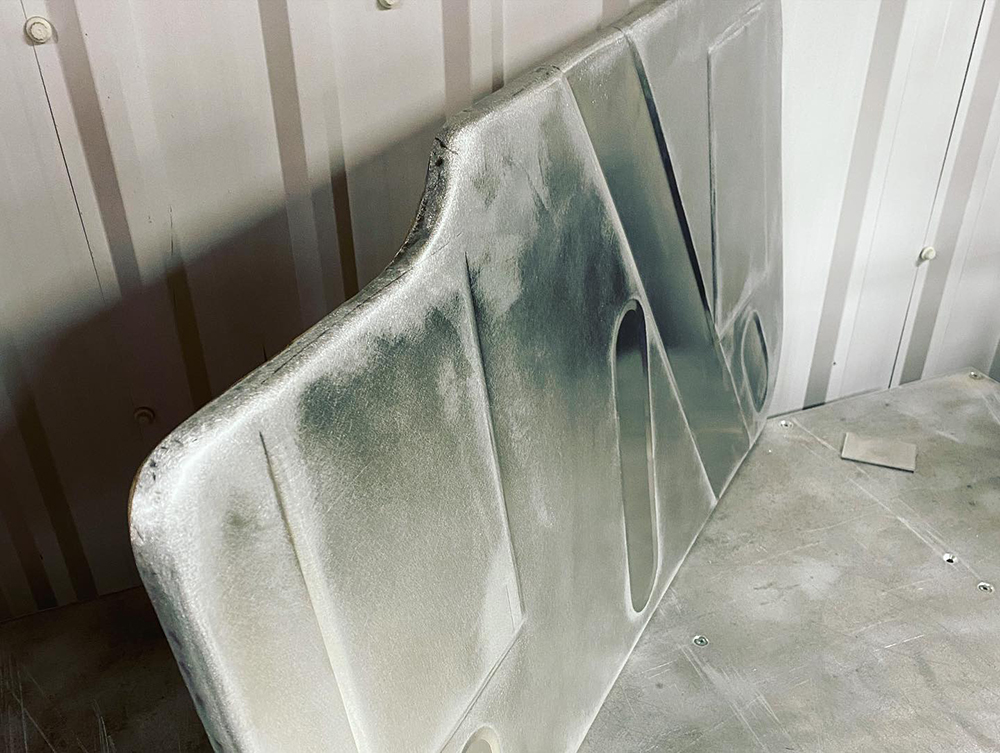
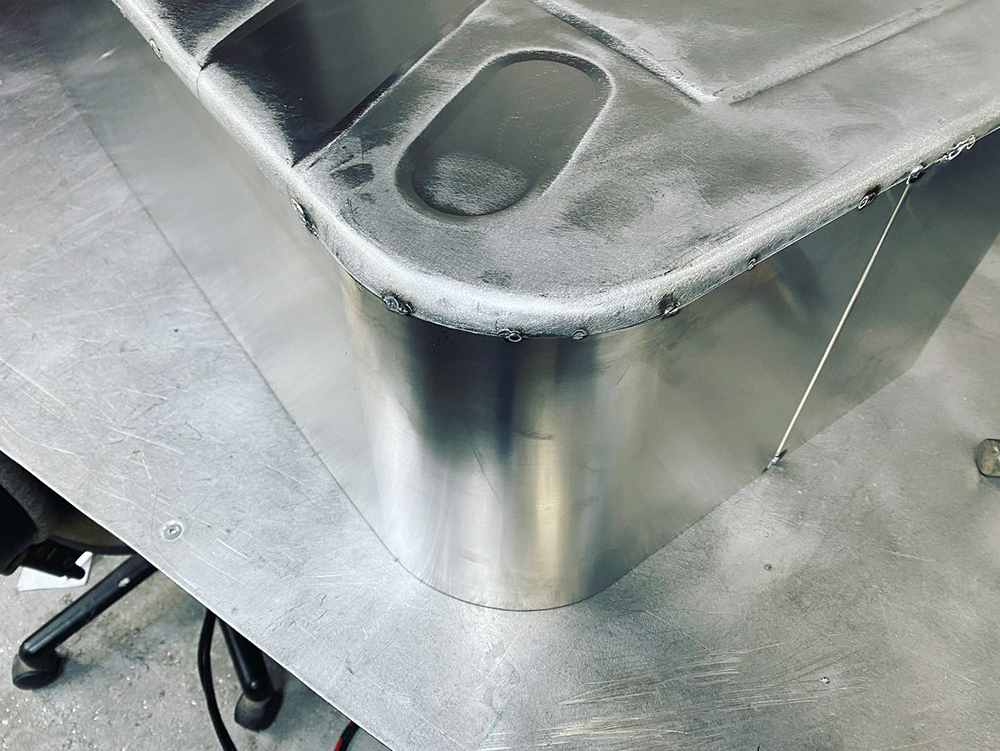
I set a bit of a challenge with this project; typically aftermarket tanks are made with straight edges but of course I wanted an OEM, and so a radius on the edges. A wooden former was made to hammer the radius, but the (yet to be fabricated) exhaust tunnel results in bead rolling to the edge of each side meaning that achieving a visually neat result was not straight-forward.
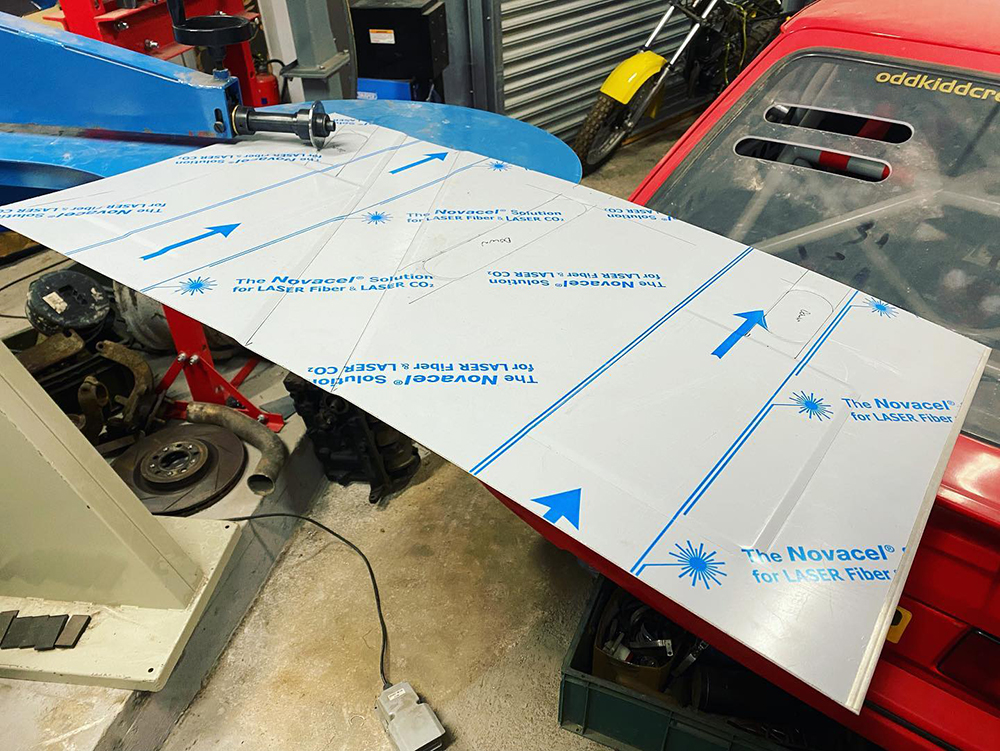
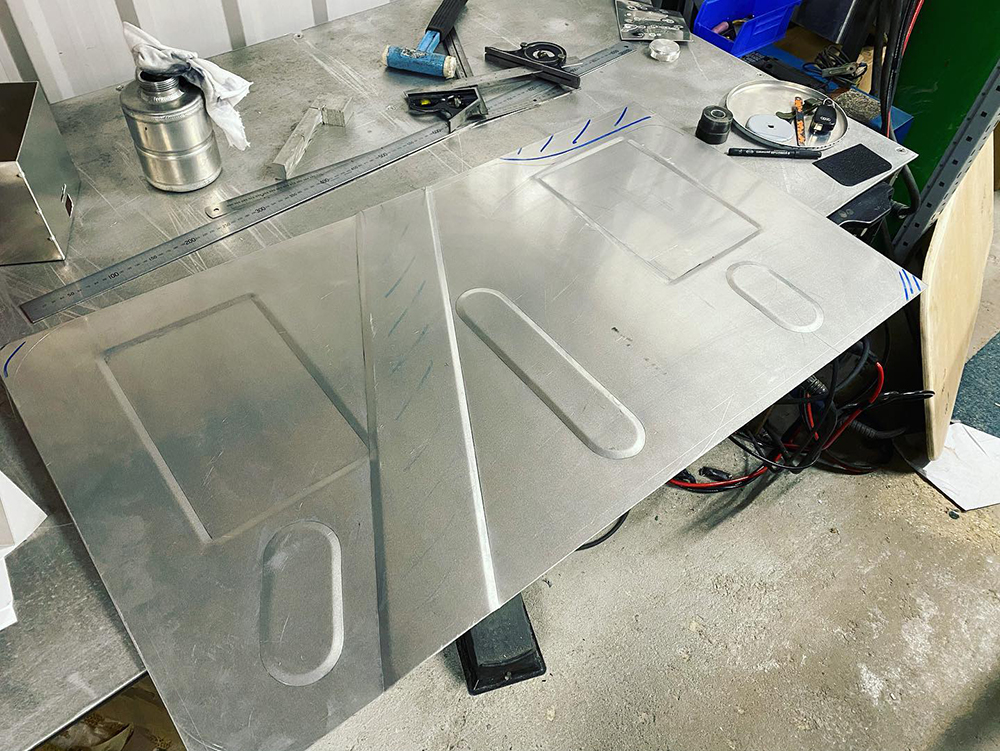
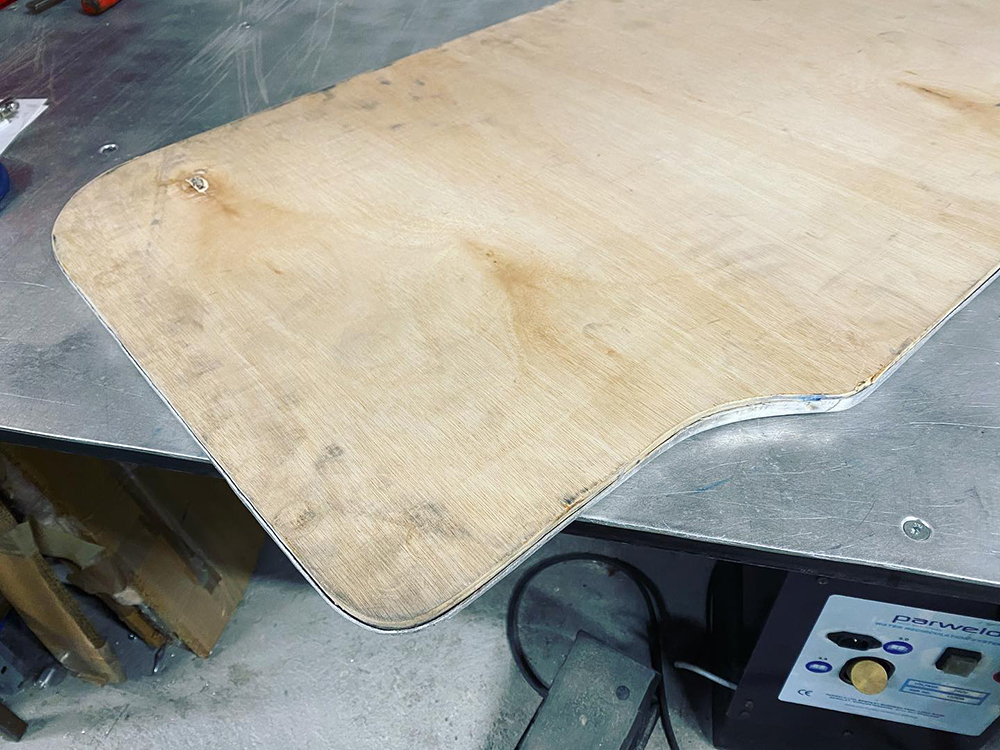
Hammer forming complete. The corners are now ready for shrinking and stretching.
You can contact my friend here: https://www.greenon.uk A life-long car enthusiast who since leaving the Paras has made a new career in fabrication.
Fuel Tank - Base
I set a bit of a challenge with this project; typically aftermarket tanks are made with straight edges but of course I wanted an OEM, and so a radius on the edges. A wooden former was made to hammer the radius, but the (yet to be fabricated) exhaust tunnel results in bead rolling to the edge of each side meaning that achieving a visually neat result was not straight-forward.
Hammer forming complete. The corners are now ready for shrinking and stretching.
You can contact my friend here: https://www.greenon.uk A life-long car enthusiast who since leaving the Paras has made a new career in fabrication.
Fuel Tank - Sides
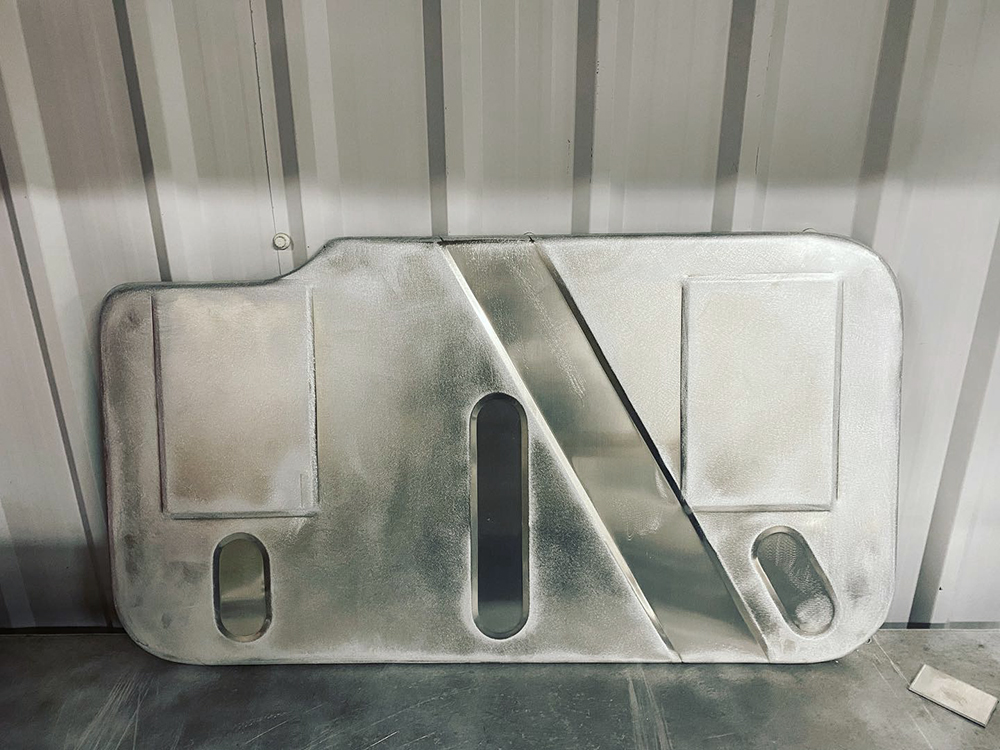
The sides are fabricated from two pieces. The top edge of the side pieces will be trimmed after they are welded into place.
The two side sections and one of the two swirl pots which is gated with one-way flaps.
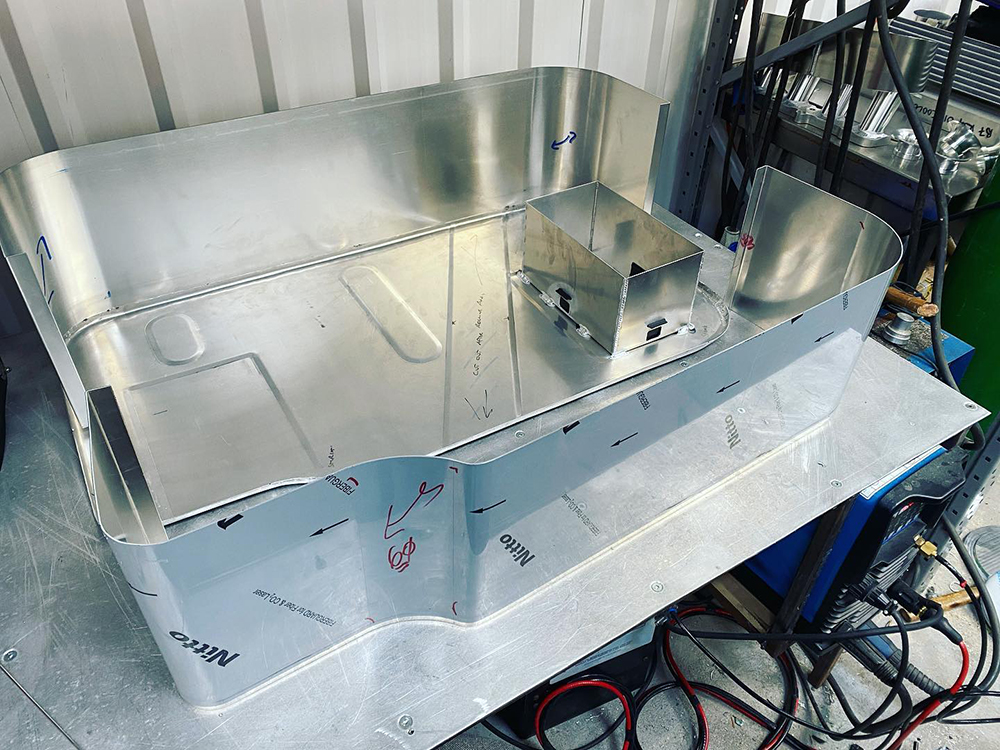
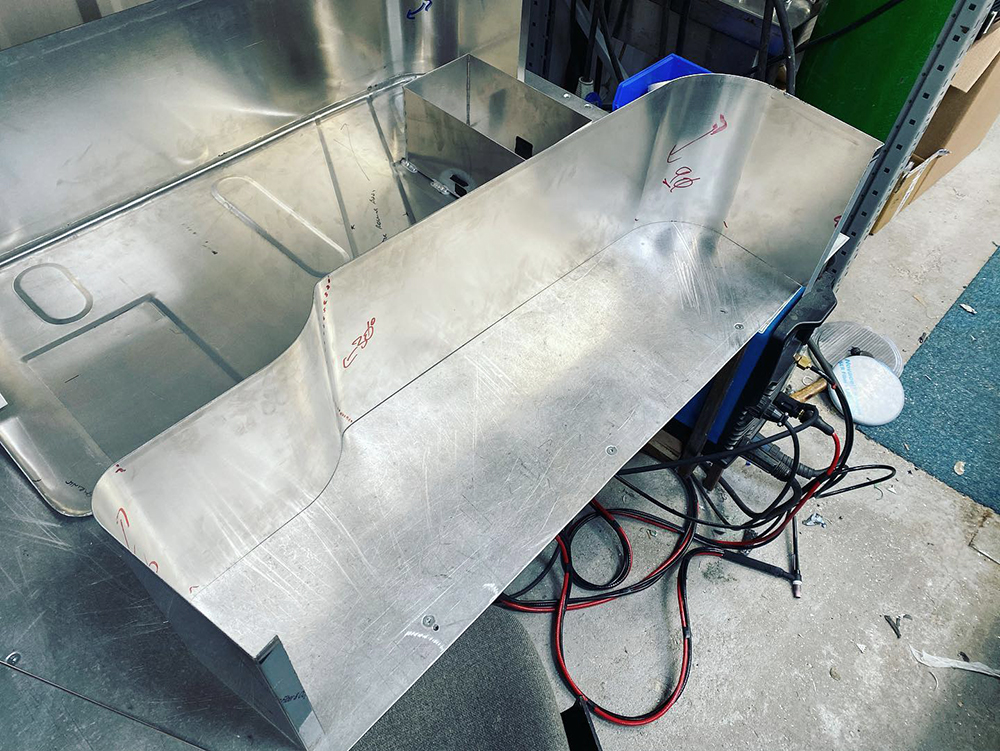
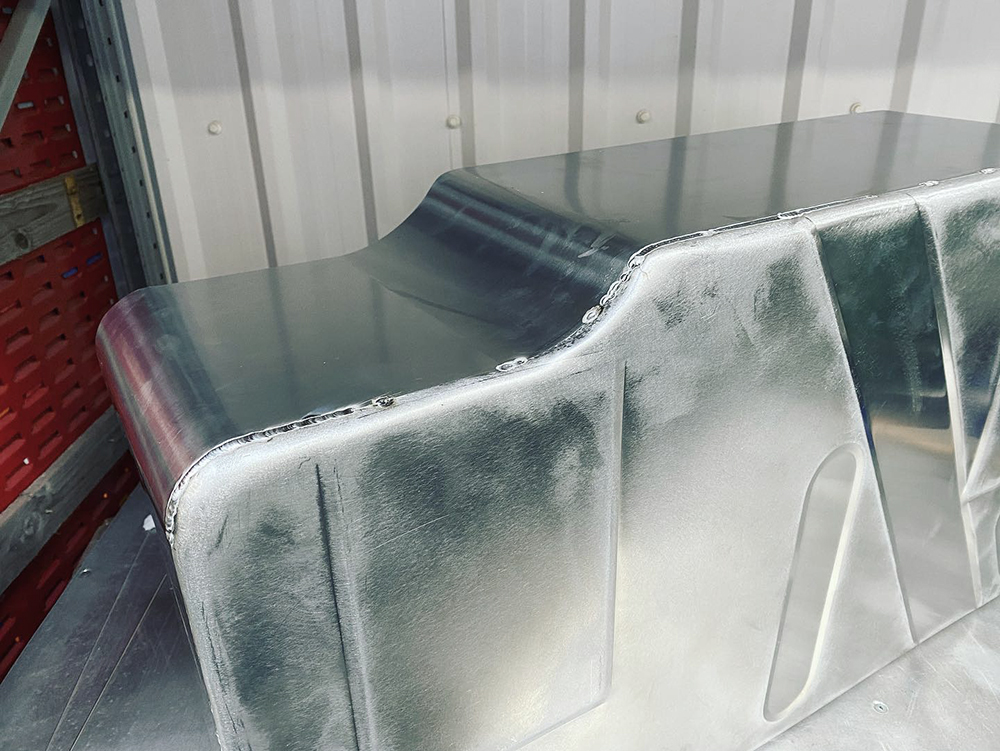
Clamped for welding, and second swirl pot fabricated & in position.
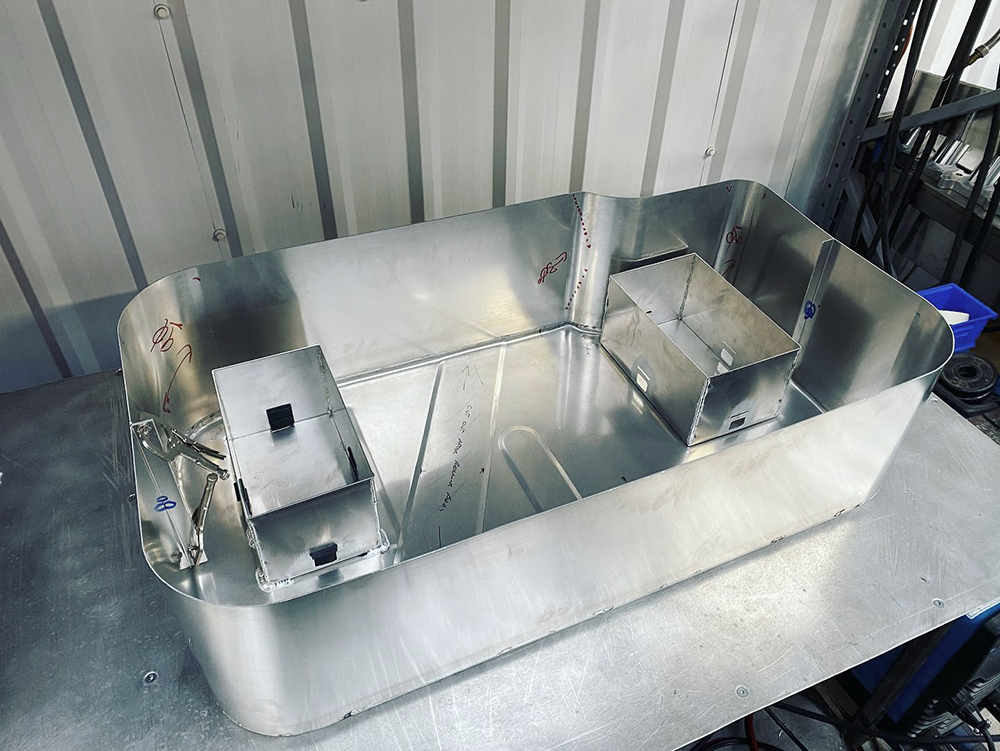
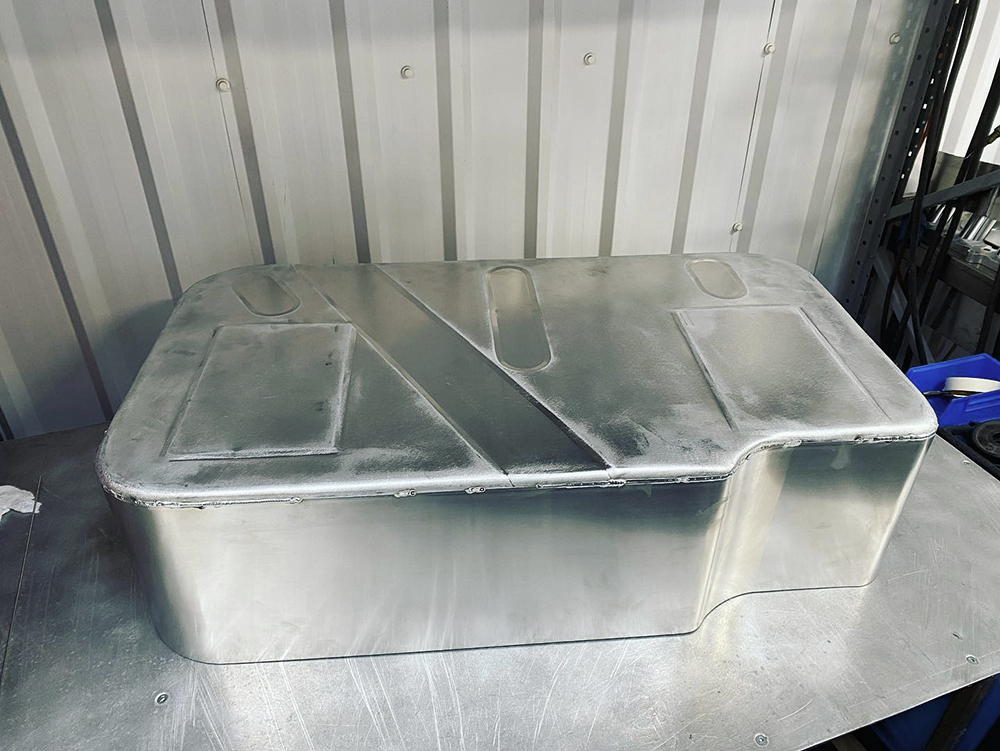
Welding complete on both sides of the join. When all fabrication is completed the external welds will be ground smooth to produce a more OEM look.
The sides are fabricated from two pieces. The top edge of the side pieces will be trimmed after they are welded into place.
The two side sections and one of the two swirl pots which is gated with one-way flaps.
Clamped for welding, and second swirl pot fabricated & in position.
Welding complete on both sides of the join. When all fabrication is completed the external welds will be ground smooth to produce a more OEM look.

Gassing Station | Readers' Cars | Top of Page | What's New | My Stuff