Taking the leather off the interior to redye, Please advise!
Discussion


Cheers guys - just to clarify I was in the passenger footwell where the 2 ducts exit and the pipe normally joins one of them to then feed to the appropriate place in the car but in mine the pipe was hanging loose and I could see a white ring of plastic sitting inside one of the rubber tubes - I assume it was meant to be positioned between the rubber tube exit and the plastic tube - but upon trying to pull it down I foolishly knocked it further in and it fell inside the front of the car (not the footwell area).
Once the weather dries up will take the main bonnet off and see if I can find the airboxes you've mentioned =) In the mean time... time to polish up the metal and prep the next leather section!
Once the weather dries up will take the main bonnet off and see if I can find the airboxes you've mentioned =) In the mean time... time to polish up the metal and prep the next leather section!
Heater "BOXES" are the 2 off rounded top 'things' just behind the N/S inner wheel arch.
The one nearest the engine contains the heater matrix...and is usually painted matt/satin black.
The outboard one contains the air-con evaporator matrix (if a/c fitted) and has insulation/foil on it.
Air comes from the N/S side of front grill, through void btwn inner & outer wings to the blower motor. The blower discharges upwards, where the flap driven by the heater stepper motor directs the blown air either through the heater matrix box or the a/c matrix box.
The heated or cooled air is then directed by the 2 off silicone elbows up into the upper dash 'plenum' where the screen vents are or through the take off to the footwell vents.
Thus, the 2 BOXES pierce the bulkhead with a circular (and integral) moulding with a shoulder. The shoulder provides a platform for a rubber/foam gasket to stop any air loss and the remainder pokes through into the cabin just below the dash ass'y.
The elbows (75mm dia?) are siliconed to the above protrusion, with the other end going to the 2 off flap valves on the 'plenum' bottom.
Nick
Hi Dischordant, been following this thread and its very interesting mate, loving the photos and the answers...
I was wondering how you got on removing the 'A' pillar trim, I ask because I am looking to fit a DAB aerial, this requires the leather trim to be removed to fit the aerial & earth it at the top left of the windscreen...
I was wondering how you got on removing the 'A' pillar trim, I ask because I am looking to fit a DAB aerial, this requires the leather trim to be removed to fit the aerial & earth it at the top left of the windscreen...
Hiya - as far as I can tell the leather trim doesn't come off the a pillar, or at least not without cocking everything up. I'm planning to dye the leather on the pillars in situ as a result. However where the bottom of the A pillar comes out you could attach it there - I don't see why the aerial would care if it is earthed at the top or the bottom of the pillar but I'm no expert in such matters.
I'll take a photo to show you tomorrow but unfortunately my phone is dead at the moment and night is falling
I'll take a photo to show you tomorrow but unfortunately my phone is dead at the moment and night is falling
Cheers mate that would be great... the reason I think i would need to mount it at the top because the aerial the unit comes with is designed like this: http://www.ebay.co.uk/itm/Pioneer-AN-DAB1-Glass-Mo... so this is what prompted the question...
Dischordant said:
I think it went into the outer most one - though I dont have aircon as mine is a standard model - does that mean that vent does nothing?
Yes, if you don't have a/c fitted, the outboard box is just part of the 'route/trunking' to the upper dash plenum.The flap underneath the 2 boxes directs the air either through the inboard one with the heater matrix, or through the outer box - with or without the a/c evaporator inside. Thus you get ambient temp air or chilled air (if a/c is fitted) into the car.
Nick
Hi guys - I've recorded some video of the inside now with everything taken off - sorry it's not very knowledgeable, but I'm a computing teacher not a mechanic..I'm just having a go and seeing what I can learn! =)
Anyhow hopefully it's helpful to someone out there as I'd like to try to give back to the community even if I can only manage it in a limited way.
Remember I've forewarned you I don't have a clue! Would be awesome if someone in the know could post a walk through of all the parts of the car! =)
http://youtu.be/3F23RwEvOZY
http://youtu.be/BHe4xBl_zy4
Edited by Dischordant on Friday 9th May 18:37
Edited by Dischordant on Friday 9th May 18:37
[quote=Dischordant]Hi guys - I've recorded some video of the inside now with everything taken off - sorry it's not very knowledgeable, but I'm a computing teacher not a mechanic..I'm just having a go and seeing what I can learn! =)
Anyhow hopefully it's helpful to someone out there as I'd like to try to give back to the community even if I can only manage it in a limited way.
Remember I've forewarned you I don't have a clue! Would be awesome if someone in the know could post a walk through of all the parts of the car! =)
http://youtu.be/3F23RwEvOZY
http://youtu.be/BHe4xBl_zy4
Hi Dischordant,
Great overview mate, informative so thanks, post more as you make progress.
I tell you what I am not a fan of red cars but I now have to make an exception as that Candy Red looks amazing mate!
I am your first subscriber...
Glenn
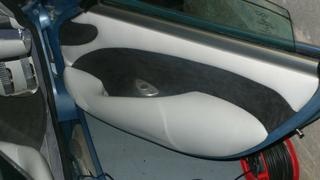
Looks nice and I wasn't aware of new door cards so cheers for that but I'm happy with the standard one so will leave it that style - plus as I'm adding speakers I'm already worried about the door looking too "busy" so don't want to add more to it.
I'm using the furniture clinic kit to dye it
I'm using the furniture clinic kit to dye it
Edited by Dischordant on Saturday 10th May 13:33
Prep of interior leather done, driver chair out and flocked sections next to seat belts removed - glass taped up around windscreen etc. so ready to go! - but unfortunately my as186 compressor doesn't fit the gun I bought so now waiting on a 2quid adapter to arrive to continue  I don't want the fiddle of using the small air gun they provide - clogs regularly and the air cans freeze up too.
I don't want the fiddle of using the small air gun they provide - clogs regularly and the air cans freeze up too.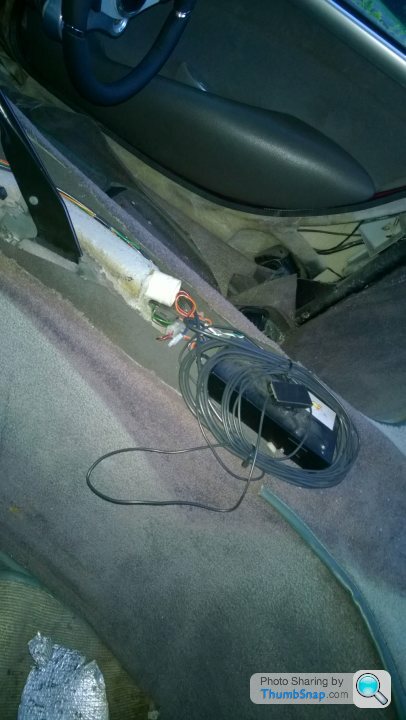
Alcantara should arrive tomorrow for roof, door cars and seat backs and outside of head unit cover (as I don't seem to be having any luck with getting hold of carbon fibre ones I think red alcantara might look nice)
Also hopefully the connector will arrive for my air gun.
Started wiring up the new stereo aswell. Will post an update vid in the next couple of days - hoping to do the bulk of it this weekend.
First bit of new carpet has gone on - just that small piece inside the handbrake gear stick - velcro idea seems to be working great.
Subwoofer purchase decided will bite the bullet on that once I have the amp wired up. Hole cutter purchased for installing components in the doors. Going with 16s with tweeters in the doors and just leaving no speakers in the normal location behind seats (apart form the sub) - instead will alcantara in black over the flocked panels there to contrast with the dark red seat belts (eta on those 6 weeks).
Gassing Station | Tuscan | Top of Page | What's New | My Stuff