Corroded chassis members repair questions
Discussion


My refurbish method is:
Powder coat stripper http://www.cirrus-systems.co.uk removes it in layers that can be scrapped off very easy to bare metal in places, some places require sanding/ wiring brushing. Dremel and handy sander are working great. For the surface rust I'm using a sandblaster then red oxide hammerite primer and white hammerite smooth finish. This will then in parts be stone chipped.
Powder coat stripper http://www.cirrus-systems.co.uk removes it in layers that can be scrapped off very easy to bare metal in places, some places require sanding/ wiring brushing. Dremel and handy sander are working great. For the surface rust I'm using a sandblaster then red oxide hammerite primer and white hammerite smooth finish. This will then in parts be stone chipped.
Well started the process of the body removal today. Seats out, front roll cage mount bolts off, tub to outrigger bolts out, seat belt mounts to both side out.
Roll cage mounts looked a bit worse for wear. Powder coating pretty much gone so will need to do something there when the body is off. Dashboard, rear roll cage body mounts, front footwell bolts, helmet holder bolt and a few more bits'n'bobs to go.
Roll cage mounts looked a bit worse for wear. Powder coating pretty much gone so will need to do something there when the body is off. Dashboard, rear roll cage body mounts, front footwell bolts, helmet holder bolt and a few more bits'n'bobs to go.

djstevec said:
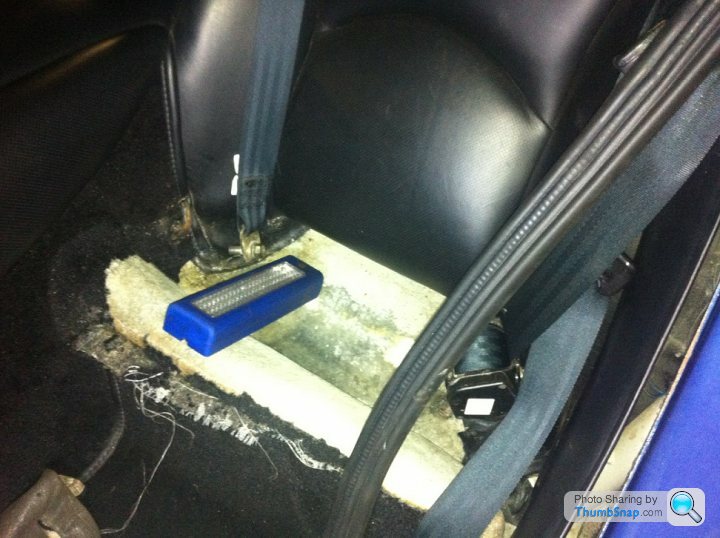
Got a bit of research to do on getting the rear seats out and petrol tank moved, but hopefully get the easy bolts all off by the weekend. I cant physically fit into the footwell to get to the foremost outrigger bolts, so borrowing some help from a much slimmer friend in UKKID35! :-)
The rear seats are just a couple of nuts under the rear wheel arches. Look for big lumps of Sikaflex and dig around with a screwdriver. There will be an 8mm nut under it. Undo those and the rear seat cushions just lift out. ridds said:
Or you'll go to undo them and they'll snap off. 
The prophet of doom!! But an accurate prophet....most of them did snap off yesterday.However all part of the progress made yesterday, again with much help of someone who knows what he's doing (and has much smaller hands!) in UKKID35, thank you Paul!!

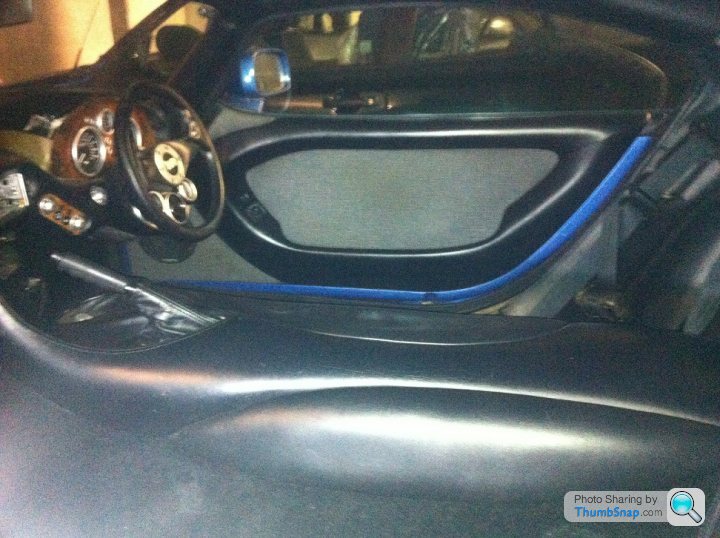
So the interior is now in slightly less than usable state, but if anyone can give me some advice on how to remove the dash/centre console and what needs to come out/off there, I'd MUCH appreciate it, as it just didnt look clear yesterday.
djstevec said:
However all part of the progress made yesterday, again with much help of someone who knows what he's doing (and has much smaller hands!) in UKKID35, thank you Paul!!
Smaller hands - Yes, knows what he's doing - No.djstevec said:
So the interior is now in slightly less than usable state, but if anyone can give me some advice on how to remove the dash/centre console and what needs to come out/off there, I'd MUCH appreciate it, as it just didnt look clear yesterday.
Photos showing the fixing points would be better still 
There are a couple of bolts at either side of the dash out by the doors. You have to poke around underneath to get at them. If you are not removing the water temperature gauge capillary, then you need to feed the instrument panel down through the hole in the dash so it hangs below the steering wheel.
My console also had a large self tapper in the drivers side just under the front edge of the elbow pad, but I have a feeling that may not be standard. Just check that the sides of the centre console lift freely before you pull it out.
That is all that is holding it in as far as I recall. Lift the helmet holder end first and gently separate the front from the body. The cubbyhole will stay in place, it's not attached to the console.
I don't know if the interior refurb pics on my website will help much. www.tvr-cerbera.co.uk
Bit late to this, b d of a week at work and was away over Easter. Start of the thread,
  not good, but you certainly don't hang around! As bad as the unexpected expense/work is for a body off now, I guess it sort of makes sense longer term, especially considering you've got the engine/box out and were planning on attacking the front suspension too? As per the email, help is here if you want it, looks like I've got more time on my hands soon.
Really looking forward to seeing how this progresses, spoke to DynoTorque earlier this week about Brummmies and they said as soon as they got the engine out it was clear it would need a body-off as well as the engine conversion. I guess those that have had their outriggers done will also want/need to be checking this area too as best they can. TVR never coated them properly, worse still, they often let them rust outside before coating them, whoever managed that process at the time needs shooting. Thankfully, it seems all of the body-offs on here end up being far better than factory fresh, built to last, as they should have done originally. I have no doubt you'll do the same shortly.
Extremely happy that this car is in good hands and constantly improving.
d of a week at work and was away over Easter. Start of the thread, not good, but you certainly don't hang around! As bad as the unexpected expense/work is for a body off now, I guess it sort of makes sense longer term, especially considering you've got the engine/box out and were planning on attacking the front suspension too? As per the email, help is here if you want it, looks like I've got more time on my hands soon. Really looking forward to seeing how this progresses, spoke to DynoTorque earlier this week about Brummmies and they said as soon as they got the engine out it was clear it would need a body-off as well as the engine conversion. I guess those that have had their outriggers done will also want/need to be checking this area too as best they can. TVR never coated them properly, worse still, they often let them rust outside before coating them, whoever managed that process at the time needs shooting. Thankfully, it seems all of the body-offs on here end up being far better than factory fresh, built to last, as they should have done originally. I have no doubt you'll do the same shortly.
Extremely happy that this car is in good hands and constantly improving.
ukkid35 said:
Managed??? Are you kidding?
Why weren't they galvanised? It's insane.
That buck had to stop at someones head! Why weren't they galvanised? It's insane.
No idea why they weren't better coated at the time. The newest cars were better, but again, no where near what an extra bit of money spent would have done, I don't buy the whole 'processes have evolved' argument, back then, they could have done more. I think there is a fear of galvanising for it all twisting with heat(?) but "Malc-something" on here has done it, with little problem I believe? Completely agree the short-sightedness was insane, and was the kind of error that made TVR's poor reputation/ downfall IMHO.
tbh I would get it powder coated again with a cold zinc layer below. It will never rust again even if the powder coat chips which it shouldn't.
POR-15, hammerite or POR-15, Whitecoat will not be as good as proper powder coat.
The zinc will add approx 10 kg to the weight of the chassis.
Powder coating will also be a damn site quicker!!! It will have rusted by the time you get to the front.
POR-15, hammerite or POR-15, Whitecoat will not be as good as proper powder coat.
The zinc will add approx 10 kg to the weight of the chassis.
Powder coating will also be a damn site quicker!!! It will have rusted by the time you get to the front.
djstevec said:
Well whatever TVR did, the future of this chassis is POR15 and hammerite top coat. And hopefully no bloody waxoyl required!
Sorry!! We started it and then insisted everyone who touched the car continued to do it. The thinking was to protect the chassis, instead we just made it horrible to work on.  Lessons learned!
Gray_101 said:
Where you at Steve..... any up dates ?
Hey Graham,Well latest is that its basically ready to separate body and chassis, Im borrowing Tanguero's 4 post lift rig (and a lot of his knowledge!!
 ) to do the actual lift off. Peter is still putting his all back together, so its in a little bit of a holding pattern right now. Im in absolutely no rush though (Im doing this once and once only!!), it also gives me some time to clean up whats going back on, and buying the new shiny bits!
 Oh and not going down the POR15 route anymore. On good advice from Peter, Im sending the chassis and all the suspension components to a place in Gravesend for blasting back to metal, zinc plasma and a proper powder coating.
Now, if the plan is to have the car resprayed black, what colour chassis to have?? Gold perhaps? Deep red?

Edited by djstevec on Sunday 10th June 11:27
Gassing Station | Cerbera | Top of Page | What's New | My Stuff