Johns cerbera rebuild and upgrade
Discussion


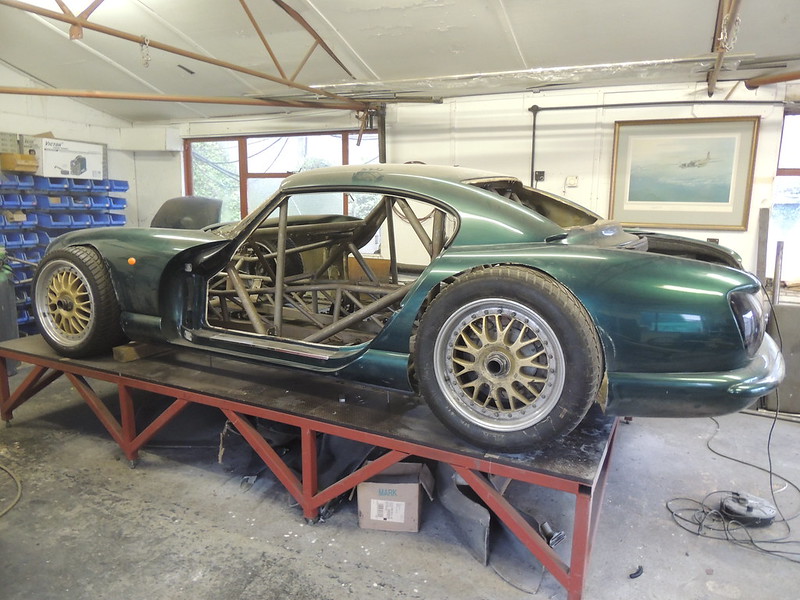
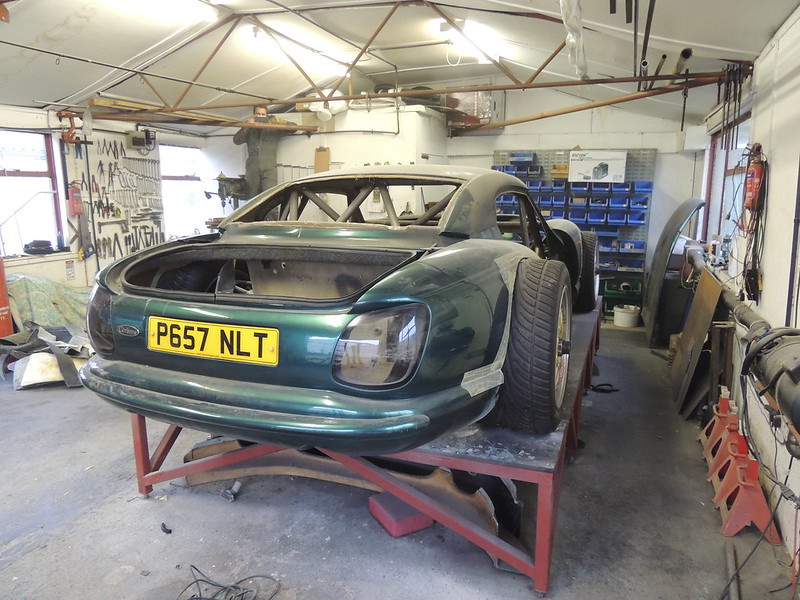
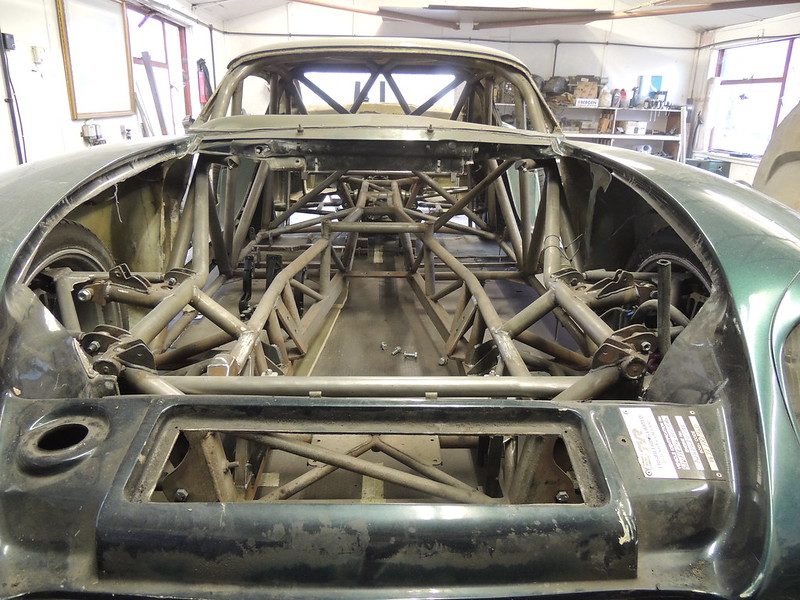
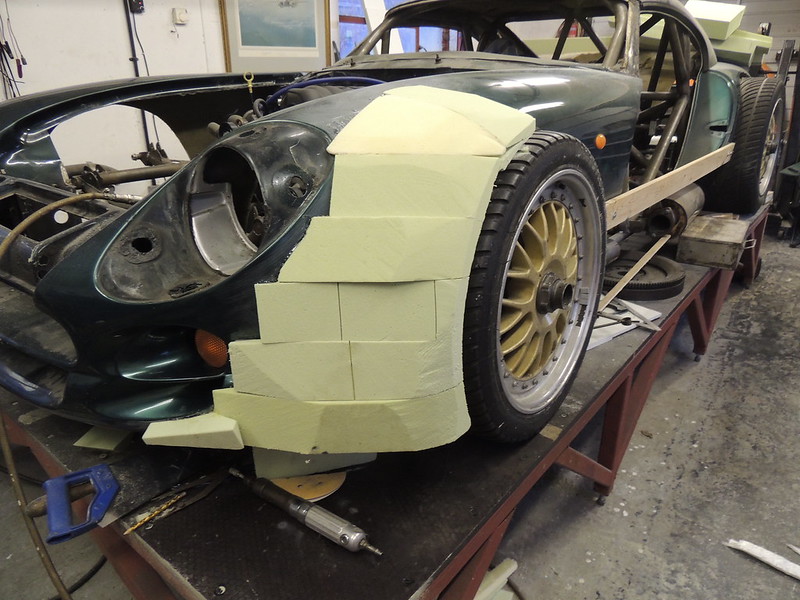
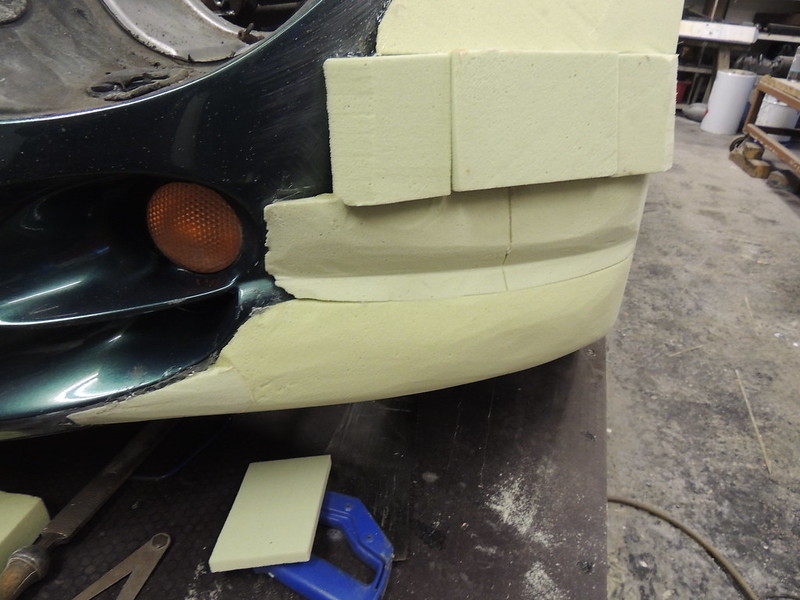
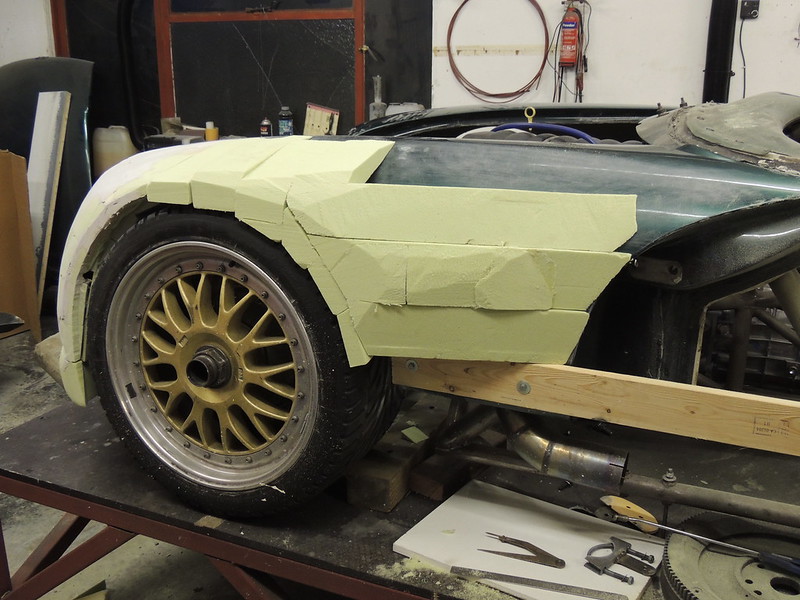
cant believe it was feburary when i last did anything to the cerb but over the last few days i have had a chance to get at it again, sorted some stuff on the chassis and now have started on the body fitment and modifications also got the pedal box mounting sorted.
john
 DSCN2821 by Brundall Motorsport, on Flickr
 DSCN2822 by Brundall Motorsport, on Flickr
 DSCN2823 by Brundall Motorsport, on Flickr
 DSCN2824 by Brundall Motorsport, on Flickr
 DSCN2825 by Brundall Motorsport, on Flickr
 DSCN2826 by Brundall Motorsport, on Flickr
 DSCN2827 by Brundall Motorsport, on Flickr
 DSCN2828 by Brundall Motorsport, on Flickr
john
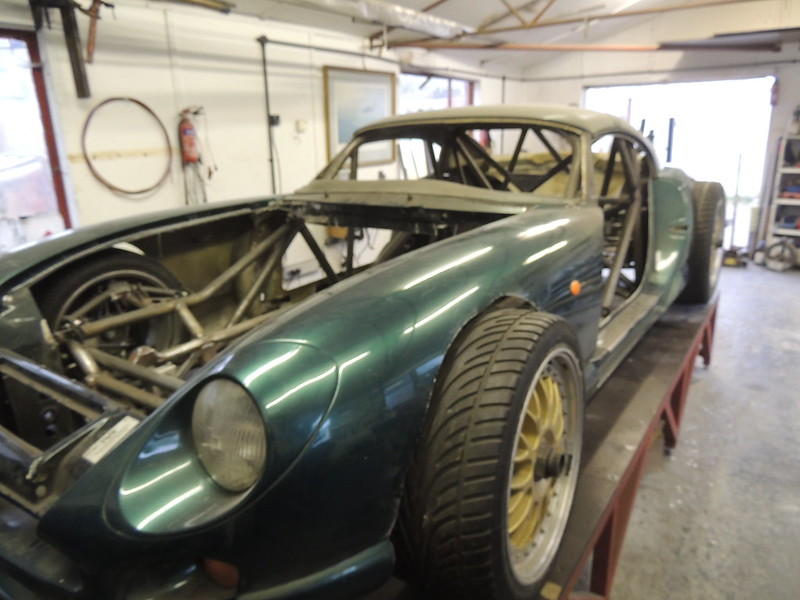
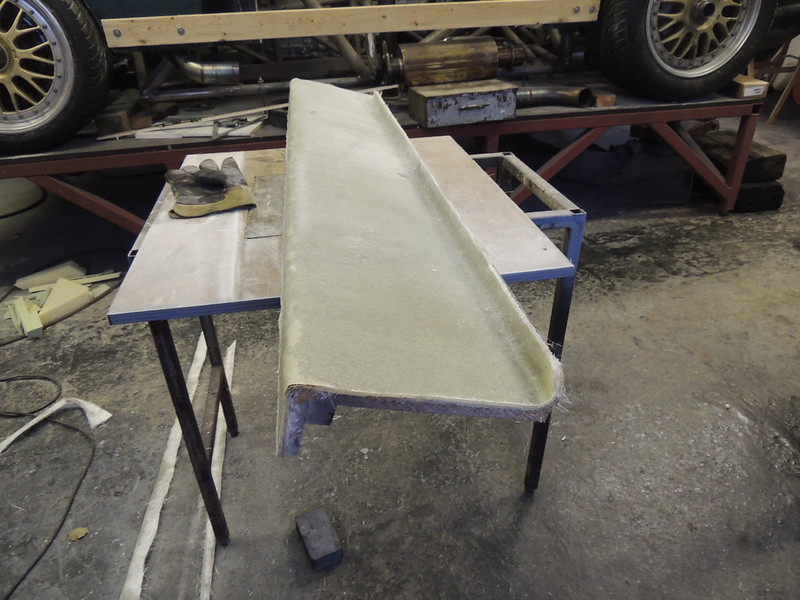
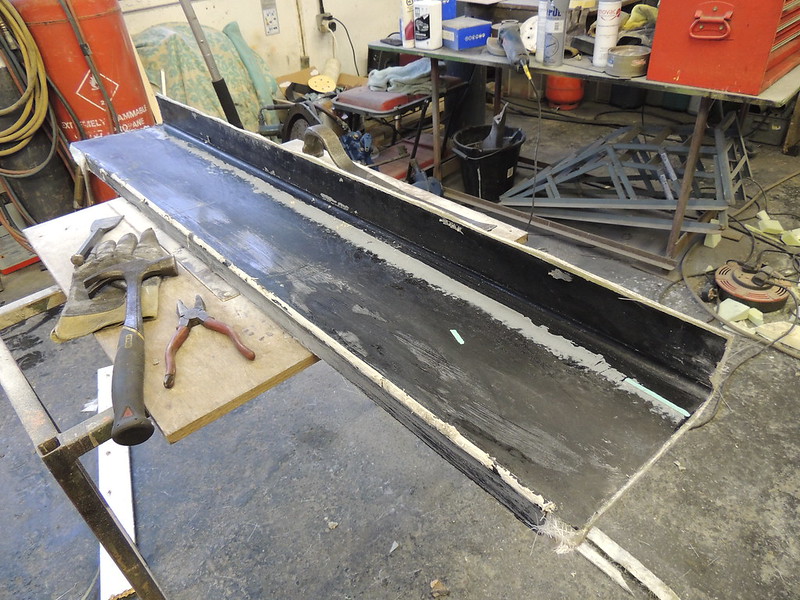
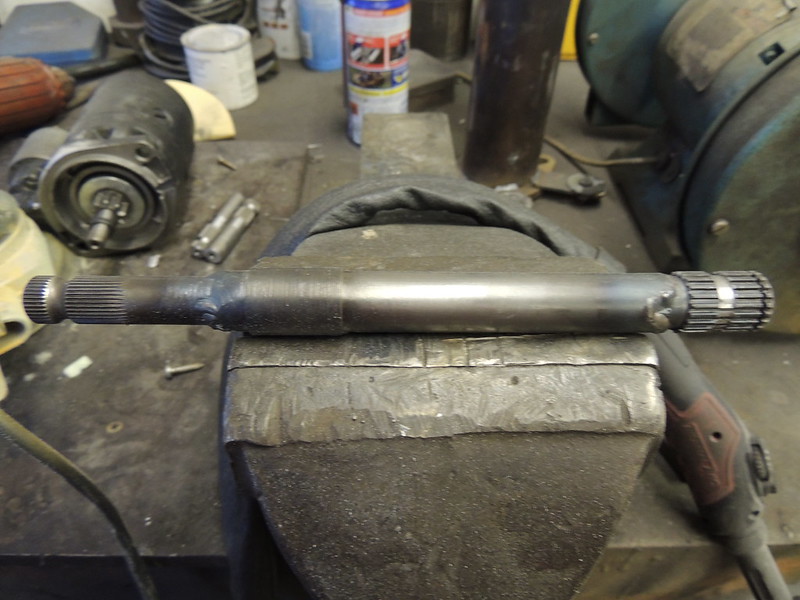
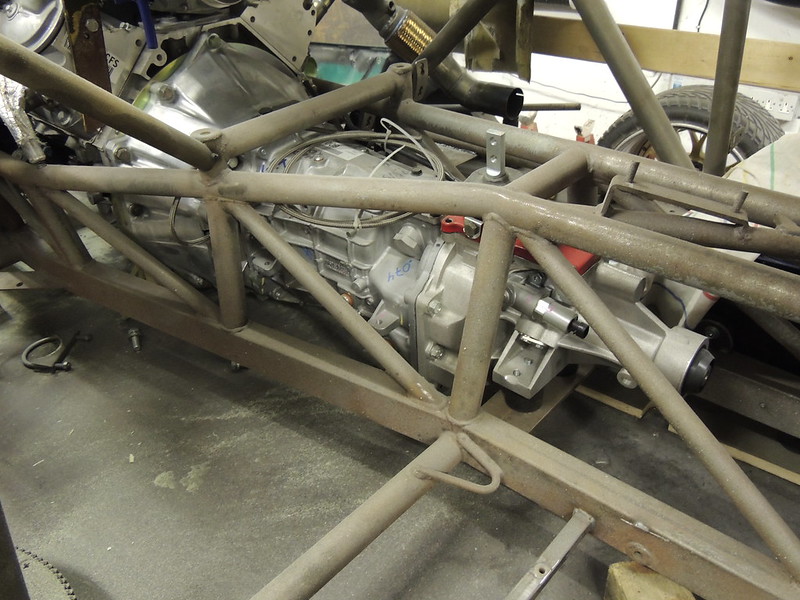
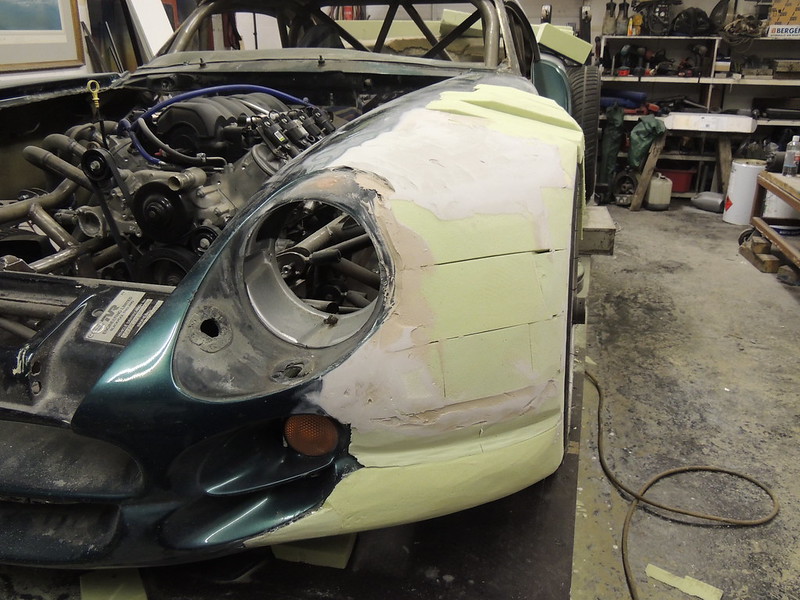
DSCN2821 by Brundall Motorsport, on FlickrDSCN2822 by Brundall Motorsport, on FlickrDSCN2823 by Brundall Motorsport, on FlickrDSCN2824 by Brundall Motorsport, on FlickrDSCN2825 by Brundall Motorsport, on FlickrDSCN2826 by Brundall Motorsport, on FlickrDSCN2827 by Brundall Motorsport, on FlickrDSCN2828 by Brundall Motorsport, on Flickrbeen to long since i did anything much to the car but getting on now the rebuilds for this year are done, started by removing the door sills to about an inch above the hip joint this is to allow the exhausts to run in newly built sills one each side so been making the plug for the tops of the sills the side and underneath will be removable to gain access to the exhaust, also started in between waiting for stuff to harden on the plug for the n/s/f wing as all four wings have got to be remade to accomodate the extra track and larger wheels plus getting on with the steering column made up the first part from rack to support bearing tube all nicely tigged onto the splines with a nice birdmouth shape for greater strength,gearbox has been changed to a t56 magnum 6 speed got to do a new mounting for that today.
john
 DSCN2864 by Brundall Motorsport, on Flickr
 DSCN2864 by Brundall Motorsport, on Flickr
 DSCN2864 by Brundall Motorsport, on Flickr
 DSCN2864 by Brundall Motorsport, on Flickr
 DSCN2864 by Brundall Motorsport, on Flickr
 DSCN2864 by Brundall Motorsport, on Flickr
 DSCN2864 by Brundall Motorsport, on Flickr
 DSCN2864 by Brundall Motorsport, on Flickr
 DSCN2864 by Brundall Motorsport, on Flickr
john
DSCN2864 by Brundall Motorsport, on FlickrDSCN2864 by Brundall Motorsport, on FlickrDSCN2864 by Brundall Motorsport, on FlickrDSCN2864 by Brundall Motorsport, on FlickrDSCN2864 by Brundall Motorsport, on FlickrDSCN2864 by Brundall Motorsport, on FlickrDSCN2864 by Brundall Motorsport, on FlickrDSCN2864 by Brundall Motorsport, on FlickrDSCN2864 by Brundall Motorsport, on FlickrEdited by Engineer1949 on Thursday 14th December 07:14
Edited by Engineer1949 on Thursday 14th December 07:15
Edited by Engineer1949 on Thursday 14th December 07:15
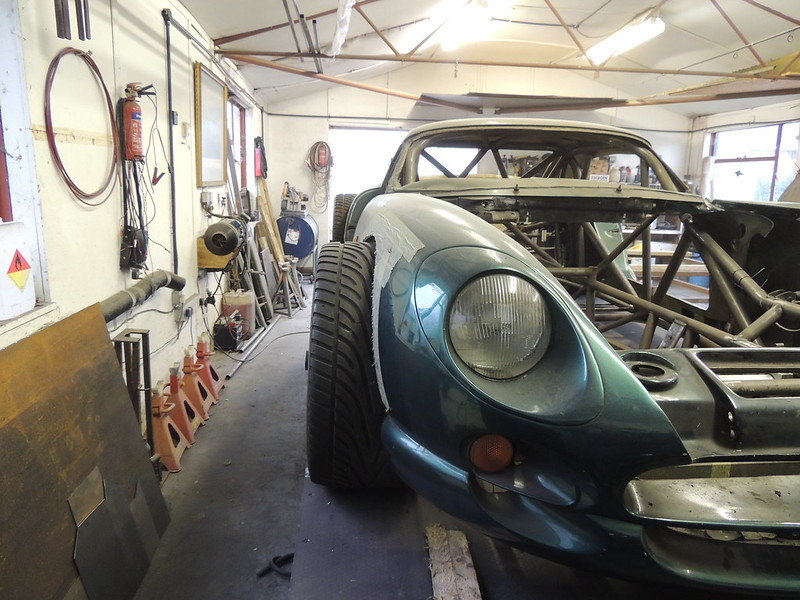
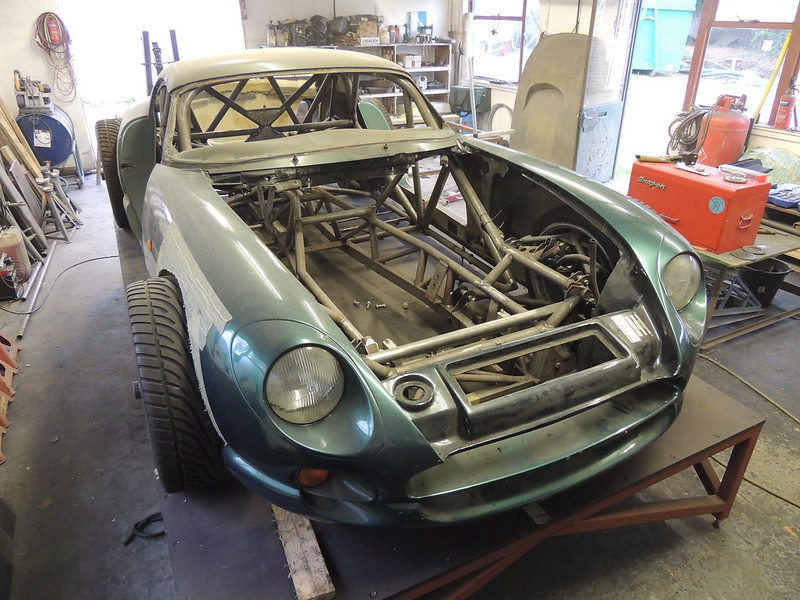
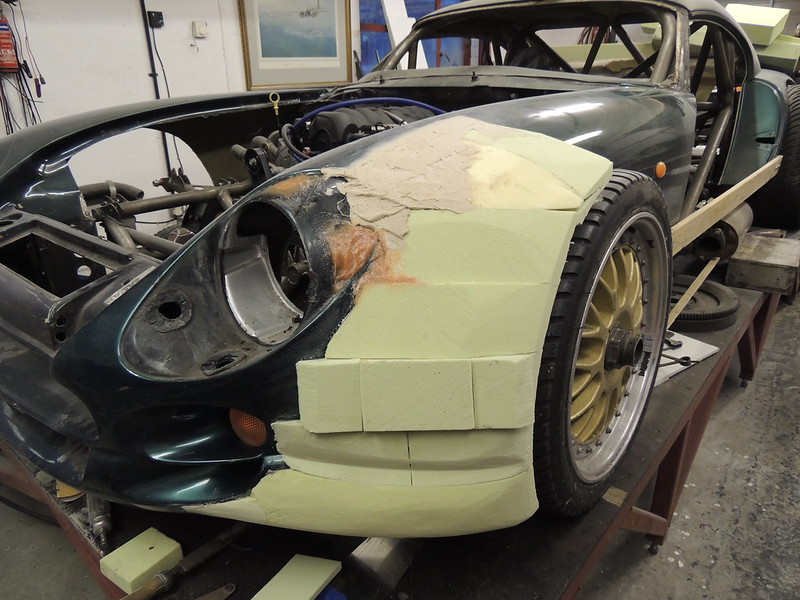
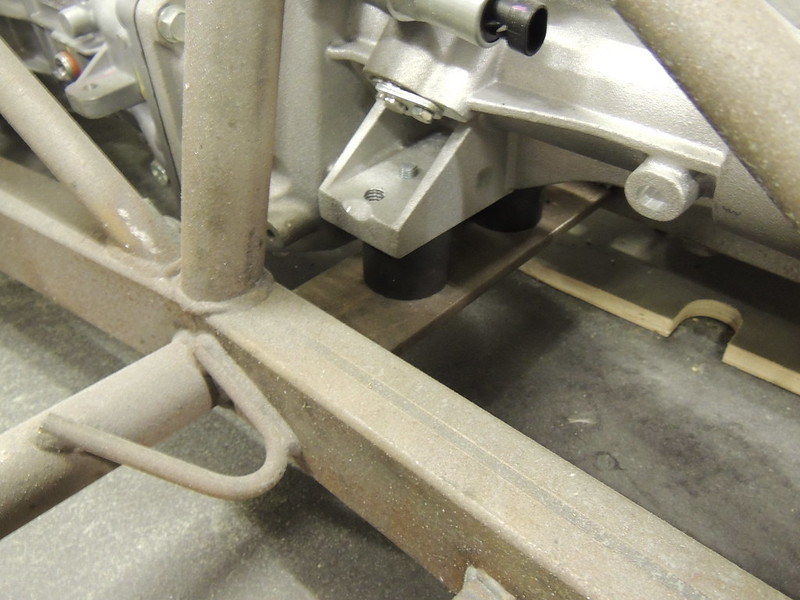
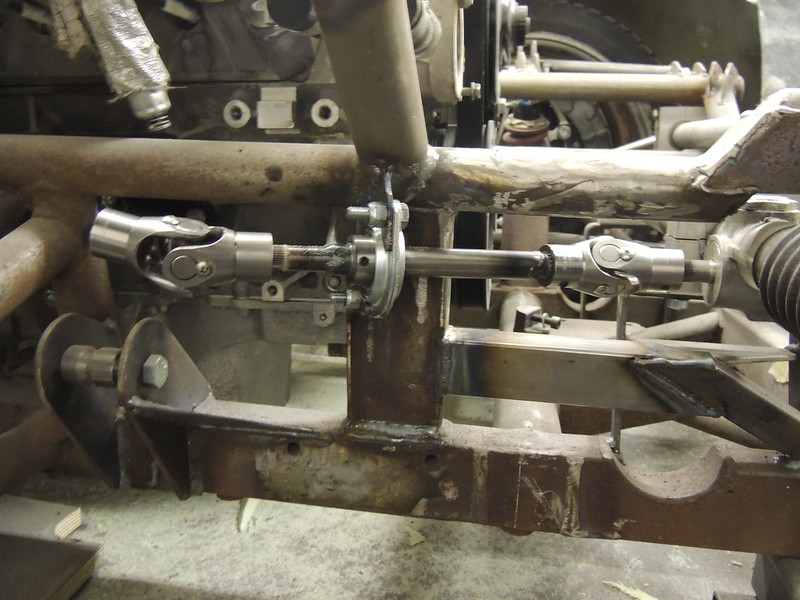
todays update, lots more done on the wing plug, first part of the steering column installed and the gearbox mount fitted the mount was easier than i thought just had to remove material from the old one as the new box is longer so further back in the chassis.
john
 DSCN2872 by Brundall Motorsport, on Flickr
 DSCN2872 by Brundall Motorsport, on Flickr
 DSCN2872 by Brundall Motorsport, on Flickr
 DSCN2872 by Brundall Motorsport, on Flickr
 DSCN2872 by Brundall Motorsport, on Flickr
john
DSCN2872 by Brundall Motorsport, on FlickrDSCN2872 by Brundall Motorsport, on FlickrDSCN2872 by Brundall Motorsport, on FlickrDSCN2872 by Brundall Motorsport, on FlickrDSCN2872 by Brundall Motorsport, on Flickr
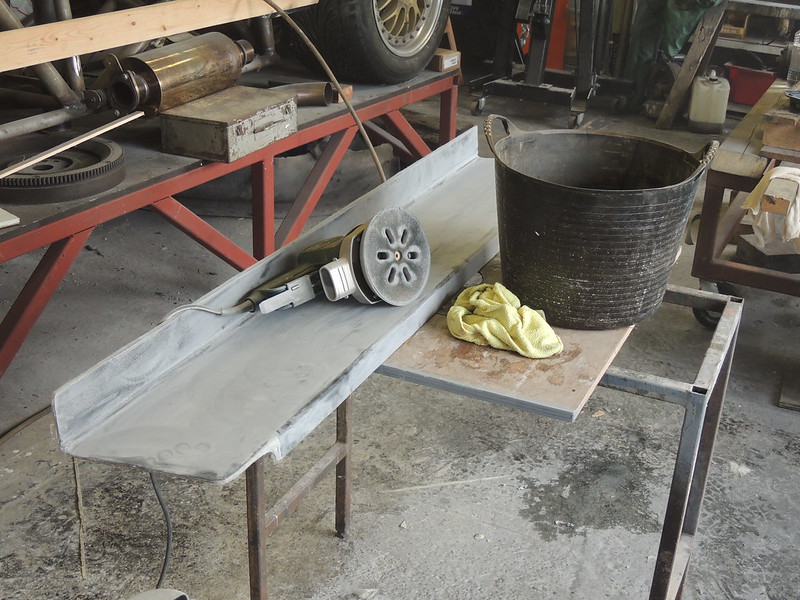
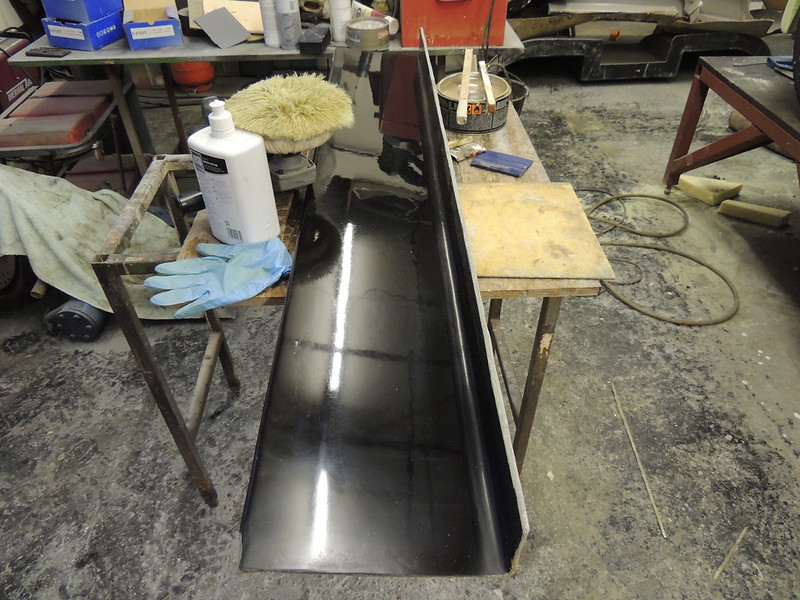
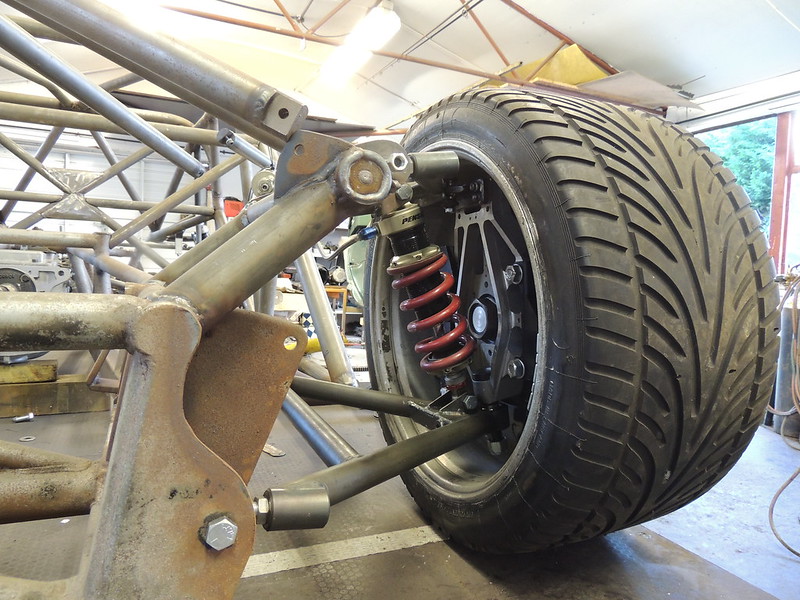
that is slightly lower than settled ride height which will be around 70mm front 95mm rear when finally set, and yes track/race car travel will be very limited 1100 lbs front springs 950 lbs for the rear massive 2in front arb 1/1/2in rear so very stiff got a fair bit further with the plug it now is mostly smoothed off ready for tissue skin.
Very impressive stuff, it looks perfectly mean!
Have you gone for full CAD design with stress analysis & all that, or my preferred type of CAD, the Cardboard Aided Design?
I suspect the TVR chassis was more of the cardboard type, but they did do crash testing of it & I think where you have chopped & sectioned the top tubes is where it was meant to fold over. I did read somewhere that the steering column was designed to pull away from the driver in the event of a heavy front impact, with the position of the rack in the chassis & the way it folded but that could have just been for an earlier model...
I see you have a lot of extra tubing so the way the chassis may have once been designed to fold is not relevant to you now. I just wanted to point that bit out in the unlikely event of anyone else copying just a bit of your design!
Carry on with the good work
Engineer1949 said:
that is slightly lower than settled ride height which will be around 70mm front 95mm rear when finally set, and yes track/race car travel will be very limited 1100 lbs front springs 950 lbs for the rear massive 2in front arb 1/1/2in rear so very stiff got a fair bit further with the plug it now is mostly smoothed off ready for tissue skin.
Thanks. If you need a test pilot when Nick is to busy

I’m enjoying the pics of how your creating bodywork. I’ve never seen how this sort of thing is done before, fascinating.
Living the dream in that workshop.
Have you an idea of what shocks your using yet John as I’m loving the race spec.
shocks are penske with remote gas cylinder 3 way adjustable
john
 DSCN2288 by Brundall Motorsport, on Flickr
 DSCN2294 by Brundall Motorsport, on Flickr
john
DSCN2288 by Brundall Motorsport, on FlickrDSCN2294 by Brundall Motorsport, on FlickrThey’ll do
Massive challenge and you must be very good with a tape measure John.
It’s about time someone reminded us of the race pedigree that Tvr are renowned for.
I remember back in the late 90’s the Tuscans pleased the crowds more than the Touring cars,, everyone in the pits watched which says a lot.
What a laugh you must be having here with all the years of fabrication and fibreglass behind you.
Turning your own pulley wheels etc.
Proper car building.
I had a great uncle who had a tin garage that opened a door into a workshop with lathe Milling machine and everything you could think of.
He showed me some bits of copper tube and pieces of metal when I was about 8 years old and told me he’d make me something out of it and the next time we trooped off to Wales and went to see my uncle Garfield there sat a hand made steam engine!
I’ve been fascinated by pistons turning ever since.
I’d enjoy that toy to this day if it wasn’t nicked as a kid but it had set the seeds of interest in engineeering.
I rue the day I stopped thinking metal work was relevant at school!
It seemed engineering was a dying art in the 70’s.
This is what you can do if you’ve learnt to weld, and toolmake.
Pictures make it look simple but you must have spent sometime setting out the measurements and positions. I’m liking the wooden brace bar ( I’m assuming) a good reference point too.
Awesome John.
Anyone with a pair will be licking their lips at this creation.
Edited by Classic Chim on Saturday 23 December 15:53
thank you for all the enthusiasum , i left school at 16 started on a 5 year city and guilds course called mechanical engineering part 2 which covered everything from hydraulics to steam and everything inbetween but spending the largest part of my now 52 years of iron fighting as a self employed person you tend to learn very quickly needs must and all that and i still cant wait to get down the workshop most mornings.
john
john
Engineer1949 said:
thank you for all the enthusiasum , i left school at 16 started on a 5 year city and guilds course called mechanical engineering part 2 which covered everything from hydraulics to steam and everything inbetween but spending the largest part of my now 52 years of iron fighting as a self employed person you tend to learn very quickly needs must and all that and i still cant wait to get down the workshop most mornings.
john
I also started at 16 John but on a 4 year C&G course in plumbing and heating...can't say it has quite the same appeal these days but then again the tools were downed some while back. I can still do some amazing things with a set of hilmors though and the stilsons came in handy on the cerb a few weeks back on an oil line. Those were the days where it was all soldered, brazed or bent and it was how many bends, sets and kicks you could get in on one 3m length of copper without having to scrap it. Lead work was also part of the course back then, hate to think how many aprons I split bossing a corner in college....took me an age to master as did lead burning john

if only I had my time again.......
Anyway as said big
 and respect to what you are putting together here!
Edited by PhilH42 on Saturday 23 December 19:42
Gassing Station | Cerbera | Top of Page | What's New | My Stuff