Battery Warning Light - permanently on !
Discussion


OK Geniuses, Engineers and Supermen,
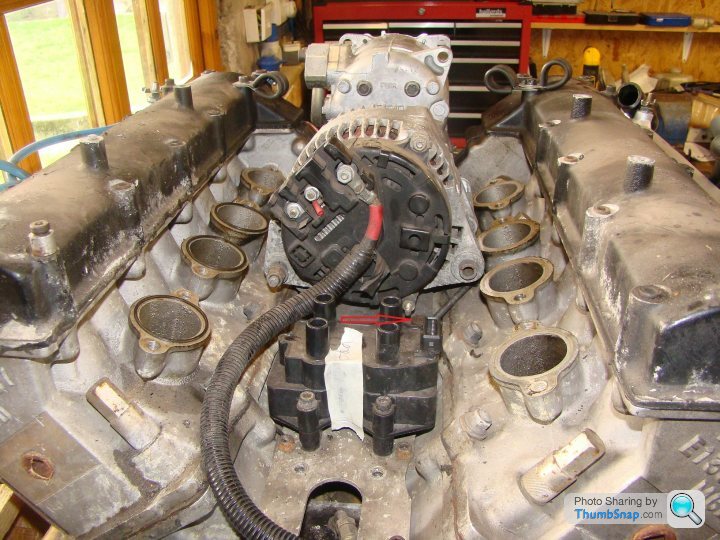
The new drive belt will not go on to the engine pulley because of the lack of space between it and the Alternator Mounting Bracket.
The rear two Alen Bolts of the AMB cannot be undone because the Alternator blocks access.
The Alternator cannot be lifted out because of lack of space between it and the throttle bodies.
!
If this means that I have to take a throttle body off to change the drive belt
then
please consider this as a Sales Ad !
Your constructive (and other) comments are desperately required
(Oh pretty please)
Edited by Mr Cerbera on Monday 16th July 17:28
It wasn't that long ago but i'm sure that the problem bolt was this one at the rear of the alternator.
I had to release the tension on the belt undo the other bolts and sort of lift the rear of the alternator as you undo the problem bolt.
If that makes any sense.
I will swap you bleading my cerb for undoing your alternator bolt.

I had to release the tension on the belt undo the other bolts and sort of lift the rear of the alternator as you undo the problem bolt.
If that makes any sense.
I will swap you bleading my cerb for undoing your alternator bolt.
The Nige said:
It wasn't that long ago but i'm sure that the problem bolt was this one at the rear of the alternator.
I had to release the tension on the belt undo the other bolts and sort of lift the rear of the alternator as you undo the problem bolt.
If that makes any sense.
I will swap you bleading my cerb for undoing your alternator bolt.
I had to release the tension on the belt undo the other bolts and sort of lift the rear of the alternator as you undo the problem bolt.
If that makes any sense.
I will swap you bleading my cerb for undoing your alternator bolt.

Nige, that is THE MOST PERFECT SHOT !
Coz even with all that stripped you STILL can't see the MoFu !
I would gladly pull Mellings fingernails out one-by-one
I can't even think what type of 'specialist tool' would do the job

______________________________________________________
I've managed to get the Alternator Locknut off and out and
I've managed to remove the Pivot Pin nut
BUT
It looks like I've got to pull both coil packs out to withdraw the Pivot to fully release the Alternator from its retaining plate.
'Effin 'Ell
Edited by Mr Cerbera on Thursday 12th July 21:43
Hmmmmmmm, I hope that you're not bored.
If, for nothing else, I put these observations in so that someone in the future has a guide
(albeit from a Numptie).
Belt arrived (YeeeeHaaa !)
Couldn't fit it on the engne pulley because of the space restriction with the Alternator SubFrame.
So, removed the first coil pack (Odd Cylinders)
Removed Passenger-side Alternator Pivot Spindle (130mm)
Alternator refused to budge !
It will rotate on the axis of the now-removed spindle but will not pop-out of the SubFrame.
I presume that there has been some 'pinching' of the Subframe's ends.
More investigation required


______________________________________________________
ETA
Why does the Block Valley look like a post-conflict scene in Teminator ?
If, for nothing else, I put these observations in so that someone in the future has a guide
(albeit from a Numptie).
Belt arrived (YeeeeHaaa !)
Couldn't fit it on the engne pulley because of the space restriction with the Alternator SubFrame.
So, removed the first coil pack (Odd Cylinders)
Removed Passenger-side Alternator Pivot Spindle (130mm)
Alternator refused to budge !
It will rotate on the axis of the now-removed spindle but will not pop-out of the SubFrame.
I presume that there has been some 'pinching' of the Subframe's ends.
More investigation required
______________________________________________________
ETA
Why does the Block Valley look like a post-conflict scene in Teminator ?
Edited by Mr Cerbera on Thursday 12th July 21:30
Paul, the rearmost holes of the alternator contain a split bush, clearly seen on the unused RHS rear hole in that pic. The bush slides to accomodate manufacturing tolerances in the bracket, allowing tightening of the pivot bolt without distorting the alternator casing. Assuming you can't get a drift onto it to tap it clear, a little rocking fore and aft should free it...
Rik
Rik
TwinKam said:
Paul, the rearmost holes of the alternator contain a split bush, clearly seen on the unused RHS rear hole in that pic. The bush slides to accomodate manufacturing tolerances in the bracket, allowing tightening of the pivot bolt without distorting the alternator casing. Assuming you can't get a drift onto it to tap it clear, a little rocking fore and aft should free it...
Rik
Rik,Rik
You're a STAR !
Will re-focus my efforts (on maybe freeing that bush up) tomoz.
Thanks Mate

_________________________________________________________________________
BTW, Where on the "South Coast" are You ?
_________________________________________________________________________
ETA
Managed to use a wood 'lever' between the A/C pump and the Alt' to free up the split bushes.
Freed up, that is, to raise about 15mm, where it is blocked by the Throttle Bodies.
Thanks to Jools, I now realise that (at least ) one of them has to come off.
"Oh TVR, How you taunt me !"
Edited by Mr Cerbera on Saturday 14th July 14:24
Mr Cerbera said:
....
Anyone got any tips on how NOT to make this a gigantic rebuild
Ta !
PJ
Oh, how I laugh when I think of the innocence of that first post....Anyone got any tips on how NOT to make this a gigantic rebuild
Ta !
PJ
6 Allen screws removed. Driver's (Even) Throttle Body removed - the wrong one - as I had removed the Odd Coil Pack and HT Cables
Whoever designed those 2 outer Allen screws to be placed almost directly under the throttle butterfly bar should be
 !
! Alternator positively shot out into my waiting palms.
Rear two AMB Allen screws removed. Bracket out.
Access to Engine Pulley enabled (Once I've cleared up the quagmire of crap that has accumulated in The Valley).
No beer in the house to celebrate with -
BUT
Thanks to everyone's kindness and patience....
It didn't beat me


Mr Cerbera said:
Mr Cerbera said:
....
Anyone got any tips on how NOT to make this a gigantic rebuild
Ta !
PJ
Oh, how I laugh when I think of the innocence of that first post....Anyone got any tips on how NOT to make this a gigantic rebuild
Ta !
PJ
6 Allen screws removed. Driver's (Even) Throttle Body removed - the wrong one - as I had removed the Odd Coil Pack and HT Cables
Whoever designed those 2 outer Allen screws to be placed almost directly under the throttle butterfly bar should be
! Alternator positively shot out into my waiting palms.
Rear two AMB Allen screws removed. Bracket out.
Access to Engine Pulley enabled (Once I've cleared up the quagmire of crap that has accumulated in The Valley).
No beer in the house to celebrate with -
BUT
Thanks to everyone's kindness and patience....
It didn't beat me
Mr Cerbera said:
Oh, how I laugh when I think of the innocence of that first post....
6 Allen screws removed. Driver's (Even) Throttle Body removed - the wrong one - as I had removed the Odd Coil Pack and HT Cables
___________________________________________________________________________________
Sorry... Post Adendum insert here...
It turned out not to be the wrong one as I had to remove all the HT leads to gain a decent access and, when I started reassembly, the driver's Throttle Body had to be removed to gain access to put the Alternator Retaining Bolt/Nut back in.
Soz
___________________________________________________________________________________
Whoever designed those 2 outer Allen screws to be placed almost directly under the throttle butterfly bar should be !
Alternator positively shot out into my waiting palms.
Rear two AMB Allen screws removed. Bracket out.
Access to Engine Pulley enabled (Once I've cleared up the quagmire of crap that has accumulated in The Valley).
6 Allen screws removed. Driver's (Even) Throttle Body removed - the wrong one - as I had removed the Odd Coil Pack and HT Cables
___________________________________________________________________________________
Sorry... Post Adendum insert here...
It turned out not to be the wrong one as I had to remove all the HT leads to gain a decent access and, when I started reassembly, the driver's Throttle Body had to be removed to gain access to put the Alternator Retaining Bolt/Nut back in.
Soz
___________________________________________________________________________________
Whoever designed those 2 outer Allen screws to be placed almost directly under the throttle butterfly bar should be
! Alternator positively shot out into my waiting palms.
Rear two AMB Allen screws removed. Bracket out.
Access to Engine Pulley enabled (Once I've cleared up the quagmire of crap that has accumulated in The Valley).
OK, the rebuild has begun and I am in trouble already.
For those kind enough to have read, this all started with a Big Fuse supposition.
I had a very fiddly job getting to the fuse but, upon retrieval, found that it was solid.
Now I am trying to put the odd coil pack back in, I am trying to get the mess of cables at the
back of the 'V' sorted a little.
Whilst doing this I have found this Junction Block and free spade terminal in mid air on the driver's side.
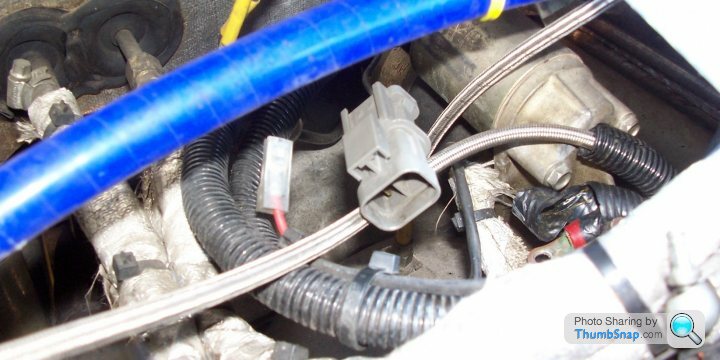
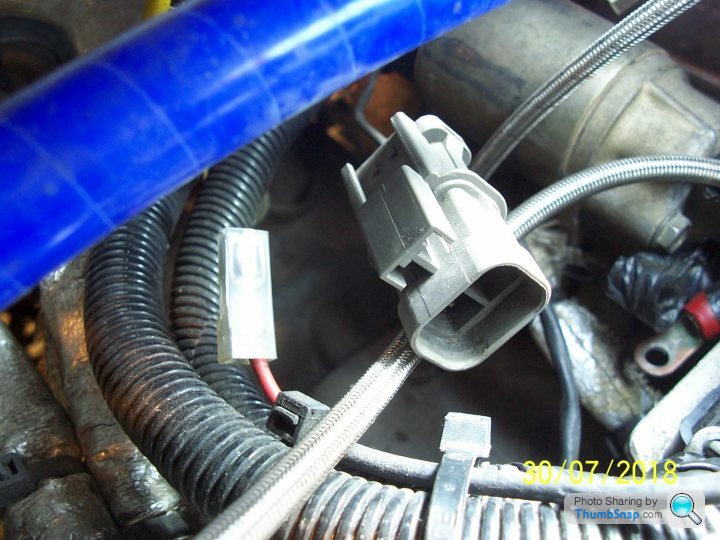
Does anyone have any idea if they should be attached to anything and, if so, what ??
Sorry for being so dull.
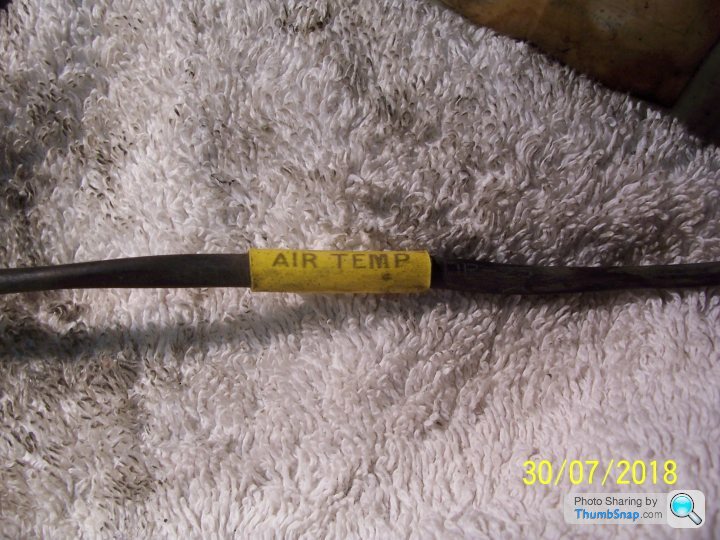
(I can't find any of those wonderful 'yellow identifying tags' on them to give me a clue a la
For those kind enough to have read, this all started with a Big Fuse supposition.
I had a very fiddly job getting to the fuse but, upon retrieval, found that it was solid.
Now I am trying to put the odd coil pack back in, I am trying to get the mess of cables at the
back of the 'V' sorted a little.
Whilst doing this I have found this Junction Block and free spade terminal in mid air on the driver's side.
Does anyone have any idea if they should be attached to anything and, if so, what ??
Sorry for being so dull.
(I can't find any of those wonderful 'yellow identifying tags' on them to give me a clue a la
Jhonno said:
Connector looks like the one for the starter..
Yes it does - mine was exactly like that - the Red spade connector plugs into the Grey starter motor connector to provide the starter with 12VI tried to buy a replacement plug for the spade connector so that it was a better fit, but found it hard to source the plug so left it as is in the end
Gassing Station | Cerbera | Top of Page | What's New | My Stuff