Cerbera 4.5 airbox
Discussion


Took mine off for a good clean and discovered quite a difference between the two airboxes. The o/s one seems to have had extra plastic inlet pieces secured in with glassfibre:

But the n/s one looks to be a bit of a mess. They have a crunched up condition. I don't believe the last owner just did the clips up extra tight, it wouldn't surprise me if it came out of the factory like that. I can get the pipes to secure OK but any suggestions for improvement (other than paying £600 + for a new one!)
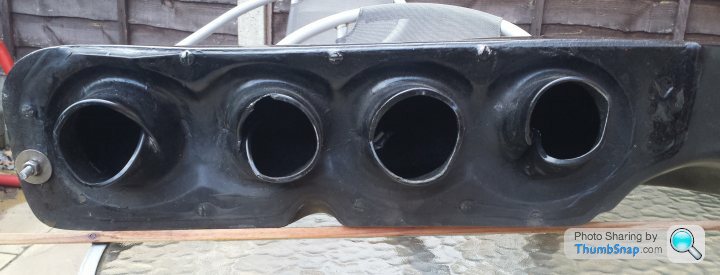
I'm considering cutting them off and creating new inlets with some Wickes black drainpipe plastic and 2-part epoxy resin.
They are the same colour but appear different due to prevailing light when I took the photos.
But the n/s one looks to be a bit of a mess. They have a crunched up condition. I don't believe the last owner just did the clips up extra tight, it wouldn't surprise me if it came out of the factory like that. I can get the pipes to secure OK but any suggestions for improvement (other than paying £600 + for a new one!)
I'm considering cutting them off and creating new inlets with some Wickes black drainpipe plastic and 2-part epoxy resin.
They are the same colour but appear different due to prevailing light when I took the photos.
Im pretty sure Fibreon do replacement fibreglass backplates/inlets. Website seems to be down for an upgrade, but there's a contact number on there.
I did go down the ACT carbonfibre boxes/plates/trumpets....look awesome and weigh less than a gnats fart, but I wouldn't spend that money again!
I did go down the ACT carbonfibre boxes/plates/trumpets....look awesome and weigh less than a gnats fart, but I wouldn't spend that money again!

I've decided to do to the n/s one what was already done to the other, o/s one. I've ordered some 63mm plastic pipe from ebay for £4 (Wickes don't stock that size) and have already taken a hacksaw to it. No going back now! I'll do a thread when it's done.
You can't see them once the inlet pipes are connected and once they are secured to the brackets, they aren't under that much stress. One of the backplates had a screw missing but I don't think a minor air leak here is that critical. Filled it in with black silicone anyway.
You can't see them once the inlet pipes are connected and once they are secured to the brackets, they aren't under that much stress. One of the backplates had a screw missing but I don't think a minor air leak here is that critical. Filled it in with black silicone anyway.
Edited by ianwayne on Thursday 8th November 19:38

Apologies for not referencing that thread earlier, it was my inspiration. It was the one I found when doing a search for airbox repairs, using Google incidentally, not the search on here....
I decided to use plastic because the other side had already been done that way, and I didn't have any metal pipe. My only consideration was 2.5" (63mm) inside diameter or outside. Metric irrigation pipes come with the od diameter as 63mm. Would have preferred inside really, but it'll suffice. This is the airbox with the knackered apertures cut back and 4 x 50mm lengths of 63mm tube inserted:
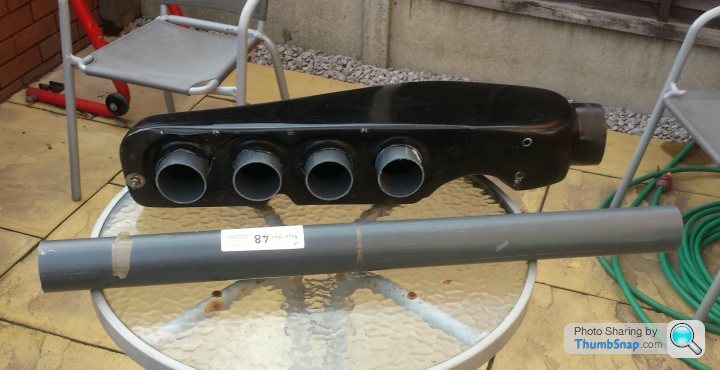
I used a 'big boy" glass fibre repair kit to bond them in. Only had to use half the matting & resin mix so enough left for further 'mods' if needed. :
:

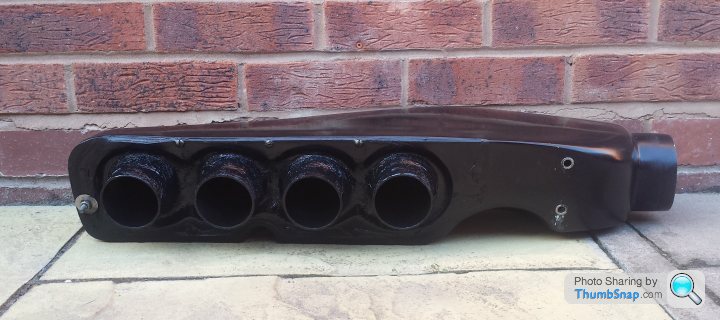
Today, I trimmed back the excess and spray painted the result with aerosol:
Cost?
Plastic pipe (63mm x 1m) - £4
Glass fibre repair kit - £8.50
Paint, gloss black - £1 (Poundland)
Hacksaw blade - 50p ( I snapped one in half and used it in my hand to get into the tricky bits)
I added a coat of lacquer from a spray can I already had.
Total - £14, and about 4 hours of my free labour. And a Stanley knife blade.
I'm waiting for a few brackets to be powder coated before re - fitting it all.
I decided to use plastic because the other side had already been done that way, and I didn't have any metal pipe. My only consideration was 2.5" (63mm) inside diameter or outside. Metric irrigation pipes come with the od diameter as 63mm. Would have preferred inside really, but it'll suffice. This is the airbox with the knackered apertures cut back and 4 x 50mm lengths of 63mm tube inserted:
I used a 'big boy" glass fibre repair kit to bond them in. Only had to use half the matting & resin mix so enough left for further 'mods' if needed.
:Today, I trimmed back the excess and spray painted the result with aerosol:
Cost?
Plastic pipe (63mm x 1m) - £4
Glass fibre repair kit - £8.50
Paint, gloss black - £1 (Poundland)
Hacksaw blade - 50p ( I snapped one in half and used it in my hand to get into the tricky bits)
I added a coat of lacquer from a spray can I already had.
Total - £14, and about 4 hours of my free labour.
And a Stanley knife blade.I'm waiting for a few brackets to be powder coated before re - fitting it all.
Edited by ianwayne on Wednesday 14th November 18:02
Gassing Station | Cerbera | Top of Page | What's New | My Stuff