Discussion


gruffalo said:
Was your refurbished clutch done here https://clutch-specialists.co.uk/
I have one of there units in my garage awaiting mine to fail I know of others who have used them without issue before.
Nope, wasn’t from these guys. I’ll defer naming until I get the unit out and on the bench again. Will give the supplier an(other) opportunity to review. I have one of there units in my garage awaiting mine to fail I know of others who have used them without issue before.
ukkid35 said:
They really do need to be fully located/tightened
Buy a pack of Starlock washers for £2, pull it all apart, clean up and tighten the pins, then reassemble with the new Starlocks
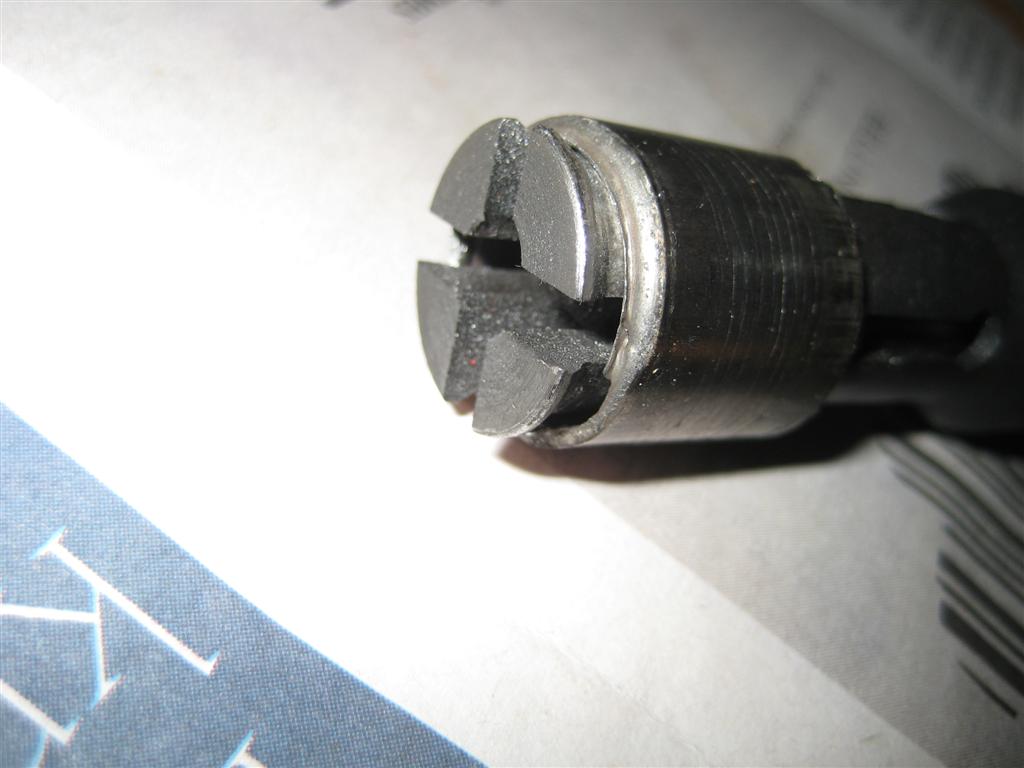
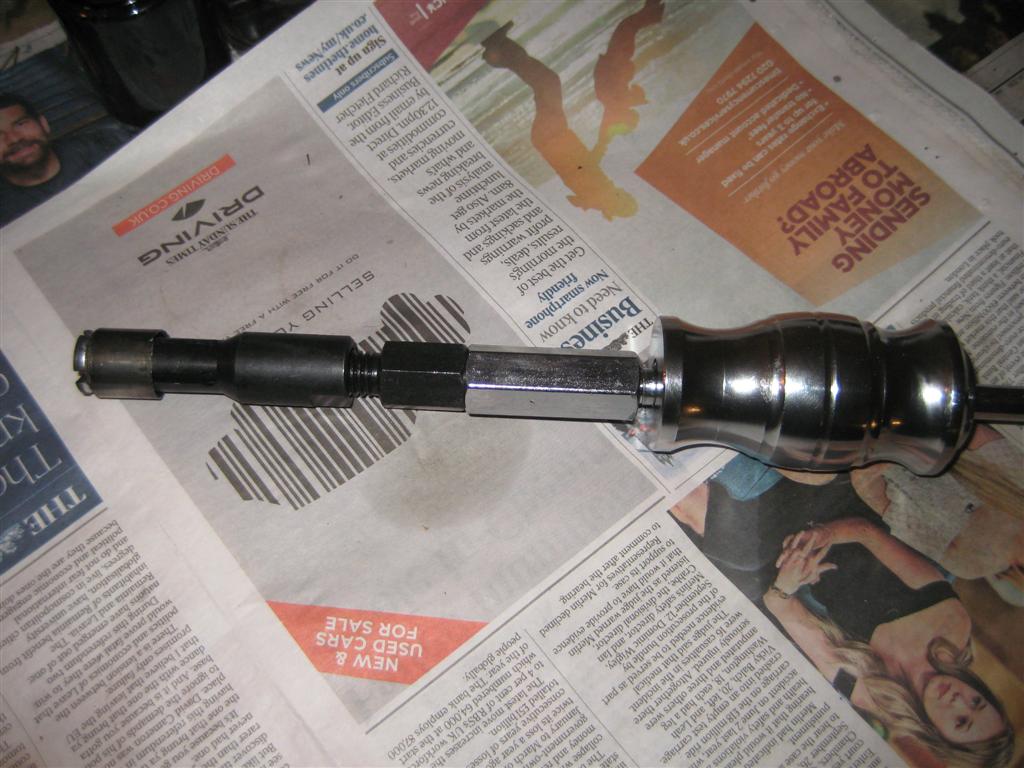
Next, change the Pilot Bearing - or Spigot Bearing as TVR call it, it will cost you at least a fiver, and I can lend you the tool to remove the old one
Finally, and equally importantly, adjust the preload on the input shaft - sure that is a bit tricky as you need a set of shims that are not easily available
However, if it all goes wrong you will destroy the input shaft - and there are none available anywhere
It will also damage the countershaft, but that doesn't matter, they are cheap and cheerful at just $100 for a new one
Learn from my mistakes

It’s a good point Paul thanks - I’ve got a new bearing in mine based on your experience. Buy a pack of Starlock washers for £2, pull it all apart, clean up and tighten the pins, then reassemble with the new Starlocks
Next, change the Pilot Bearing - or Spigot Bearing as TVR call it, it will cost you at least a fiver, and I can lend you the tool to remove the old one
Finally, and equally importantly, adjust the preload on the input shaft - sure that is a bit tricky as you need a set of shims that are not easily available
However, if it all goes wrong you will destroy the input shaft - and there are none available anywhere
It will also damage the countershaft, but that doesn't matter, they are cheap and cheerful at just $100 for a new one
Learn from my mistakes
Bogsye said:
As we are allowed to post YT links, here are a couple of videos.
https://youtu.be/u9UgwwAAvO0
https://youtu.be/o-unWAziNFQ
Cheers,
Brian
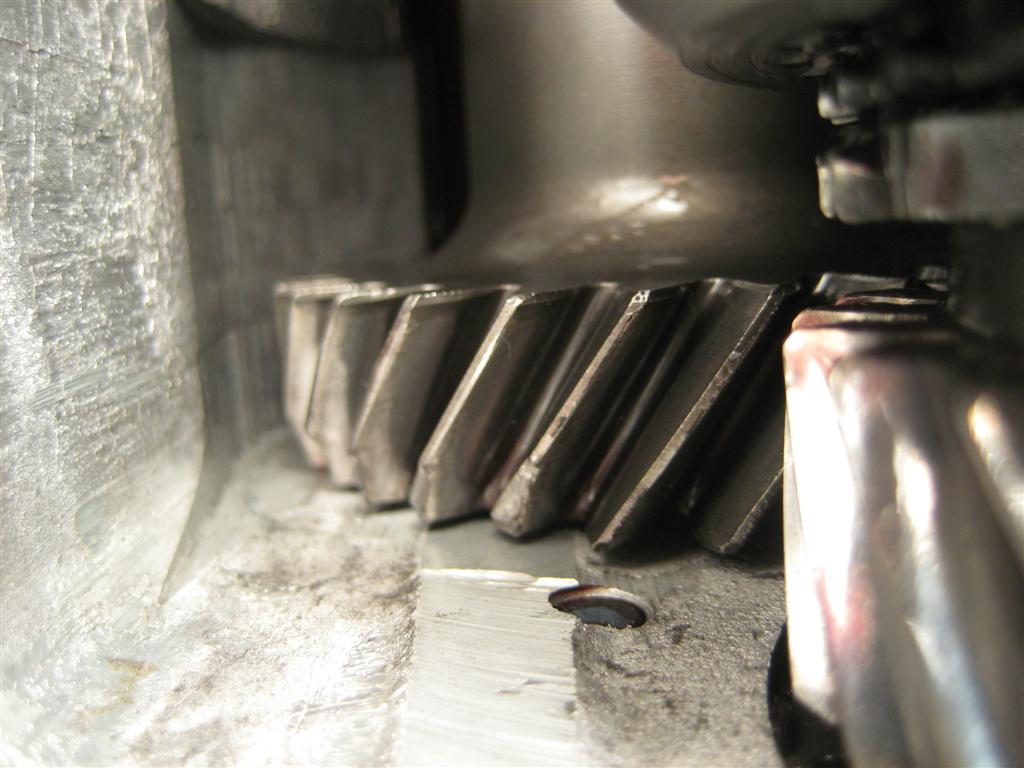
In both these clips you can clearly see lost movement in the pins (and thus the centre plate too) due to the loose nuts.https://youtu.be/u9UgwwAAvO0
https://youtu.be/o-unWAziNFQ
Cheers,
Brian
Definitely due to the loose nuts as suggested earlier.
You could try the socket cut down welded to flat bar as you suggested.
Right angled c clip pliers or right angled pliers to jam the nut while you tighten the pin nut.
It only needs the equivalent to 8 lbft of torque.
Or take the gearbox off again.
I managed to take a video of a generic plastic clutch alignment tool In position to confirm correct operation of the clutch before building up (as stated by Ukkid)
Don’t worry we’ve all been there...
I fitted a Quaife lsd to another one on my cars realising after rebuilding the gearbox I forgot to transfer the speedo drive ring across.... not funny at the time...good job I didn’t refit the box to the car
Thanks chaps - Studying it with a fresh head (not the demoralised and frustrated one) , the nuts are to blame and need adjusted.
Good call on the circlip pliers - I can borrow a decent pair of those. Certainly worth a shot!
Need to focus on it, get the thing fixed and get out on the road to remind myself why I like this car.
Cheers,
Brian
Good call on the circlip pliers - I can borrow a decent pair of those. Certainly worth a shot!
Need to focus on it, get the thing fixed and get out on the road to remind myself why I like this car.
Cheers,
Brian
I can't see how leaving them loose can possibly help. The starlock washers are there to limit the movement of what I call the floating flywheel (the bit between the two friction plates) - this makes sure the first friction plate releases fully and then the starlocks make sure any further pressure plate movement releases the second plate fully.
If the posts can move then this carefully thought out design fails to work. The action is independant of plate thickness, otherwise as plates wear this mechanism wouldn't work (the starlocks move along the pins as wear occurs , if the pins are loose I can't see that happening either) .
Sounds to me like the reconditioner doesn't appreciate how this clutch works.
Thanks for your input Joolz. Things that are designed to be tight but then left loose definitely doesn’t seem right to me but I guess I was prepared to defer to the experienced voice of the reconditioners.
I am of course more than inclined to take your view over theirs.
Hopefully Brian will soon be able demonstrate that ‘tight nuts’ are the way forward.
Cheers
I am of course more than inclined to take your view over theirs.
Hopefully Brian will soon be able demonstrate that ‘tight nuts’ are the way forward.
Cheers
No pressure - 
I wondered whether the most sensible approach is to take off the flywheel so I can mount the clutch to it on the bench. And then figure a way to operate it and properly measure it.
I’m wondering if the nuts are new and perhaps hadn’t seated in their recesses until I’ve mounted it up and operated it. Just a thought but hopefully I’ll understand more this week.
Looks like Friday evening might be dry enough for more scuttling around on the driveway.
I’d be chuffed if I can get this working as my ‘funds’ are needed for a set of tyres!
Cheers,
Brian
I don't think you need to remove the flywheel
All your testing can be done with the clutch bell-housing installed, before fitting the gearbox
You will need an assistant, but they are easy to bribe
You will also need an input shaft, or perhaps a clutch alignment tool (never used one but should work)
All your testing can be done with the clutch bell-housing installed, before fitting the gearbox
You will need an assistant, but they are easy to bribe
You will also need an input shaft, or perhaps a clutch alignment tool (never used one but should work)
I used the gearbox input shaft last time - was easy enough as it's supported on my spare trolley jack. I woudl have bought a spare shaft or tool, but shafts are nto that common, and most tools aren't designed for a twin plate setup as far as I could see.
The bench test was really just to see it and adjust it as I previously checked the clearance when it was on the bench and I was happy it was 0.75mm. When fitted it obviously wasn't so I'm keen to understand what changed, as I didn't adjust anything.
Cheers,
Brian
The bench test was really just to see it and adjust it as I previously checked the clearance when it was on the bench and I was happy it was 0.75mm. When fitted it obviously wasn't so I'm keen to understand what changed, as I didn't adjust anything.
Cheers,
Brian
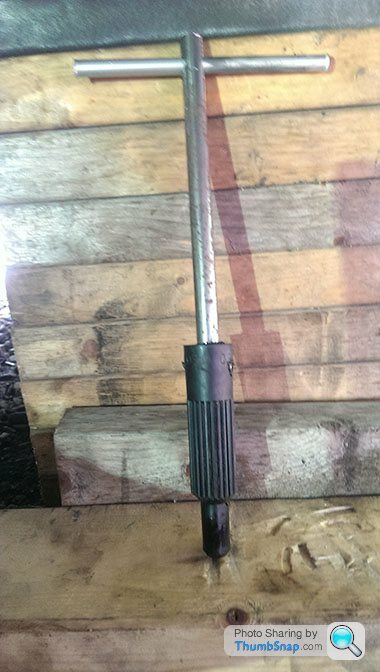
That looks a useful tool!
I removed the clutch last night, so it's on the bench ready for a good look and adjustment this evening. I'll take some photo's and share on here in case there are any useful outcomes from this, that might help others.
In the meantime I think I'm going to try and get a dummy shaft which looks much easier to do than use the gearbox' input shaft which is a bit unweildy with the box attached to it.
Cheers,
Brian
I fit these clutches without an input / dummy shaft.
All I do is wedge a length of wood onto the clutch pedal to hold it down. This releases the friction plates. Push the gearbox home and because the plates are loose and free to move into line they automatically line themselves up
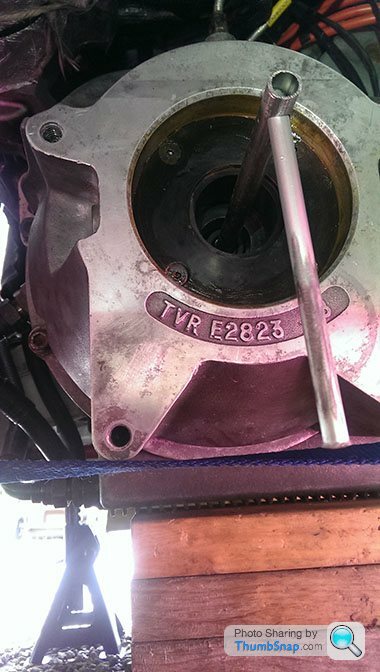
A good way to check the plates are free before you do this is to use a long screwdriver through the bellhousing hole and poke it into the splines and lift each plate up in turn, making sure it drops freely under its own weight. ANY drag of any kind spells disaster. If you use a dummy / input / aligner you cannot really feel what each individual plate is doing, so if you feel any drag you don't know which plate is the problem.
All I do is wedge a length of wood onto the clutch pedal to hold it down. This releases the friction plates. Push the gearbox home and because the plates are loose and free to move into line they automatically line themselves up
A good way to check the plates are free before you do this is to use a long screwdriver through the bellhousing hole and poke it into the splines and lift each plate up in turn, making sure it drops freely under its own weight. ANY drag of any kind spells disaster. If you use a dummy / input / aligner you cannot really feel what each individual plate is doing, so if you feel any drag you don't know which plate is the problem.
Hi Ian,
Partly there. I’ve got the clutch on the bench and I’ve adjusted it to 0.7mm. I couldn’t see any reason for sure why the clearance increased.
My only thought is that star washers settled slightly. That might make some sense as they are pushed in against the face of the pocket they sit in, but then get pulled in then other direction. Wonder if they pop/flex a little bit?
I’ve taken some photos so I’ll put them up later.
Anyway, it’s reset and ready to reinstall. I need to helicoil the lower bell housing to block holes as the threads are a bit poorly. That’s this evenings task then onto clutch fitting and seeing if I can prove it’s operation.
Fingers crossed!!
Cheers,
Brian
Presumably you managed to fully tighten the posts that the star washers locate on then. I’ve not been able work on my car in months but that will be the first job I do when I eventually get back in the garage.
Talking of heli-coils, the threads for the rear oil seal carrier on my car we’re all knackered. Had to repair all of them and the ali did seem incredibly soft.
Cheers Brian, I hope it works out
Ian
Talking of heli-coils, the threads for the rear oil seal carrier on my car we’re all knackered. Had to repair all of them and the ali did seem incredibly soft.
Cheers Brian, I hope it works out
Ian
So, rain stopped play for this evening, and I've read this through again and now realise better what both Joolz and yourself are saying.
Thanks Ian
As it stood I think I was potentially about to make an error.

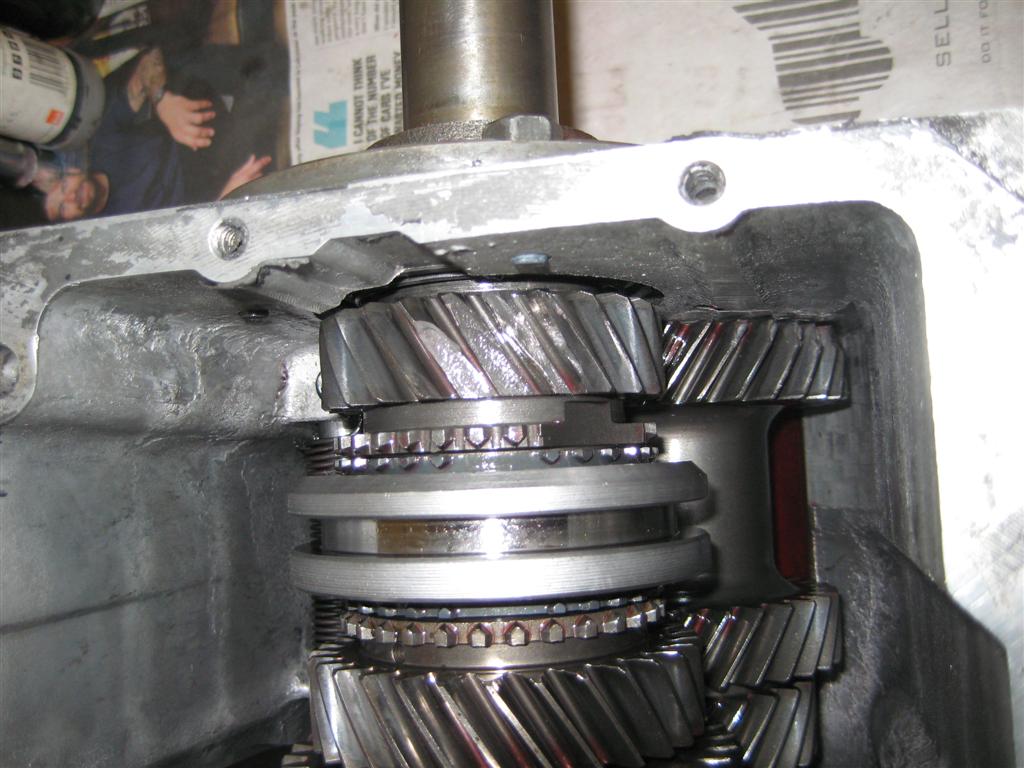
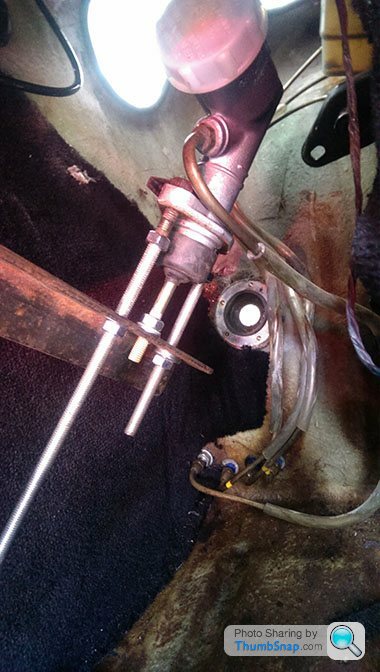
The photo show's it with the pins insufficiently tightened.
If I have this right:
The recess that the star washer sits in governs the open clearance for the intermediate plate and the secondary friction plate. The difference between the 'thickness' of that star washer's lip and the recess depth is that open clearance.That's a given, and not adjustable.
To your points earlier, the pins should be nice and tight. I've picked this up wrongly, thinking that I need to tighten them up a bit to close the clearance.
On that basis, if I tighten the pins up then the star washer is going to be too far down pin and will nip the whole thing up. To Paul's point earlier, the issue could then be that the pins get damaged as I pull it apart.
I'd better order some star washers...
Cheers,
Brian
Thanks Ian
As it stood I think I was potentially about to make an error.
The photo show's it with the pins insufficiently tightened.
If I have this right:
The recess that the star washer sits in governs the open clearance for the intermediate plate and the secondary friction plate. The difference between the 'thickness' of that star washer's lip and the recess depth is that open clearance.That's a given, and not adjustable.
To your points earlier, the pins should be nice and tight. I've picked this up wrongly, thinking that I need to tighten them up a bit to close the clearance.
On that basis, if I tighten the pins up then the star washer is going to be too far down pin and will nip the whole thing up. To Paul's point earlier, the issue could then be that the pins get damaged as I pull it apart.
I'd better order some star washers...
Cheers,
Brian
When you re-assemble, resist the temptation to push the starlocks fully along their respective pins, push them enough so they start to bite the pin and prebvent the assembly falling apaprt but don't compress the assembly fully by hand at this point.
The reason is that if you inadvertantly tilt the part actually holding the starlocks then the starlock at the tilted part will travel further down the pin than the others, meaning that starlock will never fully release the friction plate at that side.
Assemble it relatively loosely, and let the action of tightening the 6 allen bolts evenly pull the starlocks down their respective pins. This will ensure they travel just far enough but not too far along their pin.
Gassing Station | Cerbera | Top of Page | What's New | My Stuff