Engine bay tidying
Discussion


fred bloggs said:
Lol at the carpet. Sounds oddly familiar.
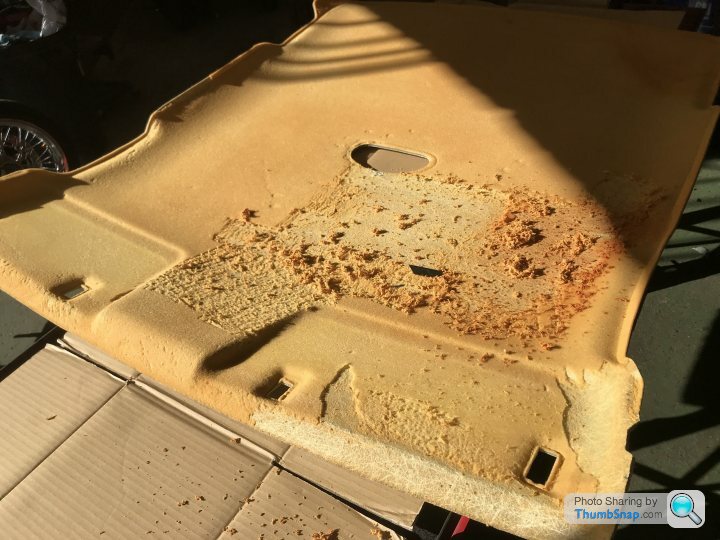
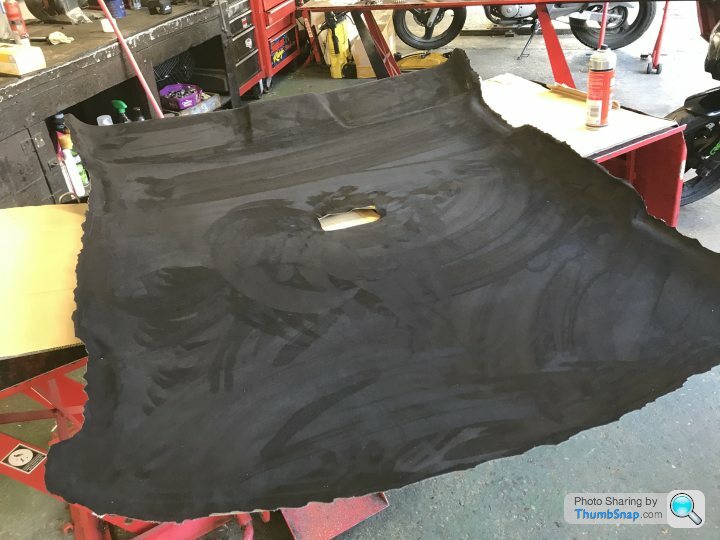
It’s not engine bay, so a bit off topic, but interior is coming along nicely, and cheaply. £20 carpet dye, £25 roll of faux suede headliner material and a flocking kit £25 to do the pillar trims.
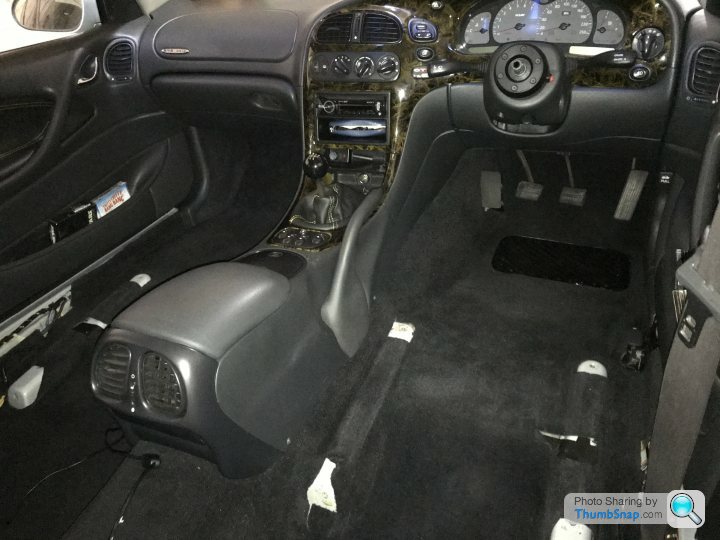
Scraping the old foam of the headliner was hideous
 [url]
[url]
 |https://thumbsnap.com/sB3JkGhX[/url]
That looks like a really nice job, good stuff!It’s not engine bay, so a bit off topic, but interior is coming along nicely, and cheaply. £20 carpet dye, £25 roll of faux suede headliner material and a flocking kit £25 to do the pillar trims.
Scraping the old foam of the headliner was hideous
[url]|https://thumbsnap.com/sB3JkGhX[/url]I've been replacing my brake lines and will be running a new fuel line once all the AN bits arrive, it was a job I was dreading but actually I've really enjoyed it, I think it helps that everything is already in bits so I have a relatively decent amount of space most of the time. The car officially has no wheels on it, so it's now firmly in the "never ending project" stage of its life

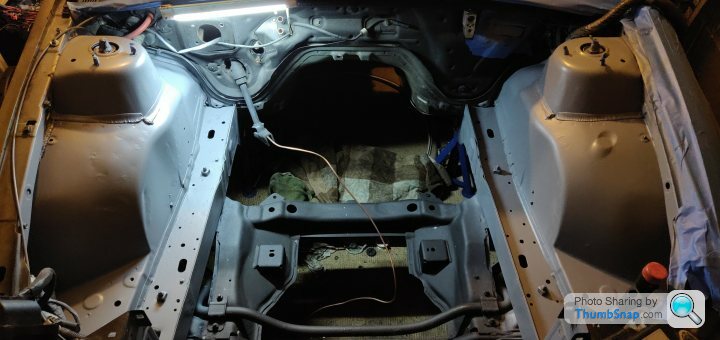
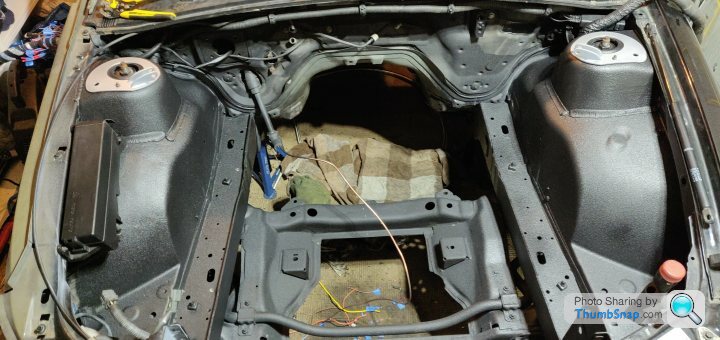
The tidying continues, primer on, will be painting it tomorrow after work.
Have hidden the wiring that ran along the driver's side strut tower / arch, so it's going to look relatively clean when it's all back together I think, although will need to run a bunch of lines (brake, power steering, heater) along that chassis rail, hopefully making them nice and neat will keep it looking fairly tidy.
99PBATR said:
Good work fella, should look awesome when you are done. One day I want to do the same to mine and get all the bolts plated and metal parts polished.....
I'm quite tempted to replace a lot of bolts whilst I'm in there, there's lots of tidying to be done in there anyway, it'll look fairly unique once it's done at least 
Most of the first coat on, the can didn't last anywhere near as long as I expected
99PBATR said:
You might be interested to see what I did with my last car.....4 years hard labour and effort
https://www.pistonheads.com/gassing/topic.asp?t=17...
Have just read through it, username suddenly makes sense! https://www.pistonheads.com/gassing/topic.asp?t=17...
That was a serious labour of love! I'm not quite at that stage of disassembly this time round, but one day maybe
Was interesting they removed the rear crash bar on the Type-Rs.
Has your Ro had any similar treatment to the ATR?
99PBATR said:
I've done about 120 hours on the paint, wet flatting and cutting it and bringing it back to life as it was quite poor, I also had the alloys shot blasted and powder coated in shadow chrome, so it looks very good now but in terms of what I did to my ATR, not even a patch on it as that was enough for a lifetime what I did to that. One day when I have more time and cash and room, I will have the engine out like you have done and go to town on it for sure but until then, I will just enjoy driving it on the odd weekend I think
Yep I can totally understand that, I think I'll be similar in terms of hiding wires and things I won't be doing on any other vehicles, but doing the engine and other general modification I've enjoyed.My reader's cars thread is over here which I've been keeping up to date more recently. I saw you sent your ATR motor off for a freshen up, if you do pull the Monaro's out, I'd heartily recommend giving it a go yourself if you haven't dabbled before, it's good fun, plenty of pics in the thread learning as I go
https://www.pistonheads.com/gassing/topic.asp?h=0&...
99PBATR said:
Enjoying watching the progress on this. You are doing a great job sir. If you ever happen to come down to Caffeine & Machine, do let me know and I will buy you a beer!
It's (not) a date! 

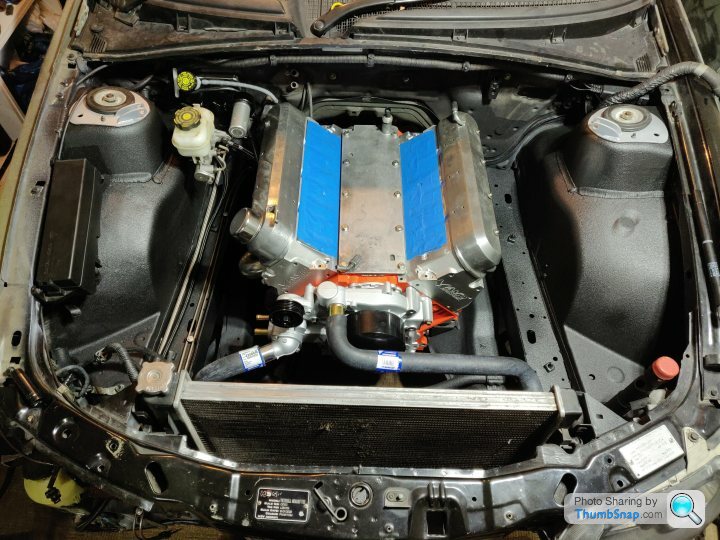
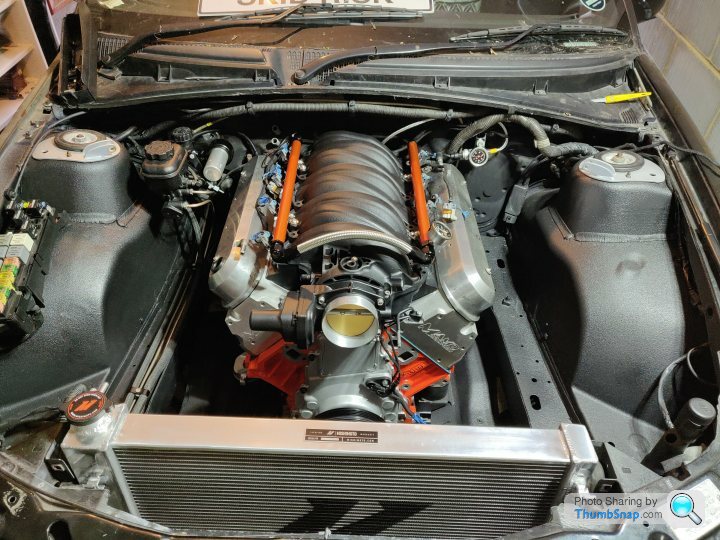
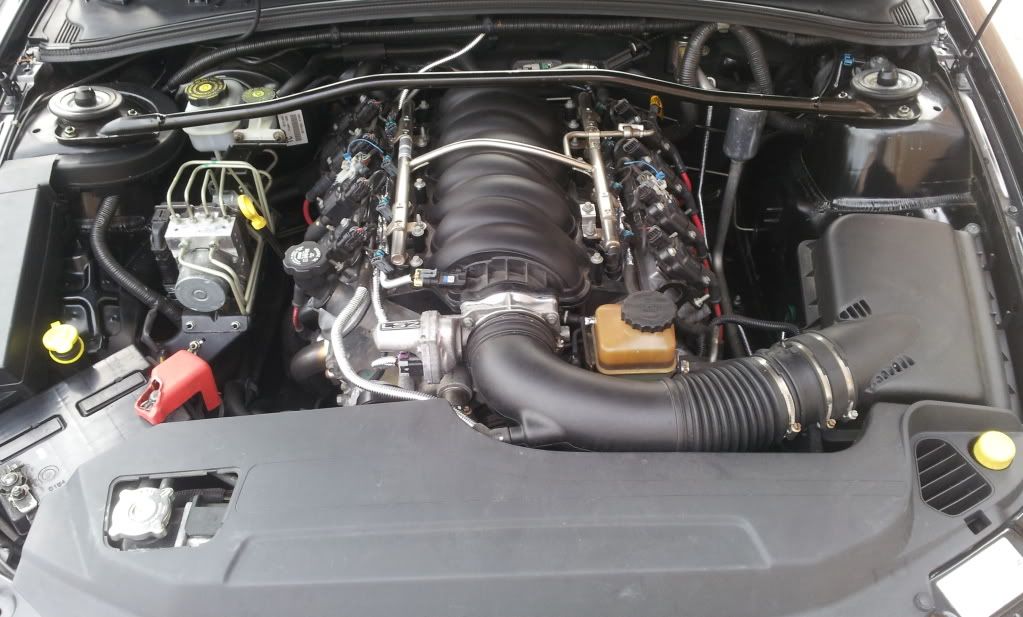
It definitely seems a shame to put anything else in the engine bay at this point, it looks so clean and tidy in there:

The engine isn't actually at this stage, it's just bolted together to seal it up whilst it's in the garage and I see about where to run power steering lines and oil cooler lines etc. once the headers and things are installed.
mfp4073 said:
Where did you get the radiator hoses from, and are you replacing the heater hoses at the same time. Looking good though
Just from rockauto, they're standard AC Delco jobbies. The rubber is weirdly chalky finished but I expect will clean up alright. I'm yet to decide what to do with the heater hoses, they're definitely ugly and as they have a habit of rubbing on the cylinder head I'll be pondering how to route them better if I made some fresh ones up that will also keep them a little more 'tidy' looking, as I don't have the ABS bracket and module there to hide them under!
There's also the matter of where to mount the coilpacks that looks 'neat'. I've seen people mount them underneath the headers but that seems a bit sketchy temperature wise, but Craig at DynoTorque has done it and he doesn't bodge things or leave them compromised so...
Well whadduya know, I popped the intake manifold on and now that the fuel hard line and associated clip is gone, brake line is gone, brake vacuum boost hose gone, there's actually quite a lot of room behind the manifold against the firewall... Room enough perhaps for... 8 coilpacks 

That or I've got the motor slightly too far forward on the engine mounts, which is eminently plausible as the gearbox isn't there to properly locate it
Looks good anyway, must finish engine bay stuff and get on with actually finishing the top end!

That or I've got the motor slightly too far forward on the engine mounts, which is eminently plausible as the gearbox isn't there to properly locate it
Looks good anyway, must finish engine bay stuff and get on with actually finishing the top end!
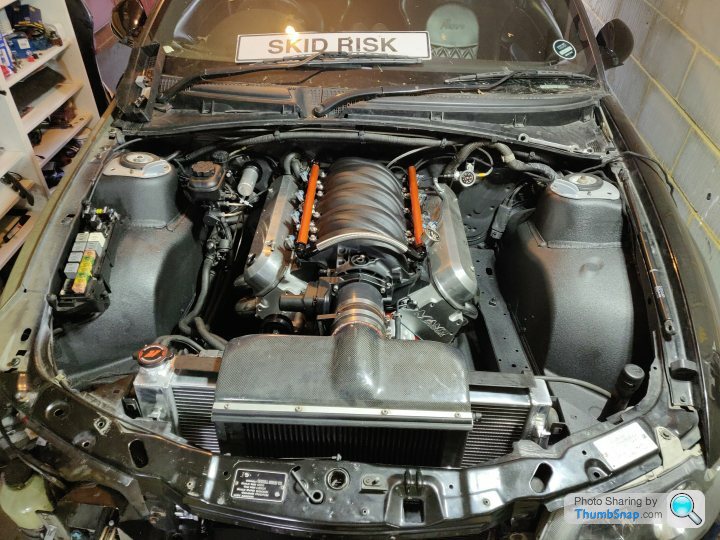
Master cylinder lines are in, power steering lines in etc. basically complete in there aside from the motor and associated engine wiring, which I'll tidy up at some point.
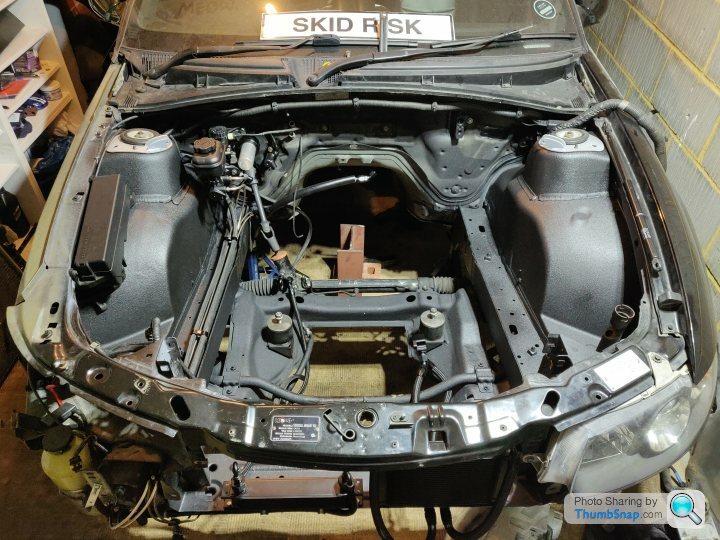
All the brake lines / PS lines run along the chassis rail on top of each other in a stack of clamps, has worked well, the clamps look like this, just with a longer bolt.
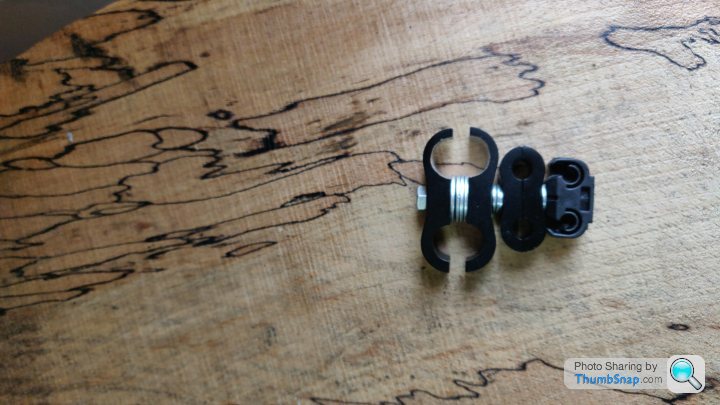
All the brake lines / PS lines run along the chassis rail on top of each other in a stack of clamps, has worked well, the clamps look like this, just with a longer bolt.


Richie Slow said:
Amazing work James, looking forward to seeing it in the summer.
Cheers Richie, me too hopefully Not 100% my wiring has been up to scratch but we shall see...Janosh said:
Looks amazing, almost a shame to spoil the cleanliness with the 78mm turbos…! 
Pah, I don't want those nasty noise suppressors on there  It's also about 11.7:1 static compression and top rings are gapped to 0.018" so I don't fancy shoving much boost up it!
Christmas present to myself (the radiator was a present for the car, honest) is a set of Quickjacks which will hopefully be on their way soon. Will lift the car to about 21 inches off the floor in 30 seconds

Jacking it up in the garage is a real faff and I need to get under it for various bits now, so they'll lift it higher than my jackstands could even reach and should be less sketchy than jacking each corner up in turn whilst pressed against the wall in the garage. £1100 well spent hopefully as they'll make jobs on the other cars much easier / quicker too, I've always disliked jacking cars up even after all these years

ringram said:
Heads look nice dude. Im guessing a decent cam as well!?
Do you think the OTR is restricting it at all? Whats MAP at WOT vs BARRO?
Good to see you post again mate!Do you think the OTR is restricting it at all? Whats MAP at WOT vs BARRO?
Dyno is booked for 14th May for running in and tuning, ( it's stroked to a 402 ) so will see then, I am a little suspicious it might do, the X-Air looks a bigger filter area and is a decent price so that'd be my next step if it looks like I'm not getting all the MAP at WOT
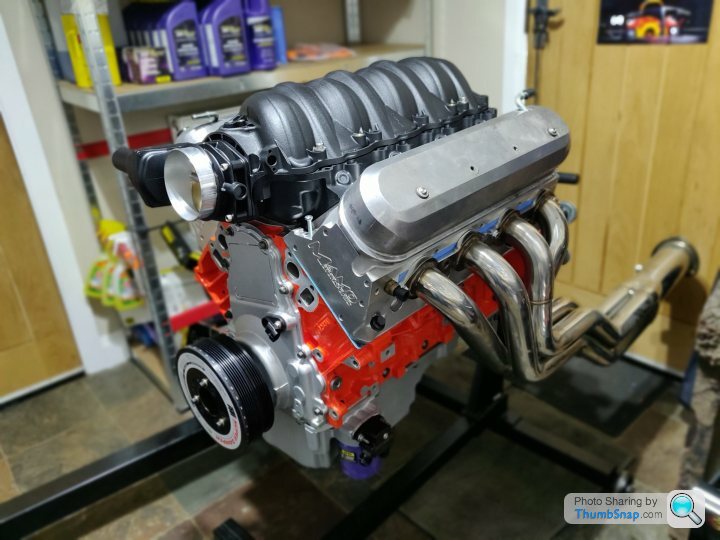
Cam is fairly spicey, 237/242 on a 113+2, lift around the 650s. Heads are a 235cc cathedral that flows about 350CFM at that sort of lift, all been hand finished as well, including the throttle body and intake manifold, the combustion chambers and the ports were a work of art.
Johnson short travel lifters (the ST2126LSRs), yella terra ultralites, 1.8 ratio with larger 10mm mounting hardware, shimmed to give a nice tight central sweep on the valve tip, and measured all the pushrods individually to get lifter preload right, ended up with 6 different lengths of pushrod once the lengths were grouped sensibly
naturally double valvesprings with Ti retainers. It's a fairly proper NA build anyway, 11.6:1 though so haven't gone insane on the compression!
I've got a build thread over in readers cars with lots of pics / details too
Allegedly the old stroker issues of them eating the skirts have been resolved in the last few years with better piston design, I chamfered the bottom of the liners a tiny bit too (in hindsight, maybe too little, we'll see!) just to try and help longevity.
Picking up a pair of tbe Holley 2 piece valve covers today to put on to finish it off visually as well


TerryS said:
I am struggling with where to put the ECU inside the car. Did you find somewhere decent?
Yep, left hand side kick panel in the passenger footwell, get that off (think you need to loosen the door sill trim possibly, I can't remember...!) and there's plenty of space and a bit of a mounting that you can easily secure the ECU to.It's where they put the gearbox computer / TCM on the autos that have a separate controller
You need to mess about poking the ECU connectors back through the hole in the firewall, but it is doable, might need to do the largest connector first I think because naturally space gets tighter as you poke more connectors back.
Gassing Station | HSV & Monaro | Top of Page | What's New | My Stuff