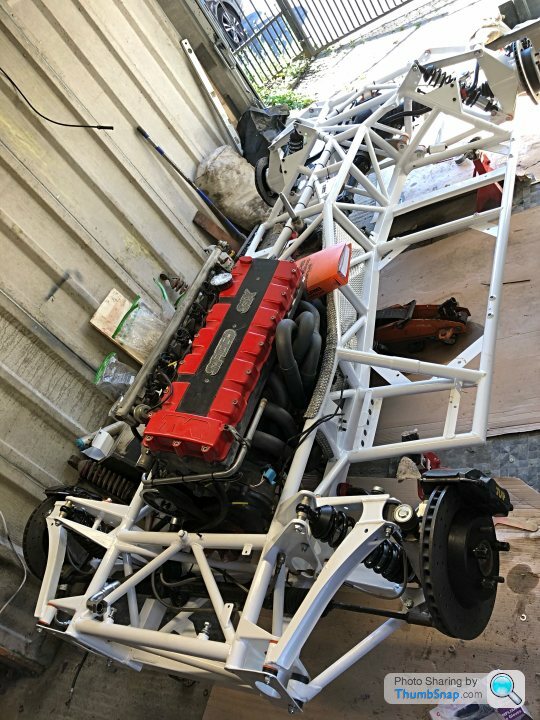
Sagaris Project returns to the UK
Discussion


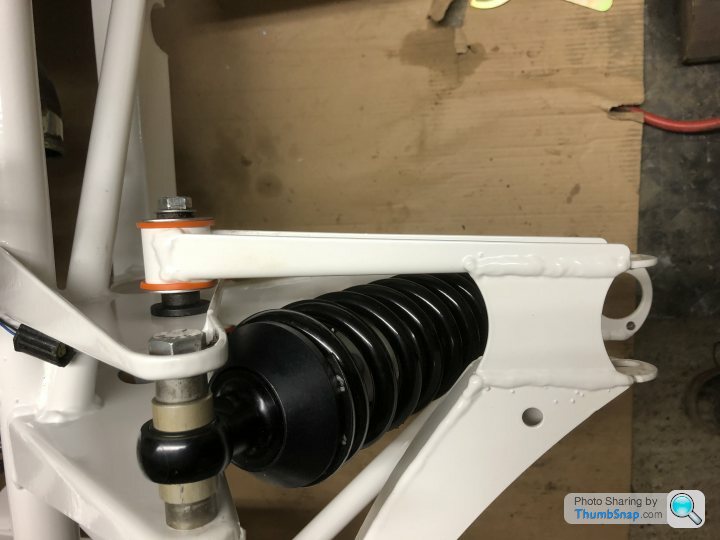
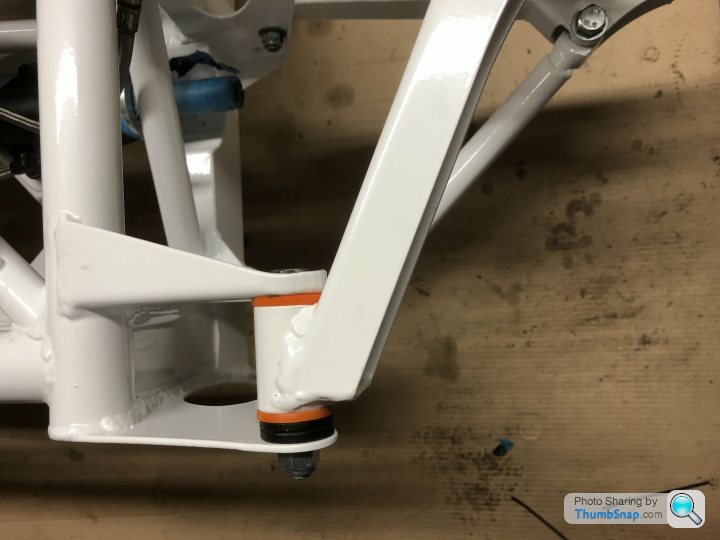
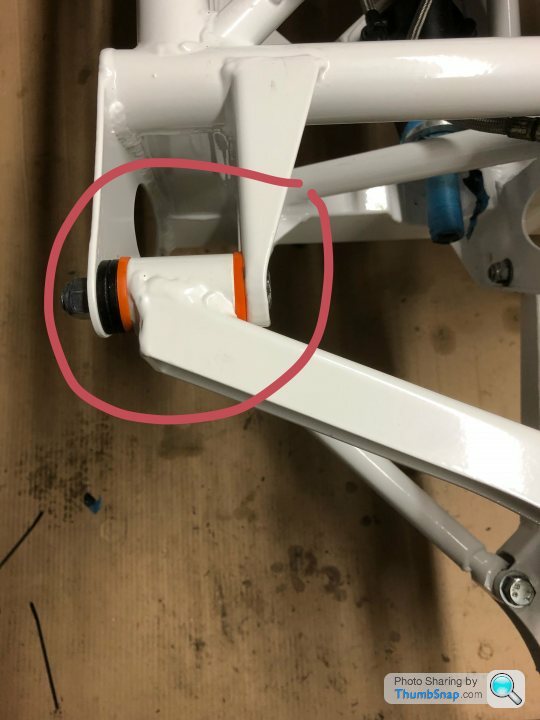
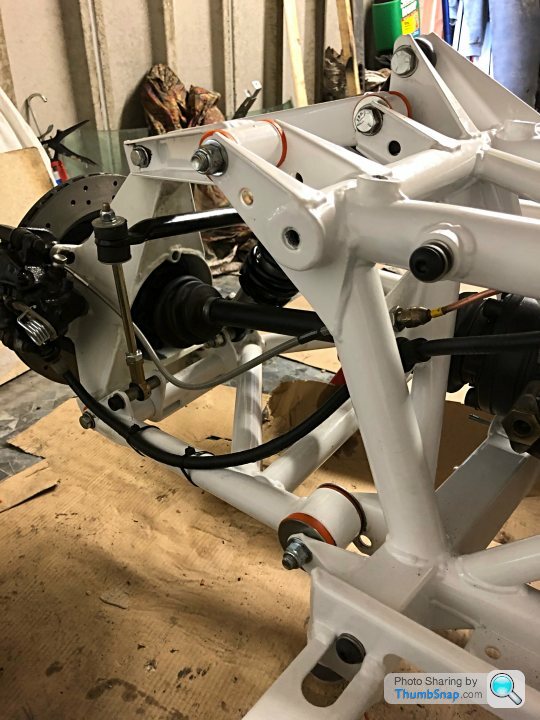
Could someone please confirm if this is correct for a Sagaris. The top front wishbone has the two spacers at the front of the bush. It has been pointed out to me that this may not be right as a T350 has them either side. This is how it was prior to dismantling but it may have been wrong to start with.
Many thanks Chris
phoenixz said:
I am assuming that you have the Speed Six bible already.
In the off chance that you do not (an absolute must for the fantastic work you are doing), http://www.varleyhyd.com/FJ062.asp may help.
Some of the pictures on the website show it but there are many, many more in the Varley handbook
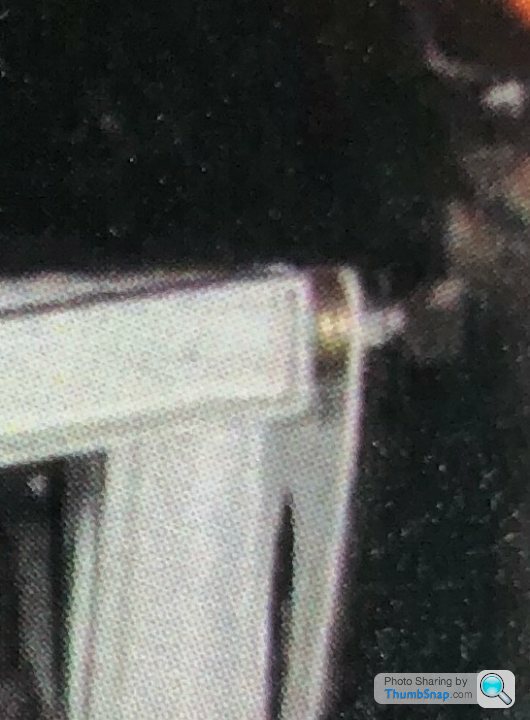
Yes I have the Sagaris book by GV and have tried to study the pictures but they are quite small so I took a picture of it and blew it up and it looks as if this is the correct way to do it. I must get better glasses. Thanks for the helpIn the off chance that you do not (an absolute must for the fantastic work you are doing), http://www.varleyhyd.com/FJ062.asp may help.
Some of the pictures on the website show it but there are many, many more in the Varley handbook
There are two seals on the rack one is at the end (drivers side the other is deep within the rack and is a pain to get to it without some sort of specialised tool. Luckily the one leaking on mine was near the end so all I had to do was drill a couple of small holes in it with a dremel screw a couple of long self tapping screws in and use a small slide hammer to pull the old seal out. There is a circlip to remove first then just press the new seal in and replace the circlip simples


Thanks STE VR this part is the most enjoyable. I have a query about the prop bolts on the car when I dismantled the car it had two odd bolts two that were fully threaded and two that were only partially threaded. None of them had lock washers on them. So I guess the fully threaded bolts were wrong but should they have had lock washers on or just thread lock?
Cheers Chris
Cheers Chris
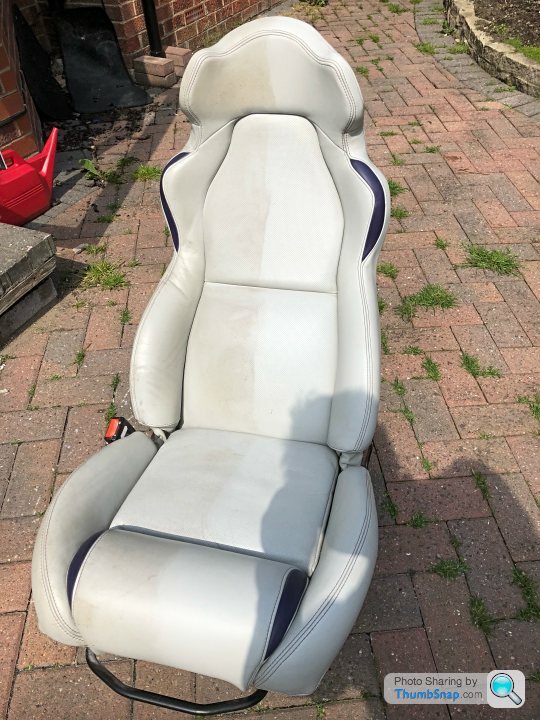
The power of steam I had spent hours trying to clean this seat with all kinds of soaps leather cleaners etc but could not get it looking nice. Anyway I had a go with our steam cleaner no detergents just the steam and a cloth to wipe it after. This took no longer than 15 minutes and the difference is amazing.
bubblebobble said:
Hey,
Looking really good.
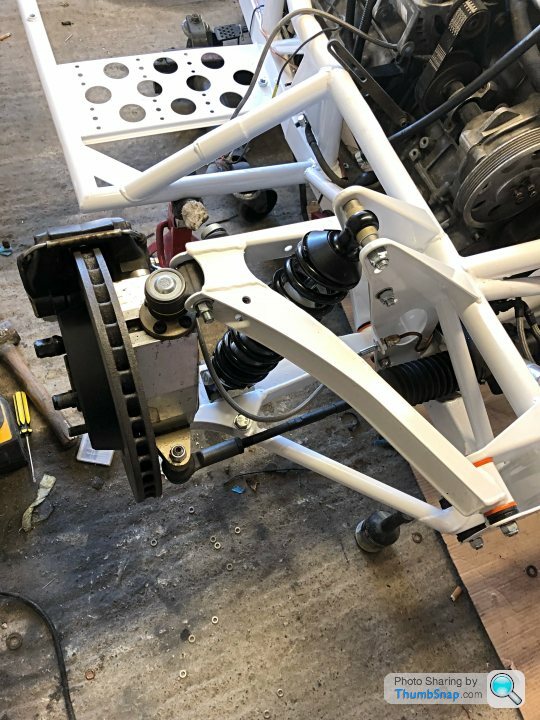
Just a quick heads up though, looks like your front callipers are on the wrong sides.
The bridging pipe that connects the calliper sides should be on the bottom.
Again really good job , be interested in the fuel piping, are you using nylon like the OE or going with something else ?
More pictures please !
Cheers
Many thanks for the heads up on the Callipers I will swap them around. The fuel pipe is the original Nylon but I have changed the rubber like for like. Looking really good.
Just a quick heads up though, looks like your front callipers are on the wrong sides.
The bridging pipe that connects the calliper sides should be on the bottom.
Again really good job , be interested in the fuel piping, are you using nylon like the OE or going with something else ?
More pictures please !
Cheers
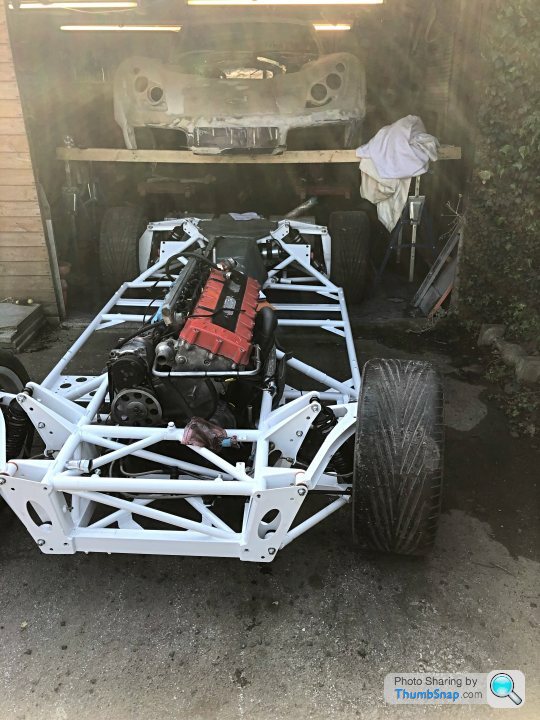


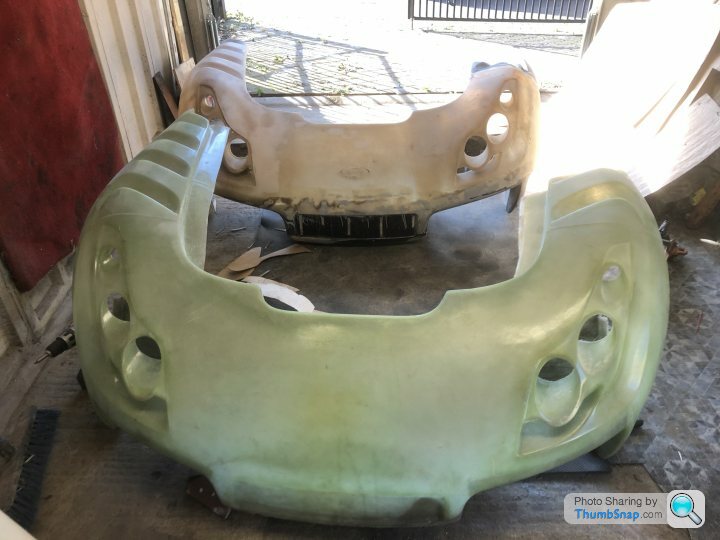
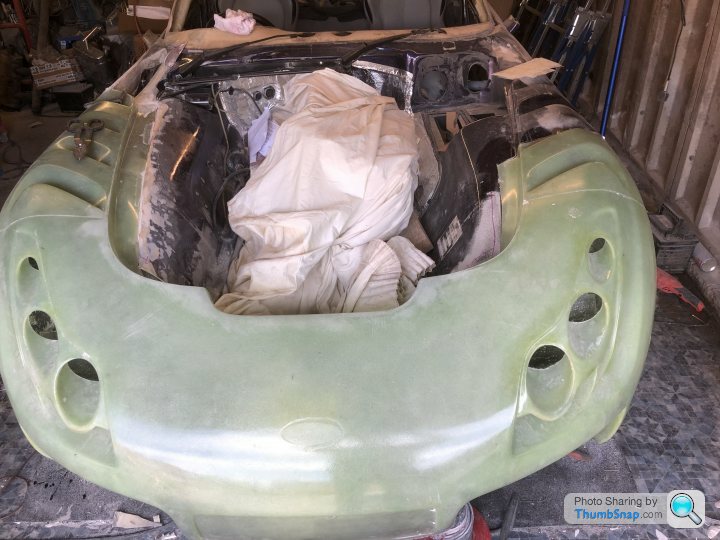
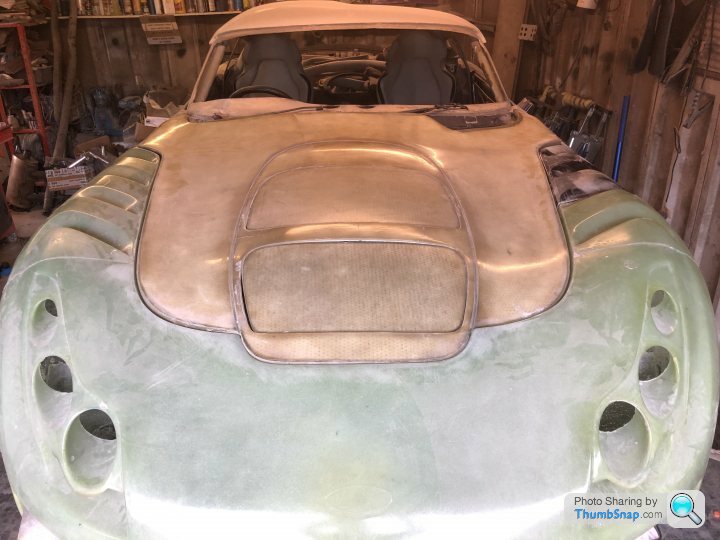
Well that’s the front in place not finished laminating it yet but should get that done over the weekend. Test fit of the bonnet went well shut lines all good. Over all very happy with it.
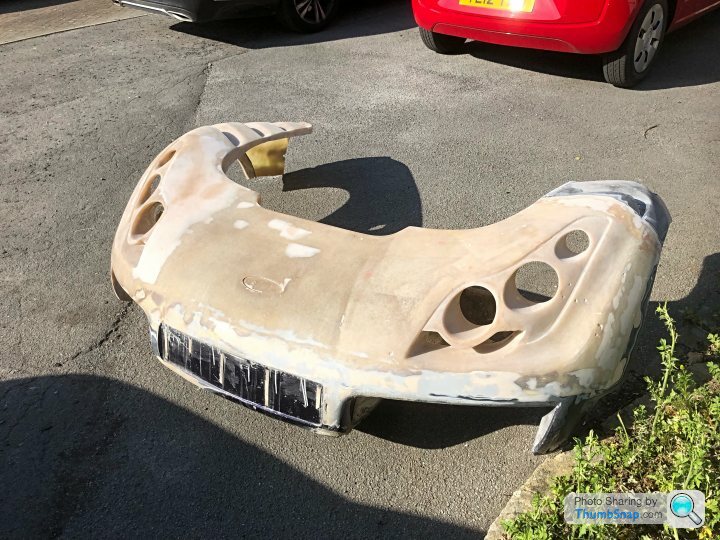
Last picture is a section of the new/old front I cut off it was ridiculously heavy and as you can was owner 25mm thick in places so really glad I decided to change it.
[url]
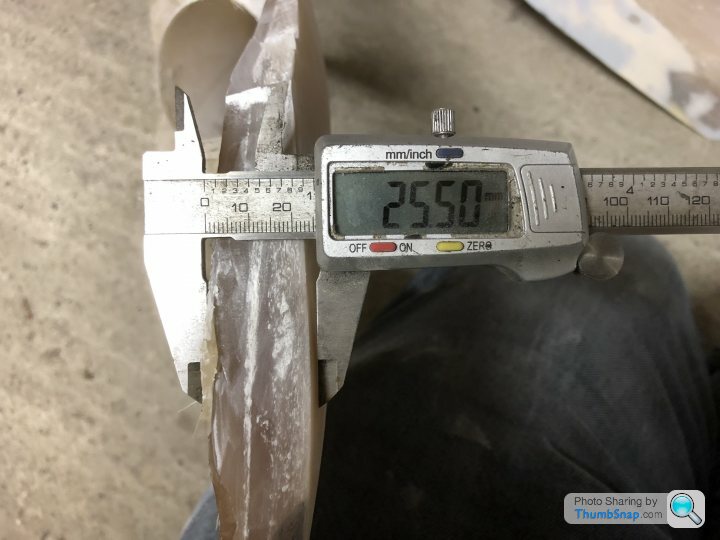
Last picture is a section of the new/old front I cut off it was ridiculously heavy and as you can was owner 25mm thick in places so really glad I decided to change it.
[url]
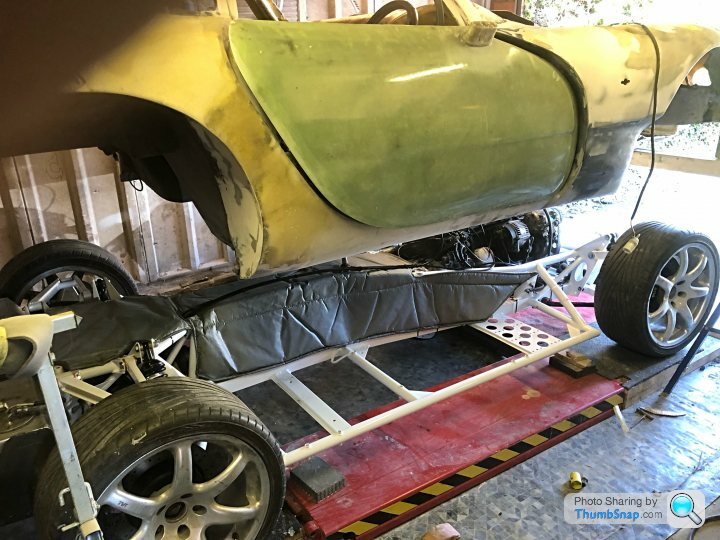
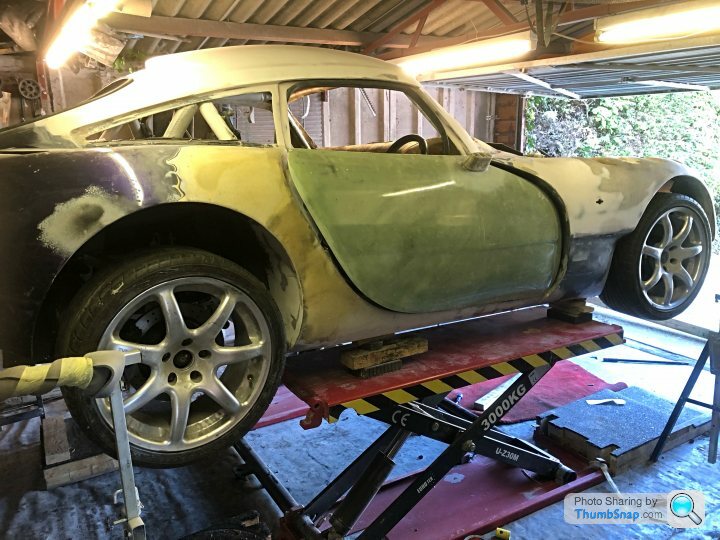
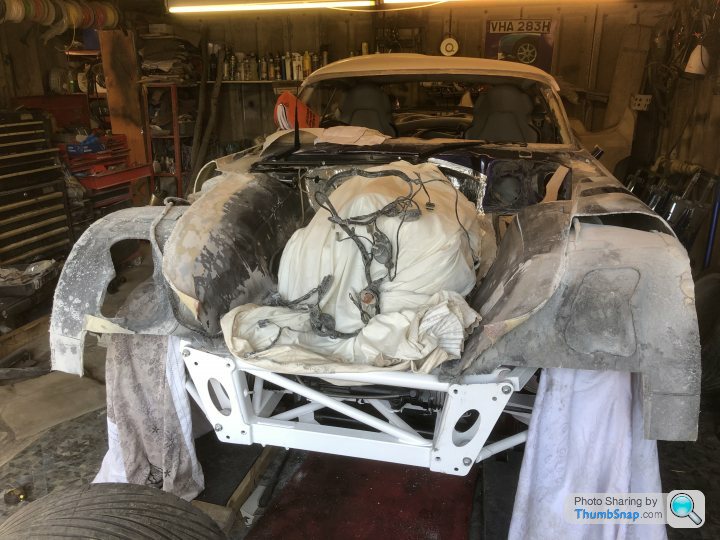
Thanks guys I took a week off work to get the body and new front end fitted as I couldn’t fit my Griff in the garage it’s amazing how much space a dismantled car takes up. Things will move a lot slower now I’m hoping to have it all finished by the end of the year or at least to the point where I can send it to the painters. I will do most of the prep including it’s first coat of primer which will be the Upol Reface to give it a good base for the paint but will leave the final prep to the experts. I also need to leave the car as long as possible until paint to help avoid any sink marks with such a lot of bodywork going on though I think this may be impossible but the longer I leave it the less chance especially if we get a nice hot summer and I can let it bake in the sun for a few days.
I am keeping the original colour for a couple of reasons main one is that I like it but another factor is that it’s not an expensive paint to buy and is a fairly easy colour to match if I get any sink marks or need to repaint a panel in the future. I want the car to be right but I want to be able to use it and not worry about a super expensive paint job if something happens to it.
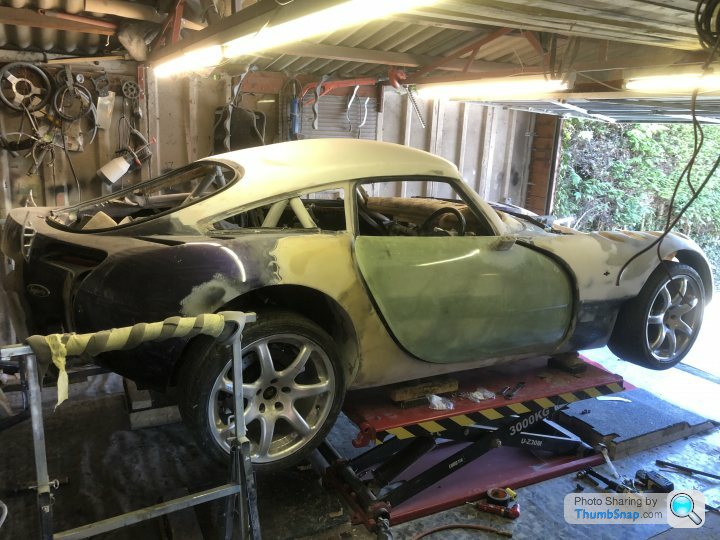
Last day on the car today for a while I’ve got the hinge boxes cut in for the bonnet just need to fibreglass them in. Still a massive amount of work needed but the major jobs are now done and it’s in one piece.
Last day on the car today for a while I’ve got the hinge boxes cut in for the bonnet just need to fibreglass them in. Still a massive amount of work needed but the major jobs are now done and it’s in one piece.
Gassing Station | Tamora, T350 & Sagaris | Top of Page | What's New | My Stuff