E36 cheap track day toy
Discussion


I'm not sure what to do with my Evo when I eventually get to doing the rod bolts and bearings, as there's no holes in the sprocket to wire lock the bolt. I've seen the upgraded pump shaft and nut kits but they seem a lot of money for what they are. Not as much money as a trashed engine, though....
I'm considering red Loctite for mine at the moment.
I'm considering red Loctite for mine at the moment.


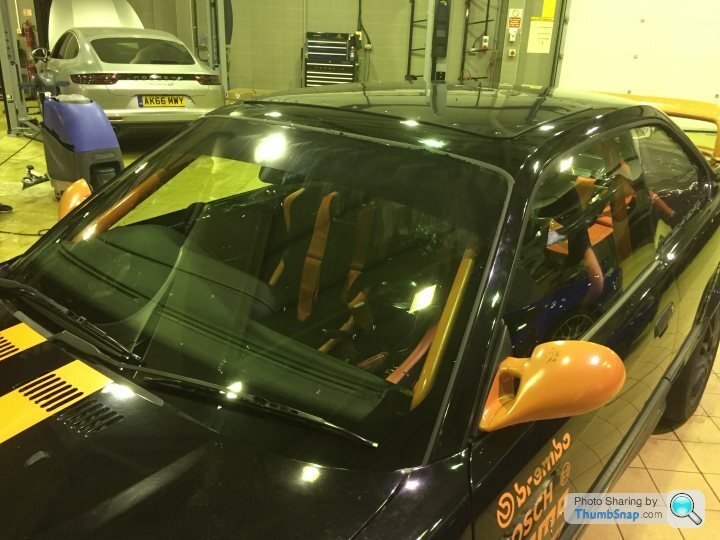
Back from holiday and a heavy stag weekend, time to crack on. I have picked up the head and will be starting the strip this week. In the meantime the MOT was due last week, so back on the road and new windscreen time.
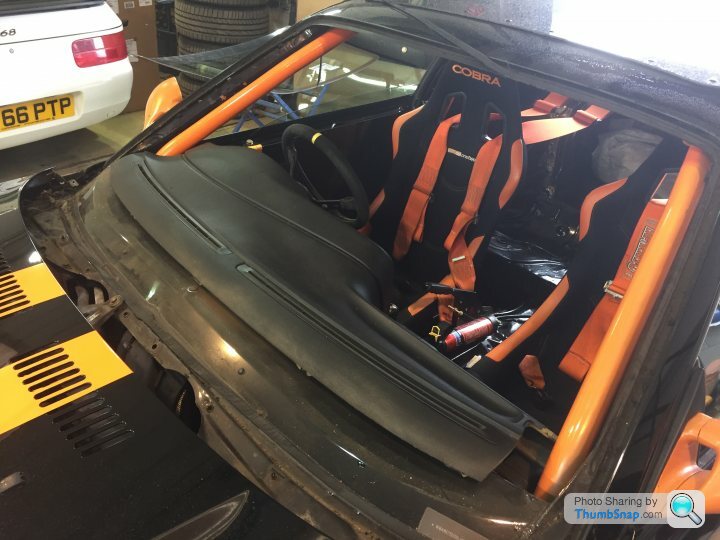
It was interesting to see it out. Looking at the frame it looks like this is its first replacement screen. Not bad for 21 years.
The old screen has randomly cracked probably just from the sun a couple of months back.
With the new screen in I set about fitting a new sun strip. Thought I would have another change, just black this time. I am considering going just black on the outside if I ever get round to painting the front bumper and around the window rivets.
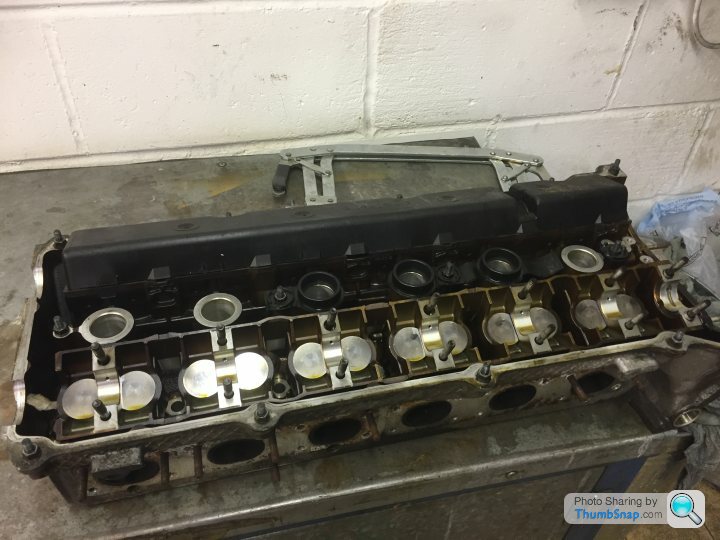
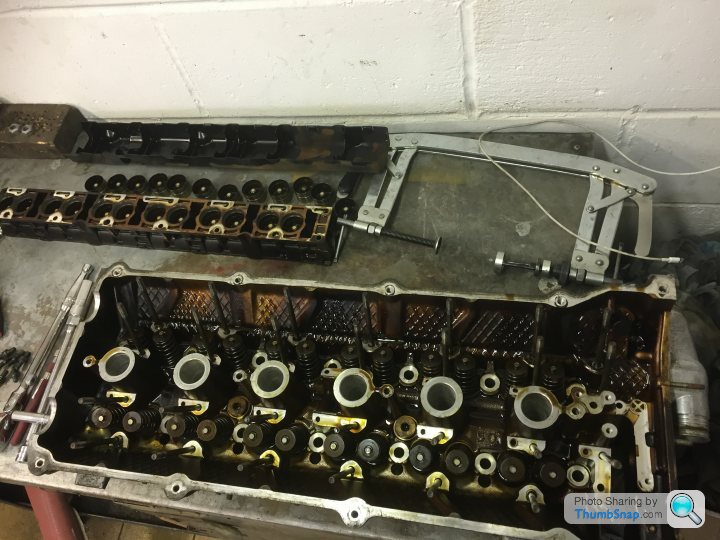
Cleaning continued this week.
Once the normal scrub was done I set about it with scotch bright on the important bits and a wire wheel on the not so important bits.
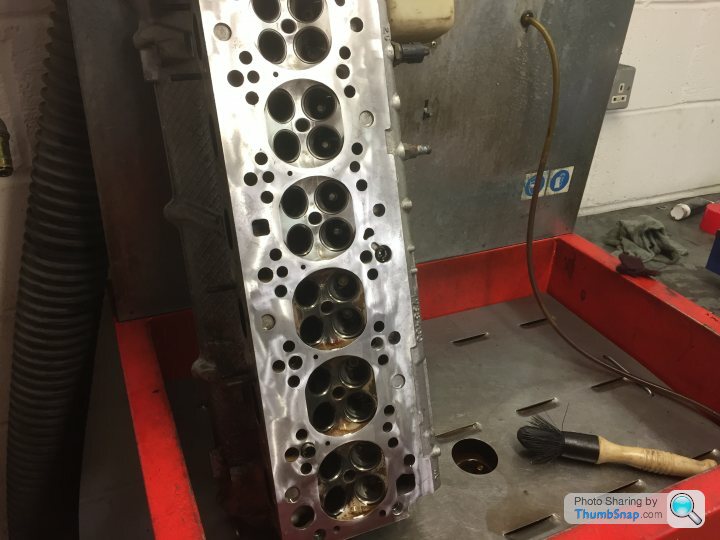
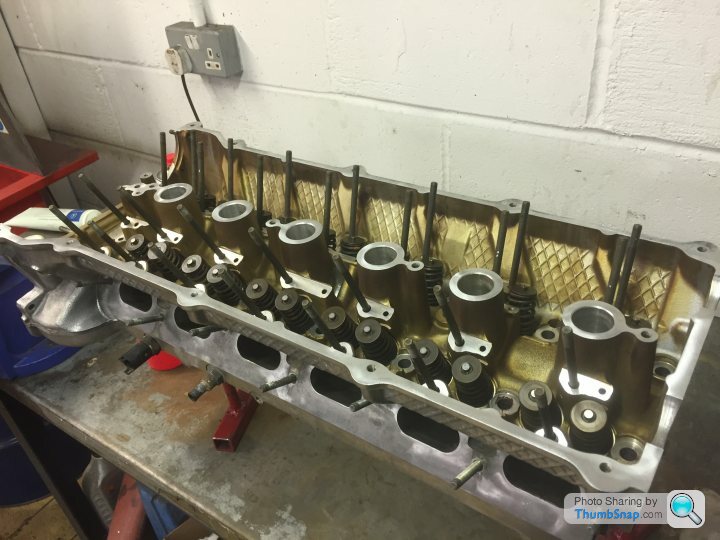
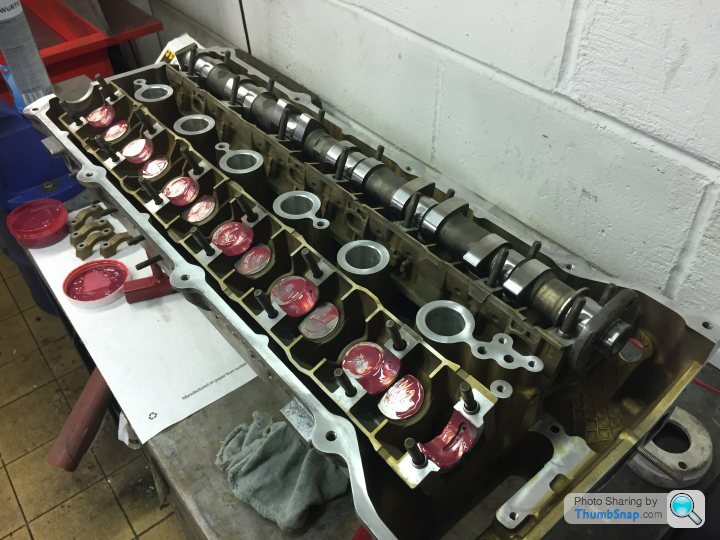
Then the long job of lapping in 24 valves begins. The inlet valves are pretty clean and only take about ten minutes each, but the exhaust are quite black and so far take about half an hour each.

On the upside though I'm not finding anything particularly worrying. The valve guides don't have massive play and the seats are cutting in quite nicely.
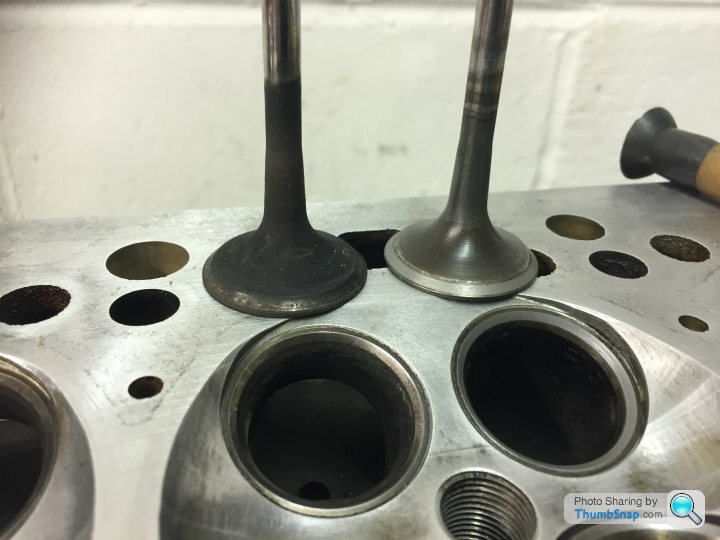
Before on the left, after on the right. Just in case you couldn't work it out.
I really want to get it all back together in the next couple of weeks. Starting to feel like I have broken the back of it. But we are also trying to move house and are very busy at work, so who knows. My aim is still to have her on track with new engine run in this year.
Once the normal scrub was done I set about it with scotch bright on the important bits and a wire wheel on the not so important bits.
Then the long job of lapping in 24 valves begins. The inlet valves are pretty clean and only take about ten minutes each, but the exhaust are quite black and so far take about half an hour each.
On the upside though I'm not finding anything particularly worrying. The valve guides don't have massive play and the seats are cutting in quite nicely.
Before on the left, after on the right. Just in case you couldn't work it out.
I really want to get it all back together in the next couple of weeks. Starting to feel like I have broken the back of it. But we are also trying to move house and are very busy at work, so who knows. My aim is still to have her on track with new engine run in this year.
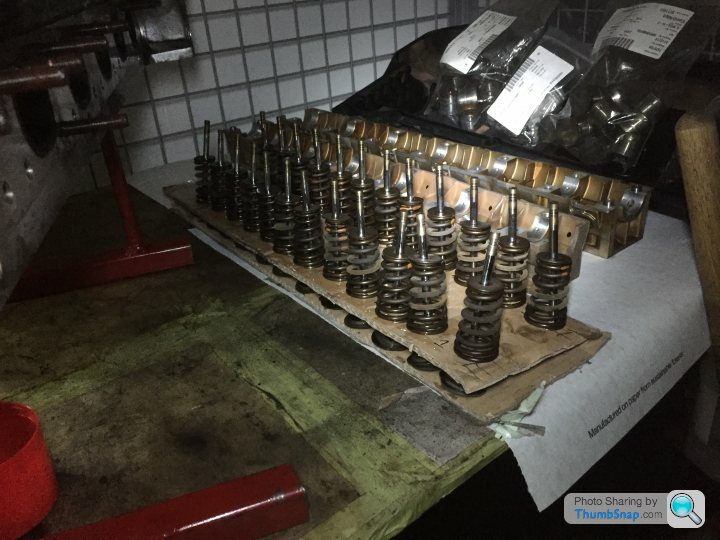
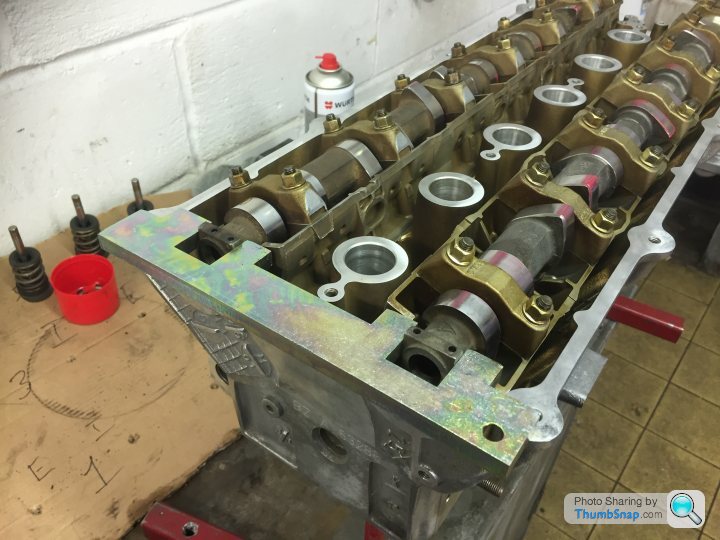
After many many hours a whole lot of valves fitted with new stem seals.
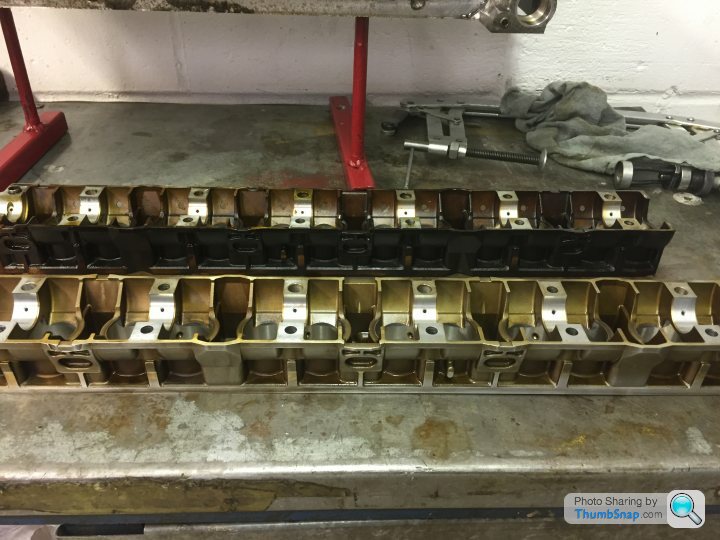
Now I set about checking the followers. I looked at the exhaust ones first. I was surprised to find only one a little stiff. Then I checked the inlets and found only two with any movement.
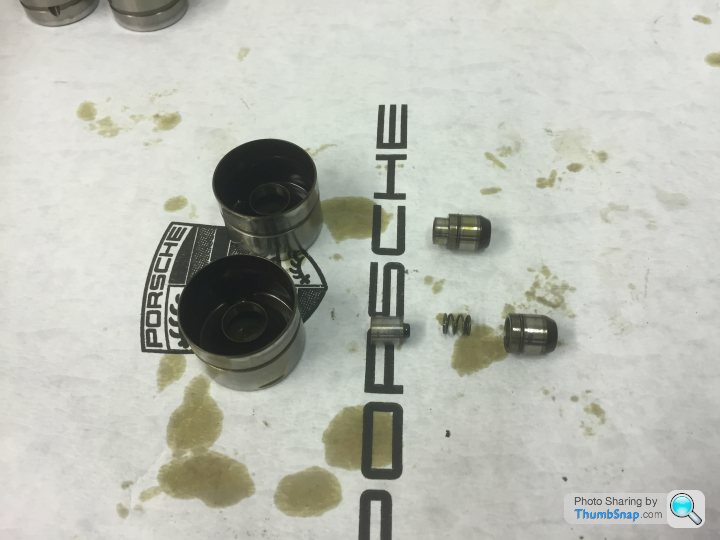
I pulled the centres aparts but found no real damage or wear, just some dirt build up. Cleaned them out and reassembled.
In that picture, the one at the top is how they came apart and sat naturally. The one at the bottom is how it sat after cleaning out.
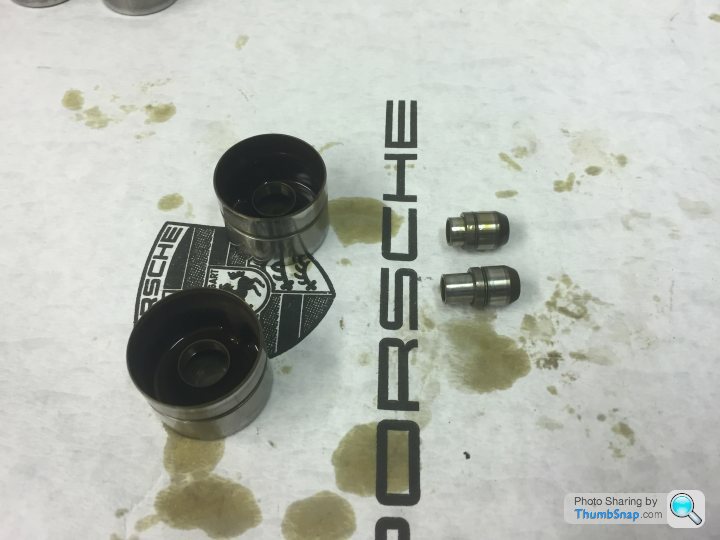
Finally all assembled and returned to the trays with some more assembly lube on.
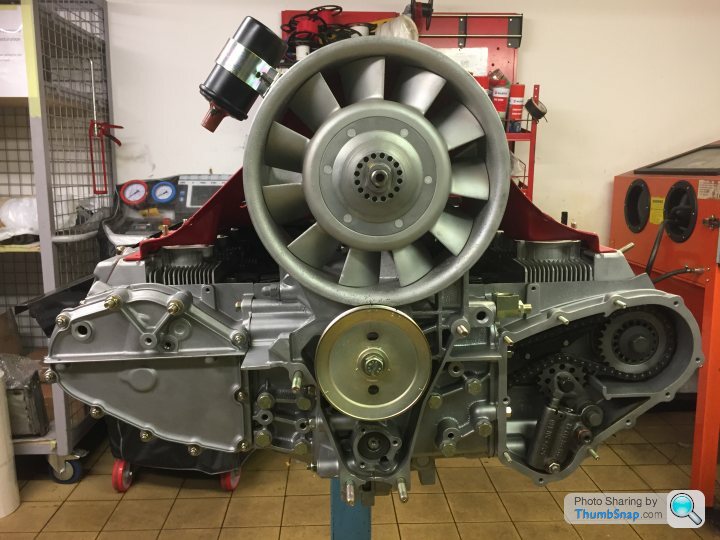
Getting there. Although I am moving in a couple of weeks, so also doing a lot of overtime on the restoration. The engine for that is starting to look quite tidy too.
House moving and work has been getting in the way a lot recently, but I did sneak in a little engine building this week.

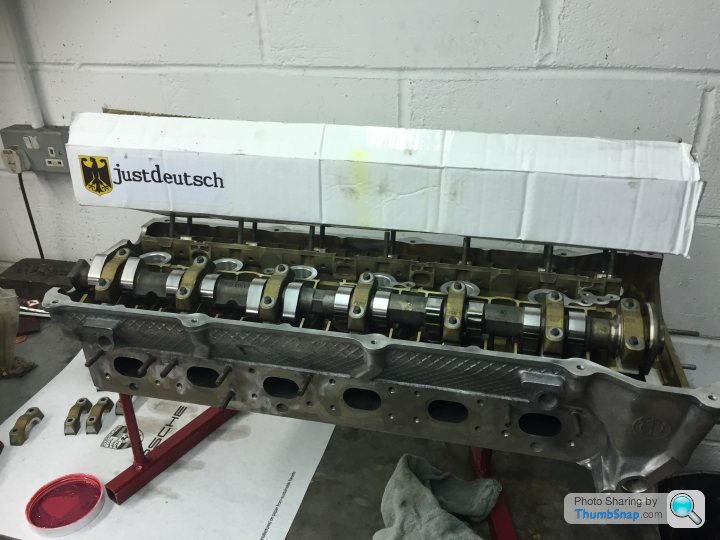
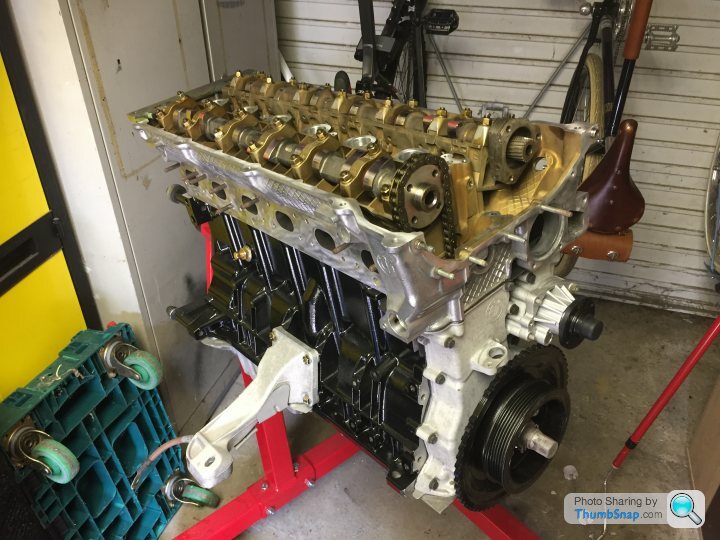
Inlet cam finally in. Which meant I could give my timing tool a go. Had it sitting in my toolbox for about three years without ever using it.
Yes it is a cheap eBay special, but it seems to work.
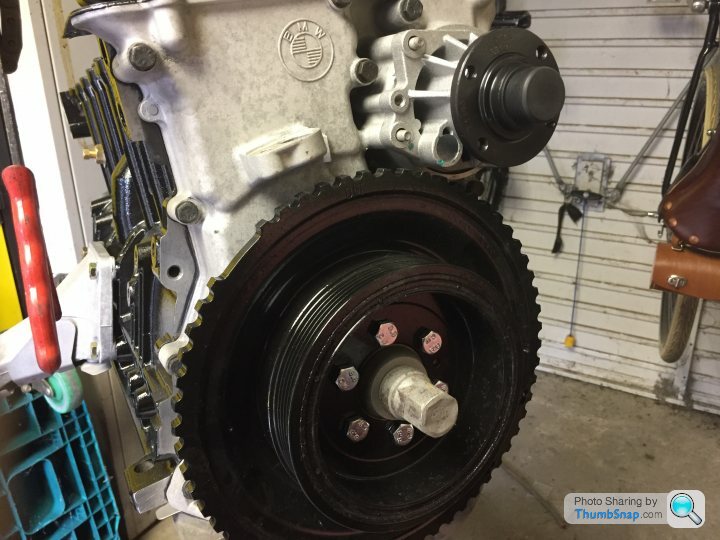
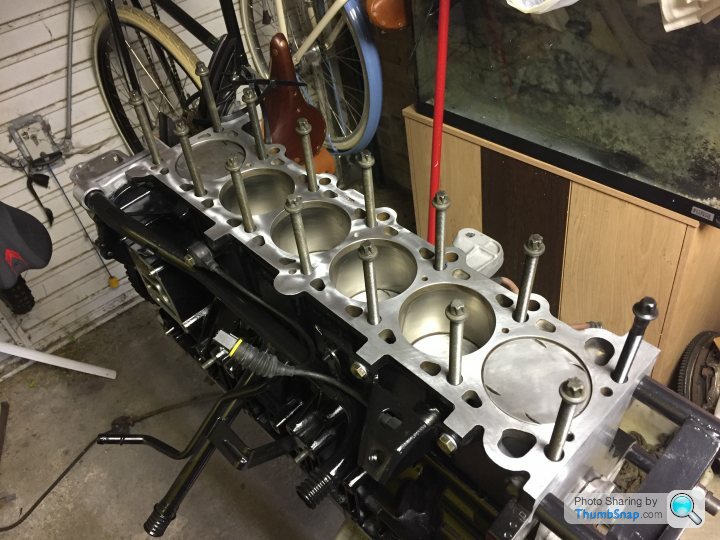
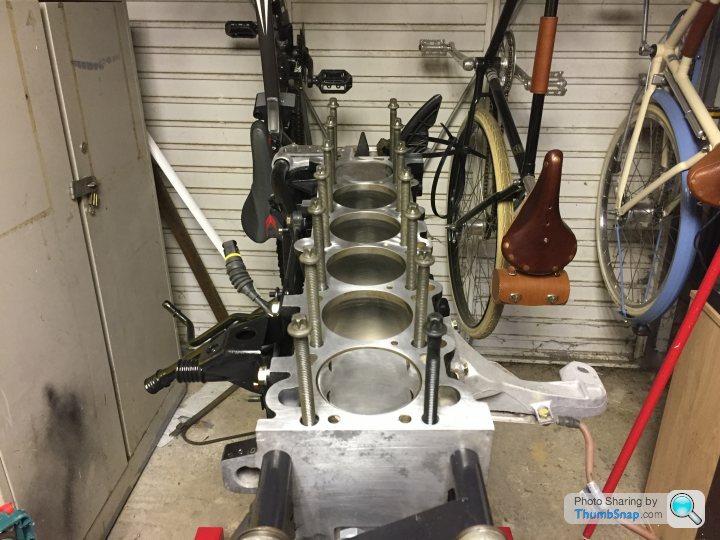
So time for some head fitting. Cleaned and painted front pulley back on and set to tdc.
Then there is nothing to do but bolt it on.
Not torqued up yet. I'm aiming to spend a day on it next weekend and get somewhere near finished.
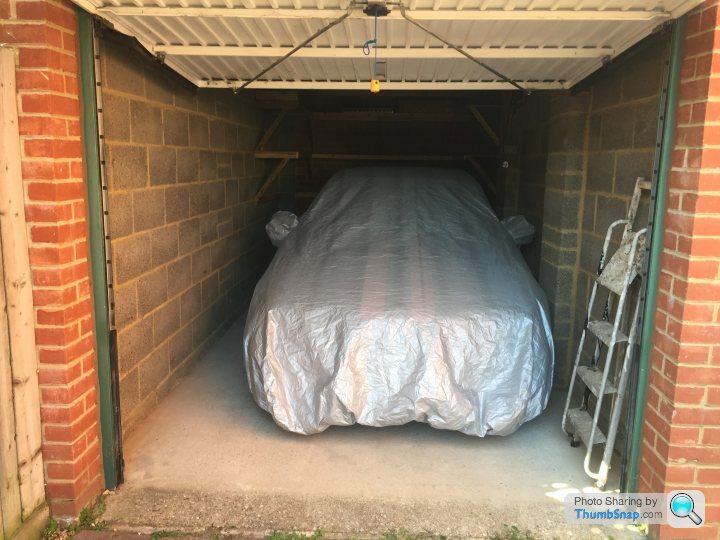
On a separate note, our new house has a garage. Doesn't sound like much I know, but I have never had my own garage before. To have this car I have been working on for five years here and ready to use whenever I want feels great!
Inlet cam finally in. Which meant I could give my timing tool a go. Had it sitting in my toolbox for about three years without ever using it.
Yes it is a cheap eBay special, but it seems to work.
So time for some head fitting. Cleaned and painted front pulley back on and set to tdc.
Then there is nothing to do but bolt it on.
Not torqued up yet. I'm aiming to spend a day on it next weekend and get somewhere near finished.
On a separate note, our new house has a garage. Doesn't sound like much I know, but I have never had my own garage before. To have this car I have been working on for five years here and ready to use whenever I want feels great!
Nice work! I've just finished replacing the head gasket on my 328i sport. Also done a bit of a top end rebuild had the head skimmed and pressure tested, cleaned and re lapped all the valves in with new stem seals. I was a little disappointed to see how you'd taken the followers apart, I didn't realise they came apart like that or I'd have done the same!
The most terrifying part for me was torquing down the head. In the OE spec Victor Reinz gasket set I used came some tightening instructions so I aimed for the very bottom in order to protect the threads. Specs were, 30NM - 32NM, 90 Deg, 90 Deg (plus or minus 5Deg)
So I ended up with 30NM, 85 Deg, 85 Deg.
This was on a steel liner block, also no apparent bore wear. Even still had honing marks!
So torquing up the head happened and as lots of people told me would happen, the threads pulled out of the block.
Not my happiest day it has to be said. Anyway a couple of weeks later and I have almost finished Timeserting all of the bolt holes, even the ones that didn't pull.
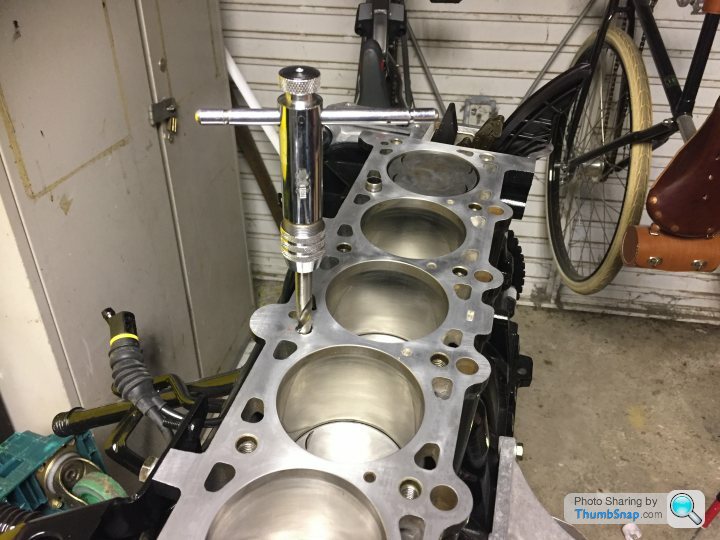
All drilled by hand. Trying to keep it as tight as possible.
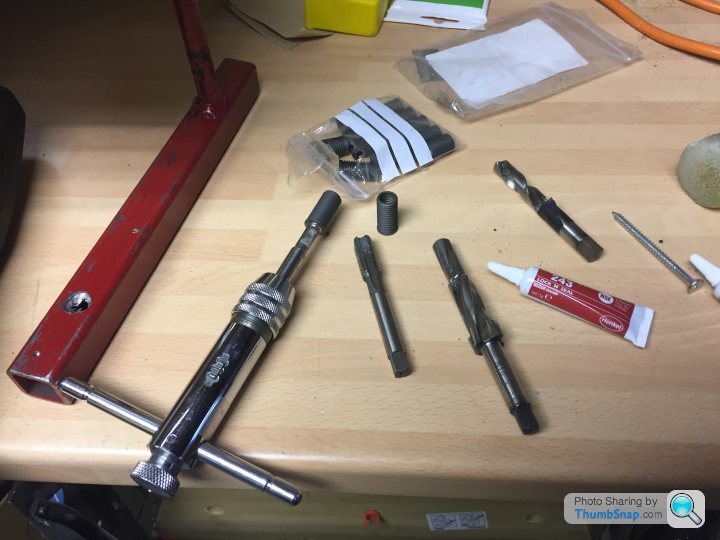
Thankfully we had three old sets of M10x1.5 at work so I managed to piece together a kit of not too worn tools. I bought 15 of the 25mm long serts. Not cheap but definitely preferable to buying a whole kit. Hellicoils are considerably cheaper and I have used them on the car before. But when it comes to holding the head down I thought I would go with the best I can get.
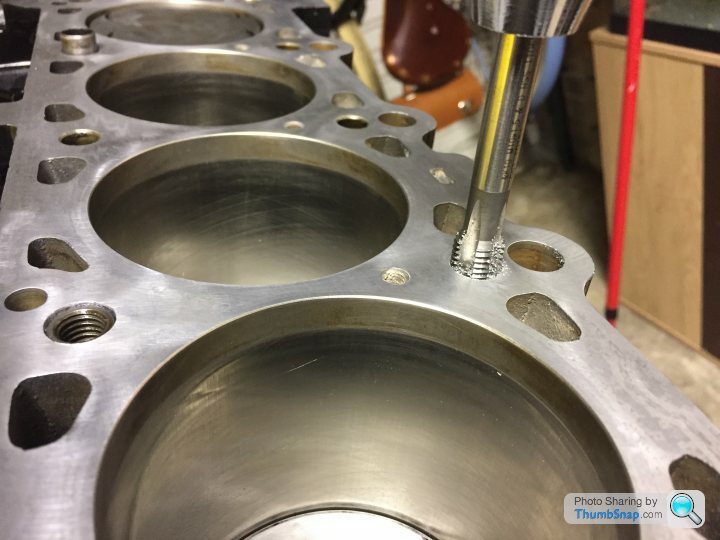
With the holes drilled and reamed they were then tapped. Finally the inserts were fitted with some locktite.
I have a new head gasket and bolts on the way. If it doesn't torque up this time it can all go in the bin!
Not my happiest day it has to be said. Anyway a couple of weeks later and I have almost finished Timeserting all of the bolt holes, even the ones that didn't pull.
All drilled by hand. Trying to keep it as tight as possible.
Thankfully we had three old sets of M10x1.5 at work so I managed to piece together a kit of not too worn tools. I bought 15 of the 25mm long serts. Not cheap but definitely preferable to buying a whole kit. Hellicoils are considerably cheaper and I have used them on the car before. But when it comes to holding the head down I thought I would go with the best I can get.
With the holes drilled and reamed they were then tapped. Finally the inserts were fitted with some locktite.
I have a new head gasket and bolts on the way. If it doesn't torque up this time it can all go in the bin!
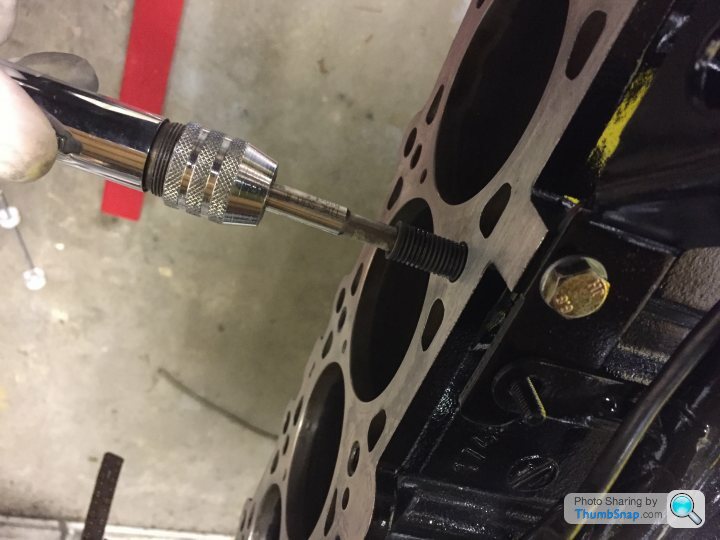
I might have a few blisters now but they are all in.
Thankfully it's all looking pretty straight too.
New head gasket has turned up today, should be going on this week.
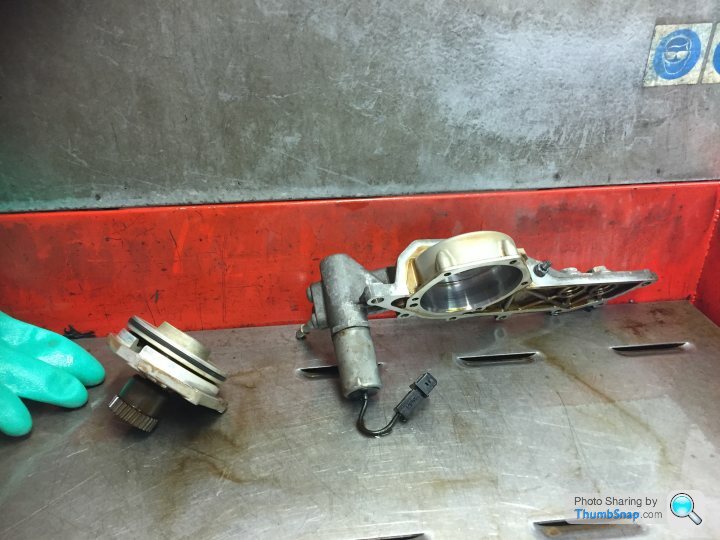
Meanwhile during my lunches this week I have stripped the Vanos and replaced the seal.
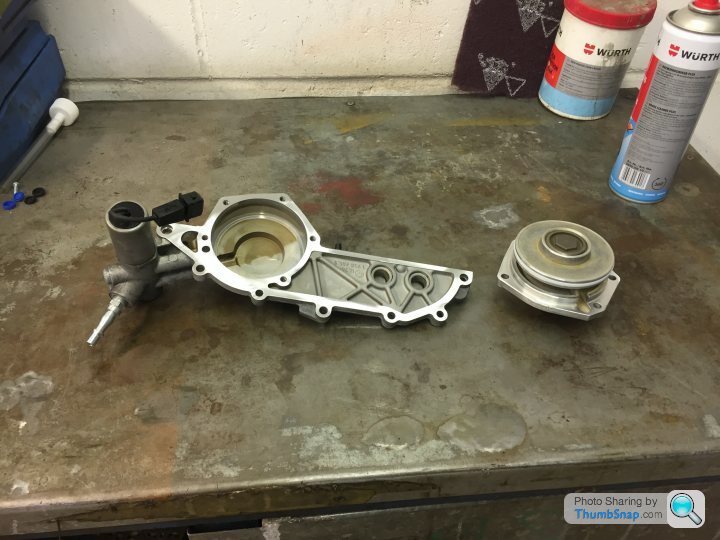
Scrubbed and sandblasted.
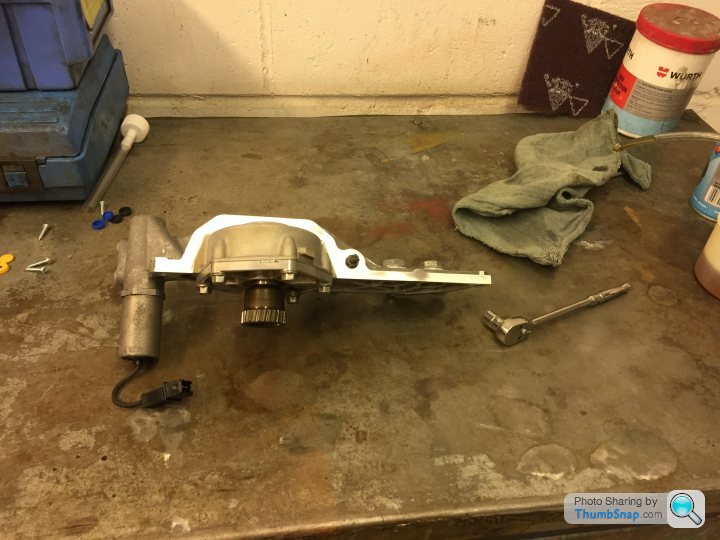
Once rebuilt I tested it on compressed air. All good!
Thankfully it's all looking pretty straight too.
New head gasket has turned up today, should be going on this week.
Meanwhile during my lunches this week I have stripped the Vanos and replaced the seal.
Scrubbed and sandblasted.
Once rebuilt I tested it on compressed air. All good!
Gassing Station | BMW General | Top of Page | What's New | My Stuff