Ducati custom build Mark II
Discussion


Greggy69 said:
Great project you have there!
I don't know how to use Photoshop but here's a Monster with a tricolore paintscheme. I always thought the black and gold Darmah looked great as well.
[url]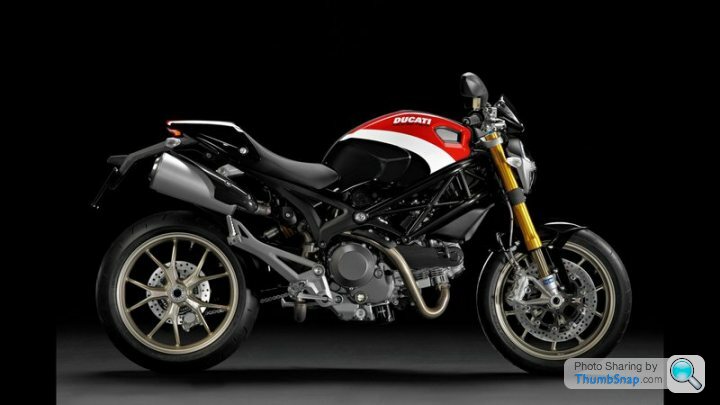 |https://thumbsnap.com/dFEn9WFb[/url0]
Looking good and this would get my vote on the paintscheme.I don't know how to use Photoshop but here's a Monster with a tricolore paintscheme. I always thought the black and gold Darmah looked great as well.
[url]
|https://thumbsnap.com/dFEn9WFb[/url0]I am still debating on the overall colour scheme... but the frame is definitely silver!
here is the frame with all the modifications finished and welded, ready to go off to the powder coaters. Over the years I have used many… some good, some absolutely dire.
For a few years now I have used a company called Redditch Shot blasting. the owner is a biker himself, and understands your requirements. They have a good selection of colours and I have never been disappointed with the results. they recently did a set of wheels for me, and when I collected them I noticed a ring around the inside of the rims… he saw me looking… he explained that the easy way is to hang the rims with a hook through the valve hole… but this he said leaves a mark, which looks poor, and also can affect the valve sealing. so he uses a long wire around the outside, which is under the tyre. Attention to detail, which I like.

Mr2Mike said:
Being brutally honest I think the tank spoils all the effort you have put in, it's huge, slabby and just wrong. Any chance of getting a monster tank to fit?
Unfortunately no Mike... i did try, but its so far away from fitting it was a complete no go. Due to the frame design and engine configuration the ST4 tank was the only steel tank that would go on... some of the plastic ones fit, but i dont want to go there....However... i have always fancied a go a making one... and now i have an AC TIG welder i will have a go. I am in the process of making an English Wheel at the moment, i have the top and bottom anvils, just need to get the frame fabricated. I want to finish the bike first though, ready for the spring.
buzzer said:
However... i have always fancied a go a making one... and now i have an AC TIG welder i will have a go. I am in the process of making an English Wheel at the moment, i have the top and bottom anvils, just need to get the frame fabricated. I want to finish the bike first though, ready for the spring.
That would be an impressive project by itself  How are you getting on with the TIG? I keep looking at AC/DC TIGs and trying to justify one to myself.
Mr2Mike said:
That would be an impressive project by itself How are you getting on with the TIG? I keep looking at AC/DC TIGs and trying to justify one to myself.
I love it to be honest Mike, but it was a luxury purchase. for a few years I have borrowed my mates portable DC TIG for home, and gone to his factory to use the AC machine as its huge... his portable TIG is actually a cheap machine, but its very good, and can be had for less than £200. but of course there is the gas on top, I paid £165 for a full bottle, but there is no rental on that, and its £65 to fill it. How are you getting on with the TIG? I keep looking at AC/DC TIGs and trying to justify one to myself.I went to the welding suppliers with the intention of buying a DC machine, but he offered me a good deal on the AC/DC one, with a 5 year warranty... hence the purchase! have to say its a LOT easier than my mates AC machine as you and adjust the ramp up and down of the amps, and the pulse, frequency and a load of other setting.
if you can gas weld, you will adapt easily to TIG... in fact, I even have my wife welding now!
https://www.youtube.com/watch?v=_Sx4xJkB4fI
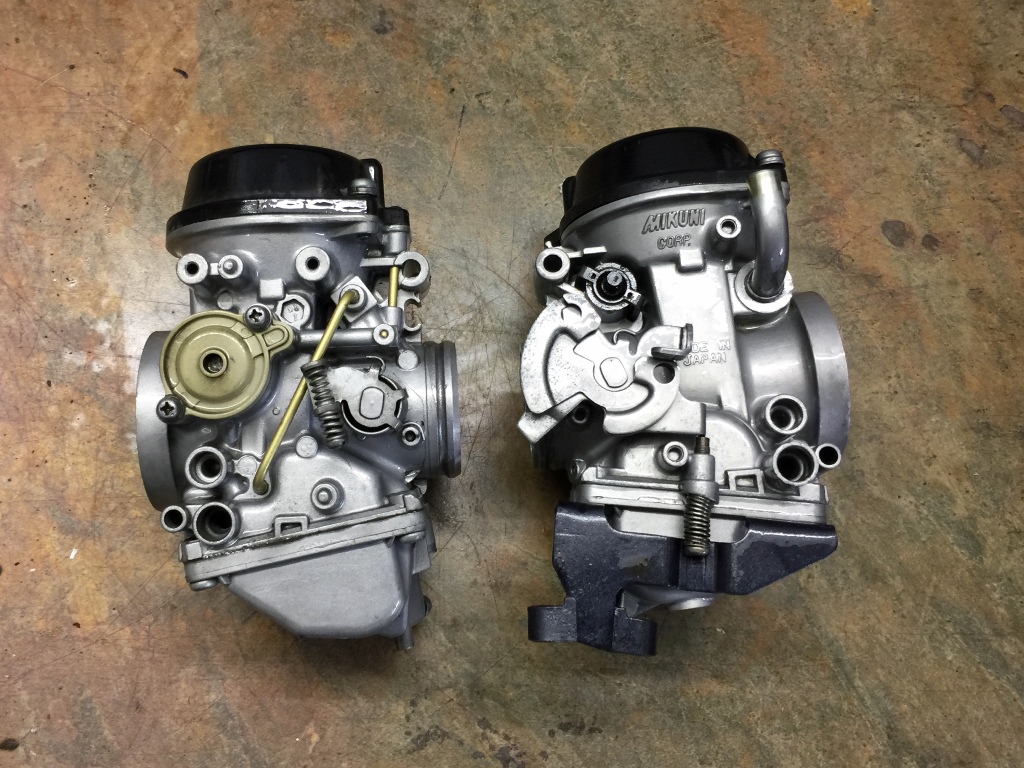
while the frame is away I have cleaned up the carbs and fitted the Dynojet springs and needles which were for a Monster 900... However the jets wont be suitable for the twin plug 1000cc engine, and need to be a bigger. it will be a bit of trial and error, but for now I have increased their size...
I know I will get some stick for this but for MANY years I have drilled jets out! A lot of people don't realise that some (but not all...) jet numbers refer to millimetres... so a 140 main jet has a 1.4 mm hole in it. A 70 idle jet has a 0.7mm hole. this is quite convenient if you have a set of Micro drills, as with a pin vice you can simply twist the drill through the jet.
In the old days of Weber DCOE and Delortto DHLA carbs I did this all the time, as did many others! I always used to check the size of the hole in jets rather than rely on the number in case someone got there with the drill before me! I can hear people sucking their teeth at this!
If you have a set of number micro drills, you can also do half size increments...
To clean the carbs up, I bead Blasted them with glass bead. the secret here is use as low a pressure as you can to clean. I made the mistake for years to use a high pressure, which shatters the glass beads, turning them to dust, where they lose their peening power and you end up with a rough surface. I used a few bungs and duct tape to seal them, but of course they still need a full strip and rebuild after.
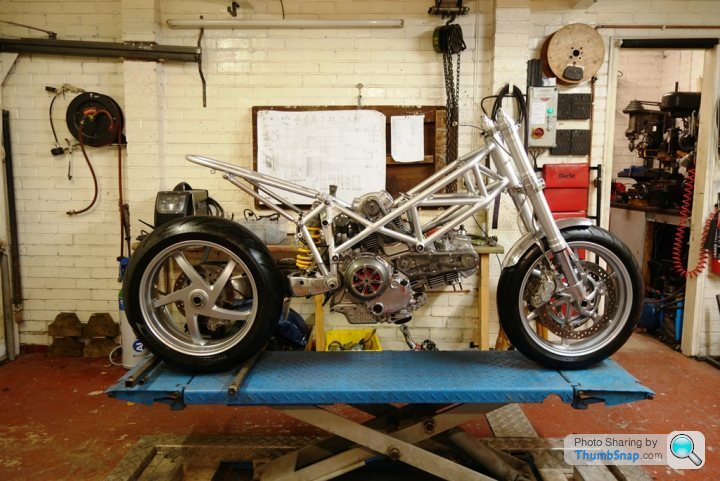
so the rebuild starts... the frame is back from the powder coaters and once again its a fantastic job. we have several companies local, but their performance in the past has been nothing but shocking! Instead I chose to travel a 40 mile round trip to Redditch Shotblasters as they are simply the best I have found for powder coat. the finish and attention to detail on the frame is amazing.


That silver frame does look good. I’m still not a fan of the open/carbon bits on the engine, but I usually always think “less is more”. And as I’ve said before, what I think doesn’t matter, it’s your bike!
That 40 mile trip to the powder coasters sounds like time and petrol well spent. It’s great when you get someone good at something. They’re worth their weight in gold.
That 40 mile trip to the powder coasters sounds like time and petrol well spent. It’s great when you get someone good at something. They’re worth their weight in gold.
Yes. I have used this guy a few times after some horrendous experiences with local companies. The last one was shocking. Wrong colour, grey not silver which is what I asked for. Plus it was dull and thick! So thick the shotblasting company couldn’t remove it! Had to have it chemical stripped!
What I like about this guy is he is so easy to deal with. He also insists he masks up so it’s done his way.
What I like about this guy is he is so easy to deal with. He also insists he masks up so it’s done his way.
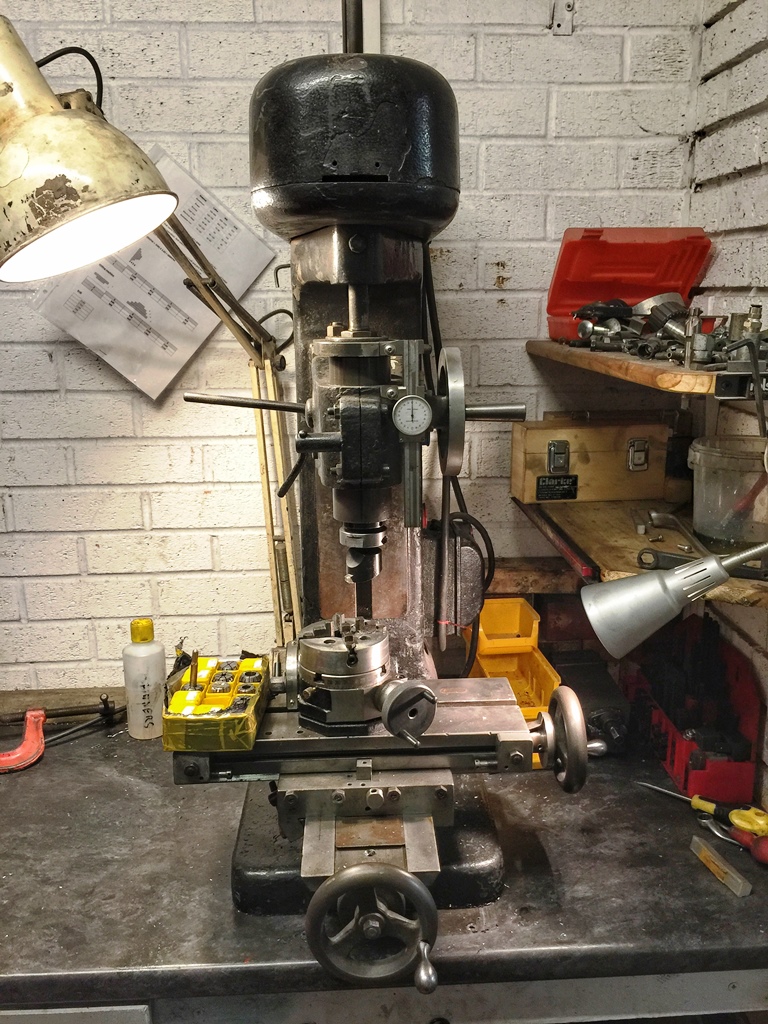
As an aside from bike building I have been doing some work on my old milling machine... A while ago I treated myself to a new one, well almost new... It had a lot of the features I wanted and while not as big as I would have liked, it seemed to fit the bill.
Well after using it for a month, I decided it was crap, and no where near as good as my old one! It was nowhere near as accurate, struggled to make decent cuts, the adjustment on the vertical was so course it was almost unusable! good job I kept the old one!
So I placed the trusty old miller ( i bought it 40 years ago, that makes me feel old!!) back in its place and gave it a bit of love. One of the reasons I like the new one was it had a full set of collets, my old one had just three, which was very restrictive. over the years I had tried to get more, but its an unusual size and I have never seen any. The miller must be from the 30's I think!
I bought a set of ER25 collets and set about converting the headstock to accept these. An accurate bit of work, it took a while to get the miller spindle in the lathe to run with zero run out. I managed it though and carefully turned the internal taper, finishing off with a fine stone in the tool post grinder. Its worked a treat!
I also replaced the threads and nuts on the bed with some off Ebay, which has taken all the slack out, the old threads were badly worn as you can imagine from probably 90 years of use! the bearings in the headstock were remarkably good though, they may have been replaced before I got it.
So its here to stay, and I will be converting it to accept some digital readouts which are cheap these days. years ago I converted my lathe to digital using some digital calipers, this transformed its ease of use. I may treat the lathe to some proper ones as well
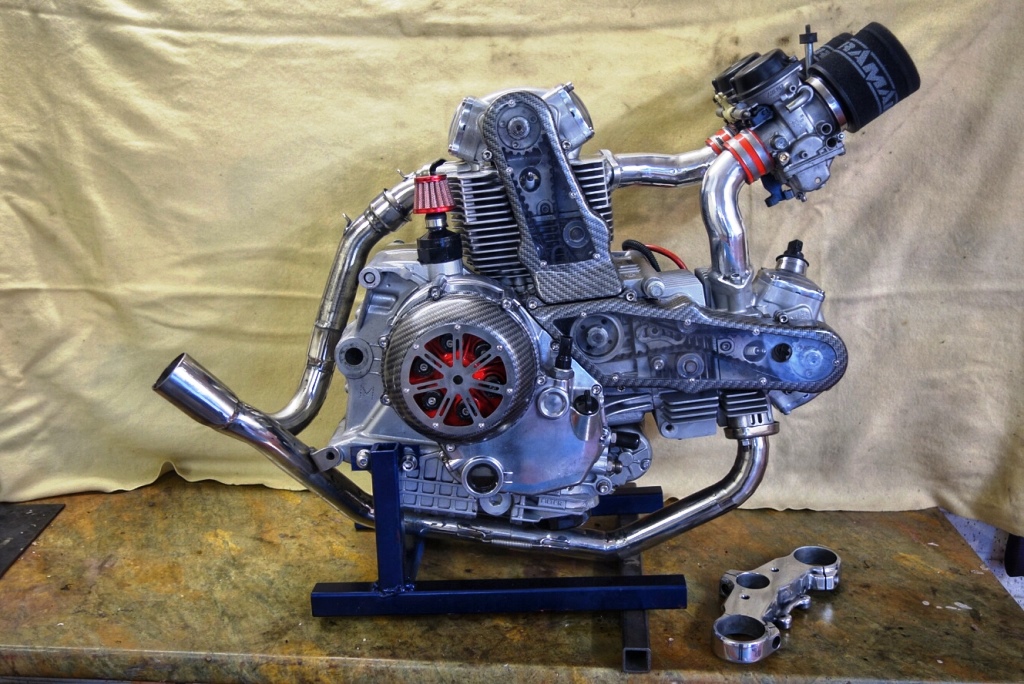
A bit of accurate filing and drilling… I drilled and tapped the end of the throttle spindle and filed a register on it to fit an adaptor for the TPS. This links directly to the new Ignitech ignition. from previous experience, adding 3D ignition greatly improves drive-ability and fuel consumption.
Here are the finished home made inlet manifolds. They have a slight register so an “O” ring separates the carbs from the manifold, I didn’t want metal to metal. I also cross braced them...


Here are the finished home made inlet manifolds. They have a slight register so an “O” ring separates the carbs from the manifold, I didn’t want metal to metal. I also cross braced them...
Edited by buzzer on Tuesday 4th December 12:11
Nice work, and I agree the engine load sensing for the ignition should be a useful upgrade.
My one concern would be if the O-rings are located securely enough, as it's hard to see the detail of the register in the pics. Under high vacuum the silicone hose is going to want to reduce it's diameter, could it potentially displace the O- ring?
My one concern would be if the O-rings are located securely enough, as it's hard to see the detail of the register in the pics. Under high vacuum the silicone hose is going to want to reduce it's diameter, could it potentially displace the O- ring?
Mr2Mike said:
Nice work, and I agree the engine load sensing for the ignition should be a useful upgrade.
My one concern would be if the O-rings are located securely enough, as it's hard to see the detail of the register in the pics. Under high vacuum the silicone hose is going to want to reduce it's diameter, could it potentially displace the O- ring?
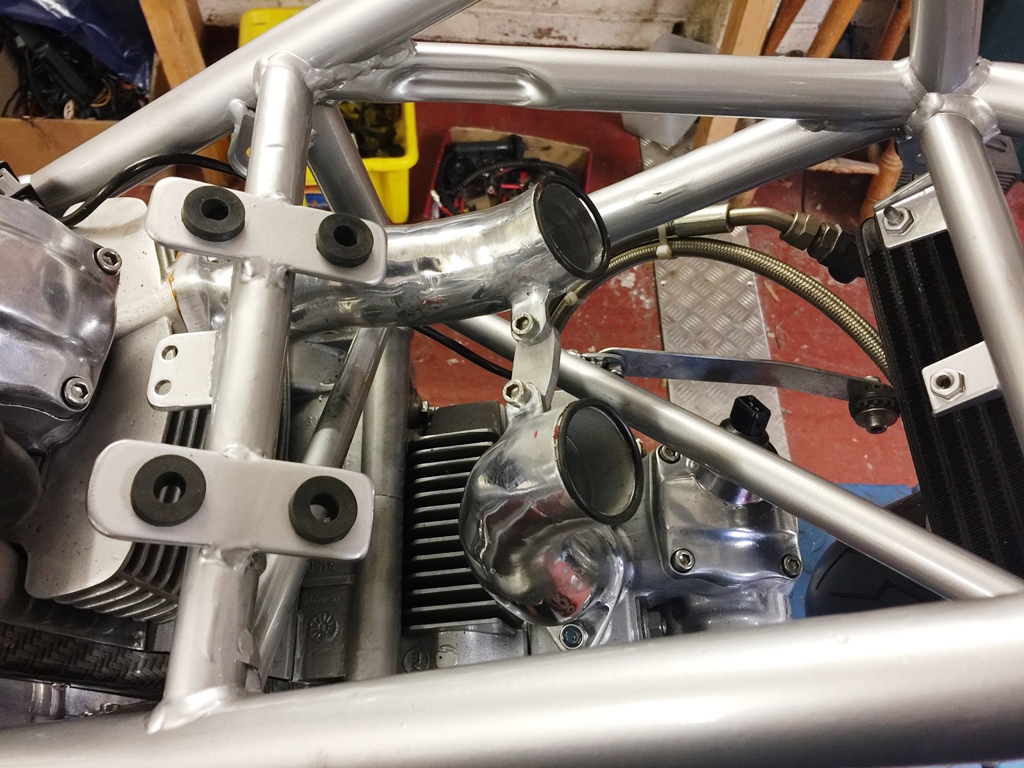
I think it will be OK Mike... the carbs sit on the "O" ring so there is no flex in the walls. there is enough register to support 50% of the "O" ring. thanks for the comment though, it always makes me think... Someone commented about the breather the other day and said they had done the same and ended up with an oily tyre... so I have changed that now and located it much higherMy one concern would be if the O-rings are located securely enough, as it's hard to see the detail of the register in the pics. Under high vacuum the silicone hose is going to want to reduce it's diameter, could it potentially displace the O- ring?
here are the last couple of photos for a while... I will be doing some small jobs and the wiring, something I love doing... will be making the loom from scratch as so much has changed! Also taking a break over the holiday (unless she goes out !)
then in the new year it will be colour decision...
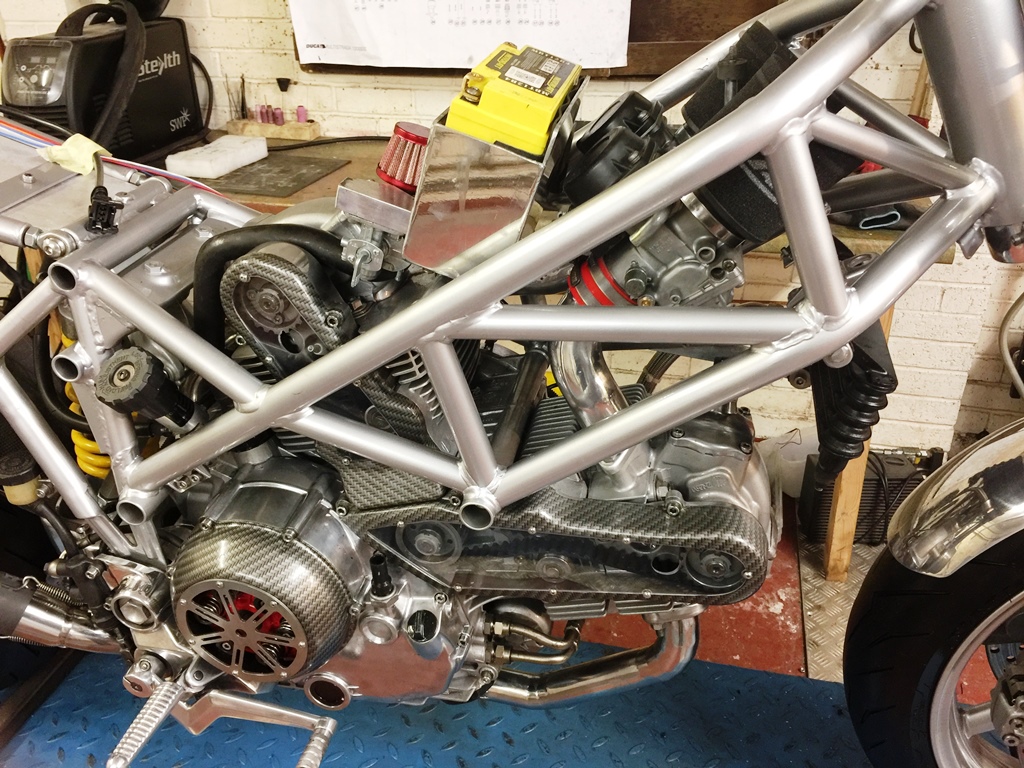
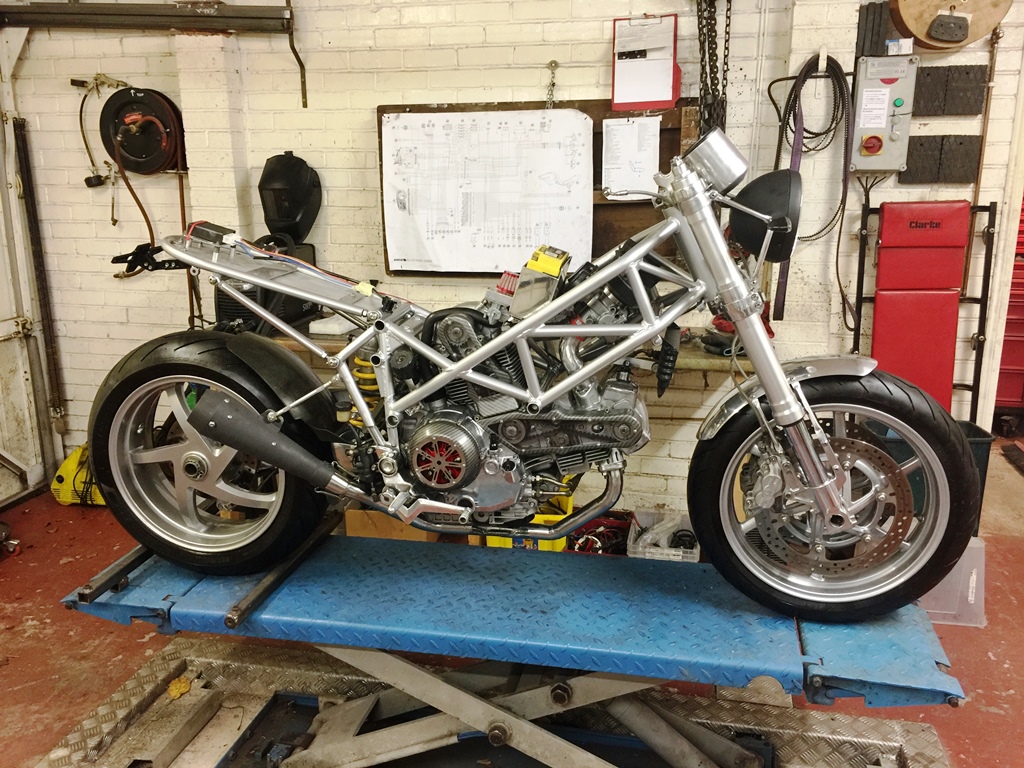
then in the new year it will be colour decision...
Onto the wiring... I looked at the existing loom and realised SO much had changed that it was redundant... So I am going to wire this from scratch, using my own design of loom. I priced up the wire new and it was a LOT of money , and although I had some wire from past rebuilds it was limited in different colours. So off to the scrap yard with a big pair of side cutters. I came away with this lot for £5! should keep me going. it took a while to separate it into single strands of wire, but there is now a right mix of colours!
its bigger than it looks in the picture

its bigger than it looks in the picture
Gassing Station | Biker Banter | Top of Page | What's New | My Stuff