Big Zed Build Thread......
Discussion


After waiting a week for this little oil pump seal ... I got started on putting the engine together this evening

I reassembled the oil pump ..... and popped it back in .....

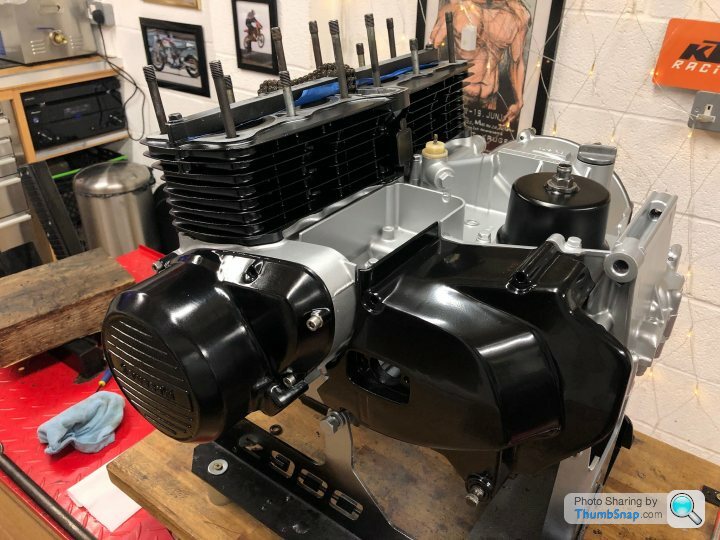
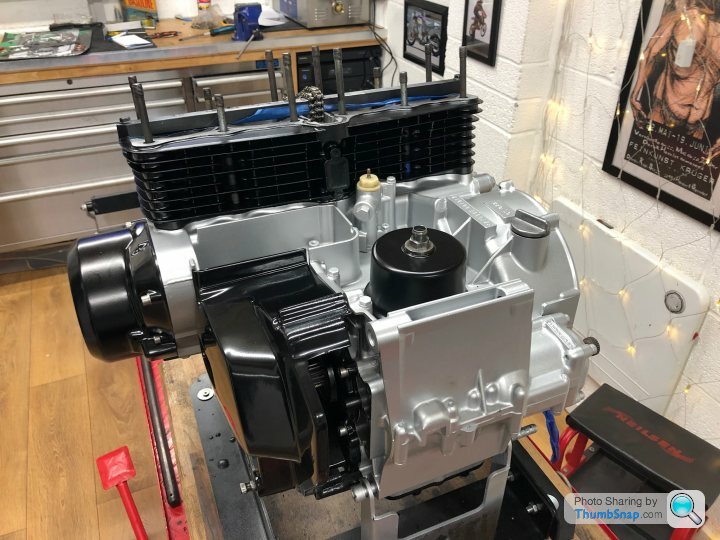
.... and then put the sump pan, gearbox cover, crack case breather and clutch cover engine casings on. Put the rest of the covers on loosely and even slipped the cylinder block on (no pistons in there yet though) to see how it looks.....
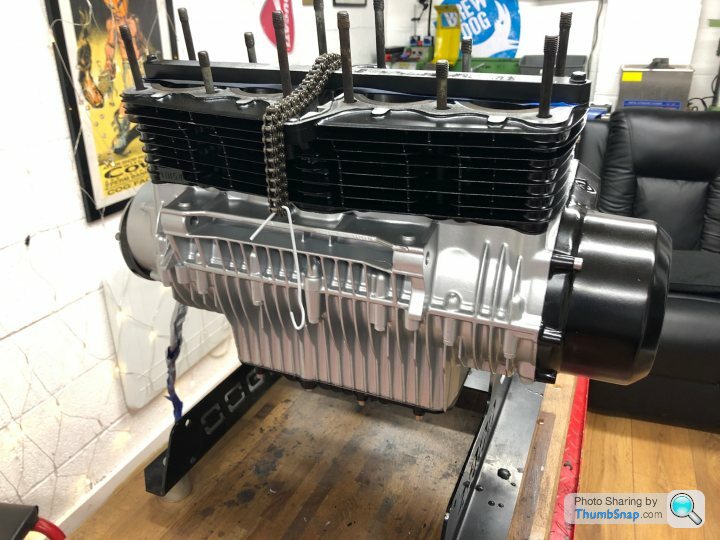
Next job is put pistons in and fit cylinder properly .... then it’s on to the head .... and the very complicated cam chain set up ...
I reassembled the oil pump ..... and popped it back in .....
.... and then put the sump pan, gearbox cover, crack case breather and clutch cover engine casings on. Put the rest of the covers on loosely and even slipped the cylinder block on (no pistons in there yet though) to see how it looks.....
Next job is put pistons in and fit cylinder properly .... then it’s on to the head .... and the very complicated cam chain set up ...
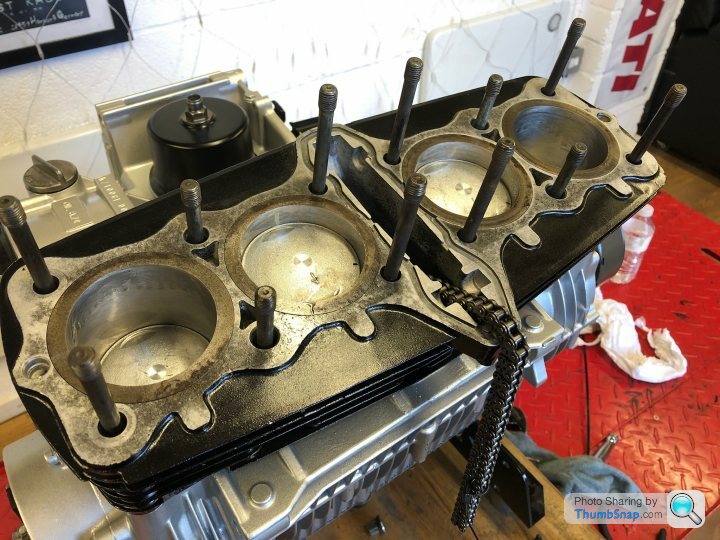
Installed pistons today....
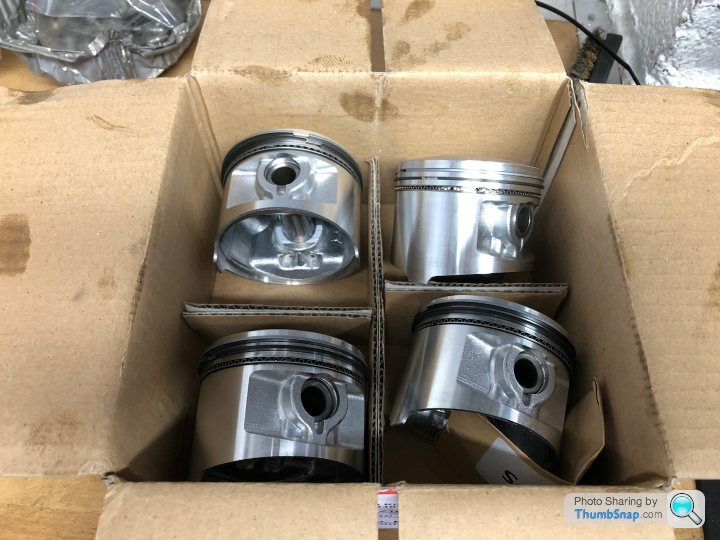
Didn’t go exactly go to plan...first of all I managed to shear off the head of the screw that holds the cam chain guide in the cylinder... luckily it eazy-outed ok.... and then I really struggled to get the 3rd and 4th pistons in to the cylinder....... got there in the end .... after the wife rather surprisingly had a good idea.

Didn’t go exactly go to plan...first of all I managed to shear off the head of the screw that holds the cam chain guide in the cylinder... luckily it eazy-outed ok.... and then I really struggled to get the 3rd and 4th pistons in to the cylinder....... got there in the end .... after the wife rather surprisingly had a good idea.
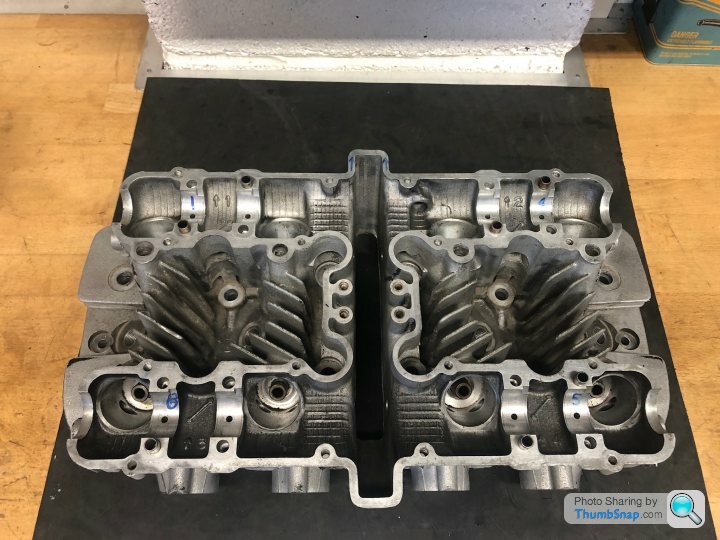
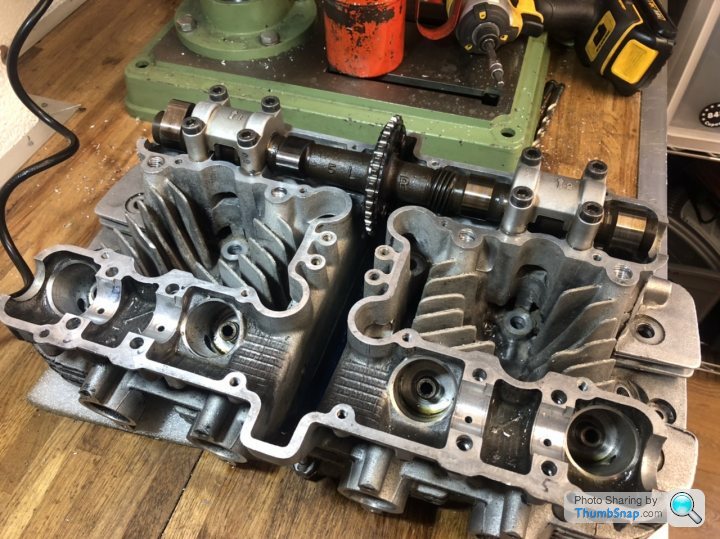
On to the head today as it was miserable outside....
The original head had too many broken fins so picked one up from eBay
 |https://thumbsnap.com/DGp2Ck3X[/url]
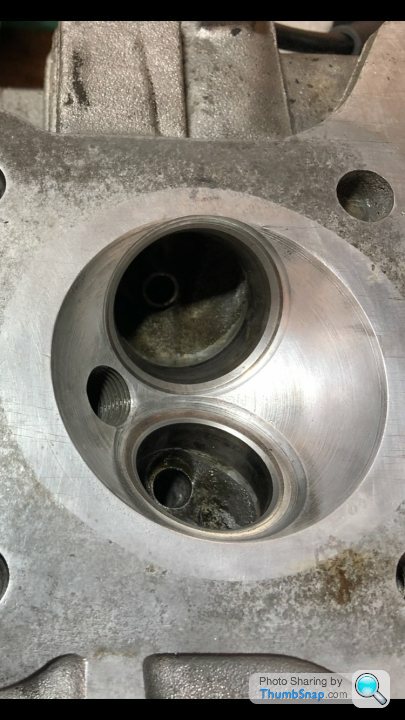
It’s in pretty nice condition. I blanked off the weird emissions holes so I can use a earlier model cam cover and then set about lapping in the valves. Inlet valve and seats were in good shape, but couldn’t get the exhaust valves to seat well, luckily I had some spares from the old head which bedded in very nicely.....
 [url]
[url]
The original head had too many broken fins so picked one up from eBay
|https://thumbsnap.com/DGp2Ck3X[/url]It’s in pretty nice condition. I blanked off the weird emissions holes so I can use a earlier model cam cover and then set about lapping in the valves. Inlet valve and seats were in good shape, but couldn’t get the exhaust valves to seat well, luckily I had some spares from the old head which bedded in very nicely.....
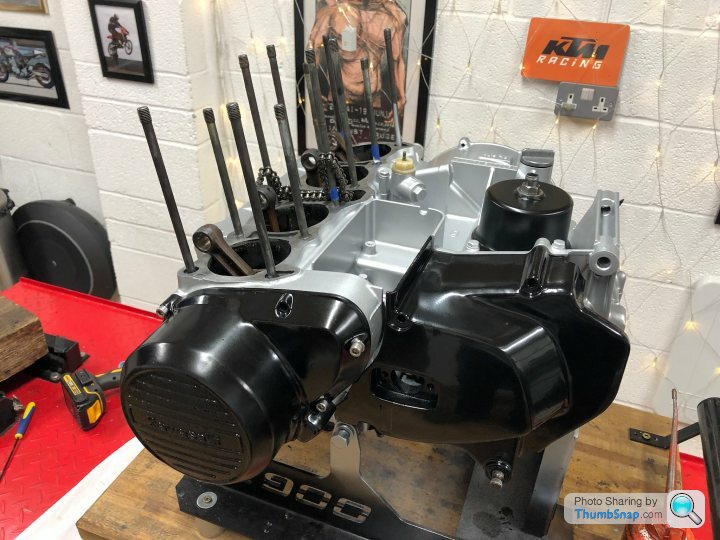
[url]b ks, went to fit the cams in the head today and the threads for number 1 and 2 cam carriers are all buggered.... and to make matters worse some of them already had inserts in which just fell apart or span in the hole......there is no worse feeling than a bolt just turning and turning when you are working on a complex casting like a head ... but when you get 8 on the trot .....
Going to try cleaning out the holes, retapping and fitting 3D helicoils with 10mm longer bolts and hopefully the extra length will give enough purchase to hold
If not, then it’s drill everything out to take a M8 thread and use M8 bolts. There’s plenty of clearance to go M8 but I’ll have to make some small pegs to ensure the carriers stay aligned .... good job I kept the old head so I can do some “prototyping”.
The joy of working on a 40 year old, 10 owner motorcycle...
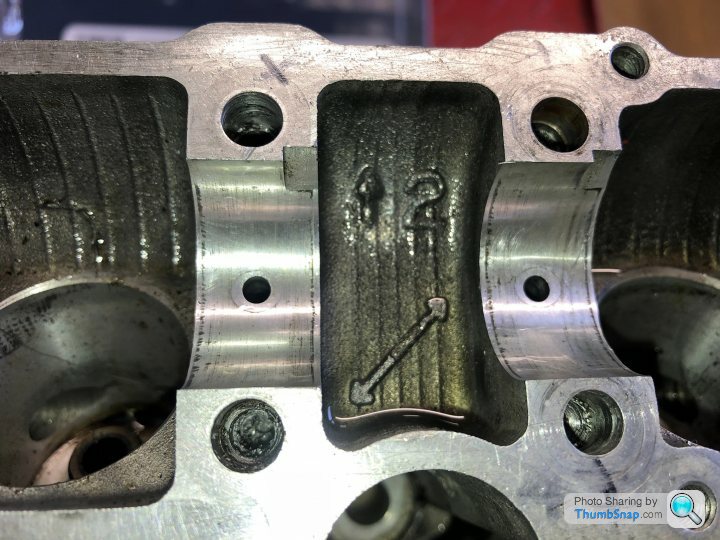
ks, went to fit the cams in the head today and the threads for number 1 and 2 cam carriers are all buggered.... and to make matters worse some of them already had inserts in which just fell apart or span in the hole......there is no worse feeling than a bolt just turning and turning when you are working on a complex casting like a head ... but when you get 8 on the trot .....Going to try cleaning out the holes, retapping and fitting 3D helicoils with 10mm longer bolts and hopefully the extra length will give enough purchase to hold
If not, then it’s drill everything out to take a M8 thread and use M8 bolts. There’s plenty of clearance to go M8 but I’ll have to make some small pegs to ensure the carriers stay aligned .... good job I kept the old head so I can do some “prototyping”.
The joy of working on a 40 year old, 10 owner motorcycle...
mygoldfishbowl said:
If M6 helicoils have already been used in some of the holes you can't drill out to M8. The OD of an M6 helicoil is about 7.25 and the tapping drill size for an M8 fine thread is only 7.00 so your hole is already slightly bigger, mashed up and probably not round. To get anywhere near a decent M8 thread easily with the holes you have would be to go bigger and insert M8 helicoils/time-serts if you have the room.
Personally I'd be looking at other options.
Just drilled out a hole ready for a new M6 helicoil. Perfect at 6.2mm. Would easily go to 7.2mm for a M8 fine if necessary, but would prefer to stick with M6.Personally I'd be looking at other options.
Edited by mygoldfishbowl on Tuesday 5th May 02:23
mygoldfishbowl said:
KTMboy said:
Just drilled out a hole ready for a new M6 helicoil. Perfect at 6.2mm. Would easily go to 7.2mm for a M8 fine if necessary, but would prefer to stick with M6.
From what you said earlier I thought some had been helicoled previously and span at some point? You can't drill a 6.2 hole in a 7.25+ hole. What am I missing.

Edit, Re read your other post and am now thinking your 6.2 hole is a new hole as you've gone deeper into the head?
Edited by mygoldfishbowl on Tuesday 5th May 12:02

mygoldfishbowl said:
I'll admit to scratching my head a little bit there but cool, hope it works out. Take extra care to drill and tap straight.
Edit. Sorry to change the subject but have you decided on your ignition system yet? Is yours the later electronic ignition or earlier points? Mine has points but one of my HT leads has been cut and is now too short so I decided to replace the lot with Boyer Bransden's electronic KIT00288 which has arrived but not fitted yet. Just wondering what you were doing with yours?
Got a nice big pillar drill with a table big enough for the head so hopefully I’ll get those M8 threads exactly where I need them....Edit. Sorry to change the subject but have you decided on your ignition system yet? Is yours the later electronic ignition or earlier points? Mine has points but one of my HT leads has been cut and is now too short so I decided to replace the lot with Boyer Bransden's electronic KIT00288 which has arrived but not fitted yet. Just wondering what you were doing with yours?
Edited by mygoldfishbowl on Wednesday 6th May 07:39
Mine has the later electronic ignition but no idea how it works - I was going to worry about that later. The bike did run before I took it all apart....
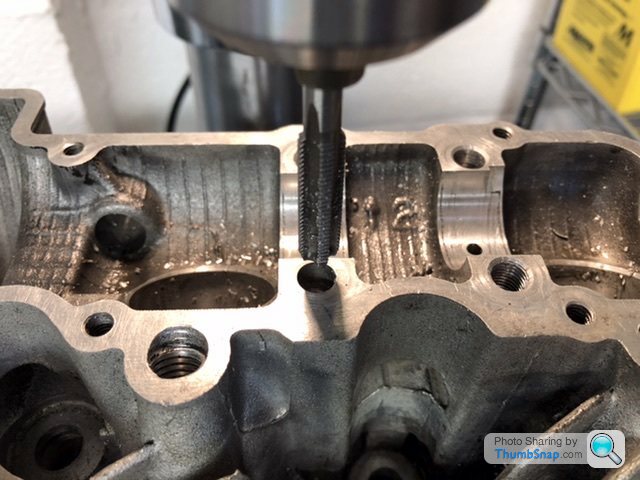
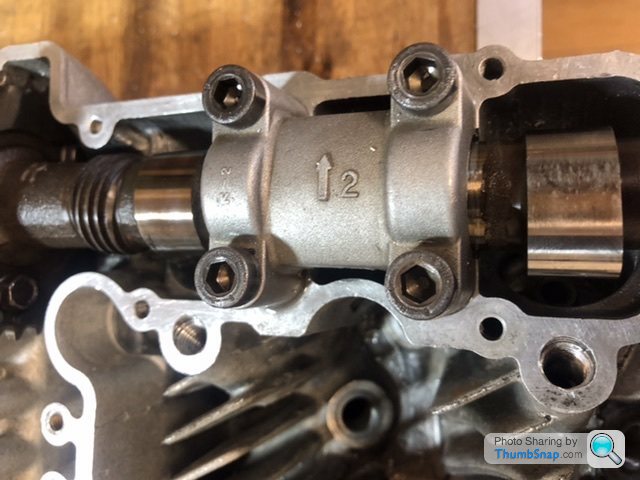
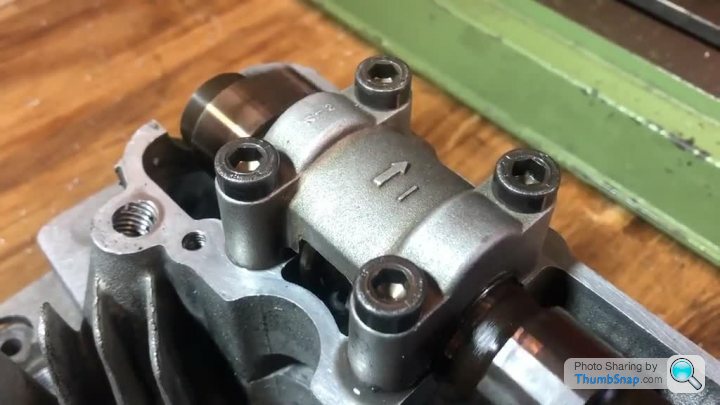
Finally got round to working on Big Zed’s head....trying to fix all the knackered threads for the exhaust cam carrier bolts....
Went M8x1, took it nice and slow, removing one locating dowel at a time - drilling and tapping the new hole then drilling the carrier - bolting it all back together to check alignment - and repeating the process - 8 times.....
I also had to turn down the heads of the bolts as is turns out there is so little clearance with the cam cover....
Took a good few hours but I’m all done and the cam runs very smoothly with zero play......

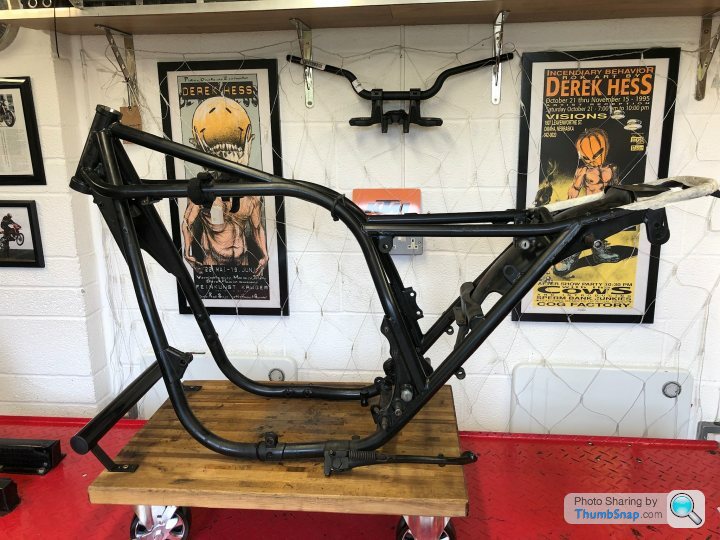
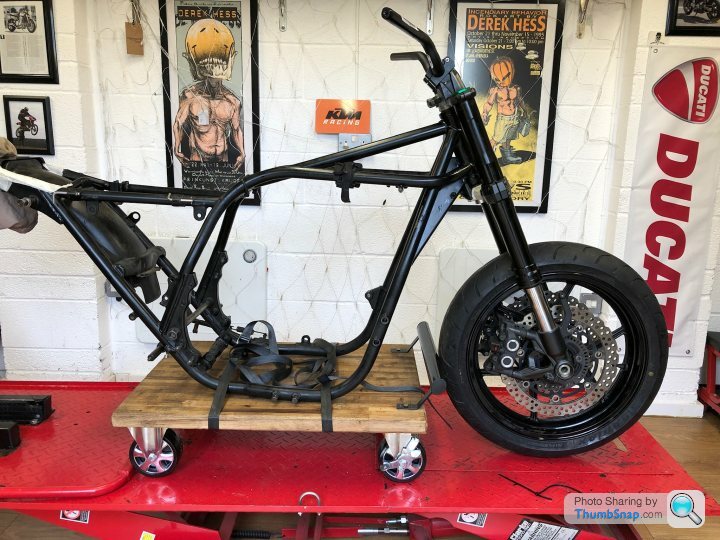
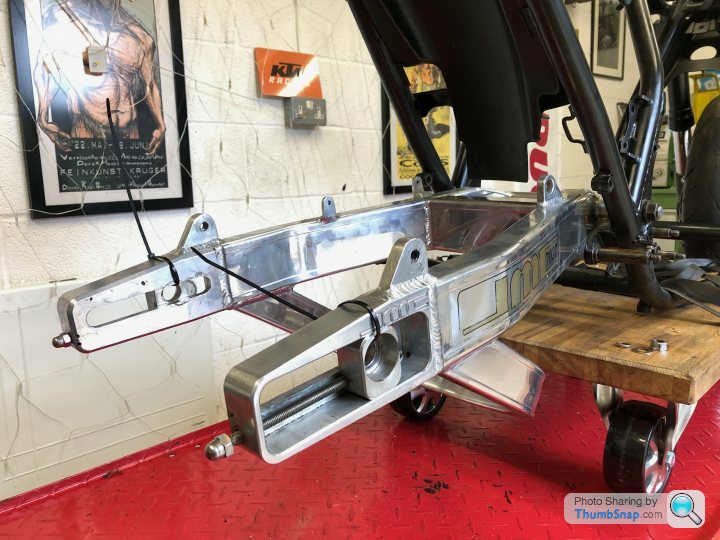
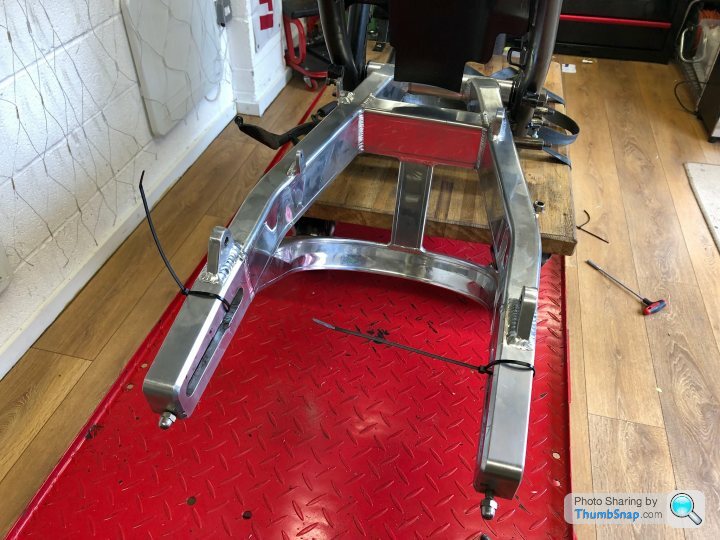
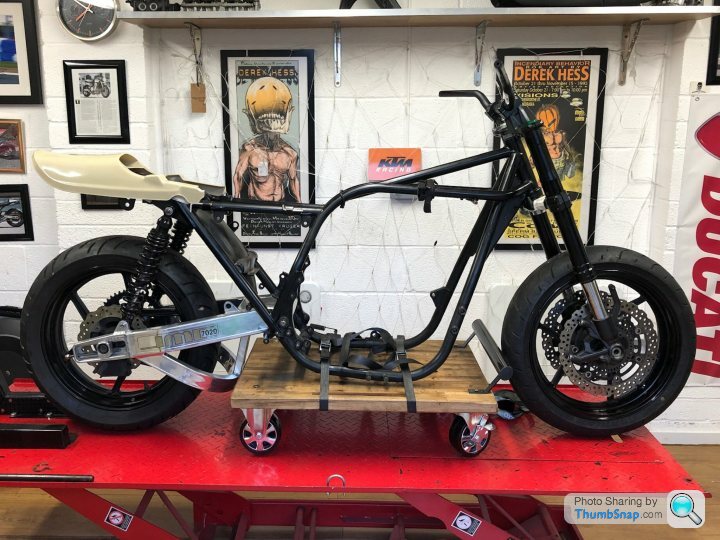
Moved on to the swing arm, shocks and rear wheel, just measuring up for spacers etc...
JMC swing arm is stamped GPZ1100. Fits nicely in the frame but needed a sleeve for the smaller 16mm swing arm bolt of the old Zed. I had some nice Bitubo shocks from a Thruxton which only needed 14mm sleeves in the bottom eyes.....they are 20mm longer so jack the rear up a little to get some more weight on the front wheel...
Rear wheel now needs spacers measuring up....and then figure out out to secure the rear brake carrier. Hopefully there will be the space to fit a chunky tie rod....
Gassing Station | Biker Banter | Top of Page | What's New | My Stuff