Big Zed Build Thread......
Discussion


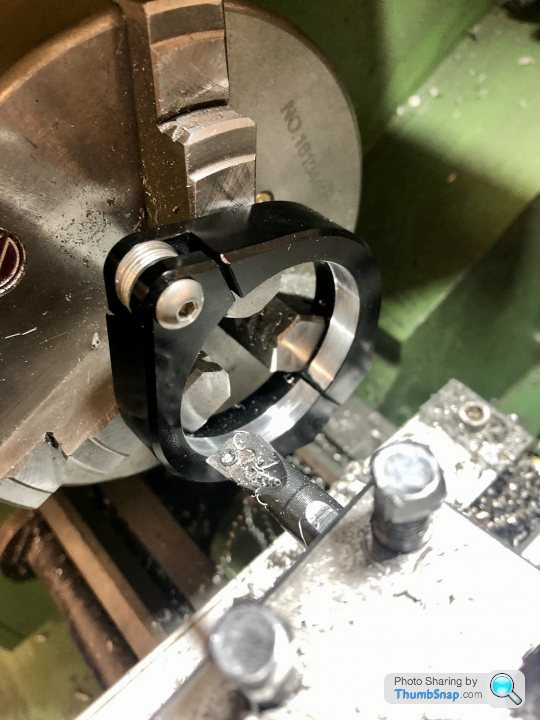
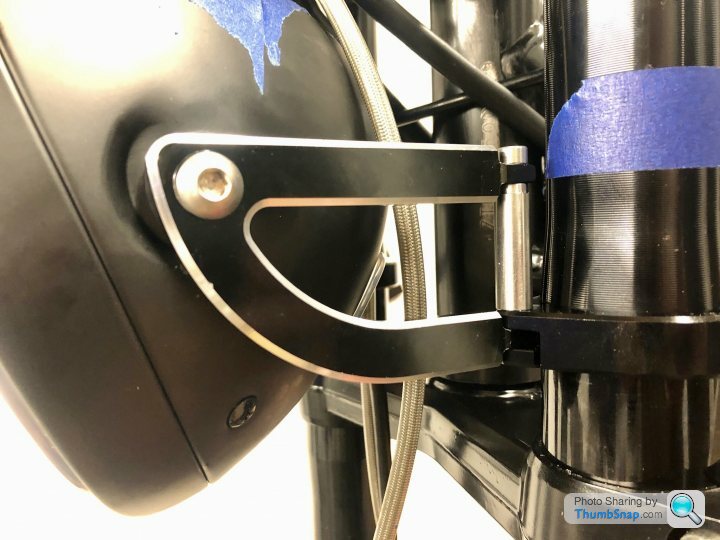
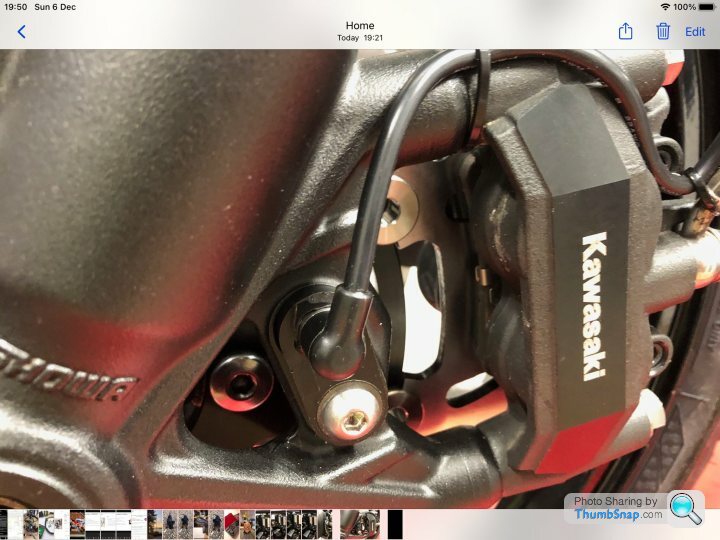
As I was fitting the bodywork I discovered the really nice fork mounted headlamp clamps were banging on the fuel tank on full lock
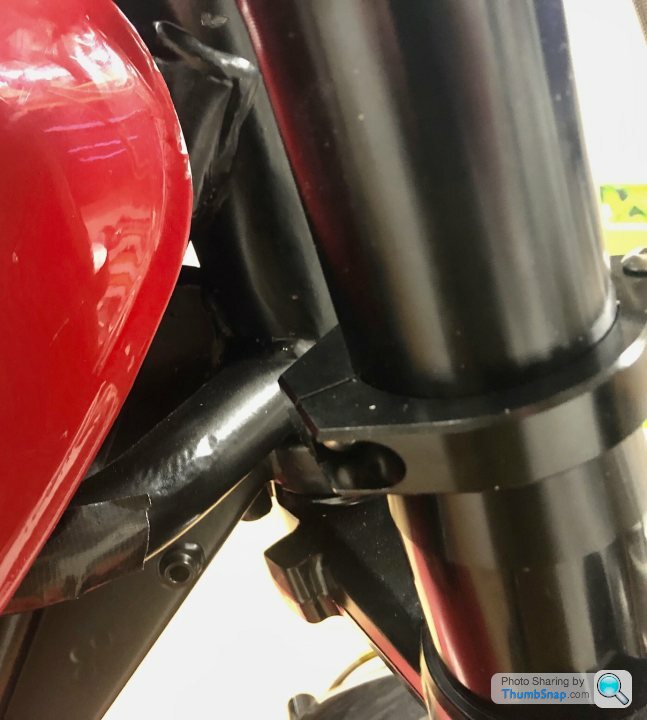
So I machined them to fit further down down the fork legs, which are a larger OD, and converted to a single clamp using a machined stainless steel connecting rod.
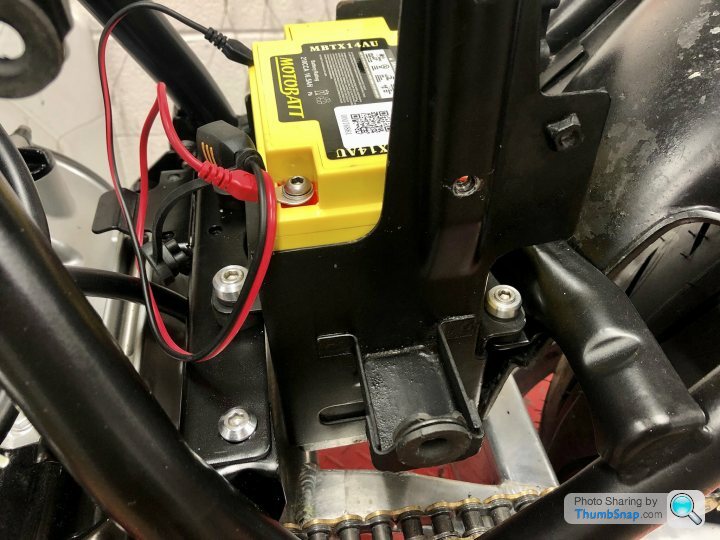
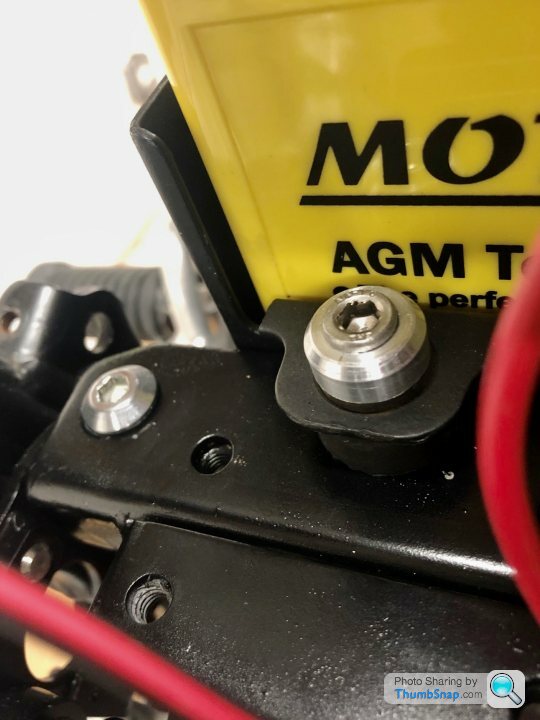
I’ve also fitted the battery tray and machined up some cup washers for the socket head bolts ..
So I machined them to fit further down down the fork legs, which are a larger OD, and converted to a single clamp using a machined stainless steel connecting rod.
I’ve also fitted the battery tray and machined up some cup washers for the socket head bolts ..
Sorry I’ve been quiet on the update for a while....
Bodywork has gone off to paint. I’ll keep the colour scheme a surprise....
So I’ve moved on to the wiring.....
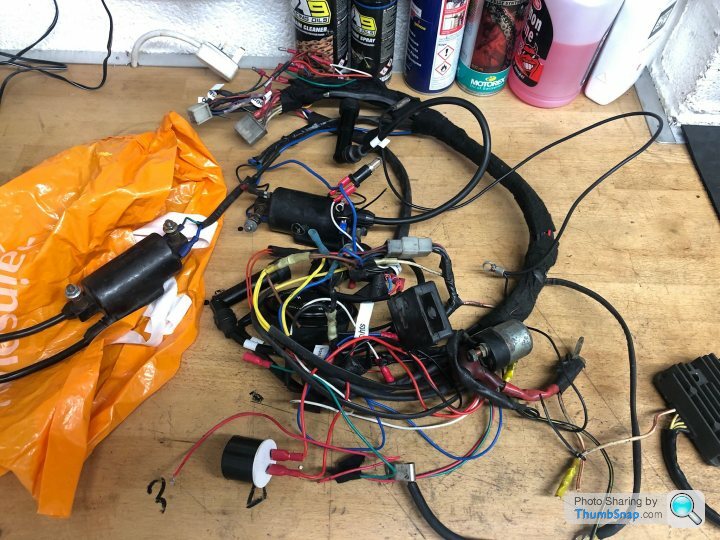
Relatively simple wiring on these older bikes, but the loom has been so badly botched in the past that I’ll be rewiring from scratch.
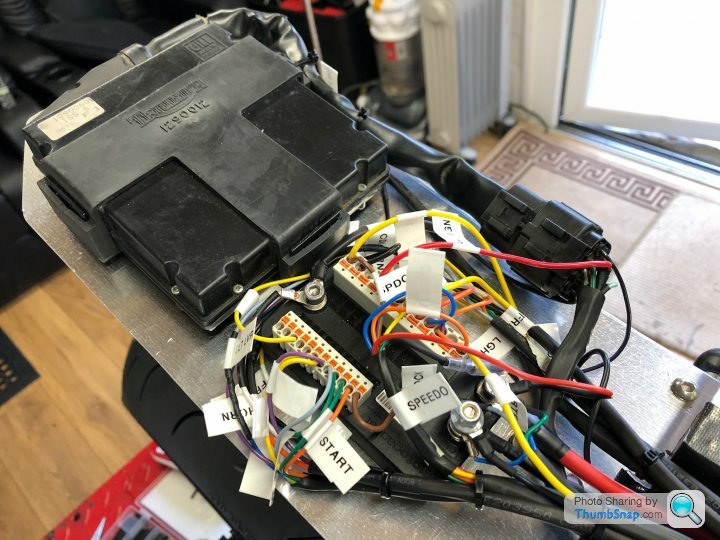
I like to to use the Motogadget M units, as they have lots of functionality like blue tooth activated ignition switch using your phone etc and really simplify the wiring. I used one on my last cafe racer build.... this time my goal is to make it look lot tidier ...
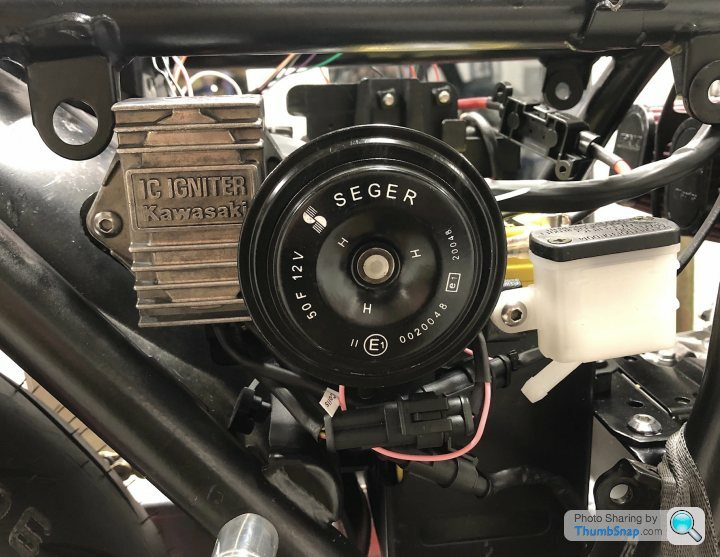
I popped a new 3 phase stator in when I rebuilt the engine, and I’ll use a new regulator. The only original component I’ll keep is the “Igniter” which is an early form of CDI I guess... they are very expensive to replace so hopefully it works...
Bodywork has gone off to paint. I’ll keep the colour scheme a surprise....
So I’ve moved on to the wiring.....
Relatively simple wiring on these older bikes, but the loom has been so badly botched in the past that I’ll be rewiring from scratch.
I like to to use the Motogadget M units, as they have lots of functionality like blue tooth activated ignition switch using your phone etc and really simplify the wiring. I used one on my last cafe racer build.... this time my goal is to make it look lot tidier ...
I popped a new 3 phase stator in when I rebuilt the engine, and I’ll use a new regulator. The only original component I’ll keep is the “Igniter” which is an early form of CDI I guess... they are very expensive to replace so hopefully it works...
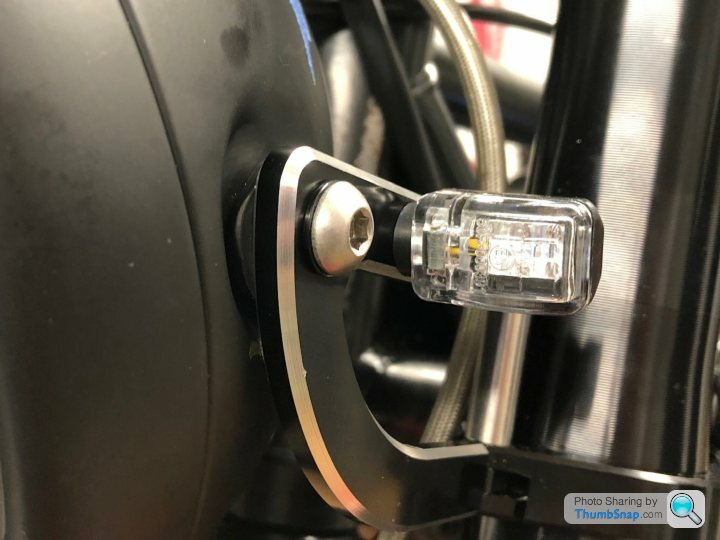
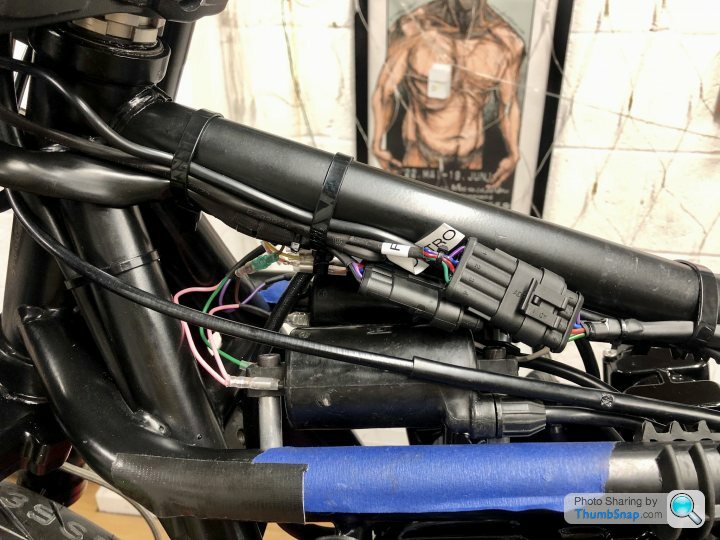
Routed the indicators through the headlamp to keep it looking tidy...
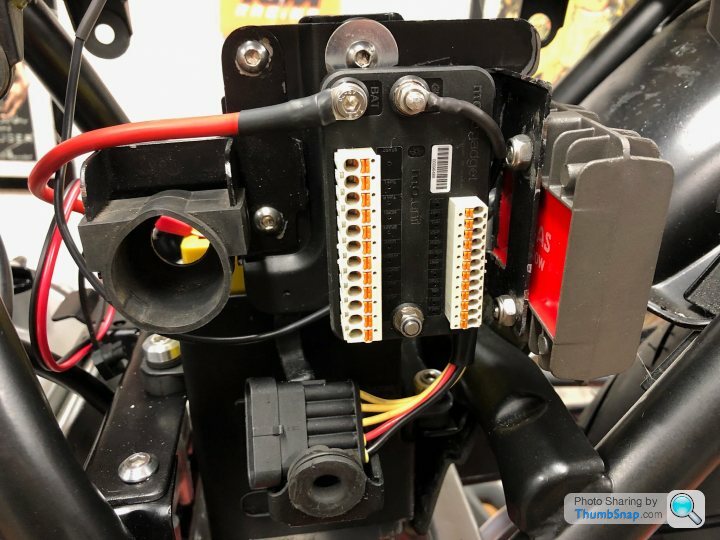
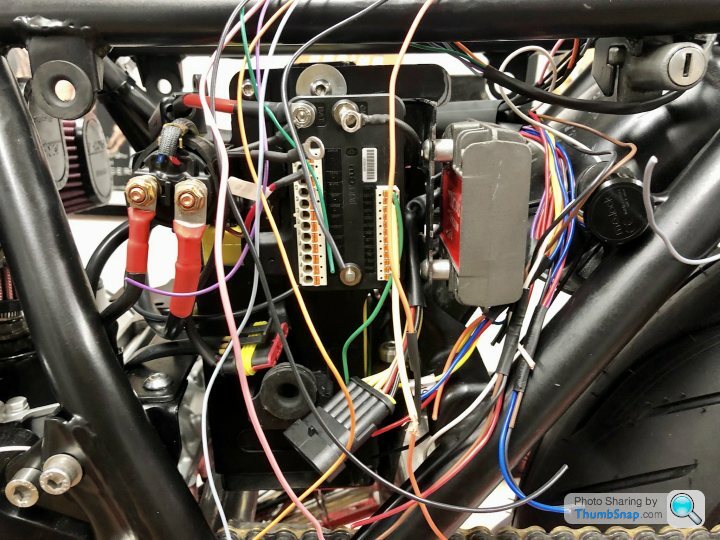
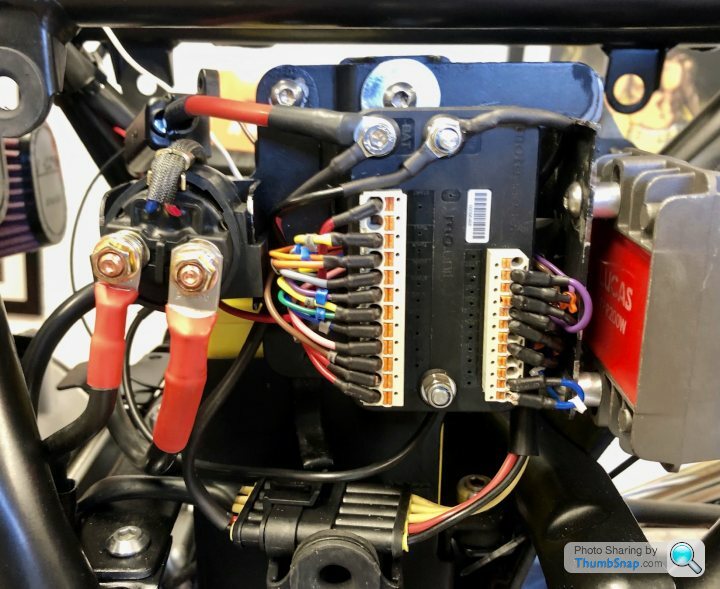
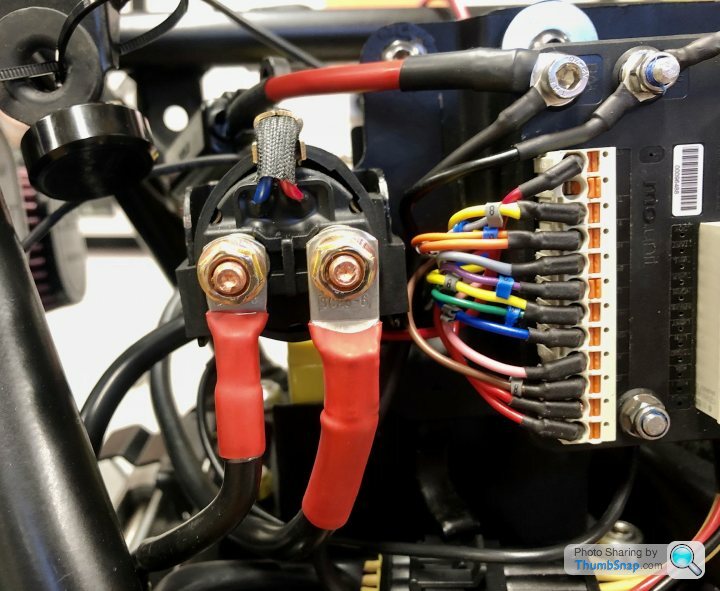
Mounted the Motogadget and the new rectifier
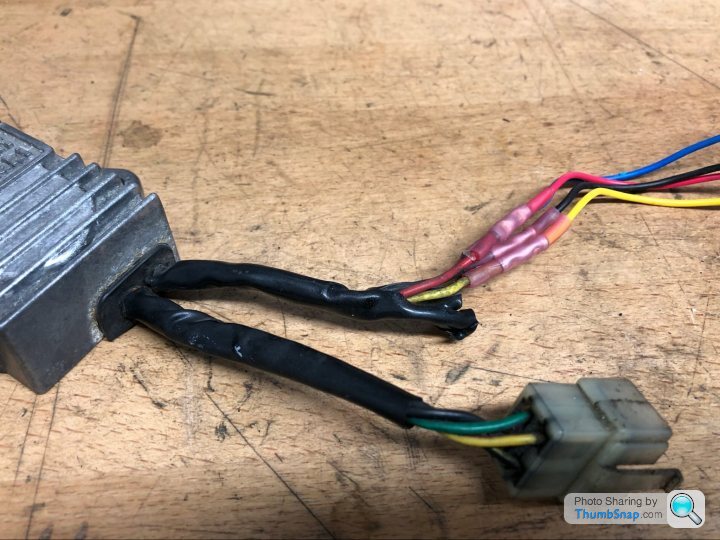
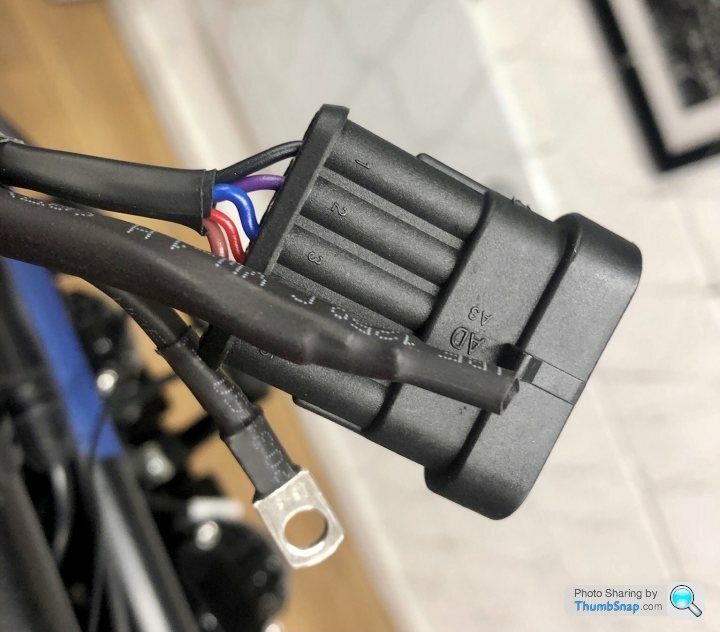
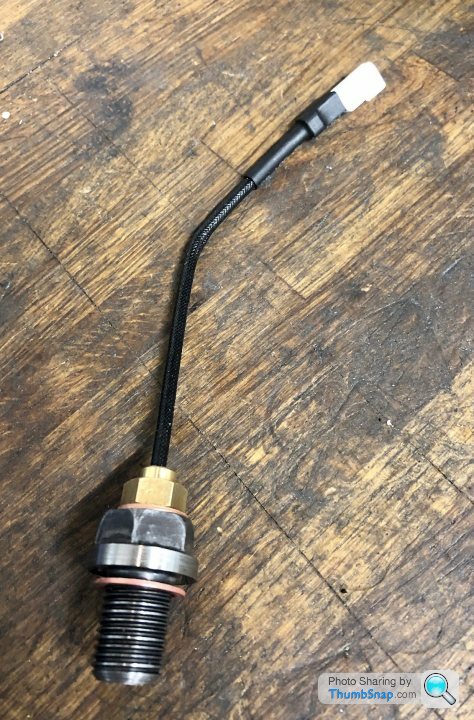
Found a couple of melted wires from the igniter so I’ve repaired those and replaced the sleeve with Raychem heatproof sleeve
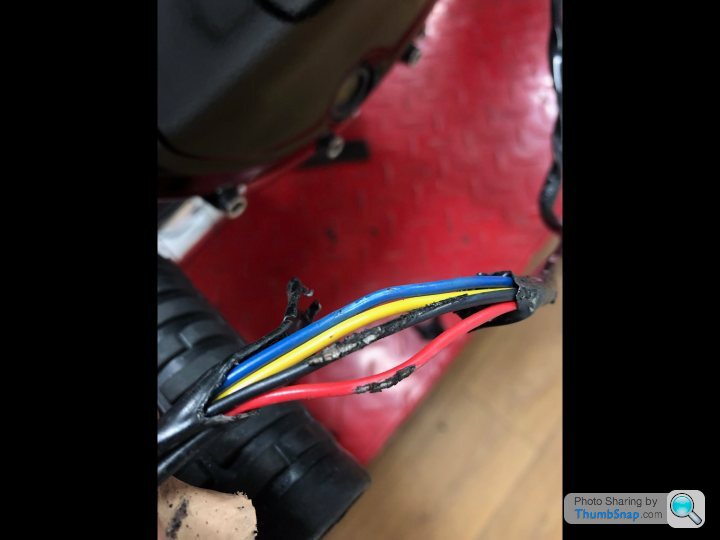
These joints will need cutting out, such bad bodging.... why? I’ll be replacing all plugs with Tyco superseals...
Mounted the Motogadget and the new rectifier
Found a couple of melted wires from the igniter so I’ve repaired those and replaced the sleeve with Raychem heatproof sleeve
These joints will need cutting out, such bad bodging.... why? I’ll be replacing all plugs with Tyco superseals...
Hopefully that 40 year old Igniter has survived the abuse ..... dodgy joints, crappy Halfords connectors and melted wires
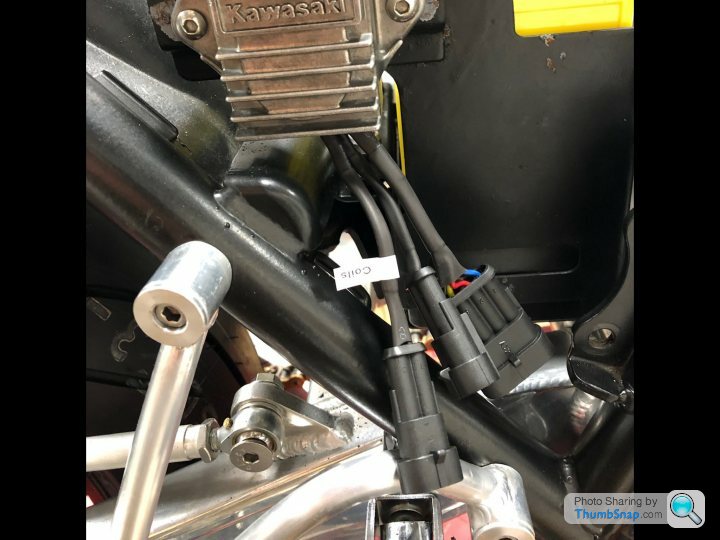
The plan is to wire up the oil light, coils, starter motor, battery and generator so we can get the engine run up before we do all the more intricate wiring on the dash, handlebar controls, lights etc... that way it’s easier to trace any faults ....
The plan is to wire up the oil light, coils, starter motor, battery and generator so we can get the engine run up before we do all the more intricate wiring on the dash, handlebar controls, lights etc... that way it’s easier to trace any faults ....

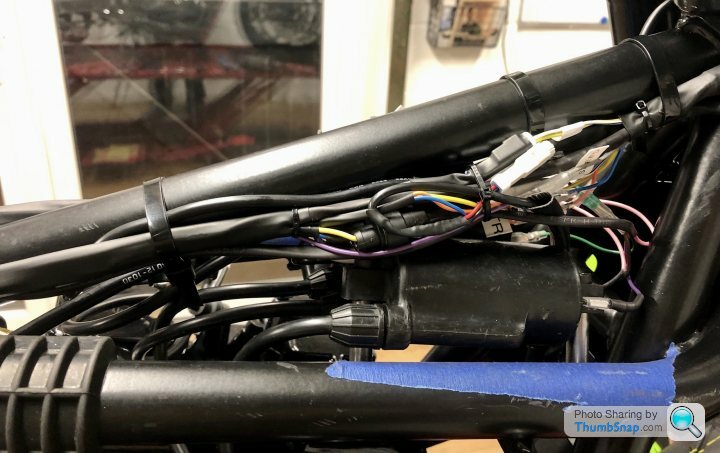
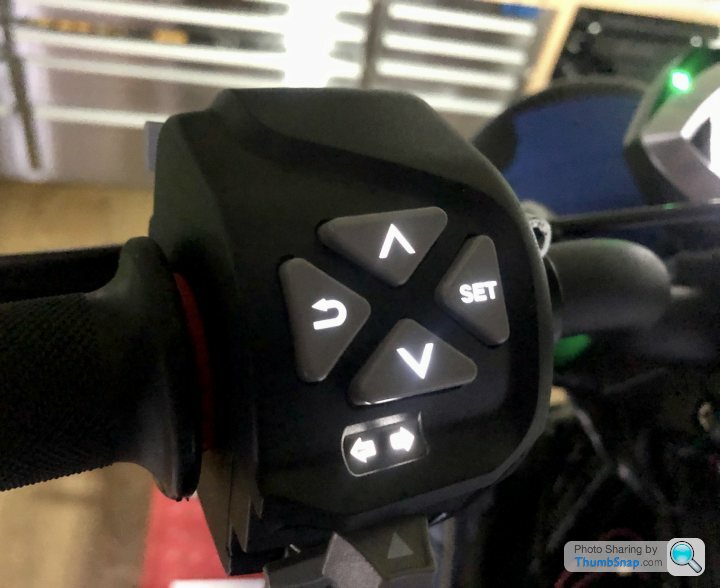
Gradually working through the electrics..... I’m using KTM switch gear. The plan is to use the menu buttons to control the Koso TFT screen menus, if it’s possible..... the cool thing about the KTM controls is that they are back-lit. Using Superseal connectors throughout... and of course the obligatory Domino grips....


Still working through the wiring....
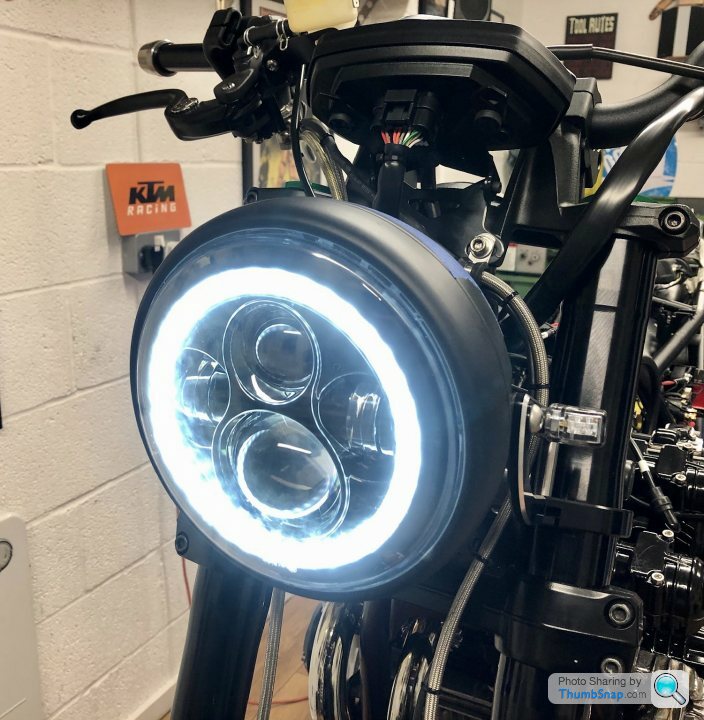
Switchgear, headlamp and speedo all wired up ....
 [url]
[url]
 |https://thumbsnap.com/dFXo4Pof[/url]
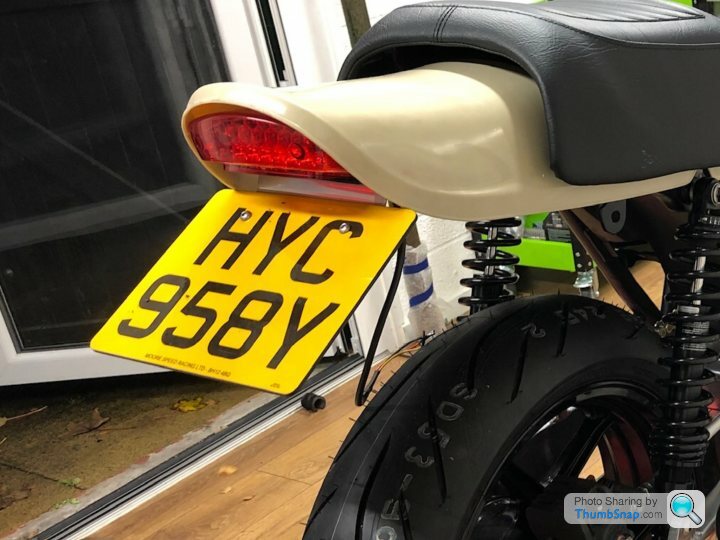
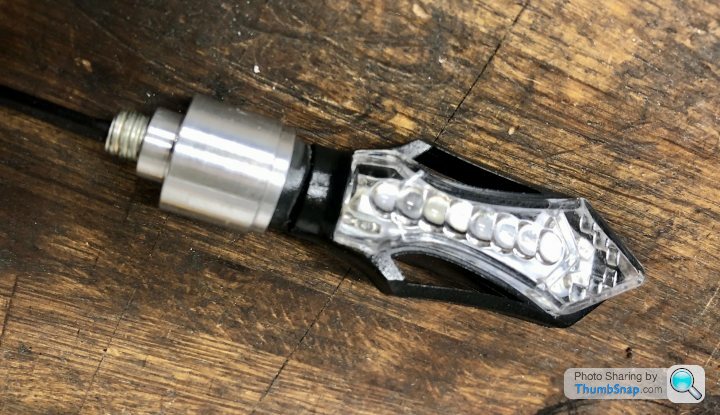
Made some spacers for the rear LED indicators
R/H side panel all finished, and tucked the horn away in there too....
Now I just need to plug all these wires in to the M-unit........as tidily as possible.....
Switchgear, headlamp and speedo all wired up ....
[url]|https://thumbsnap.com/dFXo4Pof[/url]Made some spacers for the rear LED indicators
R/H side panel all finished, and tucked the horn away in there too....
Now I just need to plug all these wires in to the M-unit........as tidily as possible.....
Electrics all done....
The M-unit gives keyless-go using your phone and I’ve also installed a touch-switch override
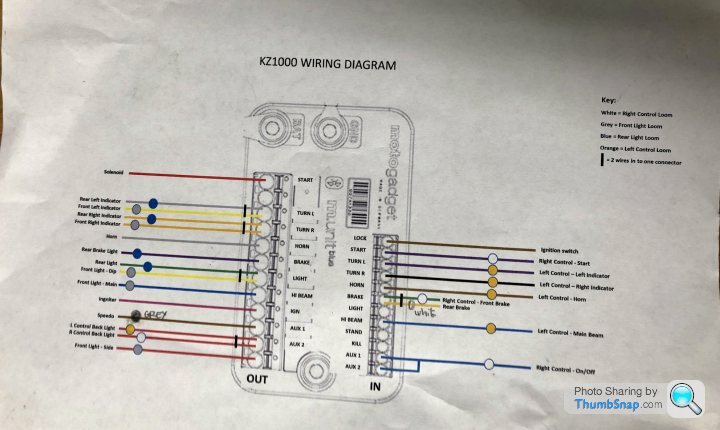
Took the time to draw up a circuit diagram ....
The TFT speedo gives air temp, oil temp, gear indicator, lean angle etc...

Daytime running lights....
Backlit switchgear....
The M-unit gives keyless-go using your phone and I’ve also installed a touch-switch override
Took the time to draw up a circuit diagram ....
The TFT speedo gives air temp, oil temp, gear indicator, lean angle etc...
Daytime running lights....
Backlit switchgear....
Edited by KTMboy on Saturday 16th January 18:21
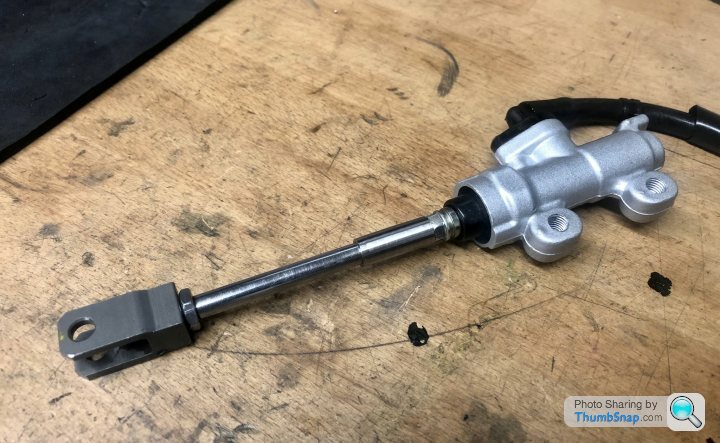
As I’m not intending to put a kickstart on this bike, I really should’ve taken the kickstart shaft out when I rebuilt the engine, and put a blanking plate in its place but hindsight as they say,,,,,,,,,
Instead, I’ve turned a cover to slide over the shaft and secure using a grub screw. I’ll enamel it black to match the engine....
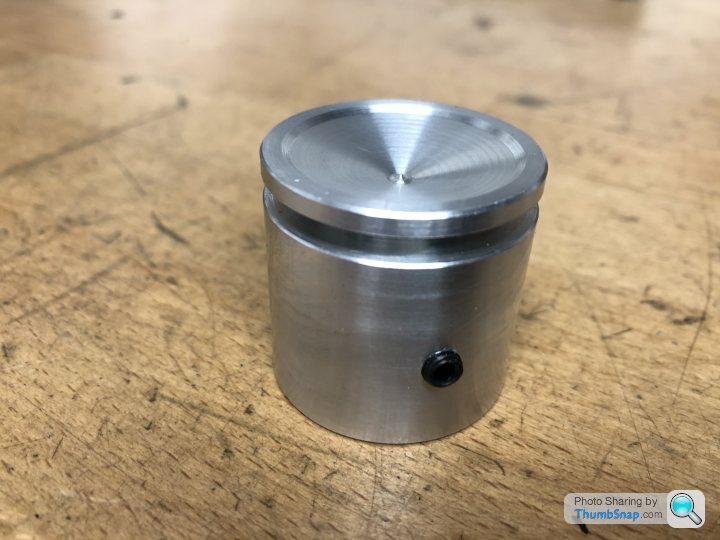
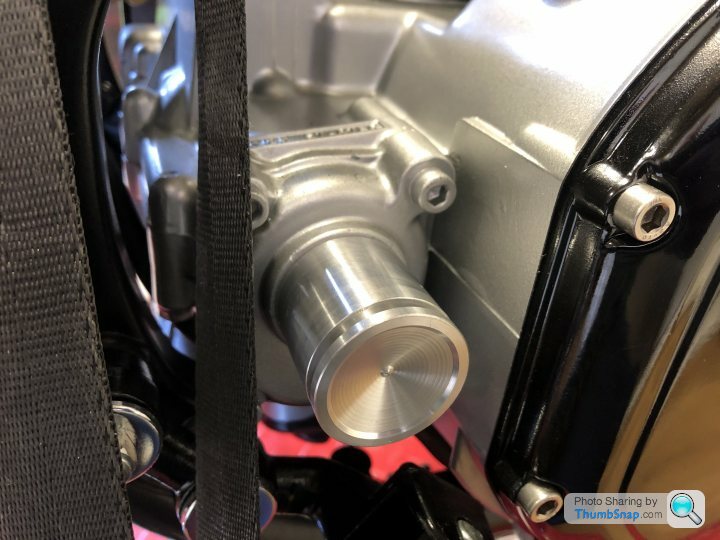
Instead, I’ve turned a cover to slide over the shaft and secure using a grub screw. I’ll enamel it black to match the engine....
Gassing Station | Biker Banter | Top of Page | What's New | My Stuff