Ducati Monster M900 restoration project
Discussion


Krikkit said:
Nice, can't beat media blasting for bringing stuff up to snuff.
I'm sure I've seen your finger before, not sure if it was yours on another thread, but it's a great idea!
What CFM do you need for the blasting cab? Just wondering if I can run one off a sensible sized compressor.
I used to have a big old compressor... I kept it going as it was quiet... but after 30 years of use it got to the stage where it was no longer effective, and the big tank was corroded... so I bought. £79 Aldi compressor 5 years ago and use that! Still going strong... they have a 3 year warranty... the important thing is the tank... it's tiny. So I supplement it with a larger propane bottle used as a tank in series. This is enough to run the cabinet, and paint a wing and door on a car...I'm sure I've seen your finger before, not sure if it was yours on another thread, but it's a great idea!
What CFM do you need for the blasting cab? Just wondering if I can run one off a sensible sized compressor.
50 years ago I was an apprentice to the best mechanic I have ever known…Gerry Lampit. He is 89 now and I still visit him… still sharp as a razor … He taught me that the hammer was the last resort… that’s always stayed with me. So when I needed to change the swinging arm bearings his words rang in my head
Parts have arrived from Moto Rapido. What a pleasure it is to deal with Craig and Luke, they are SO helpful and knowledgeable! after years of suffering the ignorant local dealer, these guys are the best!

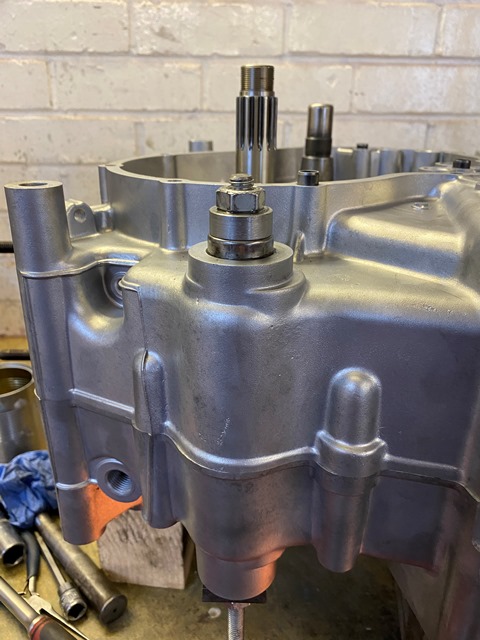
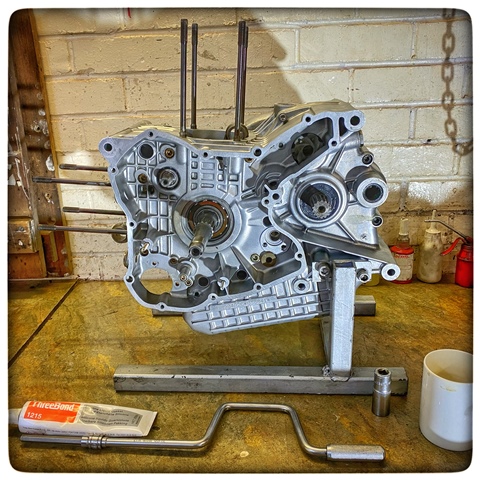
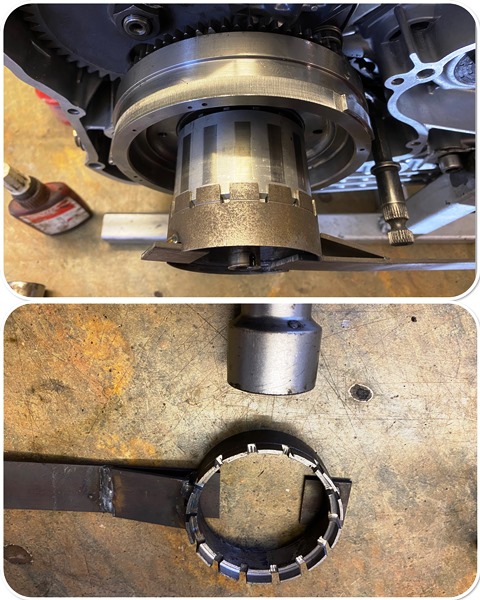
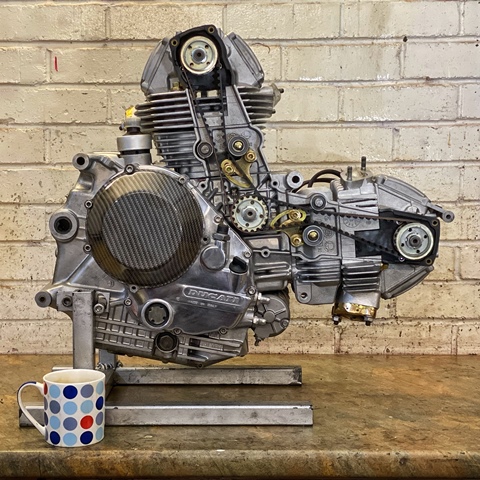
The engine rebuild has started… the cases are together, crank and gearbox shafts shimmed, and I spent a couple of hours making a flywheel holding tool. it worked rather well. Don’t ask me why the hell I welded the bar right across it, had to cut it to get the socket on! senior moment!
Parts have arrived from Moto Rapido. What a pleasure it is to deal with Craig and Luke, they are SO helpful and knowledgeable! after years of suffering the ignorant local dealer, these guys are the best!
The engine rebuild has started… the cases are together, crank and gearbox shafts shimmed, and I spent a couple of hours making a flywheel holding tool. it worked rather well. Don’t ask me why the hell I welded the bar right across it, had to cut it to get the socket on! senior moment!
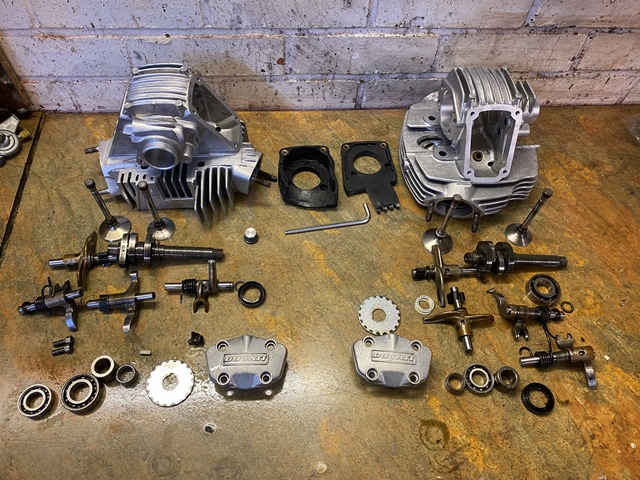
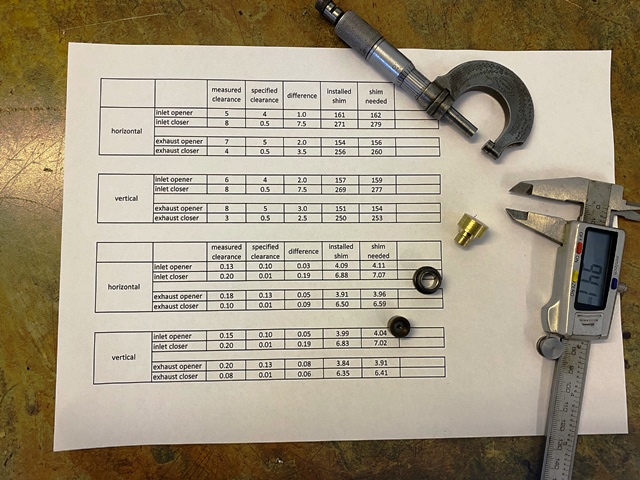
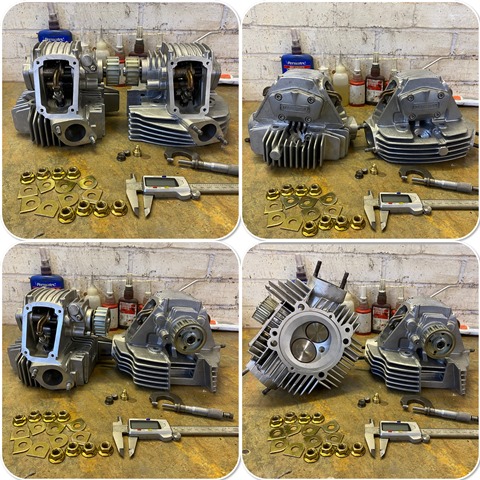
the rebuild of the heads is going well… some of the clearances are out though, not surprising as I gave the valves a bit of a grind in and replaced the half rings. I have a little spreadsheet that I put the values in, which calculates everything from there, and also mirrors the measurements in MM rather than the thous I prefer to work in. Old school I know!
Been doing the plating on and off, its time consuming, but I put parts in the bucket, set the timer so I don’t forget, and the magic happens… just a few parts to go…
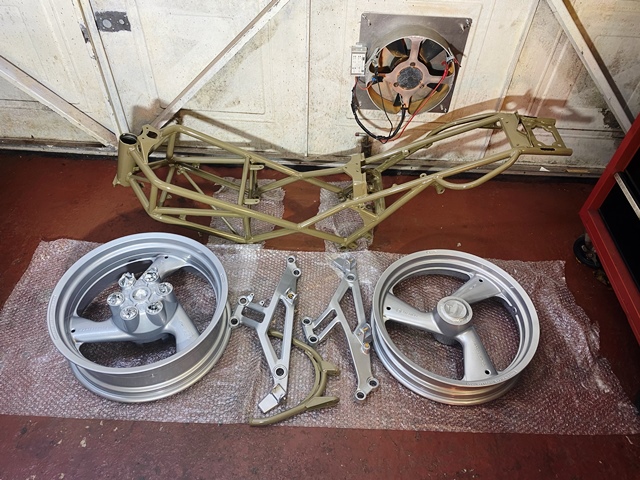
frame and wheels are back from the powder coater, and its another superb job….
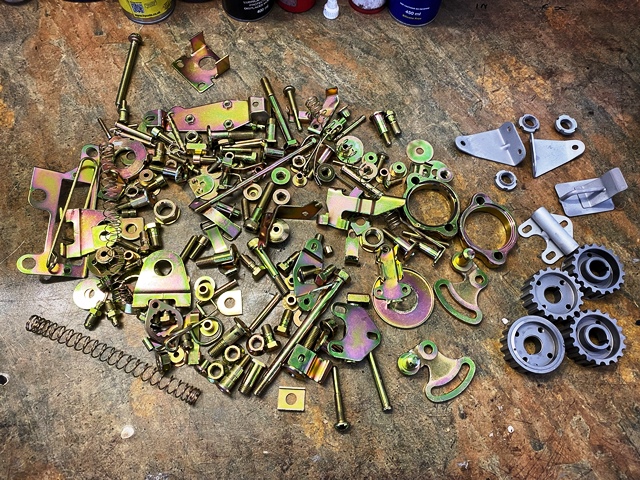

Been doing the plating on and off, its time consuming, but I put parts in the bucket, set the timer so I don’t forget, and the magic happens… just a few parts to go…
frame and wheels are back from the powder coater, and its another superb job….
Some bolts I just tighten… but critical components I always use a torque wrench… in the past I have used a long series a spanner and calculated the pull I need on a spring balance… but for some reason I could not get the spanner on I have used in the past and its part of an expensive set, so I didn’t want to modify it by grinding… , so had to make a tool… I knew that old spanner and socket would come in one day!
One tip I picked up years ago when I used to build Crossflow race engines was always mark the head nuts/bolts after the first stage torque. I would paint an arrow on them with tippex... then move on to the second stage torque, and then the final stage. then I would check all the arrows were facing the same direction, and if any weren't, I would give them an extra tweak until they did. the rational for this is that it takes much of the varying nut/bolt/washer friction out of the equation and you get an even clamping force.
Of course that's exactly what you do in effect on modern engines, but now in a more refined way with an angle gauge... on a BMW engine I recently worked on the bolts were torqued to 40 NM, then 90 degrees, then another 90... I still put arrows on them! the reason for that is its all to easy to get confused as they need to be puled down in sequence, and there are 20 bolts! its all too easy to forget where you are... and its not like a torque wrench where you give it a click to check! All too easy to give a bolt 90, 90 and another 90, at which point it pings!
Pazuzu said:
Outstanding, great thread and a great bike to get all that love.
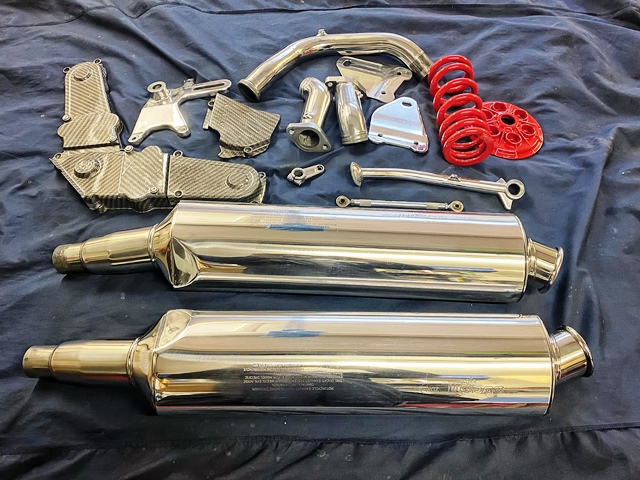
Thanks!Did a bit of painting and polishing today… painted and lacquered the clutch cover, and rear spring, and put a coat of lacquer on the cam belt covers which I had decided to carbon effect dip… not everyone’s cup of tea I know, but I like the look… The silencers came up really well! there were a few marks on them that would have niggled me so I decided to polish them.
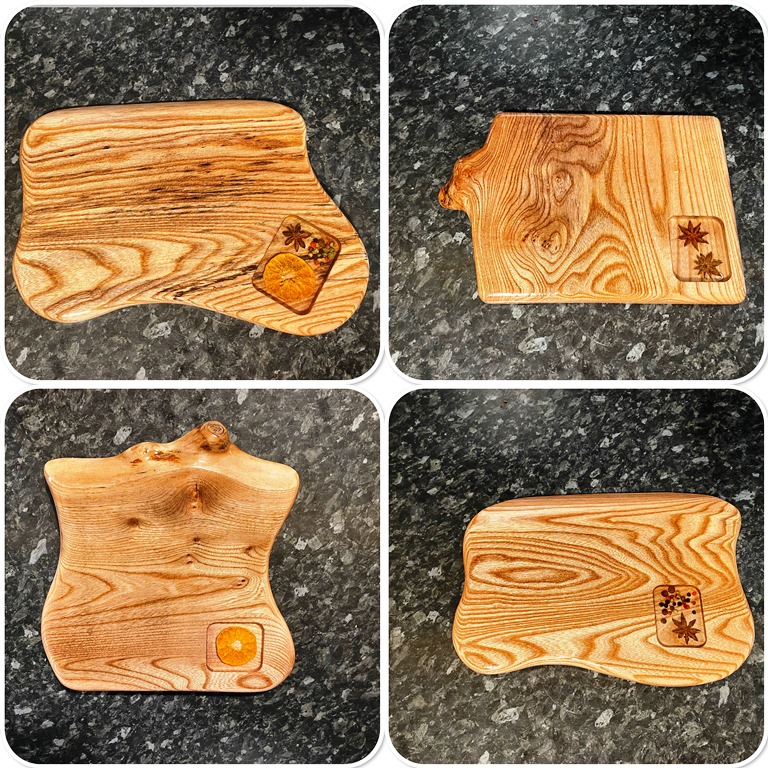
as an aside, while the spray gun had some lacquer in, I finished off some cheese boards I have been making as Christmas presents for friends... its got me a few brownie points with the wife which I desperately needed !!! the fruit and spices are encapsulated in clear casing resin.
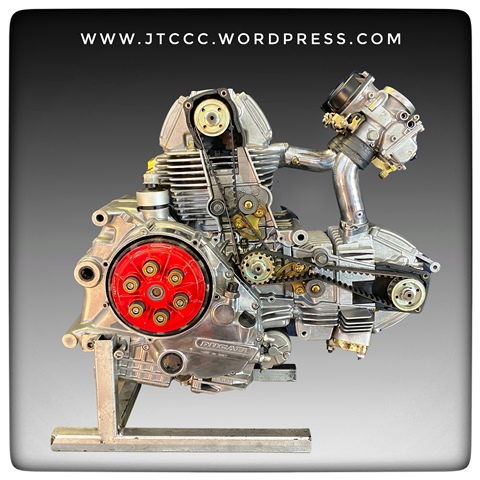
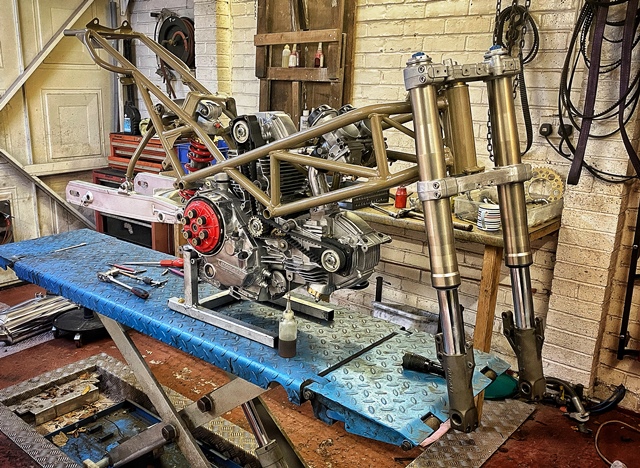
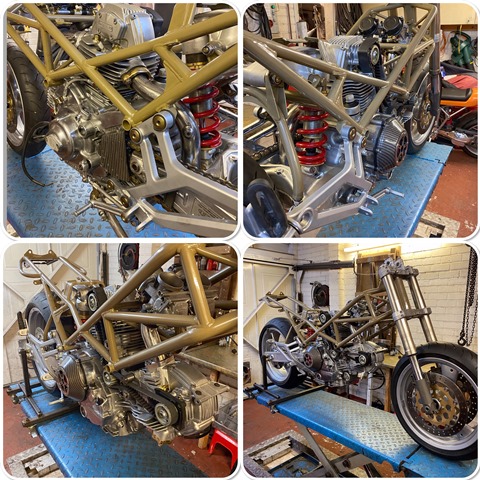
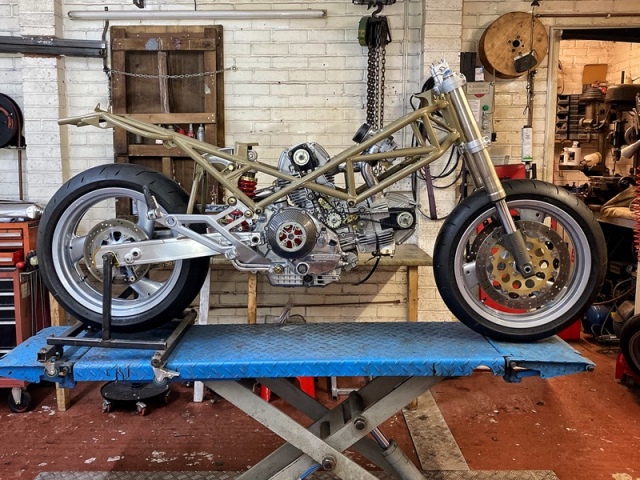
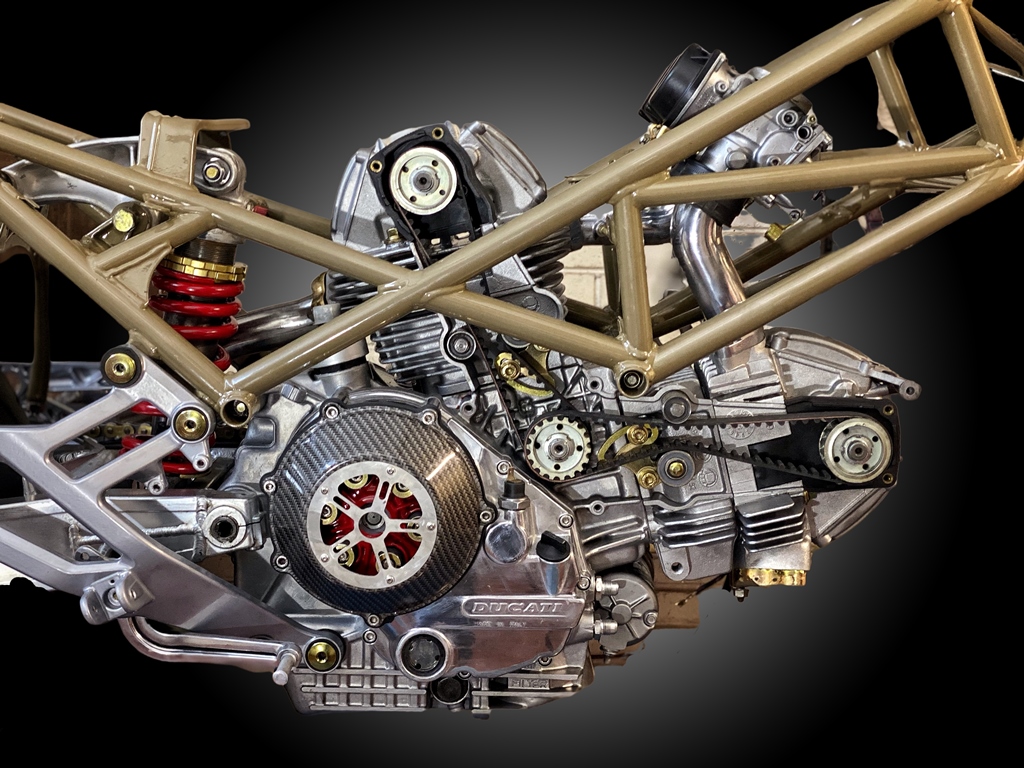
Started the rebuild… first job was to put the frame on the engine, easy job, I held it, my wife popped the bolts in! I then fitted the headstock bearings, which I have replaced as there were small sighs of pitting, and they are cheap. I pulled them in rather than use a hammer, which also means you can give them a good tighten and bed them in nice and hard against the register. Its starting to come together… Was also playing around with the image of the engine…


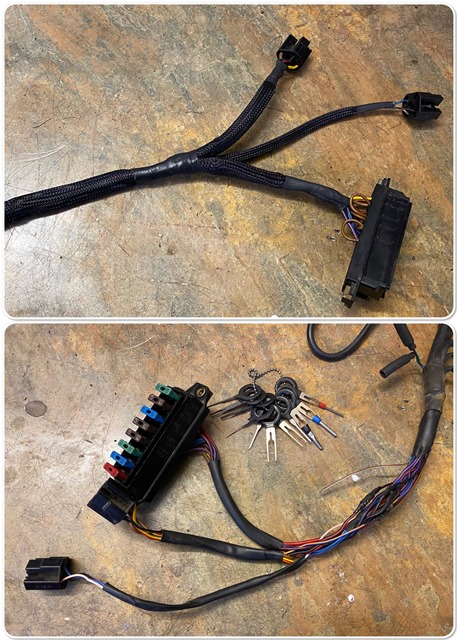
Its funny how to me progress seems slow, but when you come to put it all together you realise that all the little jobs you have been doing over the months are now paying off as it becomes an assembly job! One thing I have done in the last few days is to check the loom over… its in great condition apart from one area… It looks like someone has fitted an alarm at some point…, and someone has subsequently removed it! they didn’t do a bad repair, but I hate the tape over bare wires, and I wanted to check the integrity of the joints, so I pulled the soldered wires apart and re-soldered them, and covered the join with shrink wrap. To finish it off nicely I took the terminals out of the blocks with my terminal removal tool. this is a fantastic little set of tools, and very cheap to buy.. I have lost count of the times I have used them over the years! that meant I could use some braided expandable sheathing which most cars seem to use these days. it means it can go over the terminals and then fit tight on the wires. this is finished off with some hear shrink, and if you use the glue lined stuff it makes a good repair.
probably my last update this side of the holiday... Merry Christmas!
probably my last update this side of the holiday... Merry Christmas!

Gassing Station | Biker Banter | Top of Page | What's New | My Stuff