What did you do in the garage yesterday?
Discussion


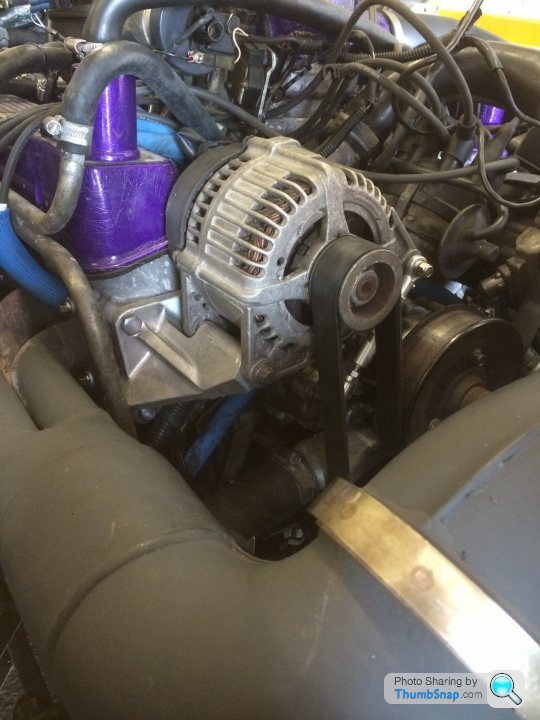
Andav469 said:
I quite like the monochrome theme of your engine bay Daz
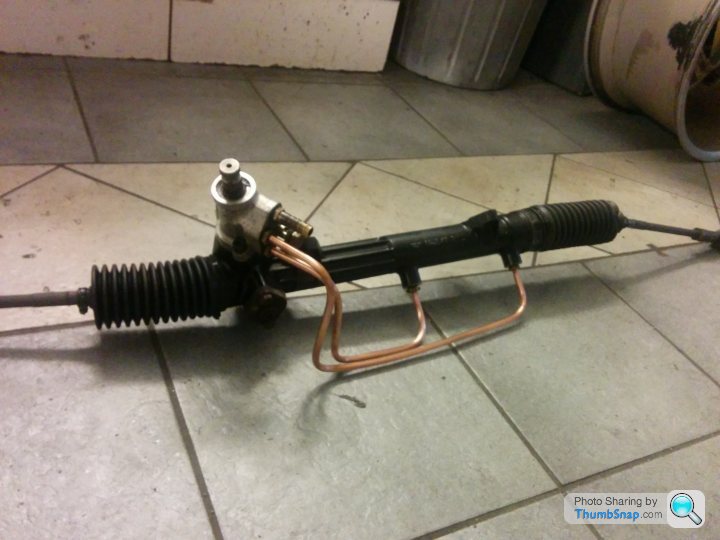
Thanks i don`t have time to improve it ,the manifolds could do with re painting .I would like to have the power steering casing part powder coted but can`t work it out how to remove . I`m two busy with twins ,a large house which needs work and a garden which takes up one day a week .

 |http://thumbsnap.com/rA7cd1r9[/url]
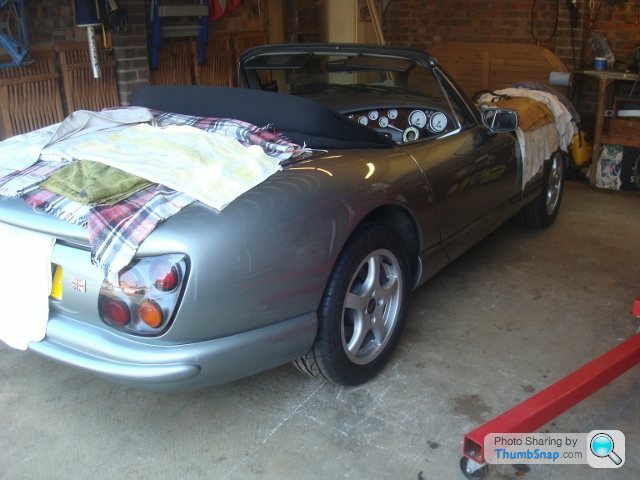
J400GED said:
I bet that kept your full attention!
Where did you run your fuel return line?
Any top tips for when putting the body on? It's a long way off yet but I am looking forward to that job on mine.
You will need an extra pair of hands holding the back end up a bit since it sags down and making the fit too tightWhere did you run your fuel return line?
Any top tips for when putting the body on? It's a long way off yet but I am looking forward to that job on mine.
Also remember: rear upper wishbones, rearmost bolt, the nut has to go against the boot so that its possible to get off!
J400GED said:
Any top tips for when putting the body on?
Don't forget to put the handbrake up vertical so it emerges back into the cabin. Otherwise the body goes back on, everything is lining up perfectly and you run round the garage self high 5'ing. Only to realise the thing is now trapped under the body and you need to re-lift to get it sorted...Pretty obvious to tell how I found this out when I did mine

Discopotatoes said:
macdeb said:
Thanks guys, glad you like it. Yes, it is by Speedy cables, [not very speedy though] anyway it's back in the car now so I'm happy.
Mac did you supply them an old guage or is this one they made from scratch?Edited by Discopotatoes on Saturday 21st March 17:32
SILICONEKID345HP said:
Andav469 said:
I quite like the monochrome theme of your engine bay Daz
Thanks i don`t have time to improve it ,the manifolds could do with re painting .I would like to have the power steering casing part powder coted but can`t work it out how to remove . I`m two busy with twins ,a large house which needs work and a garden which takes up one day a week .
You dont need to powdercoat, but a beadblast, acid primer and black enamel paint makes nice. Its a b
 h to refurb and change seals. If you manage to split it open after heating, the treads will likely lunch themselves. They are alu on alu threads with loctite... stupid idea. I had to buy a 45x1,5mm thread tap (200 pounds+vat) to clean it up. Then theres the two plastic washers inside, one of which is designed in a way that eventually will destroy the seal since its slightly smaller. I made new ones:
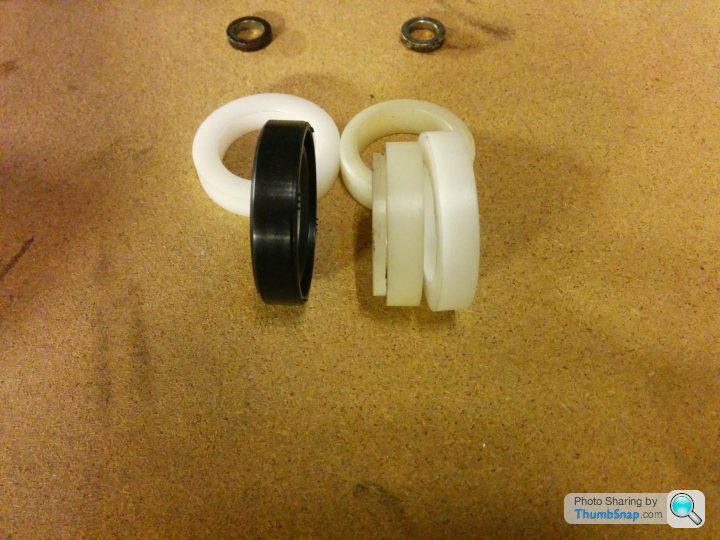
J400GED said:
I bet that kept your full attention!
Where did you run your fuel return line?
Any top tips for when putting the body on? It's a long way off yet but I am looking forward to that job on mine.
1) Make sure you clean to bare metal the earthing points on the chassis and their corresponding brass bobbins glassed into the body.Where did you run your fuel return line?
Any top tips for when putting the body on? It's a long way off yet but I am looking forward to that job on mine.
2) Make sure you know where all the wiring is supposed to end up and that nothing will be left jammed against the top of the chassis.

3) Make sure the heater pipes are clear as the body lowers and not jammed between the bulkhead and back of the rocker covers.
4) Don't forget to reconnect the earth point at the rear of the LH bank cylinder head before finally lowering on to the chassis.
5) Get some mates to give you a hand. Walk and talk them around the body and chassis and brief them as to what you are intending to achieve and potential issues.
6) When lowering the body keep it level in both planes to start with. First point of body to chassis contact is the handbrake followed by the gearstick. Make sure they go into their respective gaiters cleanly. (I used a smear of silicon grease to help matters)!
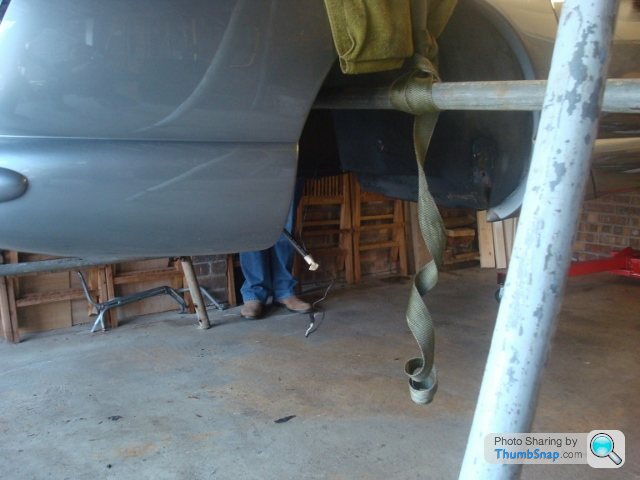
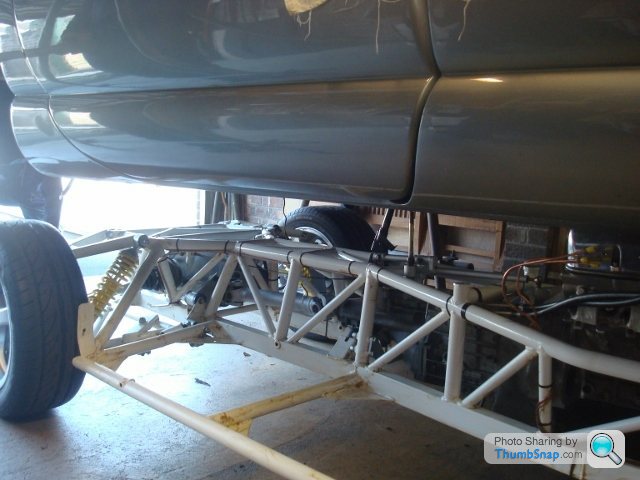
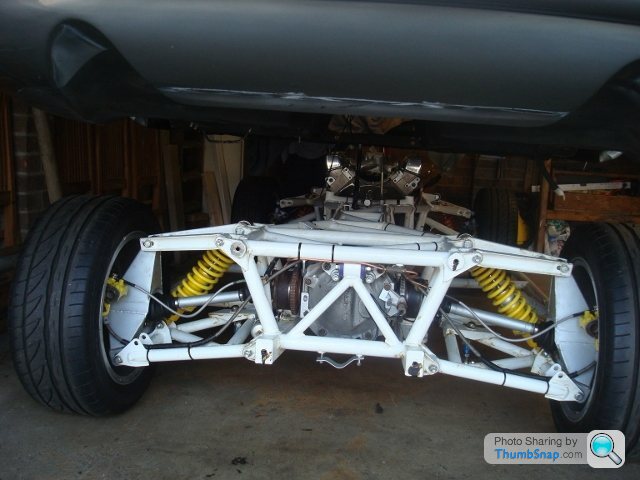
Next connect the LH side engine earth. Continue lowering, but tilt the body forward slightly as you approach the front ARB brackets to get the body past. Once past them lower to mounting point and put in the front two mounting bolts. Now lower the back end, line the body up and put in the boot space mounting bolts. Job done stand fast the cabin mounting bolts.
Re your query about the fuel return line. I put new cunifer piping back in along the top of the off side chassis rail as per the way it came out.Hope this helps. Best of luck doing yours, it's definately worth the hard work (and expense).

JWzed said:
1) Make sure you clean to bare metal the earthing points on the chassis and their corresponding brass bobbins glassed into the body.
2) Make sure you know where all the wiring is supposed to end up and that nothing will be left jammed against the top of the chassis.
3) Make sure the heater pipes are clear as the body lowers and not jammed between the bulkhead and back of the rocker covers.
4) Don't forget to reconnect the earth point at the rear of the LH bank cylinder head before finally lowering on to the chassis.
5) Get some mates to give you a hand. Walk and talk them around the body and chassis and brief them as to what you are intending to achieve and potential issues.
6) When lowering the body keep it level in both planes to start with. First point of body to chassis contact is the handbrake followed by the gearstick. Make sure they go into their respective gaiters cleanly. (I used a smear of silicon grease to help matters)!
Next connect the LH side engine earth. Continue lowering, but tilt the body forward slightly as you approach the front ARB brackets to get the body past. Once past them lower to mounting point and put in the front two mounting bolts. Now lower the back end, line the body up and put in the boot space mounting bolts. Job done stand fast the cabin mounting bolts.
Re your query about the fuel return line. I put new cunifer piping back in along the top of the off side chassis rail as per the way it came out.Hope this helps. Best of luck doing yours, it's definately worth the hard work (and expense).
Cheers John. 2) Make sure you know where all the wiring is supposed to end up and that nothing will be left jammed against the top of the chassis.
3) Make sure the heater pipes are clear as the body lowers and not jammed between the bulkhead and back of the rocker covers.
4) Don't forget to reconnect the earth point at the rear of the LH bank cylinder head before finally lowering on to the chassis.
5) Get some mates to give you a hand. Walk and talk them around the body and chassis and brief them as to what you are intending to achieve and potential issues.
6) When lowering the body keep it level in both planes to start with. First point of body to chassis contact is the handbrake followed by the gearstick. Make sure they go into their respective gaiters cleanly. (I used a smear of silicon grease to help matters)!
Next connect the LH side engine earth. Continue lowering, but tilt the body forward slightly as you approach the front ARB brackets to get the body past. Once past them lower to mounting point and put in the front two mounting bolts. Now lower the back end, line the body up and put in the boot space mounting bolts. Job done stand fast the cabin mounting bolts.
Re your query about the fuel return line. I put new cunifer piping back in along the top of the off side chassis rail as per the way it came out.Hope this helps. Best of luck doing yours, it's definately worth the hard work (and expense).
dazee said:
dazee said:
Cleaned the garage out....

....for now.
Feeling a little sick....they're talking about 5K for its "MOT" and oil leak fix.....for now.
Anyone wanna buy a Hayabusa?
So that's MOT, clutch, alternator, crank seals, bushes done and full alignment setup - says it was so out of alignment it will seem like a new car.
Of course a bit more room in the garage now the bike has gone

Forecast for good weather this weekend so looking forward to a nice drive from the heart of Tokyo back out to the boonies of Chiba.

dazee said:
Cleaned the garage out to prepare for the return this weekend. Bill down to 4K after I supplied some parts, should have been lower except they also saw the issue with the alternator and had that replaced too.
So that's MOT, clutch, alternator, crank seals, bushes done and full alignment setup - says it was so out of alignment it will seem like a new car.
Of course a bit more room in the garage now the bike has gone
Forecast for good weather this weekend so looking forward to a nice drive from the heart of Tokyo back out to the boonies of Chiba.
Think you made the right choice hayabusa,s are plentiful and your car is looking awesome.So that's MOT, clutch, alternator, crank seals, bushes done and full alignment setup - says it was so out of alignment it will seem like a new car.
Of course a bit more room in the garage now the bike has gone
Forecast for good weather this weekend so looking forward to a nice drive from the heart of Tokyo back out to the boonies of Chiba.
Was a painful choice. First time in 16 years without a Hayabusa, and this was a first year low mileage copper/silver. Had 2 reps from bike shops bidding for it in my garage and 2 more calling just after it sold.
The miles will get racked up on it this year.....just brought a hybrid too to offset the fuel costs
The miles will get racked up on it this year.....just brought a hybrid too to offset the fuel costs
Advance warning.......
Tomorrow i am going to:
1. Try to work out why my heater fan stopped working between Tuesday and Thursday. Not funny in yesterday's snow storm.
2. Try to tighten my exhaust manifold bolts with my poor old arthritic hands (plus spanner) - new gaskets were fitted three weeks/800 miles ago, and I can hear that "gasket" noise when the engine is hot.
3. Try to fit some different seats in my Chim, in the hope that bracing myself with my legs on track days will become a thing of the past (like nostalgia and rickets).
For you highly qualified spannercrats, with your two-post lifts and engineering degrees, this might seem like chicken feed, but for me, out in the wind and rain on the driveway, it's a challenge, will probably take most of the day, and will most likely be totally unsuccessful. I am at that time in a man's life where any time I have wriggled myself, flat on my back, under the car to put the nuts back onto the seat bolts, I find:
A. I've left the bloody washer and nut on the passenger seat or
B. I've got the wrong socket on the spanner or
C. I get an urgent message from the boss that she needs something getting from the shops half an hour ago or
B. I get an urgent message from my bladder that i needed to be somewhere indoors approximately 30 seconds ago


Gassing Station | Chimaera | Top of Page | What's New | My Stuff