What did you do in the garage yesterday?
Discussion


sparkythecat said:
I've not cut anything off my chassis yet. The bit you may have noticed on the floor is the front top crossmember which unbolts
I understand that the little top hat section on the outrigger is a seat belt anchor point on some cars early cars, but not on my 98 chim.
The' bobbin' welded into the outrigger in front of the top hat is one seat belt anchor point. There is a similar bobbin welded into the chassis rail opposite the first. You can probably see some white silicone gunge around it. The third seat belt mounting point is captive in the fibreglass wheel arch.
Not on my 2000 car either. I understand that the little top hat section on the outrigger is a seat belt anchor point on some cars early cars, but not on my 98 chim.
The' bobbin' welded into the outrigger in front of the top hat is one seat belt anchor point. There is a similar bobbin welded into the chassis rail opposite the first. You can probably see some white silicone gunge around it. The third seat belt mounting point is captive in the fibreglass wheel arch.
Yes I see all that and have replaced a seat belt so get all that.

What year is the chassis. Don’t look to bad from here. Nice to have it at a workable height.
Once body was off how long would you say it’s taken to get this far which is fully stripped. That’s a bit of work and depends on what’s stubborn etc but have you logged the hours by any chance. If you can work full time on it a matter of days if your experienced I suppose.
Another one saved for sure, it looks ready for it.


Classic Chim said:
Dave85chim said:
Finally finished sanding these beauties - and fitted this eve!!


Got some new battery cables coming tomorrow, once fitted- body goes back on over weekend!
I got the body off on the 23rd October. I haven't catalogued the time spent dismantling it, but it came to bits fairly easily. I used air tools which do make the job quicker.
I snapped one of the seat belt bolts off in the outrigger and had to drill it out. I clumsily broke the handbrake warning switch and managed to snap the output nozzle off the fuel pump just by undoing the jubilee clip. I couldn't believe how fragile it the was. Luckily, those are the only problems I've encountered so far.
.
Classic Chim said:
This one too, that’s an informative picture if ever I’ve seen one, I often ponder different lifting ideas but this just looks right to me.
The body isn’t actually that heavy when you have gear like that on the job
That is how I lifted my Griff body. You could also do it using an engine hoist and the cross beams (2X4 in my case). Very controllable and safe. The body stayed the same height and the chassis lowered (on jacks) out from under it. Refitting was the reverse, positioned the chassis under the body and then jacked / lifted it up to meet the body.The body isn’t actually that heavy when you have gear like that on the job
Time wise, I started Easter (last year) and had the body off end of July, two of us working one Saturday a fortnight. (not very long days, took it nice and easy). Then didn't do anything over August and not a lot in September, but had the chassis fully stripped and ready to go off for welding etc at the end of November. Again, two of us working one day a fortnight, and they were not mega long days.
BIG DUNC said:
Classic Chim said:
This one too, that’s an informative picture if ever I’ve seen one, I often ponder different lifting ideas but this just looks right to me.
The body isn’t actually that heavy when you have gear like that on the job
That is how I lifted my Griff body. You could also do it using an engine hoist and the cross beams (2X4 in my case). Very controllable and safe. The body stayed the same height and the chassis lowered (on jacks) out from under it. Refitting was the reverse, positioned the chassis under the body and then jacked / lifted it up to meet the body.The body isn’t actually that heavy when you have gear like that on the job
Time wise, I started Easter (last year) and had the body off end of July, two of us working one Saturday a fortnight. (not very long days, took it nice and easy). Then didn't do anything over August and not a lot in September, but had the chassis fully stripped and ready to go off for welding etc at the end of November. Again, two of us working one day a fortnight, and they were not mega long days.
Maybe a daft question, but why did you opt to lift the chassis up to meet the body as apposed to lowering the body completely down to meet the chassis? I’m looking to put the body back on at the weekend - so I’d welcome any thoughts/tips
I have two engine hosts and the 2x4 set to go
The front of the body was hanging on 2x4 from an RSJ, pretty much as in that photo.
The rear was on large axle stands (in turn on large blocks of wood). The original plan was to have to rear of the body hanging from an engine hoist, again with a 2x4 cross beam. However, I didn’t like the strops touching the wings and I was worried about stability. In the end the rear of the body stayed as it was and we jacked the chassis up into position.
This was actually the reverse of removal, when we got it nice and high, then supported the body and lowered the chassis away.
I don’t think there is a right and wrong method, it depends on what facilities and equipment you have to hand, as well as the skill level and number of helpers. I wanted it safe and controlled, which it was.
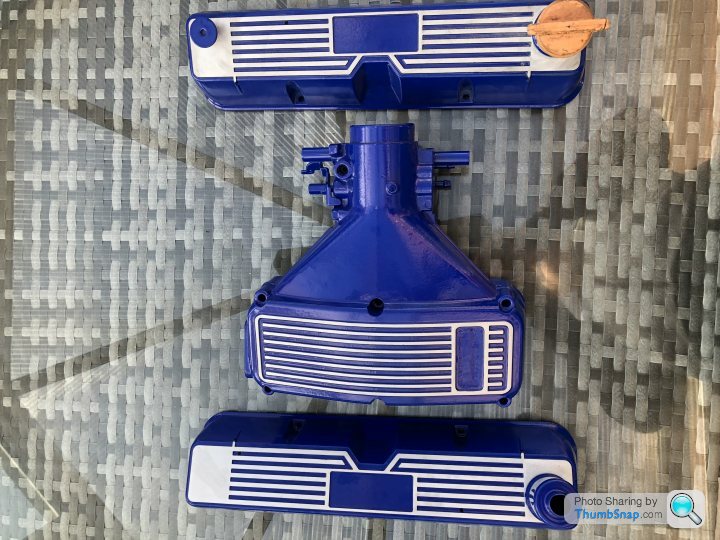
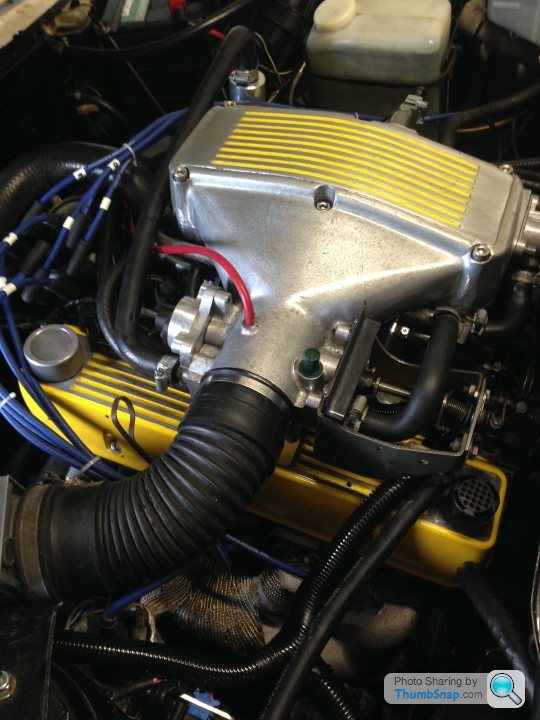
I yesterday refitted my rockers and plenum after a bit of paint. Plenum grooves just hammerite black and rubbed down the casting marks, but I used Simoniz VHT paint on th rocker covers, which by the way it came out of the can, seemed to basically be powdercoat paint in suspension. Finished off in the oven. 
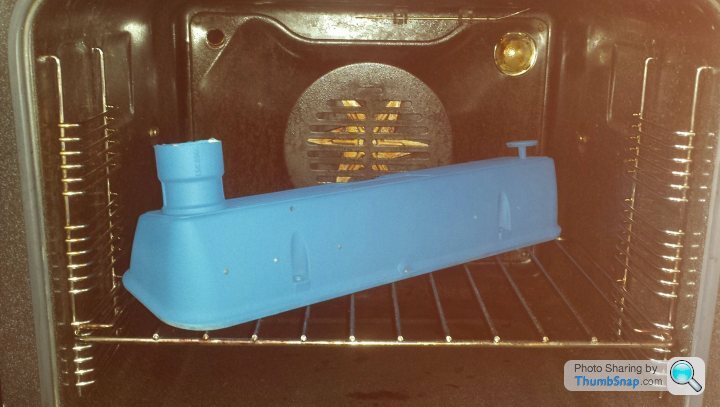
Swirl pot and expansion tanks machine polished at a local firm. The rockers have ended up being a matt finish and not quite as dark a blue as it shows on the can, a sort of dark turquoise, but I like them. Well I suppose I would...
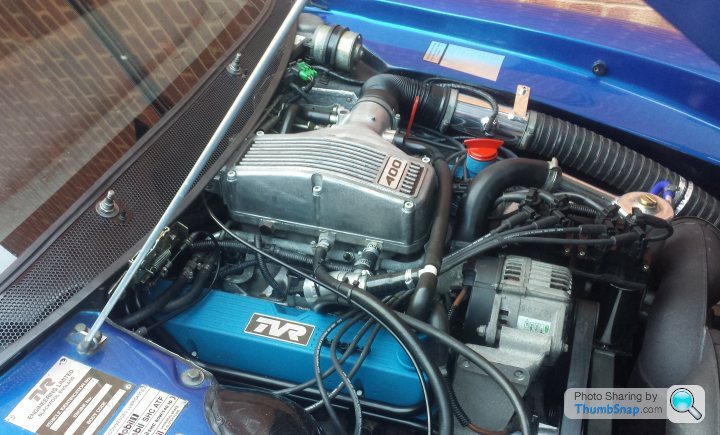
Swirl pot and expansion tanks machine polished at a local firm. The rockers have ended up being a matt finish and not quite as dark a blue as it shows on the can, a sort of dark turquoise, but I like them. Well I suppose I would...
Edited by ianwayne on Tuesday 13th November 22:38
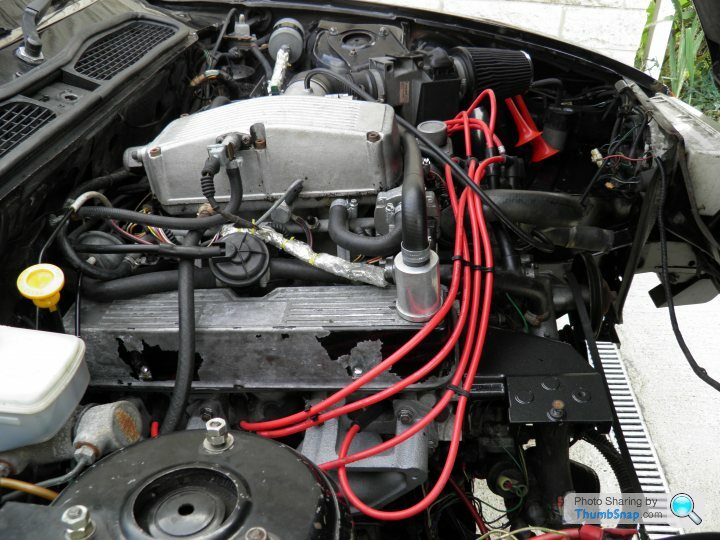
The TVR version in my SD1. I used Rustoleum matt silver on the exhaust manifolds and it has done several thousand miles and still looks good. Rustoleum yellow on the rocker covers and plenum and gunmetal on the alternator mounting bracket. It takes a couple of days to harden properly so a slow job. Sanded off like the others above and then clear coated them all with Halfords own brand to give a shine and a lot easier to keep clean 
Before:
and after:
Before:
and after:

N7GTX said:
The TVR version in my SD1. I used Rustoleum matt silver on the exhaust manifolds and it has done several thousand miles and still looks good. Rustoleum yellow on the rocker covers and plenum and gunmetal on the alternator mounting bracket. It takes a couple of days to harden properly so a slow job. Sanded off like the others above and then clear coated them all with Halfords own brand to give a shine and a lot easier to keep clean
Before:
and after:
Transformed thee ole girl Before:
and after:
 bit of yellow in a black engine bay looks well
 nice colour, we'll get into trouble this being a Chim forum an' all, even though the engines are related.
Sardonicus said:
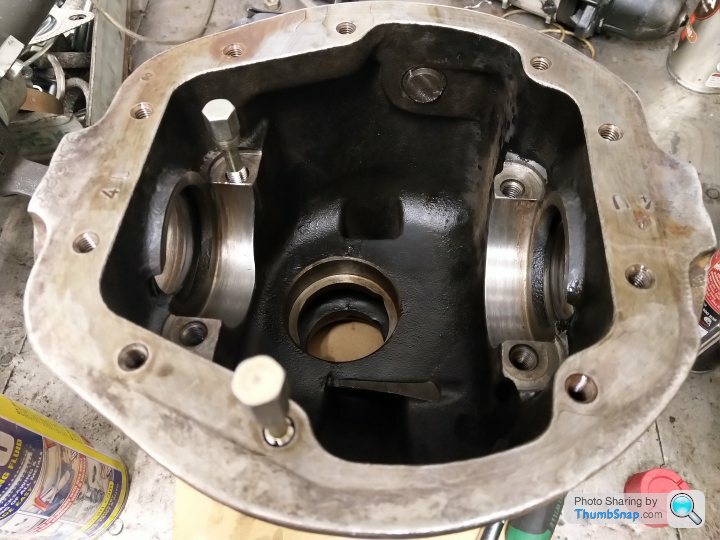
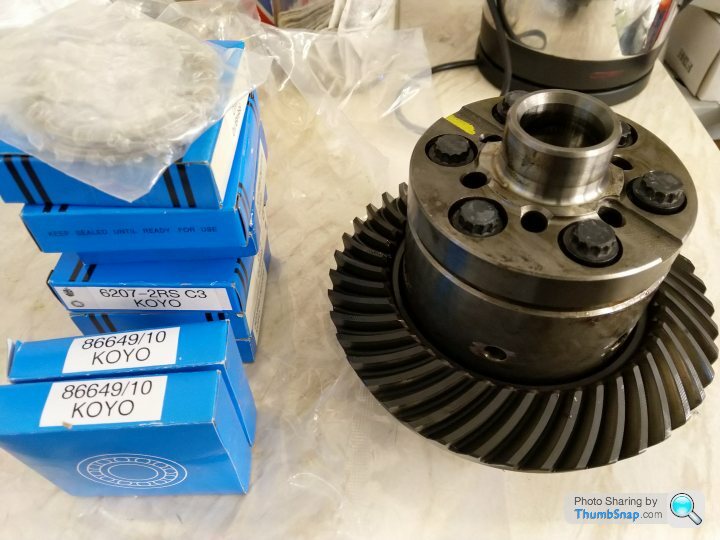
Taken over 10 years to get a start on this spare GKN diff I bagged initial and during the rebuild I have found that these are poorly set-up from the off no wonder excess drive-train lash is often a common complaint on these cars , truth be known I could of got away with just 2 pinion bearings and a set of seals in this one but that's just not me  set-up loose like they are inc the one thats currently fitted wont ever cause problems apart from noise and lash and I believe thats how they was sent out I have witnessed enough GKN fitted TVR's both low and and high mileage lash may not be consistent but still excessive IMO and this can be sorted
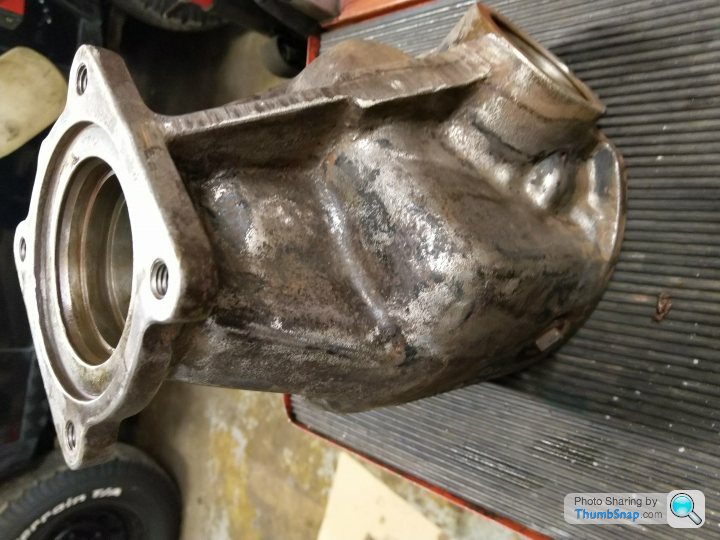

set-up loose like they are inc the one thats currently fitted wont ever cause problems apart from noise and lash and I believe thats how they was sent out I have witnessed enough GKN fitted TVR's both low and and high mileage lash may not be consistent but still excessive IMO and this can be sorted  Good work bloke.

Gassing Station | Chimaera | Top of Page | What's New | My Stuff