Another body off thread.
Discussion
Classic Chim said:
Steve_D said:
Keep going Alun..... took another body off this morning.
Steve
Your stamina astounds me Steve. All the bending and leaning over does for me in no time which is a real pity as I love it really. Steve
Thanks I need all the encouraging I can get. Back on it tonight, last corner to remove.
Then Dif then ,,,,,,,,, it goes on forever

Steve
Good progress this evening.
Steady but wins the race
All 4 corners are now off, brake and fuel lines out, prop shaft off, all Dif fixings are out bar the shouting, just need a hand while I hold and shift the Dif out of chassis.
Steering rack out.
All wishbones and brackets off ready for blasters.
Top chassis rails are ok. Phew.
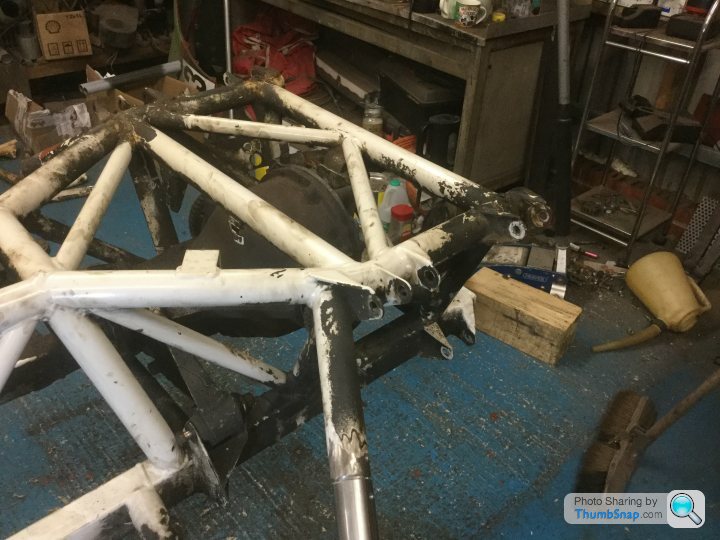
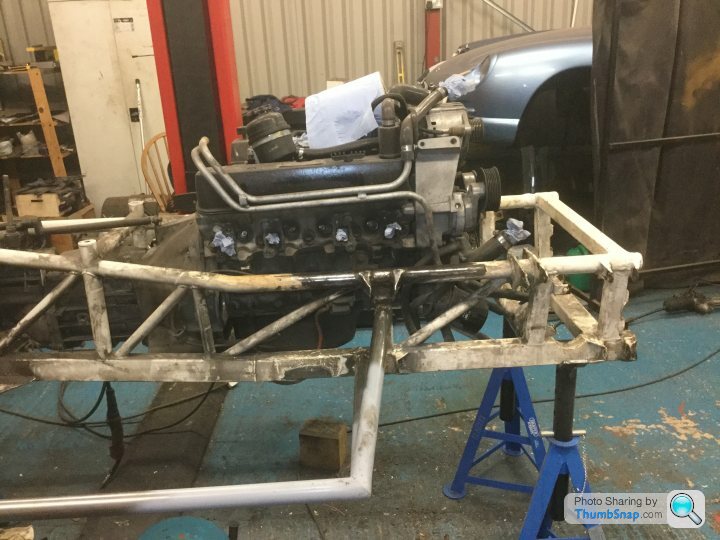

Steady but wins the race

All 4 corners are now off, brake and fuel lines out, prop shaft off, all Dif fixings are out bar the shouting, just need a hand while I hold and shift the Dif out of chassis.
Steering rack out.
All wishbones and brackets off ready for blasters.
Top chassis rails are ok. Phew.


QBee said:
Great progress Al - keep going.
Thankyou Anthony I will. 
On axle stands Steve but I’d already thought about that, lift legs should just reach main rails to lift chassis right up

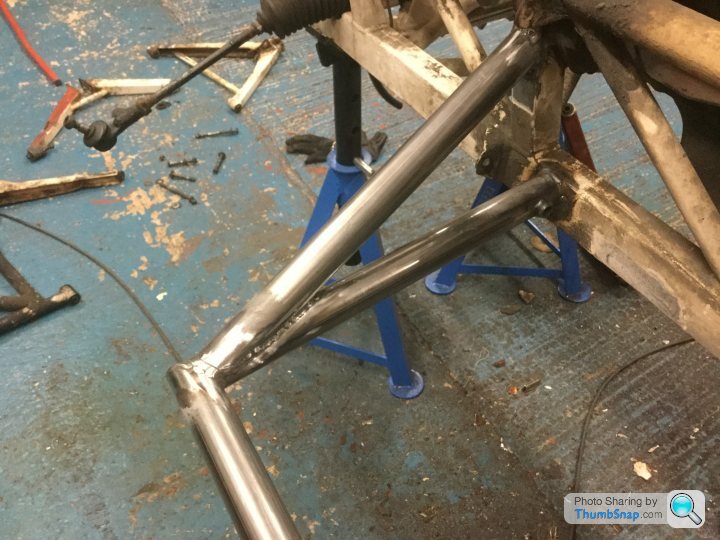
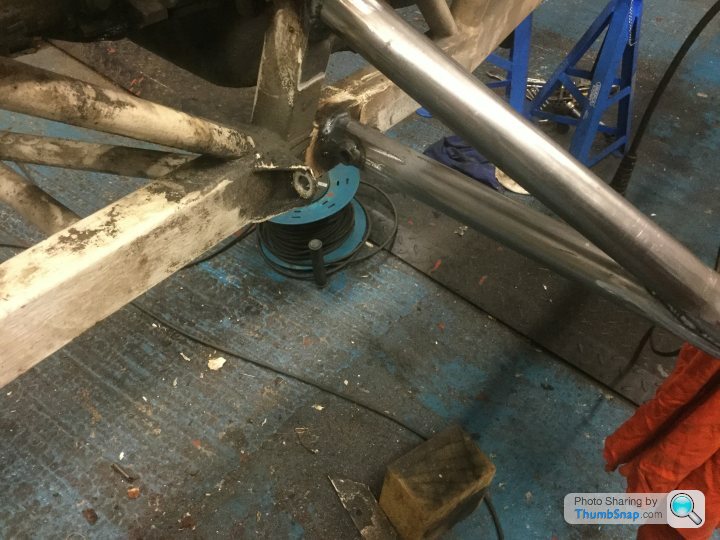
Rear tubes have been sleeved, pinned and a nice weld around chamfered gap.
Some plates to make up and riggers will be almost done.
Awaiting delivery of 7/16 threaded anchors and that will be that.
I have a tonne of jobs to do starting with carefully drilling out what turns out to be one front chassis bolt and one seat anchor bolt.
Thanks for the tips re brakes, got cables off in minutes tonight, dunno what was wrong with me

Frank the Allen keys have been really helpfull, thanks.
A few days a go I was slightly overwhelmed by just what a massive job this lot is. Today thanks to Peter High helping me install a new Dif in the past I happily removed right rear corner and everything around the Dif with some confidence.
I know this car and every single bolt now, not sure I’ll feel the same a few weeks down the line but again thanks to a great tip from Alan I’ve got tubs and tubs of bolts and washers, all indexed with a marker pen on the lids..
finding stuff later, this is a great tip.. I need more of them

Paint, gold heat proof tape, fuel lines, brake lines,rear pads, R9 fuel hose and clips all ordered up.
We’re cooking here lads.
I had a really thoughtful jesture of Dom at Powers today. You can’t get a better bunch or car to work on.
It’s emotional boys, all alone in such a quiet place with just me and it,, f
 king Christine comes to mind!
 Thanks so much for encouraging me, it’s real hard graft doing all the disassembly yourself but if anyone else helped I’d not know how to put it together so it’s better this way, I concentrate and stop talking

Edited by Classic Chim on Wednesday 18th December 00:13
Classic Chim said:
Other than a grinding disc scuffing a knuckle off I’ve survived this far 


 [url]
[url]
 |https://thumbsnap.com/d7kwIswy[/url]
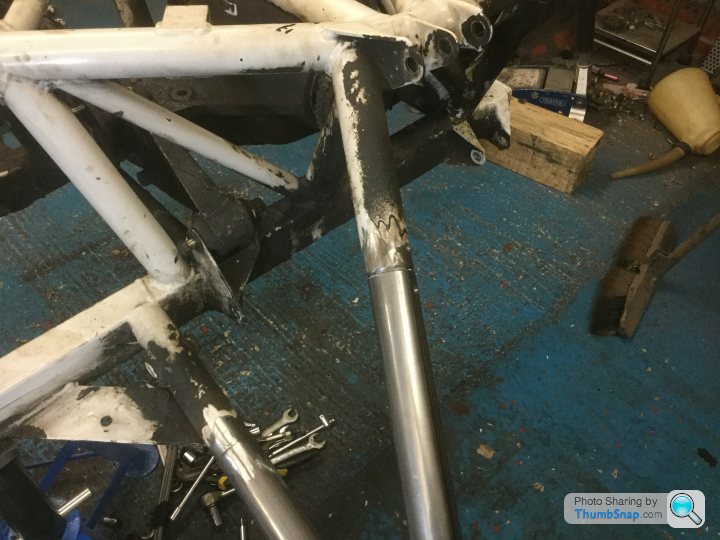
Now that's what I would call a proper job. The only way to weld out-riggers on to a chassis. Nice work Alun. 


 [url]
[url] |https://thumbsnap.com/d7kwIswy[/url]
Edited by Classic Chim on Tuesday 17th December 23:35
Edited by Classic Chim on Tuesday 17th December 23:37
Same tube as used for riggers, slot cut down it, squeezed tight, tack welded into tubes about 3 inches either end. Holes drilled and pinned. Then a nice weld around the new joint.
This on rear chassis to rigger tubes only the rest to chassis direct.
No inner tube protection, theoretically with good welds it’s closed off to the atmosphere.
I have one saving grace, as a young kid and well into motorbikes and racing, winter was always about preparing for next year so garages were always busy, that need to get it done and be ready for the first race meet of the season, all very exciting back then, I remember for years I’d feel a bit lost in winter with no bikes to prepare, this fills that gap and something I always planned to do as that young boy,, build a car one day.
Luckily for me Peter Wheeler came along and produced such a toy.
So for me this is mostly therapy

ChimpOnGas said:
Looking really good Alun, fantastic progress mate 
I don't think my guy has even started on mine yet
Keep the photos coming

I don't think my guy has even started on mine yet

Keep the photos coming


I only started this because I thought I could tag along on your lift so as to learn, fat good that idea was.
I had 3 days off the car last week and only about 5-6 hrs a time when I’m at it but I’ve been lucky in having very few stuck parts which saves a lot of messing about.
Having what is a valuable garage and expensive lift at my disposal has saved so much graft but it does add a level of pressure which overall is a good thing. I can’t just skive off

QBee said:


Are you sure you're still the same Alun we know and love?


In this case I’m having to process and store a lot of information,, which for my brain a real overload,, quietly contemplating it as I go along keeps me focused.
Such a daunting task but in less than 3 weeks I’ve got this far so considering it's kind of part time work I’m doing well I believe.
On your own it takes a lot of time.
Now I’ve sussed it out I’d happily work with someone else 2 = half the time.
Frank helped hugely with wiring early on when my nerves were shot lol but even that is logical.
It’s really great to become so personal with the car, that for me is where I’ve gained a lot of confidence, I never thought I’d see the day to be honest.
Great stuff.
ChimpOnGas said:
I'm really enjoying this post 
Alun, you're moving at such a blistering pace at this rate you'll be all done before my guy has even started on mine.
Respect
It’s not just me though, most of the marking out and fabrication for riggers was done with two guys at it, my friend has done a lot of prepping cutting tubes to a slight oversize ready for the welder. 
Alun, you're moving at such a blistering pace at this rate you'll be all done before my guy has even started on mine.
Respect

It’s moved along faster than I can take it apart so it’s caught me out, im now waiting for seat belt anchors

More than anything else my biggest fear was somehow bodging it and you lot slating me for it, No chance.

Positive feedback feels great so thankyou so much lads. It almost matters more than anything else, you know what your looking at

My gearbox linkage.
I’ve read there’s two versions of this, is this the later version, looks good to me.
I’ve marked the various bolt connection points.
I’ve not taken any notice of this area yet so a few questions if I may.
Well one, how do I remove this linkage so I can take engine and box out in one go. I’ve also marked the top bracket points where it bolts to gearbox which I’ll presumably remove once I’ve removed the linkage.
Looks fairly straight forward but i’n not near the car today so any tips would be divulged
Looking at the picture, do I need to remove gear lever,, my knowledge just hit a brick wall!
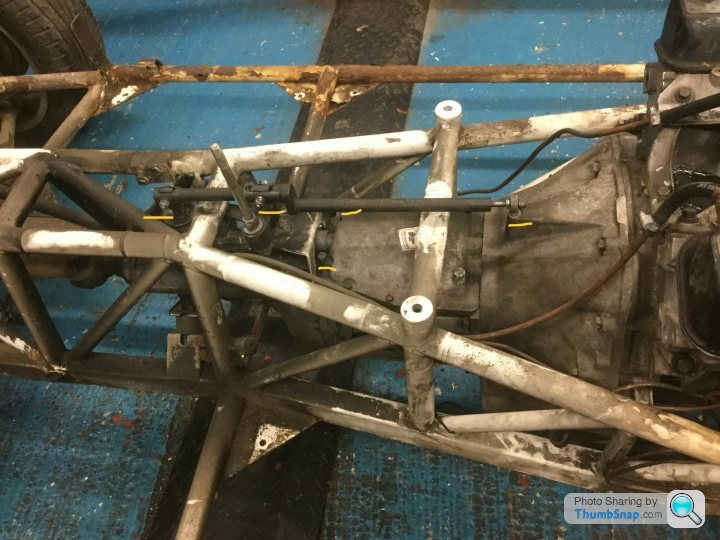
I’ve read there’s two versions of this, is this the later version, looks good to me.
I’ve marked the various bolt connection points.
I’ve not taken any notice of this area yet so a few questions if I may.
Well one, how do I remove this linkage so I can take engine and box out in one go. I’ve also marked the top bracket points where it bolts to gearbox which I’ll presumably remove once I’ve removed the linkage.
Looks fairly straight forward but i’n not near the car today so any tips would be divulged

Looking at the picture, do I need to remove gear lever,, my knowledge just hit a brick wall!

Edited by Classic Chim on Wednesday 18th December 17:04
Alun remove these two 13mm nuts (I've marked in shot) that front one will allow the shaft to slide back towards the linkage and the rear bolt and nut have 2 thrust plastic shims and an inner sleeve don't lose em, if you pull the prop you will lose the oil so mark the box as empty  you know where I am going here? it can happen and thats an expensive box to lunch bearings on
  time flies and things can get over-looked
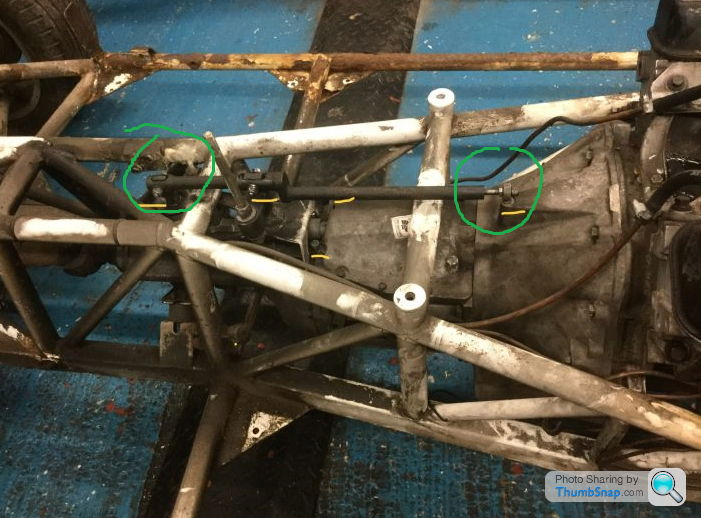
 you know where I am going here? it can happen and thats an expensive box to lunch bearings on
  time flies and things can get over-looked
Edited by Zener on Wednesday 18th December 17:52
Gassing Station | Chimaera | Top of Page | What's New | My Stuff


