Another body off thread.
Discussion


It would be if I could download pics and thanks Steve. Will do if needs must, by my reckoning the front half is nigh on all new just about so just a few brake and fuel lines a quick touch up and its a good un.
Full chassis restore I suppose. Shouldn’t take me to long to find our but I’m not rushing either, I enjoy doing it.
Steve_D said:
When I put them back I cut a patch of rubber sheet and bond that in place with PU sealant.
When I took the 500 tank out there was a ball of sealant the size of your fist. At least half a tube...can't afford to do that.
Steve
Thanks for the tip. If it’s good enough for you mate When I took the 500 tank out there was a ball of sealant the size of your fist. At least half a tube...can't afford to do that.
Steve
 I actually think the car will be far better than when originally built.
Steve_D said:
Today's tips.
Will do re roll bar. Keep forgetting about that. - The front anti-roll bar clamps will foul the body as it lifts. Remove the clamps onto the chassis and the rubbers. Leave the bar in place but just cable tie it back against the chassis then it will clear. You will do the reverse of this when you rebuild the chassis.
- You have to disconnect and untangle all the engine bay wiring. When you have done this you can pull the whole lot (including the starter positive cable) over towards the nearside where it is just one branch coming out of the bulkhead. Get a strong poly bag and stuff the whole loom into it and finally tape or cable tie the bag shut around the loom branch as close the the bulkhead as practical. Reason for this is that all that wiring will try and snag on the engine as you lift the body. With it in the bag you can just lay it on the engine and it will come clear as the body comes off. Second reason it that if you have it taped/tied right close the the bulkhead then you know you cant have missed any (engine bay) wires apart from those that come backwards under the car from the loom under the rad.
Funnily enough I had Frank with me today so we concentrated on removing cable ties and freeing up all the wiring on both sides of the block, crank sensor and gearbox etc
Removed plenum and unplugged injector/ temp wiring etc on both banks.
Franks knowledge helped me along nicely so thanks Frank
Only a few hours really as it was rather chilly today.
Still it progresses along, being my first and only time I’ll be doing this I want to saviour it and remember what I’m doing so taking time over it allows my mind to cement it all to memory.
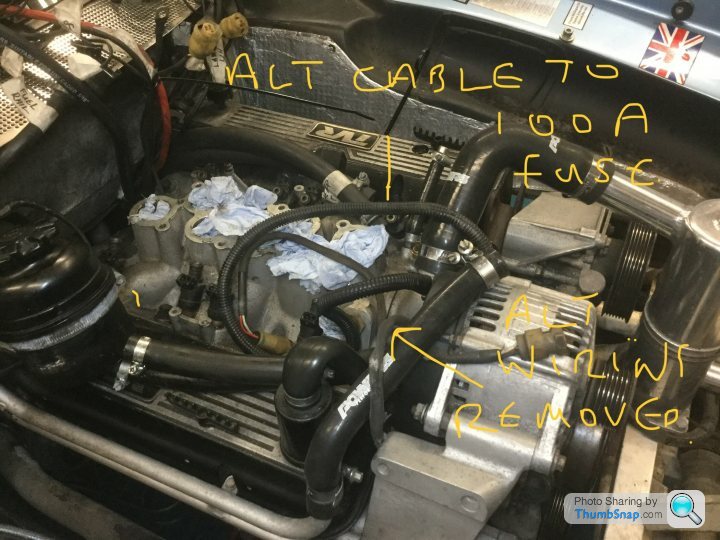
Taking pics of my wiring loom as it’s an MBE one won’t help others that much I’d have thought
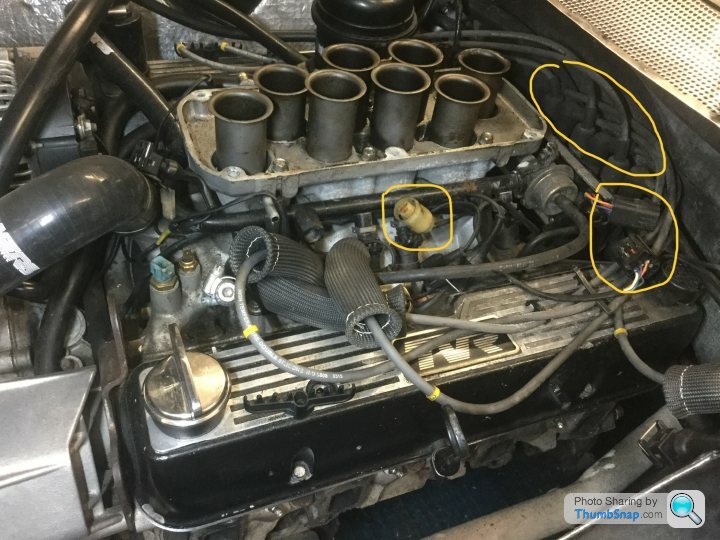
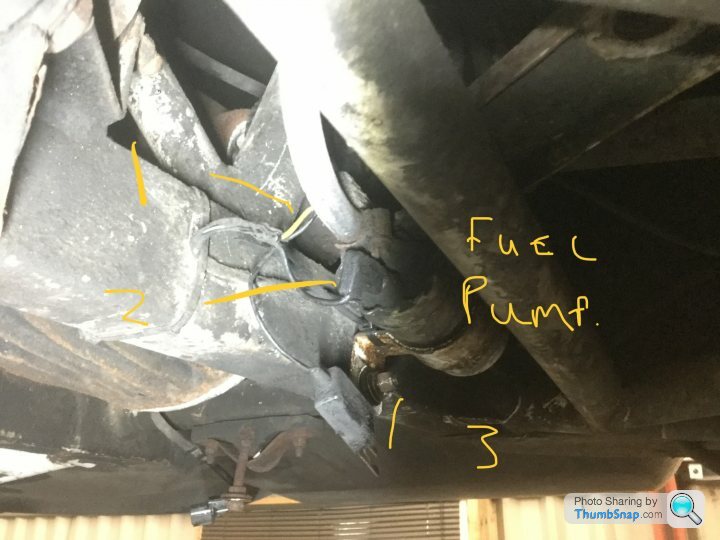
Here’s one anyway showing n/s lambda connector, the other end which goes on down side of chassis to another connected then onto lambda simply pulls out to the left.
Top right circle are my coilpacks
Bottom right ( can't remember what this one does ) so if someone can enlighten me.
I’m going to remove plenum base just to make pulling wiring through easier and easier to take a pic of it’s orientation.
I remember setting out my CUX wiring loom on the floor one time which in itself has been useful as really there’s not that much to remove and much of it self explanatory, I’ll label up which side is which but again it becomes fairly obvious what goes where. I have been all around the engine bay on both mine and Franks car which also helps as I feel familiar with it.
I will make a check list of the order I’ve done the job when I’m finished removing body.
I’ve used a couple of past threads to make notes and a basic abc and pretty much followed it so I’m doing it in the usual order.
Tomorrow tie up some loose ends and finish off chassis bolt removal if all goes well. Not long now and I’ll be in a position to lift body off.
Oh and Lance / Steve this is all very valuable info. Thanks.
PS this engine has done 25,000 miles or there abouts since Dom refreshed the engine, can you notice how clean the trumpet base still is. Still tight as a drum

Edited by Classic Chim on Monday 2nd December 19:40
Edited by Classic Chim on Monday 2nd December 19:53
Back on it today.
Finished grinding off floor chassis bolts and knocked them out, including two chassis bolts that sheared off, one front chassis n/s so below rad and both o/s seat belt into chassis and rigger, using cutting disc. I might have enough on the bolts to ease them out when body is off or I’ll just drill them out.
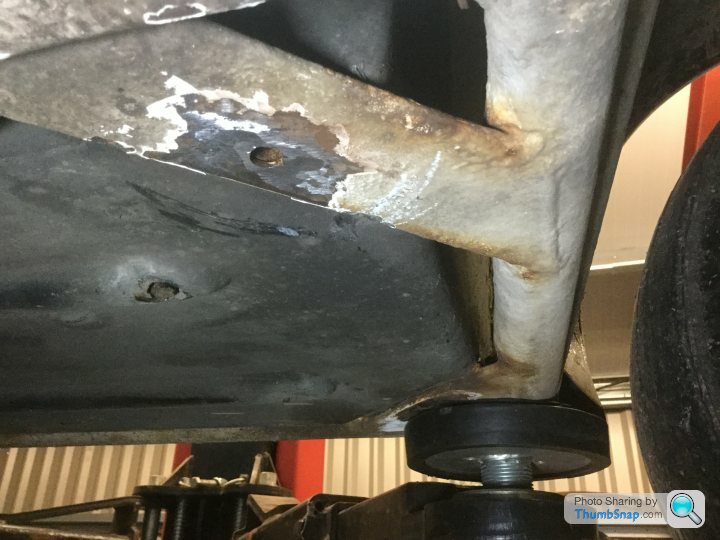
N/s front chassis below rad
Removed centre console and both transmission tunnel chassis bolts ( both have 2 earthing cables attached )
N/S
O/S still attached
So that’s all chassis bolts removed,,, I think
Finished grinding off floor chassis bolts and knocked them out, including two chassis bolts that sheared off, one front chassis n/s so below rad and both o/s seat belt into chassis and rigger, using cutting disc. I might have enough on the bolts to ease them out when body is off or I’ll just drill them out.
N/s front chassis below rad
Removed centre console and both transmission tunnel chassis bolts ( both have 2 earthing cables attached )
N/S
O/S still attached
So that’s all chassis bolts removed,,, I think

TJC46 said:
This could be very useful, also page 35 has a diagram of all the chassis bolt locations.
https://tvrcarclub.de/wp-content/uploads/2016/12/T...
Excellent and thanks. https://tvrcarclub.de/wp-content/uploads/2016/12/T...
The more info the merrier.
I’m trying to keep things simple and only removing what I need to, I nip any clips back onto hoses etc so they are the same ones going back on, I can’t be doing with a box of odd bits months down the line.
ETA putting your clips back on the way they came off means there orientation is close to correct when re installing, lining up hose clips so you can get a spanner on them takes ages and then you realise another hose blocks the one you’ve just put on,, keep the clips the right way round and nipped on their hoses your half way there
I’ve also taken the advice in using plastic containers and a marker pen to store all bolts and anything that’s loose.
I’m going to get some labels for engine wiring harness, decided I’ll forget what goes where so it’s mostly disconnected but before I remove anything I’ll mark it all up.
Such fun
Edited by Classic Chim on Thursday 5th December 00:00
Edited by Classic Chim on Thursday 5th December 00:01
motul1974 said:
Yeah, bodies on with only 4 bolts though, and 'most' of gems loom is attached....except for the complicated bits! 
Ah I see, I forgot your going Gems,, mega  I thank my lucky stars I’ve got a new loom, easy to detach and so far seems very straight forward.
 I’m not sure what to do with my RR coil packs, or how to take them off even, I’ll seek advice off the pro’s at Powers
still look on the bright side, no dizzy or ign module/ coil wiring to untangle let alone no Stepper motor to consider Tomorrow I try and finish engine bay area off so will investigate a bit closer once heater and fuel pipes are detached.
I’m going to remove plenum base and fuel rail, I have a semi ported inlet manifold I might start looking at,,,Jacko
 ( racing joke between friends )
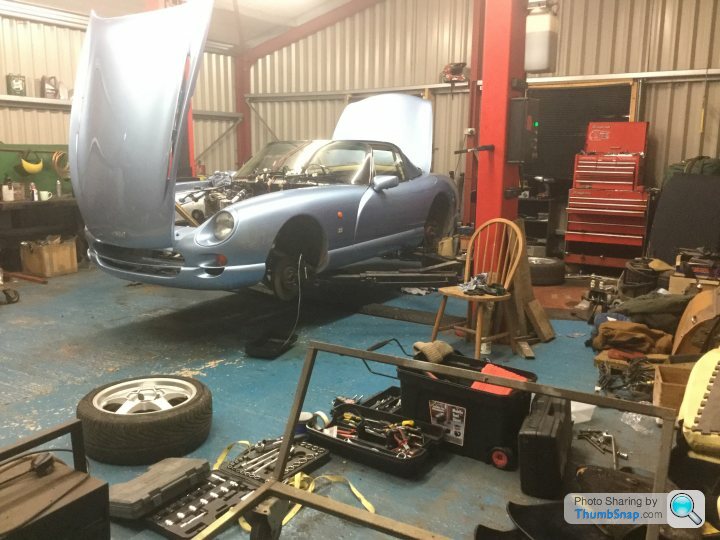
 I’ve got a fabulous garage to work in, miles from anyone, stream running past and so peaceful, I concentrate really well there, it’s a dream to be doing this if I’m honest.
My chassis looks much better than one might think,, I’m really undecided as to how or what I coat it with, or even if most of it needs doing at all, the Centre section is sound other than bottom rails, but maybe there’s rust above which is underneath powder coat. Hopefully it won’t be to long before we find out.
Edited by Classic Chim on Wednesday 4th December 20:12
Edited by Classic Chim on Wednesday 4th December 20:14
Edited by Classic Chim on Wednesday 4th December 20:38
Tyre Tread said:
Masking tape folded around the wires and back onto itself - use the blue stuff and its really obvious - loads of room to write info on rather than little tags
Written on my list this evening was masking tape,,,,, labels with a ? Exactly that, masking tape I can write a list of instructions for install later
My friend who owns the garage completely leaves me to get on with it but is also invaluable as he’s built loads of nice cars from scratch, proper wrecks so he’s not phased by anything, gives me confidence so it does.
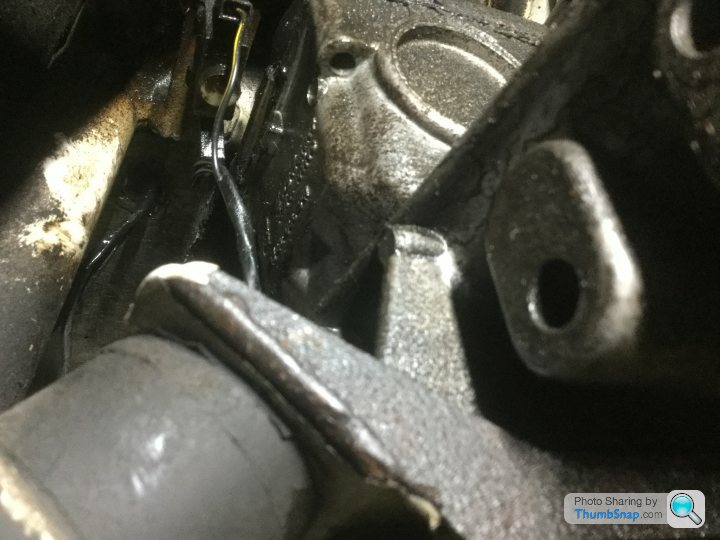
Sunday as I was getting on he was playing with this baby. Race car. From dust off the floor this thing came back to life, incredible,,,,,, except the picture won’t load up, grrrr
Mk1 Lotus Cortina with all the trimmings, it’s taken some time as it’s a friends car he’s building on their behalf. Brand new really, the cost of a race engine rebuild io one of these,,,,,,,, more than my TVR is worth

I’ll try adding pic another time as it’s a special car.
I’ve unplugged what I assume is the reverse switch from the side of the gearbox,, big black round rubber cover.
I’ve done steering joints in the past, both quite new, I’ve always had to loosen the rack to get shaft free Steve
I have to loosen it anyway as I routed the front nose wiring back the wrong side ( purposefully ) some time ago , it looks tidy but I can’t pull it through as the gaps to tight
lesson learnt. Brakes clutch I’m ok with.
Handbrake, hmmm, from underneath the car? I’m doing it last or when I’m feeling in a good mood, not looking forward to that for some reason.
Thanks that list is great mate
Kind regards Al
Edited by Classic Chim on Thursday 5th December 00:03
TV8 said:
I have t seen any really bad rust yet Al, hopefully it stays that way.
Hi Graham Plan for the worst, hope for the best.
Good from far but far from good
This is the best fun I’ve had in ages,, I must get out more,,,
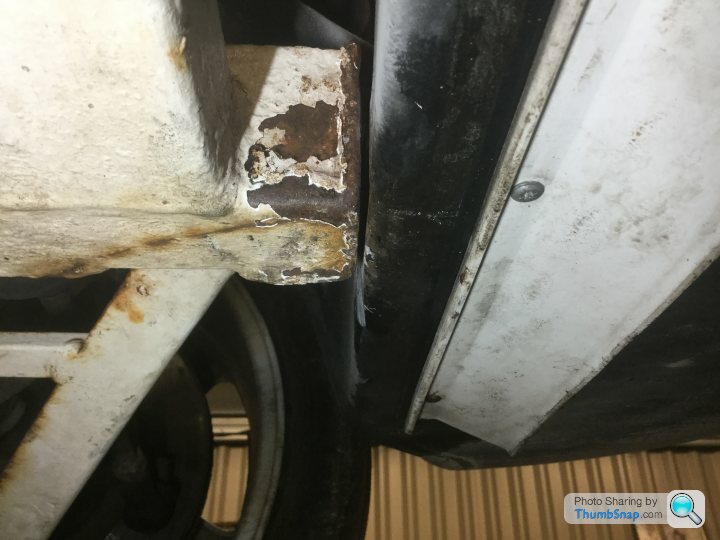
I know for a fact the front offside out rigger has a hole, a small hole but it’s paper thin around it.
It’s simply a case of my body sitting so close to the outriggers crud has been up there 20 years, you can’t get at it so it just sits there. The out tubes and diagonals are all solid steel as I’ve rubbed them back before,,, if the riggers had better protection from day one they would still be solid.
My car had done 38,000 miles with one owner over 10 years so around 3000 odd a year, but in Scotland I believe ( I never met him) I’ve had it 10 years and hammered it
all weathers, it’s now on 75,000 miles, other than riggers it’s newer than at 38,000 miles It’s such a joy to do this.
New life in the old girl.
Edited by Classic Chim on Thursday 5th December 00:34
TV8 said:
Great attitude as always! Good luck my friend. Not sure if anyone has asked the question on here (seen it on Facebook) about the reverse inhibitor switch.
Funniest thing in ages
Thanks mate, not yesterday, feeling a bit dicky so I was, in view of that Frank and I only removed water heater pipes, fuel pipes at rail, plenum base/ fuel rail ( which coil packs are mounted to so those as well ) labelled up wiring harness and pulled both left and right harness sides back so basically ready to go in a bag per Steve’s advice.
The weather has closed in and I’m not feeling great so I’m throwing a sicky
Question,
1. if I’ve freed off handbrake adjusters can I simply loosen cable and release it off the handbrake that way?
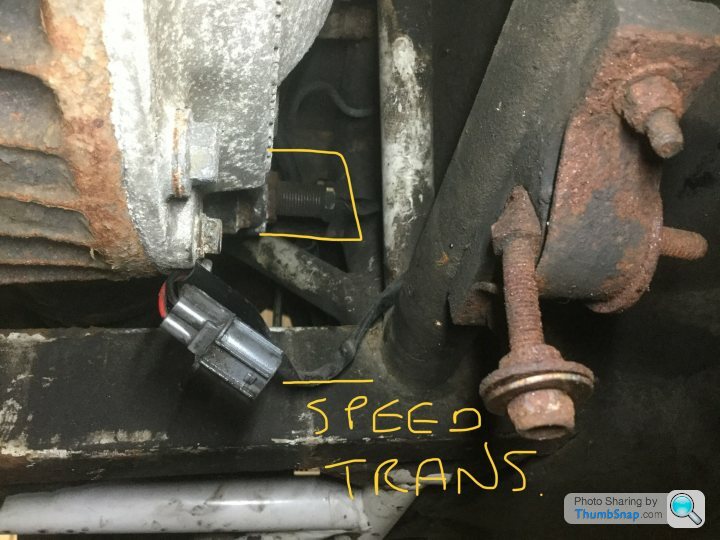
2 . Speed signal wiring from diff,,, I assume I just disconnect it there and jobs a good un? ETA that’s pretty pointless?
2a . Where does the speed transducer (black box ) behind speedo wiring come into the car and how do I disconnect it from chassis. Hang on,, cut cable ties along chassis to connector at Dif and lift body with that free to go with it..
I think I’ve answered my own question, it’s difficult when I’m not near the car to just check! 3 . Has anyone tried bungs on 4 way connector block when disconnecting to trap fluid in both master Cylinders I’d love to avoid bleeding these cyl from dry if possible
Another important task was to remove an MGB body off trolley so again thanks to Frank coming over made that possible
About 20 hours in total working time ( but I do know the car after 10 years ownership so not a total beginner but you can factor in plenty of head scratching time )
I’ve got big axle stands, lift and a trolley waiting,,,, it’s very exciting if a bit stressful
Just a bit more going round checking what I’ve done then
Steering disconnect PS remove pipes off rack and drain
Brakes and clutch drain and disconnect from o/s body 4 way junction
got to be nearly there then
Edited by Classic Chim on Friday 6th December 10:18
Edited by Classic Chim on Friday 6th December 12:21
Edited by Classic Chim on Friday 6th December 13:42
Steve_D said:
Classic Chim said:
.......1. if I’ve freed off handbrake adjusters can I simply loosen cable and release it off the handbrake that way?
Where the cable joins the lever it passes around a steel yolk but is captive in it so cannot be lifted off. There is a clevis pin secured with a split-pin which secures the yolk to the lever you simply remove these.
Classic Chim said:
.......2 . Speed signal wiring from diff,,, I assume I just disconnect it there and jobs a good un? ETA that’s pretty pointless?
The sender has about 300mm of cable to a connector. Undo the connector. The cable goes up through the body above the chassis so just leave it hanging down but in a position where it will not snag as the body comes off.Steve
Same with speed sender, I eventually worked the obvious out
thanks again for your input. Ric, love that trick with the brake pedal,, that’s never going to be forgotten.
And Alan, yes I’ve decided to drain brakes fully before undoing connector block. Gravity over night should do the trick. Same when refilling.
Hi Simon, yep well on the way
Dom rebuilding engine, Peter’s number 3 son
doing clutch and between Peter and myself the diff,,, ive not come across anything to tight, I’ve been lucky. Doing this on a 20 year old car that had never been pulled apart would be slightly more challenging I imagine. It’s been very good to work on, great car indeed
Edited by Classic Chim on Friday 6th December 18:13
TwinKam said:
'That trick with the brake pedal' also comes in real handy when you want to eg remove a caliper but have (unclampable) Aeroquip type flexis...
This is exactly what I took from this snippet of information, (pro’s trick ) if ever I’ve heard one. Saves a lot of bleeding if as you say your removing just one caliper only for maintanance or whatever.
I really appreciate this advice.
Talking about gravity fed, all brake bleed screws opened including clutch slave cyl and draining away nicely.
Steering column disconnected from rack.
Handbrake cable detached from handle.
Speed sensor disconnected and wiring un cable tied from chassis and tucked up where it feeds through body.
Wiring coming from front o/s headlight loom fed back and tucked up by radiator opening. This is actually carbon canister charge wire and oil pressure switch wire. Carbon canister hose disconnected. Decided going into wing was unnecessary, cut pipe and will use a two way connector in future.
All other wiring disconnected and tucked up around wipers for now.
I’ve been around whole car, it’s all free and ready to lift bar 4 way hydraulic connectors on o/s body, handbrake and that’s it far as I can tell
I’ve learnt the hard way not to tempt fate,,, maybe tomorrow I try and separate chassis from body. Wish me luck.
A few photo’s
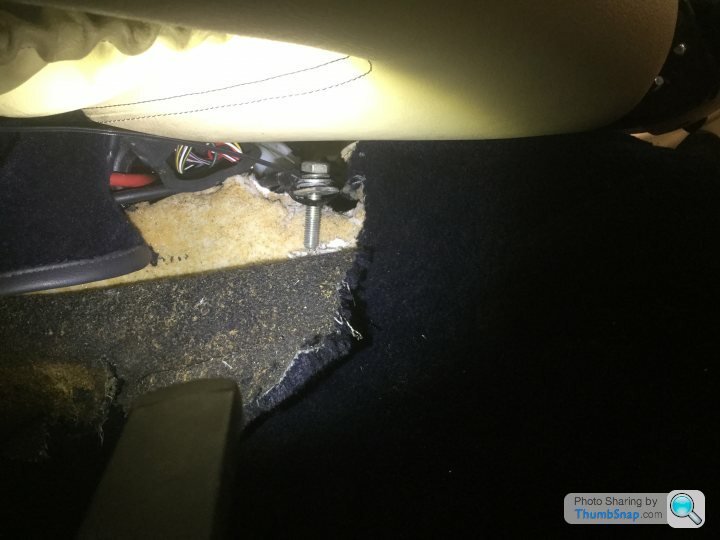
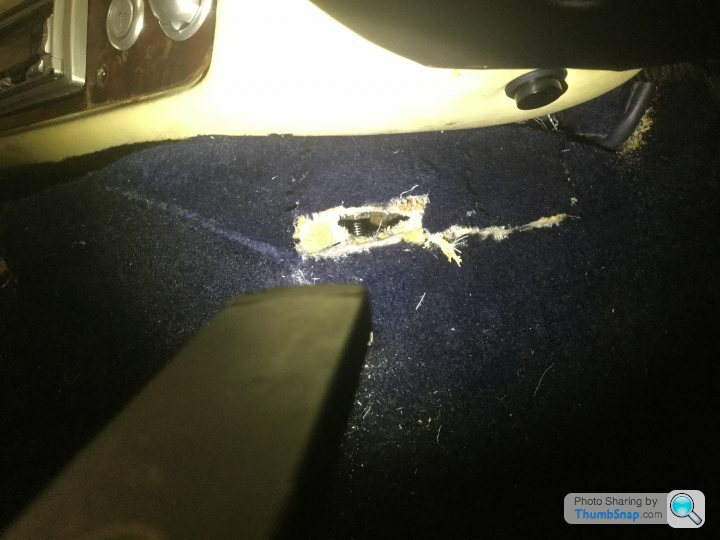
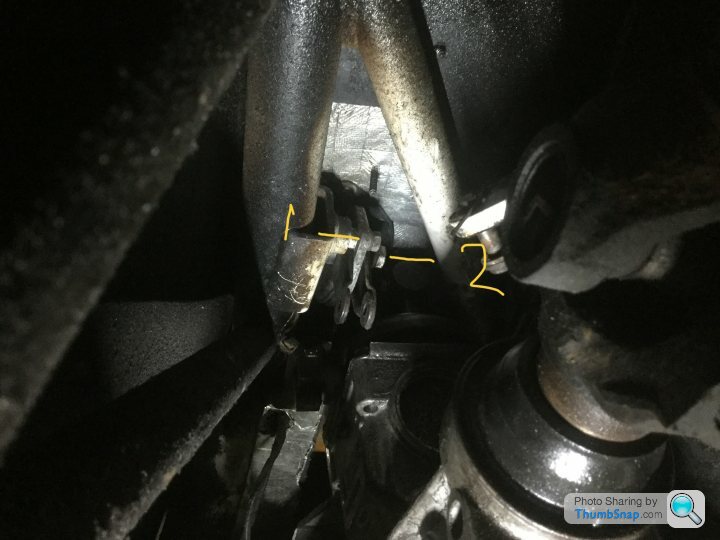
Question
1 handbrake has what looks like two retaining bolts to chassis, both marked in my picture, do both of these have to come out?
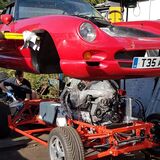
Speed sensor wiring
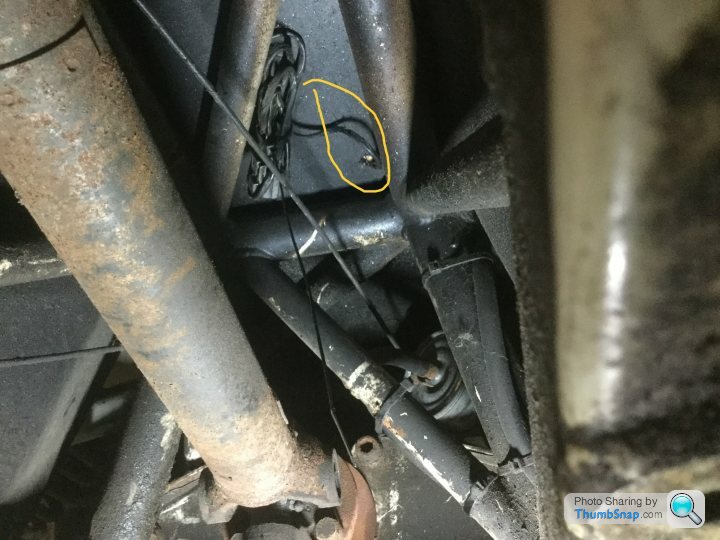
N/s earth point
Left and right side of wiring loom
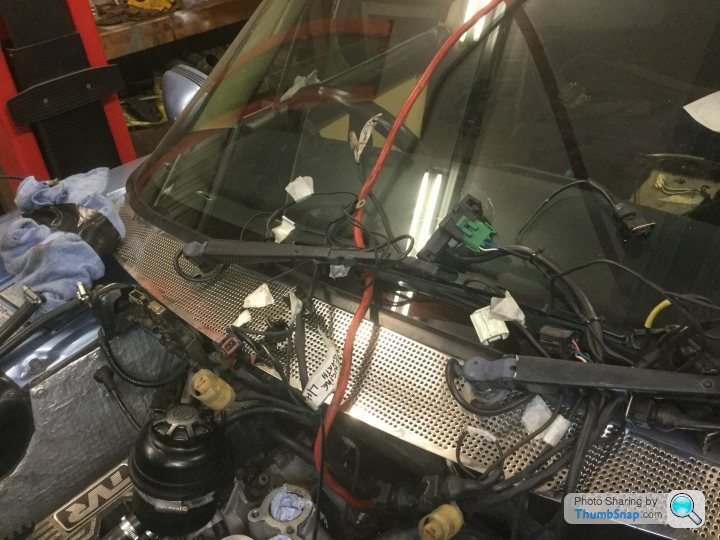
She’s ready,,,,,,,
Steering column disconnected from rack.
Handbrake cable detached from handle.
Speed sensor disconnected and wiring un cable tied from chassis and tucked up where it feeds through body.
Wiring coming from front o/s headlight loom fed back and tucked up by radiator opening. This is actually carbon canister charge wire and oil pressure switch wire. Carbon canister hose disconnected. Decided going into wing was unnecessary, cut pipe and will use a two way connector in future.
All other wiring disconnected and tucked up around wipers for now.
I’ve been around whole car, it’s all free and ready to lift bar 4 way hydraulic connectors on o/s body, handbrake and that’s it far as I can tell
I’ve learnt the hard way not to tempt fate,,, maybe tomorrow I try and separate chassis from body. Wish me luck.
A few photo’s
Question
1 handbrake has what looks like two retaining bolts to chassis, both marked in my picture, do both of these have to come out?
Speed sensor wiring
N/s earth point
Left and right side of wiring loom
She’s ready,,,,,,,
Edited by Classic Chim on Saturday 7th December 20:20
Edited by Classic Chim on Saturday 7th December 21:58
A few more for memory
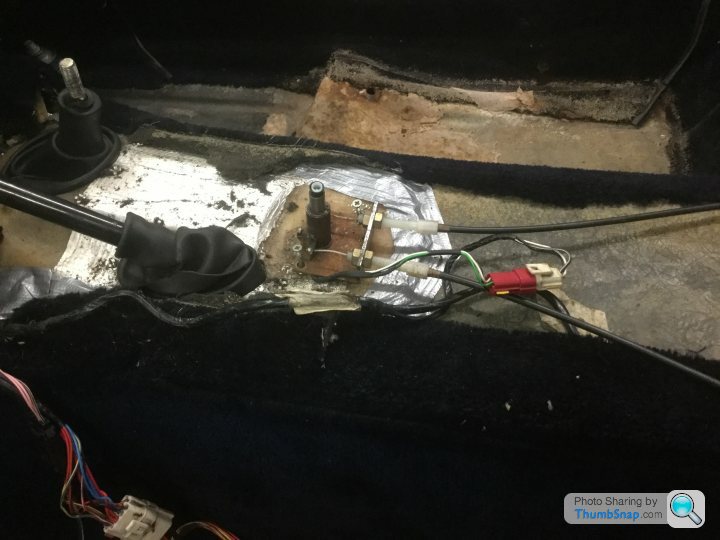
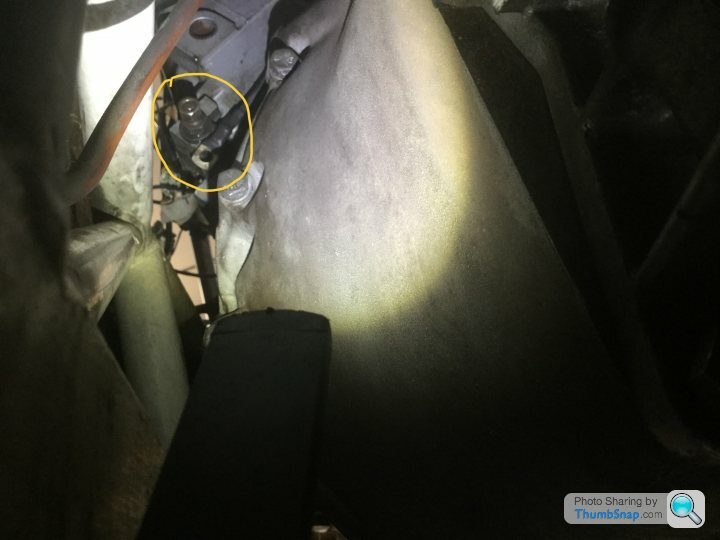
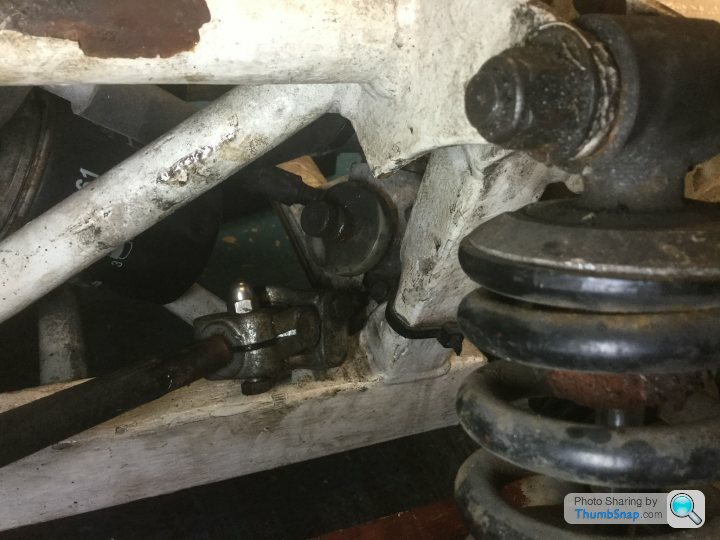
Steering shaft and rack splined shaft.
I had to knock shaft back towards steering wheel so forcing lower UJ ( shown in pic) back a few extra mm then loosen rack bolts enough to move rack forwards enough to then swear a bit pull and tug then eventually the two separate.
Steering shaft and rack splined shaft.
I had to knock shaft back towards steering wheel so forcing lower UJ ( shown in pic) back a few extra mm then loosen rack bolts enough to move rack forwards enough to then swear a bit pull and tug then eventually the two separate.
 ks and it’s easy,,,,
 Gassing Station | Chimaera | Top of Page | What's New | My Stuff