Another body off thread.
Discussion


Penelope Stopit said:
Classic Chim said:
I’m a soppy prat!
Something very simple keeps bugging me.
Drive shaft CV’s.
When reassembling not that I’ve taken them apart yet but do I pack them full of grease, like really ram it in there or do I leave space,,,
I have a wonderful ride in this car, I want to keep it that way so should I get as much of the correct grease in there as I can.
Seems obvious enough but I’m not into taking chances or allowing ignorance to ruin anything so I’m happy to ask such silly questions
Leave some space, main thing is pull them out close to max and get the grease in at the back, now push them in making sure they don't hydraulic, bang plenty more grease in at the front but don't completely fill.Something very simple keeps bugging me.
Drive shaft CV’s.
When reassembling not that I’ve taken them apart yet but do I pack them full of grease, like really ram it in there or do I leave space,,,
I have a wonderful ride in this car, I want to keep it that way so should I get as much of the correct grease in there as I can.
Seems obvious enough but I’m not into taking chances or allowing ignorance to ruin anything so I’m happy to ask such silly questions
Filled some last year from 3/4s to 7/8s full, got the boots and clips on and checked again that they didn't hydraulic, if they hydraulic will need to get working them in and out, done 10,000 miles and no grease has been chucked out past the boots
Alun, another question!!!
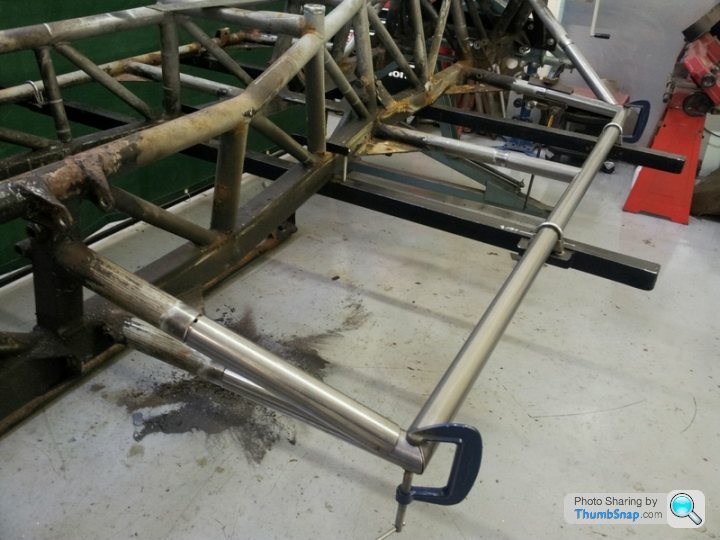
Regards what you found measuring for outrigger replacement.
I have set the chassis up on a large flat board with a view to screwing blocks on at critical places to align tubes, bolt holes, inserts etc forming a jig.
My question relates to the relationship between the chassis bottom rails and the bottom of the outriggers. It appears that these should lie on the same plane and that, since the rains measure 2 3/8" high and the outrigger tubes are 1 1/2" in diameter, if a straight ebge is place across the top of the rails it should stand 7/8" above the tubes.
Measurements I've taken thus vary between the said 3/4" and 3/8". The 3/8" point can be seen as a hump at the centre outrigger and may have been caused by jacking at that point, however on the other side the measurement is still 3/4" at the front to 9/16" at the rear.
I was wondering if you could take some similar measurements? I'm trying to understand the correct relationship here.
Dougal.
Edited by Dougal9887 on Wednesday 1st January 12:24
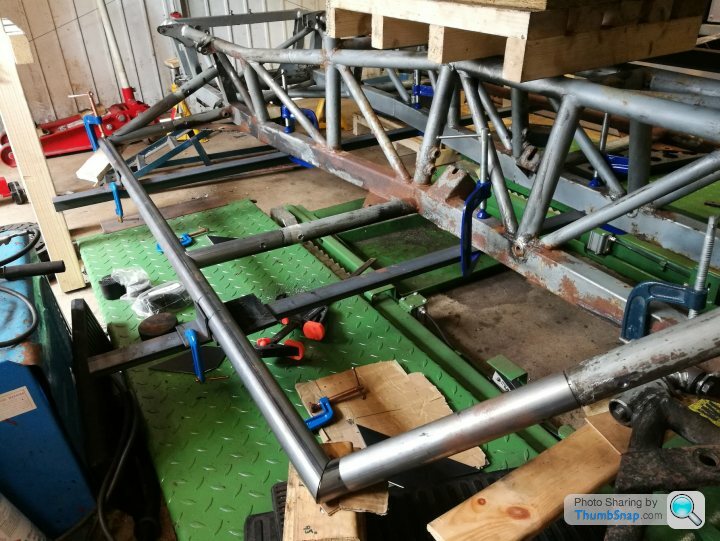
I've made a couple of corrections to my above post after further extensive measuring.
This is made more difficult by the fact that not all the oblong rails are welded up square! So a bit of averaging required.
I would now say that the base of the tube at the front lies 1/8" above the base of the rails and the rear lies 5/16" above the base. This gives a distance to a straight edge laid across the top of the rails of 3/4" at the front and 9/16" at the rear ie a 3/16" rise towards the rear.
Dougal.
Presumably there is some understanding within the community as to what the right answers are.
In don't know the cars In detail (interesting in the car, have a westfield) but from what you say I would be very supprised if it's intended to be other the flat to understand of the main chassis rails. Obviously once cooled it won't be to 1/16" (1.6mm) but should be there about.
Making a bit of a jig makes sense in terms of atleast making sure your body matches to the new outriggers even if there is some drill off variation, but the angle iron clamps in Hedgehoppers post look useful too.
ChimpOnGas said:
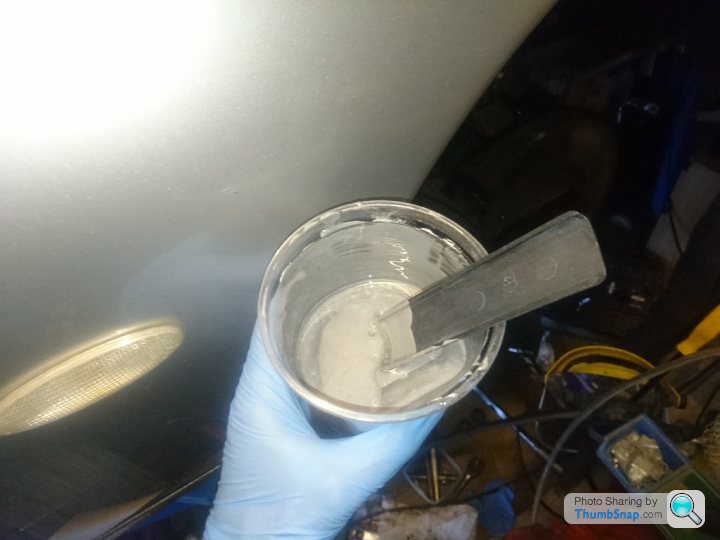
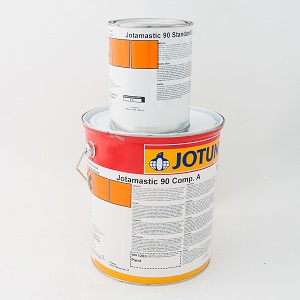
Its worth noting that Rustbuster do not make paint.... .....I suspect its Jotun's 'Jotamastic Smart Pack' product that also has a 1:1 mix ratio....
...The advantage Rustbuster offers the home restorer is they sell their EM121 Epoxy Mastic in smaller quantities, they also sell it with small quaties of the essential specific thinners to match....
....So I've ended up with 5 Litres of paint with a lot of thinners left over which in reality is going to be way more than we need, however buying it this way was £100.00 all in so for only £26.80 more than the 2.25 Litres you get with Rustbuster's 'Chassis Pack' ....
....Rustbuster EM121 Epoxy Mastic works out at £32.53 per litre while my better performing latest development Jotamastic 90 Aluminium came in at £20.00 per litre, any left over I will keep for touch ups ....
Very interesting post and makes a lot of sense....The advantage Rustbuster offers the home restorer is they sell their EM121 Epoxy Mastic in smaller quantities, they also sell it with small quaties of the essential specific thinners to match....
....So I've ended up with 5 Litres of paint with a lot of thinners left over which in reality is going to be way more than we need, however buying it this way was £100.00 all in so for only £26.80 more than the 2.25 Litres you get with Rustbuster's 'Chassis Pack' ....
....Rustbuster EM121 Epoxy Mastic works out at £32.53 per litre while my better performing latest development Jotamastic 90 Aluminium came in at £20.00 per litre, any left over I will keep for touch ups ....
I'm not overly familiar with 'epoxy mastic' but from the name and having read around it appears to be higher build than a normal epoxy aluminium (ie; very high build) and presumably softer, so less susceptible to chips? Similar to that used by the OEM production car manufacturers on the cills/underside.
We use two pack epoxy aluminium primer and acrylic urethane topcoat for our narrowboat, so very familiar with the downsides over everything coming in 5l minimum qtys.
What is the shelf life of the Jotamastic? Epoxy is often better but the urethane is knackered after 2-3years, no longer cures at all.
Daniel
Daniel
The outrigger tubes should not be level with the underside of the main rails.
The gap under the rigger does vary but is generally about 6mm.
Every chassis we do we directly measure and repair to those same dimensions. If the riggers are well rusted dimensions are often not relevant so we have to revert to 6mm.
Steve
The gap under the rigger does vary but is generally about 6mm.
Every chassis we do we directly measure and repair to those same dimensions. If the riggers are well rusted dimensions are often not relevant so we have to revert to 6mm.
Steve
Steve, thanks for the info on the tube heights relative to the rails. A least there's one thing we can rely on with our TVRs, they will all be a little different! Chassis is now jigged up so the new outriggers will go back as per the originals.
Alun, that maybe saves you another job!
The 7/16" threaded inserts I've got are 20mm o/d, the originals are 11/16" o/d (approx 17.5mm). Did you manage to get this original size?
Dougal
Alun, that maybe saves you another job!
The 7/16" threaded inserts I've got are 20mm o/d, the originals are 11/16" o/d (approx 17.5mm). Did you manage to get this original size?
Dougal
When doing mine I found that the lower of outriggers were around ~10mm higher than the bottom of the central chassis. I used two sections of angle clamped under the main chassis rails to measure before removing the old outriggers, and some shims on top the angle under the new outrigger tubes to get the heights while welding.


dhutch said:
ChimpOnGas said:
Its worth noting that Rustbuster do not make paint.... .....I suspect its Jotun's 'Jotamastic Smart Pack' product that also has a 1:1 mix ratio....
...The advantage Rustbuster offers the home restorer is they sell their EM121 Epoxy Mastic in smaller quantities, they also sell it with small quaties of the essential specific thinners to match....
....So I've ended up with 5 Litres of paint with a lot of thinners left over which in reality is going to be way more than we need, however buying it this way was £100.00 all in so for only £26.80 more than the 2.25 Litres you get with Rustbuster's 'Chassis Pack' ....
....Rustbuster EM121 Epoxy Mastic works out at £32.53 per litre while my better performing latest development Jotamastic 90 Aluminium came in at £20.00 per litre, any left over I will keep for touch ups ....
Very interesting post and makes a lot of sense....The advantage Rustbuster offers the home restorer is they sell their EM121 Epoxy Mastic in smaller quantities, they also sell it with small quaties of the essential specific thinners to match....
....So I've ended up with 5 Litres of paint with a lot of thinners left over which in reality is going to be way more than we need, however buying it this way was £100.00 all in so for only £26.80 more than the 2.25 Litres you get with Rustbuster's 'Chassis Pack' ....
....Rustbuster EM121 Epoxy Mastic works out at £32.53 per litre while my better performing latest development Jotamastic 90 Aluminium came in at £20.00 per litre, any left over I will keep for touch ups ....
I'm not overly familiar with 'epoxy mastic' but from the name and having read around it appears to be higher build than a normal epoxy aluminium (ie; very high build) and presumably softer, so less susceptible to chips? Similar to that used by the OEM production car manufacturers on the cills/underside.
We use two pack epoxy aluminium primer and acrylic urethane topcoat for our narrowboat, so very familiar with the downsides over everything coming in 5l minimum qtys.
What is the shelf life of the Jotamastic? Epoxy is often better but the urethane is knackered after 2-3years, no longer cures at all.
Daniel
Daniel
Galvanic corrosion occurs when two metals of a different electrochemical make-up are placed in contact with one another and here's the imortant bit... with an electrolyte present such as water or worse still salty water. Depending on the atomic structure of the two metals, one metal is the anode and the other is the cathode. The anode corrodes more rapidly than it would by itself and the cathode corrodes at a slower pace than it would by itself. The reason zinc is used for galvanising is because it has an affinity towards being the anode when in contact with many different types of metals, when the subtrate is steel aluminium performs as the anode very nearly just as well as zinc but you can suspend aluminium (as a powder) in paint easier than you can zinc .
The Jotamastic 90 epoxy mastic paint I'm using is market leader Jotun's very latest development of their well respected Jotamastic range that (in the 87 form) has been around for over 10 years now, the new 90 is available with or without the anode element of aluminium but I'm reliably informed if its being applied over steel the new 'Jotamastic 90 Aluminium' product is currently the ultimate epoxy mastic paint system. Whats often overlooked however is it doesnt matter if you hot dip galvanize, hot zinc/aluminium spray or use a paint system with an anode element within it, none of it starts working until the two metals of a different electrochemical make-up are placed into contact with one another and there's an electrolyte present.
That last highlighted bit is very important and often overlooked, the fact is if you paint or powdercoat over an anode protected substrate the anode protection is doing nothing, the truth is it's just sitting there waiting for a beach in the barrier layer like a chip in the powder coat (common) at which point the all important electrolyte is introduced and the 'sacrificial corrosion' process starts. The thing about coroision (even sacrificial corrosion) is it produces oxides of whatever is coroding, oxides of anything including zinc or aluminium oxide from your anode protection are no different to iron oxide in that they are volumious so as they build they will lift pwder coat in exactly the same way as rust does.
So you galvanize or hot zinc spray your chassis before top coating it, you then hope the top coat never gets breached because when it does the sacrificial corosion process starts and will soon produce the volumious oxides that will eventually lift your top coat, this much worse with powder coat because powder coat is whats known as a secondary bond. As a breach is made in a seconday bond barrier system like powder coat the two surfaces come apart easily and seperate cleanly, we have all seen this, its where the powder coating falls off in sheets revealing the oxidisation underneath.
Epoxy mastic paint is different, it creates a primary bond with the substrate on a molecular level so after it becomes completely cured (which will take upto three months) the molecules are fully locked together so creating extremely tough but flexible barrier coating system. This flexibility is key becuase unlike the brittle surface of powder coat it resists stone chips brilliantly, indeed to some degree epoxy mastic is actualy self healing and hopefully before oxides start to form beneath it, powder coat just can't do this!
But even if the system is breached by say a fast moving sharp stone and the electrolyte element gets in there before the paint self heals, with a primary bond system the substrate will only tend to corrode at that point, due to the primary bond oxidisation is unable to travel under the coating and cause the de-lamination we see with powder coat.
Because of this many chemists in the paint idustry argue a better solution is to carry the anode suspended and locked into the very molecular structure of the barrier system itself rather than aplying it to the substrate itelf as with galvanizing, this is especially true if you're only going to paint or powdercoat the galvanized substrate anyway. The anode element will still corode and produce oxides when its in contact with the disimilar metal substrate but again only when there's also an electrolyte present, but that's very unlikely as the molecular bond with 2k expoxy mastic paints are so good and if it does happen the paint's inherant flexibility is designed to take up the volume change from the oxidistation locking it into the barrier system.
In summary even when the sactraficial corrosion process starts, with a 2k epoxy mastic paint system containing a suspended anode (typically aluminium) it wont lift like powder coating is eventually going to, for all these reasons I went witth Jotun's latest formular Jotamastic 90 epoxy mastic 2k paint system but the one with added aluminium to act as the anode.
Theres reasons why powder coating is used on the chair and table legs in the ship's mess, just as there are reasons why 2k epoxy mastic paint systems are selected to paint the ship's hull

As you can probably tell I'm not a fan of powder coat
 , I'm clearly a 2k expoxy mastic paint fan boy
However, as with painting anything...Preparation is key...

Classic Chim said:
Corr blimey this 2 pack sounds like good stuff.
What I wanna know is have you mastered the 3/2-2/3 Clave for the Bossa Nova yet Dave. seeing as your in Brasilia
Excellent info
I'm just back Alun..... and feeling jet lagged What I wanna know is have you mastered the 3/2-2/3 Clave for the Bossa Nova yet Dave.
seeing as your in Brasilia Excellent info

My samba feet are getting better with every year that passes, it's just ya basic Bosa Nova played faster with every second eighth note on high hat missed out
https://www.youtube.com/watch?v=D85u364oY0s
My Brazilian family love it when the gringo dances samba, I'm a long way off this though

https://www.youtube.com/watch?v=DacRQm4Xq_g&li...
Back to paint.
You're welcome to share my Jotamastic 90 Aluminium epoxy mastic as I have double what I need, but it is either its natural silver/grey colour or tinted to red oxide and I suspect you're going with white?
You're also way ahead of me, but if you want it its yours, no charge mate
You're welcome to share my Jotamastic 90 Aluminium epoxy mastic as I have double what I need, but it is either its natural silver/grey colour or tinted to red oxide and I suspect you're going with white?
You're also way ahead of me, but if you want it its yours, no charge mate
ChimpOnGas said:
From the Jotun spec sheets thats pretty much the same shelf life I should expect with the stuff I'm using, TBH 5 litres is way more than I need
Epoxy mastic paint is different, it creates a primary bond with the substrate on a molecular level so after it becomes completely cured (which will take upto three months) the molecules are fully locked together so creating extremely tough but flexible barrier coating system. This flexibility is key because unlike the brittle surface of powder coat it resists stone chips brilliantly, indeed to some degree epoxy mastic is actually self healing and hopefully before oxides start to form beneath it, powder coat just can't do this!
As you can probably tell I'm not a fan of powder coat, I'm clearly a 2k expoxy mastic paint fan boy
However, as with painting anything...Preparation is key...
Interesting information and, yes aware the ali/zinc is for galvanic protection. Aware we are going slightly off topic but will reply none the less.Epoxy mastic paint is different, it creates a primary bond with the substrate on a molecular level so after it becomes completely cured (which will take upto three months) the molecules are fully locked together so creating extremely tough but flexible barrier coating system. This flexibility is key because unlike the brittle surface of powder coat it resists stone chips brilliantly, indeed to some degree epoxy mastic is actually self healing and hopefully before oxides start to form beneath it, powder coat just can't do this!
As you can probably tell I'm not a fan of powder coat
, I'm clearly a 2k expoxy mastic paint fan boy However, as with painting anything...Preparation is key...
The epoxy ali product we use is Leighs / Sherwin Williams Epigrip M902 which you can get 2l at a time (over coated with Resistex C137V2 on the cabin, Resistex M535 'blacking' on the hull) which comparing the spec sheets seems to give a similar film thickness, designed for brush application to hand prep'd surfaces, but cures to be reasonably hard rather than a softer finish, if very well stuck and not has hard/brittle as powder coat. Drying times also appear to be about 1/4 of the Jotamastic 90, which is great for working in a drydock in september but doesnt leave you much pot life at room temperature. It's also not colour-stable and yellows like more epoxies if exposed to light without a topcoat. We have also used their zinc based epoxy (5l min) and also Dacrylate 'Epidac 2 HB' which appears to cure to a softer finish. Currently we have a 300mm strip the M353 and the Epidac on the base-plate doing a real life abrasion wear test over the next four years. Obviously for stone chips it is all about impact resistance rather than abrasion resistance.
Eitherway, seems the Rustbusters and or Jotun is a good product and well suited the the job with or without a topcoat. it also appears you can tint it otehr colors, include black but perhaps not white.
Daniel (also a 2 pack fanboy)
ChimpOnGas said:
You're welcome to share my Jotamastic 90 Aluminium epoxy mastic as I have double what I need, but it is either its natural silver/grey colour or tinted to red oxide and I suspect you're going with white?
You're also way ahead of me, but if you want it its yours, no charge mate
Cant fault that.You're also way ahead of me, but if you want it its yours, no charge mate
Gassing Station | Chimaera | Top of Page | What's New | My Stuff