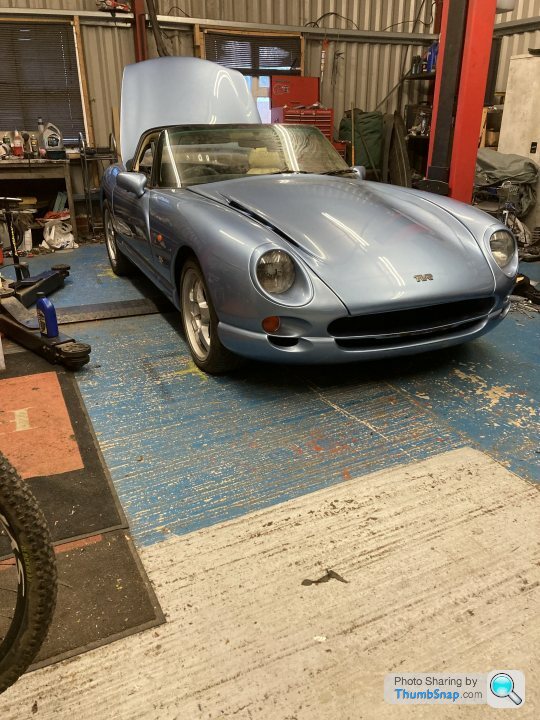
Another body off thread.
Discussion


lancepar said:
It joins the tank to the pump.

Instead of a big dollop of sealant I made a thin gasket to finish where the pipework goes through the rear bulkhead which I thought would look tidy.


Further reading.
http://www.bertram-hill.com/replacing-the-fuel-lin...
Thanks that’s really helpful and I was just looking at your post from probably a year ago now with your really nice gasket. Instead of a big dollop of sealant I made a thin gasket to finish where the pipework goes through the rear bulkhead which I thought would look tidy.
Further reading.
http://www.bertram-hill.com/replacing-the-fuel-lin...
Edited by lancepar on Tuesday 23 March 22:28
I have suitable material so will make one tomorrow


Zener said:
AF/Imperial  I have some Britool industrial finished sockets from the 50's ex MOD gifted by an uncle when I first started out in the 80's
Yeah I have some Britool industrial finished sockets from the 50's ex MOD gifted by an uncle when I first started out in the 80's Some of these are rare old beasts and forged so well all the jaws are still the correct size

I’m waiting on hyd hose delivery before 1 pm ? Then regardless off to do the afternoon / evening shift in the garage. Seal floor holes around seat belt anchors and tidy up lots of loose ends.
Does anyone have a spare FUEL PUMP BRACKET as mine has gone walk about in the last week ffs the last bit too. Try my patience or what. I will make one most likely.
Paul Goldstar said:
Thank you for that. Sorry for the minor hijack Alun.
How did you get on today?
Yes it’s fuel pump if it’s yellow and no bother re the thread. How did you get on today?
Started connecting up seat belt bolts so both reels are in place.
Tvr leak a lot from below. This might be why?
To be fair I had what looks like rubber grommets and mastic in these large holes but still.
So I’ve made up 4 rubber sections for the seat belt chassis bolts and another for the large hole the fuel tank hose comes through.
The idea is I now have a rubber backing pad to mastic to from the outside.
Fuel tank,pump,and all fuel hoses connected. Fuel sender connected.
Brakes bled. I have a rock hard pedal.
Do I need the servo assistance when doing brakes?
Anti freeze fuel injector clips as I forgot and a hyd pipe for clutch to fit and I’m close to putting exhaust and battery on.
Also replaced a couple of bolts for rear upper wishbones which were wrong.
I hope it runs tomorrow but I’ll mostly be looking for leaks and things before it moves under its own steam.


I can never get videos to work on here but then I’m hardly computer savvy.
So here we are 5 months in total but that’s with many weeks forced lay off and delays spread over 16 months just about.
Finish off adding fluids in engine bay
Put interior console and bolster cards in
Seats
Petrol
I’m not tempting fate so fingers crossed.
So here we are 5 months in total but that’s with many weeks forced lay off and delays spread over 16 months just about.
Finish off adding fluids in engine bay
Put interior console and bolster cards in
Seats
Petrol
I’m not tempting fate so fingers crossed.
phazed said:
I have been looking at 60's classic cars for a project.
Have you seen the prices for a pile of rust! Don't ever mention Fords from that era!
From any era. Fortunes wasted on the lot of em. Have you seen the prices for a pile of rust! Don't ever mention Fords from that era!
I constantly look at top end XJ6 series1 with the Etype style clocks etc. I prefer the series 3 to be honest. A minter one of those. Dream ride if you like that wafting feel but low down and handle great really.
Peanut Gallery said:
Looking really good! - Fingers crossed it will be sounding really good soon!
May I also say a thank you to all the others on the thread, anyone posts a question, people come back with a quick and exact reply to the question! - the pic of the bent pipe is worthy of note.
Must avoid the classifieds...
May I also say a thank you to all the others on the thread, anyone posts a question, people come back with a quick and exact reply to the question! - the pic of the bent pipe is worthy of note.
Must avoid the classifieds...

We are blessed to still have this basic but far easier format to use and even more blessed by the valuable knowledge and help the users contribute and often just to help others with no favour or gain to be found.
Just old fashioned blokes helping eachother out. Tvr is not so much about how outright good they are but how good they are to own and play with with like minded friends. The sound is like the best though
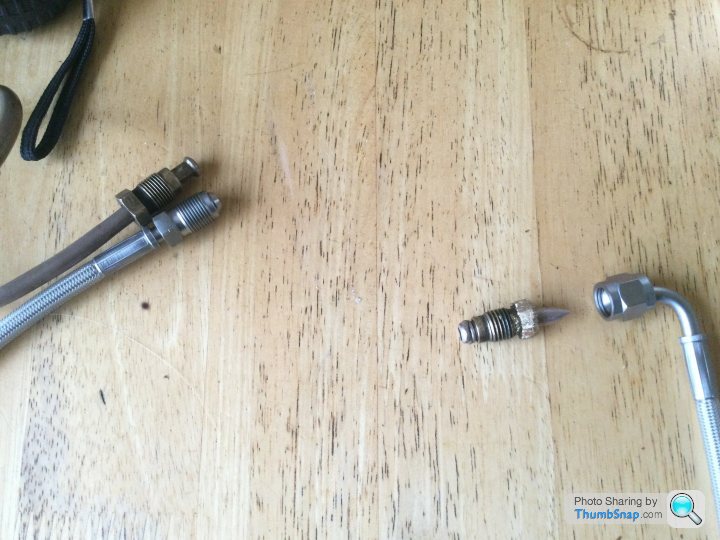
Problem.
Hyd slave line.
To the left are the slave end connections.
To the right are the bulkhead connections.
I presume I now need a male to male adaptor to first screw into bulkhead before then screwing this female end to it?
Hmmm.
I’m waiting on a reply from pipe makers re adaptor / connector.
Any ideas of what I need here and where I get it from I’m going to my local pipe makers but doubt they will stock such a thing?
Thanks
Zener said:
Yes its UNF Alun, love your moniker you put in your tub .....bloody good too like this 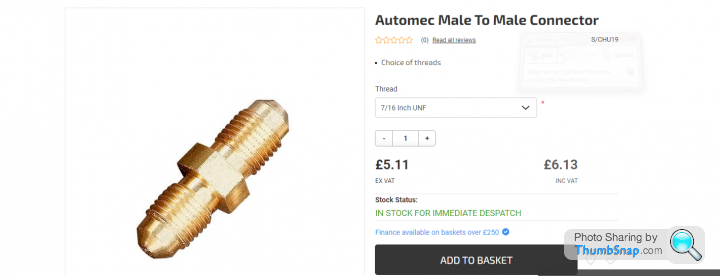
like this Edited by Zener on Friday 26th March 10:16
So 7/16 unf both ends. Thanks as I was going nuts there for a minute.
Moniker, well it’s 21 years old officially in 4 days time so it’s now come of age.
And ready to start a new stronger life hopefully.
Come of age, plastic surgery more like.
Better get it running first
phazed said:
Well done Alun!
A proud moment.......very happy for you.
Thanks Peter. A proud moment.......very happy for you.
It felt more like building a race car with 3 weeks to go before the start of the season in so many ways. Time of year for one.
I thought as it took me one week to separate body it would take two to rebuild it and I’m not far off as I couldn’t work both Mondays these last two weeks.
But I also did repairs and a day cleaning off corrosion which was mighty on the engine. Ruined it really as it just looks old now but chassis is solid and I will protect it and use the car galore I hope.
I’ll keep it clean but all that show car lark. I’m done with that. Still a work in progress as I should get shocks and interior done next

Paul Goldstar said:
Nice work Alun.
Thanks Paul. I feel honoured to have joined the ( practical ) BODY OFF group of owners who have done this job.
As with everything I could have done a lot more but this last year made me look at what was really necessary rather than what would only really amounted to a few more shiny bolts.
I have a word of warning regarding replacement modern bolts. Beware they are quality. 8 years ago I replaced all the suspension and steering bolts at the front as a kit.
All of those bolts were corroded though I’d used lots of copper slip and losing there coating, furring.
All the originals on the front from years ago are all intact with no corrosion down the shanks and never appear seized when loosening them.
The rears are exactly the same. I will find a photo sometime.
So not all things are pretty but they are sound and will last longer is my belief.
I’ll know when I’ve added another 20,000 miles
lancepar said:

On my Chim' the small pipe from the pressure regulator to the stepper housing needed a tee in it and extra pipe to connect it to the Megasquirt ECU throught the bulkhead, Does your ignition system need the same? Any lengths of small pipe left over?
I’m pretty sure it goes as Qbee says as I’ve not got a T piece.
I’ll check with Powers MBE guru guys at Powers to be sure so thanks for that info.
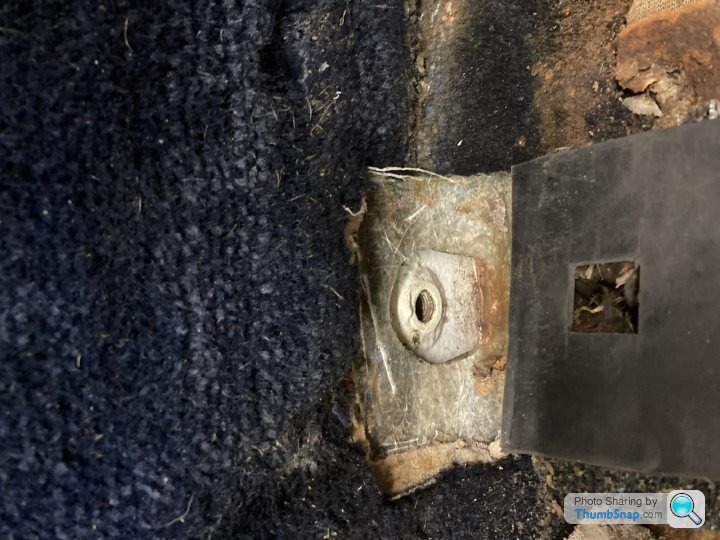
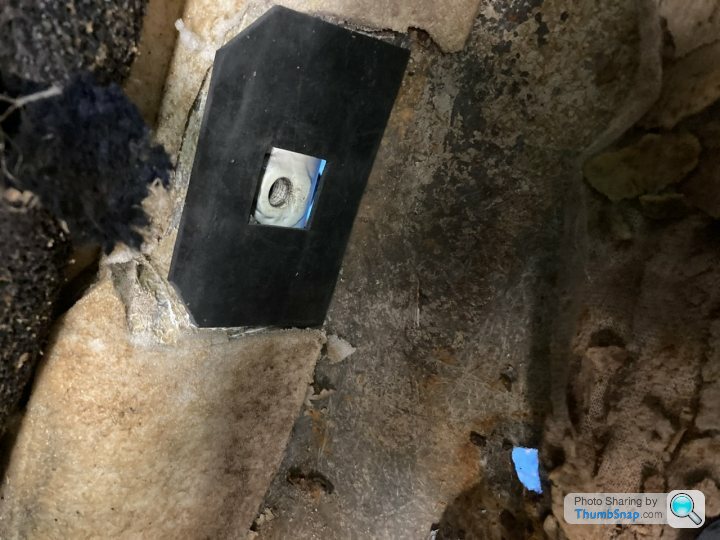
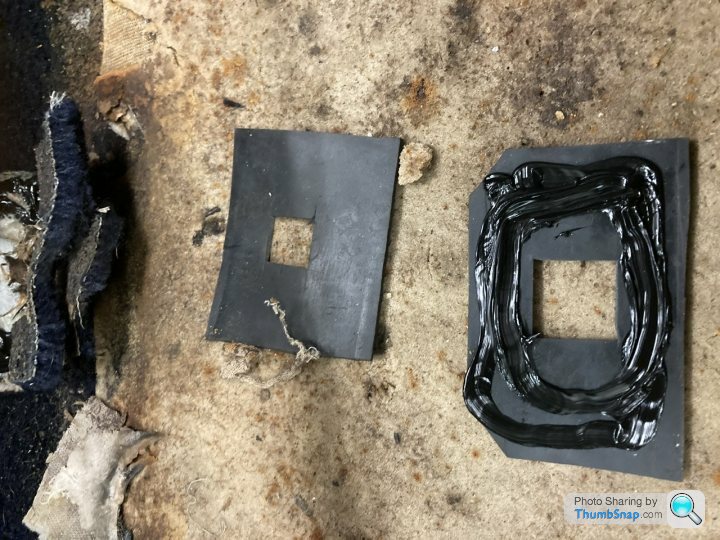
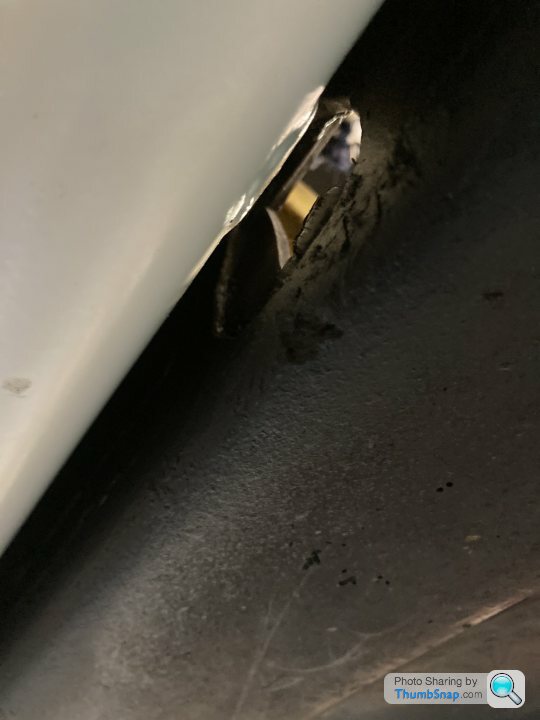
One part of the rebuild I never looked forward to was fitting seat belt anchor bolts through the body to chassis. How to seal a gaping hole.
Following from another Tve builders idea I made some rubber sections /gaskets to seal them from the inside first as detailed a few days ago in this thread.
So having cut square holes slightly larger than bolts then adding bush and seat belt arm tightening them up the bush pushes through and bulges the rubber around them nicely. Remember the bolt is pulled until bush is tight against chassis, you can see copper grease where it sits. I wiped this grease away then set about using a thin nozzle to pump mastic up and around this rubber and body.
As you can see from one picture here the opening is large. My rubber pad mastic from inside the car gives a decent surface to now finish off sealing in and around that hole.
I might aswell seal in the bolt as let it rust so it’s a matter of cutting off mastic in future if and when you get in there. Slightly Heath Robinson but mastic gone off then cut correctly would come off in one large lump mostly. Easier than rusted in bolts.
That’s my plan and I hope it stops water ingress mostly.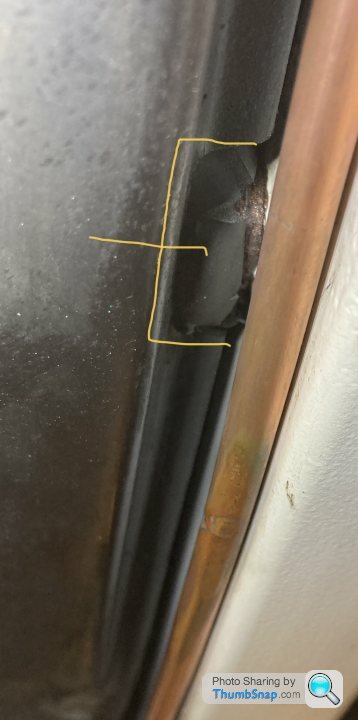
Gassing Station | Chimaera | Top of Page | What's New | My Stuff