Another body off thread.
Discussion


EddyP said:
Rust looking at this as about to order my paint, the 6.0L kit isn't actually 6.0L of paint, it's 5.0L of paint + 1L of thinner.
On that basis I think the SML Marine price is probably a bit better as you get 4.5L of paint and 2.5L of thinner for £100, instead of 5.0L for £120. Sounds like the 4.5L will still be plenty to do two coats and the wishbones etc
Good choice. You will need most of that paint. On that basis I think the SML Marine price is probably a bit better as you get 4.5L of paint and 2.5L of thinner for £100, instead of 5.0L for £120. Sounds like the 4.5L will still be plenty to do two coats and the wishbones etc

EddyP said:
ChimpOnGas said:
Looking at the Rustbuster website and for future reference the best value way for people to buy their 121 Epoxy Mastic is to select their 6 litre pack which is £123.00 all in including postage and VAT.

Obviously you only want to buy this amount of product if you're painting the full chassis, wishbones, ect ect ect and even then you'll still end up with two litres more paint than you need, the way I'd look at it Alun is you paid £124.56 ie more or less the same money for all the paint you needed (3.75 litres), so I wouldn't worry about it mate.
Actually you played a blinder without even knowing it as you could have bought two of their 2.25 litre chassis packs but doing so would have cost you £143.98 for 4.5 litres, by far the best thing for people to do is spend £20 less on the 6 litre pack to get 1.5 litres more paint, this makes no sense but it's definitely the way to buy 121 Epoxy Mastic if you need a quantity of 3.5 litres or more.
I think Mr Rustbuster needs to check is pricing policy
Rust looking at this as about to order my paint, the 6.0L kit isn't actually 6.0L of paint, it's 5.0L of paint + 1L of thinner.Obviously you only want to buy this amount of product if you're painting the full chassis, wishbones, ect ect ect and even then you'll still end up with two litres more paint than you need, the way I'd look at it Alun is you paid £124.56 ie more or less the same money for all the paint you needed (3.75 litres), so I wouldn't worry about it mate.
Actually you played a blinder without even knowing it as you could have bought two of their 2.25 litre chassis packs but doing so would have cost you £143.98 for 4.5 litres, by far the best thing for people to do is spend £20 less on the 6 litre pack to get 1.5 litres more paint, this makes no sense but it's definitely the way to buy 121 Epoxy Mastic if you need a quantity of 3.5 litres or more.
I think Mr Rustbuster needs to check is pricing policy
On that basis I think the SML Marine price is probably a bit better as you get 4.5L of paint and 2.5L of thinner for £100, instead of 5.0L for £120. Sounds like the 4.5L will still be plenty to do two coats and the wishbones etc
The Jotamastic range of epoxy mastic paints have been around for almost 20 years now, in that time they have proved themselves to be exceptional performers in the most testing marine environments, however they have evolved over time. Jotun have been on a path continual development that started with Jotamastic 80, moving to Jotamastic 87 and finally the latest development known as Jotamastic 90.
The ultimate incarnation of Jotamastic 90 being their 'Aluminum' variant, if you consult Jotun's website you'll find they recommend moving to the 'Aluminum' variant where the highest level of protection and corrosion resistance is required and recommend Jotamstic 90 'Aluminum' where the painted surface is expected to do service in a marine environment below the water line ie in submerged saline conditions, clearly this is the very most extreme condition any paint can be expected to tolerate.
Now lets be clear, Rustbuster don't make paint, you need a massive chemical paint plant for that so Rustbuster is just selling paint made by someone else and I'd put money on Rustbuster EM121 being Jotun's Jotamastic Smart Pack product. Jotamastic Smart Pack & the re-branded EM121 from Rustbuster is designed with convenience in mind by creating a product with a 1:1 paint to hardener mix ratio. Rustbuster EM121 and Jotamastic Smart Pack are one and the same in this respect, however traditional epoxy mastic paints have always had a mix ration of 3.5:1 and there must be a reason for this, I suspect it's like this because 3.5:1 is the most effective ratio for the best chemical reaction cross linking performance.
Rustbuster EM121 definitely scores on the convenience front as the 1:1 mix ratio maths are virtually impossible to get wrong, Rustbuster also offer EM121 in smaller quantities making it very convenient for the home restorer/DIY market but you do pay for this convenience, saying that if all you need is a litre or two EM121 may well make the best sense. If on the other hand you need more than 3.3 litres it seems clear you are better off going Jotun even if you do end up with a litre or so too much, which to be honest is always useful for touch ups, and lets be honest its better to have too much paint than too little.
Performance wise it doesn't matter if you choose Rustbuster EM121 or Jotamastic Smart Pack because for sure they are one and the same, and make no mistake both these epoxy mastic paints are going to be exceptional performers. As with all epoxy systems be them an adhesive, a paint, or your TVRs fiberglass body for that matter, it's the curing temperature that's absolutely key! And in the case of paint not just the ambient temperature of the environment you're painting in, but the temperature of the substrate the paint is being applied to. If the temperature of either is too low the cross linking chemical reaction essential for the epoxy system to perform correctly will likely not occur, if the cure does not happen fully within the specified time window an epoxy mastic paint will actually perform worse than an evaporative polyurethane or acrylic paint system.
This was why I chose Jotamstic 90 'Aluminum' WG, the WG stands for Winter Grade where the hardener is modified to ensure effective cross linking at temperatures from +10c down to as low as -5c, with the application environment at roughly 8c and my chassis 2c cooler it was decided the Winter Grade formula would guarantee a correct cure, and indeed the WG formula proved itself to be the correct choice. Alun on the other hand has had the clear advantage of a professional heated paint booth which means a standard summer grade product was the formula of choice.
The critical point to consider being that the curing process must be fully completed within the correct window of time, if the epoxy mix cures too fast you will have a very short pot life, brush marks or a clogged gun, and don't be tempted to solve this by thinning it beyond 10% because that will screw up the paint chemistry and cause all sorts of other issues. On the other hand if the cure is too slow your epoxy mastic coating will never fully cure leaving a very weak paint finish, however the reality is an epoxy mastic is actually quite forgiving especially when compared with a moisture cured polyurethane like POR15 which is super fussy stuff to work with, which is the real reason why it often gives such disappointing results.
Finally powder coat is best described as a wrap rather than a proper bonded coating, it does not and can not bond to the substrate like a traditional paint will, the best primers that bond to a metal substrate are those that contain an acid, these are known as acid etch primers because as the name suggests they actually etch deep into the metal surface. Powder coat has lots of advantages but none of them relate to improved performance I'm afraid, the only areas where powder coat scores over paint is in aspects of cost saving and convenience. You can achieve lovely looking results with powder coat for a very small equipment investment, you also don't need an expensive clean filtered paint booth environment to apply it as you do when spray painting.
Finally a professional automotive painter will take years to learn his trade, but any old numpty can become a powder coater because the elctrostatic nature of the process takes all the skill out of the job. All you need to set up in the powder coating game is a few hundred quids worth of gear, an old shipping container and some heat panels to cure the stuff. Sadly because any tom dick or harry can set themselves up in the powder coating business with zero knowledge or training, most powder coat jobs are very poor. And even the best powder coat job is marginal which is why it's not used in extreme industrial environments, however worse still when applied and or cured badly by the inexperienced it's worse than no coating at all, because as all us TVR owners know it chips allowing moisture under it creating the ideal environment for corrosion.
For all these reasons I advise avoiding powder coat, it may look pretty to start out with but for how long? Any wet paint system will be better than a powder coat job which is why the painted silver/grey TVR chassis' seen up to late 1996 last longer than the white powder coated ones. TVR themselves only went to powder coat because it sped up production, reduced costs, and freed up experienced skilled painters to work on top coating body work.
Epoxy mastic is what you want for your TVR chassis chaps, but if you don't believe me just research what they use in the shipping and oil industries and you'll see I'm right

Slowly a Tvr comes back to life.
Steering rack, brake lines in loose, DIF and prop shaft in and bolted up.
Dif on your own is a b d with no gearbox jack. .
NOTE. I cleaned up my rear brake lines as it’s been covered in Dinitrol or similar for years,,, but I’ve decided I don’t like it so will be replacing it in the next few days.
Spent a few hours cleaning up all my brake Calipers braided lines and bits and bobs.
And clocked up 1000 miles on my Ebike
A good day


Steering rack, brake lines in loose, DIF and prop shaft in and bolted up.
Dif on your own is a b
d with no gearbox jack. . NOTE. I cleaned up my rear brake lines as it’s been covered in Dinitrol or similar for years,,, but I’ve decided I don’t like it so will be replacing it in the next few days.
Spent a few hours cleaning up all my brake Calipers braided lines and bits and bobs.
And clocked up 1000 miles on my Ebike
A good day
Edited by Classic Chim on Tuesday 17th March 19:48
Edited by Classic Chim on Tuesday 17th March 20:11
Rear toe adjuster.
I noticed one of mine was slightly loose.
Nipped it up using the nut on the end so it pulls it’s tighter to the threaded tube.
People often have the odd knock or rattle from the rear end, check these adjusters are not loose. It introduces in and out play as well as up and down movement of the assembly in the wishbone.
Edited by Classic Chim on Thursday 19th March 10:43


Thanks Dave.
Painters full of flu!,,, frigging infecting me. Woke up with a huge headache and my legs stiff as fook. I cycle loads so that’s not right!
Day off today so if I can get the garage isolated I’ll be back tomorrow. Sometimes I think the world wants to make my life as hard as humanly possible. Here I am being positive just as the world goes into melt down ffs.
Makes this seem so unimportant which it is in the scale of things.
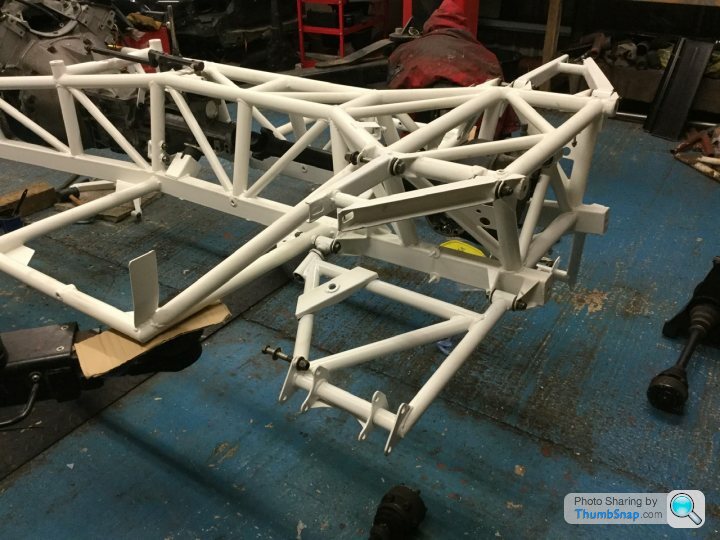
The main aim here is to show pics of all the important bits we either can’t see or find with the body on. It’s also a pictorial record ( roughly ) of the order in which I’m doing the job.
Here’s a thing. A TVR bolt Kit I ordered online a few years ago are wrong.
Sizes are wrong.
I noticed the front bones bolts were a smaller Dia than the originals,,,, my car has had an annoying knock on the front which I just can’t trace. It could well be those bolts which rattle in the holes. I kept all my original bolts which are a flush fit and using them!
Jokers,,,,,,
Painters full of flu!,,, frigging infecting me. Woke up with a huge headache and my legs stiff as fook. I cycle loads so that’s not right!
Day off today so if I can get the garage isolated I’ll be back tomorrow. Sometimes I think the world wants to make my life as hard as humanly possible. Here I am being positive just as the world goes into melt down ffs.
Makes this seem so unimportant which it is in the scale of things.
The main aim here is to show pics of all the important bits we either can’t see or find with the body on. It’s also a pictorial record ( roughly ) of the order in which I’m doing the job.
Here’s a thing. A TVR bolt Kit I ordered online a few years ago are wrong.
Sizes are wrong.
I noticed the front bones bolts were a smaller Dia than the originals,,,, my car has had an annoying knock on the front which I just can’t trace. It could well be those bolts which rattle in the holes. I kept all my original bolts which are a flush fit and using them!
Jokers,,,,,,
Edited by Classic Chim on Thursday 19th March 06:39
Classic Chim said:
Here’s a thing. A TVR bolt Kit I ordered online a few years ago are wrong.
Sizes are wrong.
I noticed the front bones bolts were a smaller Dia than the originals,,,, my car has had an annoying knock on the front which I just can’t trace. It could well be those bolts which rattle in the holes. I kept all my original bolts which are a flush fit and using them!
Jokers,,,,,,
That's really annoying Alun but your existing bolts should come up like new after a session on the wire wheel, you're definitely better off with refreshed originals than shiny new fixings that aren't exactly the right size, like you say knocks and other noises are inevitable with those wrong bolts. Sizes are wrong.
I noticed the front bones bolts were a smaller Dia than the originals,,,, my car has had an annoying knock on the front which I just can’t trace. It could well be those bolts which rattle in the holes. I kept all my original bolts which are a flush fit and using them!
Jokers,,,,,,
Fixings are either right or wrong, there's no middle ground, Alex has replaced all my nuts and bolts with new but I believe he created a reference list of the correct sizes so fits the right size, first time, and every time.
If the ones supplied to you are even slightly wrong, you are definitely better off with the cleaned up originals
Great stuff the way it's going.
When I replaced my front wishbones and balljoints on my Chimaera, I only had to replace the nyloc nuts and washers. Rear upper arms too, I didn't have to remove the rear lowers, thankfully. The bolts themselves were is surprisingly good condition! Still mostly retained their shank passive coating (possibly cadmium so be careful abraiding them), I think getting the old nuts off cleaned the threads up quite a bit. I had to use low profile washers on some of them at the front
I changed the upper balljoint bolts though, because new ones came supplied with the new balljoints.
I'm sure you're aware of this but for those attempting similar work, the wishbone mounting bolts should be fully torqued up at the normal ride height with the body on etc. I didn't have access to a ramp so I jacked up each corner under the hubs until the chassis just started to clear the axle stands to get the right height. There'll be excess twisting force on the bushes otherwise.
And you didn't make the classic mistake of putting the forward most wishbone bolts in from the front which would mean they wouldn't come off with the body in place.
When I replaced my front wishbones and balljoints on my Chimaera, I only had to replace the nyloc nuts and washers. Rear upper arms too, I didn't have to remove the rear lowers, thankfully. The bolts themselves were is surprisingly good condition! Still mostly retained their shank passive coating (possibly cadmium so be careful abraiding them), I think getting the old nuts off cleaned the threads up quite a bit.
I had to use low profile washers on some of them at the frontI changed the upper balljoint bolts though, because new ones came supplied with the new balljoints.
I'm sure you're aware of this but for those attempting similar work, the wishbone mounting bolts should be fully torqued up at the normal ride height with the body on etc. I didn't have access to a ramp so I jacked up each corner under the hubs until the chassis just started to clear the axle stands to get the right height. There'll be excess twisting force on the bushes otherwise.
And you didn't make the classic mistake of putting the forward most wishbone bolts in from the front which would mean they wouldn't come off with the body in place.
V8fan said:
Great stuff the way it's going.
When I replaced my front wishbones and balljoints on my Chimaera, I only had to replace the nyloc nuts and washers. Rear upper arms too, I didn't have to remove the rear lowers, thankfully. The bolts themselves were is surprisingly good condition! Still mostly retained their shank passive coating (possibly cadmium so be careful abraiding them), I think getting the old nuts off cleaned the threads up quite a bit. I had to use low profile washers on some of them at the front
I changed the upper balljoint bolts though, because new ones came supplied with the new balljoints.
I'm sure you're aware of this but for those attempting similar work, the wishbone mounting bolts should be fully torqued up at the normal ride height with the body on etc. I didn't have access to a ramp so I jacked up each corner under the hubs until the chassis just started to clear the axle stands to get the right height. There'll be excess twisting force on the bushes otherwise.
And you didn't make the classic mistake of putting the forward most wishbone bolts in from the front which would mean they wouldn't come off with the body in place.
Yep and good info for others. I’ve nipped these to pull them together enough to pinch the lugs a bit while I work on it. I’ve tested the articulation and tightened so when at the wrong angle will twist and shorten the Bush life considerably. When I replaced my front wishbones and balljoints on my Chimaera, I only had to replace the nyloc nuts and washers. Rear upper arms too, I didn't have to remove the rear lowers, thankfully. The bolts themselves were is surprisingly good condition! Still mostly retained their shank passive coating (possibly cadmium so be careful abraiding them), I think getting the old nuts off cleaned the threads up quite a bit.
I had to use low profile washers on some of them at the frontI changed the upper balljoint bolts though, because new ones came supplied with the new balljoints.
I'm sure you're aware of this but for those attempting similar work, the wishbone mounting bolts should be fully torqued up at the normal ride height with the body on etc. I didn't have access to a ramp so I jacked up each corner under the hubs until the chassis just started to clear the axle stands to get the right height. There'll be excess twisting force on the bushes otherwise.
And you didn't make the classic mistake of putting the forward most wishbone bolts in from the front which would mean they wouldn't come off with the body in place.
My preferred method will be to Jack the wishbones upto standard height when all assembled then torque bolts up while it’s easy to get at them and before body goes on.
V8fan said:
........I'm sure you're aware of this but for those attempting similar work, the wishbone mounting bolts should be fully torqued up at the normal ride height with the body on etc. .......
For clarity worth pointing out that this is not required if you are fitting poly bushes.Steve
QBee said:
I bought a roll of half inch mesh and took it to the Renault dealer along with the car, and instructed him to fit it in front of said radiator.
It looked neat and did the job. Never had another broken aircon rad.
The Renault dealer was so impressed he sent the idea in to Renault HQ - apparently I was far from the sole person suffering from the problem
Love that, why not!It looked neat and did the job. Never had another broken aircon rad.
The Renault dealer was so impressed he sent the idea in to Renault HQ - apparently I was far from the sole person suffering from the problem
dhutch said:
Absolutely.
It’s ok. Nothing special. I’ve lost a bag of wishbone plastic washers/ spacers for my rear hubs. Been looking for 1/2 hr. I’ve had them 5 years, looked everywhere in the garage too. Old age!
I noticed out of all the original spacers it was the ones off the rear hub carriers that had worn a groove into them and binned them weeks ago. How annoying as I was going self isolating by playing on the car tomorrow.

I hope Tvr parts suppliers stay open over the next few weeks or I’ll never get this bloody job done


Zener said:
Alun how many do you need? I have a secret stash of things like this  gratis of course
20 all told. gratis of course Must have dropped them out my bag when getting milk for the garage is all I can think of.
12 for rear hub carriers and 8 for the o/s front. Thrown good ones away too!
Will the post be working next week?
Thinking of just getting them off Dom via post but bloody heck maybe that won’t be working either!
Thanks though. See what gives
I've had an email (I have a click & drop account). It's their intention to keep Post Office branches open and Royal Mail deliveries going as much as possible. Here's a link:
https://www.royalmail.com/coronavirus?cid=CM0320_C...
https://www.royalmail.com/coronavirus?cid=CM0320_C...
Gassing Station | Chimaera | Top of Page | What's New | My Stuff