Early Precat Fuel sender unit
Discussion


The early cars had the sensor in the LH side of the tank and not as it says in the bible on the top RH side as later cars.
Anyway mine is in the side and it aint going to be easy getting to it to reseal as it's weeping a bit.
Some of the fixings are inaccessible so I'm hoping somebody may have done it without removing the tank completely.

Edit.....
Original post refered to the early cars having "S" series fuel tanks, this is not the case
Anyway mine is in the side and it aint going to be easy getting to it to reseal as it's weeping a bit.
Some of the fixings are inaccessible so I'm hoping somebody may have done it without removing the tank completely.
Edit.....
Original post refered to the early cars having "S" series fuel tanks, this is not the case
Edited by lancepar on Saturday 11th January 14:29


Well Duncan it looks like you suggestion will work.
With the straps and the filler neck hose removed the tank does tilt a large amount and although not tried probably allow access to the sender fixings.

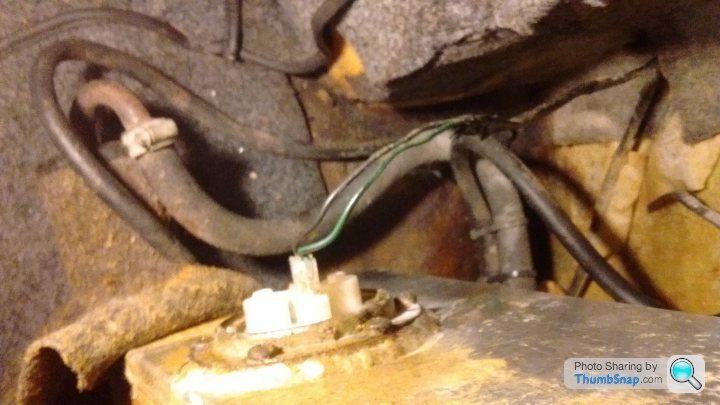
I didn't fancy trying to remove the filler as it was well and truly stuck to the body so I cut the thick walled hose between the filler and section of neck with the breather pipe stub, the pipe on this goes to this unit behind the tank fixed to the rear bulkhead.

Going to use some of this to join the filler neck on reassembly.
https://www.ebay.co.uk/itm/311974176570
Oh and I found some Blue Hylomar gasket sealant, seems like that others have found this to do the trick.
With the straps and the filler neck hose removed the tank does tilt a large amount and although not tried probably allow access to the sender fixings.
I didn't fancy trying to remove the filler as it was well and truly stuck to the body so I cut the thick walled hose between the filler and section of neck with the breather pipe stub, the pipe on this goes to this unit behind the tank fixed to the rear bulkhead.
Going to use some of this to join the filler neck on reassembly.
https://www.ebay.co.uk/itm/311974176570
Oh and I found some Blue Hylomar gasket sealant, seems like that others have found this to do the trick.
I've just done this same job. I used Stag Wellseal which is superb stuff and doesn't set hard like Hylomar does. Interesting that the neck on my tank is shorter than the one pictured, ie my tank is taller. Must be a larger capacity I guess. If you have taken the tank out replace the rubber flow and return hoses too.
Teamred said:
I've just done this same job. I used Stag Wellseal which is superb stuff and doesn't set hard like Hylomar does. Interesting that the neck on my tank is shorter than the one pictured, ie my tank is taller. Must be a larger capacity I guess. If you have taken the tank out replace the rubber flow and return hoses too.
Wow Stag Wellseal that brings back memories.Blue Hylomar is a plastic based compound "Resistant to Petroleum Products" that also doesn't set hard either and like Wellseal is a bugger to remove.
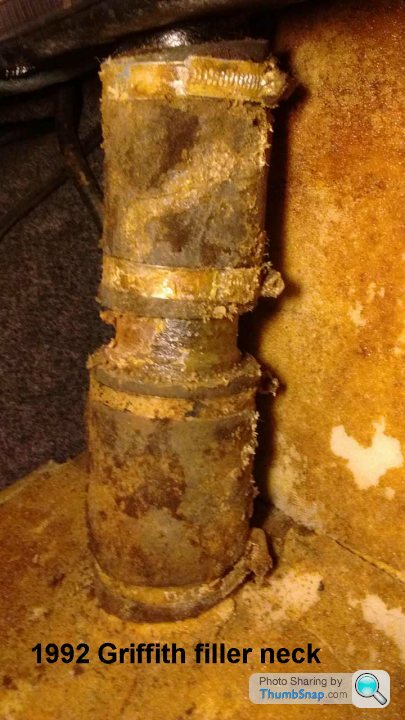
My '92 Griffith is a very early one and the short alloy neck doesn't have the breather stub on it. Instead there is a steel tube with a breather pipe stub in between the filler and the tank therefore two hoses. Don't think there is any difference in the capacity. And there is room to slide a new hose down and then up to close the gap.
Tank is not coming out just tilting it enough to get at the side mounted sender and reseal it.
Cheers
Edited by lancepar on Wednesday 22 January 21:05
Well I wasn't expecting that, the outlet from the tank is completely different to my '95 Chim as in there is enough flexible pipe and wiring to pull the tank back to clear the wheel arches and then slide it to the RH of the boot.
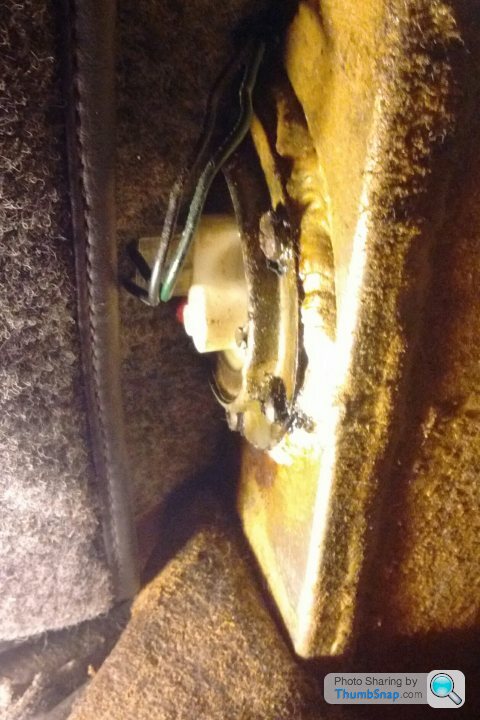
Thus making access to the sender fixings much easier, however the two lower fixings were more than screwdriver tight so I've sprayed them with my penetrating fluid mix of 50/50 Acetone and ATF, usually does the trick.
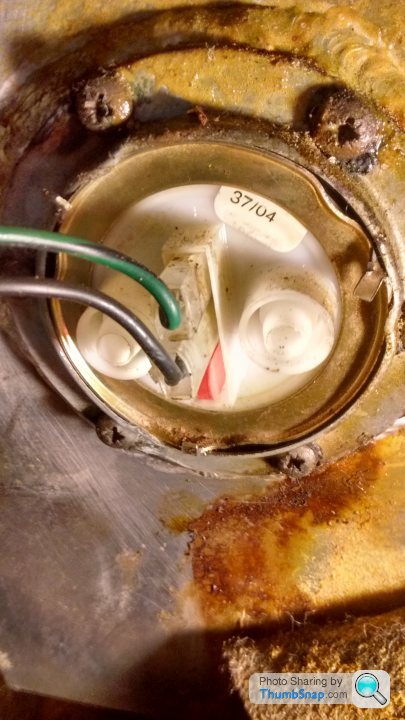
As the photo shows, leaking fuel has washed the tank below it clean and evidence of where it has settled on the boot floorcan be seen in the other photo.
That Zinc coloured ring has me confused, as I can't see its purpose and looks like the earlier models twist to lock/unlock method of securing the sender but round the wrong way!!!
Or have I got it wrong and that is what holds the sender in place so what does the ring of screws do?
Thus making access to the sender fixings much easier, however the two lower fixings were more than screwdriver tight so I've sprayed them with my penetrating fluid mix of 50/50 Acetone and ATF, usually does the trick.
As the photo shows, leaking fuel has washed the tank below it clean and evidence of where it has settled on the boot floorcan be seen in the other photo.
That Zinc coloured ring has me confused, as I can't see its purpose and looks like the earlier models twist to lock/unlock method of securing the sender but round the wrong way!!!
Or have I got it wrong and that is what holds the sender in place so what does the ring of screws do?
Edited by lancepar on Thursday 23 January 15:51
Edited by lancepar on Thursday 23 January 15:52

Teamred said:
Is your tank outlet directly below the sender on the side of the tank then? Mine is on the inside face adjacent to the bulkhead. I don't see the point of the locking ring as you say. I left it alone and replaced the gasket underneath it - with my favoured Wellseal!
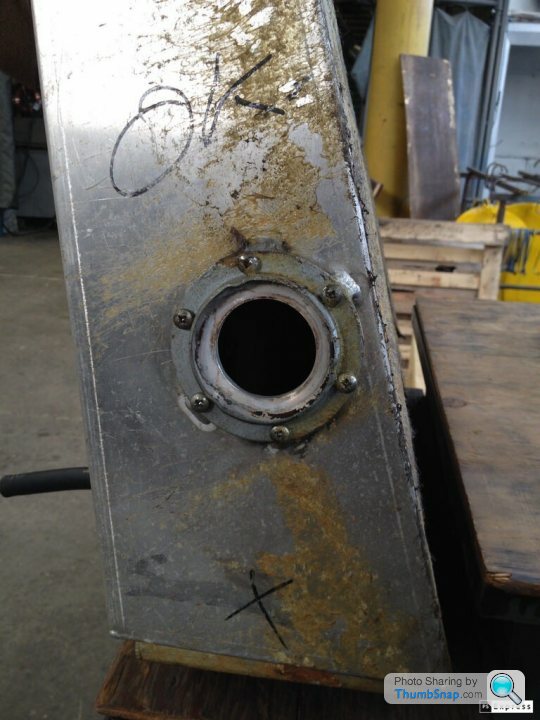
Firstly, yes the tank outlet is directly below the sender on the side of the tank as can be seen in the photo above showing the tank moved from its seated position. It's completely different from any Griff/Chim tank I've seen photos of. And I did put a tank back into my old Chim'.Next, the alloy ring secured to the tank with the six screws is what the locking ring locks into and doesn't need to be disturbed.
To reassemble.
After fitting the seal between the sender and the tank the locking ring is inserted and turned so it locks into the alloy ring.
This is easily done with a special tool that engages with the tangs on the Locking ring, which can be seen bent on mine.
However most will probably use a Brummagem screwdriver (Hammer) and a drift and gently tap the ring round until tight.
I will use some sealant as belt and braces.
https://www.ebay.co.uk/itm/range-rover-classic-fue...
Gassing Station | Griffith | Top of Page | What's New | My Stuff