1995 Griffith 500 restoration
Discussion


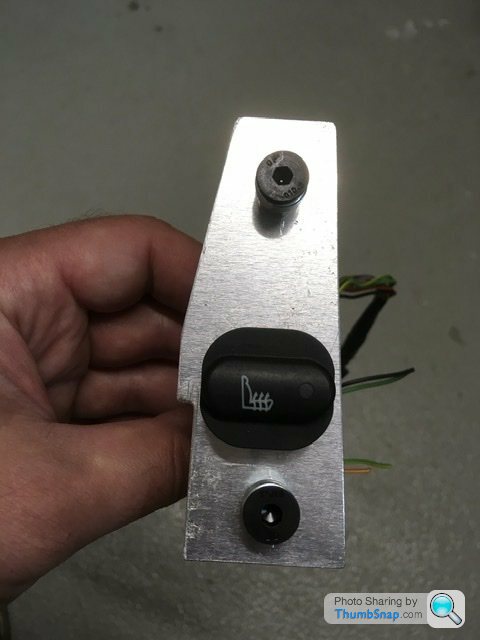
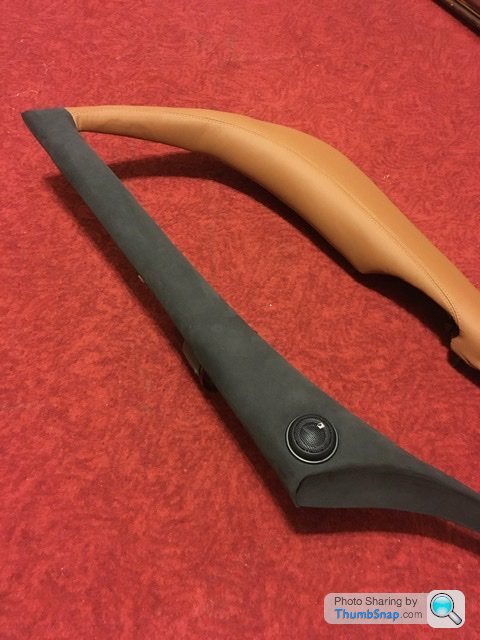
So I’m back to the heated seat buttons which will be fitted into the door trim surround armrests.
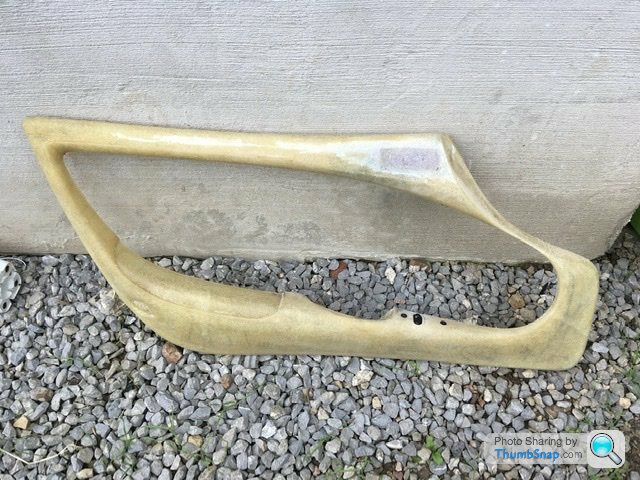
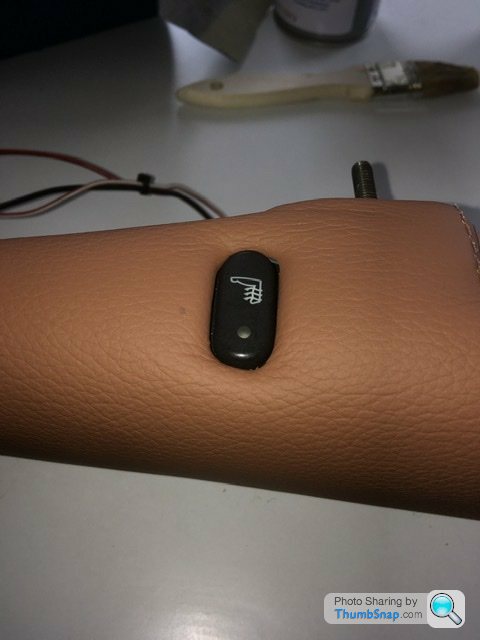
A while back I machined square holes into an aluminium plate to hold a Jaguar S type pre-facelift heated seat switch. This plate is then spaced and fitted underneath the armrest so I can have the switch top virtually flush with the armrest trim once it’s covered again.
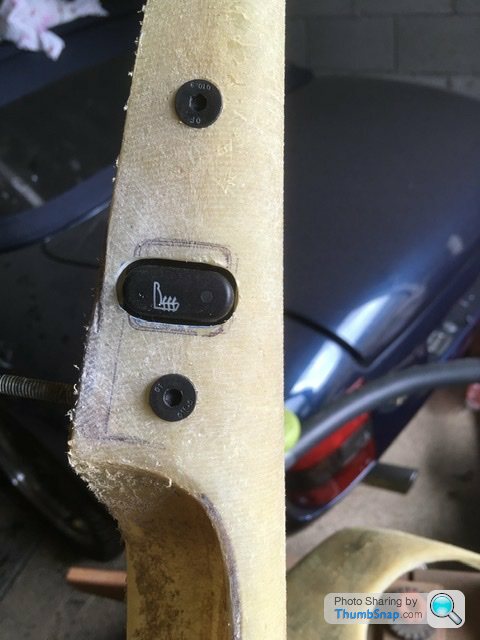
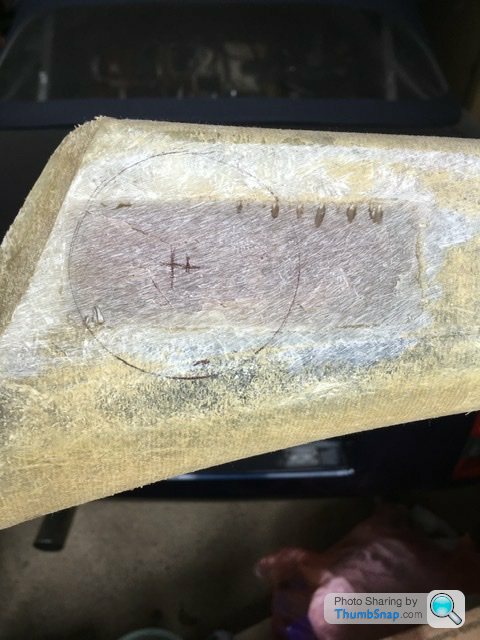
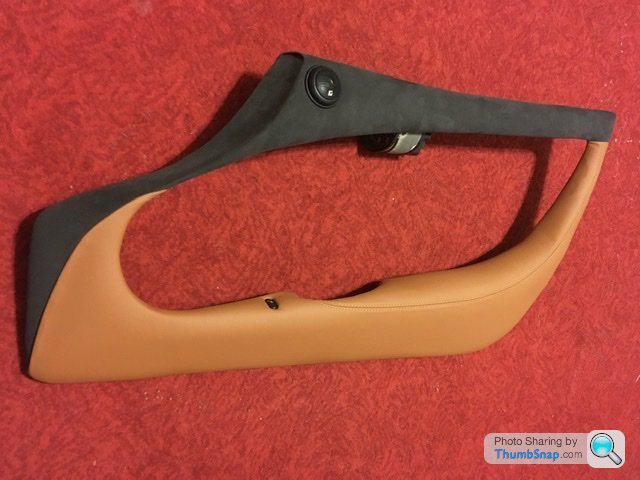
Pictures below show the shaped bracket and bolted up into the door trim surround. The rather large hole currently showing all of the switch will be repaired with a fibreglass patch and then worked back to just show the oval top of the button. The reason the hole is so big is that was the cigar lighter position. Far easier to make the hole bigger then position the bracket underneath accordingly. When I fit the passenger bracket I’ll know the position it needs to be.
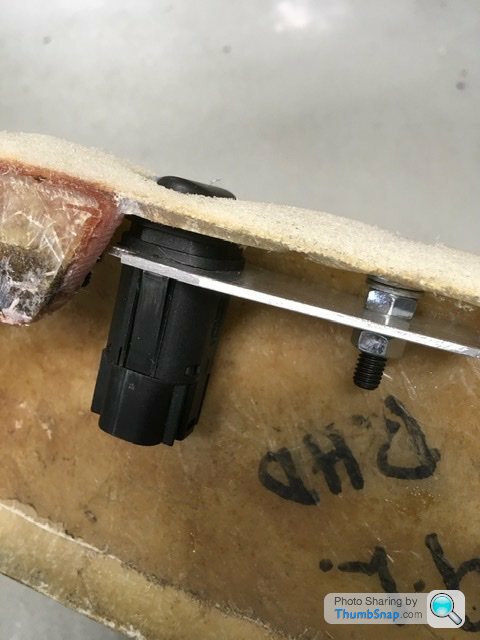

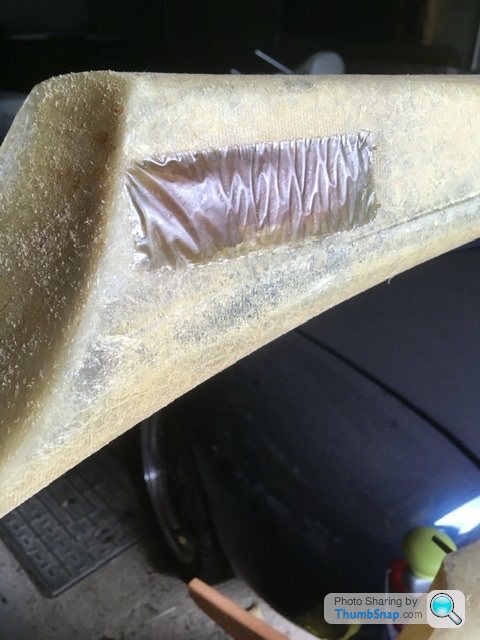
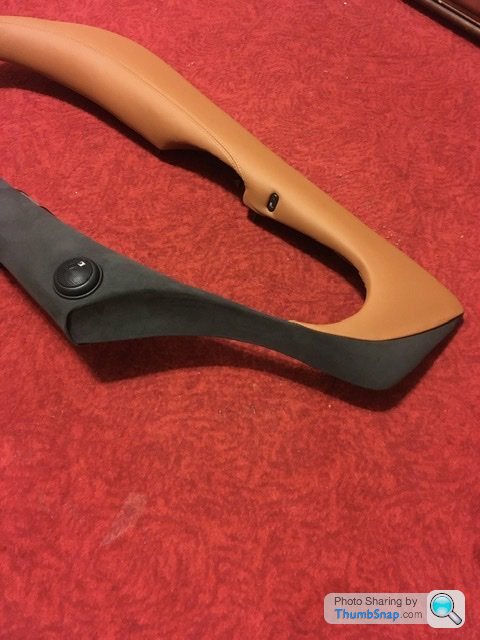
So now I have a positive position for the button I’ll remove the bracket, fibreglass the hole over and then carefully file back the clearance for just the oval part of the button to be on show. It’s a bit of a faff for a button but there isn’t a nice position on the centre console I don’t think.
A while back I machined square holes into an aluminium plate to hold a Jaguar S type pre-facelift heated seat switch. This plate is then spaced and fitted underneath the armrest so I can have the switch top virtually flush with the armrest trim once it’s covered again.
Pictures below show the shaped bracket and bolted up into the door trim surround. The rather large hole currently showing all of the switch will be repaired with a fibreglass patch and then worked back to just show the oval top of the button. The reason the hole is so big is that was the cigar lighter position. Far easier to make the hole bigger then position the bracket underneath accordingly. When I fit the passenger bracket I’ll know the position it needs to be.
So now I have a positive position for the button I’ll remove the bracket, fibreglass the hole over and then carefully file back the clearance for just the oval part of the button to be on show. It’s a bit of a faff for a button but there isn’t a nice position on the centre console I don’t think.
RichB said:
RobXjcoupe said:
<clip> It’s a bit of a faff for a button but there isn’t a nice position on the centre console I don’t think.
I assume you didn't like the idea of it being switched by the heated wing mirror knob, one of the four clustered with the heater controls?Now it’s not standard I’d rather have 2 separate switches rather than a single switch for both seats.

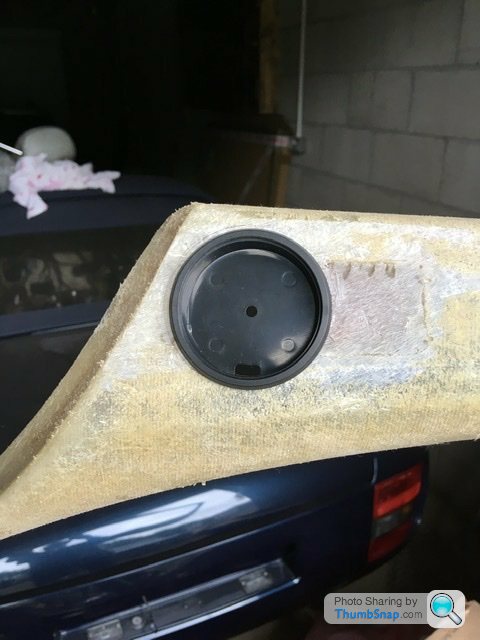
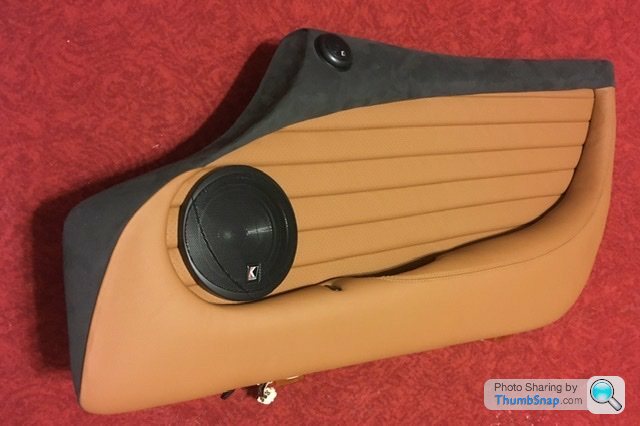
Been a while, had a spare weekend and finally finished the fit of the heated seat buttons within the door trim surround. The countersunk bolts will be flushed off soon ready to retrim.
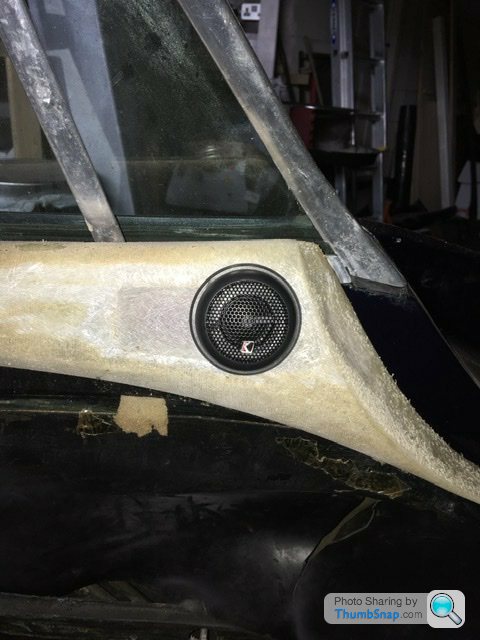
Below shows the ashtray holes filled ready to cut out new holes for the small tweeter speakers

Fingers crossed I can start cutting the new trim pattern over the bank holiday weekend.
Granturadriver said:
This looks very good!
How are you going to do it with the edges around the button? Just cut it out or should the leather be folded over?
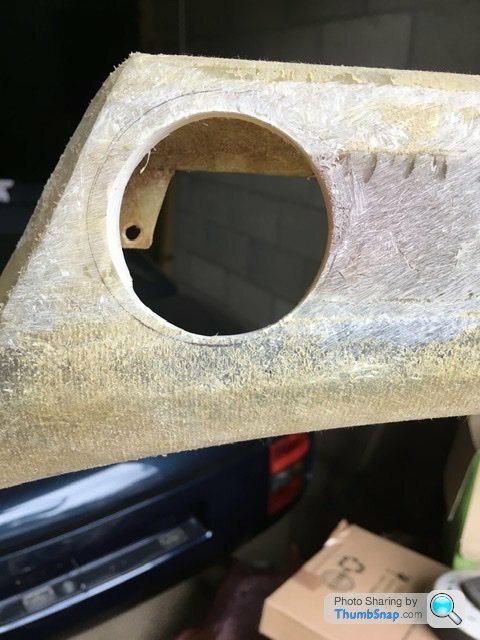
Not shown in the pictures are the holes fully fettled, chamfered with clearance for the leather thickness to wrap into the button holes. The button only moves 4 mm so it took some work getting a working space under the glassfibre as well as around it. I’ll also have to delete the hard foam padding originally fitted under the leather in that area, otherwise the switch will be within a padded divot.How are you going to do it with the edges around the button? Just cut it out or should the leather be folded over?
Hope that makes sense?

The weekend I managed to get the drivers door trim on. I modified it a little so the top matches the dash and the lower portion the same as the seat colour. Not the easiest to fit. 5hrs to get it wrinkle free.
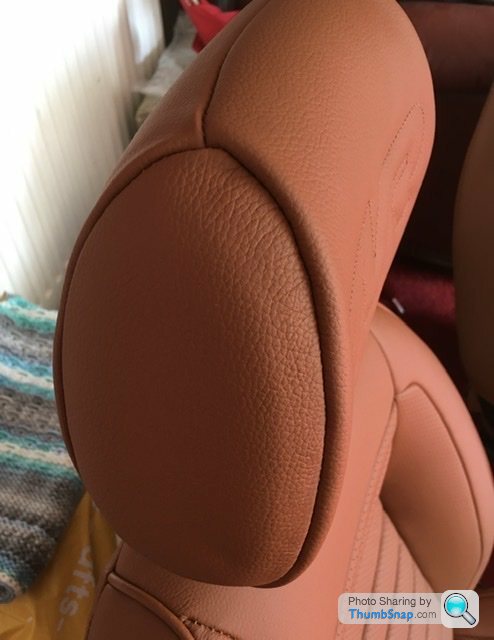
Pictures below just to show the heated seat button. Still in a bit of a divot but acceptable I think. Also the tweeter pushed into the upper trim.

I don’t have much of the dash colour alcantara so might have to change the inside of the door trim design to just the pleated perforated leather.
Pictures below just to show the heated seat button. Still in a bit of a divot but acceptable I think. Also the tweeter pushed into the upper trim.
I don’t have much of the dash colour alcantara so might have to change the inside of the door trim design to just the pleated perforated leather.
PabloGee said:
Looks brilliant. The button looks intended, the divot in the padding is not an issue to my mind.
Intrigued to know if the tweeters make a difference in such a noisy car…
Hmmm….whilst driving I wouldn’t bother with the stereo. When parked up looking inside, I think it finishes a nice cabin interior seeing component speakers fitted.Intrigued to know if the tweeters make a difference in such a noisy car…
The original fit ashtray gives access to a securing point for the door trim to the door so swapping the ashtray for a small speaker seemed to be a better way of plugging an access hole.
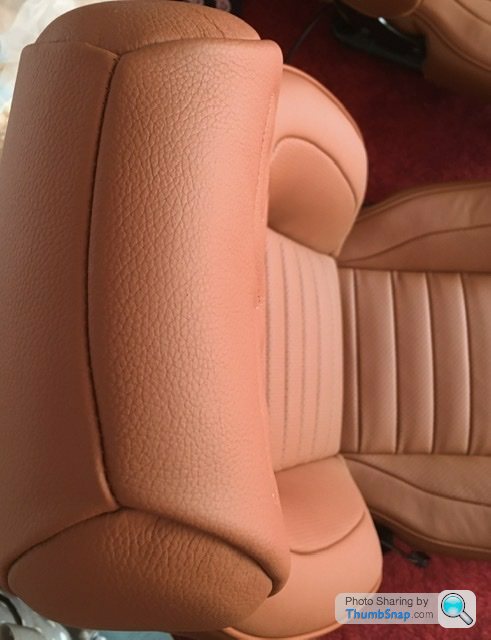
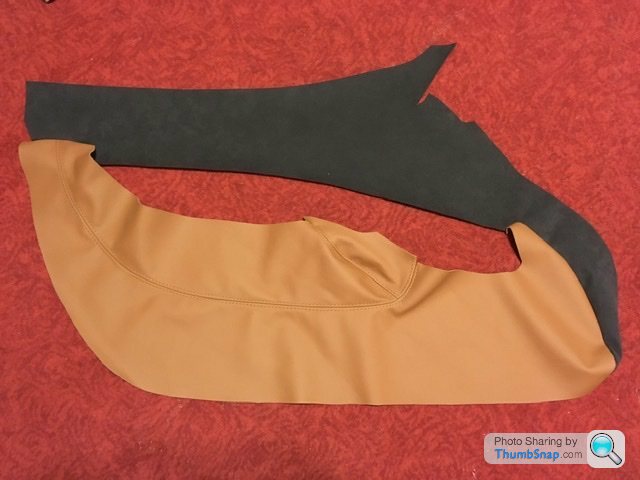
The finished door trim back panel. Just propped up in the picture but it gives an idea how it looks. The panel is classic tuck and roll using two layers of 6mm scrim the same as the seats so gives a lovely soft feel using perforated leather. This design will also appear at the rear of the interior which is usually covered in carpet. Will give a bit of continuity I think.
Gassing Station | Griffith | Top of Page | What's New | My Stuff