1995 Griffith 500 restoration
Discussion


So today I thought can the wiring a bit of power via a battery charger first in case of short circuits.
Low and behold there is an issue with buzzing central locking relay and lock solenoids buzzing. So disconnected the central locking relay. Buzzing stopped.
Plugged alarm main unit back in. Indicators flash on and off when activated and turned off.
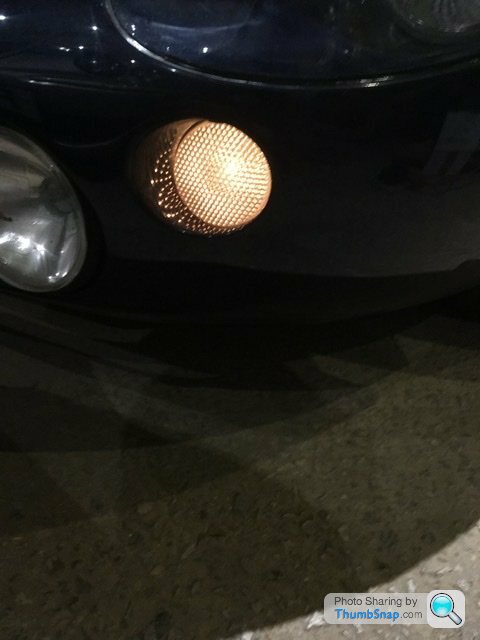
Picture below shows new front clear indicators without amber bulbs fitted.
Yet more jobs to correct
Low and behold there is an issue with buzzing central locking relay and lock solenoids buzzing. So disconnected the central locking relay. Buzzing stopped.
Plugged alarm main unit back in. Indicators flash on and off when activated and turned off.
Picture below shows new front clear indicators without amber bulbs fitted.
Yet more jobs to correct
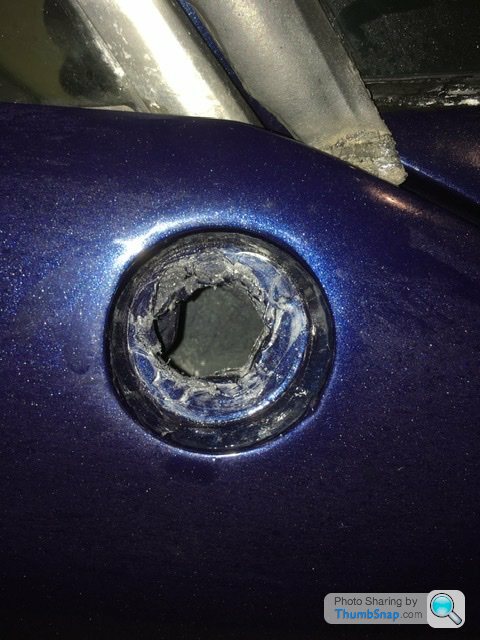
Above picture shows the hole the drivers door mirror is supposed to fit but no brass threaded insert. But I do have that insert in a bag of parts removed from the car. I suppose that’s one positive?!
That hole was neatly covered before the door was painted. Stuff like this is below the scale of shoddy workmanship.
jeremyc said:
Less of the naming and shaming please, or the excellent thread will have to be closed. 
My words are all in context. For the reader it gives an idea of issues that are found whilst I progress through this restoration rather than skirt round them. Obviously if it’s factory faults I will point them out, if it’s mods I’ve attempted to do and have failed I will point them out also. Again no point pretending all is good if I make a complete balls up. I believe It’s the details that make a good rebuild. It’s what owners and perhaps new owners which are reading this will choose to either take on a project or not and where if expert help is needed or not.
I just wish to share my experience, be it positive or negative.
If you have specific issues just private message and we can go from there
Cheers
Rob
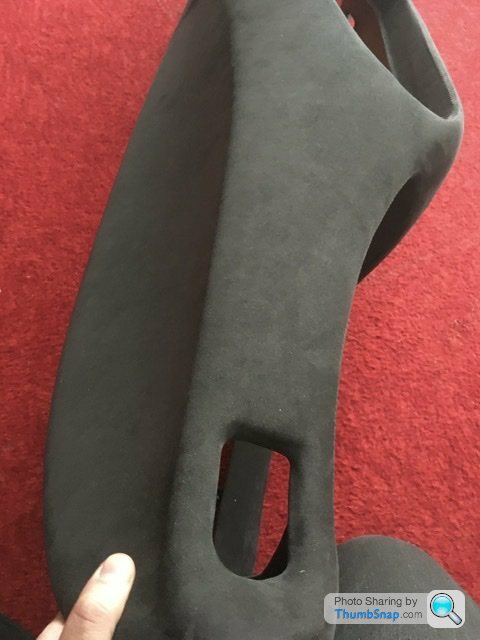
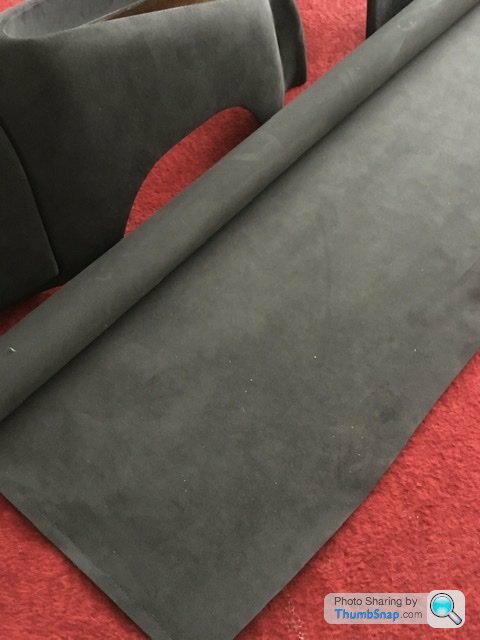
Interior materials are being delivered tomorrow.
I went with the saddle tan hide. 2 hides ordered, one has been perforated. New door seals, hoop seal and boot seal as originals have seen better days. Note to carefully remove tvr made end pieces from seals. I’ll show these when I remove and fit the new seals. I do have 2 seals missing from the bottom of the doors. They were there before strip down. They stop water rising up between the door and sill of the body. The dash is also waiting to be picked up. Another 6hr drive not including traffic. I’ve asked for a length of matching dash alcantara so I can use it within the doorcards and centre console.
The doorcards I’ve hopefully got a really good design. It’s a split design. I’m thinking of a double pipe between the leather and alcantara, swapping the colours so perforated tuck and roll leather to alcantara pipe, then leather pipe to alcantara lower trim curved upwards from the speaker.
Horizontal tuck and roll to continue behind where the rear vents are. Seats in leather plain and perforated centre panels. I’ll put map pockets on the back of the seats. I’ll use vinyl for the seat backs and map pockets and as a pipe over the seat backs due to the seat belts rubbing there. The vinyl will create a more slippery surface for the seat beat to rub against unlike the leather. Easier to wipe any dirty marks from the vinyl. Headrests I’m thinking keep plain or perhaps a tuck and roll front? Not sure yet. I’ll minds eye both designs once the seats are wearing the new covers.
As I’m doing my own interior the speakers can also be given a revamp. It’s a simple but quality set up. Door speakers will be two way components. Tweeter fitted where ashtray currently resides. Original door position for a woofer. Then a pair of slim mount 8” subwoofers behind each seat under the centre console trim fitted to there own enclosures. I’ll run the speakers via an active crossover so an amplifier per pair of speakers.
The amplifier I have is a 6 channel lump so perfect for this using a single power and earth cable. Speaker mounts can then be trimmed accordingly in the matching new trim so giving a nice custom but factory look. The alpine unit I bought recently will finish off the retro 90’s look on the newly veneered dash. Oh and green back light on the dash dials to match the alpine stereo green illumination.
The boot I’ll use black lining carpet. This stuff has 4 way stretch and easily fits over compound curves which cuts down the amount of pieces to cut unlike the tvr originals. The panel under the boot lid I’ll use the interior saddle tan colour vinyl with an interior matching tuck and roll design. I’ll also make new cover bags for the targa hood, tool kit and spare wheel cover. They won’t take long.
Might also change the wheels. Any good offer will buy them. I could do with a chunk of cash lol
Good men that do nothing let bad things happen……
I shall plod on. Basically I’ve worked on the car and a “specialist “.
I won’t need to explain anymore.
On another thread I’m going through random wire issues. I didn’t do the dismantling, I have been left with a dodo currently that doesn’t work. When I took the Jag xjc apart I took plenty of photos and labelled items. I wrongly assumed a specialist would do the same for my TVR.
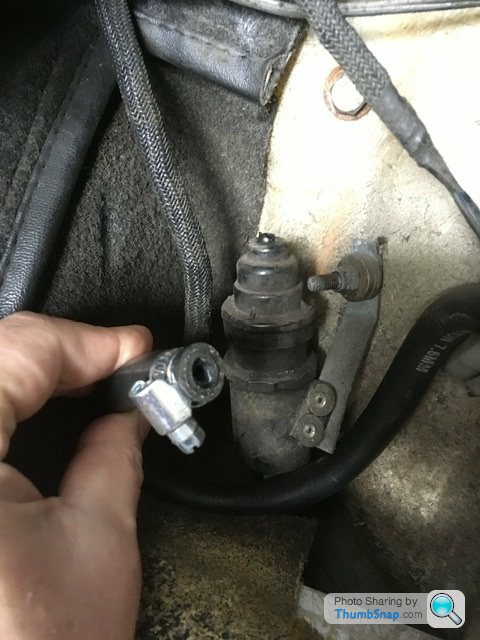
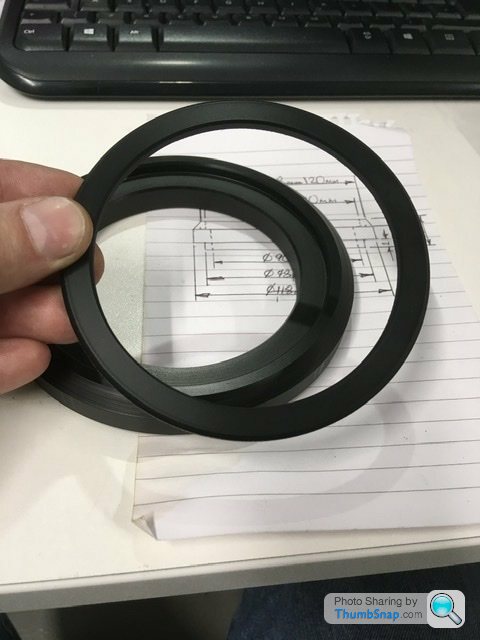
Yesterday checking wiring and chasing them I could smell fuel, noticed it coming from the rear speaker holes. So had a look in the boot checking the fuel cap and noticed the top of the roll over vent had sheared off, hence the fuel smell. Noticed the pipe had new jubilee clips and a new pipe.
New roll over valve ordered and I’ll make a better securing bracket. It gets hidden behind trim but it’s always nice knowing something is properly done. Pictures below show damaged roll over valve.

I shall plod on. Basically I’ve worked on the car and a “specialist “.
I won’t need to explain anymore.
On another thread I’m going through random wire issues. I didn’t do the dismantling, I have been left with a dodo currently that doesn’t work. When I took the Jag xjc apart I took plenty of photos and labelled items. I wrongly assumed a specialist would do the same for my TVR.
Yesterday checking wiring and chasing them I could smell fuel, noticed it coming from the rear speaker holes. So had a look in the boot checking the fuel cap and noticed the top of the roll over vent had sheared off, hence the fuel smell. Noticed the pipe had new jubilee clips and a new pipe.
New roll over valve ordered and I’ll make a better securing bracket. It gets hidden behind trim but it’s always nice knowing something is properly done. Pictures below show damaged roll over valve.
sixor8 said:
jl34 said:
Well that a rule too far really. Thanks to that rule , many other people may get shoddy work done. Brilliant!
I've read several threads where a few hints are enough for anybody really interested and aware of the network to work it out. A less obvious 'rhyme' can also be enough. There aren't that many specialists, and you can always send an email direct to the OP for clarity.
So I’ve been going through my wiring the past few days, with the help of tvr owners I’ve managed to fire up the ole girl.
Currently there are no cats fitted although I do have a pair to bolt on once it’s nearer mot time.
Blimey I didn’t realise how angry she sounds!
I don’t have any cold start with the tune yet n the engine so it needs a bit of easy blipping on the throttle to stop her stalling. Once she settled it was idling rather fast for a cold engine so I turned her off to check the throttle cable position first………but the bonnet pull wasn’t there? Then I found it in the bag of bits that were removed during the strip down I didn’t do.
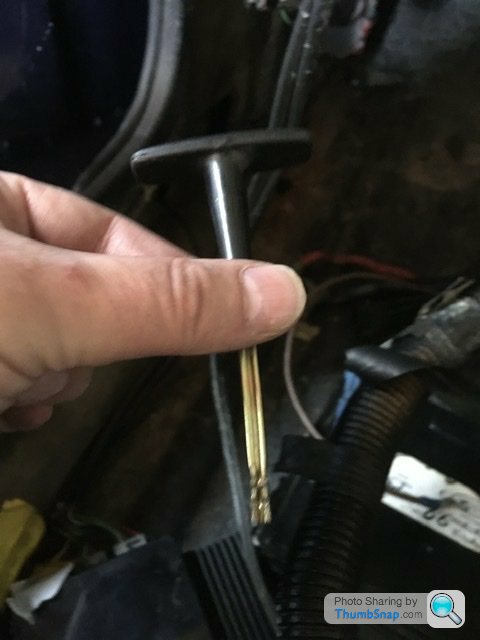

So now I need to Jack the front so I can slide under the car and somehow pull the actual latch……it’s just one thing after another s as t the moment.
I got her fired up though with the alarm now working correctly.
Currently there are no cats fitted although I do have a pair to bolt on once it’s nearer mot time.
Blimey I didn’t realise how angry she sounds!
I don’t have any cold start with the tune yet n the engine so it needs a bit of easy blipping on the throttle to stop her stalling. Once she settled it was idling rather fast for a cold engine so I turned her off to check the throttle cable position first………but the bonnet pull wasn’t there? Then I found it in the bag of bits that were removed during the strip down I didn’t do.
So now I need to Jack the front so I can slide under the car and somehow pull the actual latch……it’s just one thing after another s as t the moment.
I got her fired up though with the alarm now working correctly.
Had a couple of hours today to make a bracket of sorts to hold the new fuel tank roll over valve. I used an engineering nylon which allows tapped threads.
Pictures below of the valve and it’s new holding bracket

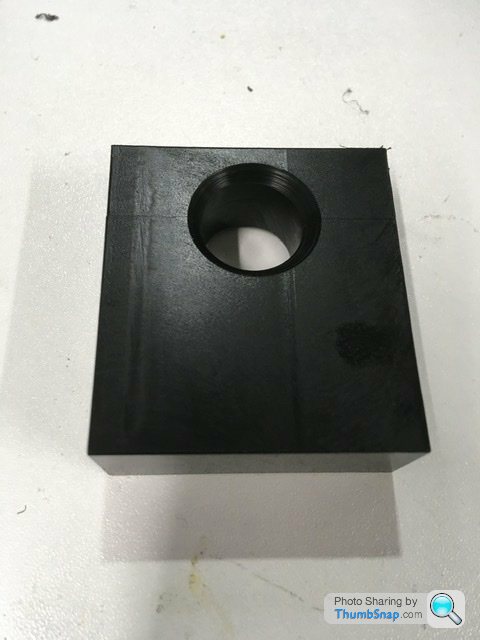
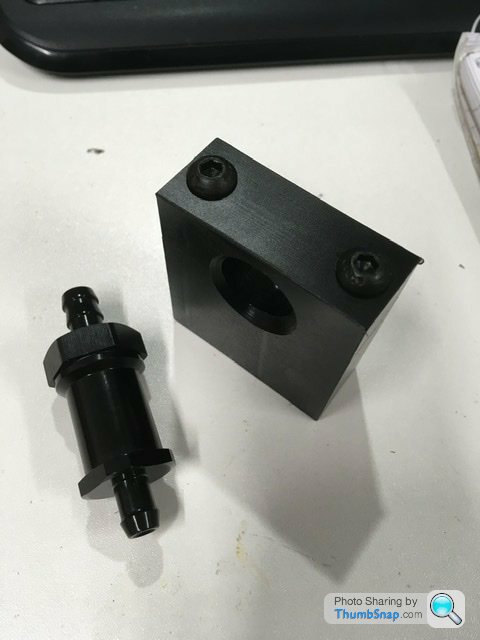
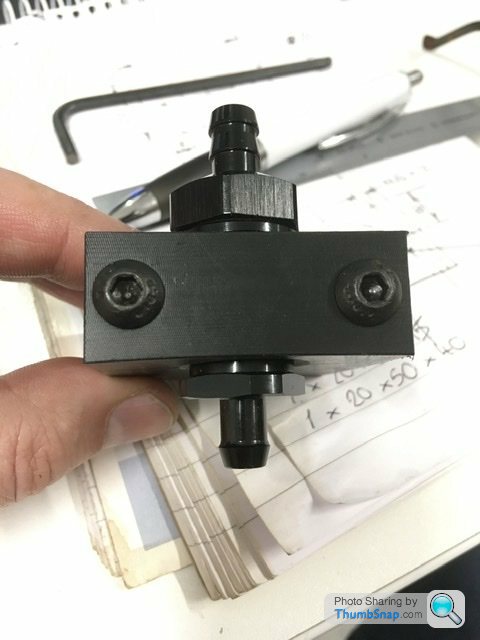
The base will need an angle machined but I’m unsure of that yet until I offer it up for it’s position. The original has just a steel strap bent into position. Very TVR as it’s hidden behind trim lol
Pictures below of the valve and it’s new holding bracket
The base will need an angle machined but I’m unsure of that yet until I offer it up for it’s position. The original has just a steel strap bent into position. Very TVR as it’s hidden behind trim lol
Bowks said:
Any chance of a sneaky peek at the leather hides? Also really interested in the speaker upgrades.
The hides haven’t arrived yet as there is a hold up with the perforation machine. Is it the colour you want to see?The speaker upgrade will be using new old stock kicker 5 1/4” front components with 8” subwoofers fitted behind the front seats and using the space under the centre console. All run active via another new old stocker item a kicker 6 channel amplifier. Keeps everything retro 90’s/2000’s.

Bowks said:
RobXjcoupe said:
The hides haven’t arrived yet as there is a hold up with the perforation machine. Is it the colour you want to see?
The speaker upgrade will be using new old stock kicker 5 1/4” front components with 8” subwoofers fitted behind the front seats and using the space under the centre console. All run active via another new old stocker item a kicker 6 channel amplifier. Keeps everything retro 90’s/2000’s.
Mostly the colour. I'm a few years away from sorting out the trim but I'm collating the ideas now. The speaker upgrade will be using new old stock kicker 5 1/4” front components with 8” subwoofers fitted behind the front seats and using the space under the centre console. All run active via another new old stocker item a kicker 6 channel amplifier. Keeps everything retro 90’s/2000’s.
I'm almost at the point of removing the stereo as I don't want too much tech on show, however, your plan sounds good.
My preferred colour was actually the burnt orange. Unfortunately no matching vinyl and only available as a smooth grain hide so more expensive. Technically you can do the interior with a single hide like for like as per original. As I’m going with perforated seat panels and door trims I needed 2 hides. Then add in new roof cover bag and tool kit bag you need a matching vinyl or plain black to save a few pounds. I’ve gone with matching as it’s a difference I haven’t seen done with another car. Currently I’m at £720 for interior materials inc boot carpet and new door and boot seals but not including interior carpet, scrim foam and any specific colour stitching thread.
As I’m going to use black carpet, I’m personally using black top stitch.
The dash and glovebox in alcantara is extra at £700. New veneer dash and lower panel with all new fittings but using original dials and gauges is £500. Things add up extremely quickly! Any custom machined parts I do myself. On paper the car is going to be a looker but until it’s all back together it’s all just words at the mo lol.
Speakers and audio if you keep things simple it’s very easy to build a nice system…… I think anyway.
If you choose an older head unit, you can find that Sony and kenwood built lovely top end revolving face units. Pioneer and alpine used motorised fronts to adjust panel angle instead. All top end units will have front, rear and sub-out pre-outs and adjustable high and low filters to help stop speaker distortion. There will also be ways of using cd changer inputs as aux inputs if needed as well either wired or as a Bluetooth connection.
Just a matter of searching fleabay for the correct plug in connection for the manufactured unit.
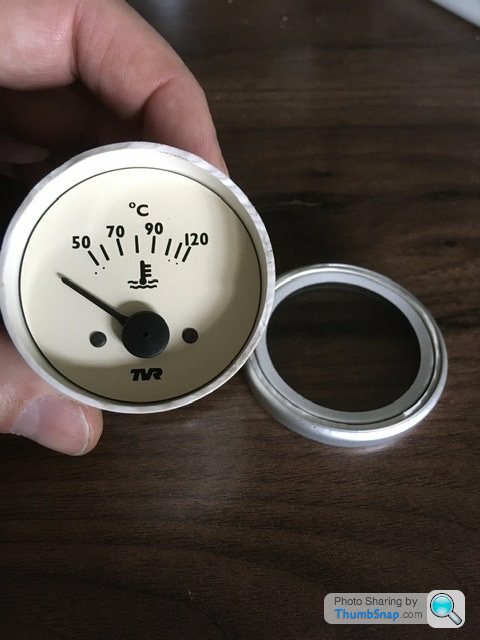
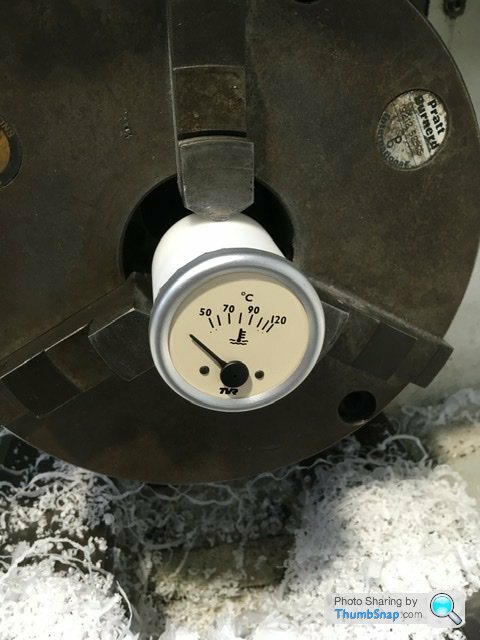
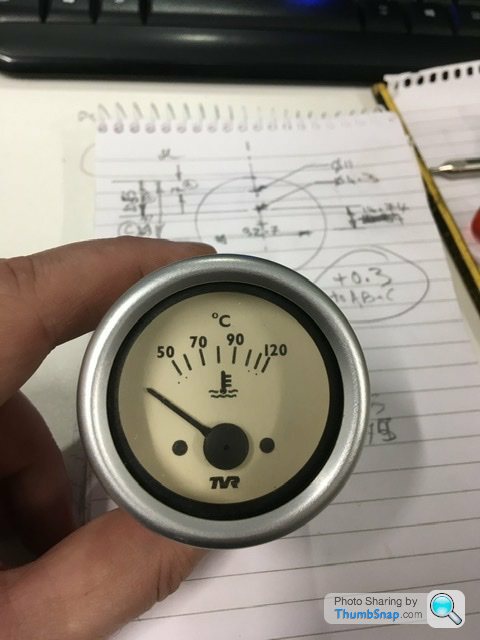
Another issue I’ve been looking at is this broken temp gauge. Broken by the specialist restoration firm I used.
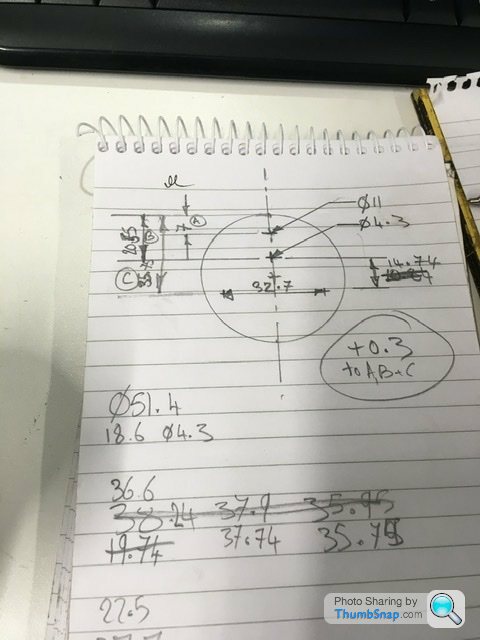
I’ve been looking at Jaguar gauges which are the same size to fit the aperture in the dash. So had a measure today and found the Jag gauge doesn’t have the same depth of housing, which is a pain.
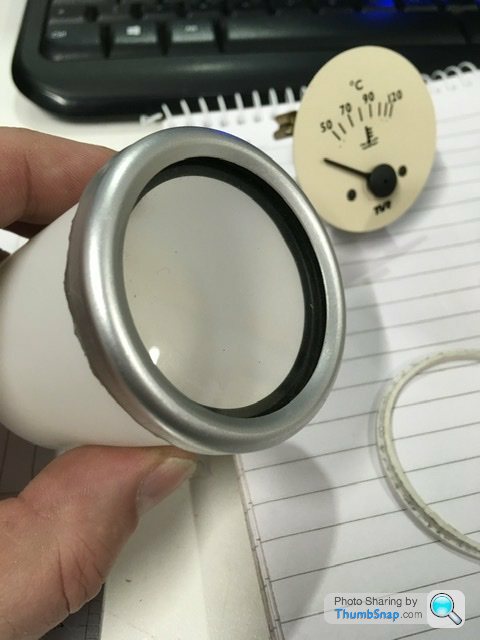
So I’ll attempt to machine a new housing next week. The hard part will be removing the original bezel surround from the broken part and then squeeze it all back together. I’ll try. No fingers crossed with this.
Going back to the wiring, I’ve ordered some electrical bits and bobs so as I can feed a higher current to the window motors when the up button is pushed. A very easy mod while I don’t have any dash fitted. The window motors I’ll also remove from the doors to give an overhaul of the mechanism and fit new felt guides. Hopefully should have a reasonable quick up operation rather than the original will it get there eventually with crossed fingers lol.
The doors also need removing to see what’s up with the hinges as I’m not happy with the current specialist restoration firm fit. There is a bit of drop so possibly new hinge bushes are needed. Originals are nylon. If worn I’ll make new bronze versions. No point trying to adjust a worn out hinge pivot.
The doors also need removing to see what’s up with the hinges as I’m not happy with the current specialist restoration firm fit. There is a bit of drop so possibly new hinge bushes are needed. Originals are nylon. If worn I’ll make new bronze versions. No point trying to adjust a worn out hinge pivot.

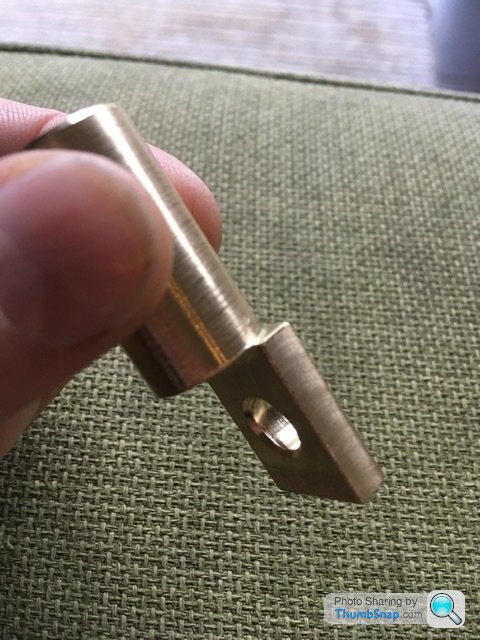
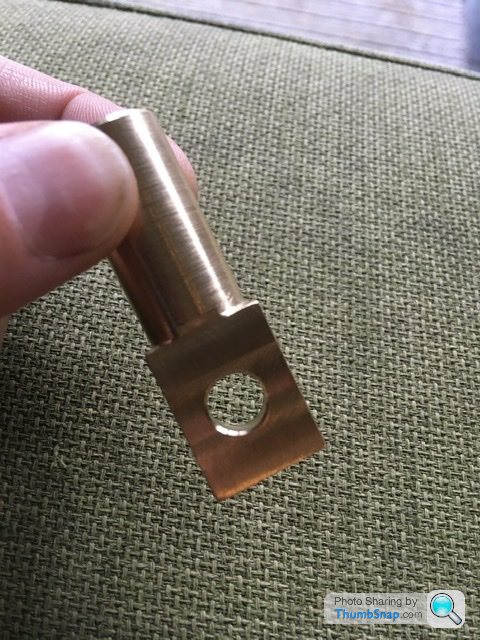
Above I made a new terminal for the big power cable that supplies the starter motor. The battery I’m now using has the positive terminal nearest the transmission tunnel so I can shorten that cable now. Made from 25mm diameter brass I’ll solder the join using a plumbing torch.
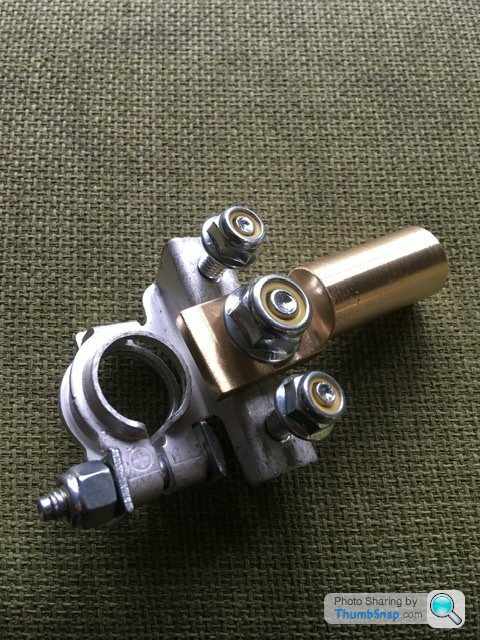
Below is the new holder to attach 3 separate power leads to the battery positive terminal.
The starter motor, main fuse box feed and the amplifier for the new audio system. I think it gives a neater fit with 3 separate power offs rather than use the clamp bolt holding everything to the battery terminal.
Started to make a new body for temperature gauge. I’ve used a dirty white coloured nylon. I think if lit with a standard bulb you would notice a slight shade of white difference. As I’m going to green bulbs I don’t think it will notice any shade variation. I might be wrong….hopefully not. Pictures below of making the body.

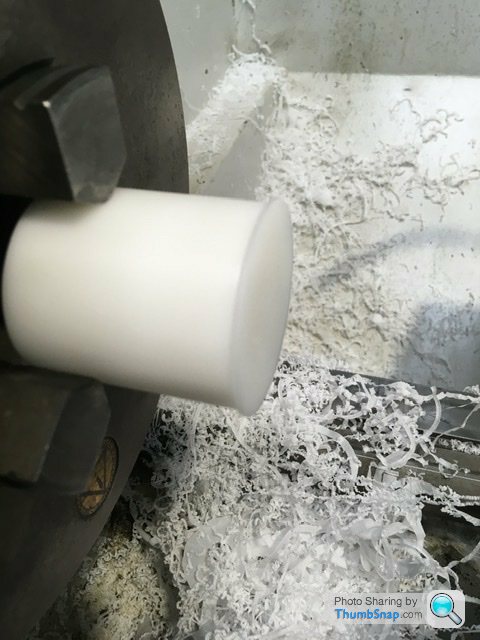
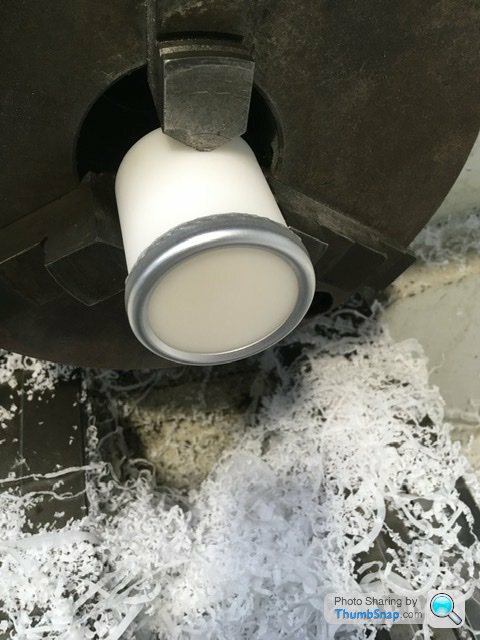

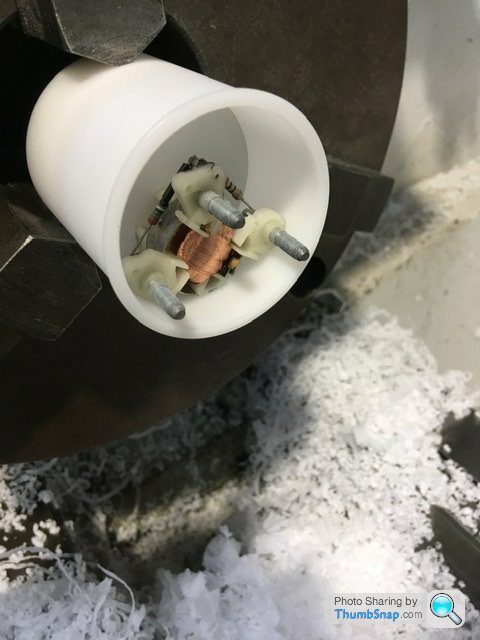
Next week I’ll put the holes in to secure the actual dial and machine the back away to leave the material to hold the backlight bulb and holder. Should be a nice job when finished keeping the original dial face and surround so all dials have the same patina rather than a random new looking temp gauge.
Next week I’ll put the holes in to secure the actual dial and machine the back away to leave the material to hold the backlight bulb and holder. Should be a nice job when finished keeping the original dial face and surround so all dials have the same patina rather than a random new looking temp gauge.


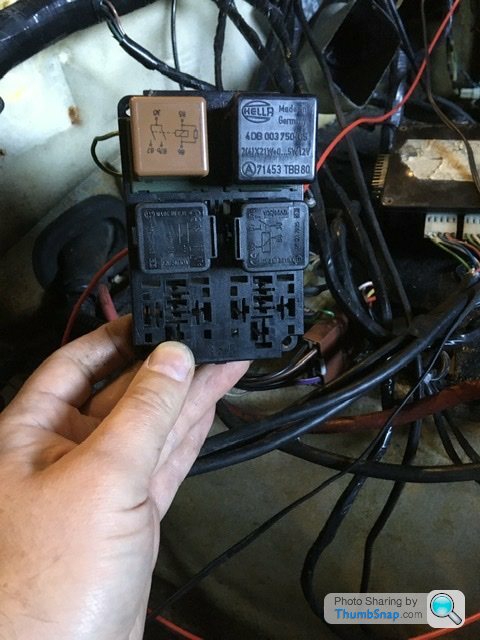
Started to tidy up the wiring loom in the passenger footwell and also add a wiring mod to raise the windows a bit quicker.
Pictures below are the relays to supply a higher current to help move the windows up. I used the relay holder that was already there but without any wiring. I bought the correct terminals to clip in and it looks factory. Left relay supplies left window, right hand relay supplies right hand window motor. The main feed is still needed but I will need the fuse box removed first to gain access to the back and see if there are any spare fuse spaces. If not a separate fuse holder will be needed
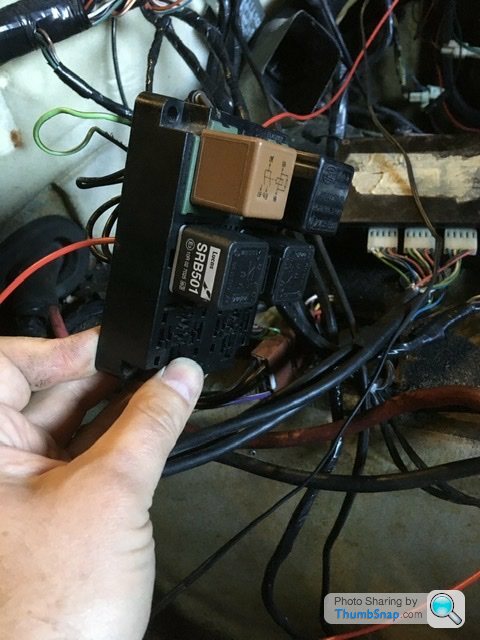
The ecu loom and floating relays have also had a bit of work today. The relay wiring has been shorted and new relay holders fitted that slot together. These will be secured on the bulkhead. The fuse box is going into the glovebox so the ecu will bolt to into that space out the way behind the battery. The third relay in the row is the hot start mod. Again that will be wired properly into the fuse box, properly fused and no loose wiring.
So fusebox removal tomorrow. So I can get the ecu mounted and finally no more rats nest on top of the battery

Pictures below are the relays to supply a higher current to help move the windows up. I used the relay holder that was already there but without any wiring. I bought the correct terminals to clip in and it looks factory. Left relay supplies left window, right hand relay supplies right hand window motor. The main feed is still needed but I will need the fuse box removed first to gain access to the back and see if there are any spare fuse spaces. If not a separate fuse holder will be needed
The ecu loom and floating relays have also had a bit of work today. The relay wiring has been shorted and new relay holders fitted that slot together. These will be secured on the bulkhead. The fuse box is going into the glovebox so the ecu will bolt to into that space out the way behind the battery. The third relay in the row is the hot start mod. Again that will be wired properly into the fuse box, properly fused and no loose wiring.
So fusebox removal tomorrow. So I can get the ecu mounted and finally no more rats nest on top of the battery
Gassing Station | Griffith | Top of Page | What's New | My Stuff