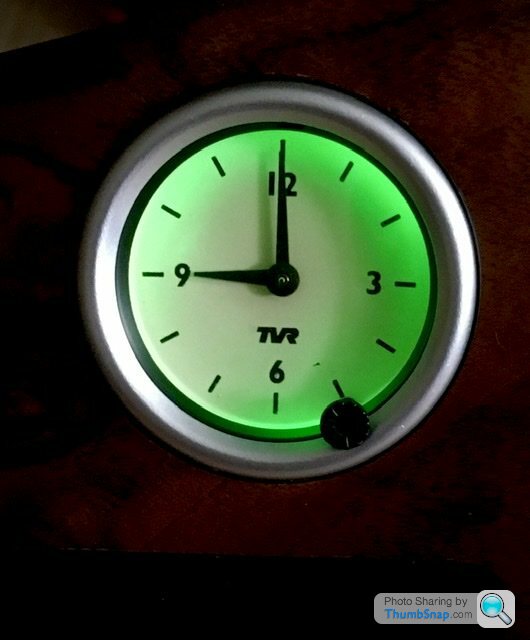
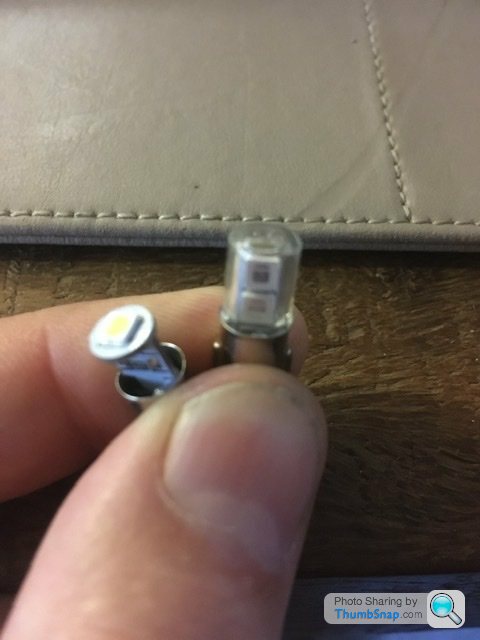
1995 Griffith 500 restoration
Discussion
Polly Grigora said:
RobXjcoupe said:
Polly Grigora said:
Do you know anyone that will supply you with a knackered gauge to play with?
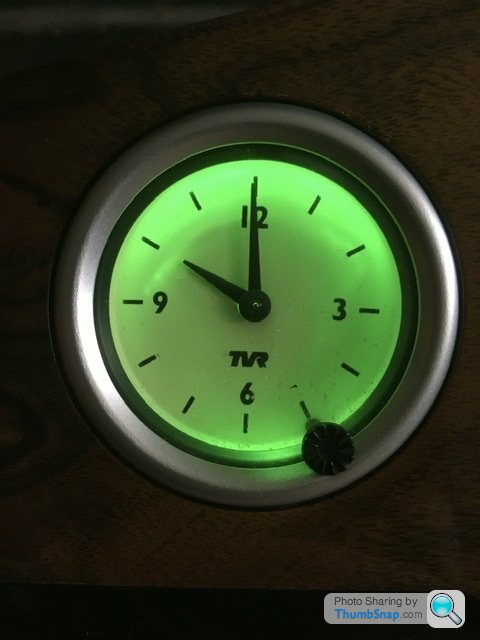
Unfortunately not. I’m hoping the new bulb being lit on the sides as well as the front will get rid of the shadow and possibly not highlight the bit of dirt behind the glass front.Shame that nobody is able to send you a gauge to play with
Bevelled all around?
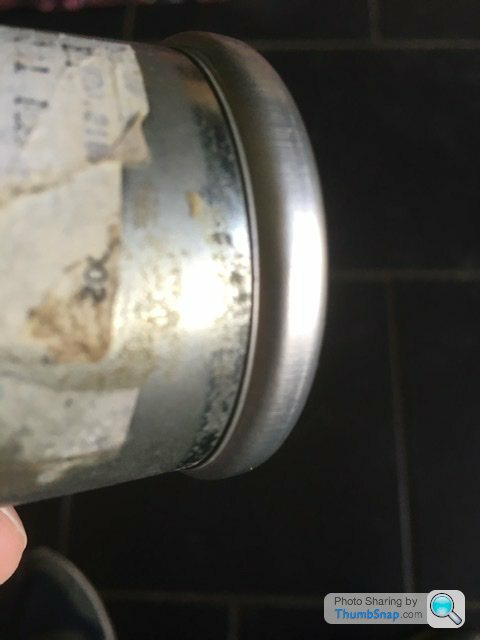
Have only done the job once on a gauge that had a bevelled chrome ring, it was ok after but not perfect by any means
Would cutting the bevelled part of the ring in several places with a dremel circular saw give you a fix?
Then once repaired I could gently squeeze the aluminium bezel back into place with a line of sealant to finish the repair.
Stick Legs said:
How?
We need answers!
Mounted in a lathe chuck, clocked up, parting tool used to carefully cut away the flanged part of the bezel. Proper squeaky bum time as no room for mistakes.We need answers!
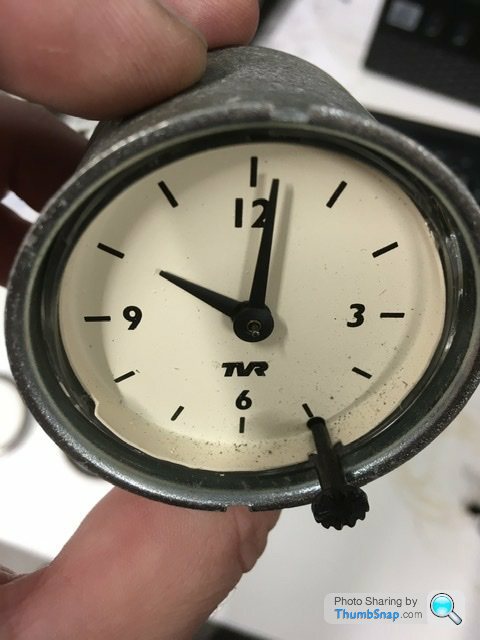
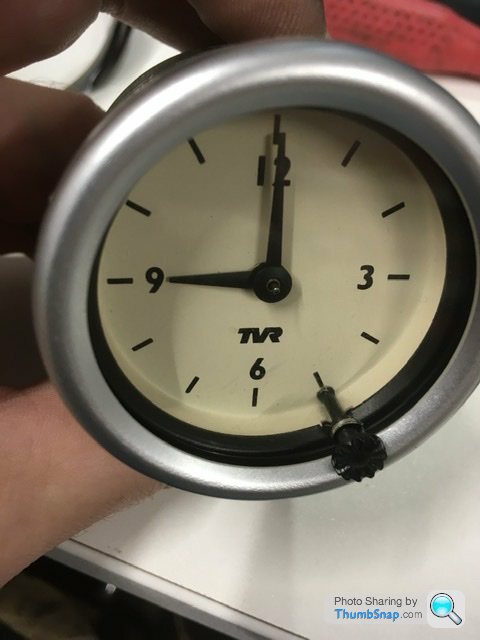
Sharpened a small flat blade screwdriver to a point to gently prise off the bezel.
Popped it off, cleaned up the clock face and job done.
Polly Grigora said:
RobXjcoupe said:
RobXjcoupe said:
Mounted in a lathe chuck, clocked up, parting tool used to carefully cut away the flanged part of the bezel. Proper squeaky bum time as no room for mistakes.
Sharpened a small flat blade screwdriver to a point to gently prise off the bezel.
Popped it off, cleaned up the clock face and job done.
You have got to be feeling goodSharpened a small flat blade screwdriver to a point to gently prise off the bezel.
Popped it off, cleaned up the clock face and job done.
Have witnessed a few near on impossible fixes throughout my life, your fix is now added
Perfection

sixor8 said:
You'd have a secondary income I reckon, doing that to the analogue speedometers (Chimaeras and Cerberas too). 
So many of them stick eventually, and it's getting the bezel off without butchering it that's the main problem.
The Griff and chimaera dials are just rehashed old Jaguar items. New chrome chamfered bezels are available for Jaguar dials. If the TVR bezels are damaged at removal they can be replaced with a Jaguar part. I’ve just tried to keep my Griff dials looking original where possible and on a tiny budget. 
So many of them stick eventually, and it's getting the bezel off without butchering it that's the main problem.
sixor8 said:
RobXjcoupe said:
sixor8 said:
You'd have a secondary income I reckon, doing that to the analogue speedometers (Chimaeras and Cerberas too). 
So many of them stick eventually, and it's getting the bezel off without butchering it that's the main problem.
The Griff and chimaera dials are just rehashed old Jaguar items. New chrome chamfered bezels are available for Jaguar dials. If the TVR bezels are damaged at removal they can be replaced with a Jaguar part. I’ve just tried to keep my Griff dials looking original where possible and on a tiny budget. 
So many of them stick eventually, and it's getting the bezel off without butchering it that's the main problem.

Being greedy I think.
Polly Grigora said:
RobXjcoupe said:
That made me smile 
You've got me smiling
Totally agree lots of pointless morning meetings. Jaguar had far more management staff involved than the Ford equivalent.
Press shop production didn’t like toolroom boys telling them to hurry up as we need a line for try out. Press shop supervisors were a mixed ability bunch. Best meeting was a particular supervisor losing his s
 te because he didn’t understand the engineering, basically stood up told everyone he was the only man in the room that could lift 250lb then stormed out?! Higher management were speechless and one of our toolmakers who was a big fella simply said he could lift 250lb but could we just make sure the panels numbers are completed for lunchtime so we could set our tools.
sixor8 said:
RobXjcoupe said:
Indeed but if they made them available repairs could be made elsewhere. I originally contacted Caerbont to buy a new temp gauge but they wasn’t interested, just want to sell me a new complete set of gauges.
Being greedy I think.
I'm a little surprised they would only sell a set. The individual gauges are in their catalogue (under Chimaera and Griff, they are the same):Being greedy I think.
https://www.smiths-instruments.co.uk/products/tvr-...
They also available with striped logo if required.
If a Chimaera or Griff analogue speed completely packs in, the digital ones don't have the oil & ignition warning lamps in so a new rev counter would be needed too. I asked...... They're £185 and £195 each respectively. Plus VAT and P+P no doubt.

Mighty Flex said:
Always an interesting read when I see new posts in here.
We did have a conversation about interior work by email, but this may be useful to others:
I investigated my interior a bit better and my best estimate is that it was originally biscuit, but has been sprayed (with varied levels of attention) doeskin or magnolia. It comes off very quickly back to the original colour with cellulose thinners, so this has got me thinking about returning it and then patching what is left with more care and attention.
I have the early type seats with the flat base- would it just be straightforward forward to change to the later seat base style as part of a refurbishment? That said, I have tried a mx5 seat in place of the tvr one and it is so much better...
I expect I'm not alone in having a wrinkly dash: it's full leather an I expect it may have shrunk, is there a way to save it? I have wondered if it will relax with a feed?
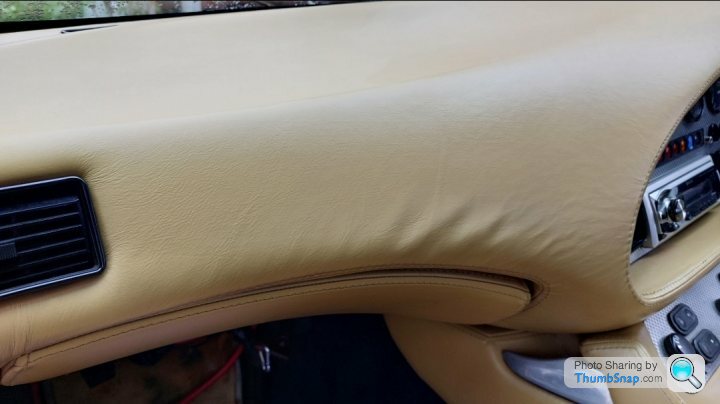
My dials are also looking a bit battered (black rings) so it's good to see what can be done without resorting to new.
This is just my opinion to possibly remove those wrinkles on the dash. Feed won’t work as the dash has technically been painted to recolour it and thus sealing the top of the leather. Feed would only soften the leather and wouldn’t remove the wrinkles. The process below would be used in conjunction with any leather softening.We did have a conversation about interior work by email, but this may be useful to others:
I investigated my interior a bit better and my best estimate is that it was originally biscuit, but has been sprayed (with varied levels of attention) doeskin or magnolia. It comes off very quickly back to the original colour with cellulose thinners, so this has got me thinking about returning it and then patching what is left with more care and attention.
I have the early type seats with the flat base- would it just be straightforward forward to change to the later seat base style as part of a refurbishment? That said, I have tried a mx5 seat in place of the tvr one and it is so much better...
I expect I'm not alone in having a wrinkly dash: it's full leather an I expect it may have shrunk, is there a way to save it? I have wondered if it will relax with a feed?

My dials are also looking a bit battered (black rings) so it's good to see what can be done without resorting to new.
First off the dash needs to be removed from the car.
Remove the glovebox lid also. This gives access to the leather tucked behind the dash panel. Using a heat gun, you need to warm up the leather to soften the glue. This will burn the sprayed on colour if it gets too hot.
Carefully pull the tucked over edges off the dash panel adjacent to the offending wrinkled area all the way to the wrinkled leather so you can get your fingers under the wrinkles.
All the time gently warming the leather to keep the old glue soft.
Now to remove the wrinkles you need to pull the leather left to right carefully without creating any bunching which will simply move the wrinkles to another part of the dash and at the same time stretch the leather back over the dash using fresh high temp contact adhesive to glue it all back in place. The stitched line around the glove box aperture is your guide to how much leather can be pulled down around the dash. Pull too hard and you have a wonky stitch line. To fit a new cover, you start with the stitched lines so it’s all straight and remove excess from the back of the dash. It’s not an easy job.
When complete you can prep the entire dash for a fresh recolour.
As the dash is out it also allows refurbishment of your dials, bulbs, switches etc
Harvy500 said:
RobXjcoupe said:
A bit of an update.
I visited the car recently, freshly painted body now fitted to the chassis with all the running gear.
Body looks good, chassis looks good.
Dirty engine fitted back on brand new chassis, gearbox and diff in a similar condition. Was assured these items would be cleaned and looking good. Before strip down I actually asked to take these parts away to clean ready for the new chassis, was told it was part of the price so no need to take away. Was told too many hours involved to do that. Now wondering if gearbox,diff and engine have had an oil change as was originally told. My car also had a faulty alarm when dropped off. Again was told wouldn’t be an issue. No mention if this has or is going to be repaired or replaced.
Secondly I asked for my under cover twin lights to be fitted with deleted lower front main beam lamps. The front opening to be carefully opened up into a nice oval before paint. This was forgotten. So no front grille mod. Was told this could still be done. I said I wouldn’t want blended in paint on the front after a totally new paint job. So a 7” headlight upgrade was given as a sorry.
Lastly which is really bizarre is the interior. I said I would complete a new interior save the dash and windscreen surround. So both my front seats were stripped to component level?!
As a sorry they will fit my supplied new covering for the targa roof and fold down rear.
I’m gobsmacked. More so as I thought I’d chosen a competent specialist tvr garage to do the work.
The work on the chassis and body is good but both not what I originally asked for. I actually asked for a black chassis but got a white chassis.
Now I feel I need to hold my tongue to have the last bit of work completed so I can pick the car up and trailer away.
Sounds exactly what my experience of an alleged TVR specialist did to me. I visited the car recently, freshly painted body now fitted to the chassis with all the running gear.
Body looks good, chassis looks good.
Dirty engine fitted back on brand new chassis, gearbox and diff in a similar condition. Was assured these items would be cleaned and looking good. Before strip down I actually asked to take these parts away to clean ready for the new chassis, was told it was part of the price so no need to take away. Was told too many hours involved to do that. Now wondering if gearbox,diff and engine have had an oil change as was originally told. My car also had a faulty alarm when dropped off. Again was told wouldn’t be an issue. No mention if this has or is going to be repaired or replaced.
Secondly I asked for my under cover twin lights to be fitted with deleted lower front main beam lamps. The front opening to be carefully opened up into a nice oval before paint. This was forgotten. So no front grille mod. Was told this could still be done. I said I wouldn’t want blended in paint on the front after a totally new paint job. So a 7” headlight upgrade was given as a sorry.
Lastly which is really bizarre is the interior. I said I would complete a new interior save the dash and windscreen surround. So both my front seats were stripped to component level?!
As a sorry they will fit my supplied new covering for the targa roof and fold down rear.
I’m gobsmacked. More so as I thought I’d chosen a competent specialist tvr garage to do the work.
The work on the chassis and body is good but both not what I originally asked for. I actually asked for a black chassis but got a white chassis.
Now I feel I need to hold my tongue to have the last bit of work completed so I can pick the car up and trailer away.
I spoke to them about what I wanted done to my car for weeks before my car went to them to be clear and concise about what I wanted. Many agreements and promises made.
I typed out a long 'job sheet' and left a paper copy in the car AND emailed a copy to the 'specialist' office .
When I got the car back, many things were done I didn't ask for and things I did ask for weren't done. So many things in prior conversations where stated as being 'included'. Invoice seriously contradicted that. Fortunately, I have absolute proof of I was stated as being included.
I'm not directly naming said company because it's very likely to get legal.
My better experience shows the non specialist that can restore any marque is the real specialist. Restoring parts rather than replace, modifying according to customer requirements noting any issues before commencing with any work.
Happy new year!
Been a while doing anything trev wise. So finished off the wiring ie shortening the loom to the fusebox.
Plugged battery in for a test and nowt. Plugged the alarm back in and nothing. Well the remotes are not doing anything. So my question is do my remotes need syncing with the alarm module?
The alarm module was sent away and came back with a good bill of health and an upgrade. The remotes were also checked and with new batteries work.
I found a rather simple method to sync the remotes which still didn’t do anything visually with the hazard lights but the starter then cranked the engine but no fuel pump prime. I could here a relay click on pause then click again. Presumably the fuel pump relay?
If I unplug the alarm module the starter doesn’t crank the engine. Plug alarm back in, starter works but no fuel pump????
I’ve checked and double checked my wiring and visually all corresponds with my pictures before and after. I literally shortened the loom one wire at a time so no mistakes were made.
Any ideas of how to sync my foxguard alarm would be a good start. A double check so to speak
Thanks in advance for any help
PabloGee said:
Dave at HF Solutions knows the Foxguard alarm well enough to have told me how to bypass the immobilising. https://www.hf-solutions.co.uk/TVR
I had problems with the starter motor not cranking, in fact zero response at all on the starter circuit, though the fuel pump primes every time.
I chose to bypass the starter motor circuit only, then discovered the previously installed 'hot start relay kit' was incorrectly wired and falling to bits, so I've made a couple of changes to that circuit with added fuses and an uprated relay on advice of the wonderful people on here - all can be uncovered on the latter pages of this thread https://www.pistonheads.com/gassing/topic.asp?h=0&...
I mention it because you might find the immobiliser relay inside the alarm has finally given up on your fuel circuit, and it's a simple bypass to test that bit - these wires are not covered in that thread, but you can PM me to find out.
Thank you for the info. I had problems with the starter motor not cranking, in fact zero response at all on the starter circuit, though the fuel pump primes every time.
I chose to bypass the starter motor circuit only, then discovered the previously installed 'hot start relay kit' was incorrectly wired and falling to bits, so I've made a couple of changes to that circuit with added fuses and an uprated relay on advice of the wonderful people on here - all can be uncovered on the latter pages of this thread https://www.pistonheads.com/gassing/topic.asp?h=0&...
I mention it because you might find the immobiliser relay inside the alarm has finally given up on your fuel circuit, and it's a simple bypass to test that bit - these wires are not covered in that thread, but you can PM me to find out.
I have an original wired plug instead of the hot start mod. So I know that circuit is good. I can’t actually turn the alarm on/off. The starter turns though? Unplug the alarm main unit and no turning starter. Checked the fuel pump and ecu relays and they are good. So time to pm you I think
With a bit of help from some well drawn circuit diagrams the non working alarm and no fuel pump prime checked as zero power going to both items. Seems the spare fuse position according to my original TVR driver manual isn’t actually a spare fuse position. Popped said fuse in and the alarm came to life and in turn gave power to the fuel pump. I only looked at that because the supplied circuit diagrams showed two fuses were used for the alarm.
So I’m happy, my shortened main loom to the fusebox isn’t faulty which would have been a mammoth task to check.
Currently my modified battery box has now been removed to fibreglass over moved screw positions and then a coat of satin black and a new carpet outer as it was originally.
Feels like I’m moving forward again

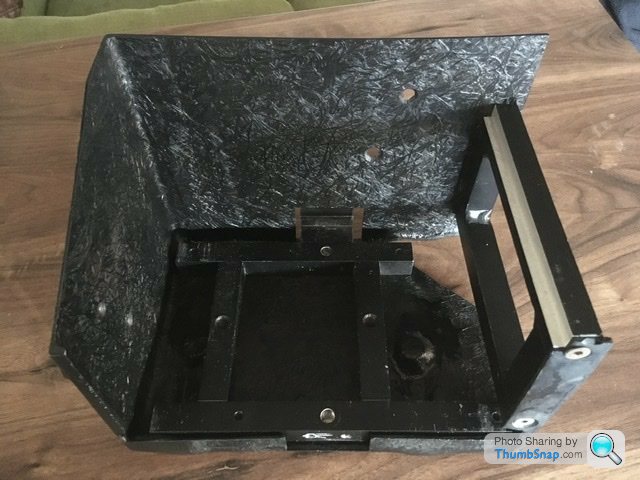
Not much to look at, battery box with a coat of satin black. Didn’t bother fitting carpet to the outside as it’s not seen bolted in position.
Also its a bit nippy in the garage currently and the wiring being moved around won’t do it any favours. I’ve ordered extra wiring components to run the heated seat circuits from the door switches to under the seats. Decided to use relays rather than let the switch take the current. Just thought a failed relay in the future will be easier to change than an obsolete Jaguar s-type heated seat switch
Been a while since I’ve worked on the Griff. So started to tinker again looking at the wiring mods and thinking oh yes lost the power to the fuel pump. That ole chestnut lol.
Easy fix as the offending relay tested was duff.
Strangely had a similar issue with the xj coupe which is the reason I revisited the Griff. The xj issue was a wiring missing from the inertia cutoff switch, but anyway Griff had a replacement fuel pump relay fitted and she fired up lovely.
As the weather is warming up, I can now tinker away again in the garage.
As a recap I need to finalise the modded wiring to push up the windows and complete the heated seat wiring. Dash and dials can then go back in. I have carefully stored all the new trim so will be a relief once fitted and get all that space back. It’s surprising how much flat space is needed storing trim parts.
No time line as it’s just myself doing the work against life battles, if that makes sense

Gassing Station | Griffith | Top of Page | What's New | My Stuff


