Discussion


A few hours work this afternoon.
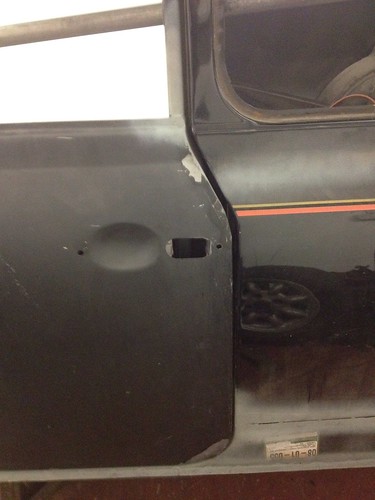
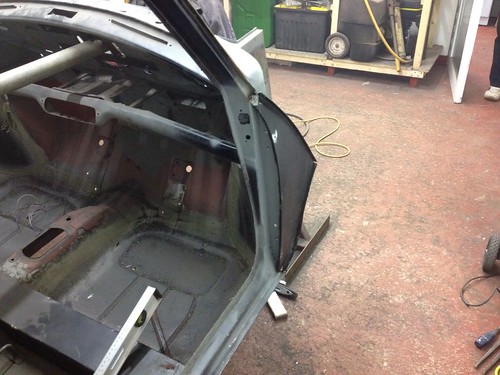
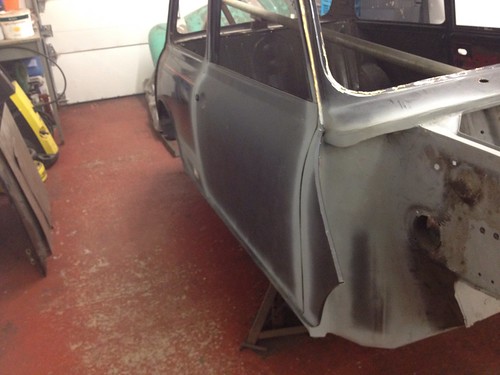
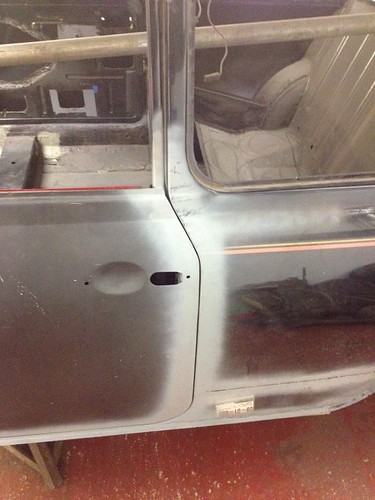
Started by finish of the frame repairs to the offside door
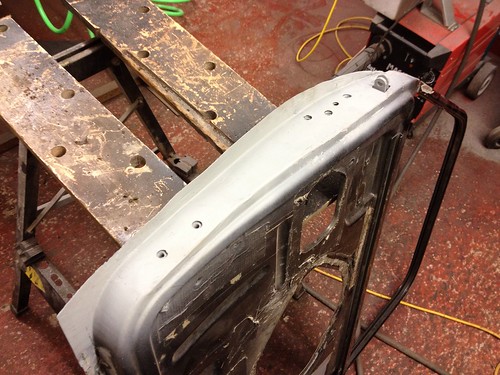
4/2/12.1 by russell.grant, on Flickr
4/2/12.2 by russell.grant, on Flickr
4/2/12.3 by russell.grant, on Flickr
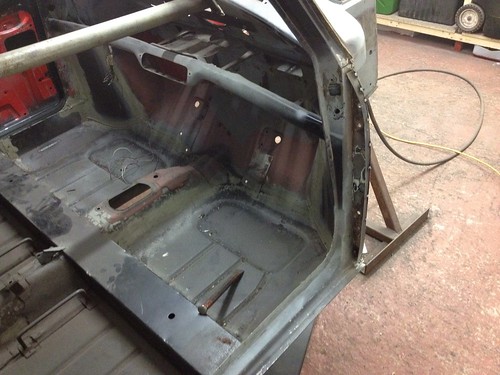
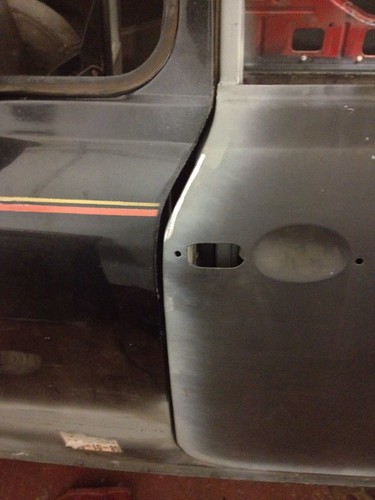
Then for a change of scenery I went back to the nearside and added an A-panel.
4/2/12.4 by russell.grant, on Flickr
Fairly happy with the fit so far just needs a bit of fine tuning and dressing off the welds. Time for a well deserved trip to the pub. Might try a bit more tomorrow once the hangover passes
Started by finish of the frame repairs to the offside door
4/2/12.1 by russell.grant, on Flickr
4/2/12.2 by russell.grant, on Flickr
4/2/12.3 by russell.grant, on Flickr
Then for a change of scenery I went back to the nearside and added an A-panel.
4/2/12.4 by russell.grant, on Flickr
Fairly happy with the fit so far just needs a bit of fine tuning and dressing off the welds. Time for a well deserved trip to the pub. Might try a bit more tomorrow once the hangover passes
Well a hangover & a trip to the apple store to have my phone replaced stopped me working on the mini this morning. However I did manage to get a few hours in this afternoon.
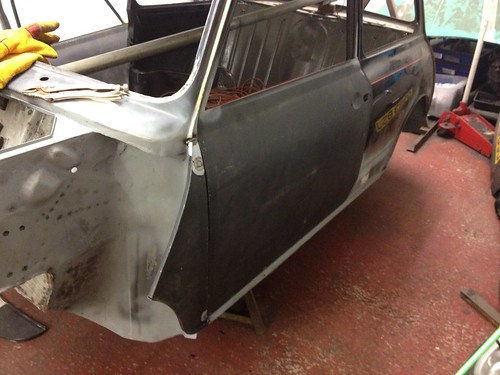
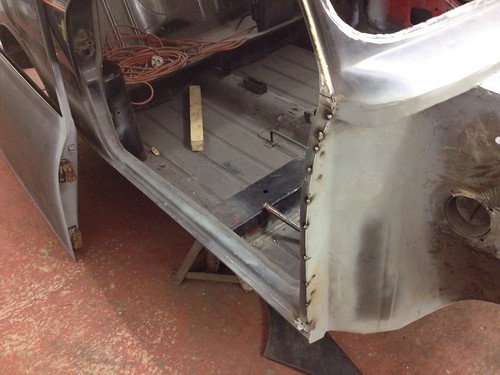
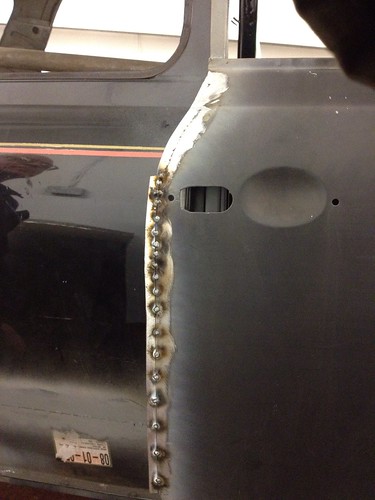
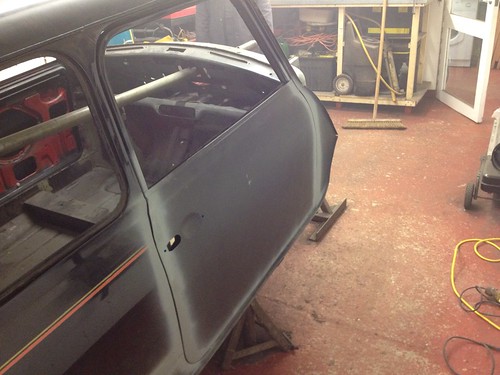
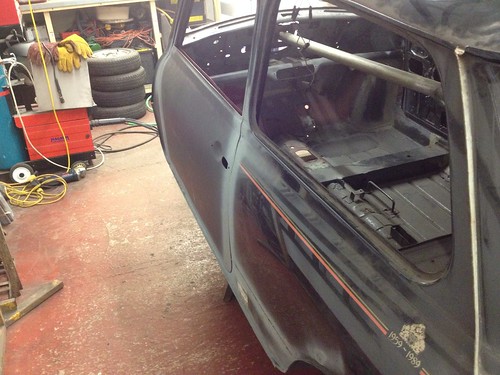
Welds all dressed off on nearside and im happy with the panel gap on the door leading edge too

5/2/12.1 by russell.grant, on Flickr

5/2/12.2 by russell.grant, on Flickr
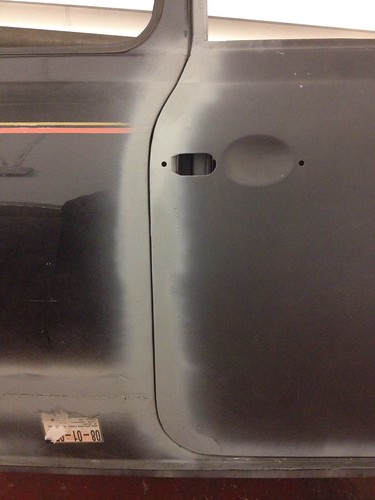
The trailing edge of the door is going to need a bit more work but I will do this once I have the offside at the same stage.
5/2/12.3 by russell.grant, on Flickr
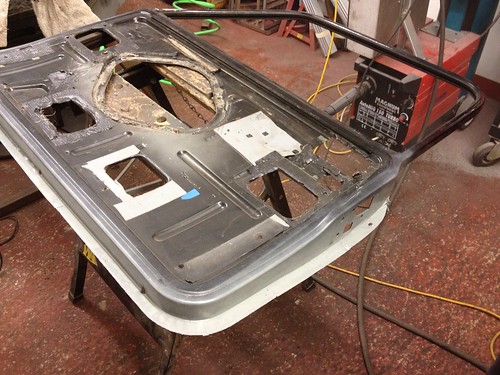
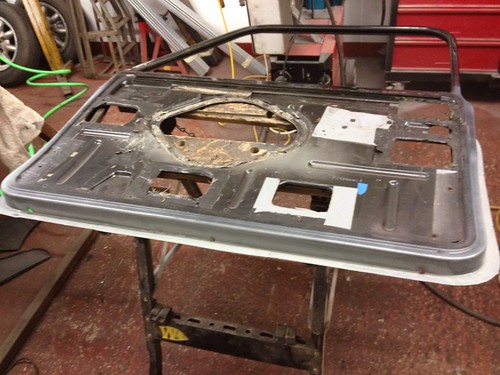
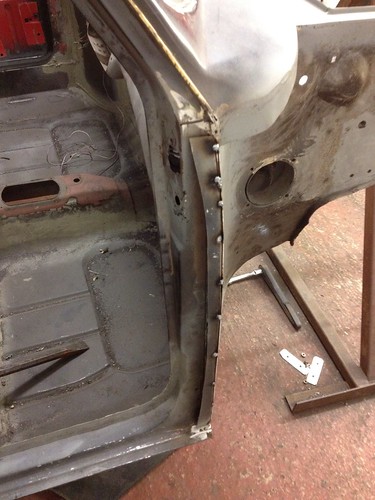
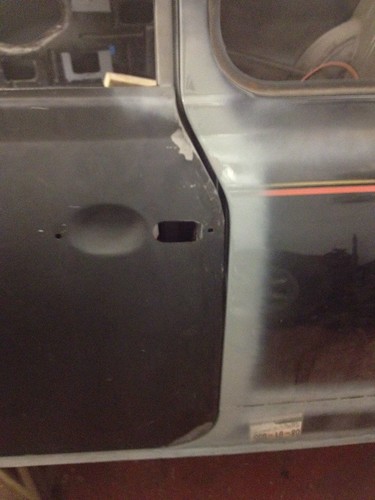
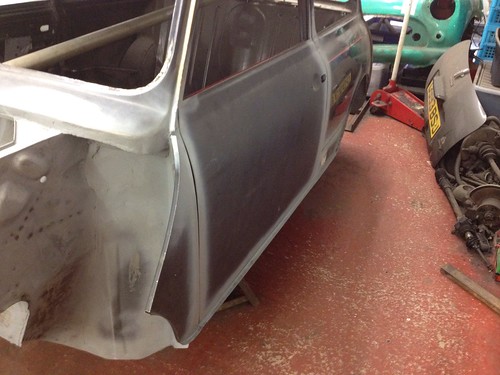
I have the offside door skin fitted as well, still needs a few welds dressing off on the underside but not much.

5/2/12.4 by russell.grant, on Flickr
Im quite pleased with the progress this weekend but the offside A-panel and flitch look like they will need a fair bit of tweaking to make it all line up well. Hopefully get onto this next time.
Welds all dressed off on nearside and im happy with the panel gap on the door leading edge too
5/2/12.1 by russell.grant, on Flickr
5/2/12.2 by russell.grant, on Flickr
The trailing edge of the door is going to need a bit more work but I will do this once I have the offside at the same stage.
5/2/12.3 by russell.grant, on Flickr
I have the offside door skin fitted as well, still needs a few welds dressing off on the underside but not much.
5/2/12.4 by russell.grant, on Flickr
Im quite pleased with the progress this weekend but the offside A-panel and flitch look like they will need a fair bit of tweaking to make it all line up well. Hopefully get onto this next time.
Not much to show for tonights few hours.
Got the door skin on the offside finished & tested fitted door. the door is a fairly good fit but the A-panel wasnt going to be a great fit on the offside, so rather than mess around I decided to measure up then remove the door and cut the edge of the flitch. After which I ground down the flitch to give me the correct position for the A-panel. I have now tacked the edge of the flitch back in position.
7/2/12.1 by russell.grant, on Flickr
7/2/12.2 by russell.grant, on Flickr
7/2/12.3 by russell.grant, on Flickr
Next time I wil grind the tacks flat then refit the door and test fit the A-panel fit again. Hopefully after that I can remove the door and weld it all back up properly.
Minor update tonight.
Finished modifying the flitch & I am now half way through fitting the A-panel. I only spent a couple of hours at it tonight but it should mean hopefully I will get time to alter the door trailing edges to give the desired gaps.
9/2/12.1 by russell.grant, on Flickr

9/2/12.2 by russell.grant, on Flickr
Finished modifying the flitch & I am now half way through fitting the A-panel. I only spent a couple of hours at it tonight but it should mean hopefully I will get time to alter the door trailing edges to give the desired gaps.
9/2/12.1 by russell.grant, on Flickr
9/2/12.2 by russell.grant, on Flickr
Today I have got the offside A-panel finished and then went to work on the door gaps.
Not a great shape or gap at the trailing edge before any work
11/2/12.2 by russell.grant, on Flickr
Then a couple of work in progress snaps
11/2/12.4 by russell.grant, on Flickr

11/2/12.5 by russell.grant, on Flickr
Which when finished looks like this
11/2/12.7 by russell.grant, on Flickr
11/2/12.8 by russell.grant, on Flickr
11/2/12.9 by russell.grant, on Flickr
Not a great shape or gap at the trailing edge before any work
11/2/12.2 by russell.grant, on Flickr
Then a couple of work in progress snaps
11/2/12.4 by russell.grant, on Flickr
11/2/12.5 by russell.grant, on Flickr
Which when finished looks like this
11/2/12.7 by russell.grant, on Flickr
11/2/12.8 by russell.grant, on Flickr
11/2/12.9 by russell.grant, on Flickr
Tomorrow afternoon I will hopefully try and tackle this
11/2/12.6 by russell.grant, on Flickr
Then If I have enough time I might get a chance to use this lot on the underside of the mini
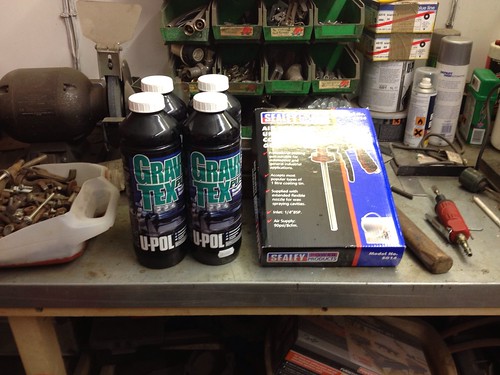
11/2/12.1 by russell.grant, on Flickr
11/2/12.6 by russell.grant, on Flickr
Then If I have enough time I might get a chance to use this lot on the underside of the mini
11/2/12.1 by russell.grant, on Flickr
Had a productive day today.
The nearside door has changed from this
11/2/12.6 by russell.grant, on Flickr
to this
12/2/12.1 by russell.grant, on Flickr
12/2/12.2 by russell.grant, on Flickr
12/2/12.3 by russell.grant, on Flickr
The nearside door has changed from this
11/2/12.6 by russell.grant, on Flickr
to this
12/2/12.1 by russell.grant, on Flickr
12/2/12.2 by russell.grant, on Flickr
12/2/12.3 by russell.grant, on Flickr
Then I decided to turn my attention to coating the floor in anti-stonechip because I need to take the mini off the spit to allow me to fabricate the front end.
Before
12/2/12.5 by russell.grant, on Flickr
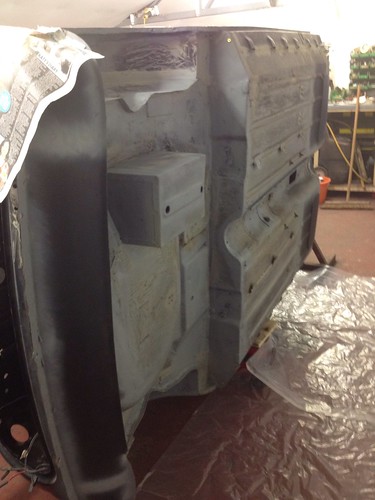
12/2/12.6 by russell.grant, on Flickr
After
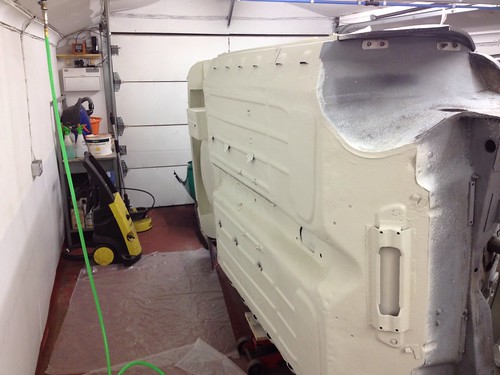
12/2/12.7 by russell.grant, on Flickr
Next Im going to turn my attention to turning the bits in the next picture into a trolley to sit the car on while I make a frontend
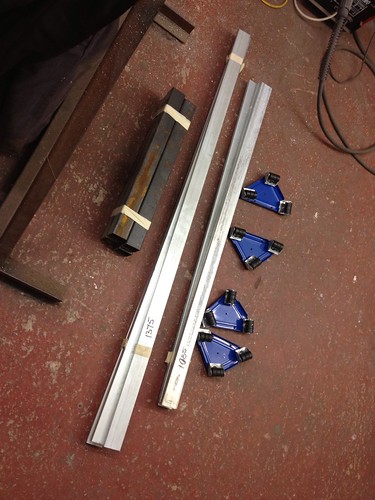
12/2/12.10 by russell.grant, on Flickr
Before
12/2/12.5 by russell.grant, on Flickr
12/2/12.6 by russell.grant, on Flickr
After
12/2/12.7 by russell.grant, on Flickr
Next Im going to turn my attention to turning the bits in the next picture into a trolley to sit the car on while I make a frontend
12/2/12.10 by russell.grant, on Flickr
The fumes from yesterdays stonechip painting were still strong in the garage tonight, so I decided I bet got out and open up the front and back doors a bit for a while to while to let some fresh air through the place.
While there I decided I might as well make a start to the trolley to sit the mini on
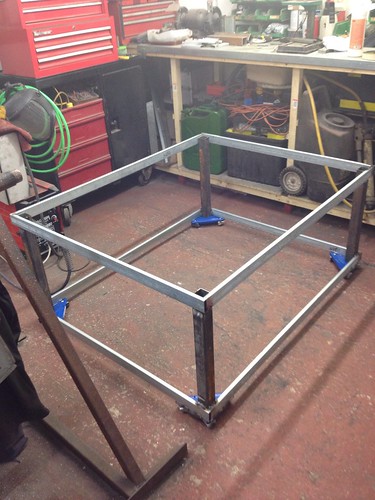
13/2/12.1 by russell.grant, on Flickr
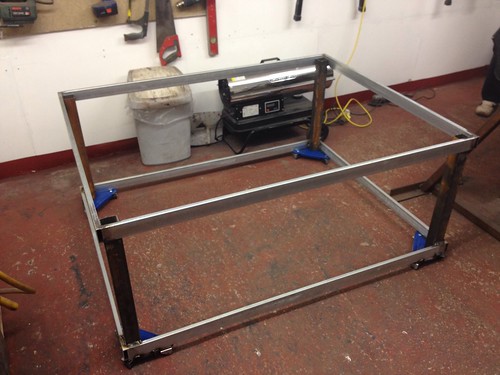
13/2/12.2 by russell.grant, on Flickr
Didnt see a point in spending a lot of time on it so an hour or so got it to this stage & less than half an hour should finish the few bits and pieces that still need done to it.
While there I decided I might as well make a start to the trolley to sit the mini on
13/2/12.1 by russell.grant, on Flickr
13/2/12.2 by russell.grant, on Flickr
Didnt see a point in spending a lot of time on it so an hour or so got it to this stage & less than half an hour should finish the few bits and pieces that still need done to it.
Just a quick update today.
Finished the trolley for the shell to sit on
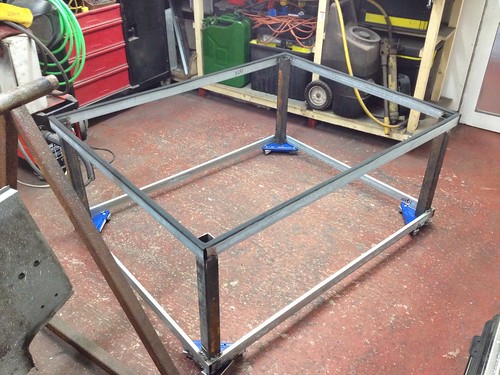
15/2/12.1 by russell.grant, on Flickr
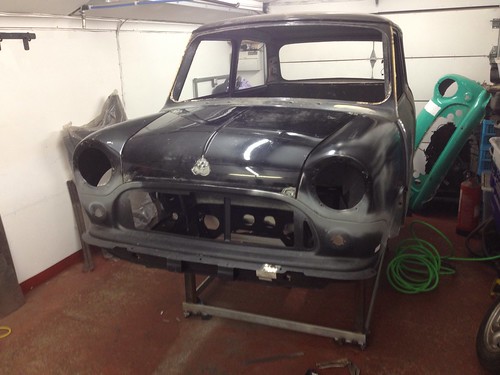
Then put the body shell up on it, fitted the front subframe and gave the workshop a tidy up
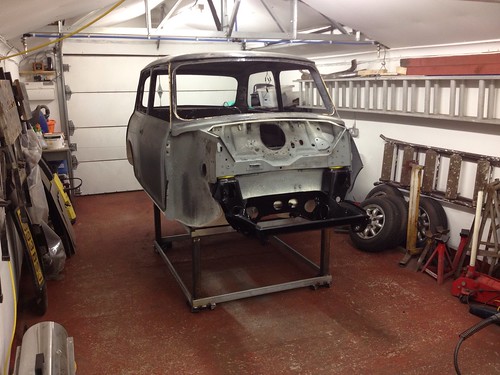
15/2/12.2 by russell.grant, on Flickr
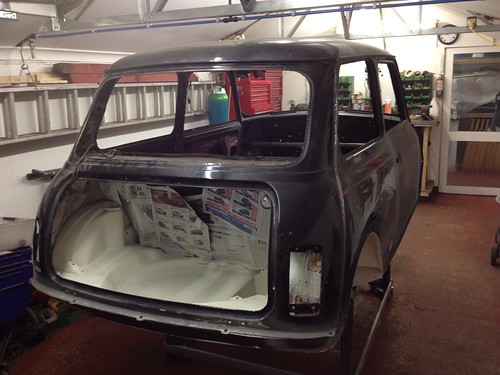
15/2/12.3 by russell.grant, on Flickr
Finished the trolley for the shell to sit on
15/2/12.1 by russell.grant, on Flickr
Then put the body shell up on it, fitted the front subframe and gave the workshop a tidy up
15/2/12.2 by russell.grant, on Flickr
15/2/12.3 by russell.grant, on Flickr
I havent done any work on the mini to update on in the last couple of days
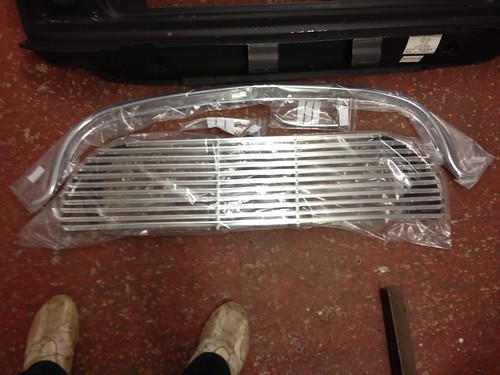
Today however I have had a delivery of a few goodies that I will start work with at the weekend
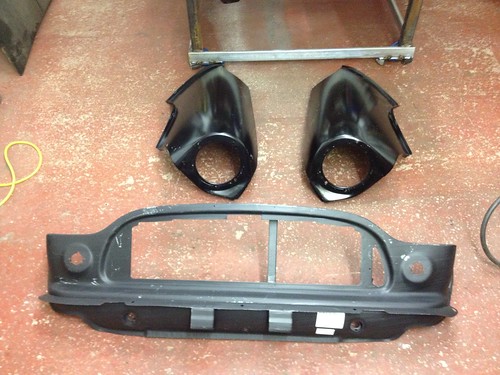
17/2/12.1 by russell.grant, on Flickr
17/2/12.2 by russell.grant, on Flickr
Today however I have had a delivery of a few goodies that I will start work with at the weekend
17/2/12.1 by russell.grant, on Flickr
17/2/12.2 by russell.grant, on Flickr
Not a huge update today but I did get a couple of hours on the mini. Spent a fair bit of the time altering the wing to make them a good fit with the front panel.
I got time to weld the offside wing onto the front panel but the nearside one is only positioned with vice grips till tomorrow.
18/2/12.1 by russell.grant, on Flickr
I got time to weld the offside wing onto the front panel but the nearside one is only positioned with vice grips till tomorrow.
18/2/12.1 by russell.grant, on Flickr
Edited by RussellG on Saturday 18th February 19:57
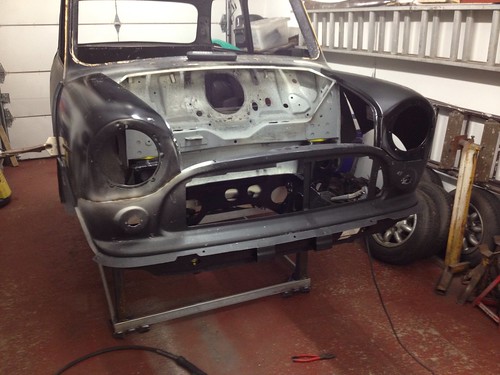
Today was hard going but ultimately well worth the effort.
I have both wings welded up to the front panel & all the welds dressed off. I then refitted to the front of the car to double check it was going to be a close fit & to allow me to position the bonnet correctly. Next I removed the bracket that holds the original grille trim on the front of the bonnet & gave the bonnet edge a few repairs.
Then it was time to fit the bonnet to the frontend. I have secured the bonnet in place with a few tack welds along the front and either side just now but I will weld it in place properly next time. All this just left me enough time to sit the front in place so I can double check that it will all fit properly with a sensible amount of adjustment and gave me a chance for a couple of quick pictures.
19/2/12.1 by russell.grant, on Flickr
19/2/12.2 by russell.grant, on Flickr
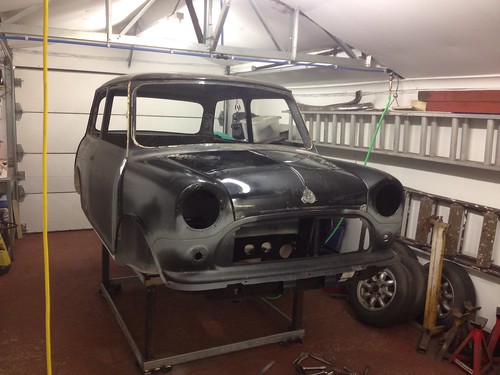
Started to fit the hinges for the one piece front tonight. I decide to make up a box section on the inner wing to mount the hinge on. Its still very much a work in progress but I have taken a couple of pictures of the work so far.
Without the hinge fitted
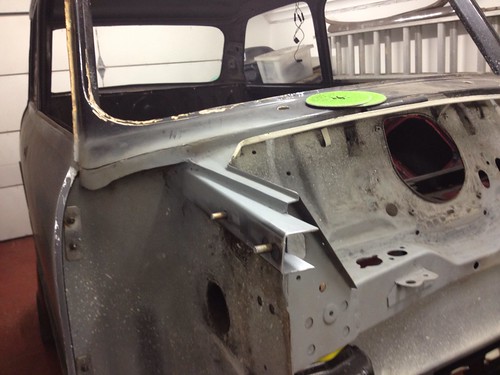
22/2/12.1 by russell.grant, on Flickr
With the hinge fitted (closed position)
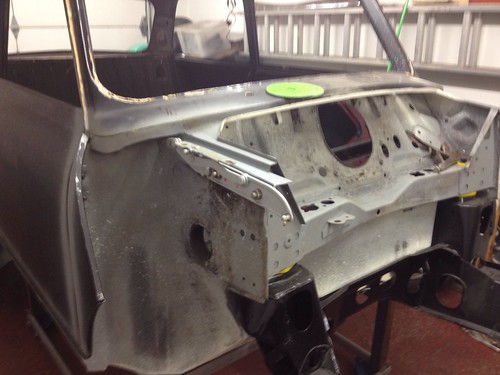
22/2/12.2 by russell.grant, on Flickr
With the hinge fitted (open position)
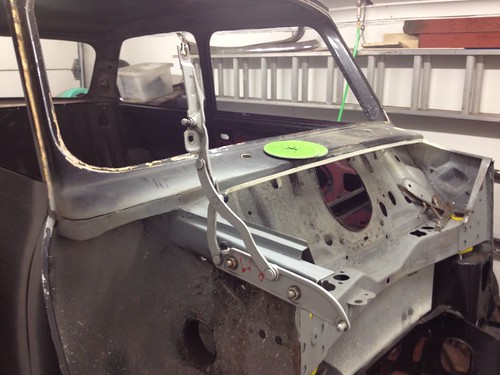
22/2/12.3 by russell.grant, on Flickr
Without the hinge fitted
22/2/12.1 by russell.grant, on Flickr
With the hinge fitted (closed position)
22/2/12.2 by russell.grant, on Flickr
With the hinge fitted (open position)
22/2/12.3 by russell.grant, on Flickr
Gassing Station | Classic Minis | Top of Page | What's New | My Stuff