Discussion


Bit more work done tonight
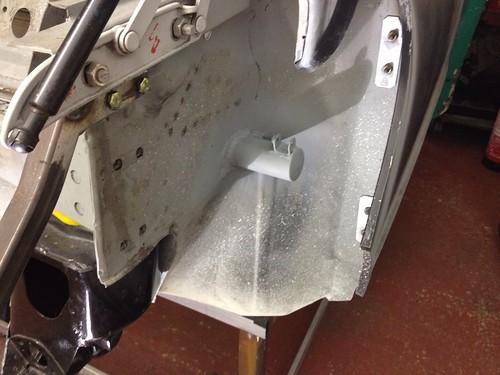
Nearside before the hinge was fitted

23/2/12.1 by russell.grant, on Flickr
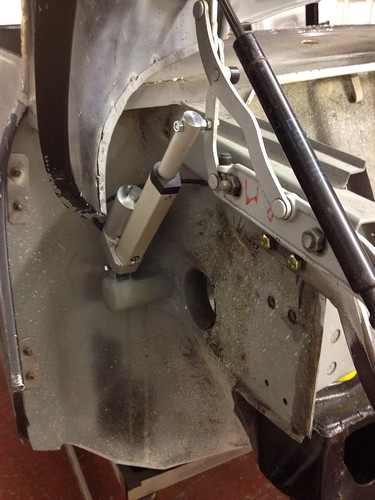
after the hinge was fitted
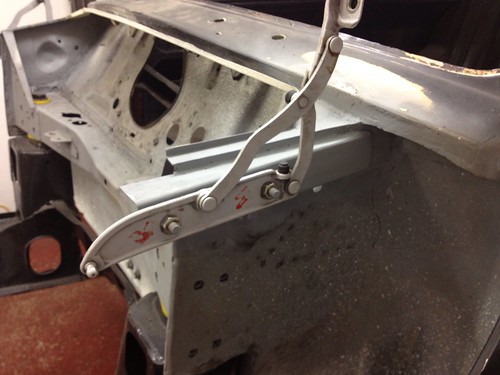
23/2/12.2 by russell.grant, on Flickr
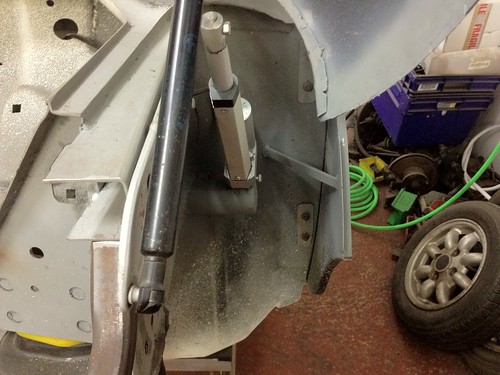
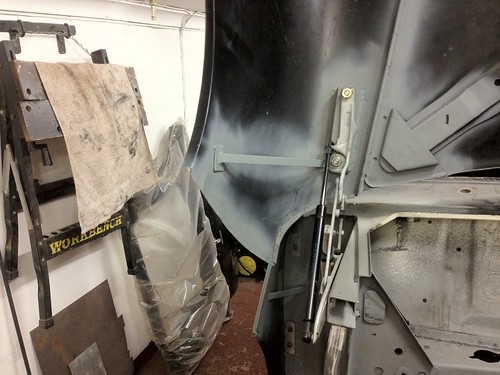
and a few shots from other angles

23/2/12.3 by russell.grant, on Flickr
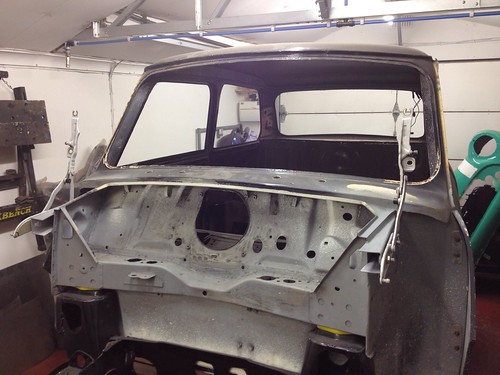
23/2/12.4 by russell.grant, on Flickr
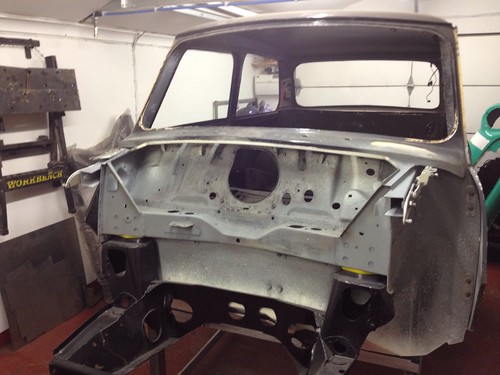
23/2/12.5 by russell.grant, on Flickr
I will close off the end of the box sections and fabricate a section of inner wing to finish the hinges off at a later date. For now this should be enough to allow me to start attaching the hinges to the front end.
Nearside before the hinge was fitted
23/2/12.1 by russell.grant, on Flickr
after the hinge was fitted
23/2/12.2 by russell.grant, on Flickr
and a few shots from other angles
23/2/12.3 by russell.grant, on Flickr
23/2/12.4 by russell.grant, on Flickr
23/2/12.5 by russell.grant, on Flickr
I will close off the end of the box sections and fabricate a section of inner wing to finish the hinges off at a later date. For now this should be enough to allow me to start attaching the hinges to the front end.
camelotr said:
Drill a hole from the engine bay to allow some rust prooving. Water will get into that box even if you close it.
Thats a good point I hadn't thought about drainage. I will put a couple of holes along the underside of the box section tomorrow. It's always good to hear other people's suggestions and ideas. Thanks Update time
This weekends focus was on getting the front end hinge setup working which after most of Saturday afternoon and Sunday afternoon I am pleased to say it is. It still needs a fair amount of work yet but the basics are done.
Bonnet down
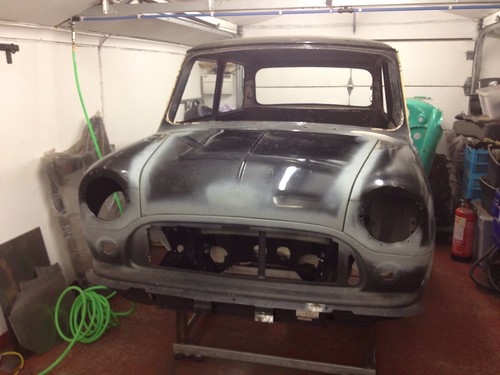
26/2/12.1 by russell.grant, on Flickr
Bonnet up

26/2/12.2 by russell.grant, on Flickr
This weekends focus was on getting the front end hinge setup working which after most of Saturday afternoon and Sunday afternoon I am pleased to say it is. It still needs a fair amount of work yet but the basics are done.
Bonnet down
26/2/12.1 by russell.grant, on Flickr
Bonnet up
26/2/12.2 by russell.grant, on Flickr
I have taken a very quick video just to show the flip front in action
http://youtu.be/yypauYqJIag
There is a lot still to do but this is how it stands just now
http://youtu.be/yypauYqJIag
There is a lot still to do but this is how it stands just now
Edited by RussellG on Sunday 26th February 21:51
I havent done much on the mini since last weekends update but tonight I decided to have a look at the subframe brace bars and modify them as required
A quick inspection revealed they would take a fair amount of modifying to fit correctly and if im honest im not impressed with the finish of them
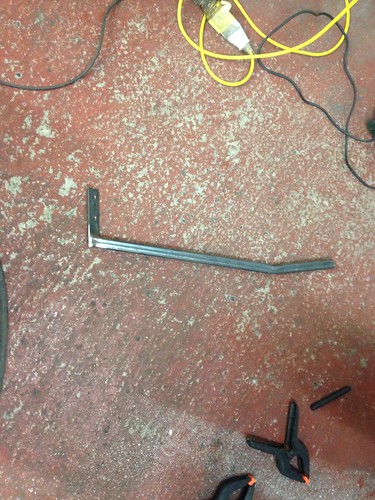
29/2/12.3 by russell.grant, on Flickr
So I decided to change there design from a pair of seperate brace bars which bolt on either side into 1 piece that bolts onto the front of the subframe and both sides.
I havent completed it yet but heres how I started
29/2/12.1 by russell.grant, on Flickr
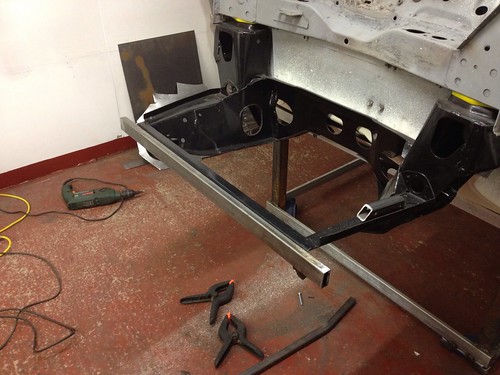
And how it sits as I left it tonight (hopefully get this finished tomorrow night)
29/2/12.2 by russell.grant, on Flickr
A quick inspection revealed they would take a fair amount of modifying to fit correctly and if im honest im not impressed with the finish of them
29/2/12.3 by russell.grant, on Flickr
So I decided to change there design from a pair of seperate brace bars which bolt on either side into 1 piece that bolts onto the front of the subframe and both sides.
I havent completed it yet but heres how I started
29/2/12.1 by russell.grant, on Flickr
And how it sits as I left it tonight (hopefully get this finished tomorrow night)
29/2/12.2 by russell.grant, on Flickr
I have a set of 12" wheels in the garage but was considering a set of 13" instead. The pictures probably don't make it clear but the new brace bars should actually be less intrusive than the originals. However I will be getting wheels before painting the shell so that clearances and any arch mods can be carried out. So if it's a problem it's not a disaster to change.
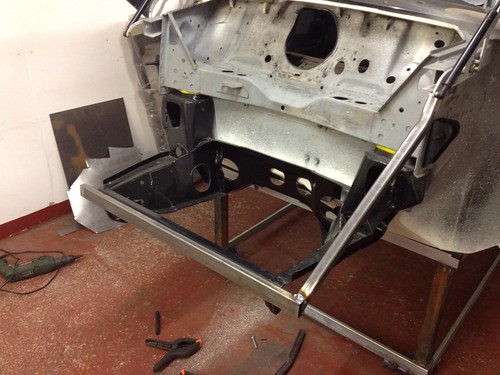
Finished the brace bars tonight , they just need a coat of paint now
Back view
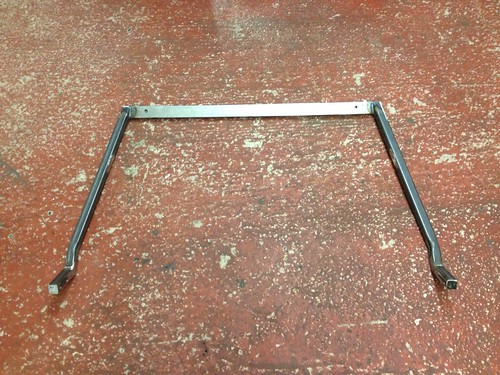
1/3/12.1 by russell.grant, on Flickr
Front view
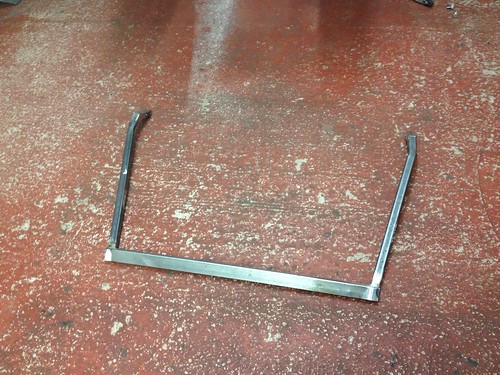
1/3/12.2 by russell.grant, on Flickr
Fitted
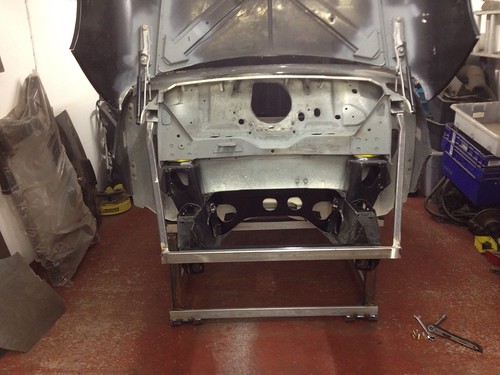
1/3/12.3 by russell.grant, on Flickr
1/3/12.4 by russell.grant, on Flickr
Back view
1/3/12.1 by russell.grant, on Flickr
Front view
1/3/12.2 by russell.grant, on Flickr
Fitted
1/3/12.3 by russell.grant, on Flickr
1/3/12.4 by russell.grant, on Flickr
Don't have any pictures to show for the work since the last update.
A lot of swearing and trial and error means I am now confident that I will soon be able to post images of the new front hinge setup which will now incorporate a pair of these;
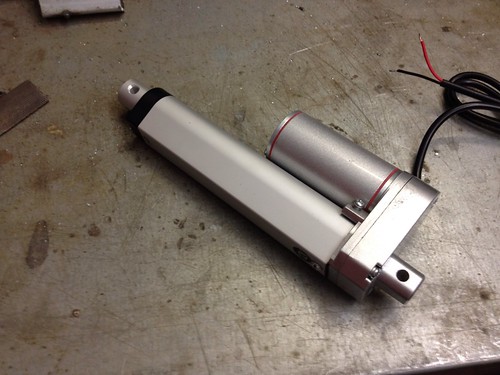
8/3/12.1 by russell.grant, on Flickr
A lot of swearing and trial and error means I am now confident that I will soon be able to post images of the new front hinge setup which will now incorporate a pair of these;
8/3/12.1 by russell.grant, on Flickr
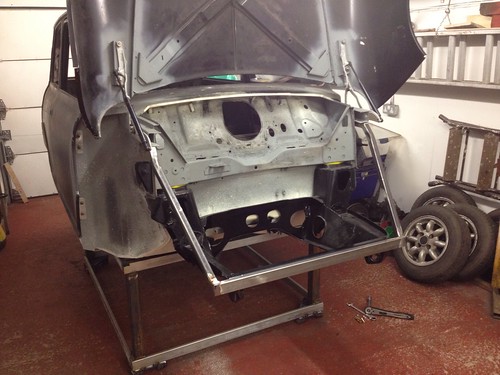
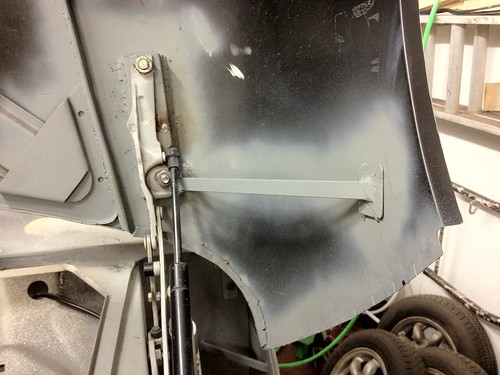
Got the actuator mounting points done on both sides now
17/3/12.1 by russell.grant, on Flickr

18/3/12.2 by russell.grant, on Flickr
18/3/12.3 by russell.grant, on Flickr
Got time for a quick video as well
http://youtu.be/my0np43n1u8
17/3/12.1 by russell.grant, on Flickr
18/3/12.2 by russell.grant, on Flickr
18/3/12.3 by russell.grant, on Flickr
Got time for a quick video as well
http://youtu.be/my0np43n1u8
Nothing to report since the last update yet 
Been having a new heating system installed in the house which has meant I have had to pull up floors and demolish walls in the process. So half the house contents were moved to the garage and I have been decorating the house. I can see the light at the end of the tunnel now so hopefully by the weekend the house will be finished and the garage will get a tidy then its back too the mini
Been having a new heating system installed in the house which has meant I have had to pull up floors and demolish walls in the process. So half the house contents were moved to the garage and I have been decorating the house. I can see the light at the end of the tunnel now so hopefully by the weekend the house will be finished and the garage will get a tidy then its back too the mini

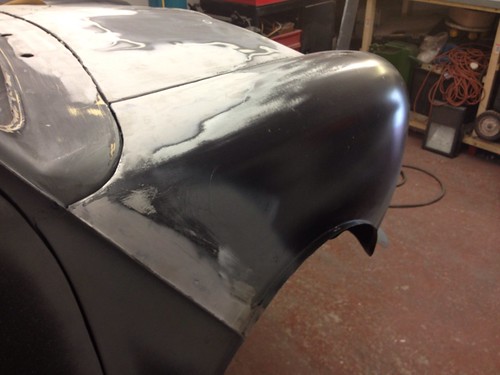
Managed a few hours on the mini yesterday. I have dressed up the edge between the wings and the a panels now to give me a nice neat fit. Then set to work on tidying up the gap between the bonnet edge and the scuttle panel. I always knew that this was going to be a pain to fix but I felt it was important to make the bonnet fit well at the front since I was going to use a mk1 style grille which meant the fit along the rear wasn't exactly perfect. A bit of welding in of extra metal in a similar style to my door skins has sorted this though.
I forgot to take pictures when I finished for the day but will try to get some up soon.
I forgot to take pictures when I finished for the day but will try to get some up soon.
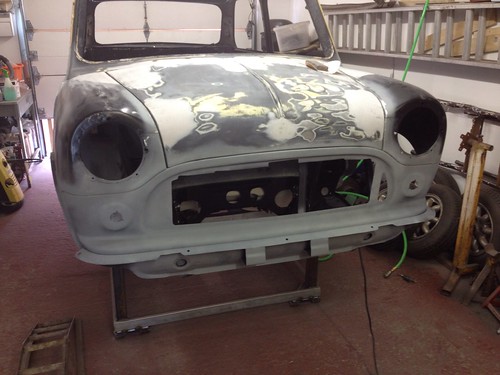
Today has seen a decent amount of work on the mini
Started filling and rubbing down the front end and blending the flip front with the a panels and scuttle panel. I also welded up all the mounting holes on the front end for the grille that are not required anymore.
9/6/12.1 by russell.grant, on Flickr

9/6/12.2 by russell.grant, on Flickr
9/6/12.3 by russell.grant, on Flickr
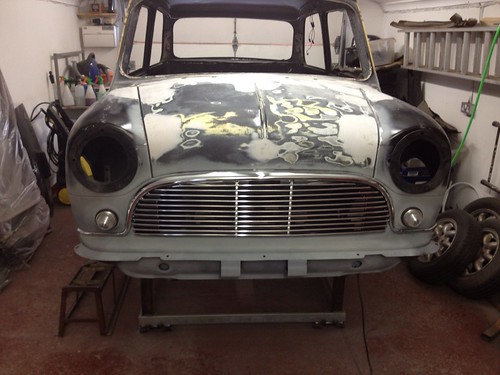
Then I decided to take a break from filling and instead tested fitted the grille, surround and indicators.
9/6/12.4 by russell.grant, on Flickr
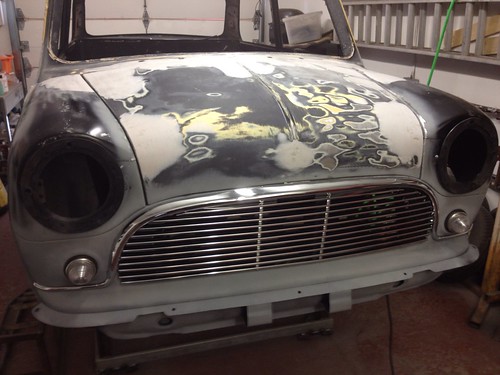
9/6/12.5 by russell.grant, on Flickr
Hopefully some more updates in the pipeline tomorrow.
Started filling and rubbing down the front end and blending the flip front with the a panels and scuttle panel. I also welded up all the mounting holes on the front end for the grille that are not required anymore.
9/6/12.1 by russell.grant, on Flickr
9/6/12.2 by russell.grant, on Flickr
9/6/12.3 by russell.grant, on Flickr
Then I decided to take a break from filling and instead tested fitted the grille, surround and indicators.
9/6/12.4 by russell.grant, on Flickr
9/6/12.5 by russell.grant, on Flickr
Hopefully some more updates in the pipeline tomorrow.

Gassing Station | Classic Minis | Top of Page | What's New | My Stuff