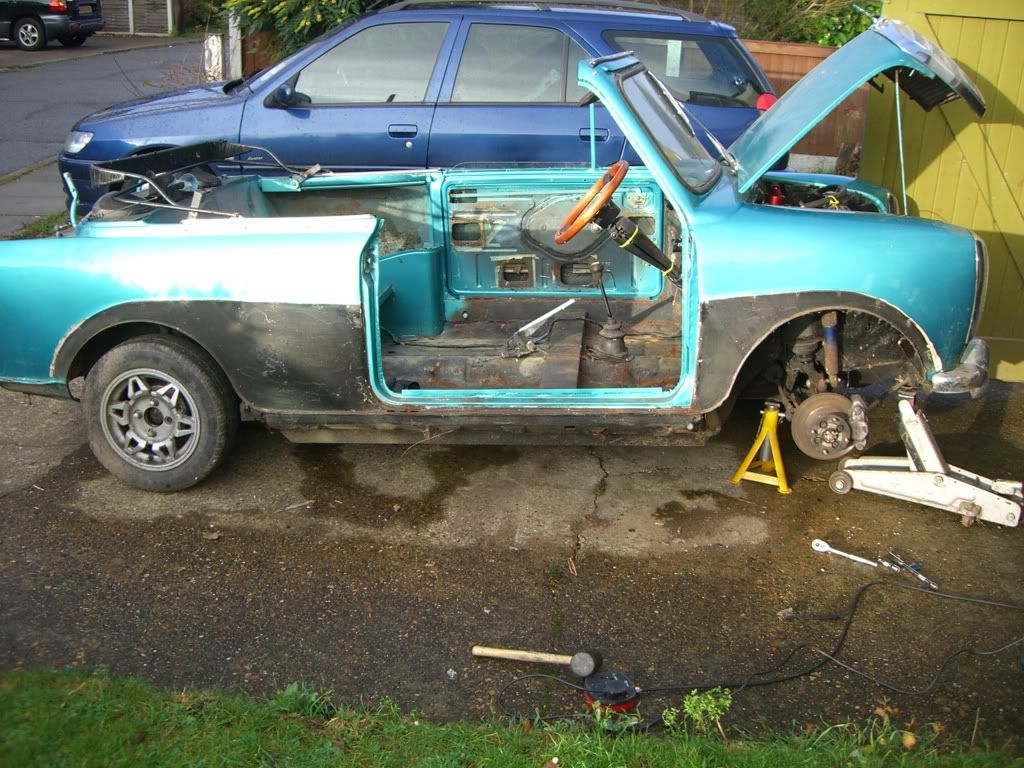
Riley Elf restoration dilemma.......
Discussion


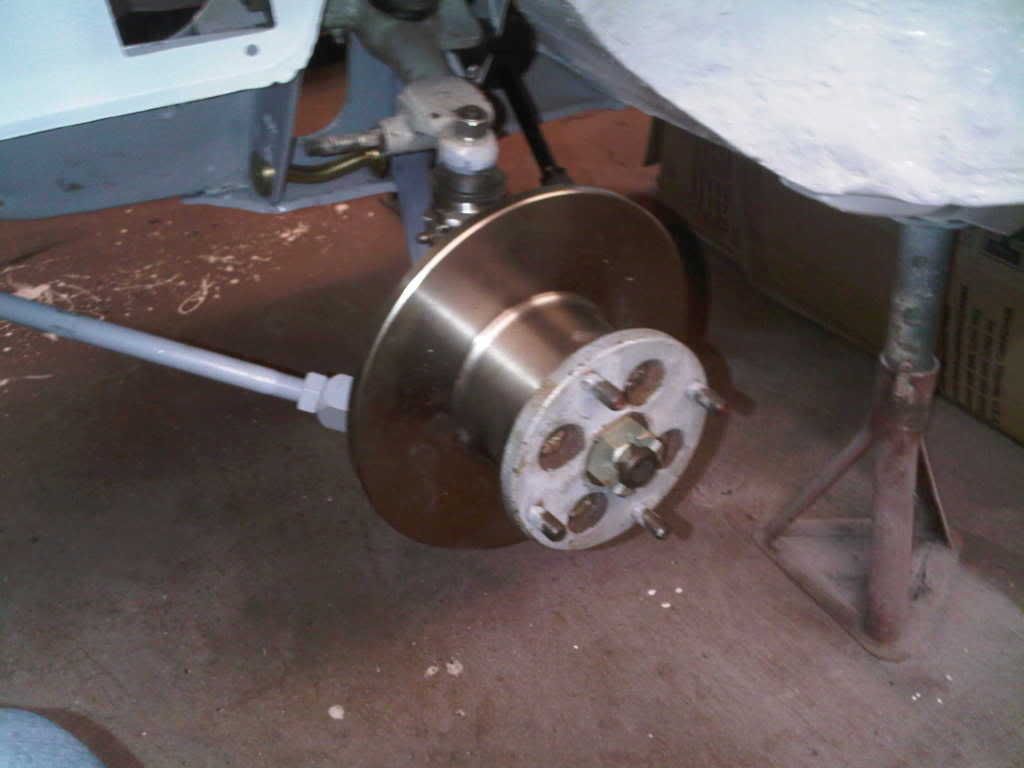
Preparation for the big event today (rear subframe removal) Restricted space means the car must still move under "Andy power" afterwards so I've rigged up a scavenged pallet with 100mm castors ready to replace the backend with when I'm ready.
Liberally coated all the subframe retaining bolts with penetrating fluid from underneath before I started then set about loosening the bolts right off ready to go.
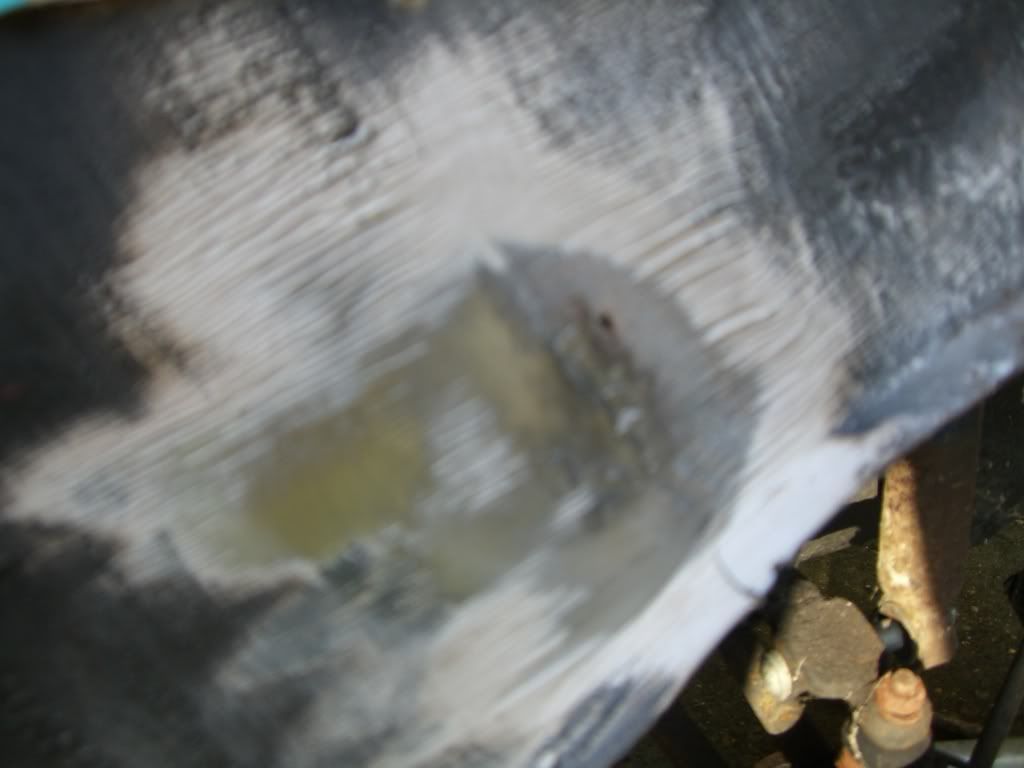
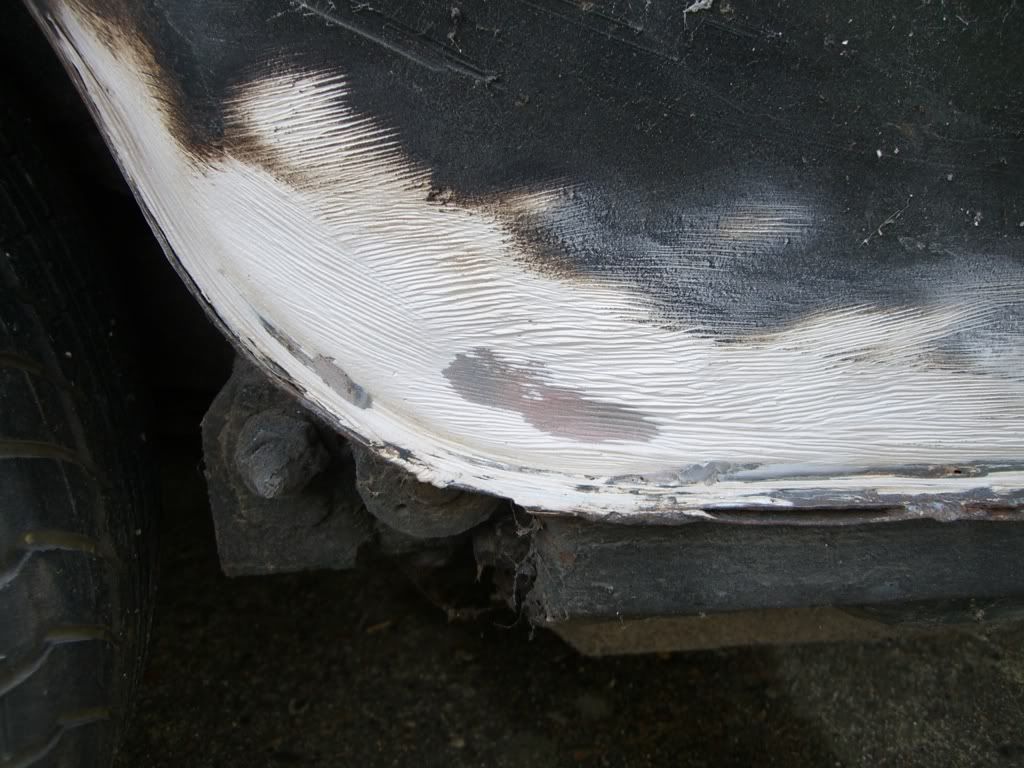
Finally cleared the last of the remaining expanding foam from the boot
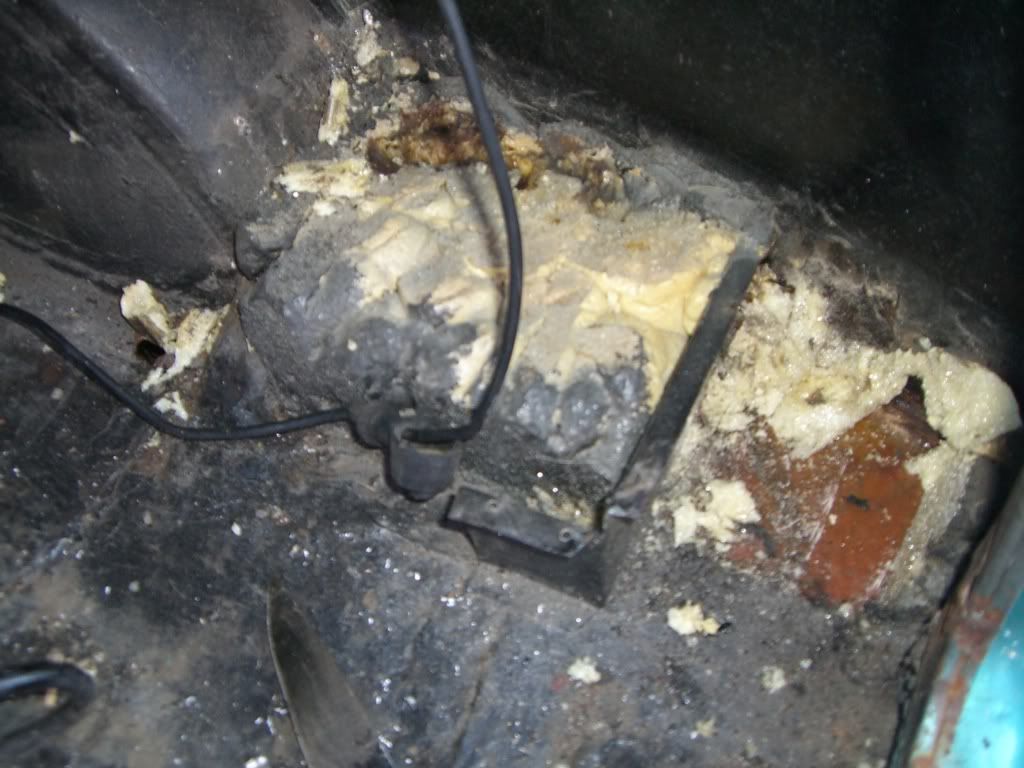
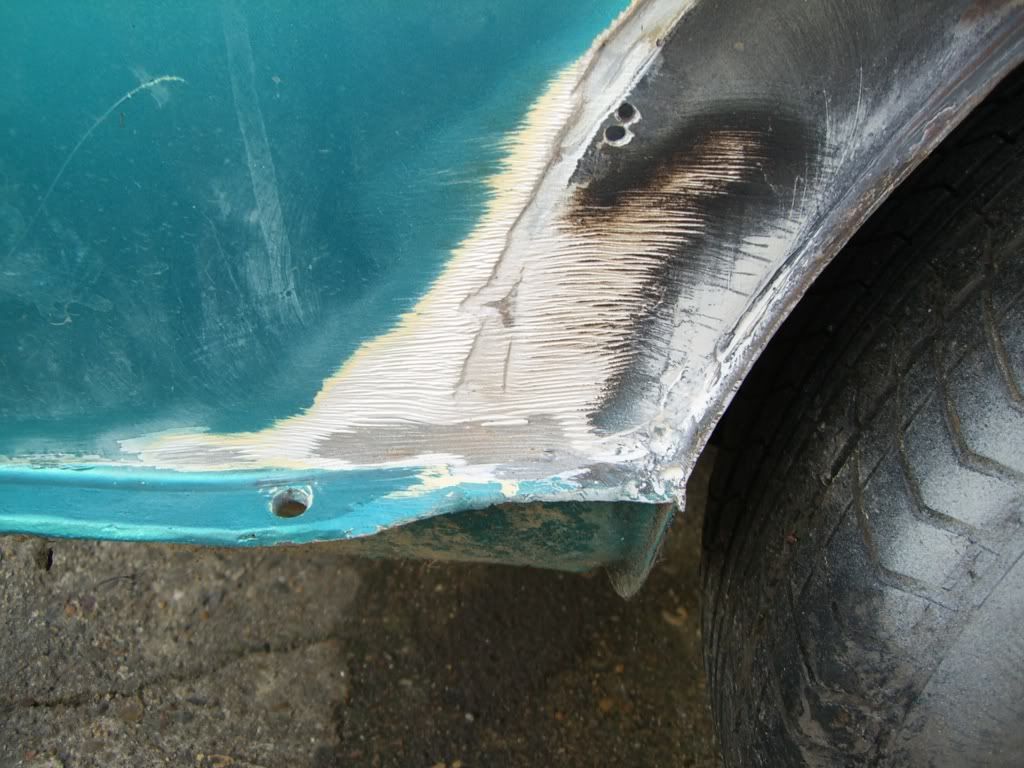
Leaving a lovely fiberglass coloured area arount the subframe mount, the only upside being at least the glass held the head of the bolts in place while I undid the nut!
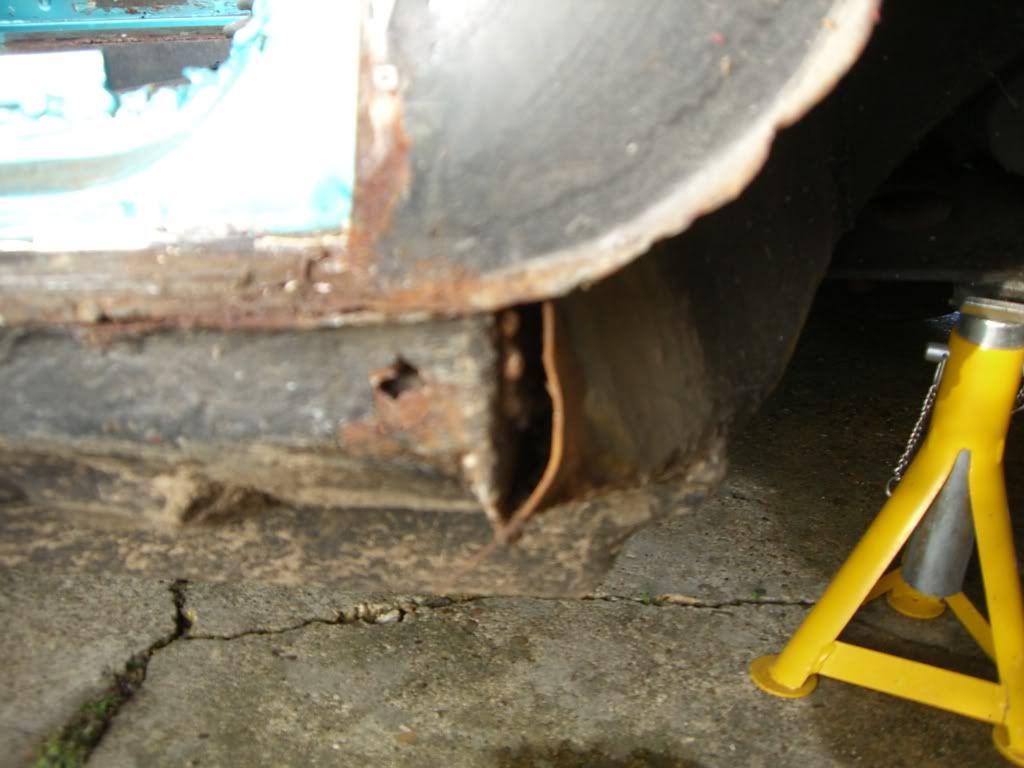
Once again there's no real strength of metal holding the subframe on....
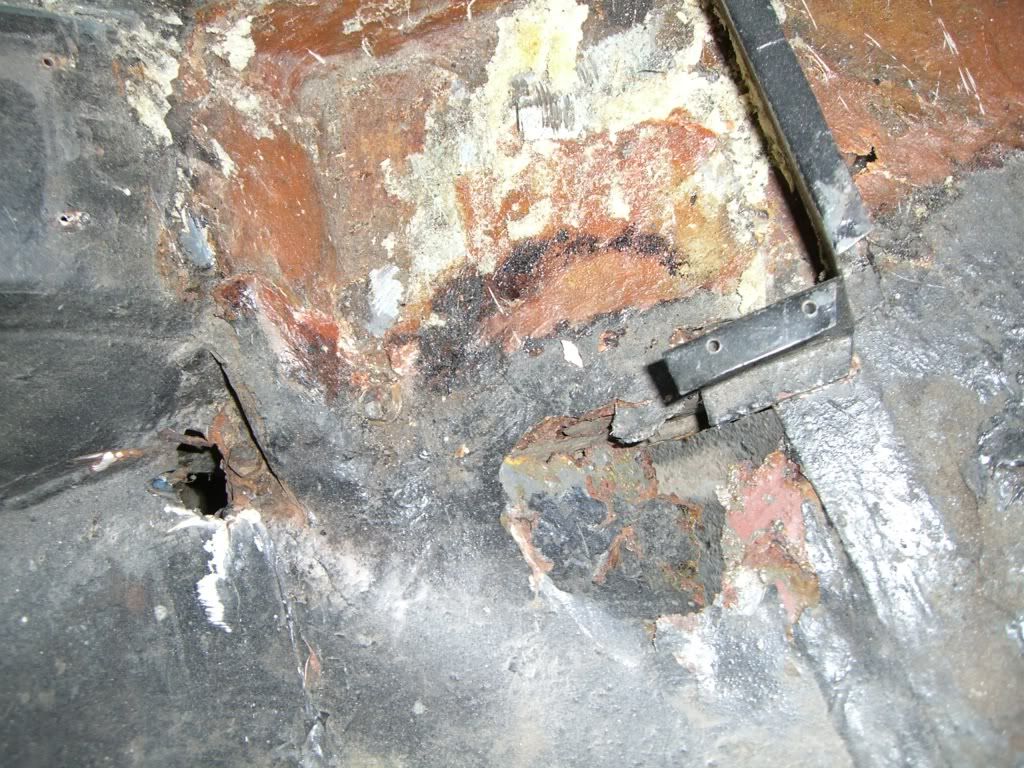
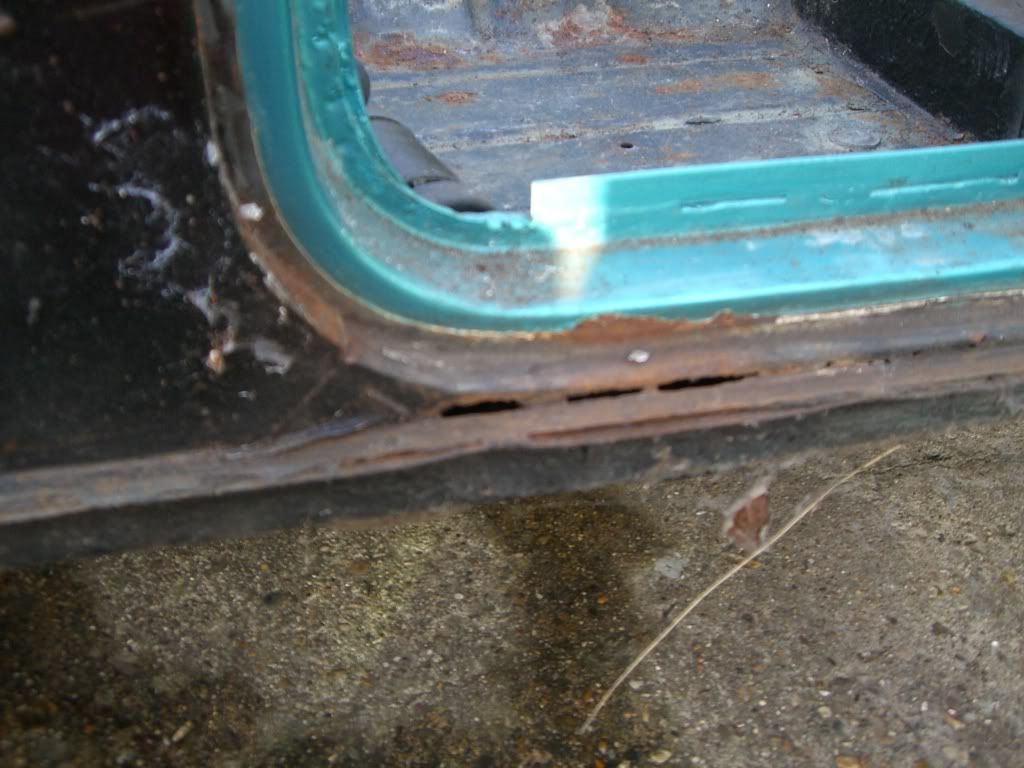
The nearside was hardly surprising either, I knew there was fiberglass there so expected more of the same but....
A plate had been welded over the top of the nut (and corrosion surrounding the subframe mount)
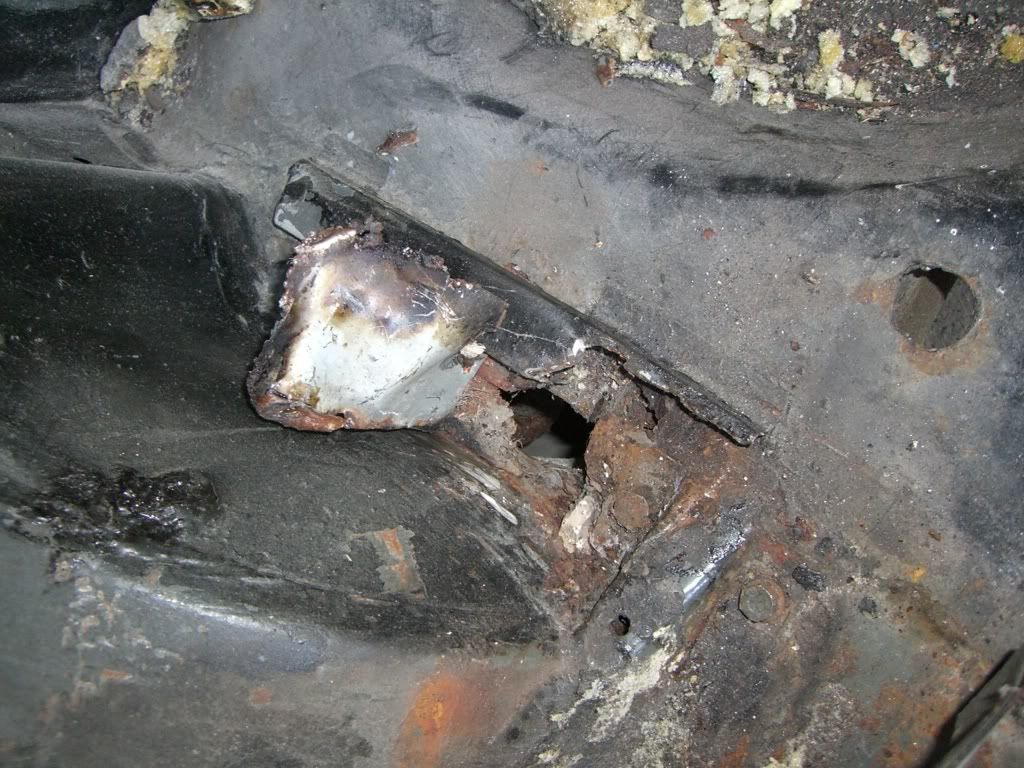
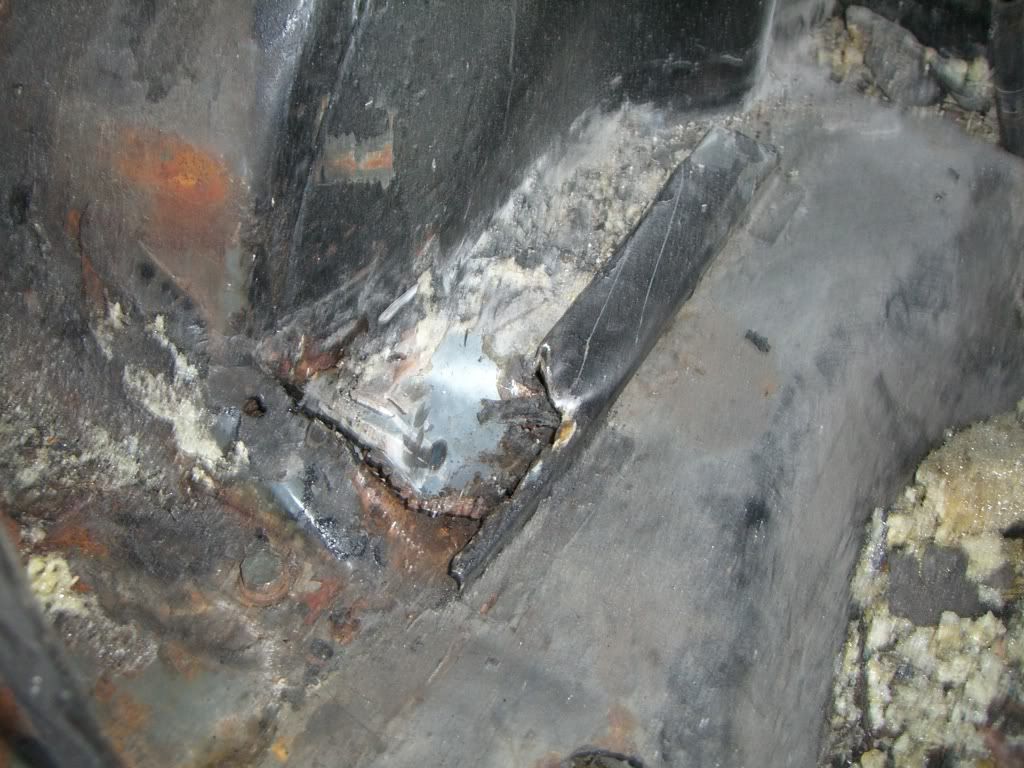
So I'm thinking now I might as well replace the boot floor in its entirety (if such a panel exists?)
The question is now if I'm replacing: boot floor, heelboard panel, and complete floors what do I weld to what as I go????? Here's hoping the rear quarters are made of metal!
Having looked at the price of box section yesterday bracing is going to be constructed of 13mm studding which I can aquire in ample supply from a mate in the air conditioning trade - I'm saving my pennies for panels!
Liberally coated all the subframe retaining bolts with penetrating fluid from underneath before I started then set about loosening the bolts right off ready to go.
Finally cleared the last of the remaining expanding foam from the boot
Leaving a lovely fiberglass coloured area arount the subframe mount, the only upside being at least the glass held the head of the bolts in place while I undid the nut!
Once again there's no real strength of metal holding the subframe on....
The nearside was hardly surprising either, I knew there was fiberglass there so expected more of the same but....
A plate had been welded over the top of the nut (and corrosion surrounding the subframe mount)
So I'm thinking now I might as well replace the boot floor in its entirety (if such a panel exists?)
The question is now if I'm replacing: boot floor, heelboard panel, and complete floors what do I weld to what as I go????? Here's hoping the rear quarters are made of metal!
Having looked at the price of box section yesterday bracing is going to be constructed of 13mm studding which I can aquire in ample supply from a mate in the air conditioning trade - I'm saving my pennies for panels!
the boot floor / rear seat pan is an easy panel to replace - it takes longer to hack the old one out and sort the edges out than it does to weld the new one in.
if your doing this you will need the heritage floor, the adaptor bit from mini machine (or you could make it your self out of flat steel) the little triangles that tie the floor to the rear arches, and the large corner reinforcers at go at each back corner (id just use saloon ones and make them longer to suit the elf rear valance (you can mod a van one to suit if your money saving!)
when i did mine i jammed it in place, then bolted the frame to the heel board - this made sure that the floor and rear mount holes where right. i then checked the dimensions, and tacked it in, measuring every so often. once 99% was welded in, i dropped the frame out and finished it off. using new triangles and what not saves loads of time as it means that all the rusty mess is hacked out and your welding to new stuff where it matters.
i got mine done in an afternoon, it was far, far easier than i had feared (mine was on my spit, so i could turn it over)
if your going to get into doing stuff like the boot floor, id do the main floor, heel board and sills first, then the tub is fairly solid when you start chopping. again, the boot floor/seat pan is easier to do if the companion boxes arnt there - id hack yours out and put them in last.
if the rear arches are rotton as well a good money saving tip is to source a bent late shell, then hack the boot floor, arches and heel board out in a onner, clean all the edges up and let the whole lot in, that way a 'big' panel is known to be straight and true and is fairly easy to hook into place, we did this on my brothers shell, and got it all married togther and ready to weld when we discovered that the floor and back qtrs where too far gone to justfy the work. the panel is sat in my 'store' waiting for a rusty mk1!
we paid 50 quid for a bent mpi shell off ebay to get the back floor, we also got another rolled mpi shell and harvested the entire floor, heel board, toe board etc to splice into one of our mk1 racers - its a very cost effective way of doing larger repairs (it saved us nearly a 1000 quid in panels!), and as long as you stich them in along the original seams it will be as strong as before (though you must make sure your welding etc is very good - its not a job for the faint hearted!)
im liking the little patches in the front floor held in with self tappers, years ago mu mum ran a 68 mk2 that had its entire floor consructed in a similar fashion, just with buckets of tar poured in to make it look solid! it certainly kept the water out!
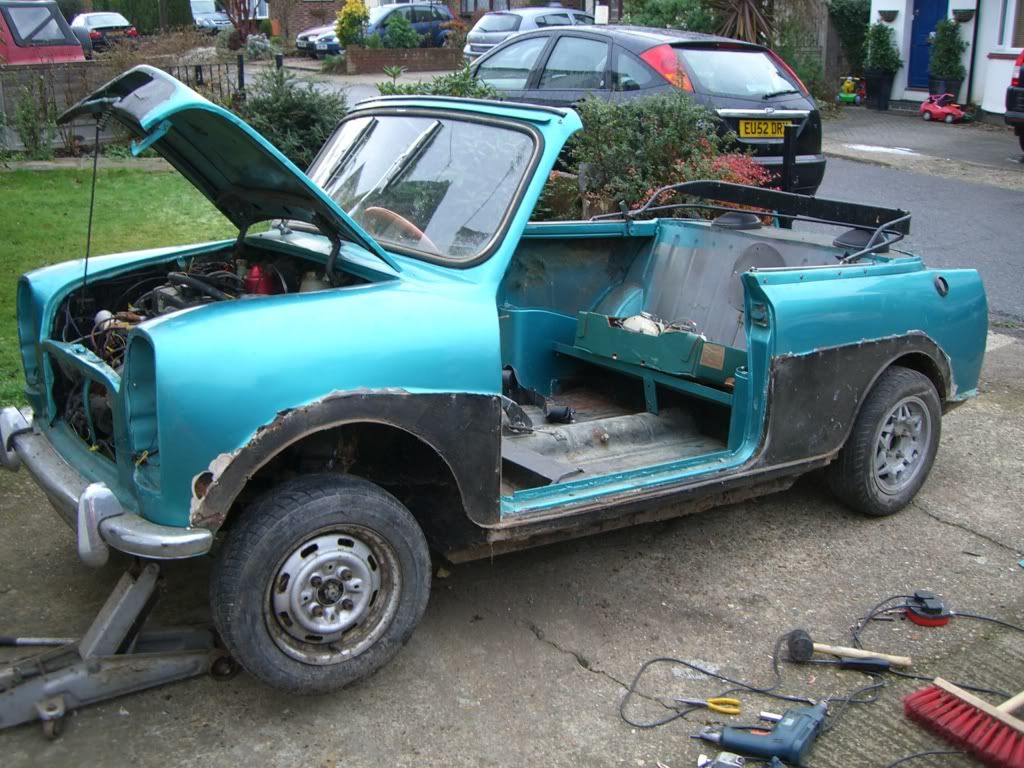
Limited garage time again today due to work  so taking into account the realisation that every panel I've looked at so far needs major work I thought I'd brave body kit removal....
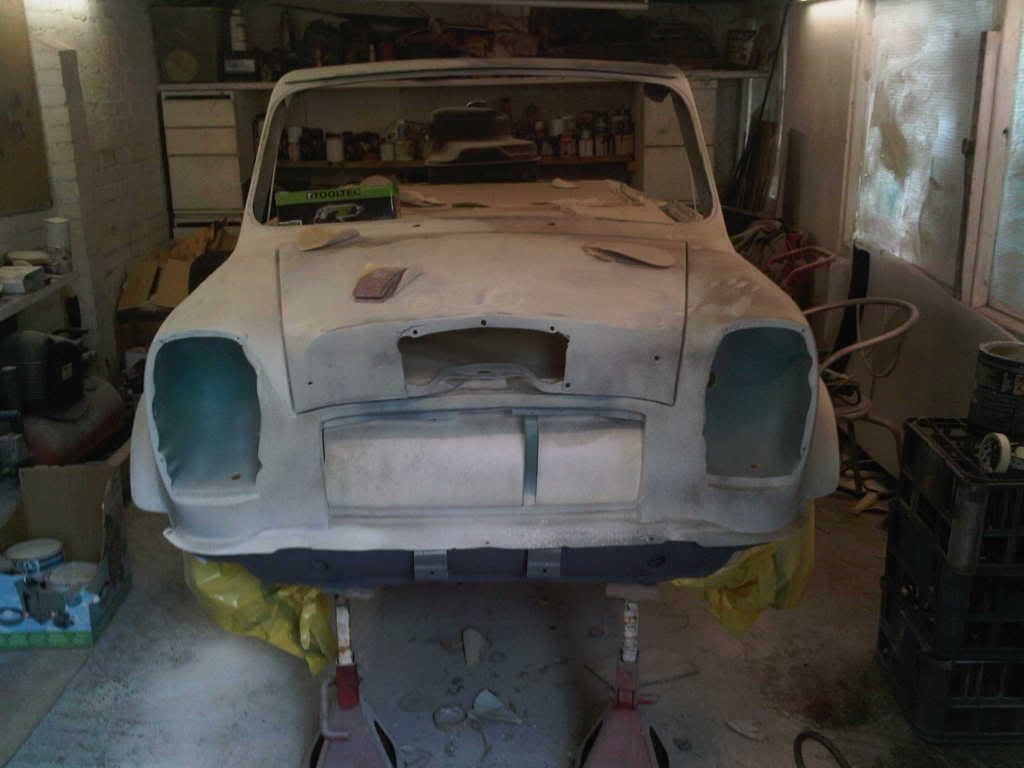
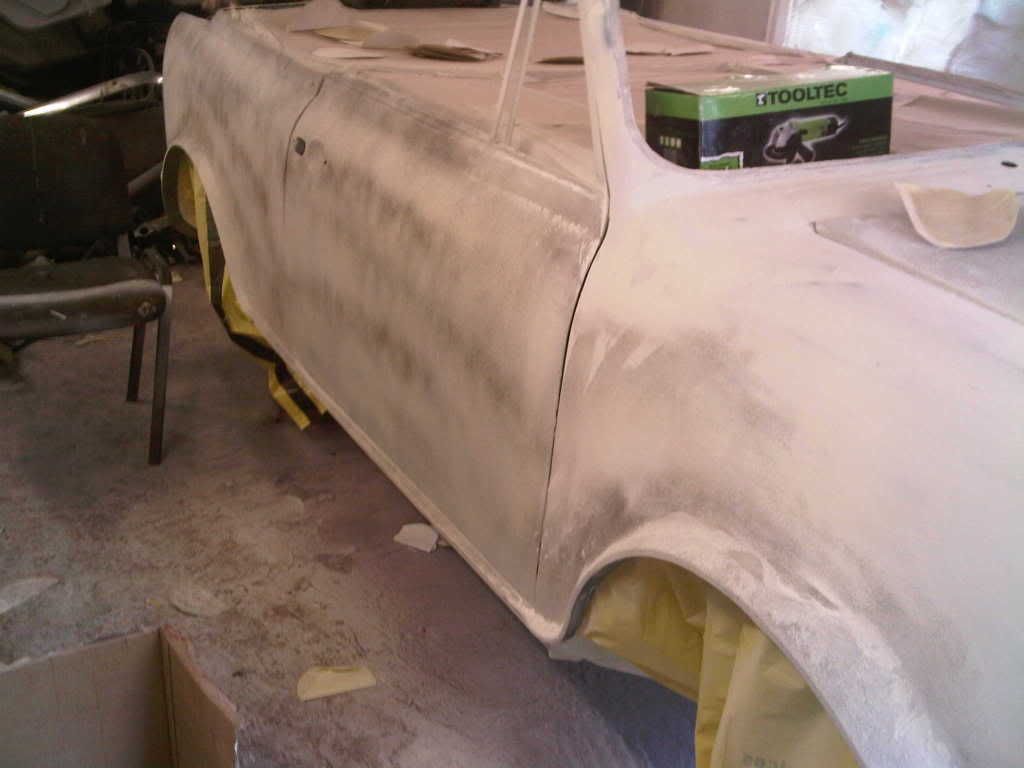
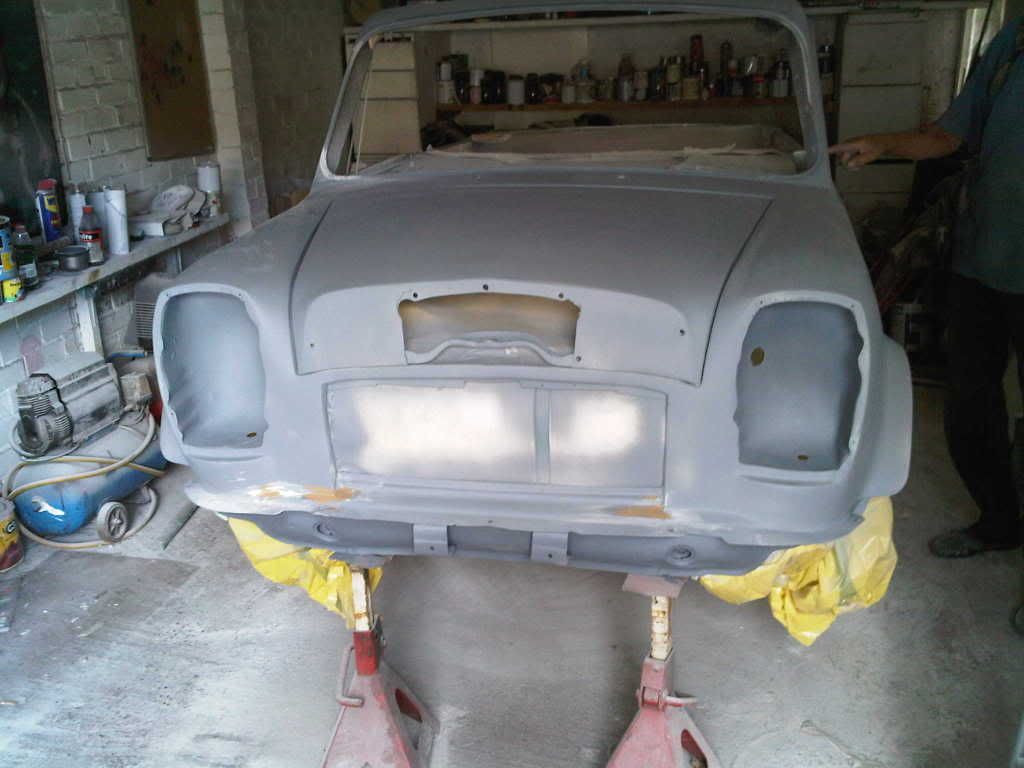
Already looking a million times better although I had some concerns about standard of workmanship on the deseamed front end (given everything else I've seen so far!) so thought I'd get the electric wire brush and dig through the filler....
Although the toeboard patch panel below had some "alignment issues"
Also had a dig about in the usual rust havens to see how bad things were and am generally happy'ish that the project is still worth doing.
I'll do the other side tomorrow and then hopefully my consignment of illicit studding will arrive so I can start bracing - gave the MIG a quick test drive today and surprisingly after a new tip and general service it was welding ok after at least 10 years of inactivity! On the downside forgot to turn off the compressor last night and it fired up at 3:30am - wifey not best pleased as the garage backs on to the bedroom in our bungalow!
so taking into account the realisation that every panel I've looked at so far needs major work I thought I'd brave body kit removal.... Already looking a million times better although I had some concerns about standard of workmanship on the deseamed front end (given everything else I've seen so far!) so thought I'd get the electric wire brush and dig through the filler....
Although the toeboard patch panel below had some "alignment issues"
Also had a dig about in the usual rust havens to see how bad things were and am generally happy'ish that the project is still worth doing.
I'll do the other side tomorrow and then hopefully my consignment of illicit studding will arrive so I can start bracing - gave the MIG a quick test drive today and surprisingly after a new tip and general service it was welding ok after at least 10 years of inactivity! On the downside forgot to turn off the compressor last night and it fired up at 3:30am - wifey not best pleased as the garage backs on to the bedroom in our bungalow!
robminiman said:
just strip it toa bare shell ad bracing were required and have it shot blasted to remove all the rust filler and foam.
Has anyone ever done this? How much does it cost and what are the drawbacks?the last shell i had blasted was about 150 and well worth it.
they did inside, underneath and engine bay, then just the edges of the rear qrts and roof.
i then painted it same day with etch primer.
before i took it i scraped the worse of the underseal off.
well happy with it.
i guess the best thing about your elf is to say that someone has spent a lot of time, effort and money on it at some time, and its safe to assume they at least choose to start with something that was at least half decent!
good to see yoiur getting stuck in!
Just been quoted £300 for a shell blast (no doors, bonnet or boot) and immediate paint in '2 pack holding primer' providing it is a completely bare shell. Seems like a good deal but means I need to hire a trailer as I only have an a frame and I'm not sure my pallet and casters set up is road legal! 
I've convinced myself overnight that blasting is the only option in the long run and so all thoughts of correcting anything have been overtaken by stripping the car ready to go, removed the nearside kit today
and the Merc front end...
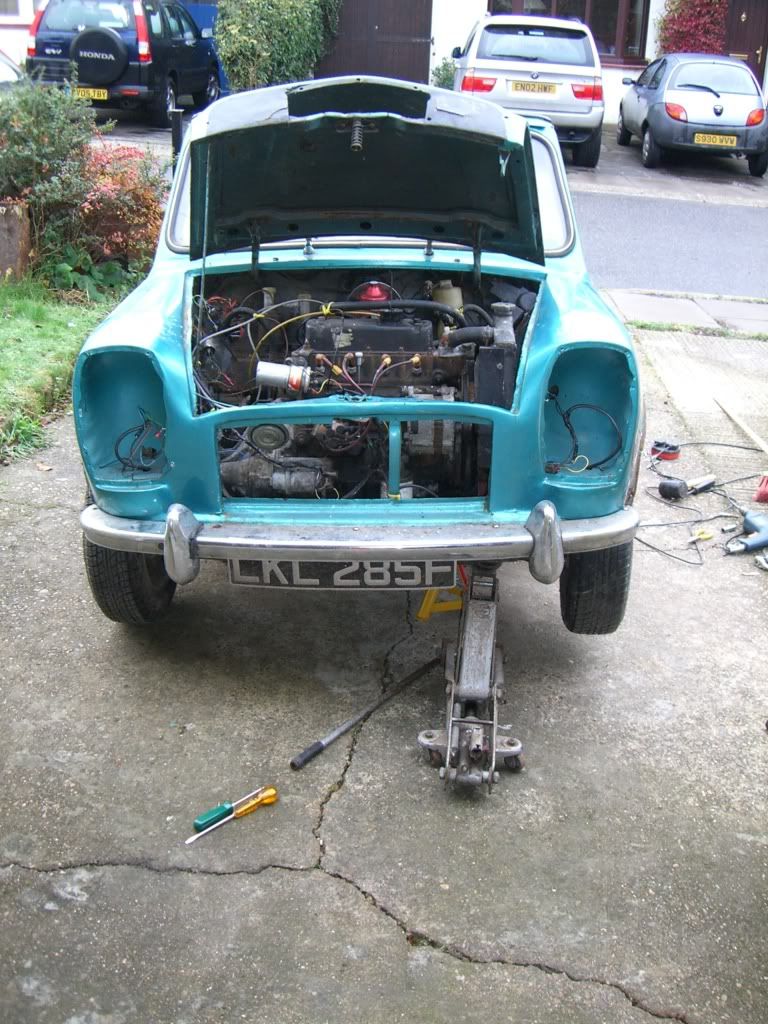
looks wierd without the lights!
Have also been thinking about the things I can be getting on with whilst the car is at the blasters (estimated 2 days).
Never having fiddled with 4 stroke engines (as a motorbike rider in my late teens I could take a 2 stroke engine apart, replace the broken part and put it back together as I found it but thats it) I'm slightly reluctant to touch it but then again it seems a shame to miss an oppertunity to at least smarten things up. I have no idea on the history of the engine whatsoever and haven't even heard it run so I know I need to spend some time on it but it also feels a tad premature.... On the other hand it would be a shame to get everything else ready to go and not have an engine waiting.
My mind has also wondered to colourschemes based on my thoughts I'd repaint the block but what colour - wouldn't want it to clash with the shell
Also having looked at the cost of heritage panels I'm thinking pattern parts are the way to go! My local panel supplier is a Hadrians distributor has anyone got any experiences of the quality of fit etc?
bargain number one ..... 08-01-341 a bit cheaper than Hadrians £85.33! even with my hastily brokered P&P deal!
and the Merc front end...
looks wierd without the lights!
Have also been thinking about the things I can be getting on with whilst the car is at the blasters (estimated 2 days).
Never having fiddled with 4 stroke engines (as a motorbike rider in my late teens I could take a 2 stroke engine apart, replace the broken part and put it back together as I found it but thats it) I'm slightly reluctant to touch it but then again it seems a shame to miss an oppertunity to at least smarten things up. I have no idea on the history of the engine whatsoever and haven't even heard it run so I know I need to spend some time on it but it also feels a tad premature.... On the other hand it would be a shame to get everything else ready to go and not have an engine waiting.
My mind has also wondered to colourschemes based on my thoughts I'd repaint the block but what colour - wouldn't want it to clash with the shell
Also having looked at the cost of heritage panels
I'm thinking pattern parts are the way to go! My local panel supplier is a Hadrians distributor has anyone got any experiences of the quality of fit etc?bargain number one ..... 08-01-341 a bit cheaper than Hadrians £85.33! even with my hastily brokered P&P deal!
Edited by uksurvivor on Friday 12th December 13:24
Hi there looks like you got a handfull there, nice to see some good resto/welding,
and not all this "reshelling" the guy who does my welding, had a simelar kit on a 1275GT many years ago, it was on the car when he bought it, and it didnt take him long to remove it, and repaint the car, as he didnt like it. Here is a couple of links to inspire you, so you can see more hidden/covered up rust-good luck with it
http://www.showcars.dk/images/basicfiles/wood/befo...
http://www.arperformance.citymax.com/page/page/182...
looks like you got a handfull there, nice to see some good resto/welding, and not all this "reshelling" the guy who does my welding, had a simelar kit on a 1275GT many years ago, it was on the car when he bought it, and it didnt take him long to remove it, and repaint the car, as he didnt like it. Here is a couple of links to inspire you, so you can see more hidden/covered up rust-good luck with it
http://www.showcars.dk/images/basicfiles/wood/befo...
http://www.arperformance.citymax.com/page/page/182...
Just so nobody thinks I've stopped I thought I'd update you. A new client has meant I'm spending more time away from home than usual (normally I work from home) but on the plus side its doubled my reach in terms of Ebay items! I've sourced a heritage boot floor as well as a selection of other panels, an original Elf engine and a "spit" for the car to help with floorpan removal/refitting. The spit was a bargain at £40!
Rest assured I still pop in the garage evey time I come home but nowadays its to add something new to the pile of bits awaiting attachment!
Rest assured I still pop in the garage evey time I come home but nowadays its to add something new to the pile of bits awaiting attachment!
Its been a while..... The job lasted longer than expected and I've moved house so the work on the Elf stopped around the same time as the last post and she's now tucked up in the garage under so many other bits that got relegated from the old house when I moved that there's little chance of progress indoors this winter.
By chance I was searching Ebay and came across a Stimson mini bug for sale and put a speculative bid on it figuring I could work on that outdoors without fear of the dreaded tin worm undoing all my good work. Anyway I won! I picked up the car a few weeks ago and returned to pick up the engines and paperwork for the Stimson this weekend and got chatting with the guy I'd bought it off about minis in general. He'd owned a few and offered to show me some of his pictures of previous cars... as we walked we got chatting about my "special elf" and it turns out he built it! He's got pictures of it being built and the finished article in its heyday...
Small world!
Just found some Rover technical videos on YouTube - including one that shows a Mini Cabriolet bodyshell & the additional strengthening in the bodyshell. No idea if it'll help you with the Elf restoration sometime?: Rover Tech
The poster has obvioulsy filmed an old video so it's not top quality, and is in two parts, but might give you some pointers.
Good luck with both projects,
Steve
The poster has obvioulsy filmed an old video so it's not top quality, and is in two parts, but might give you some pointers.
Good luck with both projects,
Steve
I remember seeing your car on Ebay and wondered if it went to a good home. Glad to see you're doing a full restore without the horrible body kit. Looking forward to seeing how it comes out. If you need any Elf specific advice or support, come and check out the Elf/Hornet Forum. http://elf-hornet.4forum.biz/forum.htm
Edited by Red Riley on Tuesday 3rd November 19:06
Latest update... Its been a while but after securing a new job in difficult times I thought I'd best not take the mickey and put in too much time in the garage. My plans have now changed and rather than wait 10 years for me to restore the car I've handed it back to its original creators! We have agreed a good price (in my mind) and although I don't get the pleasure of saying "I did that" at least I'll get to drive the car before I'm too old to have a licence
The guys are 62 and 77 respectively and are two of the nicest blokes I'm ever likely to meet - progress updates have been plentiful (as has the list of parts required) and whilst its a long way from being completed the pace they're working at astounds me! In less than a week they've achieved more than the bloke restoring my 68 Hornet has managed in 18 months. The shell is now on the £40 spit in their workshop andx they both seem happy it'll reduce their need to bend down
I'm excited, slightly dissapointed but reassuring myself it'll be worth it in the end and am forgoing a holiday to make myself feel better about the cost. I'll get some piccys next time I'm there and provide a photographic update.
Minor update as I've finally made it down the workshop for a look at progress.... Slightly gutted I won't be able to drive it this summer but totally chuffed with how things are going. Sadly by the time we worked out exactly how much metal needed to come out there was nothing left to hold the shell rigid (as the roof has already gone) so the original plan to replace the entire floor with the mini machine floor panel has gone by the wayside and I've ended up with a patchwork quilt (albeit with full floorpan sections).
Budget is still semi under control but probably 25% over my first thoughts, if its worth doing its worth doing properly!
Budget is still semi under control but probably 25% over my first thoughts, if its worth doing its worth doing properly!
Edited by uksurvivor on Thursday 23 September 23:39
Gassing Station | Classic Minis | Top of Page | What's New | My Stuff