DB9 Rear Subframe Refurbishment Project.
Discussion


So, it's now the time to remove the rear subframe of my DB9 as it has signs of corrosion. the car is 16 years old and time to get this job done.
I have thought about this long and hard and although some other owners have had their subframes painted in situ I felt that the only way this can be done properly is to remove it, have it painted by a specialist company before refitting.
I have SORN my car now until spring next year and today I put her on axle stands and managed to remove the driveshaft wheel hub nuts, they were on VERY tight and had to use a long scaffold pole to give plenty of leverage.
I will post up some photos tomorrow which will be the before photos.
I just want to say a big thanks to JonnyCJ as he has just completed refurbishing his V8V and given me some great info for this job.
I'll be replacing any worn parts as I go along and will be replacing both wheel bearings, although I don't have problems with the existing ones the car has almost completed 60K miles so prudent to replace them.

Good luck Paul - take your time, you have all winter and there's no need to rush anything.
Do it correctly and you'll be extremely satisfied with the result.
As ever pop up any q's and I'm sure the forum will help out.
Worth getting all the bolts you're going to re-use cleaned and zinc/black plated. it's much cheaper than buying new and they'll last longer.
The best part is having a big box of bits that slowly empties as you fit all the clean shiny bits back on. It's sensible to take pics of some of the bolts next to a tape measure and next to the part they come from, so you know what goes where. It's easy to forget sometimes.
Busy couple of days,
I've removed the brake calipers and disc's, I decided to purchase a couple of brass blanks for the brake lines so the fluid doesn't empty out and run out onto the floor.
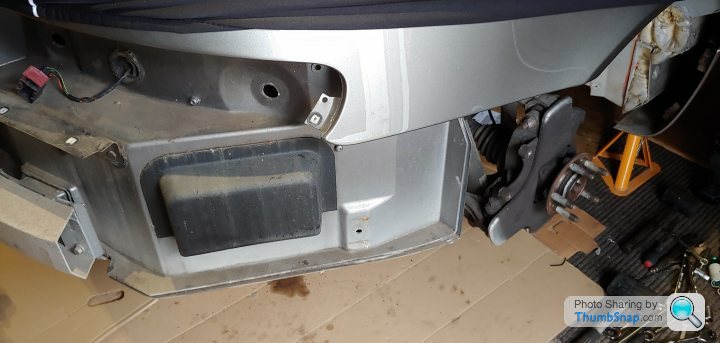
So, rear wheel liners out, rear undertray off, rear lights out, rear bumper off, rear drop links off (need a 18mm open ended spanner) and antiroll bar plus rear silencer off with rear exhaust pipes.
Parts on my ordering list so far are -
Handbrake cable, on mine the adjusters were seized and plastic outer all cracked
6x Exhaust rubber mounts, they are Land Rover mounts, can be brought for £10 each
The rear silencer bolts to rear exhaust pipes were extremely corroded so might get new ones.
I've removed the brake calipers and disc's, I decided to purchase a couple of brass blanks for the brake lines so the fluid doesn't empty out and run out onto the floor.
So, rear wheel liners out, rear undertray off, rear lights out, rear bumper off, rear drop links off (need a 18mm open ended spanner) and antiroll bar plus rear silencer off with rear exhaust pipes.
Parts on my ordering list so far are -
Handbrake cable, on mine the adjusters were seized and plastic outer all cracked
6x Exhaust rubber mounts, they are Land Rover mounts, can be brought for £10 each
The rear silencer bolts to rear exhaust pipes were extremely corroded so might get new ones.
Rightly. or wrongly, I’ve gone down the preventative route with my 2010 V12V and have been to a specialist for waxoiling. Trays off, arch liners out, all brakes and exhaust carefully masked off and very thorough coating applied to the relevant areas of the entire underside. Process videod for the customer too.
Not cheap, but good peace of mind!
Not cheap, but good peace of mind!

Did some work on the car this afternoon,
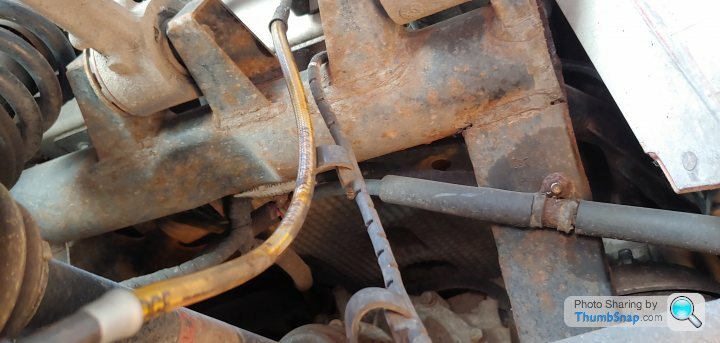
I removed the offside rear suspension & driveshaft, fairly straightforward, the ABS sensor removed ok and most of the bolts loosened off ok.
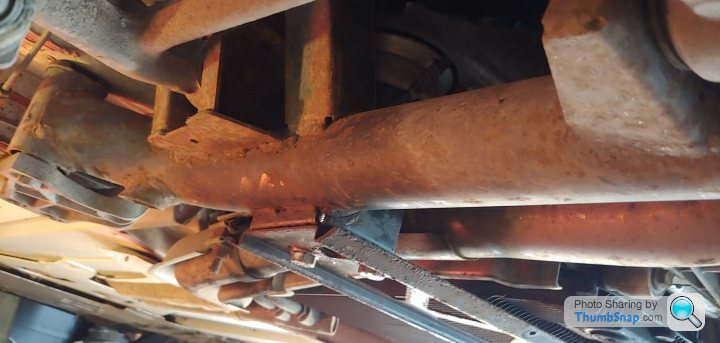
The biggest problem is the bolt in the toe control arm to the subframe is completely corroded in, seems to be a fairly common problem, I've used a ton of penetrating spray and a large hammer but no go and i'm not going to use heat so looks like the only way to move this is to hacksaw either side of the bolt and install a new bolt and arm, not cheap! I've got a feeling the other side will be the same.
The driveshaft going into the wheel bearing housing will not budge, i'll probably take both sides to a garage and ask them to remove the driveshaft from the bearing housing using a hydraulic press.
I've got new nuts (6xM12, 1xM14 either side) as all of them are the nyloc type.
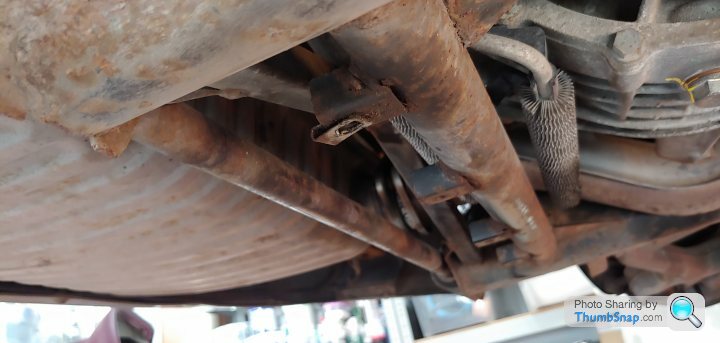
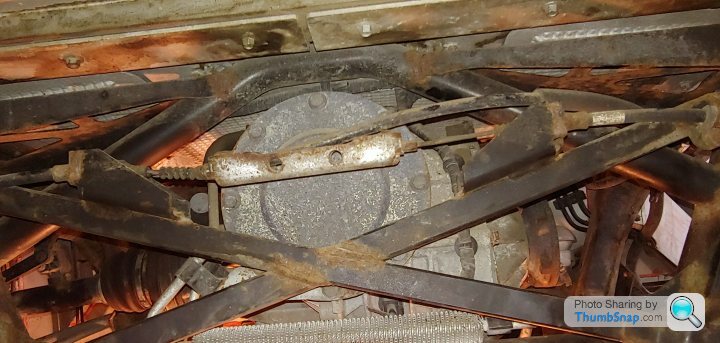
The subframe is now alot more visable and i'm really enjoying this project.
I removed the offside rear suspension & driveshaft, fairly straightforward, the ABS sensor removed ok and most of the bolts loosened off ok.
The biggest problem is the bolt in the toe control arm to the subframe is completely corroded in, seems to be a fairly common problem, I've used a ton of penetrating spray and a large hammer but no go and i'm not going to use heat so looks like the only way to move this is to hacksaw either side of the bolt and install a new bolt and arm, not cheap! I've got a feeling the other side will be the same.
The driveshaft going into the wheel bearing housing will not budge, i'll probably take both sides to a garage and ask them to remove the driveshaft from the bearing housing using a hydraulic press.
I've got new nuts (6xM12, 1xM14 either side) as all of them are the nyloc type.
The subframe is now alot more visable and i'm really enjoying this project.

Definitely worth getting a garage involved when you come to stuck parts.
I usually go with the line of “can you press that out for a tenner for the Christmas fund” ?
That way if it takes them ages it’s only a tenner.
Glad to hear you’re enjoying it - it really is satisfying.
Also worth speaking to the garage about the stuck bolt. There’s probably a tool to get it out and saves a new toe arm.
paulrog1 said:
The biggest problem is the bolt in the toe control arm to the subframe is completely corroded in, seems to be a fairly common problem, I've used a ton of penetrating spray and a large hammer but no go and i'm not going to use heat so looks like the only way to move this is to hacksaw either side of the bolt and install a new bolt and arm, not cheap! I've got a feeling the other side will be the same.
Have you tried rotating the bolt in the hole without actually trying to push it out ? that would break any corrosion bond and help the penetrating fluid do its thing.When re-assembling I used a very thin smear of nickel grease on the shaft of the bolts, but taking care not to get any on the case of the washers/bolts/threads. The nuts and bolts are all torqued up and grease anywhere that's supposed to grip will increase the amount of torque applied to the bolt/nut whilst showing a lower reading on the torque wrench.
Also, don't forget to take a picture of the eccentric washers on the suspension adjustment. That way you can put them back in the same way as they went in and have your suspension somewhere close to what it was before, prior to getting the alignment done properly.
front bolts are the same, i had to replace the lower wishbone for this same issue, in the old pre alloy suspension days we would of heated it up , never failed.
now its not an option or is it?, been looking at induction heat tools ,if you got the coil over the bolt head it would conduct heat along the bolt / bush, you might loose the rubber but im sure they could be found somewhere.
just a thought
now its not an option or is it?, been looking at induction heat tools ,if you got the coil over the bolt head it would conduct heat along the bolt / bush, you might loose the rubber but im sure they could be found somewhere.
just a thought
JonnyCJ said:
Have you tried rotating the bolt in the hole without actually trying to push it out ? that would break any corrosion bond and help the penetrating fluid do its thing.
When re-assembling I used a very thin smear of nickel grease on the shaft of the bolts, but taking care not to get any on the case of the washers/bolts/threads. The nuts and bolts are all torqued up and grease anywhere that's supposed to grip will increase the amount of torque applied to the bolt/nut whilst showing a lower reading on the torque wrench.
Also, don't forget to take a picture of the eccentric washers on the suspension adjustment. That way you can put them back in the same way as they went in and have your suspension somewhere close to what it was before, prior to getting the alignment done properly.
Hi Jonny, yeah i've taken photos of the eccentric bolts either side for the wheel alignment and I will definitely use a small amount of nickel grease when I reassemble.When re-assembling I used a very thin smear of nickel grease on the shaft of the bolts, but taking care not to get any on the case of the washers/bolts/threads. The nuts and bolts are all torqued up and grease anywhere that's supposed to grip will increase the amount of torque applied to the bolt/nut whilst showing a lower reading on the torque wrench.
Also, don't forget to take a picture of the eccentric washers on the suspension adjustment. That way you can put them back in the same way as they went in and have your suspension somewhere close to what it was before, prior to getting the alignment done properly.
The bolt on the O/S tie bar is on rock solid so this afternoon I used a hacksaw to remove it, the arm is now scrap but I knew that, I've got a new bolt and a replacement arm so that's ok, hopefully the N/S one will be better.
I've been contacted by a forum member who recommends using an SDS drill in breaker mode with a SDS to 1/2 inch ratchet bit to a socket on the bolt, together with good rust penetrating spray this could shock the bolt and make it move, tried that this afternoon with no joy, but i'll see if it works on the N/S bolt when I get round to it.
I'm also getting XCP rust blocker for the aluminium arms once they come back from vapour blasting.
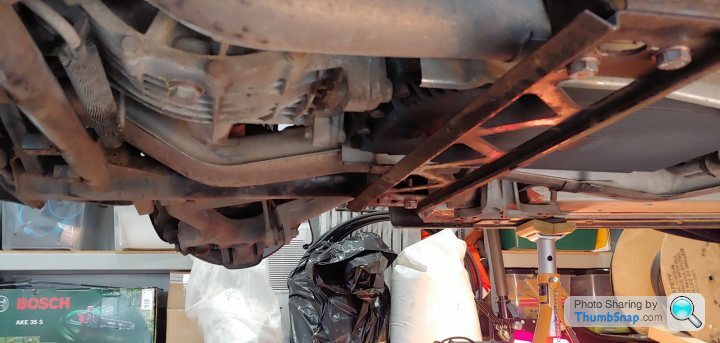
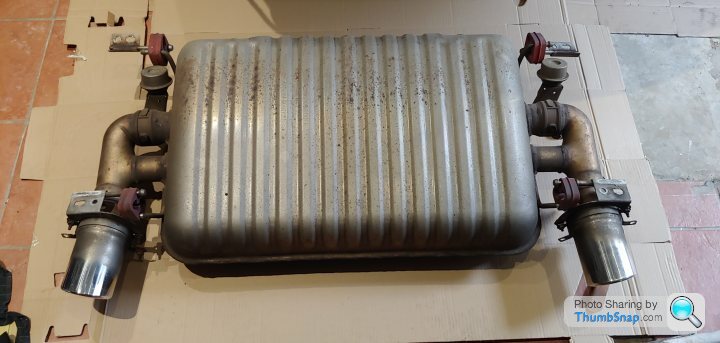
I've also noticed there is quite a difference between the V8V and DB9, I was worried about the gearbox oil cooler pipes but on the DB9 they are well forward of the rear subframe and the rear diff looks completey different and has an unusual oil cooler with cooling spines on a couple of pipes.
Photos of Jonnys V8V (before the refurb work)
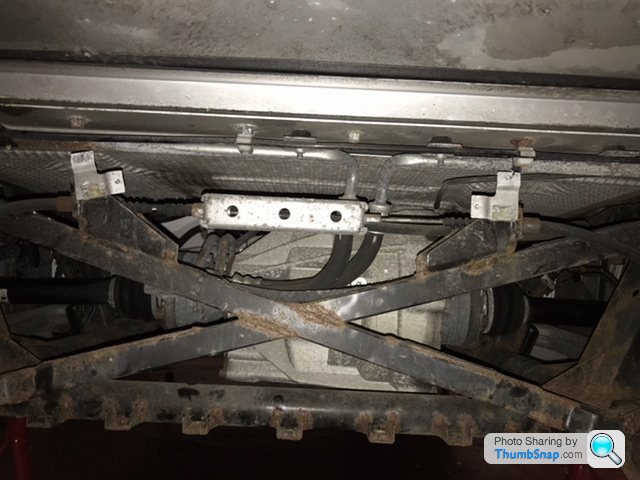
Now my DB9, notice the cooling pipe at the bottom of the photo.
Edited by paulrog1 on Wednesday 23 September 20:35
Edited by paulrog1 on Wednesday 23 September 20:50
Thanks for making this thread Paul. I too will have to address this at some point. When I do the transmission oil change I will get a closer inspection of the subframe but the paint finish on mine is compromised too.
Using the old trick removing stuck bolts with the SDS, I might not have made myself clear from your description. If access allows you to get the end of the chisel straight on to the end of the bolt (I have cut a chisel down so there is a larger flat landing), you push the bolt out backwards with the SDS. The less interfaces to lose energy the better. To stop the chisel wondering off the end of the bolt & damaging the bolt threads, I leave the nut on a couple of turns (or a spare nut) to keep the chisel centralised. I had to do this again the other week on the front wishbone eccentric bolts on a 23 year old Toyota Land Cruiser. One of them took about 4 minutes to release. I don't know which was hotter, me or the bolt
Using the old trick removing stuck bolts with the SDS, I might not have made myself clear from your description. If access allows you to get the end of the chisel straight on to the end of the bolt (I have cut a chisel down so there is a larger flat landing), you push the bolt out backwards with the SDS. The less interfaces to lose energy the better. To stop the chisel wondering off the end of the bolt & damaging the bolt threads, I leave the nut on a couple of turns (or a spare nut) to keep the chisel centralised. I had to do this again the other week on the front wishbone eccentric bolts on a 23 year old Toyota Land Cruiser. One of them took about 4 minutes to release. I don't know which was hotter, me or the bolt
I feel for you guys in the UK, the undersides of your cars look like 30 year old beaters. I am really surprised by how bad these look. I guess the cold, damp, salty atmosphere really does a number. Here in the USA, most buyers would walk after seeing those pictures, even though it appears mostly cosmetic.
DB9VolanteDriver said:
I feel for you guys in the UK, the undersides of your cars look like 30 year old beaters. I am really surprised by how bad these look. I guess the cold, damp, salty atmosphere really does a number. Here in the USA, most buyers would walk after seeing those pictures, even though it appears mostly cosmetic.
Don't they sell Astons in the Salt Belt? Or is it just in sunny California?Gassing Station | Aston Martin | Top of Page | What's New | My Stuff