Discussion


Does anyone know where all the previous threads on this are? I've removed the glove box and the bolts on either side and although the sides are free it seems to be still secured to something in the middle near the windscreen. I've seen a dash off a car and don't remember there being any more bolts (apart from all the little nuts holing the trim panel & instruments on).
You’re quite right Tinks, the veneered/wood effect dash panel is secured with the nuts you describe. I was hoping to be able to pull the whole moulding ie the vinyl covered bit away front the screen so I could get behind the dash and make getting at the others nuts easier. I have a hardboard template I took of another dash panel so I know where all the little buggers are. Two hours in and I’ve managed to remove three of them. At this reate I be struggling to be ready for Scotland.
I've also managed to ping this off something.
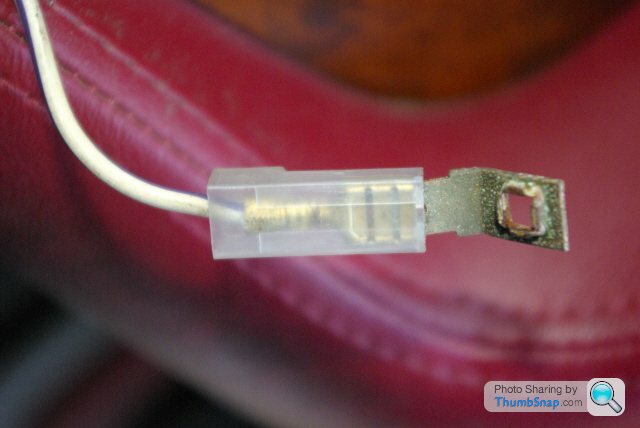
Any ideas what it was connected to and will I be able to re-connect it (the wire is white with a purple trace)? I though I might have been the tacho but that's working OK. Had enough for today, going to cut the grass. At least I know what I’m doing there!
I've also managed to ping this off something.
Any ideas what it was connected to and will I be able to re-connect it (the wire is white with a purple trace)? I though I might have been the tacho but that's working OK. Had enough for today, going to cut the grass. At least I know what I’m doing there!
Edited by v8s4me on Sunday 17th October 13:14
Thanks for the help chaps. I managed to get the four screws under the bottom edge of the windscreen off this evening. The passenger side is now loose but the drivers side still won’t budge. Got too cold so gave up!
The plan is to try and make up a mounting plate which is separate from the dash assembly and mounted onto the tub somehow – not sure how. If this works, the whole dash (trim & Vinyl) can be fitted and removed without disturbing the instruments and heater controls. All the electrical connections will be through multiple snap connectors so the whole unit can be removed and re-fitted with the minimum of fuss.
Do you think it will work? Has any one ever tried this?
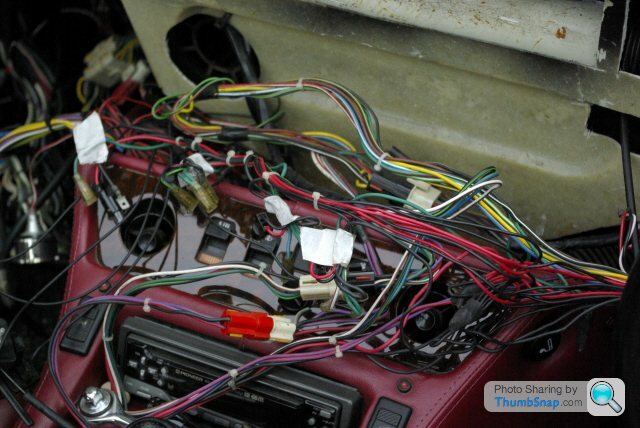
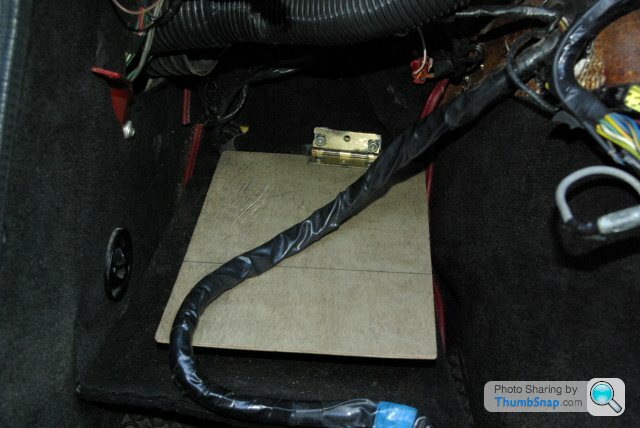
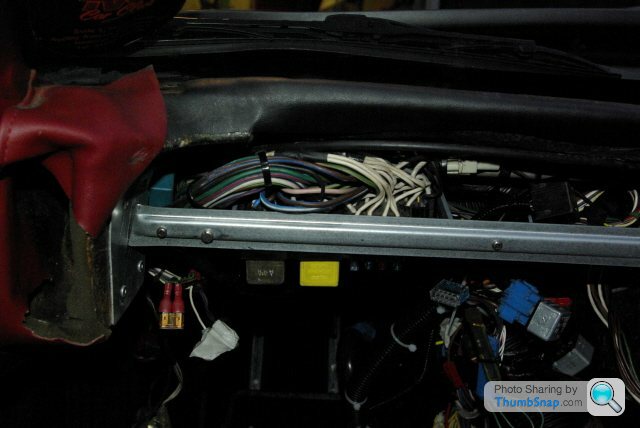
Finally got the dash off. What a mess! This was just what was crammed behind the centre console, never mind what was behind the glove box.
I’ve now removed all the duplicate wiring and tidied it all up with proper connectors. Now the dash and its loom and the centre console and its loom can be separated from each other and the main loom. I’ve you’ve ever wondered about the dim, dimmer, no use at all illumination settings it’s because TVR used 3w bulbs and then covered them in a green rubber sheath to give the tinted light. So an already pathetic glow was dulled even more. If you want to make the lighting be as it should be, replace the bulbs with 501 5w ones and paint them with green ink. No loss of light and a lovely green glow. Of course you’ll have to take the dash off to do it!
This is why there has never been any cold air ventilation on the passenger side of the centre console.
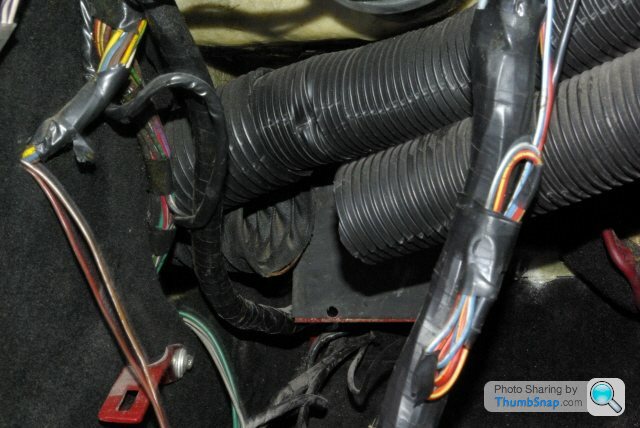
There is a 6” gap between the end of the pipe to the centre console and the tube coming in from the intake vent (thank you Mr G Gill 3/10/91 No. 587). Must have been late on a Friday so they couldn’t be bothered to look for a longer pipe.
Still can't figure out where the white and purple wire is supposed to be attached to (see earlier photo) any ideas anyone?
This weekend’s entertainment will be trying to make some sense of the wiring that’s now in the passenger foot-well and working out how to get it all back in so that there will be easy access to the fuse box, the relays and the ECU. Any one got a TVR Tardis?
I’ve now removed all the duplicate wiring and tidied it all up with proper connectors. Now the dash and its loom and the centre console and its loom can be separated from each other and the main loom. I’ve you’ve ever wondered about the dim, dimmer, no use at all illumination settings it’s because TVR used 3w bulbs and then covered them in a green rubber sheath to give the tinted light. So an already pathetic glow was dulled even more. If you want to make the lighting be as it should be, replace the bulbs with 501 5w ones and paint them with green ink. No loss of light and a lovely green glow. Of course you’ll have to take the dash off to do it!
This is why there has never been any cold air ventilation on the passenger side of the centre console.
There is a 6” gap between the end of the pipe to the centre console and the tube coming in from the intake vent (thank you Mr G Gill 3/10/91 No. 587). Must have been late on a Friday so they couldn’t be bothered to look for a longer pipe.
Still can't figure out where the white and purple wire is supposed to be attached to (see earlier photo) any ideas anyone?
This weekend’s entertainment will be trying to make some sense of the wiring that’s now in the passenger foot-well and working out how to get it all back in so that there will be easy access to the fuse box, the relays and the ECU. Any one got a TVR Tardis?
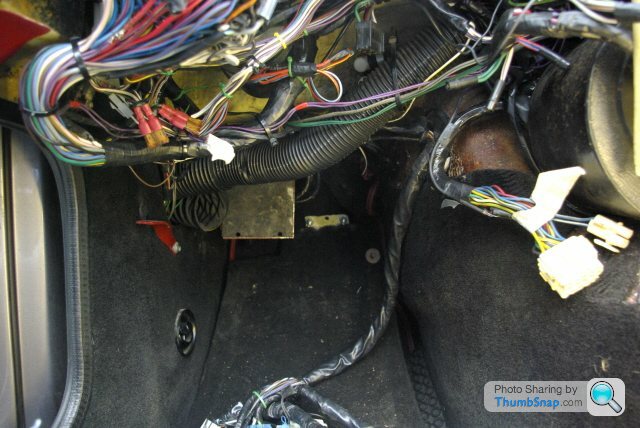
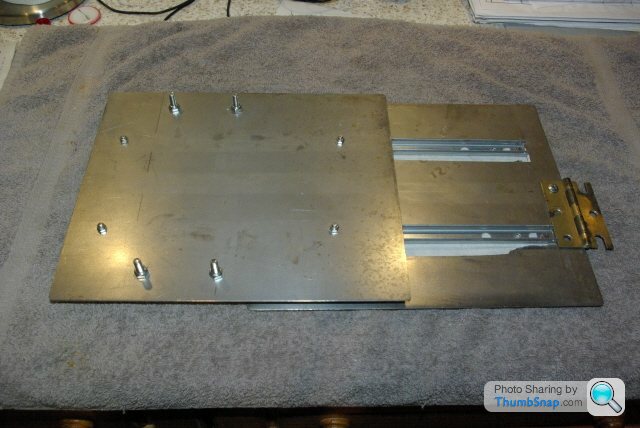
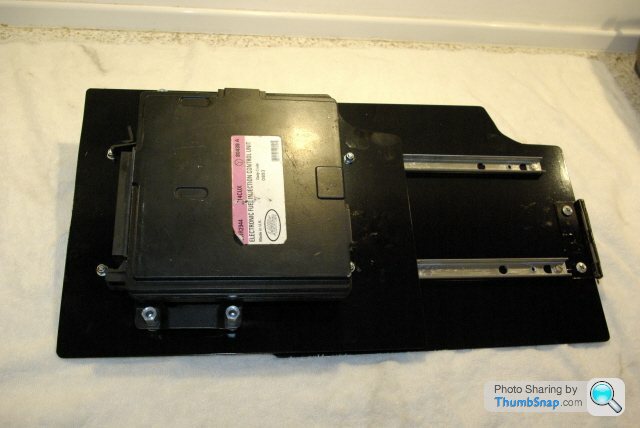
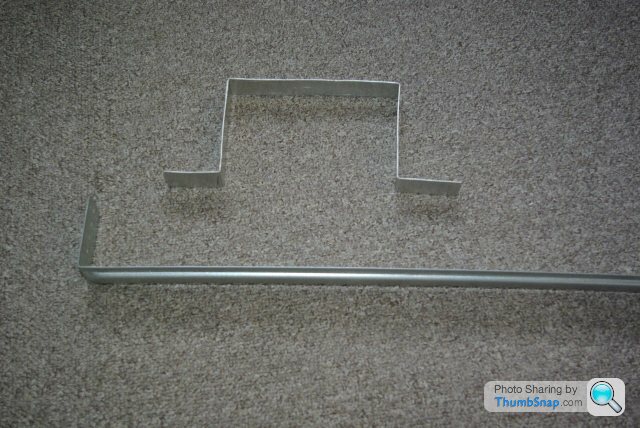
The dash project is progressing well. It’s looking a lot tidier already. I’ve unwrapped a lot of the crappy black tape, separated the wiring into smaller groups, re-routed some and tucked it all away in the various gaps with P-clips and zip-ties. Assuming the idea of putting the fuse box in the glove box works (Paul D managed to do this so it should be possible) it looks like there might be plenty of room now to mount the ECU on a base-board which will mean that the ECU and associated loom will not be supported by the carpet, (the way it should have been built in the first place!) The first photo shows all that is now left of the loose wiring. The second photo (metal bracket now removed) shows the first attempt at putting in a hinged base board to mount the ECU and its loom.
That’s as far as I’ve got for now.
That’s as far as I’ve got for now.
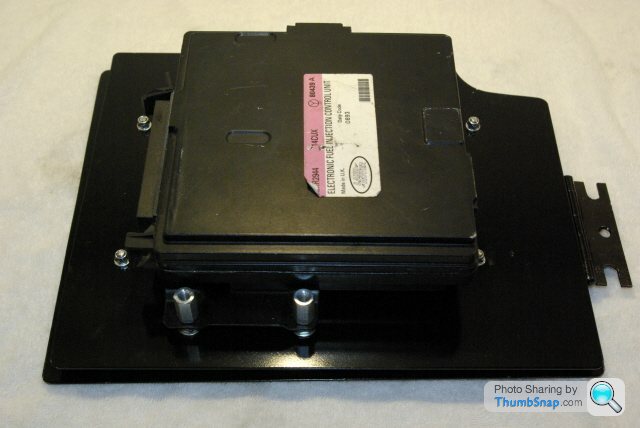
Thanks Neil, might explain why the interior light never worked. The idea of mounting the ECU on a sliding tray is progressing well, see photos.
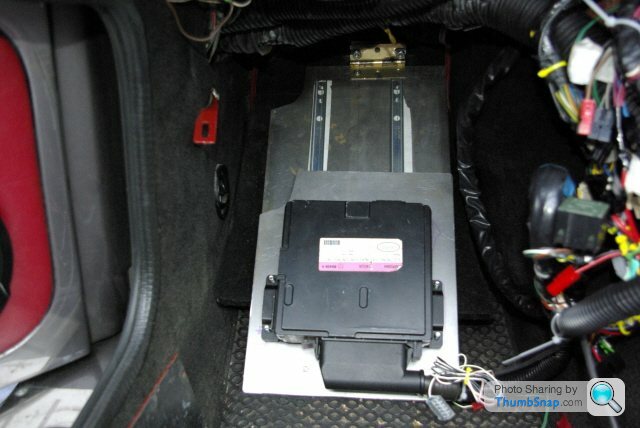
Still a bit of work to do to tidy up the wiring but I’ve got an idea for the fuse box and the relays. Watch this space.
This where I the sliders came from and they have a particularly good selection of nuts & bolts at very reasonable prices. If you have one near you, it's well worth a look.
http://www.clasohlson.co.uk/Product/CategoryDispla...
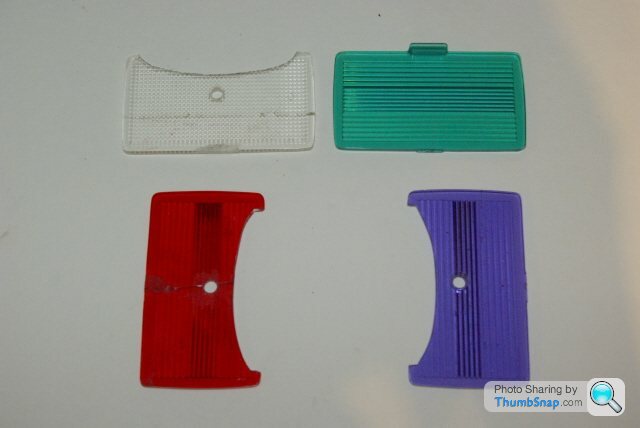
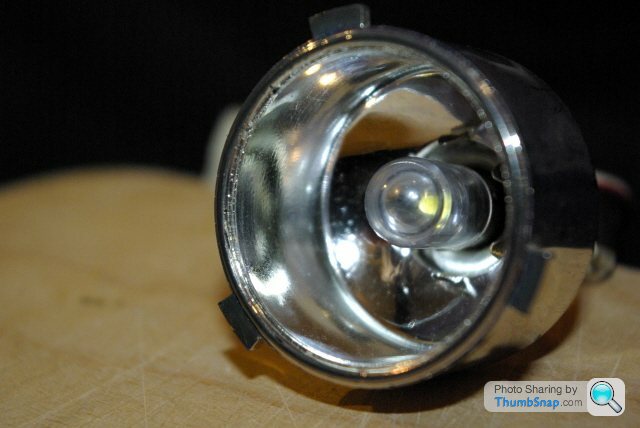
Some V8S owners will be familiar with the heater control moulding which moves from side to side when you slide the levers. In my case I also had holes instead of coloured indicators. I also wasn’t aware that these little “windows” should have been lit by fibre optics. Fixing the fibre optics was easy – fit a new bulb! But I’m still trying to find one with a decent wattage. The original is just 4w and the only other one I can find with the right fitting is 21w which might be a bit much for the plastic housing. Any thoughts?
Fixing the sloppy fit and the coloured glass took a lot of head scratching but in the end the solution was simple. The bits of plastic in the photos are flash gun diffusers bought for a couple of quid. Shaping them to fit the front of the heater control moulding and drilling a hole to fit the mounting stud on the back of the dash means they double up as spacers and coloured lenses for the “windows”. The green fibre optic still looks green through the blue filter and putting another green behind the red filter for the “up” indicator makes it look orange so we’ve got different colours for the four indicators. I thought I’d been quite clever here but after I’d finished I had another look at the fragments of plastic which fell out from behind the dash and it looks like the original fitting might have been similar. Although, my originals were bits of clear thin plastic with coloured insulating tape over them so even if it’s not a completely original idea after all I think my solution is much better.

The fuse box mounting idea is coming along. More to follow if it works but here’s a clue for now.
Fixing the sloppy fit and the coloured glass took a lot of head scratching but in the end the solution was simple. The bits of plastic in the photos are flash gun diffusers bought for a couple of quid. Shaping them to fit the front of the heater control moulding and drilling a hole to fit the mounting stud on the back of the dash means they double up as spacers and coloured lenses for the “windows”. The green fibre optic still looks green through the blue filter and putting another green behind the red filter for the “up” indicator makes it look orange so we’ve got different colours for the four indicators. I thought I’d been quite clever here but after I’d finished I had another look at the fragments of plastic which fell out from behind the dash and it looks like the original fitting might have been similar. Although, my originals were bits of clear thin plastic with coloured insulating tape over them so even if it’s not a completely original idea after all I think my solution is much better.
The fuse box mounting idea is coming along. More to follow if it works but here’s a clue for now.
Thanks for the info, I'll check them out and let you know what happens. Not sure how the quoted intensity figure equates to wattage though. RS also seem to do the cap-less instrument light bulbs in green with a 5W output. This is probably the answer to the dim or dimmer still lights if anyone is interested. I changed mine to clear 5W and painted them green (this was before I found the green ones at RS) and the difference is amazing.
Frustration!!!!! RS didn’t have the bulb in stock so that will mean another trip once they (hopefully) get it in. By the time I do another round trip the fuel will have cost almost as much as the so
 ing bulb. They insisted on me paying so even if they don’t come up with the thing I’ve still got to go back for the refund. Got it wrong about the green cap-less instrument bulbs. It wasn’t RS which do them, it is vehiclewiringproducts.co.uk - ref 501G.
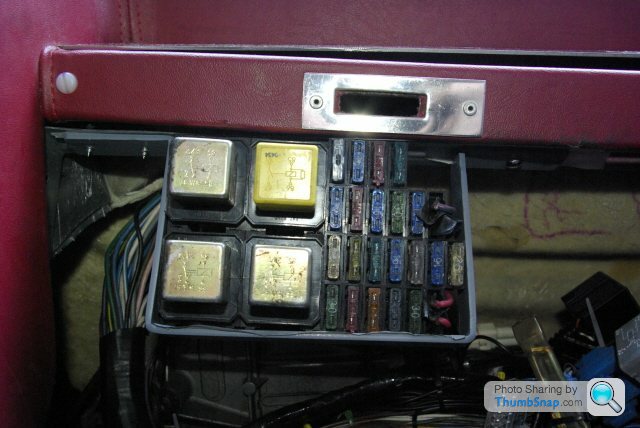
RS didn’t have the bulb in stock so that will mean another trip once they (hopefully) get it in. By the time I do another round trip the fuel will have cost almost as much as the soing bulb. They insisted on me paying so even if they don’t come up with the thing I’ve still got to go back for the refund. Got it wrong about the green cap-less instrument bulbs. It wasn’t RS which do them, it is vehiclewiringproducts.co.uk - ref 501G. The fuse box is now mounted in a bracket which holds it behind the dash and makes it accessible from the glove box with out taking up any space in the glove box itself. If pics not explanatory PM me for more.
Green instrument light bulbs or clear ones painted with green ink? Nothing much in it really, if anything the DIY ones are slightly brighter and a more subtle shade of green.
Green instrument light bulbs or clear ones painted with green ink? Nothing much in it really, if anything the DIY ones are slightly brighter and a more subtle shade of green.
I’ve replaced the fresh air pipe to the center console with the hose off a hoover. It’s much more flexible so it can be tucked around the tight corners and kept out of the way. It’s is a bit smaller in diameter but conveniently it now fits inside the centre console vents and a bit of foam padding secures the other end inside the intake pipe. It’s 2°C in my garage so that’s enough for this evening!

Gassing Station | S Series | Top of Page | What's New | My Stuff