I'm getting too old for this ^$(%
Discussion


Had the 390SE in for its MOT last weekend, which it passed, although Big John did mention that the handbrakes were operating unequally (though still within spec.).
On Monday Nursy and I went out for a spin and the bloody brakes failed again, exactly as last year which prompted me to rebuild the rear calipers.
Once underneath I decided it was time to bite the bullet and go for the full Monty: bushes, UJs, sort the brakes, paint the chassis, fix the oil leaks... although this does mean I probably won't now make the 'Fest. To be fair though, the car was near undriveable with the brakes playing silly bu993rs.
Now in my 12 years of ownership I've only done minimal work down at the mucky end so I was expecting major hassle in getting the bits apart but apart from a few seized fasteners it hasn't been too bad so far - apart from the fact that I'm finding it hard going lying on my back and rolling around the floor: I'm pushing 50 for god's sake, I should have staff to do this for me
The car's history file does show that it's had a couple of suspension rebuilds but the last would have been around 1995 (the Koni shocks are dated 1992) so I don't think I've done too badly in getting away with it for so long: I've been aware of some play in a couple of UJs for three or four years now but an annual squirt of grease pre-Wedgefest has kept the spanners at bay. Unfortunately the sticking brakes issue has not only cooked the brand-new pads but has also melted the Nylocs that hold the driveshafts on (!) and, I suspect, caused the diff seals to fail as there's a lot of oil about the place.
This'll be an expensive 'do' I reckon, so without further ado here's a cluster of pics. to enlighten those who have yet to venture under the rear arches
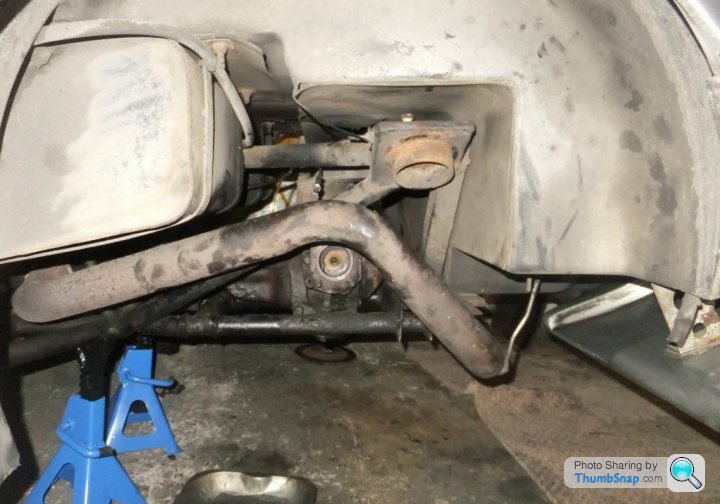
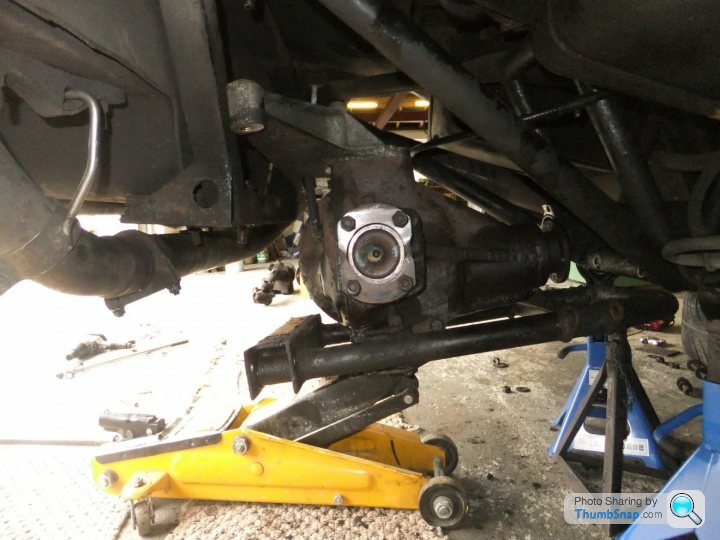
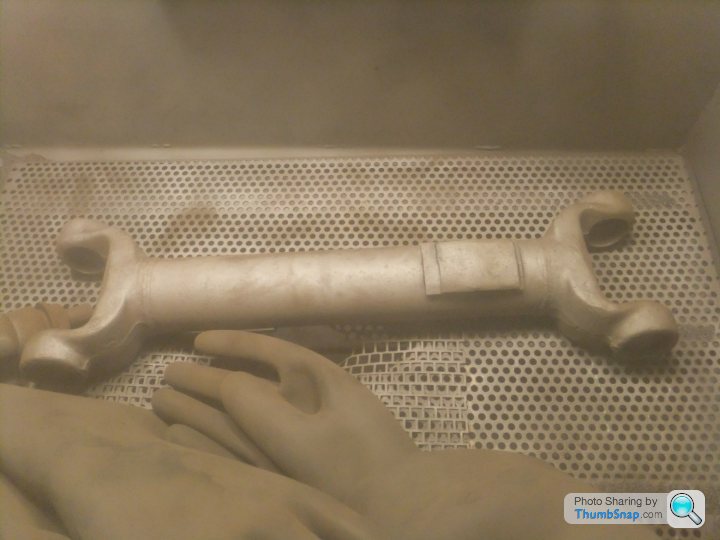
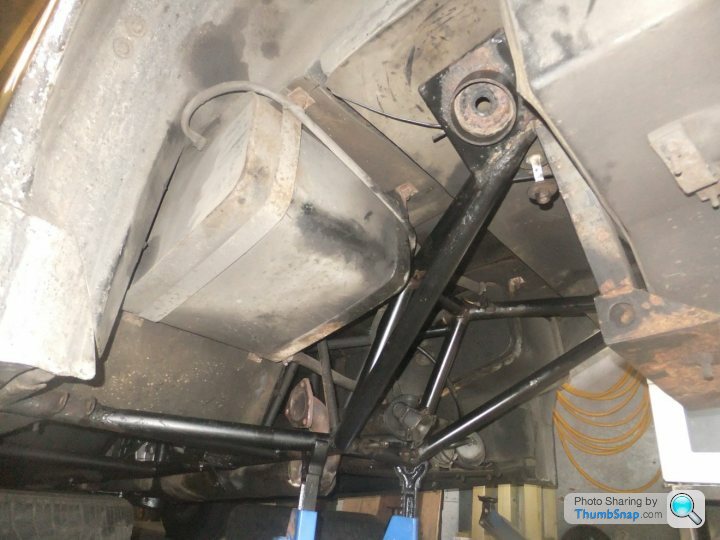
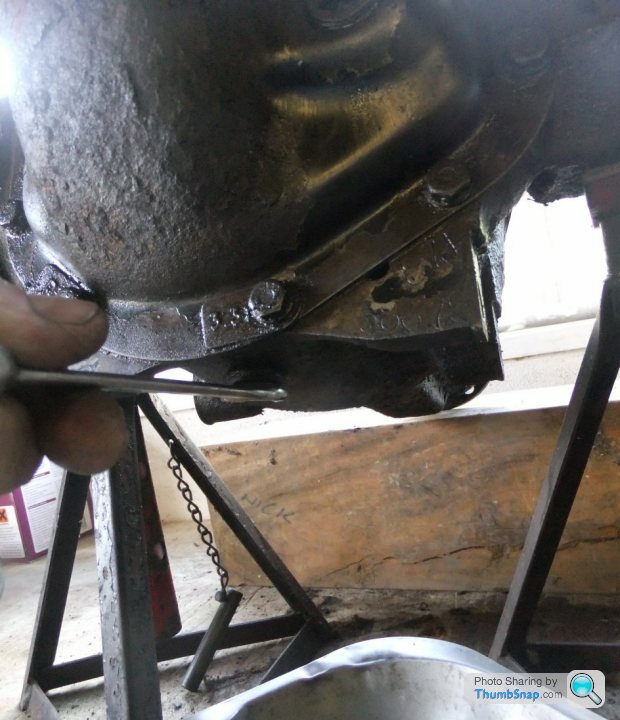
View of the nearside: I left the exhaust on but access to some bits, e.g. the drivesahft nuts, would have been easier with it off...
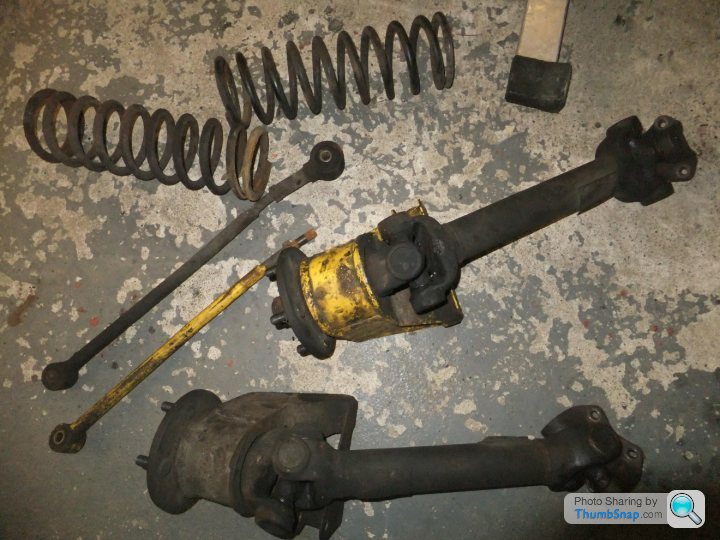
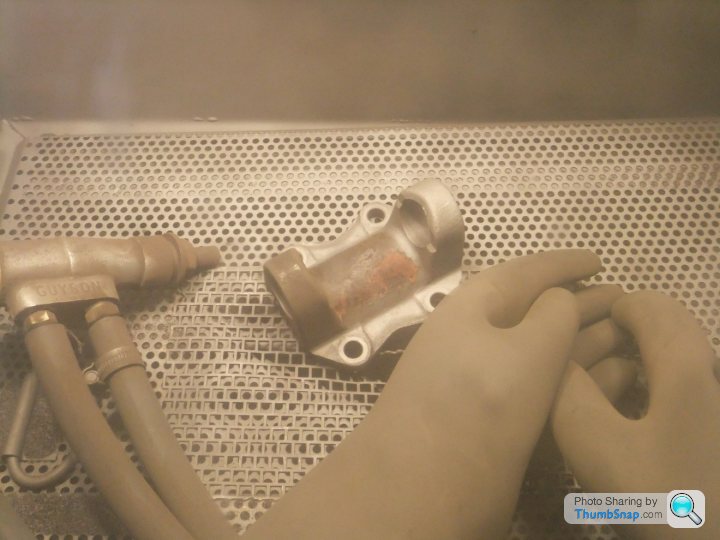
A cluster of rusty bits.
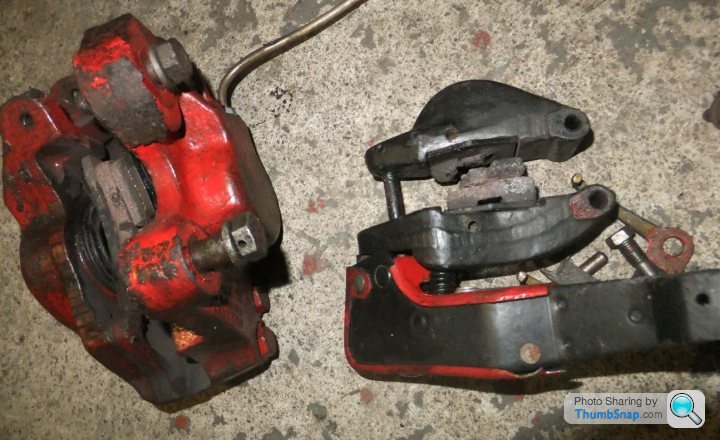
One of the recently-rebuilt brake calipers. You can see that one of the handbrake pads has disintegrated (again); I wasn't impressed with the quality of the parts to start with. Bloody Asian quality control...
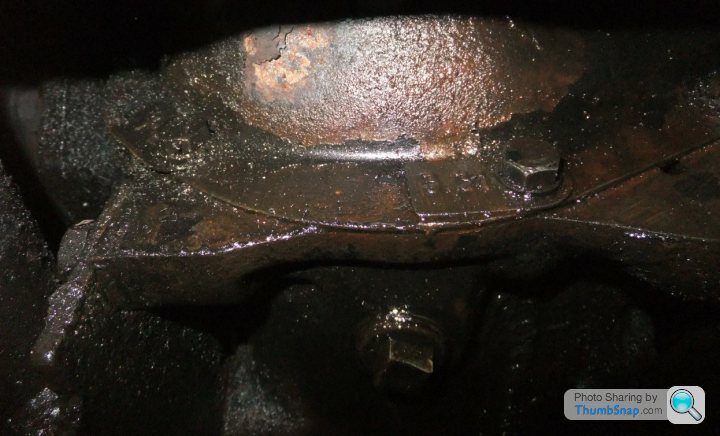
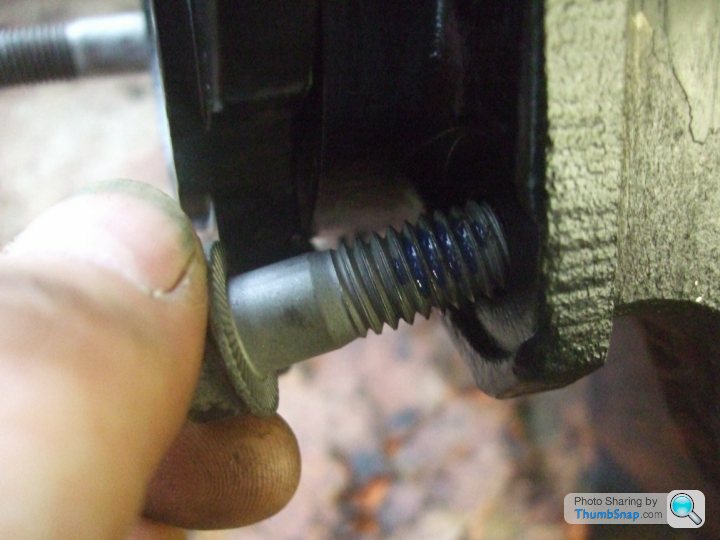
These two bolts hold the rear end of the diff. cradle. One of them turns, the other is so seized I fractured a Britool socket on a 3-foot cracking bar and it still didn't shift. Where's me grinder
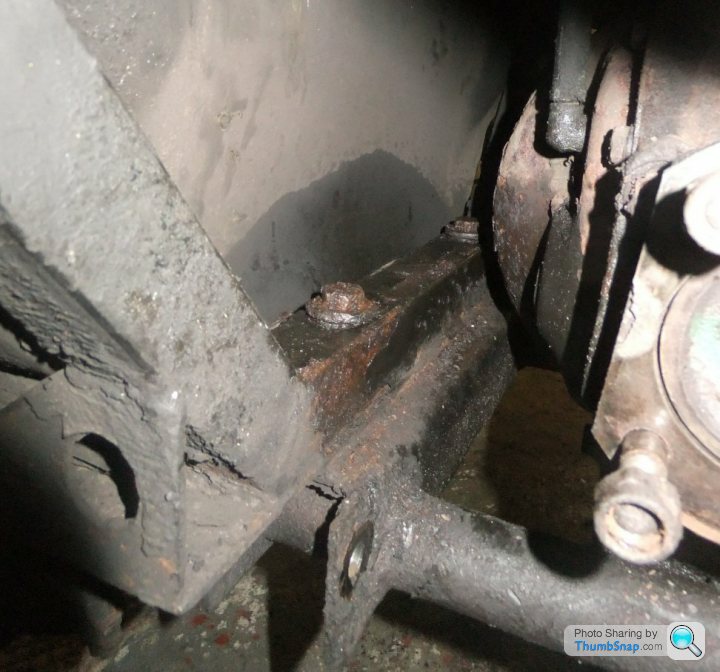
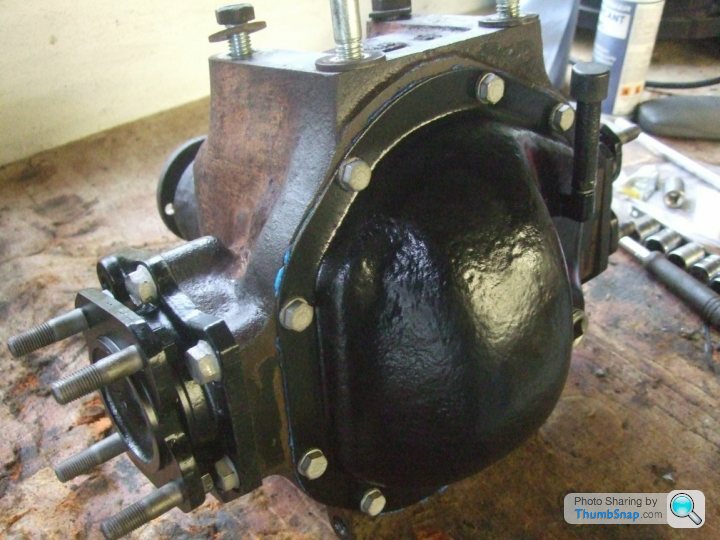
Amazingly, after all these years it's the first time I've realised that the diff. is the 3.31:1 ratio rather than the more common 3.54:1. It's a PowerLok LSD, of course...
On Monday Nursy and I went out for a spin and the bloody brakes failed again, exactly as last year which prompted me to rebuild the rear calipers.
Once underneath I decided it was time to bite the bullet and go for the full Monty: bushes, UJs, sort the brakes, paint the chassis, fix the oil leaks... although this does mean I probably won't now make the 'Fest. To be fair though, the car was near undriveable with the brakes playing silly bu993rs.
Now in my 12 years of ownership I've only done minimal work down at the mucky end so I was expecting major hassle in getting the bits apart but apart from a few seized fasteners it hasn't been too bad so far - apart from the fact that I'm finding it hard going lying on my back and rolling around the floor: I'm pushing 50 for god's sake, I should have staff to do this for me
The car's history file does show that it's had a couple of suspension rebuilds but the last would have been around 1995 (the Koni shocks are dated 1992) so I don't think I've done too badly in getting away with it for so long: I've been aware of some play in a couple of UJs for three or four years now but an annual squirt of grease pre-Wedgefest has kept the spanners at bay. Unfortunately the sticking brakes issue has not only cooked the brand-new pads but has also melted the Nylocs that hold the driveshafts on (!) and, I suspect, caused the diff seals to fail as there's a lot of oil about the place.
This'll be an expensive 'do' I reckon, so without further ado here's a cluster of pics. to enlighten those who have yet to venture under the rear arches
View of the nearside: I left the exhaust on but access to some bits, e.g. the drivesahft nuts, would have been easier with it off...
A cluster of rusty bits.
One of the recently-rebuilt brake calipers. You can see that one of the handbrake pads has disintegrated (again); I wasn't impressed with the quality of the parts to start with. Bloody Asian quality control...
These two bolts hold the rear end of the diff. cradle. One of them turns, the other is so seized I fractured a Britool socket on a 3-foot cracking bar and it still didn't shift. Where's me grinder
Amazingly, after all these years it's the first time I've realised that the diff. is the 3.31:1 ratio rather than the more common 3.54:1. It's a PowerLok LSD, of course...
Oops, dammit, meant to hit Preview, not Submit... where was I?
Some more crustiness needing attention... the yellow paint is my doing: about ten years ago I replaced a wheel bearing and while I was in there I got busy with some emery cloth. Then I went looking for the black paint I could have sworn I had... but at 5PM on a Sunday the shops had shut and yellow Smoothrite was all I could lay hands on!
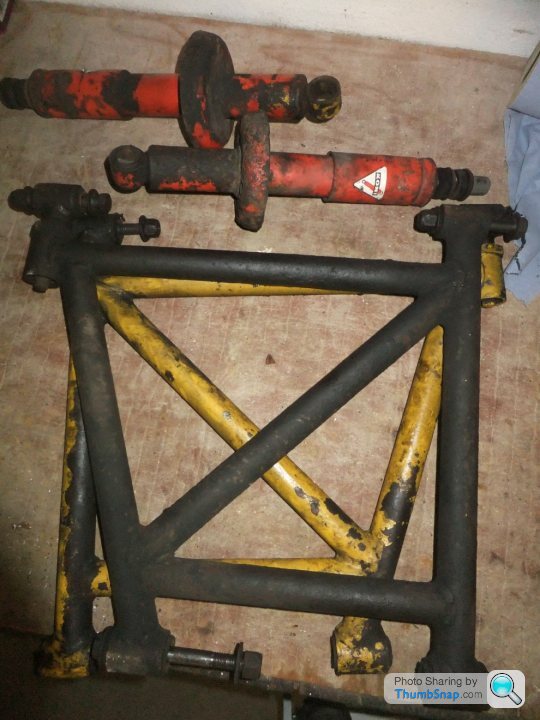
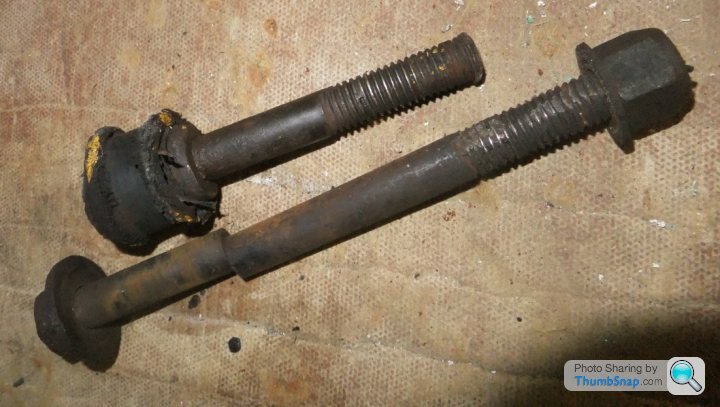
These are so far the only two bolts I've had to destroy to remove; they pass through the shocks, to which they'd rusted. I sawed through them in order to detach the shock from the A-frame then brayed them with a 4-pounder, but only one came out. The other took the Koni's bush with it!
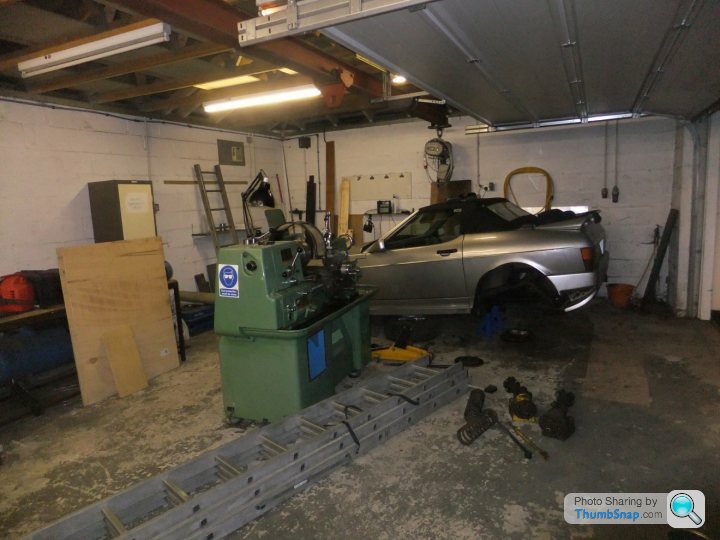
It's nice to have a bit of space to work (gratuitous lathe pic into the bargain  )
)
Some more crustiness needing attention... the yellow paint is my doing: about ten years ago I replaced a wheel bearing and while I was in there I got busy with some emery cloth. Then I went looking for the black paint I could have sworn I had... but at 5PM on a Sunday the shops had shut and yellow Smoothrite was all I could lay hands on!
These are so far the only two bolts I've had to destroy to remove; they pass through the shocks, to which they'd rusted. I sawed through them in order to detach the shock from the A-frame then brayed them with a 4-pounder, but only one came out. The other took the Koni's bush with it!
It's nice to have a bit of space to work
(gratuitous lathe pic into the bargain )
 - but I don't own it. It's 40 x 19 feet, the one I do own is only 30 x 9. And full of cr*p. And is sinking
Well that's another weekend over... still, I got some more work done on the 390.
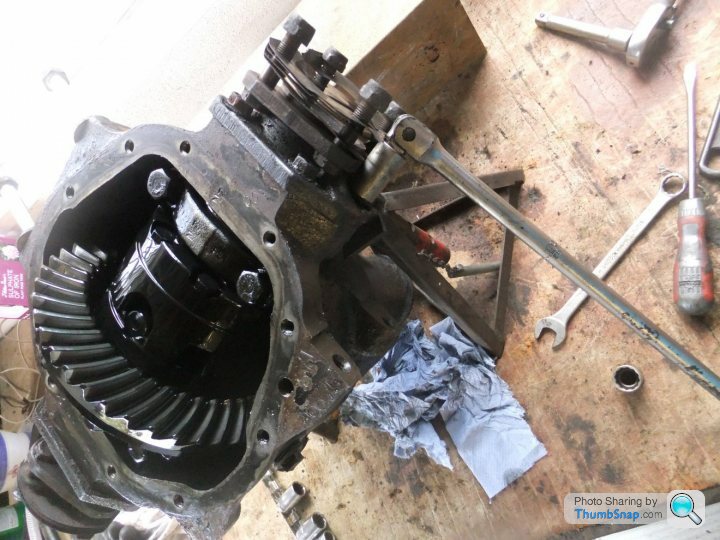
Diff coming out with its cradle...
...and on the floor:

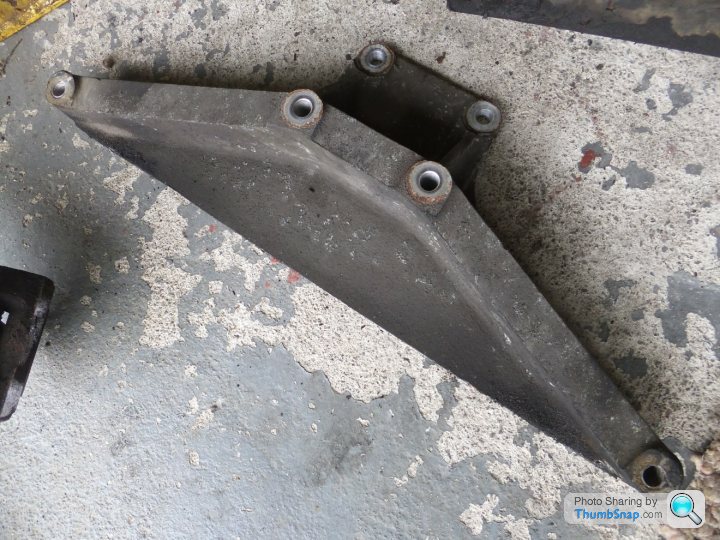
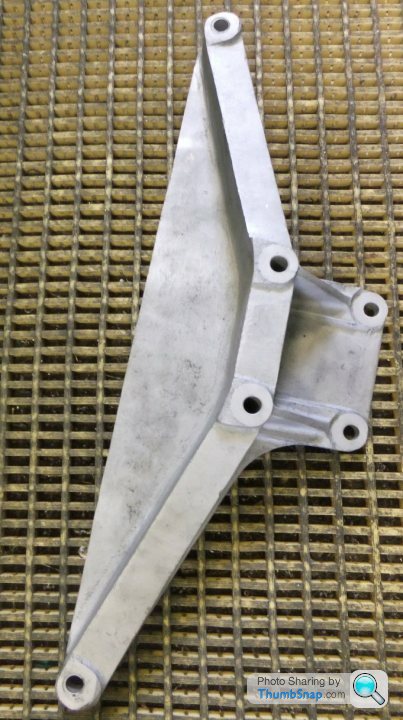
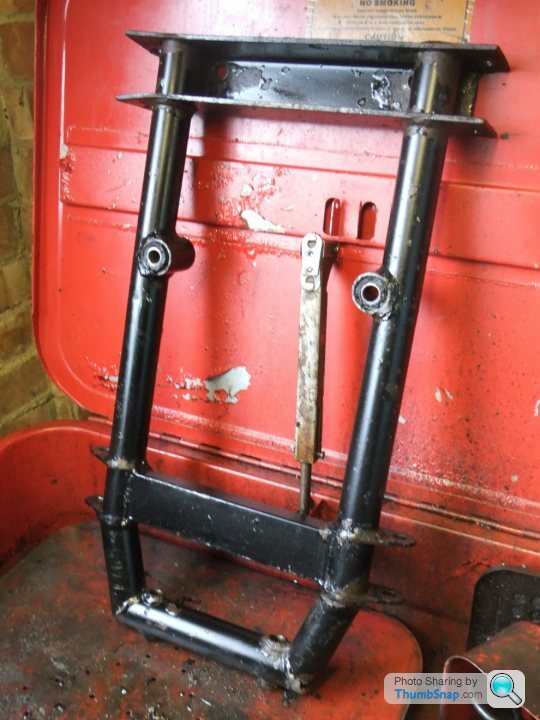
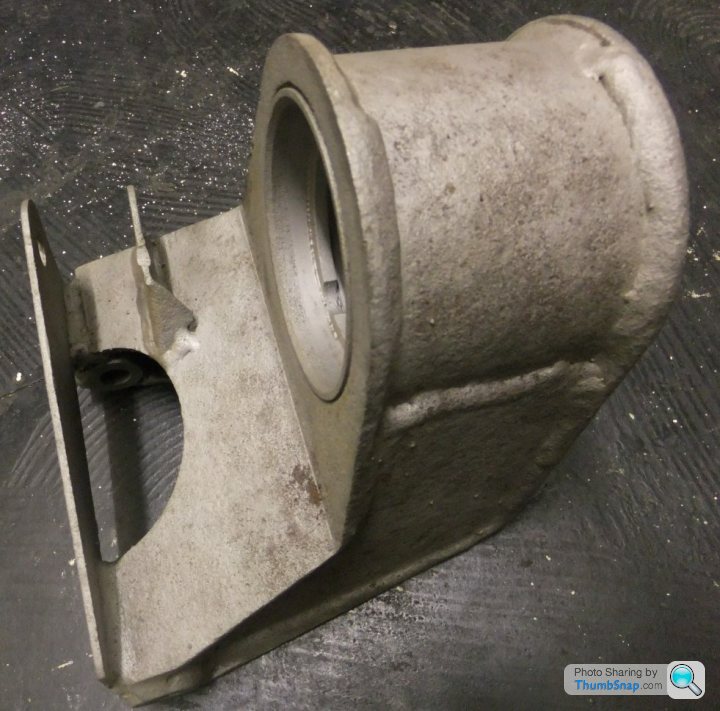
Alloy top hanger removed for bead-blasting:
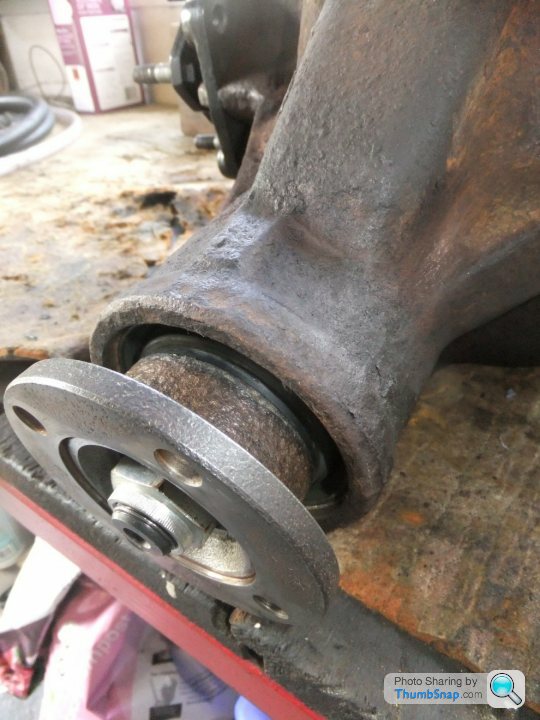
Nearside tie-rod front mounting bolt was taking the rubber bush around with it. Only one thing to do; thin cutting disc in the air grinder:

You know those threads where people talk about renewing the gearshift extension support bushes? Well there's only this much clearance between the bottom of the housing and the propshaft!

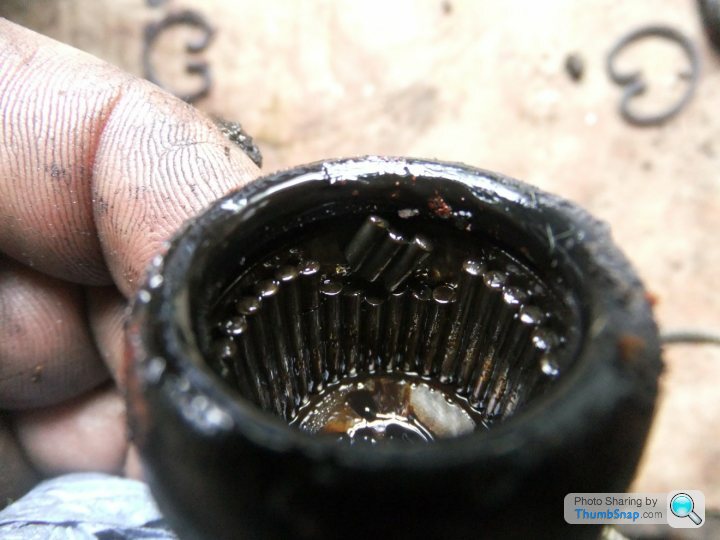
Started the real mucky stuff by knocking out all the driveshaft UJs; this is one reduced to its component parts...

The following pics show why the joints are wearing:
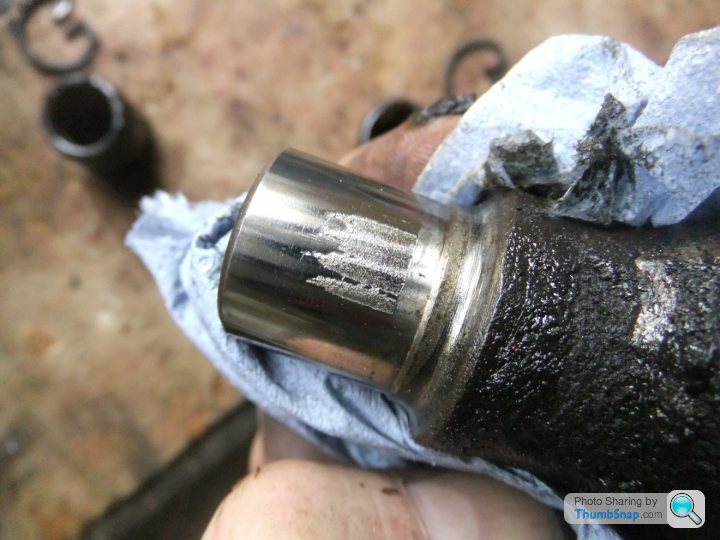
...and you know they've been getting some stick when you find snapped needle rollers!
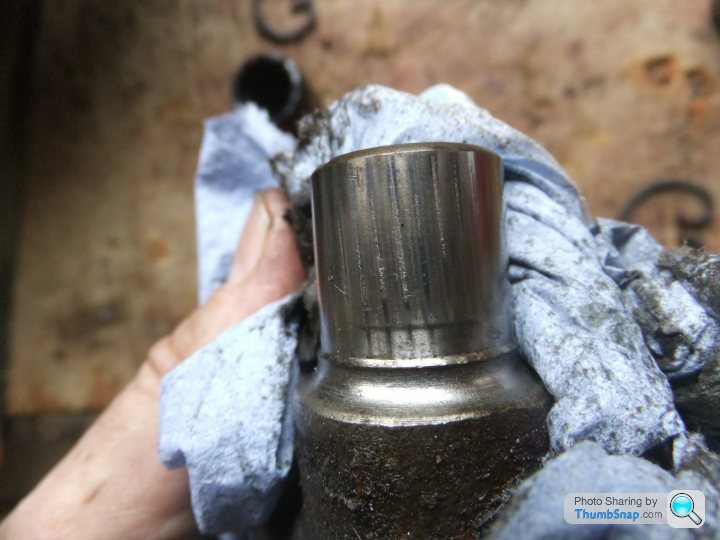
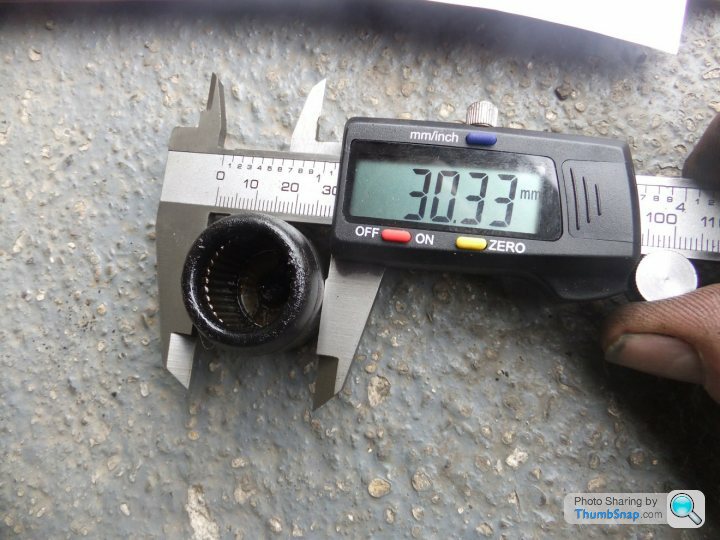
Confirming that the joints are HS179 size...
Diff coming out with its cradle...
...and on the floor:
Alloy top hanger removed for bead-blasting:
Nearside tie-rod front mounting bolt was taking the rubber bush around with it. Only one thing to do; thin cutting disc in the air grinder:
You know those threads where people talk about renewing the gearshift extension support bushes? Well there's only this much clearance between the bottom of the housing and the propshaft!
Started the real mucky stuff by knocking out all the driveshaft UJs; this is one reduced to its component parts...
The following pics show why the joints are wearing:
...and you know they've been getting some stick when you find snapped needle rollers!
Confirming that the joints are HS179 size...
dixiebabes said:
Ignorance is bliss on my part here Ian but i had exactly the same problem 2 BBWFs ago If you can remember. I crawled home with various scary occasions, rear brakes smoking and having no brakes at all eventually now and then at 50mph. When i gave it to car tech in hartlepool as it was far beyond my knowledge, they said the Diff bearings had collapsed causing the rear brakes to bind resulting in brake fluid boiling and hence no brakes after certain amounts of motorway driving. Like i say i have never been "at" the rear brakes but it sounds alot like the symptoms i had maybe worth a look at the diff bearings. Or was it just charge the clown £650 and tell him it was the diff bearings. HTH
Dix
P.S if you need a hand im off for the next month and would gladly help if needed. you have my number.
Cheers Jeff: I've had a feel of the diff. bearings and they seem fine. The Jag unit is built like the proverbial brick outhouse, not quite sure what you'd have to do to get the bearings to collapse, maybe traffic-light Grand Prix is a tougher game over your way Dix
P.S if you need a hand im off for the next month and would gladly help if needed. you have my number.
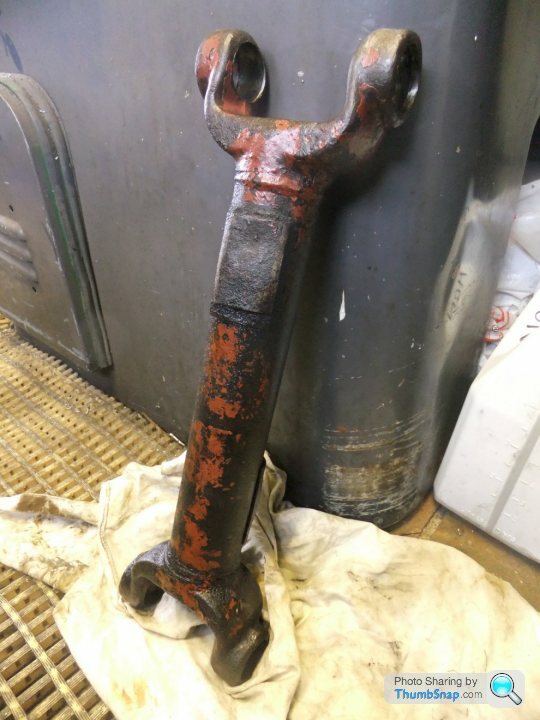
Diff support beam after blasting...
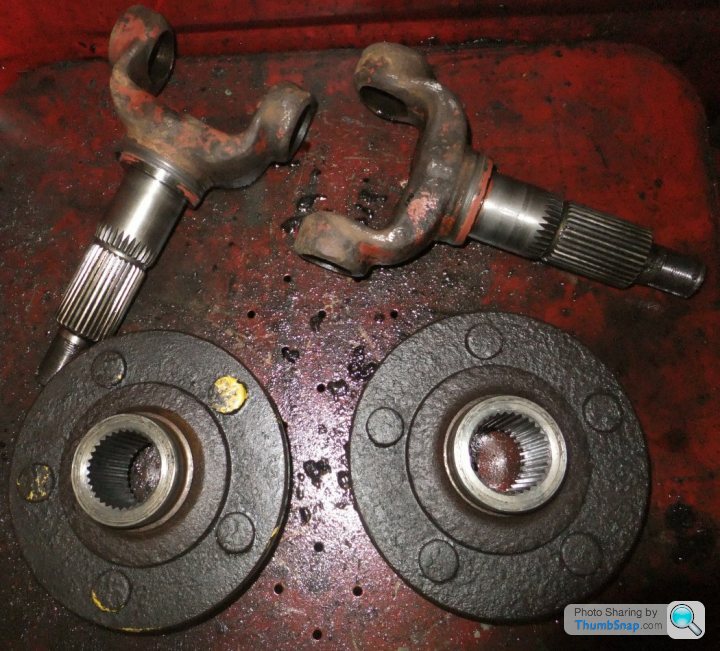
Offside half-shaft after a night in the parts washer; could be the original paint lurking under all the diff. oil and brake dust!
Quick coffee-break in the middle of sandblasting the halfshaft...
... and the diff-end drive flange (snigger):
Almost seems a shame to have to put paint back on:
The diff. cradle draining Jizer. Don't get any in your eyes kiddies, it bloody stings
Note the splayed sides (top left of pic) where one of the A-frames pivots: that'll need squaring-up. Not sure if it's accident damage or from some tyre-monkey with a jack...
Need to knock all the old bushes out and then the cradle and the A-frames can go for powder-coating; they're too big to fit in my sandblast cabinet and I want a better finish than I could achieve with paint.
Offside half-shaft after a night in the parts washer; could be the original paint lurking under all the diff. oil and brake dust!
Quick coffee-break in the middle of sandblasting the halfshaft...
... and the diff-end drive flange (snigger
):Almost seems a shame to have to put paint back on:
The diff. cradle draining Jizer. Don't get any in your eyes kiddies, it bloody stings
Note the splayed sides (top left of pic) where one of the A-frames pivots: that'll need squaring-up. Not sure if it's accident damage or from some tyre-monkey with a jack...
Need to knock all the old bushes out and then the cradle and the A-frames can go for powder-coating; they're too big to fit in my sandblast cabinet and I want a better finish than I could achieve with paint.
Edited by Wedg1e on Tuesday 12th June 00:46
JMF894 said:
Out of interest have you an access hole in the boot for the top diff mounting bolts?
Jimbo
No, it was easy enough to get in there with a 19mm spanner. The bolts can't lift out as there's insufficient 'headroom' but they're free to turn in the bushes and the diff carrier just drops off the bottom of the bolts once the nuts are removed.Jimbo
I guess as long as the bushes aren't shot, even if the bolts have rusted in you still don't 'need' to chop bits out of the car.
I'm off to my local bearings/ drivetrain supplier this afternoon to try and source the necessaries. Then it'll be a ride to the fasteners stockist to replace nuts'n'bolts. Then a visit to the bank manager to explain it all
The fasteners guy always rolls his eyes when I wak in because I generally seem to be looking for something obscure like an M7.5 x 4.753" 93tpi left-hand thread flange-head socket screw in pure Unobtanium

Edited by Wedg1e on Tuesday 12th June 13:24
voltage_maxx said:

Looks like my garage!
Since this picture was taken I've now got the diff out too. Mine didn't leave the factory with an LSD, so I've got a 3.54 LSD
to go in.
Lots of work ahead, but glad I did it. It's shown up loads of hidden nightmares: Knackered trailing arm bushes, bent trailing arm pins, a crack in the chassis etc etc
She'll be a good 'un when I've finished though! Good luck with yours!


It looks as though your car has remained fluids-tight unlike mine... diff oil, gearbox oil, PAS fluid, coolant...
At least my chassis can't rust too fast! Haven't found any cracks yet but need to clean up the tubes and get in there with a brighter light than my ATEX headtorch. Certainly the paint has flaked off around many of the welds, that's common. The main spine tubes are fine, most of the surface rust is confined to the rear end where the diff mounts.
You must have to go some to bend the trailing arm front mounting pins: I recall doing the bushes on my Tasmin, they were Kerry Packer-ed but the pins were OK.
I've spent the evening sandblasting, also busting my buns getting the various bushes out. Bent the handle on my bench vice!
The joy of Wedges eh
Not much progress to report. Most of the bits I've sandblasted are going rusty due to the damp weather; I didn't want to send them to the powdercoaters until I had all the bits prepped, maybe I should have sent them as I did them. Oh well.
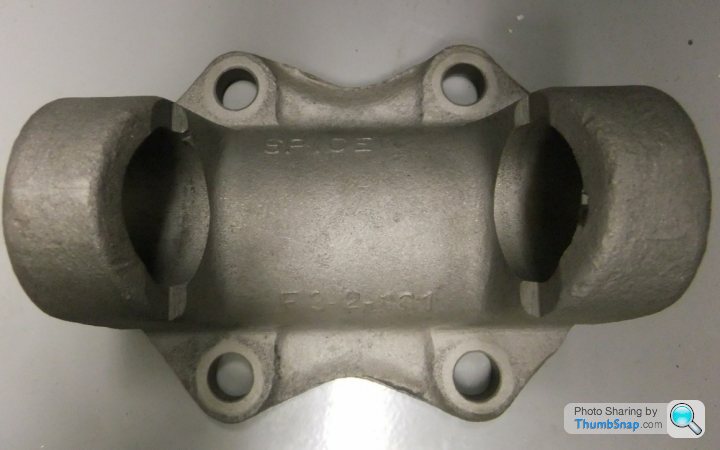
Here's one of the hub carriers... there was naff-all on telly worth watching this evening so I took a ruler and caliper to the carrier and now have a set of CAD drawings, 'just in case'
On the parts washer conveyor tonight Bruce: stub axles and hubs. Splines and threads are fantastic: I'm going to stamp them to ID as matched pairs so that when I put them back together I can reuse the nuts and get the spit pin holes to line up.
Drilling-out the rusted diff carrier bolt: no amount of Plusgas, 4-pounder or swearing was moving it. The joy of air tools is they're lighter, quieter and more compact for situations like this:
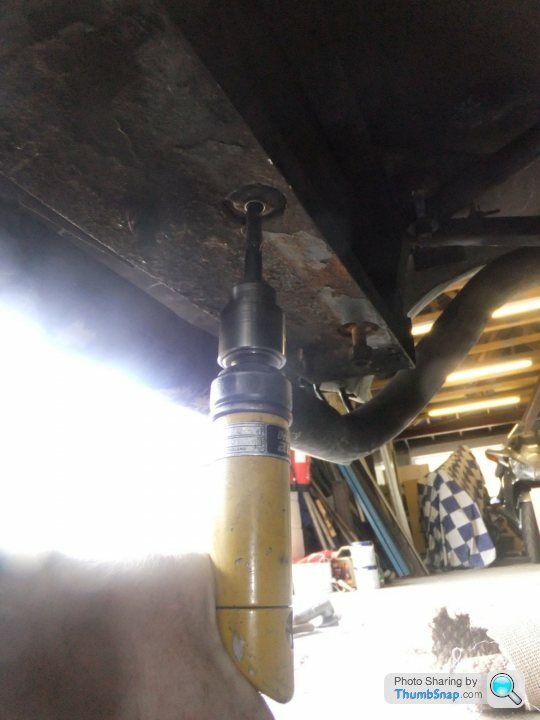
To improve access for cleaning and painting the chassis rails I took the exhaust off. You wouldn't think this was stainless...
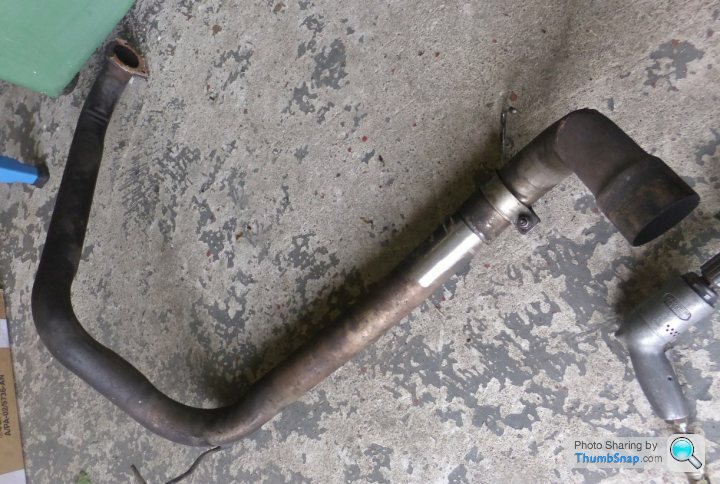
...but it is, albeit probably cheap 406. It cleaned up quite well with a mild abrasive disc in the grinder (used for polishing welds on stainless) but you can still see some areas of pitting. It's only an exhaust system, even I'm not THAT anal!
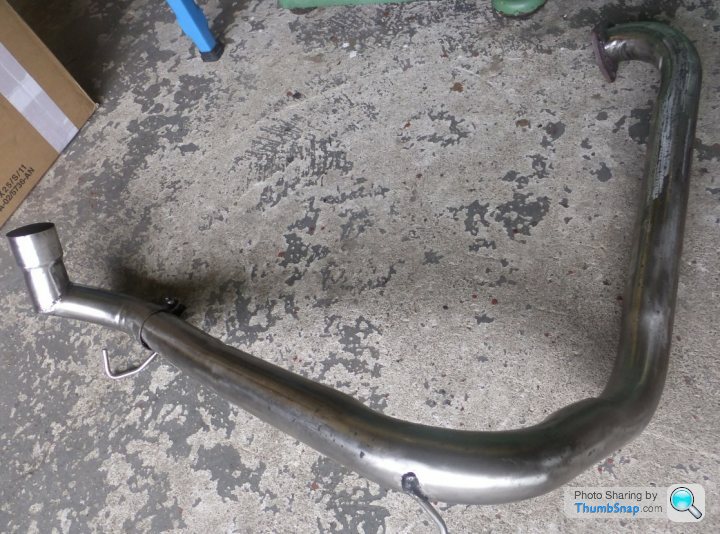
It hasn't been off in at least a dozen years, there wasn't a lot left of the three bolts through that coupling flange! Anyway, with more room to swing a diesel-soaked rag I got in there and cleaned a lot of the crap off the frame rails, even if only to make it a bit easier on my hairdo
I'm now thinking that for the sake of 8 bolts and some fuel-pipe clips, I may as well drop the tanks and tart them up while I'm at it...
Here's one of the hub carriers... there was naff-all on telly worth watching this evening
so I took a ruler and caliper to the carrier and now have a set of CAD drawings, 'just in case' On the parts washer conveyor tonight Bruce: stub axles and hubs. Splines and threads are fantastic: I'm going to stamp them to ID as matched pairs so that when I put them back together I can reuse the nuts and get the spit pin holes to line up.
Drilling-out the rusted diff carrier bolt: no amount of Plusgas, 4-pounder or swearing was moving it. The joy of air tools is they're lighter, quieter and more compact for situations like this:
To improve access for cleaning and painting the chassis rails I took the exhaust off. You wouldn't think this was stainless...
...but it is, albeit probably cheap 406. It cleaned up quite well with a mild abrasive disc in the grinder (used for polishing welds on stainless) but you can still see some areas of pitting. It's only an exhaust system, even I'm not THAT anal!
It hasn't been off in at least a dozen years, there wasn't a lot left of the three bolts through that coupling flange! Anyway, with more room to swing a diesel-soaked rag I got in there and cleaned a lot of the crap off the frame rails, even if only to make it a bit easier on my hairdo
I'm now thinking that for the sake of 8 bolts and some fuel-pipe clips, I may as well drop the tanks and tart them up while I'm at it...
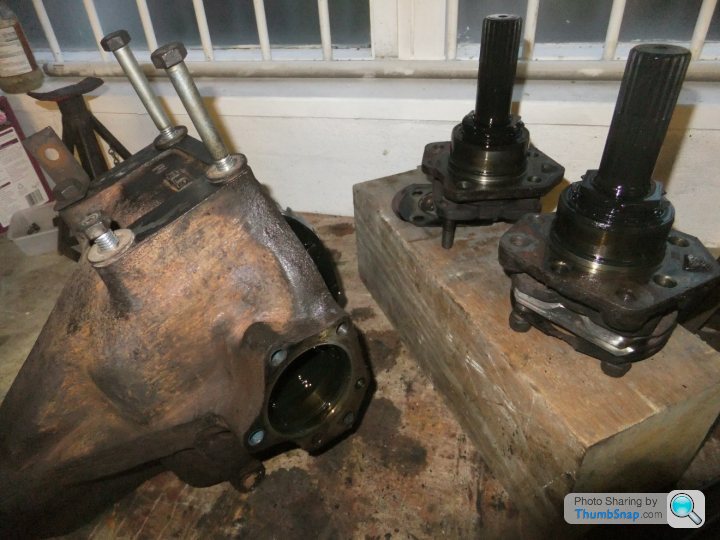
So, you take your freshly-shaved diff...
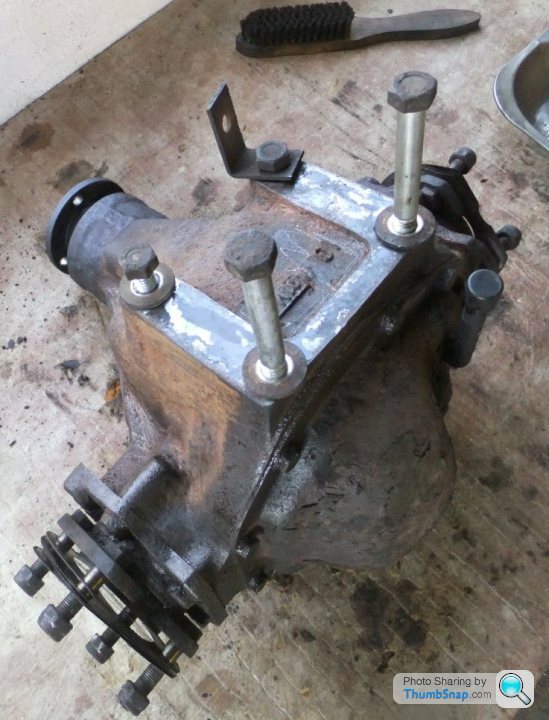
...and you prop it up precariously on axle stands and blocks of timber:
so that you can get a drain tray underneath it. Did I mention the diff weighs 30Kg? Apply a spanner to the drain plug:
only to discover that the plug is so tight that if you get enough weight behind the spanner, the diff will be on your toes.
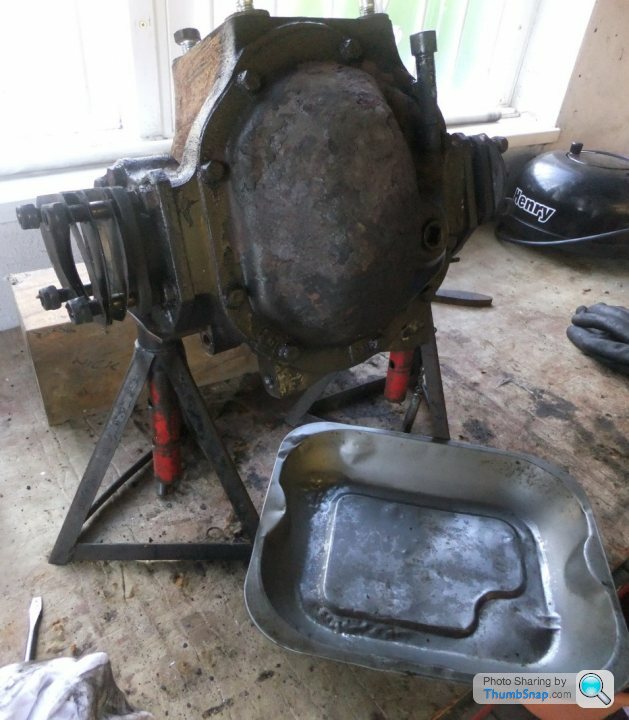
Instead, clean around the rear cover joint and remove all the cover bolts. The oil will descend into your drain tray. Or down your leg as appropriate. Note bench covered in old carpet underlay. Soft, strong and thoroughly absorbent.

I was relieved to see there was that much oil in there: with all three seals weeping I thought it could have been drier than a nun's whatsit. Next, reposition the diff nose-down on the stands. This makes it less wobbly while you apply a socket...
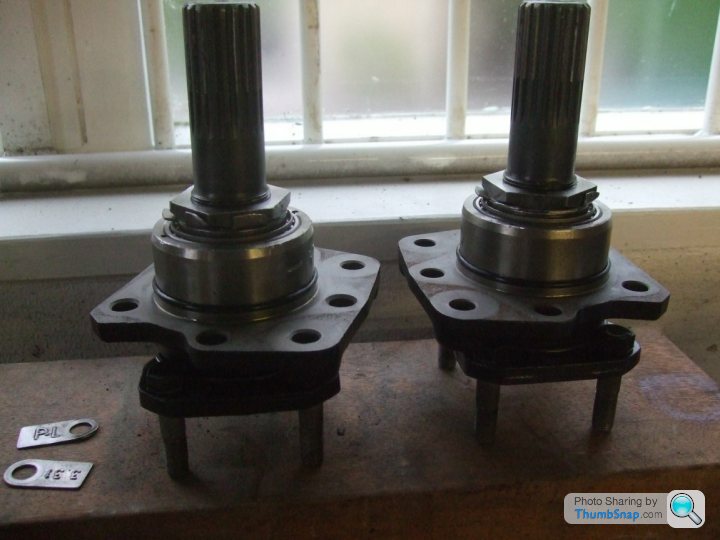
and remove the 5 bolts that hold each side bearing retainer (which doubles as the caliper mounting bracket of course). With the bolts out (they're stiff due to threadlock) you can pull the output shaft assembly free:
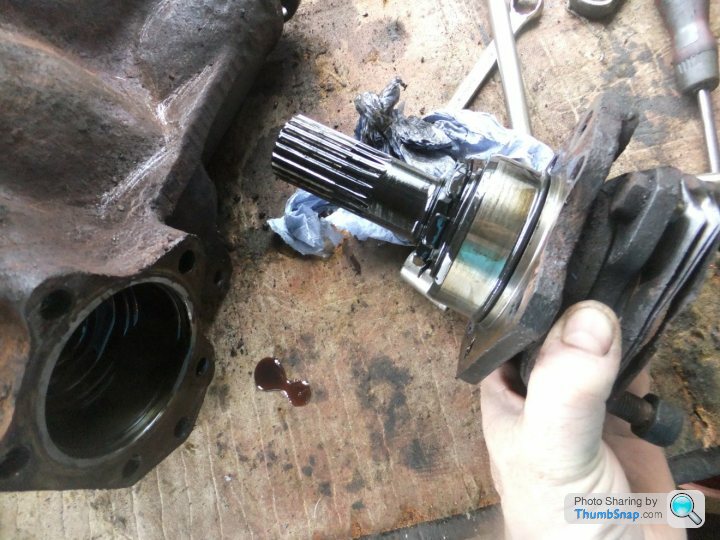
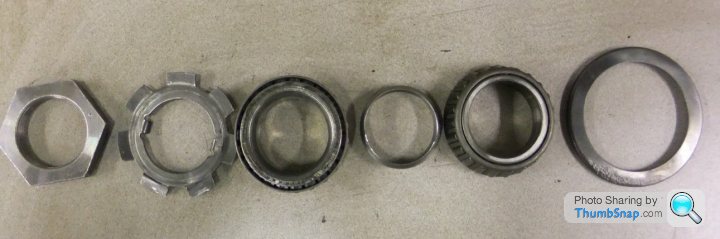
The large nut is secured by the bent-up locking tabs: these will be prised back to allow removal of the nut so that the splined shaft can be withdrawn to allow access to the seal. The O-ring around the bearing housing will also be replaced.
Once both seals have been renewed I'll reassemble the diff and attack the pinion shaft seal - the tricky bit! The rear cover is currently in parts wash and will be sandblasted and painted before refitting. Once the diff's rebuilt I'll show it some abrasives and a coat of paint. Well that's the plan at any rate
Edited for typos...
...and you prop it up precariously on axle stands and blocks of timber:
so that you can get a drain tray underneath it. Did I mention the diff weighs 30Kg? Apply a spanner to the drain plug:
only to discover that the plug is so tight that if you get enough weight behind the spanner, the diff will be on your toes.
Instead, clean around the rear cover joint and remove all the cover bolts. The oil will descend into your drain tray. Or down your leg as appropriate. Note bench covered in old carpet underlay. Soft, strong and thoroughly absorbent.
I was relieved to see there was that much oil in there: with all three seals weeping I thought it could have been drier than a nun's whatsit. Next, reposition the diff nose-down on the stands. This makes it less wobbly while you apply a socket...
and remove the 5 bolts that hold each side bearing retainer (which doubles as the caliper mounting bracket of course). With the bolts out (they're stiff due to threadlock) you can pull the output shaft assembly free:
The large nut is secured by the bent-up locking tabs: these will be prised back to allow removal of the nut so that the splined shaft can be withdrawn to allow access to the seal. The O-ring around the bearing housing will also be replaced.
Once both seals have been renewed I'll reassemble the diff and attack the pinion shaft seal - the tricky bit! The rear cover is currently in parts wash and will be sandblasted and painted before refitting. Once the diff's rebuilt I'll show it some abrasives and a coat of paint. Well that's the plan at any rate
Edited for typos...
Edited by Wedg1e on Thursday 28th June 00:22
Hmmm, losing momentum a bit here... stripped down the output shaft assemblies in order to replace the seals. Whilst I was at it I took a long hard look at the bearings themselves but couldn't detect any wear that would suggest they needed replacing - not bad for a 120,000 mile unit!
Some might say it'd be wise to replace them as the diff's already in bits but I reckon there's more chance of getting some Chinese chocolate ones that don't last 5 minutes so I'm happy to keep these going.
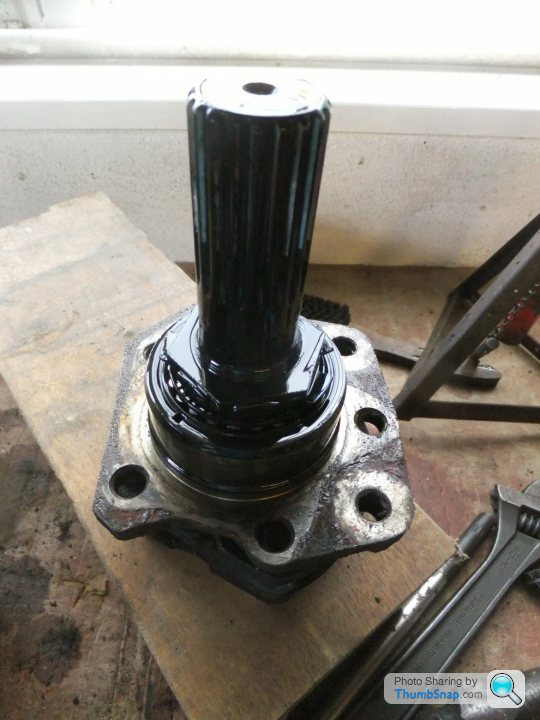
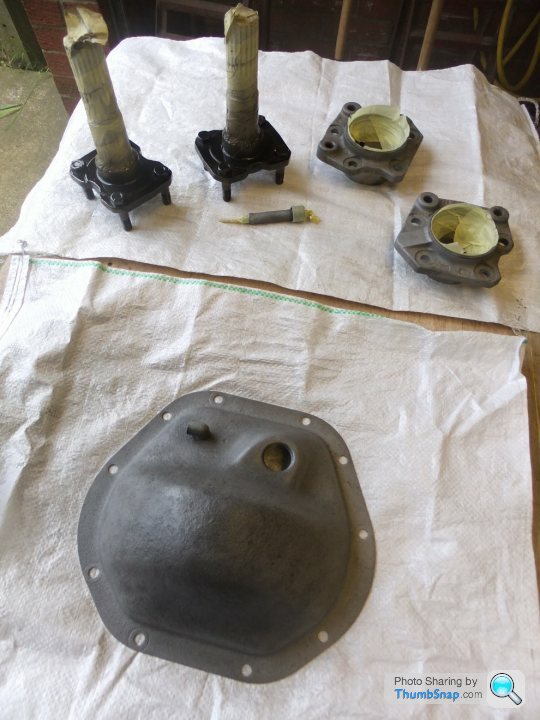
Bearing housings, output shafts and the rear cover sandblasted and ready for paint:
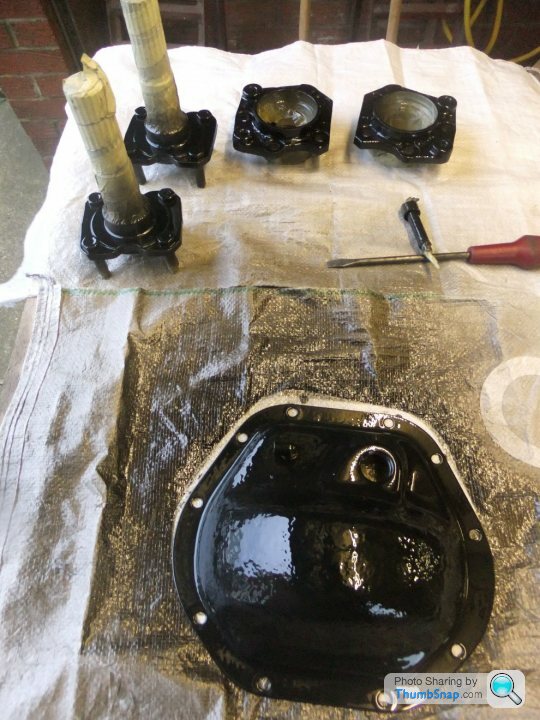
... blinging!
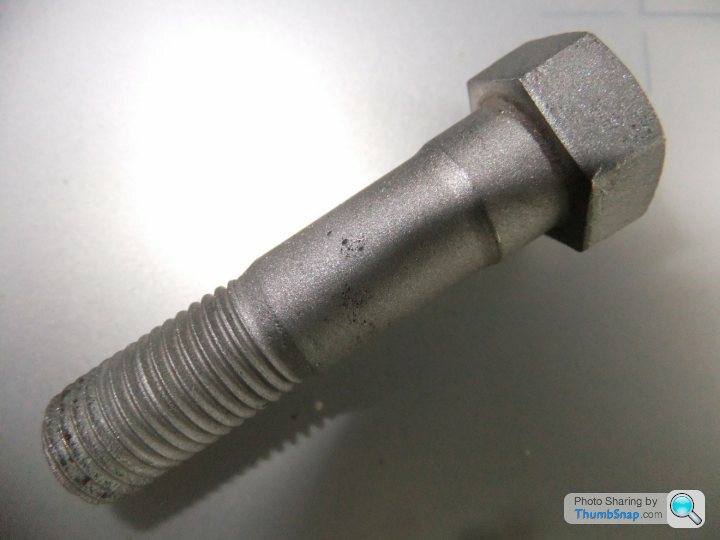
This is one of the special bolts that retain the brake discs and propshafts (note the wider section just below the head that makes them an interference fit in the output flange):
Reassembled output shaft units (filled with oil, no leaks after 24 hours) - note new O-rings:
When reinstalling them, remember to use threadlock on the 5 securing bolts:
...and although the original rear cover gasket had been fitted dry, I used blue Hylomar just for extra sealing (excess will be trimmed off!):
Next up: the pinion shaft seal...
Some might say it'd be wise to replace them as the diff's already in bits but I reckon there's more chance of getting some Chinese chocolate ones that don't last 5 minutes so I'm happy to keep these going.
Bearing housings, output shafts and the rear cover sandblasted and ready for paint:
... blinging!
This is one of the special bolts that retain the brake discs and propshafts (note the wider section just below the head that makes them an interference fit in the output flange):
Reassembled output shaft units (filled with oil, no leaks after 24 hours) - note new O-rings:
When reinstalling them, remember to use threadlock on the 5 securing bolts:
...and although the original rear cover gasket had been fitted dry, I used blue Hylomar just for extra sealing (excess will be trimmed off!):
Next up: the pinion shaft seal...
ralph350i said:
Hi Wedge1
interesting does the diff not fall apart if you take both output shalf's out? and nice work mate, cheers Ralph
No, the internals are held in place by two big sod-off bearings, you can see the caps either side of the crownwheel assembly:interesting does the diff not fall apart if you take both output shalf's out? and nice work mate, cheers Ralph
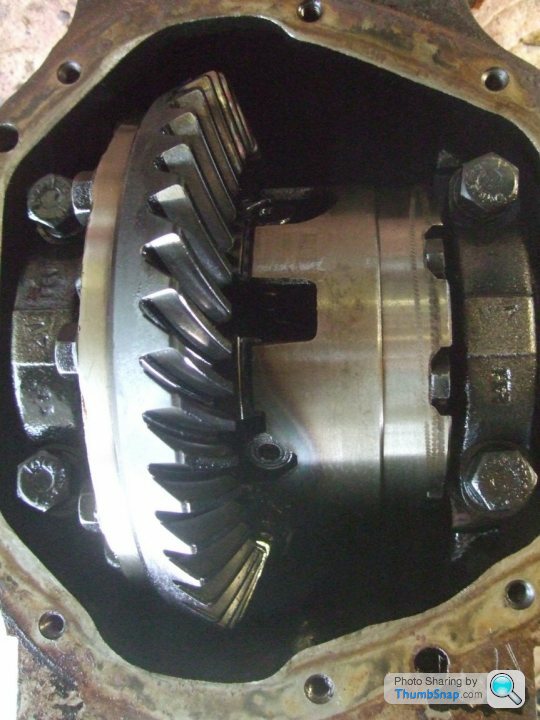
Interestingly, the caps and the main housing adjacent to them are stamped with a series of matching numbers (like 00 or 2N) which suggests to me they're like bike engine main bearings and are selected or adjusted to be matched on assembly... which would make sense really.
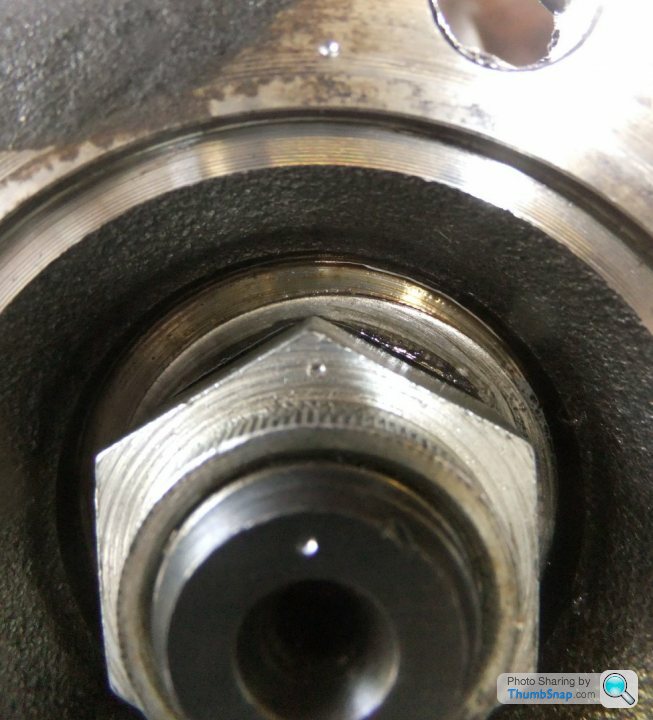
So, to the pinion shaft seal. First I centre-punched the shaft end, the nut and the flange to give me a datum for reassembly:
Then I drilled a length of flat bar that was bolted to the drive flange to hold it whilst I cracked the nut loose (didn't take a pic of a length of bar with two holes in it, sorry!). I counted the number of turns it took to remove the flange then used a slide hammer to pull the old seal out:
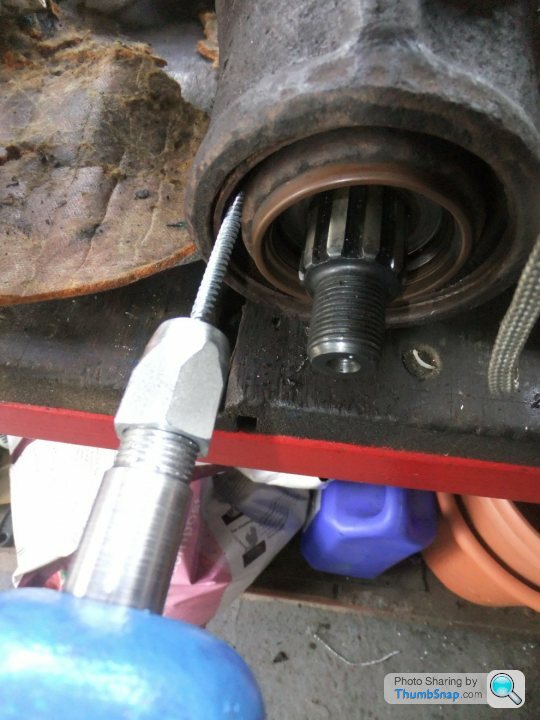
The bearing was slidout and thorougly washed in petrol so I could check it for damage; none was evident and the outer race was in superb condition. Here's the bearing with its oil flinger and the new seal, ready to go in:
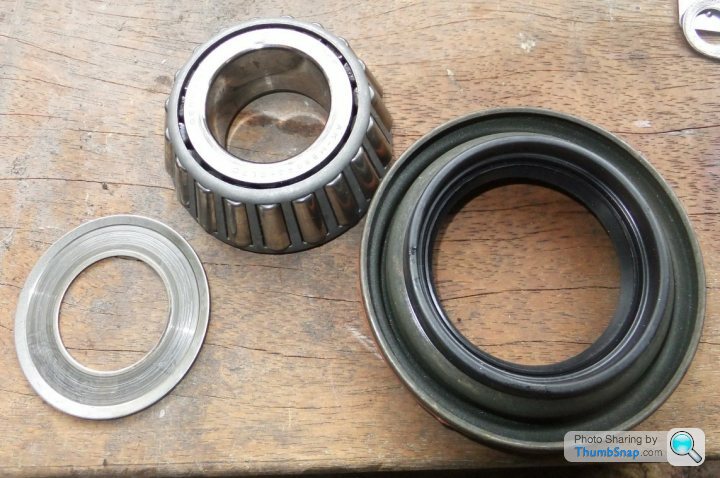
New seal fitted:
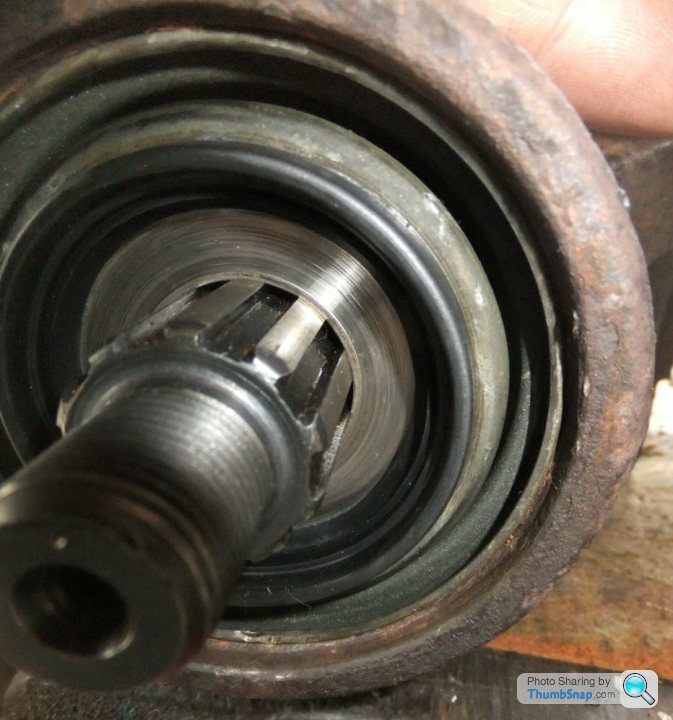
and with the drive flange refited in its original attitude the nut was tightened down until the three punch marks aligned:
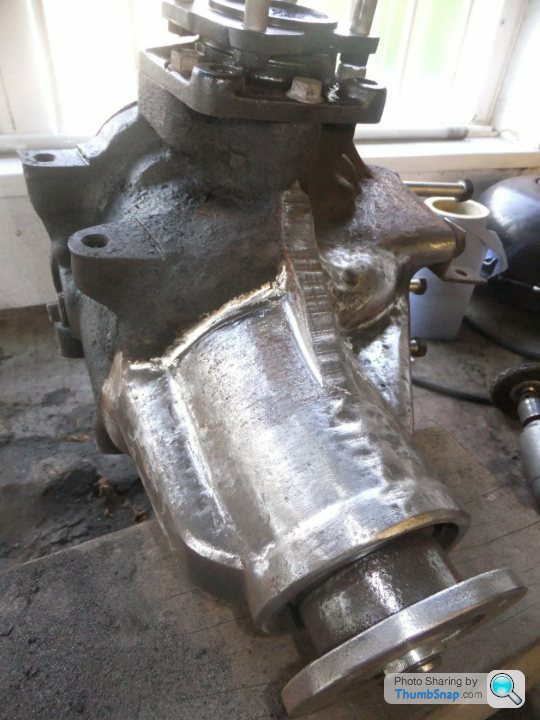
There's no way I'm slapping paint on over the amount of rust and stray oil on the diff., so it was time to get jiggy with the abrasives:
Then I drilled a length of flat bar that was bolted to the drive flange to hold it whilst I cracked the nut loose (didn't take a pic of a length of bar with two holes in it, sorry!). I counted the number of turns it took to remove the flange then used a slide hammer to pull the old seal out:
The bearing was slidout and thorougly washed in petrol so I could check it for damage; none was evident and the outer race was in superb condition. Here's the bearing with its oil flinger and the new seal, ready to go in:
New seal fitted:
and with the drive flange refited in its original attitude the nut was tightened down until the three punch marks aligned:
There's no way I'm slapping paint on over the amount of rust and stray oil on the diff., so it was time to get jiggy with the abrasives:
Gassing Station | Wedges | Top of Page | What's New | My Stuff