280i FHC Re-trim Starts
Discussion


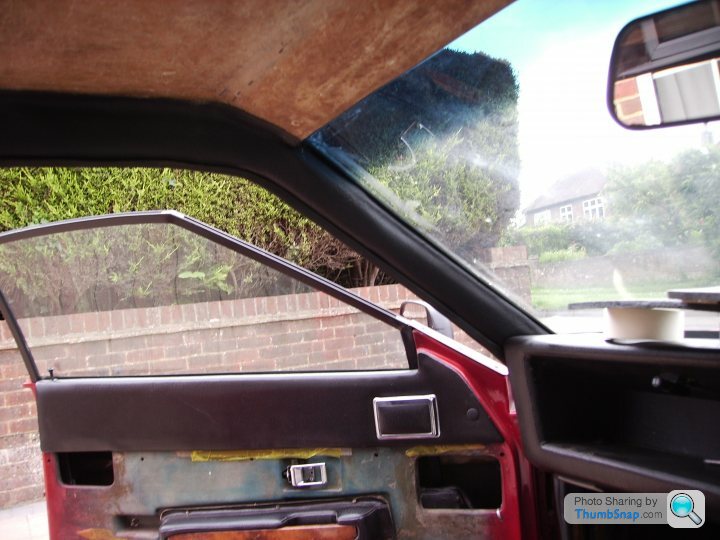
After months of delays the re-trim can now start. A trial fit of all the repaired but untrimmed panels shows just how poor the build quality was on these cars.
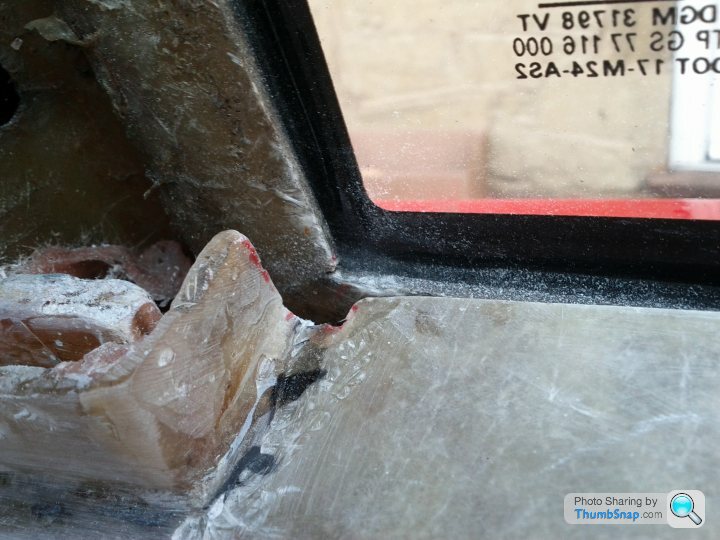
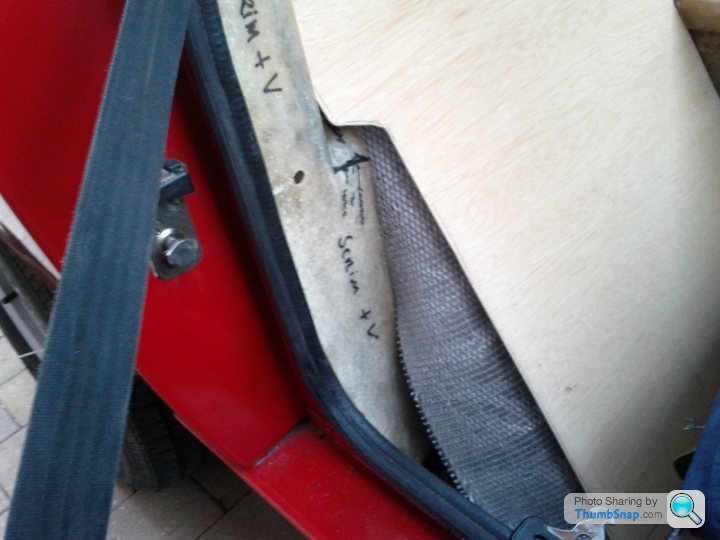
These are the rear side panels which are supposed to be a tight fit to the glass. But the only way these will fit snugly up to the glass is if there is a little cut-out behind the ‘B’ post, see photo…
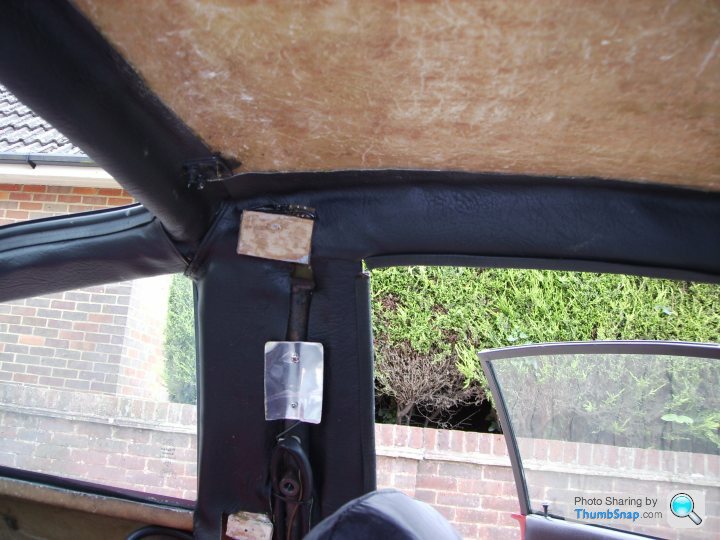
Where the side panels screw to the ‘B’ post there is a 20mm gap which really needs a spacer to stop the thin lip on the panel being stressed and eventually cracking or breaking off. Not a difficult thing to repair but now let’s do the job properly…
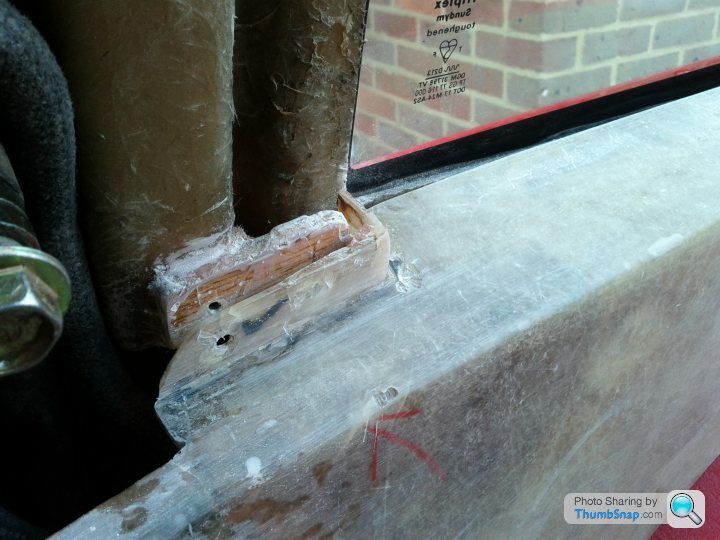
The same applies to the top of the ‘B’ post trim panel..
The securing screws for both these panels go through the bodywork but are hidden by the exterior ‘B’ post trim panel. Of course this means they can allow any water which gets behind the exterior trim panel to track back into the car. Hopefully the ply packers will stop that.
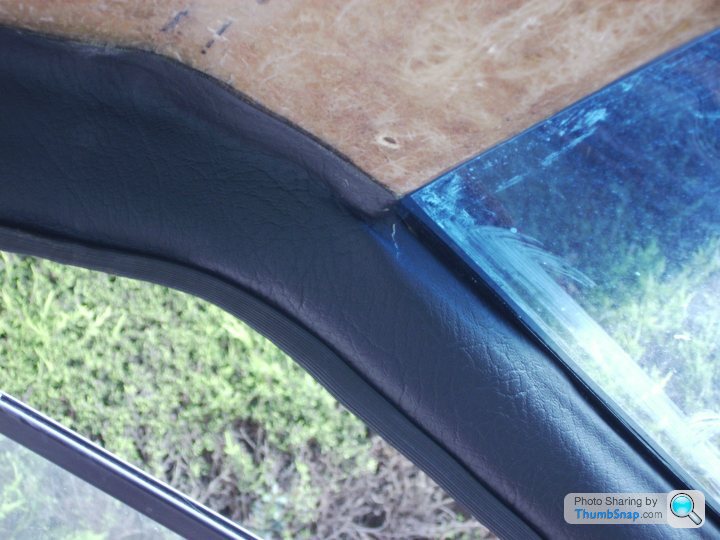
It’s the same with the panel which runs along the back of the wheel well. The back edge of this is supposed to be a snug fit against the glass but the only way that can happen is by cutting a notch at each end so the panel can fit around the recess the glass sits in.
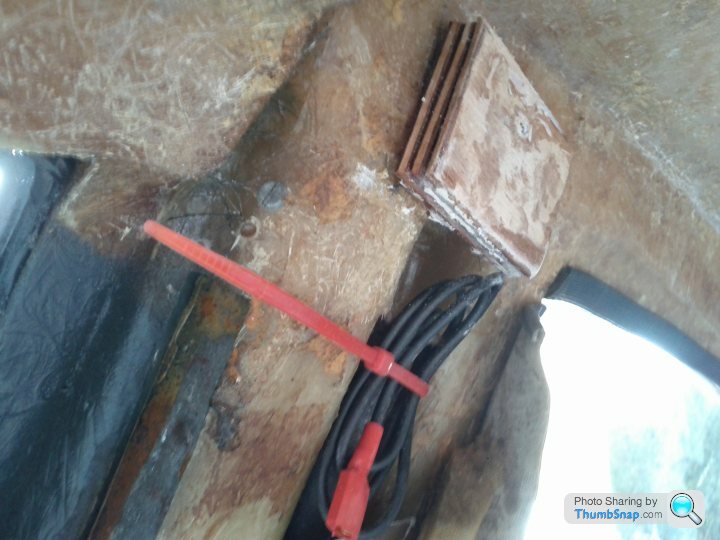
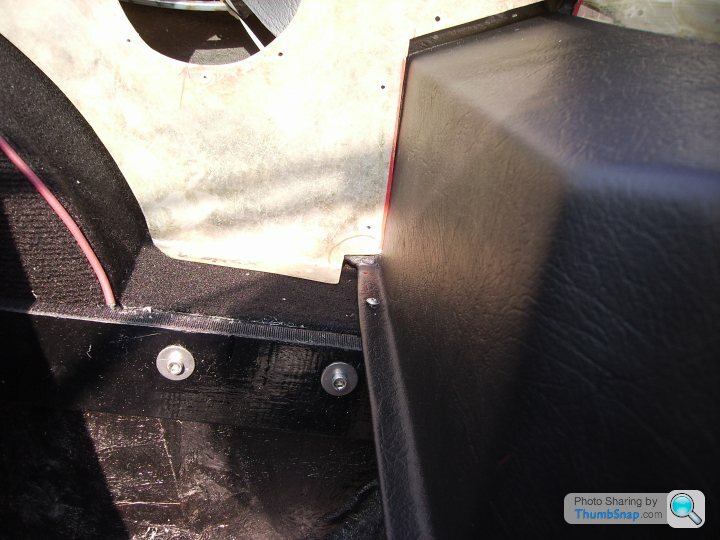
Because the side panels are attached to the rear panel the whole lot relied on just two self-tappers through the lower lip on the rear panel into a stiffening web molded into the body. I’ve made two alloy plates to cover the voids behind the wheel arches. These provide secure independent mounting points for the side panels and rear panel…
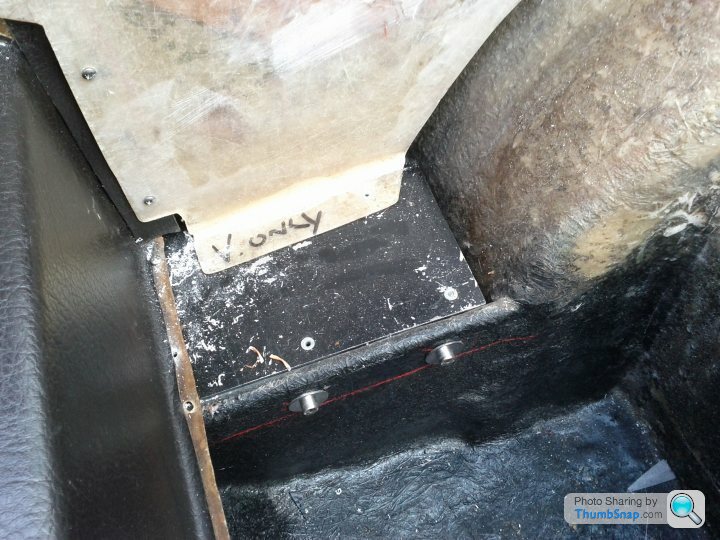
TVR did actually mould a couple of blocks of wood onto the rear of the tub to screw the rear panel to. Not surprisingly the single screw they put in here was in the wrong place. Now we have two screws centered on the middle of the blocks.
Now all the panels are positively secured in several places. Next step is to take them all off again and trim them. First though I need to work out how to deal with the "shelf".
It always makes me smile when I carefully measure and centre something on a TVR then stand back to see it never looks like it's in the centre
These are the rear side panels which are supposed to be a tight fit to the glass. But the only way these will fit snugly up to the glass is if there is a little cut-out behind the ‘B’ post, see photo…
Where the side panels screw to the ‘B’ post there is a 20mm gap which really needs a spacer to stop the thin lip on the panel being stressed and eventually cracking or breaking off. Not a difficult thing to repair but now let’s do the job properly…
The same applies to the top of the ‘B’ post trim panel..
The securing screws for both these panels go through the bodywork but are hidden by the exterior ‘B’ post trim panel. Of course this means they can allow any water which gets behind the exterior trim panel to track back into the car. Hopefully the ply packers will stop that.
It’s the same with the panel which runs along the back of the wheel well. The back edge of this is supposed to be a snug fit against the glass but the only way that can happen is by cutting a notch at each end so the panel can fit around the recess the glass sits in.
Because the side panels are attached to the rear panel the whole lot relied on just two self-tappers through the lower lip on the rear panel into a stiffening web molded into the body. I’ve made two alloy plates to cover the voids behind the wheel arches. These provide secure independent mounting points for the side panels and rear panel…
TVR did actually mould a couple of blocks of wood onto the rear of the tub to screw the rear panel to. Not surprisingly the single screw they put in here was in the wrong place. Now we have two screws centered on the middle of the blocks.
Now all the panels are positively secured in several places. Next step is to take them all off again and trim them. First though I need to work out how to deal with the "shelf".
It always makes me smile when I carefully measure and centre something on a TVR then stand back to see it never looks like it's in the centre
Edited by v8s4me on Friday 24th March 00:01
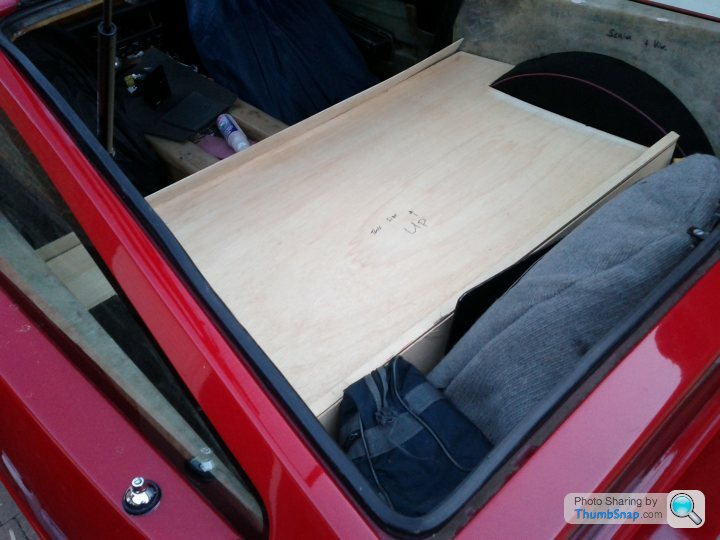
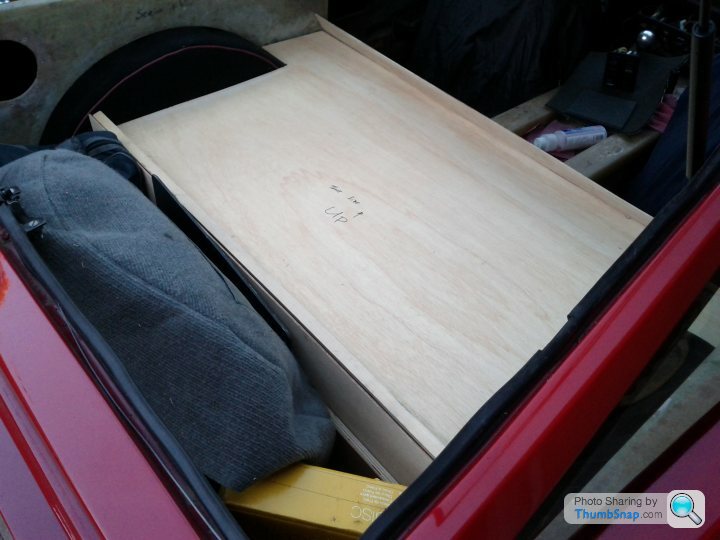
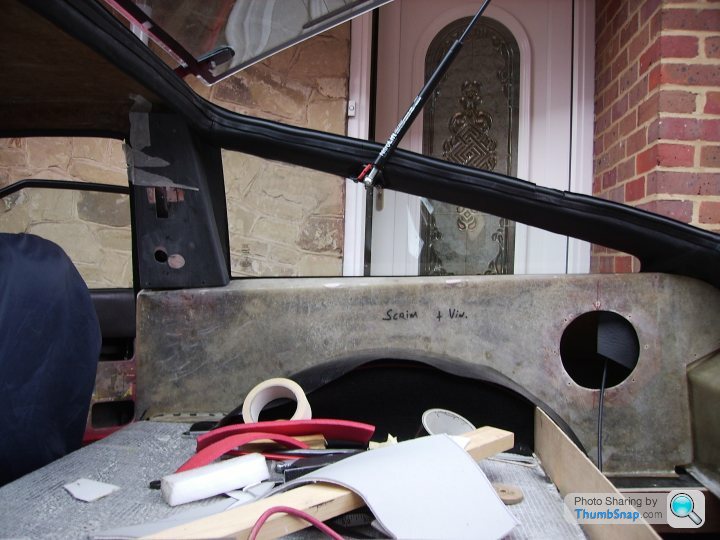
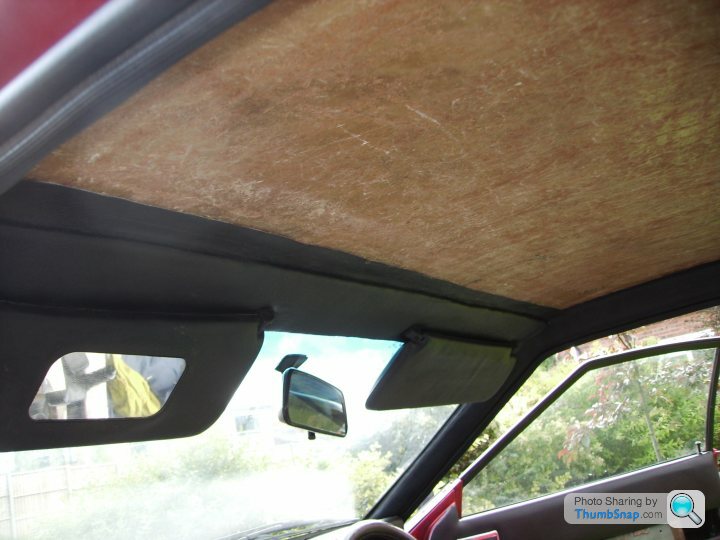
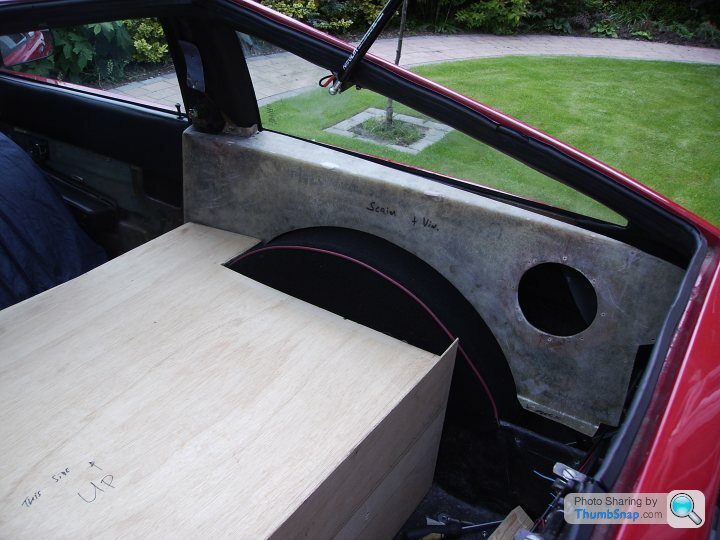
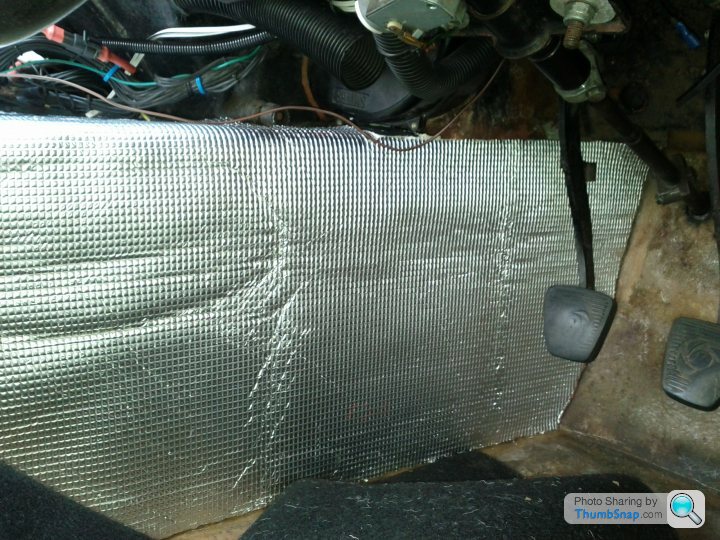
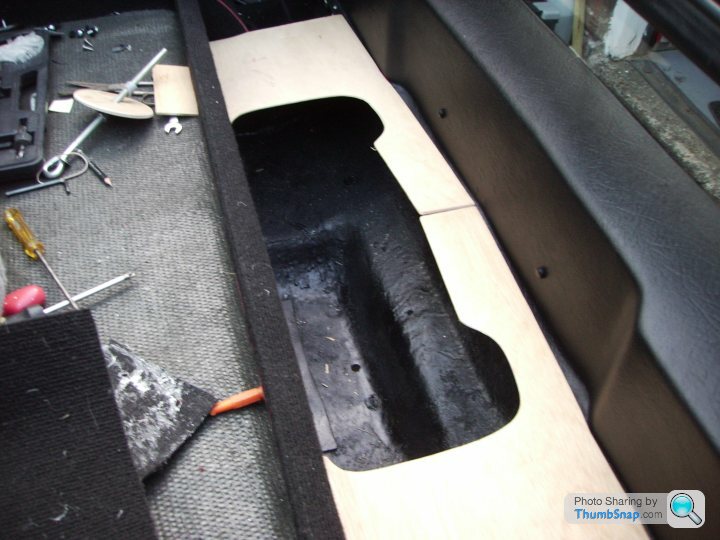
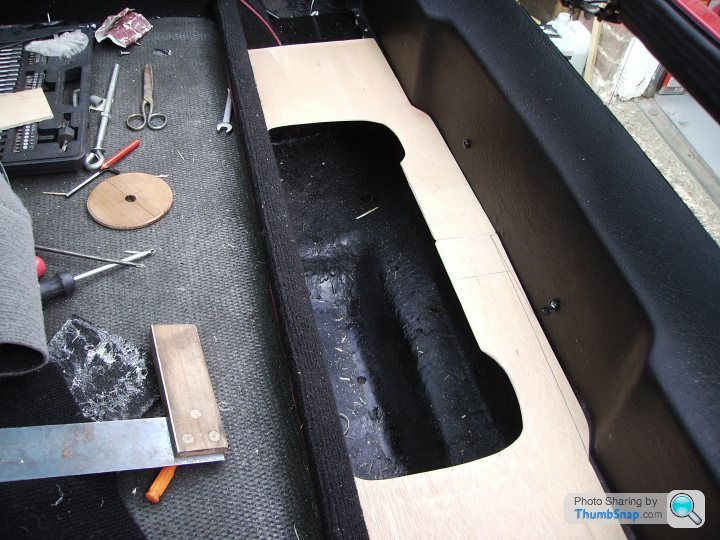
Today was about trying to work out how to deal with the "parcel shelf" (what do yo call this area?).
My "shelf" is flat from the back of the seats to the wheel-well so I've cut sheets of 3mm ply to cover this area. More sheets of ply cover the tub behind the seats and the rear facing part of the wheel-well. These sheets will be covered in carpet and will be stuck to sound-deadening material which in turn will be stuck to the tub...
I'm a bit stuck on how best to deal with this section...
Any suggestions?
mrzigazaga said:
...What bit are you actually talking about?......
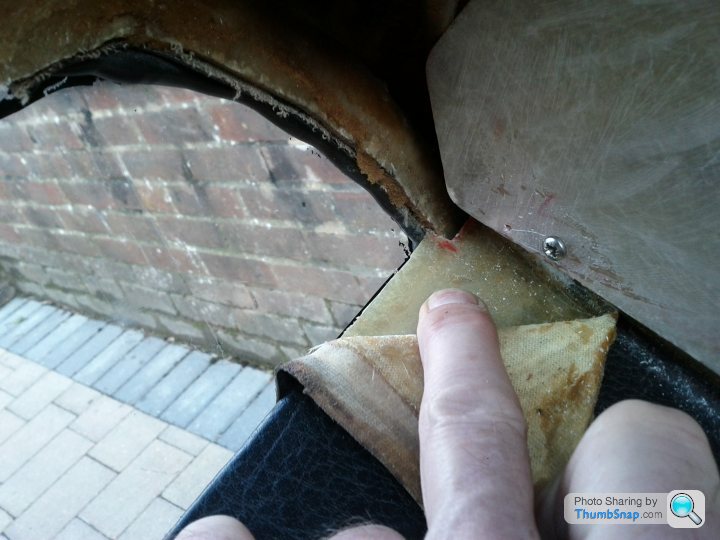
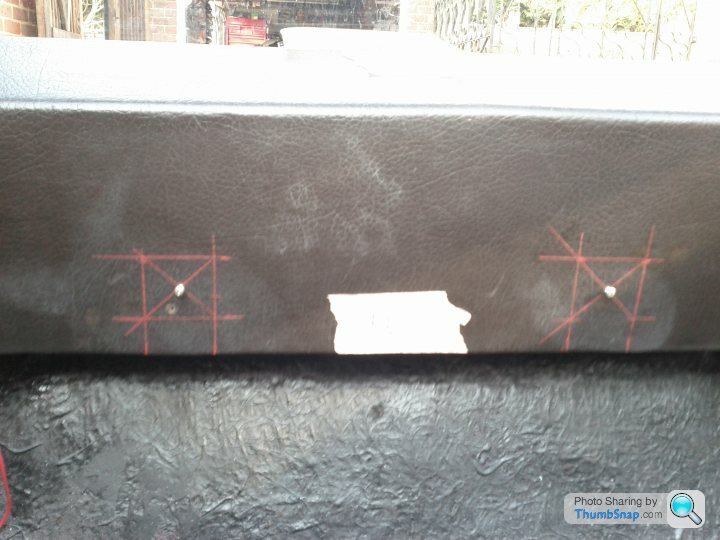
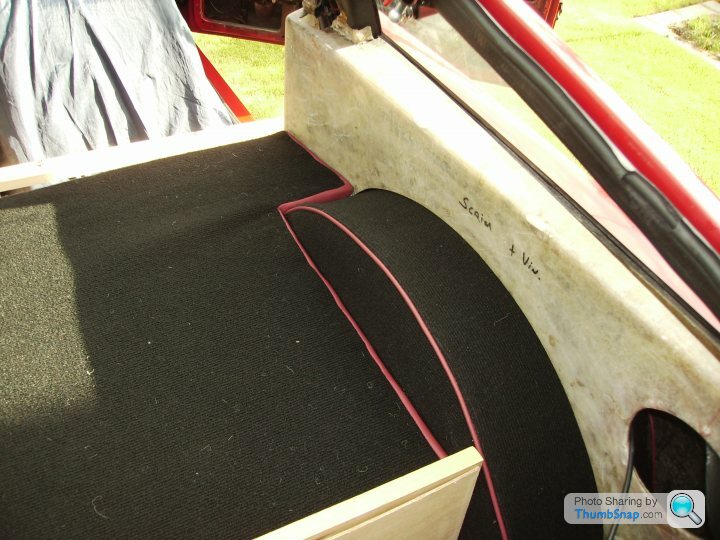
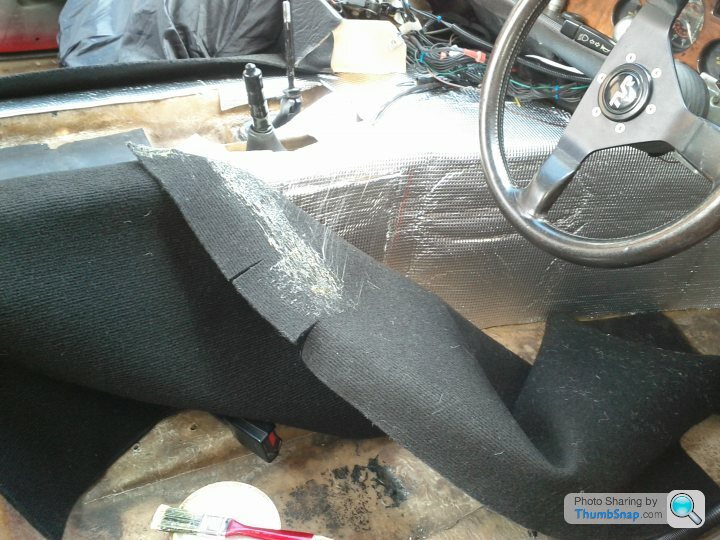
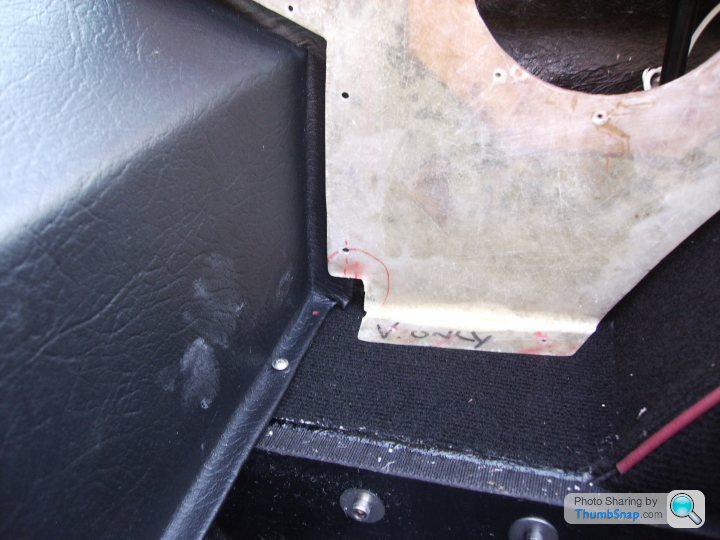
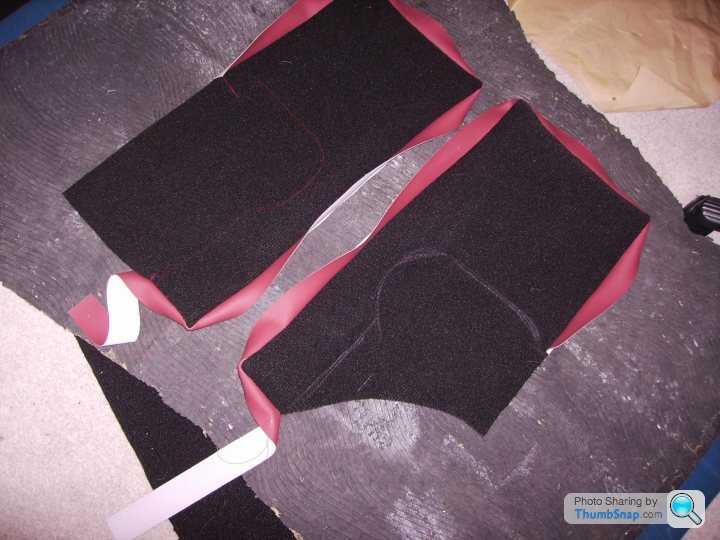
The gap between the wood and the rear side trim, outlined in the red triangle, and the curved bit of the rear side trim outlined in the red rectangle.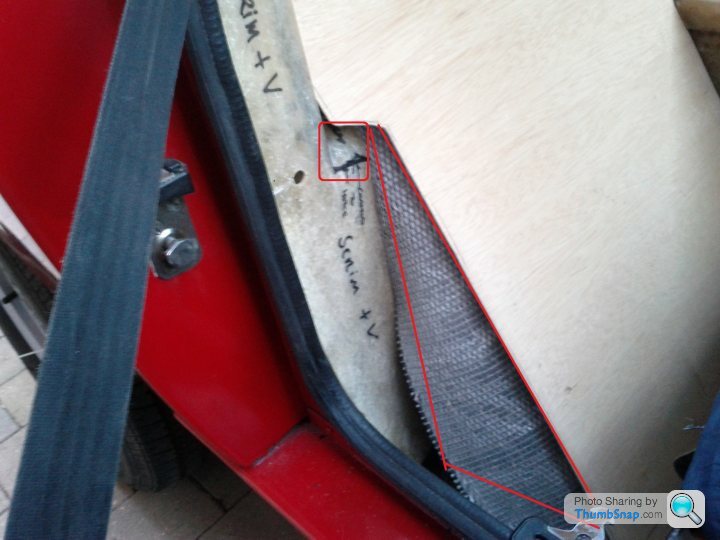
This flap of sound-deadening will be glued to the tub but I'm unsure how to finish it off. I could use carpet but that might affect how the ply sits against the body. Or I could use vinyl.
Another issue is how to screw the ply backed panel to the tub. The bottom bit is safe but higher up the petrol tanks sit against the other side of the tub.
mrzigazaga said:
....Your doing a fabulous job by the way...
Thanks  but you might want to wait and see what it looks like when I'm finished
 I've finally plucked up courage and cut some vinyl. Mainly because of trying to minimise waste I've started with the strip down the side of the tailgate, the 'B' post/window piece and the rear edge of the roof.
It doesn't look much but it's taken most of the day because I've no idea what I'm doing and I'm making it up as I go along. Many thanks to Zigga for the help and tips
This little section in the corner is still causing a lot of head scratching.
It doesn't look much but it's taken most of the day because I've no idea what I'm doing and I'm making it up as I go along. Many thanks to Zigga for the help and tips
This little section in the corner is still causing a lot of head scratching.
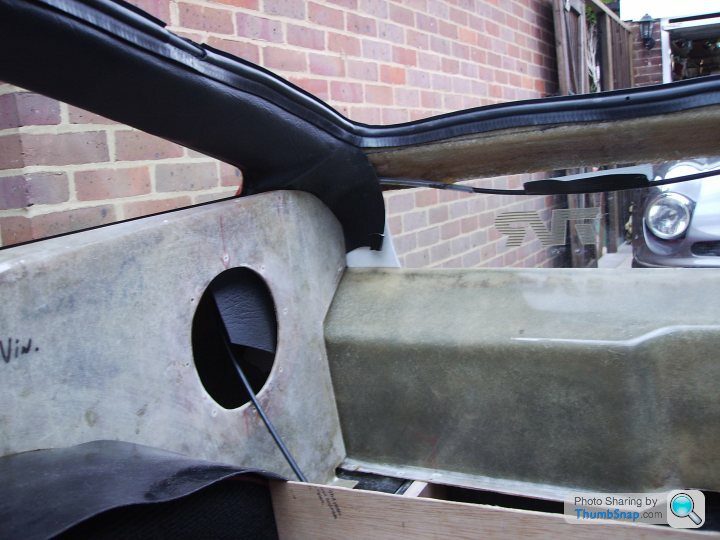
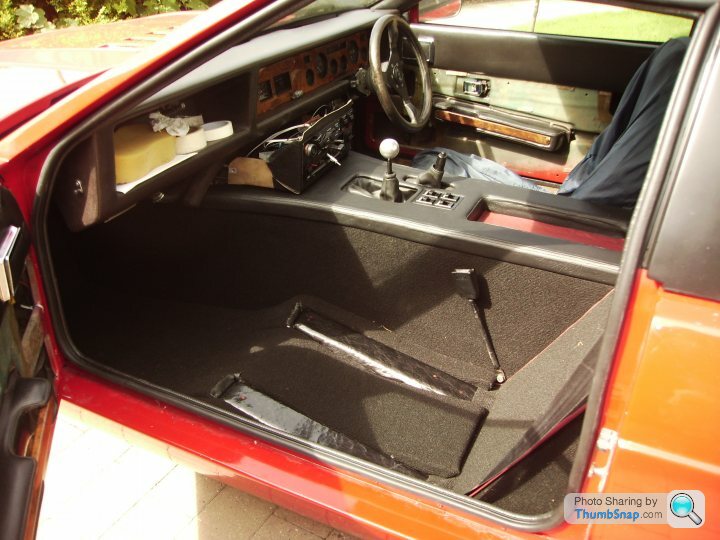
More progress on the re-trim this week. I opted for a non-standard trim around the roof/doors by making a continuous vinyl piece which runs from the side of the dash, up the 'A' post, along the roof/door line and into the area at the top of the 'B' post...
More vinyl and scrim across the rear roof moulding and across the angled part at the front of the roof down to the screen.

This then leaves a flat rectangular space in the roof where a pad of foam covered with headlining material can be glued. The theory being that this will give a more "luxurious" fininsh and help with sound and heat insulation.
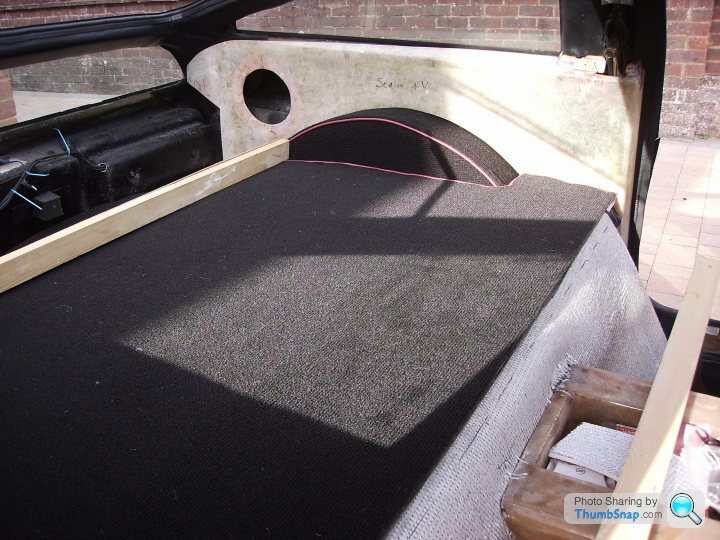
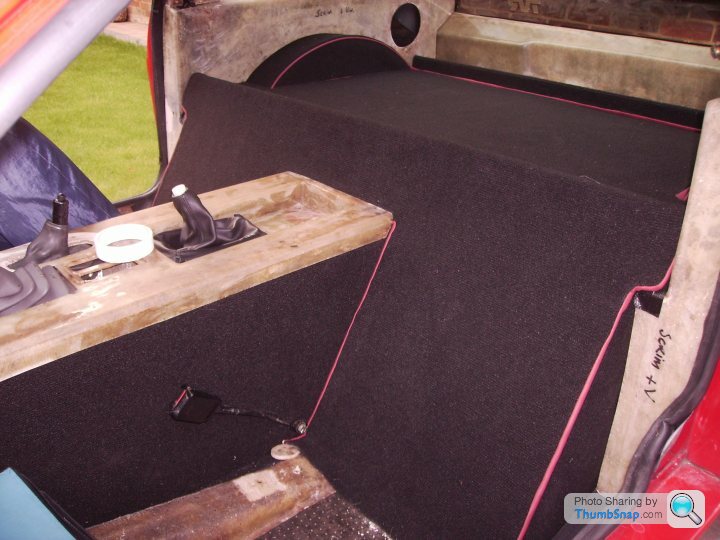
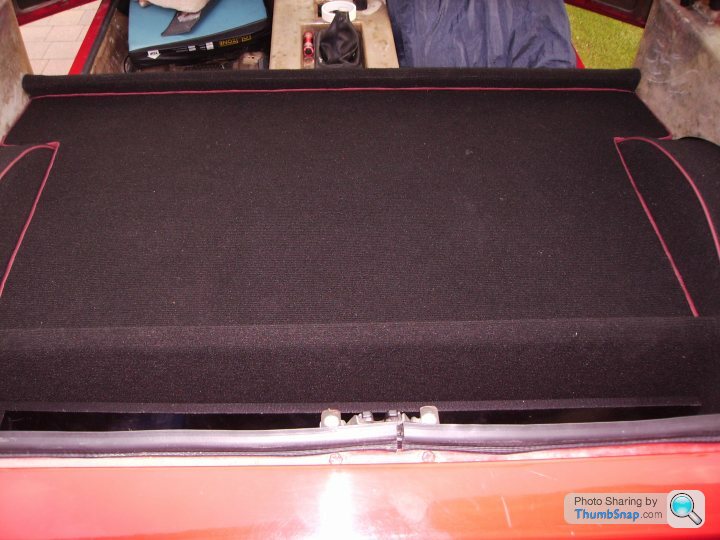
The rear wheel arches are now carpeted and the ply and foam pad which will cover the shelf is now ready for carpet.
More progress next week hopefully if the rain holds off.
More vinyl and scrim across the rear roof moulding and across the angled part at the front of the roof down to the screen.
This then leaves a flat rectangular space in the roof where a pad of foam covered with headlining material can be glued. The theory being that this will give a more "luxurious" fininsh and help with sound and heat insulation.
The rear wheel arches are now carpeted and the ply and foam pad which will cover the shelf is now ready for carpet.
More progress next week hopefully if the rain holds off.
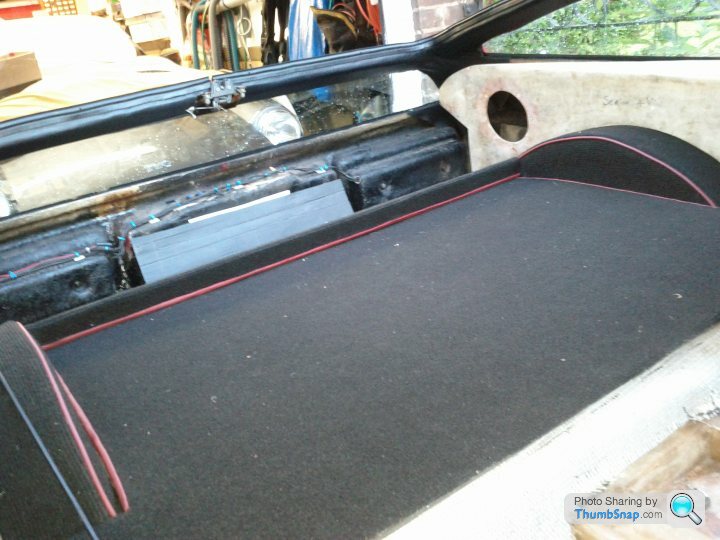

This is the panel which goes behind the seats...

The carpet is just pinned in place at the moment so that's why it looks a bit wrinkly. This panel looks fairly simple but it is actually very complicated because the carpet trim will have to be glued onto the ply backboard in stages to make sure it fits well all round. Working out what order to glue each section is part of what makes this bit time consuming and difficult.
The carpet is just pinned in place at the moment so that's why it looks a bit wrinkly. This panel looks fairly simple but it is actually very complicated because the carpet trim will have to be glued onto the ply backboard in stages to make sure it fits well all round. Working out what order to glue each section is part of what makes this bit time consuming and difficult.

Here's another example of the dreadful build quality on these cars. Have a look at the gaps where the rear and side panels come together...
Right.
Left.
The cut-outs for the overlapping corners are different on each side but both are far too big so the gap will be visible even with the closure panels fitted. Both sides will need building up with GF to get the right gap. Or maybe it might be easier to leave an overlapping fold of scrim & vinyl to cover the holes?
This car was built in March(?) 1981. Did the build quality improve on the later ones?
On cars which have been re-trimmed, have flaws like this been corrected or preserved in the interests of "originality"?
Edited by v8s4me on Tuesday 20th June 09:08
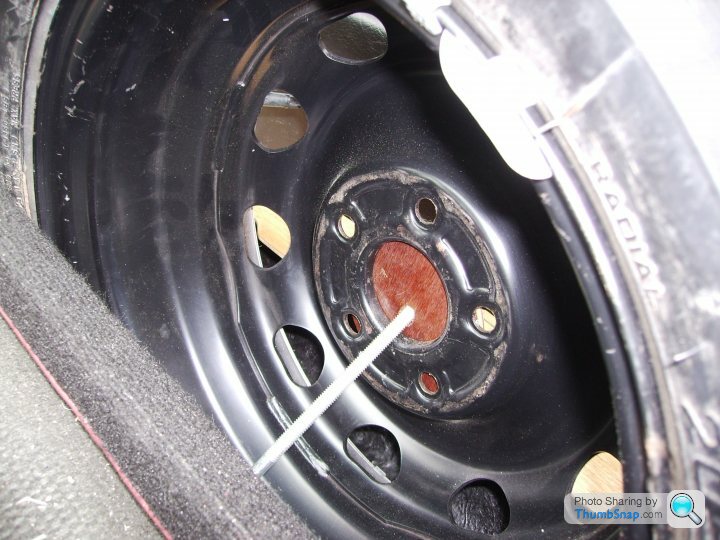
No prizes for guessing what these are for...
Looking at the photo I’m wondering why I didn’t make them fit more neatly around the rear panel. I measured and cut them with the wheel in place and they looked OK then. Oh well, I’ve cut and edged the carpet bits now so I’m not doing them again. In true TVR style, near enough is good enough and they will be easier to get out with that little bit of "slack" to get my fingers under. Maybe edging the carpet pieces is a bit of overkill though...
Looking at the photo I’m wondering why I didn’t make them fit more neatly around the rear panel. I measured and cut them with the wheel in place and they looked OK then. Oh well, I’ve cut and edged the carpet bits now so I’m not doing them again. In true TVR style, near enough is good enough and they will be easier to get out with that little bit of "slack" to get my fingers under. Maybe edging the carpet pieces is a bit of overkill though..
.

I simply used the old vinyl pieces as templates. The velour was shot to pieces but the door card covers were easy to measure and cut. I made new door-cards from 3mm ply because the old hardboard ones were rotten. For the carpeted areas I made templates from Proplex.
Most of the materials came from a local trimmer. When you come to do yours you will be amazed at how much you spend on the sundries eg glue, thread, sound-deadening etc. The actual materials you see eg the carpet and the vinyl are quite a small part of the overall cost.
This project has give me a very good insight into why trimming is so expensive and shown that it is hard graft as well. My fingers, knees, back and neck will stop aching eventually, or so I've been told
Gassing Station | Wedges | Top of Page | What's New | My Stuff