450 SEAC - the return
Discussion


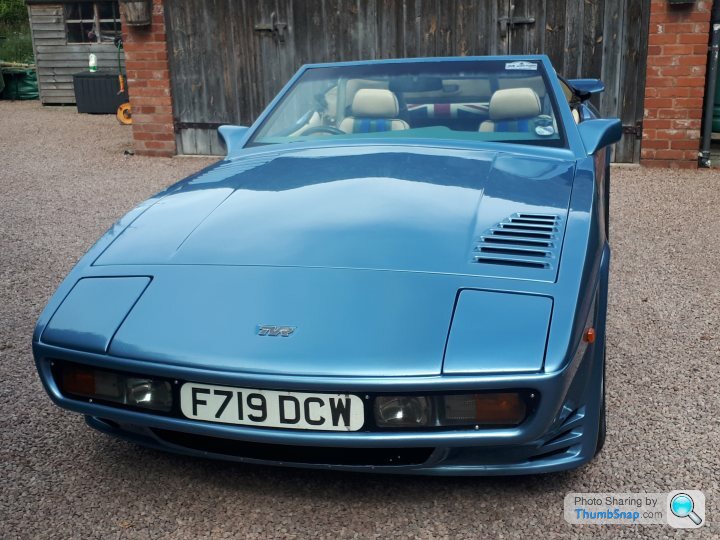
Hi, following the purchase of F719 DCW and the collection on Friday I thought it best to start a new thread and occasionally post updates. There's a few out there not on Facebook and as I've found over the last few days the Pistonheads forums are searchable so my thread may be of use to a SEAC owner in the future.
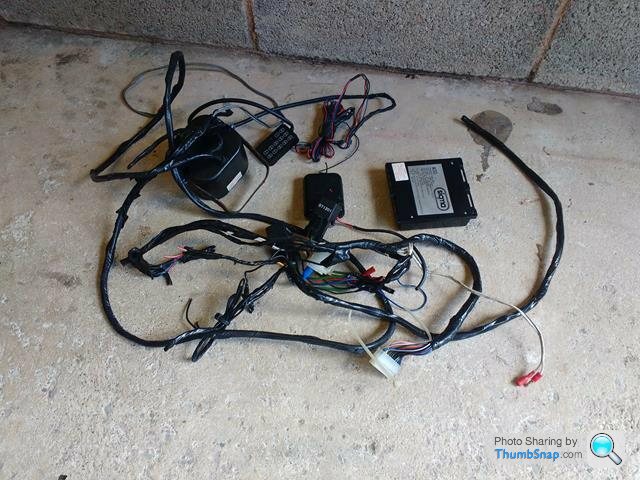
Well second day spend on the car today. Armed with the correct wiring diagram off the 450SE I made short work of returning the ignition wiring back to original. At the same time I replaced the wire feeding the starter solenoid and I now have a car that starts using the ignition key. I then spent the next few hours carefully removing the faulty alarm and associated wiring.
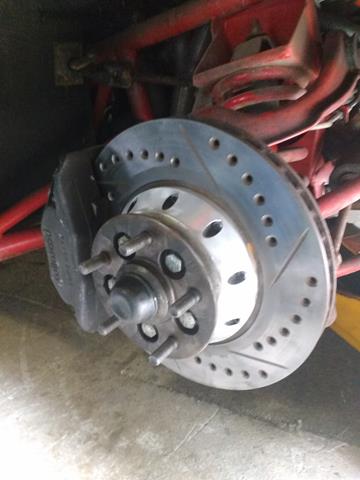
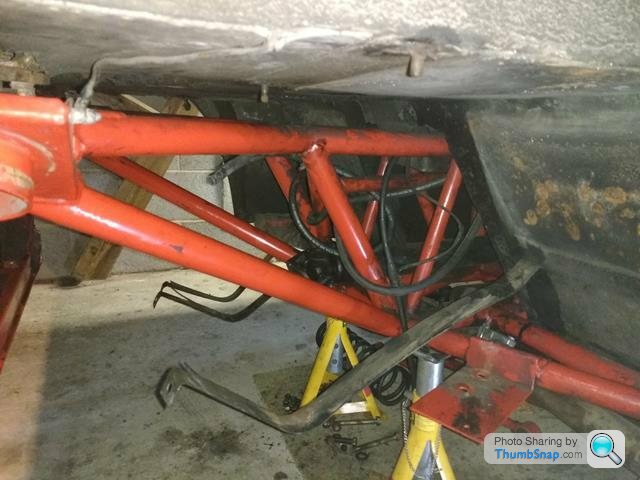
While I was in the wheel arch playing with the solenoid wire I had 10 minutes with the wire brush and the discs came up like new. I will remove, check and clean the pads but the Wilwood 4 pot calipers still look tidy and do not seem to be binding at all. The underside of the car still looks very good, despite it's years in storage.

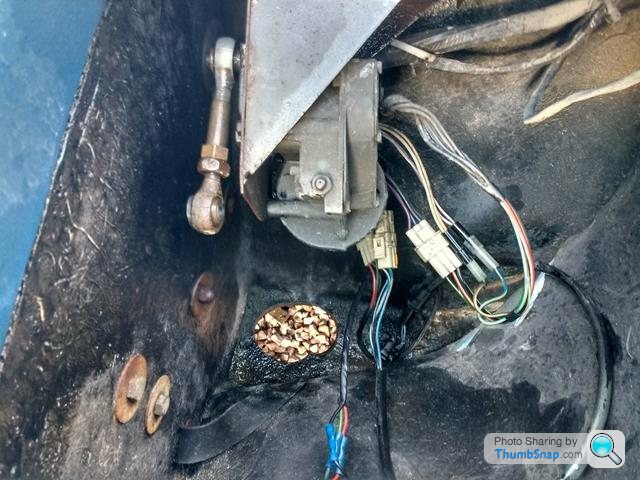
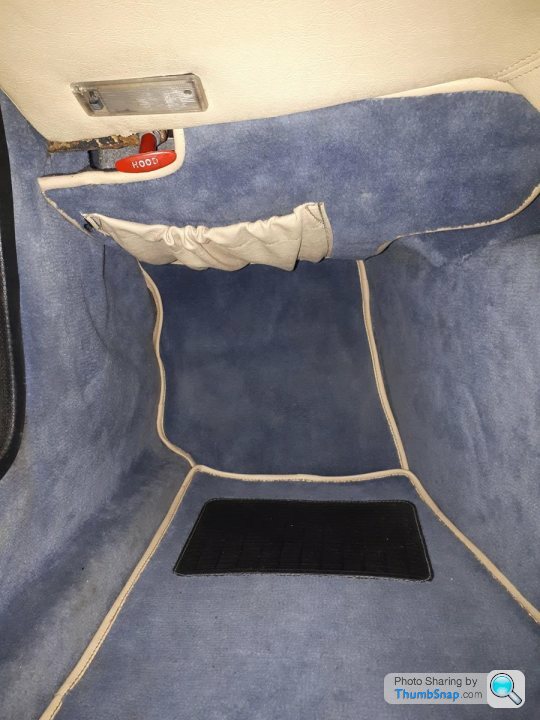
Next job was to tidy up all the original wiring under the steering column and also by the relay/fuse board. As with all the Wedges I've had the drop down flap is distorted and will need some work in the future. Some of the carpet sections were very damp, no doubt from the monsoon trip home on Friday so I've removed them to clean and dry them out.

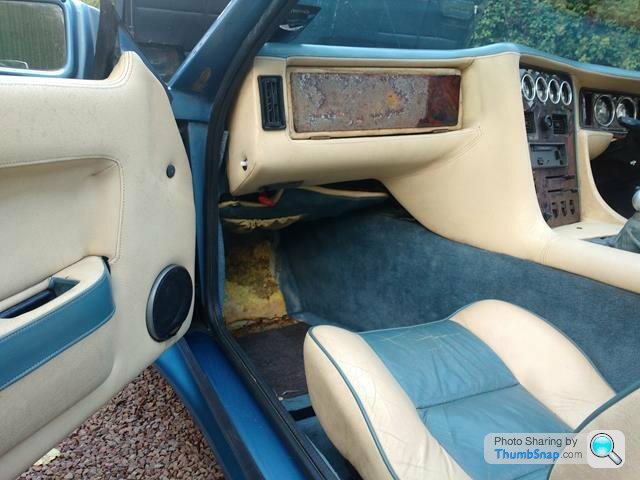
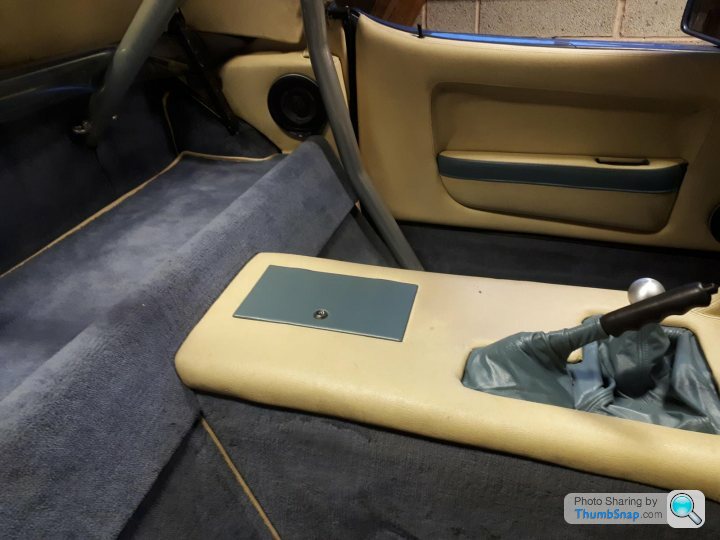
I also had a further play with the leather cleaner. The section under the cubby hole was black with mould but the cleaner seems to be lifting it off without leaving any staining. Considerable further work is needed.
Last job of the afternoon was to look at the non-functioning near side headlamp. The only way in was via a very small hole in the bottom of the wing. There was no way my fat hands would get in there so some very careful enlarging with the jig saw and I could then access the manual winder to get the headlamp up, remove the lens and see what's happening. The rose jointed arm is virtually seized and the motor won't run. If however I wind it manually and then put the power on, the motor does run and immediately re-parks itself in the down position. I'm hoping the limit switches just need a clean. A job for another day. Similarly the inside of the pop up headlamp needs some work. The original ply has de-laminated leaving precious little to attach the lens back to. I'll re-glass it before I reassemble.

Overall very pleased with the progress. The engine now starts with the key, runs great and sounds amazing, the original wheel centres were found under the passenger seat, the wiring is now all sorted and I think the interior trim (except the veneers) looks like it will clean up nicely. Cheers.
Well second day spend on the car today. Armed with the correct wiring diagram off the 450SE I made short work of returning the ignition wiring back to original. At the same time I replaced the wire feeding the starter solenoid and I now have a car that starts using the ignition key. I then spent the next few hours carefully removing the faulty alarm and associated wiring.
While I was in the wheel arch playing with the solenoid wire I had 10 minutes with the wire brush and the discs came up like new. I will remove, check and clean the pads but the Wilwood 4 pot calipers still look tidy and do not seem to be binding at all. The underside of the car still looks very good, despite it's years in storage.
Next job was to tidy up all the original wiring under the steering column and also by the relay/fuse board. As with all the Wedges I've had the drop down flap is distorted and will need some work in the future. Some of the carpet sections were very damp, no doubt from the monsoon trip home on Friday so I've removed them to clean and dry them out.
I also had a further play with the leather cleaner. The section under the cubby hole was black with mould but the cleaner seems to be lifting it off without leaving any staining. Considerable further work is needed.
Last job of the afternoon was to look at the non-functioning near side headlamp. The only way in was via a very small hole in the bottom of the wing. There was no way my fat hands would get in there so some very careful enlarging with the jig saw and I could then access the manual winder to get the headlamp up, remove the lens and see what's happening. The rose jointed arm is virtually seized and the motor won't run. If however I wind it manually and then put the power on, the motor does run and immediately re-parks itself in the down position. I'm hoping the limit switches just need a clean. A job for another day. Similarly the inside of the pop up headlamp needs some work. The original ply has de-laminated leaving precious little to attach the lens back to. I'll re-glass it before I reassemble.
Overall very pleased with the progress. The engine now starts with the key, runs great and sounds amazing, the original wheel centres were found under the passenger seat, the wiring is now all sorted and I think the interior trim (except the veneers) looks like it will clean up nicely. Cheers.
A good day on the SEAC today. Non-functioning headlamp re-assembled and all working great. Amazingly both now pop up and close down in perfect unison. One thing I did notice is the halogen bulbs used in the Triumph Toledo headlamps.The ones fitted are high powered 100/60w units, which I'm not sure are entirely legal, even though they are bloody impressive shining down the drive when it went dark. Perspex around driving lamps removed, cleaned and refitted with new self tapers.
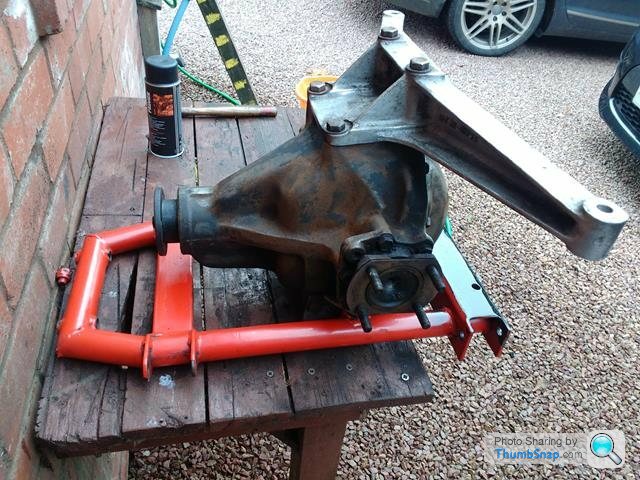
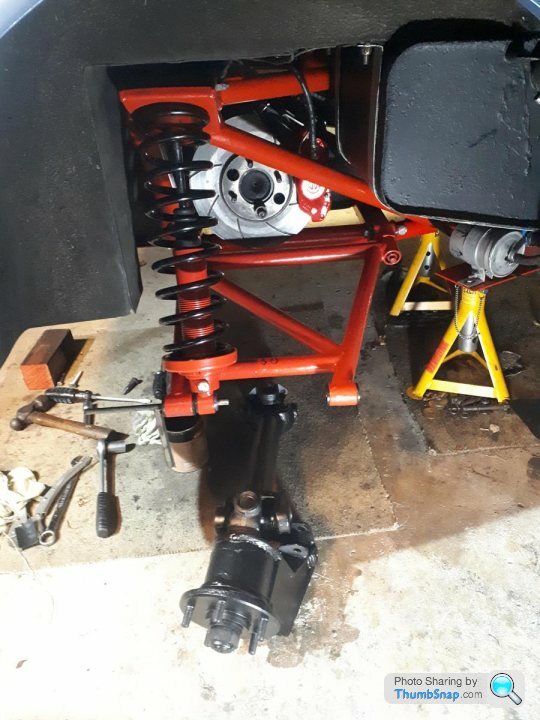
Further work on the diff. Props shaft joint now disconnected, but a fair cup of diff oil came out of the flange joint so I'm guessing the pinion flange seal is leaking via the lock nut. Diff oil all drained. Also drained down the brake master reservoir to get the lines clear of brake fluid and managed to disconnect and pull the 3m flexible brake line all the way back to the diff. Handbrake cable disconnected and diff top mounts also slackened with my new skinny spanner. So tomorrow it's angle grinder time, cutting off the rear and front diff carrier bolts which are totally galvanised and 2 pack epoxied into position. Obviously during the previous rebuild Peninsular had the chassis blasted, galvanised and epoxy painted with the diff carrier in place, and then loaded up the diff and dropped the body back on.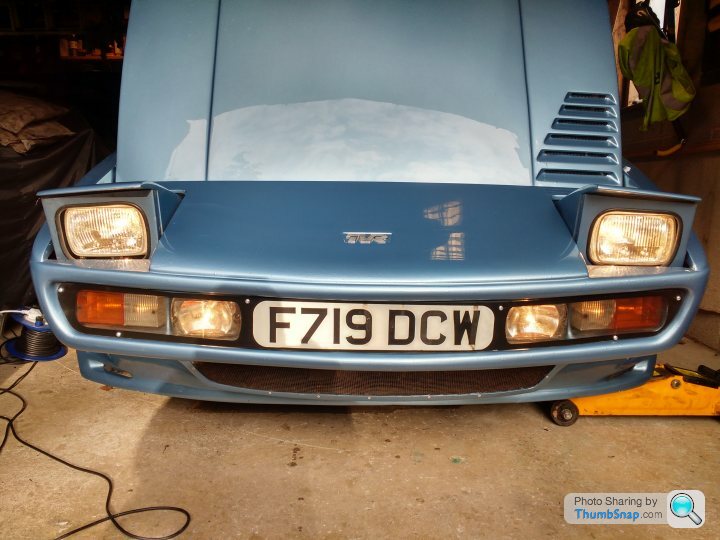
Further work on the diff. Props shaft joint now disconnected, but a fair cup of diff oil came out of the flange joint so I'm guessing the pinion flange seal is leaking via the lock nut. Diff oil all drained. Also drained down the brake master reservoir to get the lines clear of brake fluid and managed to disconnect and pull the 3m flexible brake line all the way back to the diff. Handbrake cable disconnected and diff top mounts also slackened with my new skinny spanner. So tomorrow it's angle grinder time, cutting off the rear and front diff carrier bolts which are totally galvanised and 2 pack epoxied into position. Obviously during the previous rebuild Peninsular had the chassis blasted, galvanised and epoxy painted with the diff carrier in place, and then loaded up the diff and dropped the body back on.
Edited by KKson on Friday 11th October 23:46
A fairly productive weekend on the SEAC. Friday had the headlamp sorted as above.
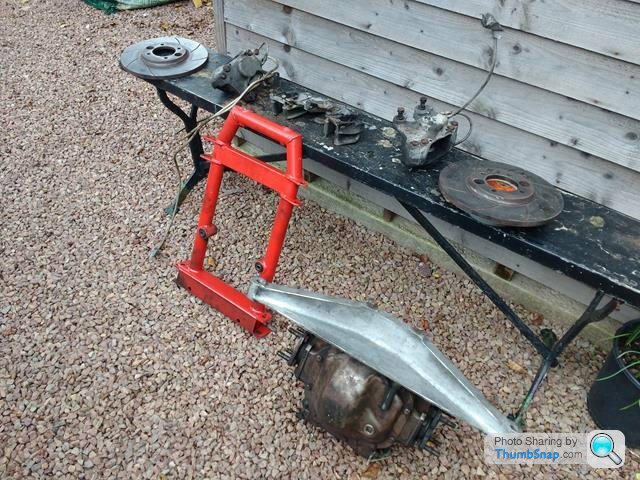
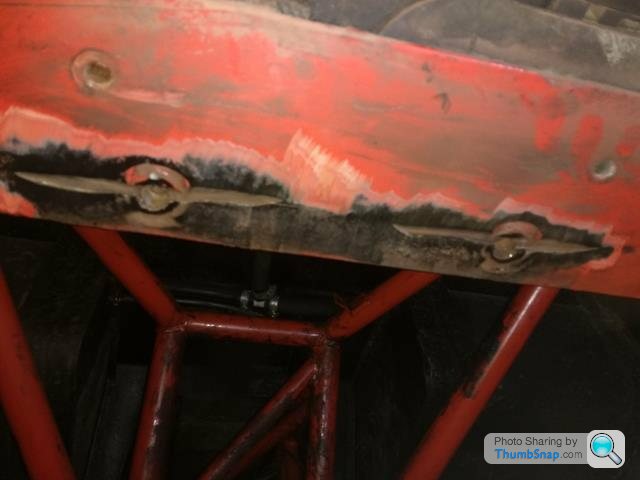
Most of Saturday was spent continuing with the diff removal. The diff carrier had been fitted prior to galvanising and epoxy coating the chassis and in addition I found that the rear carrier bolts had been tacked welded into position just to make life more difficult. Eventually with the use of a suitable angle grinder the diff and carrier were out and it then took less than 15 minutes to strip the calipers, handbrake assemblies and discs off. With a bit of wire brushing the discs have come up great so just the calipers to rebuild.

During the disassembly I did note quite a volume of diff oil escaped from the diff pinion flange centre. When I stripped the bits and pieces off the diff I noticed that the pinion lock nut was less than finger tight with some movement on the pinion flange. My dilemna now is do I send the diff off and get it rebuilt or do I risk trying to gently tighten up a new lock nut and hope I don't go too far with the pre-load. I have messaged a local transmission repairer for their advice on this one.


As I had to cut the rear diff carrier bolts out, one of them in particular was well rusted into the chassis support. No amount of hammering or penetrating oil would budge it so 2 hours were spent today very carefully drilling it out. I will need to MIG weld the rear chassis a little were the angle grinder touched the plate, but overall happy with the weekends progress.
Most of Saturday was spent continuing with the diff removal. The diff carrier had been fitted prior to galvanising and epoxy coating the chassis and in addition I found that the rear carrier bolts had been tacked welded into position just to make life more difficult. Eventually with the use of a suitable angle grinder the diff and carrier were out and it then took less than 15 minutes to strip the calipers, handbrake assemblies and discs off. With a bit of wire brushing the discs have come up great so just the calipers to rebuild.
During the disassembly I did note quite a volume of diff oil escaped from the diff pinion flange centre. When I stripped the bits and pieces off the diff I noticed that the pinion lock nut was less than finger tight with some movement on the pinion flange. My dilemna now is do I send the diff off and get it rebuilt or do I risk trying to gently tighten up a new lock nut and hope I don't go too far with the pre-load. I have messaged a local transmission repairer for their advice on this one.
As I had to cut the rear diff carrier bolts out, one of them in particular was well rusted into the chassis support. No amount of hammering or penetrating oil would budge it so 2 hours were spent today very carefully drilling it out. I will need to MIG weld the rear chassis a little were the angle grinder touched the plate, but overall happy with the weekends progress.
Well I've had a bit of a break from the SEAC as I've been in Cyprus visiting my sister. But back to the garage today.
First task was a 2 hour drive to drop the diff off for a professional rebuild. I was contemplating having a go at nipping up the pinion nut myself however as the crown wheel and pinion gears are no longer available common sense prevailed. Diff is having a full rebuild, bearings, seals, etc for £350 plus the VAT.
When I got home the plan was to fire up the welder and repair the slightly butchered chassis which was attacked when trying to get the welded in diff bolts out. Was about to fire up the MIG but there was a definite smell of fuel so decided that I should investigate.
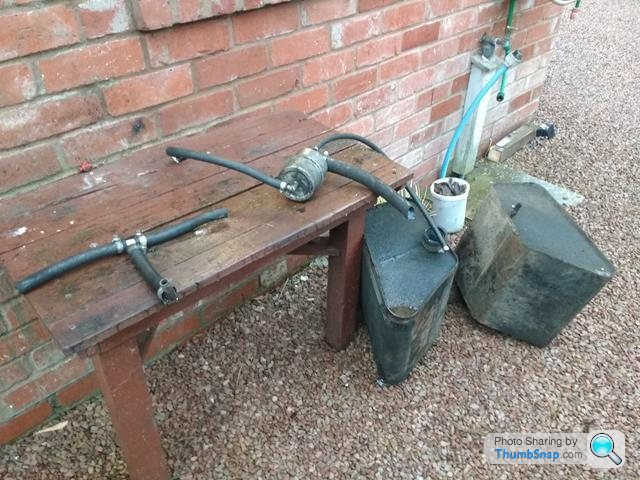
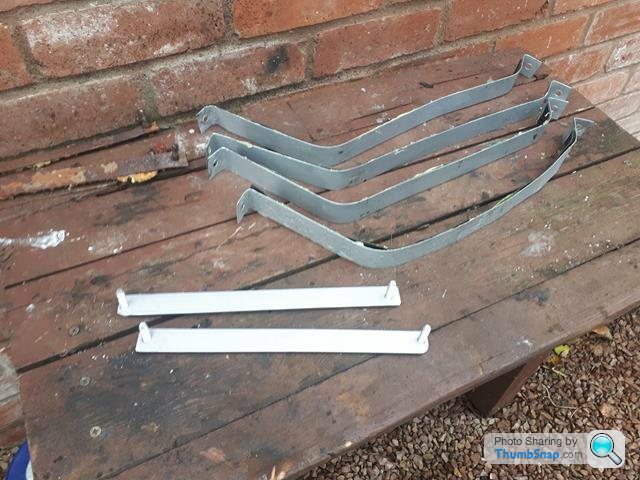
I was planning to replace all hoses anyway. The main 2" fuel filler flexible was hidden behind a riveted-in plate. Once I'd removed it I could see that the hose was well perished. Also the fuel tanks straps looked tatty so rather than mess about I thought it easy to remove the tanks and all hoses.

Prior to removal, I drained all the old fuel out of the tanks. There was no noticeable muck in the tanks but I will give them a thorough flush prior to re-installing. I've also measured all lines and penciled a flow chart of where everything goes so I've got a record for the future. Fuel lines are a mixture of 3/8", 5/8", 25mm and 2".
Everything came out without issue. So much simpler when there's no rear suspension, diff or diff carrier!


Out tomorrow taking to lad to have a look at Leeds University but Sunday it will be welding repair to the chassis and cleaning of the fuel tank exterior, straps and swirl pot.
First task was a 2 hour drive to drop the diff off for a professional rebuild. I was contemplating having a go at nipping up the pinion nut myself however as the crown wheel and pinion gears are no longer available common sense prevailed. Diff is having a full rebuild, bearings, seals, etc for £350 plus the VAT.
When I got home the plan was to fire up the welder and repair the slightly butchered chassis which was attacked when trying to get the welded in diff bolts out. Was about to fire up the MIG but there was a definite smell of fuel so decided that I should investigate.
I was planning to replace all hoses anyway. The main 2" fuel filler flexible was hidden behind a riveted-in plate. Once I'd removed it I could see that the hose was well perished. Also the fuel tanks straps looked tatty so rather than mess about I thought it easy to remove the tanks and all hoses.
Prior to removal, I drained all the old fuel out of the tanks. There was no noticeable muck in the tanks but I will give them a thorough flush prior to re-installing. I've also measured all lines and penciled a flow chart of where everything goes so I've got a record for the future. Fuel lines are a mixture of 3/8", 5/8", 25mm and 2".
Everything came out without issue. So much simpler when there's no rear suspension, diff or diff carrier!
Out tomorrow taking to lad to have a look at Leeds University but Sunday it will be welding repair to the chassis and cleaning of the fuel tank exterior, straps and swirl pot.
Hi Mark, certainly going to fit a new sender unit while the tanks are out. The previous owner did say that he only got a short run before the gauge read empty so he never did more than 100 miles between fill ups. Given the 25mm cross pipe between the two tanks I can't see that there would be much difference in level. The tanks are jointly connected at the bottom but also twin vented at the top so they should act as one tank, especially given the thin nature of petrol.
Anyone know the source of the original fuel sender?? Cheers.
Anyone know the source of the original fuel sender?? Cheers.
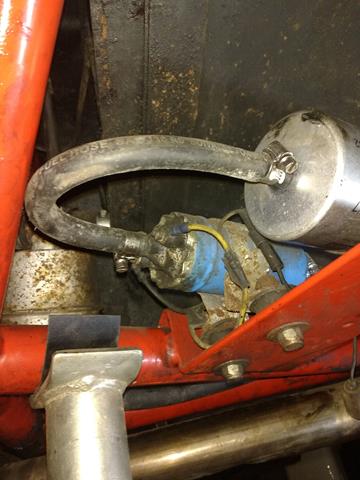
Hi Mark, no that looks like a spare that does nothing and has been blocked off. It's directly under the filler neck. At the bottom and lower point of each tank is a 25mm outlet that connects via the swirl pot to the bottom of the other tank. On the top of each tank, facing each other is a 5/8" connection. The T of rubber on my outside table seen in the photo connects these two, plus this then breathes through the boot floor and back to the filler neck.
The swirl pot connects via a 5/8" tube to the pump, then 3/8" to the filter and then 3/8" to the Efi system. The Efi return line goes into the near side tank, on a similar tank connection as the blanked one. The swirl pot also has a breather that also connects on a separate 3/8" connector to the near side tank. I've sketched it all out but will do a tidy drawing for reference for others if they are interested. Cheers.
The swirl pot connects via a 5/8" tube to the pump, then 3/8" to the filter and then 3/8" to the Efi system. The Efi return line goes into the near side tank, on a similar tank connection as the blanked one. The swirl pot also has a breather that also connects on a separate 3/8" connector to the near side tank. I've sketched it all out but will do a tidy drawing for reference for others if they are interested. Cheers.
Well a bit more progress made this weekend. Friday I collected my rebuilt diff. It needed new bearings and seals but the crown wheel and pinion and clutches were all good so at least I know I shouldn't have any issues with it.


Fuel tank wise they are all back in. The top brackets which secure the straps to the rear parcel shelf were dust so I made two new brackets with retained bolts, with plenty of galvanised zinc spray coating. I also cleaned up the old straps, wire brushed down, zinc spray and bonded new rubbers to the straps. I've got some new stainless items coming which I'll swap out on a later date but I was keen to crack on today.
I also power wire brushed the filler piece, swirl pot and all assorted steel connectors and again applied several coats of zinc finish to them.
The new 2" hose from filler to tank was a bit of a fiddle to get in but after much pushing, manipulation and some choice words it all lined up. So both tanks now refitted, fuel filler all plumbed up and small bore overflow and larger bore tank breathers also now all connected. Next job is a new flexible mount for the fuel pump then refit the pump and new fuel filter into place.
Well thought I'd better update the thread in case you think I've been idle. Work is progressing although 4 university open days for the lad have got in the way of progress somewhat.
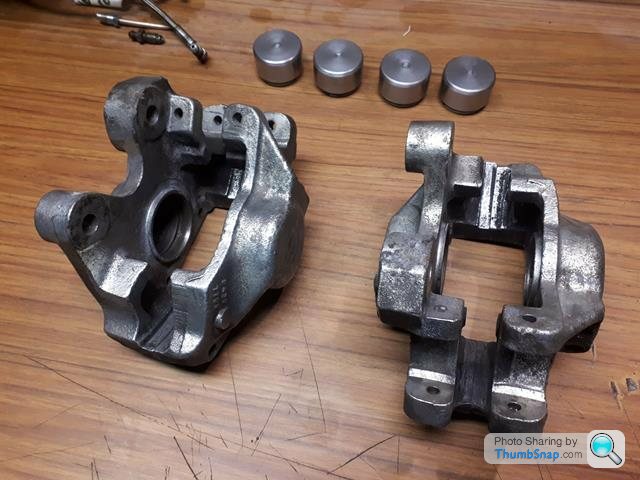
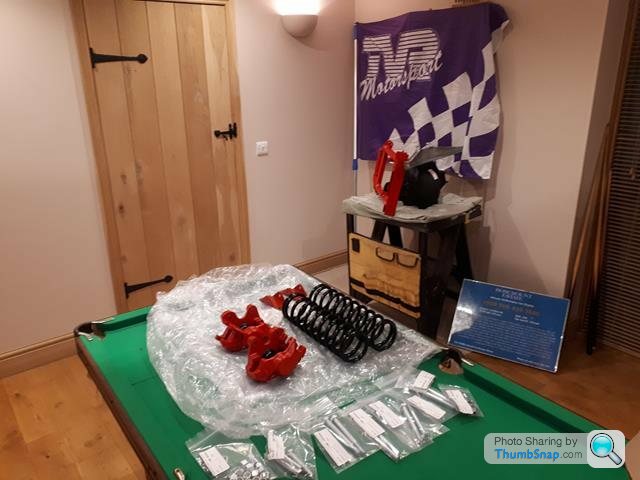
Calipers have been stripped, cleaned, blasted out with an air line, painted and today I've fitted new seals. Currently got the handbrake mechanisms apart on the bench but apart from a clean they look like new.

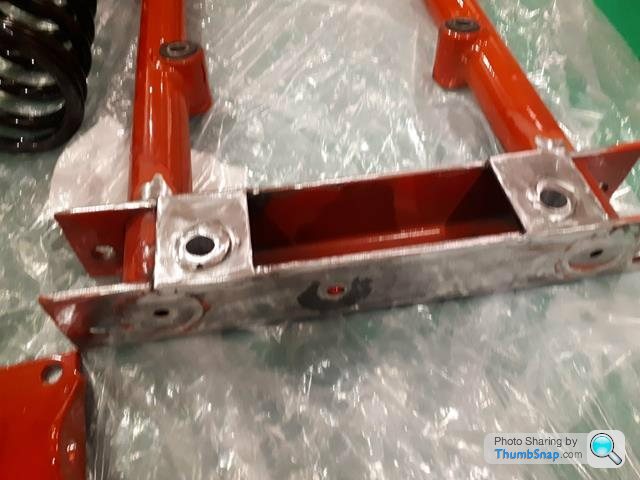
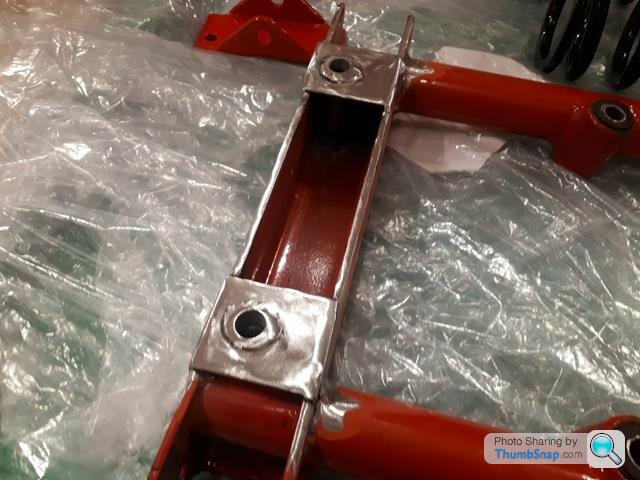
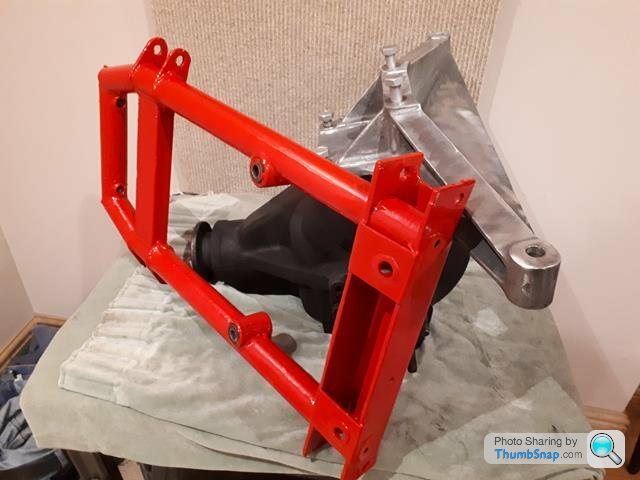
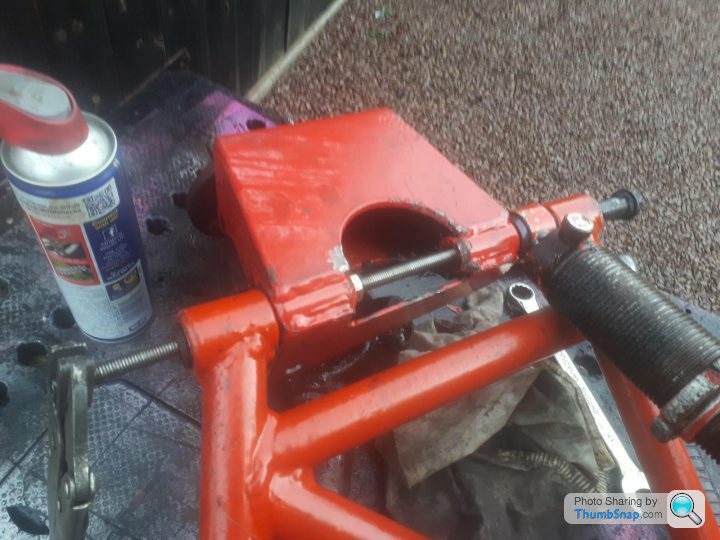
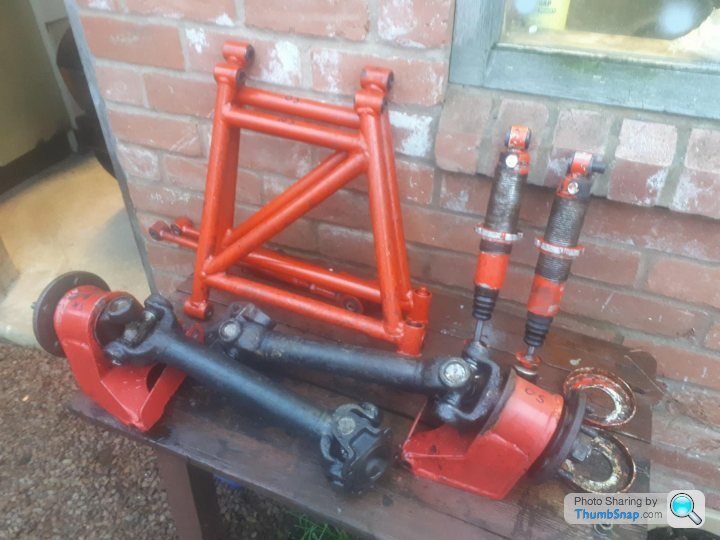
Other job now complete is the modification of the diff carrier to allow longer through bolts, rather than the bolts trapped inside the channel. New Grade 5 high tensile bolts all purchased and trial fitted, without the diff, just to ensure everything lined up okay.

Original rear springs have been lightly blasted and epoxy coated for £20.
Next job is to finish off the handbrake mechanisms and then start re-assembling the diff and brakes on its cradle.
Calipers have been stripped, cleaned, blasted out with an air line, painted and today I've fitted new seals. Currently got the handbrake mechanisms apart on the bench but apart from a clean they look like new.
Other job now complete is the modification of the diff carrier to allow longer through bolts, rather than the bolts trapped inside the channel. New Grade 5 high tensile bolts all purchased and trial fitted, without the diff, just to ensure everything lined up okay.
Original rear springs have been lightly blasted and epoxy coated for £20.
Next job is to finish off the handbrake mechanisms and then start re-assembling the diff and brakes on its cradle.
Well it's been a while since I updated this thread and as the missus and daughter are hogging the TV I thought I'd post a few photos of the progress.
So progress was going well, diff had been returned following rebuild, calipers were refurbished so came to re-assemble the rear brakes only to find that the output hubs were not as original dimensions, with one flange too tight on the diff casing and rubbing and the second too far out so the brake disc rubbed on the caliper.

One call later and the rebuilder was straight over, collected it, found he'd used incorrect bearings, and diff was returned the next week. Annoying but good service on the second rebuild. Brakes were refitted with the original number of shims and everything lined up and diff was then reassembled with hand brake mechanisms and I also made new kunifer brake pipes to suit.

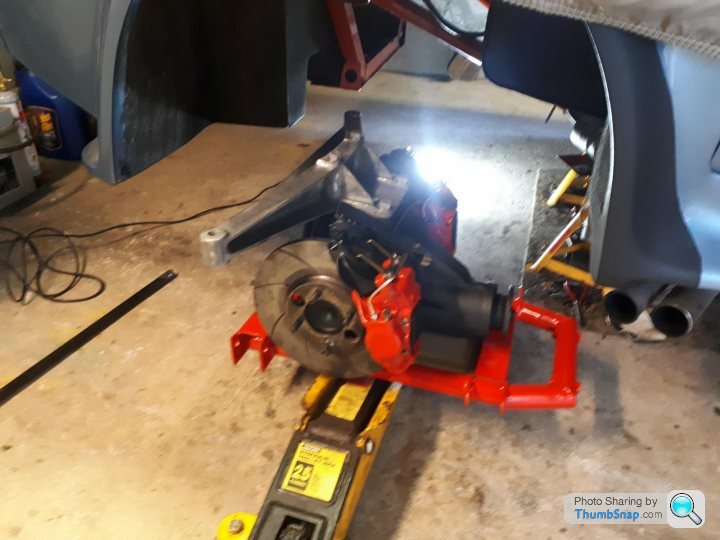
I'd trial fitted the modified diff cradle previously so knew it would fit, so put the diff in the wheelbarrow and took it down to the garage. I'd tied a suitable flt section of wood under the carrier to ensure it would balance on the trolley jack, so 10 minutes later it was back in position. Very satisfying.


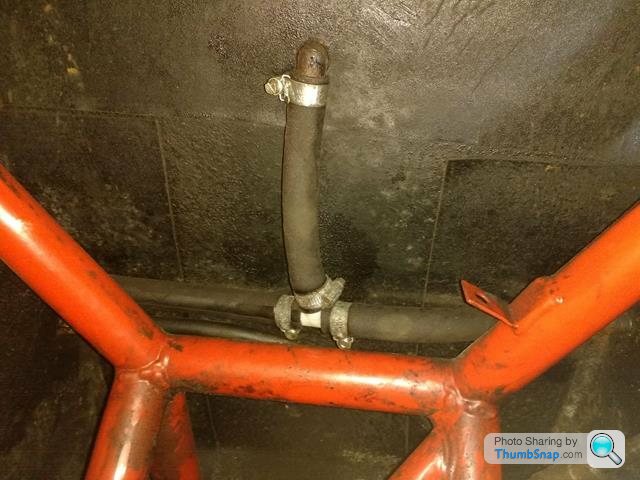
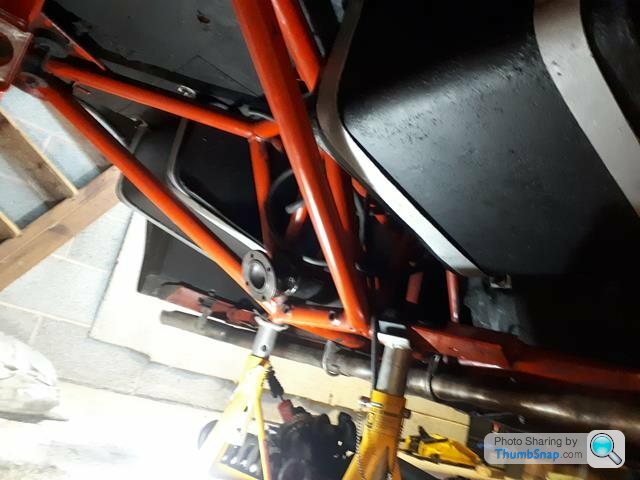
So next was to reconnect the brake and the prop shaft. When the prop shaft was installed it was obvious that the cross hose linking the two fuel tanks was touching the top of prop. The bottom of the tank outlets is approx 10mm lower than the top of the prop shaft. I therefore re-positioned the hose to ensure it arched over the prop shaft and to ensure it never touches the prop I made a stainless cowl from an off cut of 6" stainless pipe.


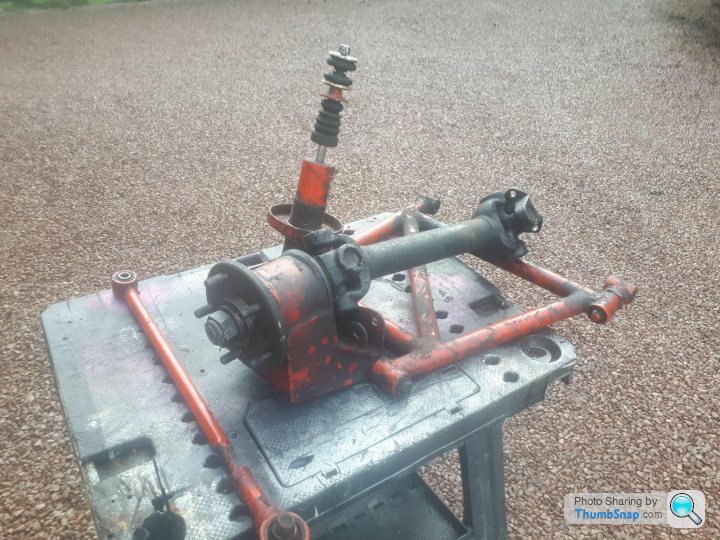
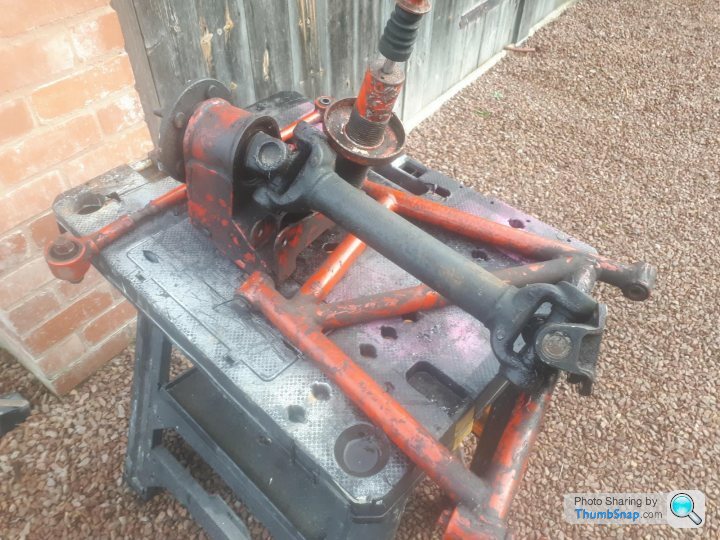
Next job was to strip the rear suspension, which I'd left it two large lumps. The bolts were seized in the rear hubs, as always, but plenty of WD40 and a length of studding helped ease the old bolts out. Suspension parts then cleaned, stripped and repainted. Unfortunately the A frame bushes were shot so a new set of poly bushes were bought.


Before the suspension went back in I ran a new kunifer brake line front to back, bled the brakes with new DOT 5.1 brake fluid, adjusted the handbrake cable, and greased the prop shaft.
So today I've fitted some new black silicon hoses in the engine bay as a few of the hoses were perished and leaking, stripping a load of rusty bits and pieces from the engine bay ready for wire brushing and repainting and I've made a start on the suspension reassembly.


Still plenty left to do before I can get it on the road though, but pleased with the progress so far.
So progress was going well, diff had been returned following rebuild, calipers were refurbished so came to re-assemble the rear brakes only to find that the output hubs were not as original dimensions, with one flange too tight on the diff casing and rubbing and the second too far out so the brake disc rubbed on the caliper.
One call later and the rebuilder was straight over, collected it, found he'd used incorrect bearings, and diff was returned the next week. Annoying but good service on the second rebuild. Brakes were refitted with the original number of shims and everything lined up and diff was then reassembled with hand brake mechanisms and I also made new kunifer brake pipes to suit.
I'd trial fitted the modified diff cradle previously so knew it would fit, so put the diff in the wheelbarrow and took it down to the garage. I'd tied a suitable flt section of wood under the carrier to ensure it would balance on the trolley jack, so 10 minutes later it was back in position. Very satisfying.
So next was to reconnect the brake and the prop shaft. When the prop shaft was installed it was obvious that the cross hose linking the two fuel tanks was touching the top of prop. The bottom of the tank outlets is approx 10mm lower than the top of the prop shaft. I therefore re-positioned the hose to ensure it arched over the prop shaft and to ensure it never touches the prop I made a stainless cowl from an off cut of 6" stainless pipe.
Next job was to strip the rear suspension, which I'd left it two large lumps. The bolts were seized in the rear hubs, as always, but plenty of WD40 and a length of studding helped ease the old bolts out. Suspension parts then cleaned, stripped and repainted. Unfortunately the A frame bushes were shot so a new set of poly bushes were bought.
Before the suspension went back in I ran a new kunifer brake line front to back, bled the brakes with new DOT 5.1 brake fluid, adjusted the handbrake cable, and greased the prop shaft.
So today I've fitted some new black silicon hoses in the engine bay as a few of the hoses were perished and leaking, stripping a load of rusty bits and pieces from the engine bay ready for wire brushing and repainting and I've made a start on the suspension reassembly.
Still plenty left to do before I can get it on the road though, but pleased with the progress so far.
Edited by KKson on Sunday 2nd February 18:18
Well it's been a while since I last updated but those on FB will probably be fed up with my various updates but thought I'd add a little more to this PH thread.
Work on the SEAC project has come on in leaps and bounds, helped by our current unfortunate circumstances and virus lock down.
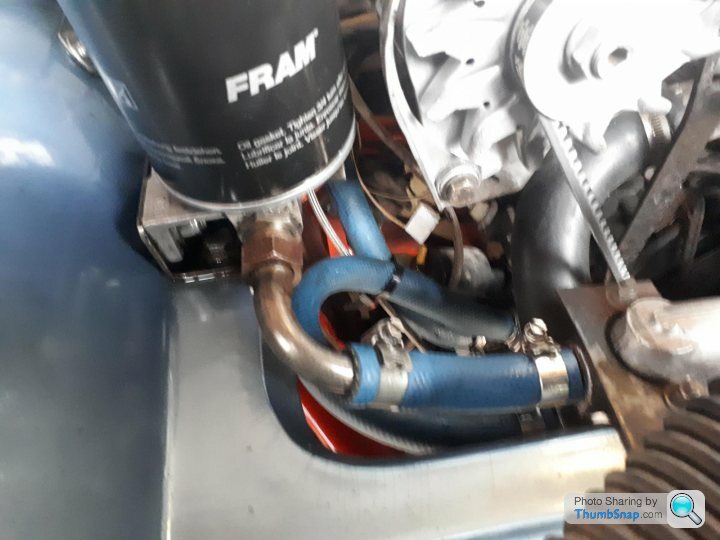
Suspension was the last reported work, and this is now all rebuilt, new brake lines in, system bled and brake pedal nice and firm. The next area of attention was the engine bay which was horrible. Oxidised components, knackered and perished mixture of hoses, and plenty of rust. basically anything in the engine bay I could easily unbolt came off, including all brackets, power steering pump, alternator, plenum etc. I cleaned and painted up all I could, polished up the plenum and all things oxidised. Complete new set of hoses, belts etc. The other issue I had was a large bundle of unused wired tied up near the battery box. After much head scratching Dick dastardlys mate confirmed that the wires were from the redundant factory fitted alarm system. I therefore carefully chased the wires back into the interior, cut, heat shrinked and tidied them up. I also fitted a new oil catcher to replace the original K&N filter rusty tin can. All in all it's much tidier under there now.

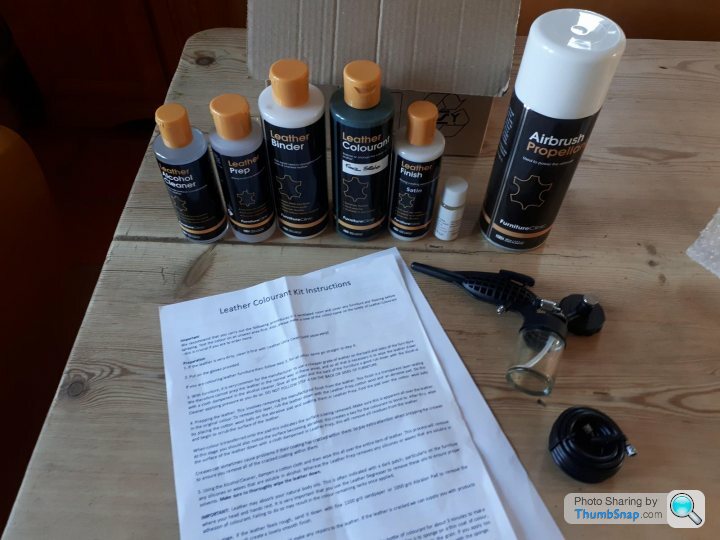
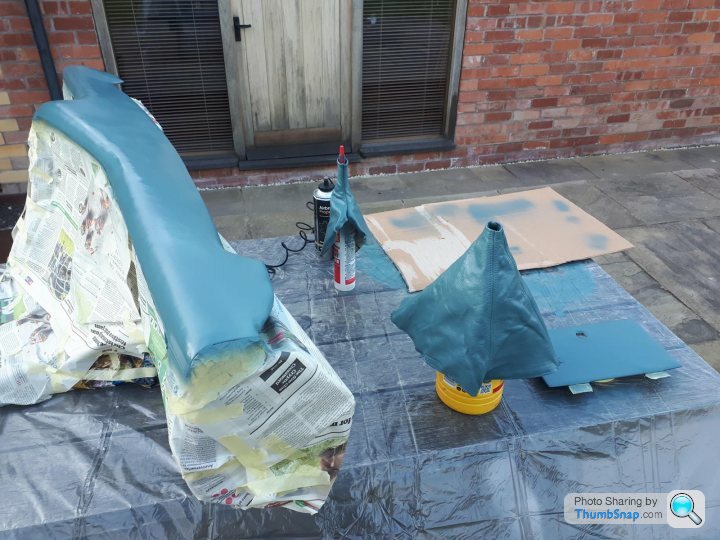
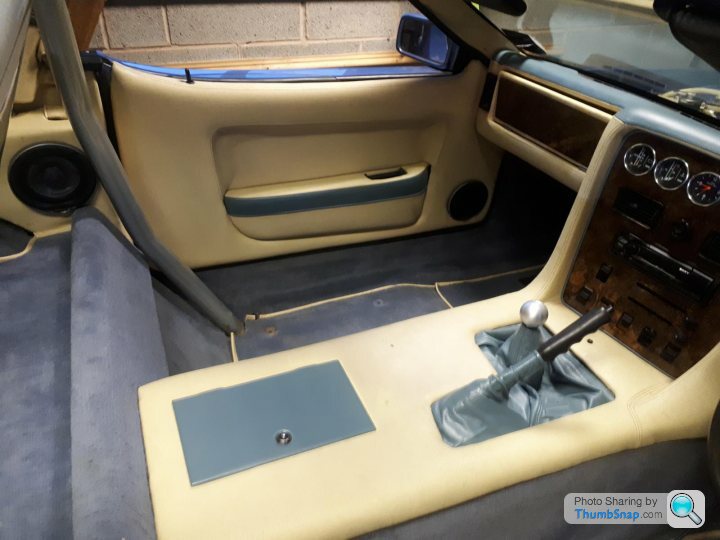
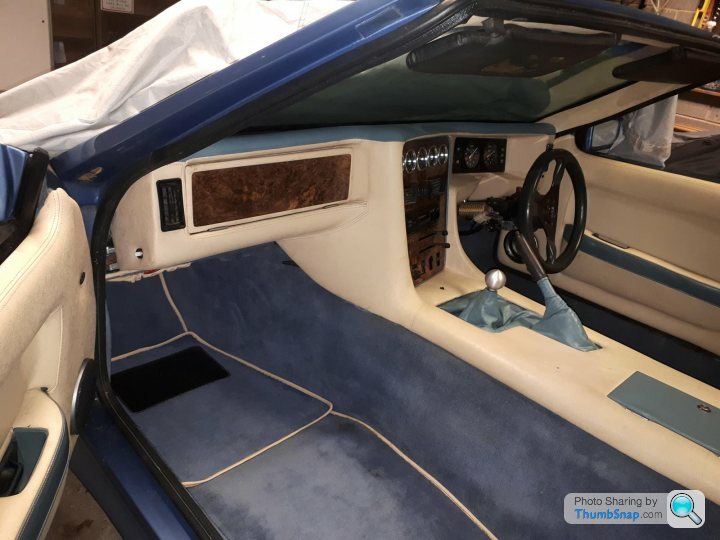
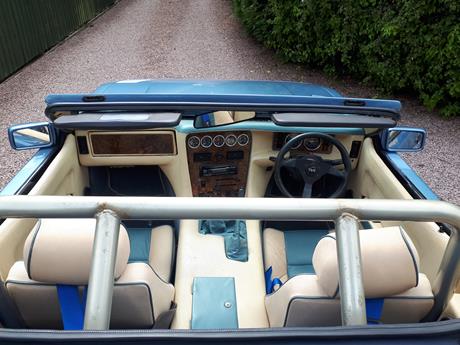
The dashboard was in a sorry state plus there was a miriad of hacked wires behind it. The heater didn't work and the mini disc stereo was of no use, so I decided to take the lot out. That way I could recolour it properly. The dash was a doddle to remove and came out without issue. I was able to snip a small section of blue trim off the back of the dash and sent it to Furniture Clinics who matched it and sent a recolouring kit, including small air brush. As well as the dash top I also recoloured the gaiters and locking cubby hole cover. To say I'm happy with the results would be an understatement.


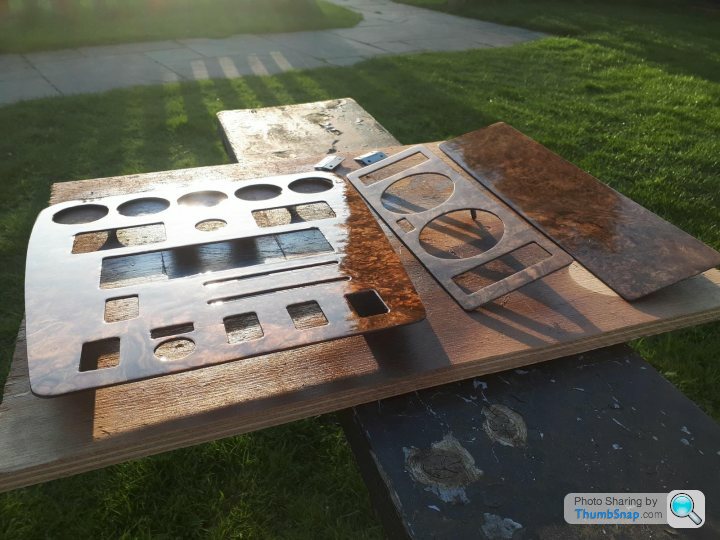
Another job required was to reveneer the dash inserts. The veneers had been badly damaged by the 15 years of damp storage. So for £29 I bought a large sheet of walnut burr, made myself a press using thick ply sheet and loads of bolts and nuts, and also bought a variety of glues. My initial attempt was a disaster. I used the water activated Gorilla glue and when it expanded it covered everything and completely buggered up my press. i then tried Cascamite, but this wasn't strong enough to hold the veneers down, so back to the Gorilla glue but very sparingly and plenty of grease proof paper to stop it sticking the press together. This time it worked well. Several hours with craft knives, fine sand paper and finally 12 coats of lacquer and I'm delighted with the results. With the cost of the glue, lacquer and walnut coming in at less than £50.


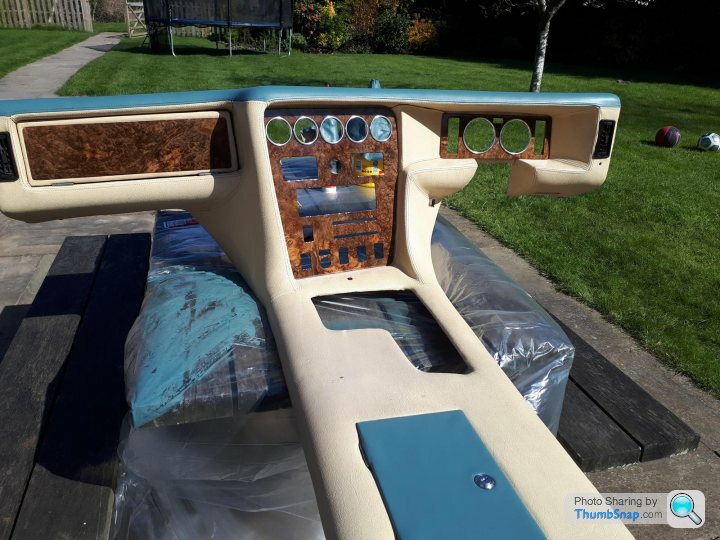
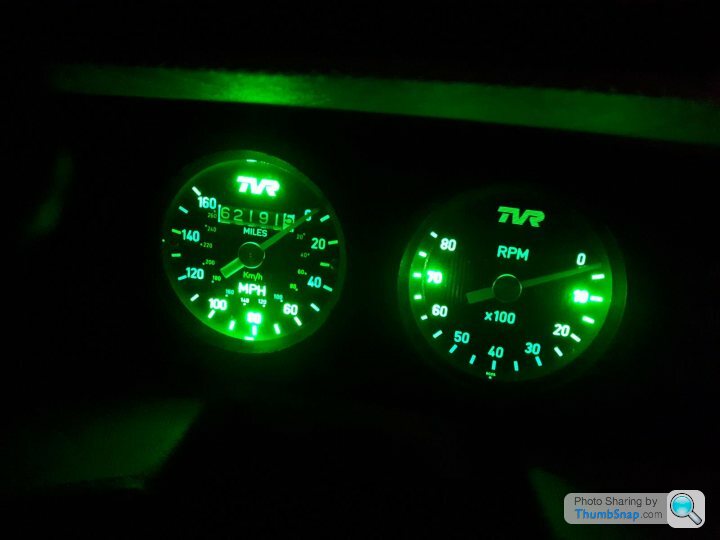
Dashboard was then refitted, the steel gauge/switch back plates stripped and painted, replacement clock sourced as the old one was dead, and time to wire everything back in. I had labelled everything so refit was straight forward and amazingly everything worked as well. I did upgrade all bulbs to LED and the main clocks are now VERY bright at night.
Breakfast calls. I'll continue update later.
Work on the SEAC project has come on in leaps and bounds, helped by our current unfortunate circumstances and virus lock down.
Suspension was the last reported work, and this is now all rebuilt, new brake lines in, system bled and brake pedal nice and firm. The next area of attention was the engine bay which was horrible. Oxidised components, knackered and perished mixture of hoses, and plenty of rust. basically anything in the engine bay I could easily unbolt came off, including all brackets, power steering pump, alternator, plenum etc. I cleaned and painted up all I could, polished up the plenum and all things oxidised. Complete new set of hoses, belts etc. The other issue I had was a large bundle of unused wired tied up near the battery box. After much head scratching Dick dastardlys mate confirmed that the wires were from the redundant factory fitted alarm system. I therefore carefully chased the wires back into the interior, cut, heat shrinked and tidied them up. I also fitted a new oil catcher to replace the original K&N filter rusty tin can. All in all it's much tidier under there now.
The dashboard was in a sorry state plus there was a miriad of hacked wires behind it. The heater didn't work and the mini disc stereo was of no use, so I decided to take the lot out. That way I could recolour it properly. The dash was a doddle to remove and came out without issue. I was able to snip a small section of blue trim off the back of the dash and sent it to Furniture Clinics who matched it and sent a recolouring kit, including small air brush. As well as the dash top I also recoloured the gaiters and locking cubby hole cover. To say I'm happy with the results would be an understatement.
Another job required was to reveneer the dash inserts. The veneers had been badly damaged by the 15 years of damp storage. So for £29 I bought a large sheet of walnut burr, made myself a press using thick ply sheet and loads of bolts and nuts, and also bought a variety of glues. My initial attempt was a disaster. I used the water activated Gorilla glue and when it expanded it covered everything and completely buggered up my press. i then tried Cascamite, but this wasn't strong enough to hold the veneers down, so back to the Gorilla glue but very sparingly and plenty of grease proof paper to stop it sticking the press together. This time it worked well. Several hours with craft knives, fine sand paper and finally 12 coats of lacquer and I'm delighted with the results. With the cost of the glue, lacquer and walnut coming in at less than £50.
Dashboard was then refitted, the steel gauge/switch back plates stripped and painted, replacement clock sourced as the old one was dead, and time to wire everything back in. I had labelled everything so refit was straight forward and amazingly everything worked as well. I did upgrade all bulbs to LED and the main clocks are now VERY bright at night.
Breakfast calls. I'll continue update later.
Hi Adrian, I bought the veneer off ebay, from this supplier. They have many different grains to choose from. Veneer was lovely, with no splits or tears. I have nothing to do with the supplier, and I'm sure there are several alternative suppliers also.
https://www.ebay.co.uk/itm/REAL-WOOD-VENEER-4X-LON...
Lacquer wise, after much google searching I went for just normal aerosol auto lacquer. I gave it several coats, then 1200 wet and dry to flatted it and then many more coats. Cheers.
https://www.ebay.co.uk/itm/REAL-WOOD-VENEER-4X-LON...
Lacquer wise, after much google searching I went for just normal aerosol auto lacquer. I gave it several coats, then 1200 wet and dry to flatted it and then many more coats. Cheers.
Right, last update before I head down to the garage for some seat rail modifications....
Last few jobs over this last week have been cleaning and refitting the interior trim and cleaning all the carpets.
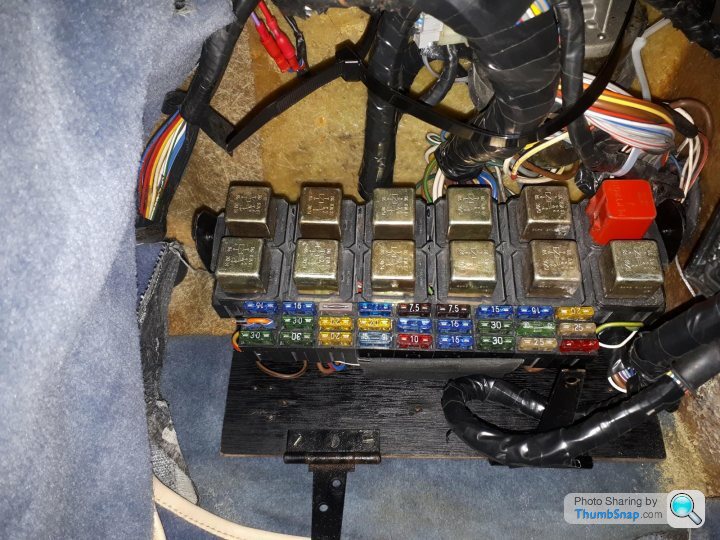
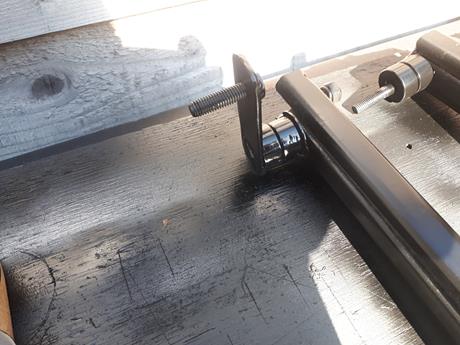
Before all the trim could go back in I wanted to make a better securing catch for the relay board, which was just loosely stuffed under the dash. I tried a few options, which weren't ideal, until I knocked up a couple of sprung stainless clips as photo. The clips hold the relay board 50mm off the original superbly designed bit of ply and gate hinges, but also clip over the top of the relay board with a 5mm overlap. That way if I want to release the relay/fuse board i just pop the tabs on each catch and off it comes.
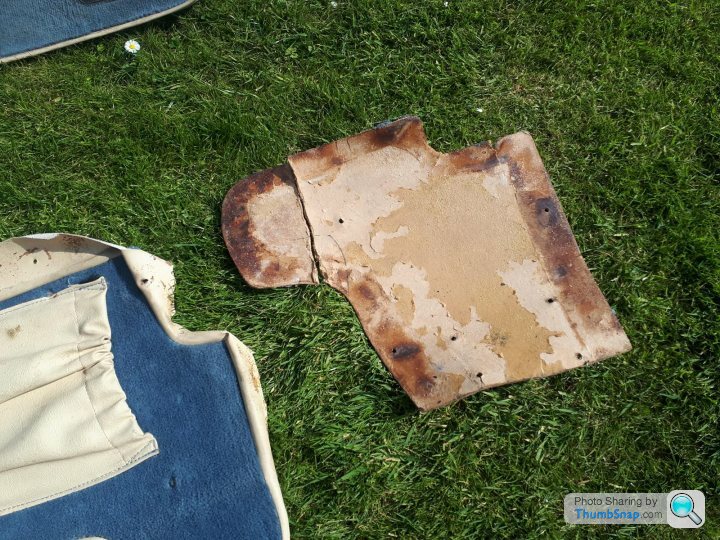
I stripped the old ECU flap, fitted new hardboard, retrimmed it and refitted. it's the first Wedge I've had that doesn't now need a cable tie or self tapper to hold the flap in place.
 [url]
[url]
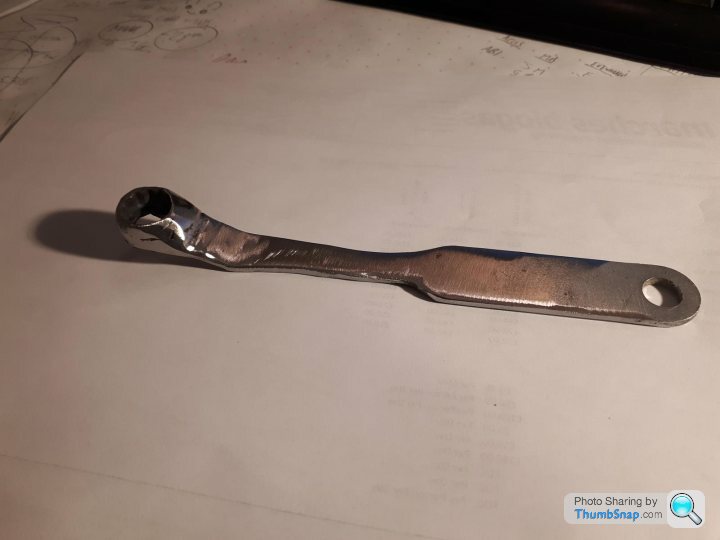
Time to refit the cleaned trim panels. All went in fine apart from when I tried to fit the door card to the drivers door. Giving it a little brute force, the door dropped 1" on its hinges. It appeared that the hinge plate wasn't tight. The problem was I could bnt get at the top inner nyloc with my usual range of spanners, so resorted in butchering an old 13mm spanner and welding up a suitable cranked tool that fits perfectly. Trim and carpets all fitted and looking pretty good.
Last few jobs this weekend. My new speedo cable arrived from Speedy cables. They turned around a new cable in less than 2 weeks from posting the old one off, to receiving the new cable. Well impressed. So cable fitted, new oil hoses to remote and oil cooler stat fitted, engine oil and filter change and also changed the gearbox oil, even though it looked like new. It took exactly 2 litres. I ran the car up after the oil changes and let it idel for an hour to double check for leaks, over heating etc. All behaved with the rad fan kicking in nicely as required.
Well the SEAC is now ready for an MOT, however with the current lockdown my preferred local garage is closed so I'll keep fettling for the time being. One job is to modify the seat rails. Due to the roll bar mounts, the rear outer seat bolt was stuck under the chassis mount and is a pain to get at so I'm going to weld a small extension to the seat rail, to move the bolt location away from it's current position by 2". Nearly there.... Cheers.
Last few jobs over this last week have been cleaning and refitting the interior trim and cleaning all the carpets.
Before all the trim could go back in I wanted to make a better securing catch for the relay board, which was just loosely stuffed under the dash. I tried a few options, which weren't ideal, until I knocked up a couple of sprung stainless clips as photo. The clips hold the relay board 50mm off the original superbly designed bit of ply and gate hinges, but also clip over the top of the relay board with a 5mm overlap. That way if I want to release the relay/fuse board i just pop the tabs on each catch and off it comes.
I stripped the old ECU flap, fitted new hardboard, retrimmed it and refitted. it's the first Wedge I've had that doesn't now need a cable tie or self tapper to hold the flap in place.
[url]Time to refit the cleaned trim panels. All went in fine apart from when I tried to fit the door card to the drivers door. Giving it a little brute force, the door dropped 1" on its hinges. It appeared that the hinge plate wasn't tight. The problem was I could bnt get at the top inner nyloc with my usual range of spanners, so resorted in butchering an old 13mm spanner and welding up a suitable cranked tool that fits perfectly. Trim and carpets all fitted and looking pretty good.
Last few jobs this weekend. My new speedo cable arrived from Speedy cables. They turned around a new cable in less than 2 weeks from posting the old one off, to receiving the new cable. Well impressed. So cable fitted, new oil hoses to remote and oil cooler stat fitted, engine oil and filter change and also changed the gearbox oil, even though it looked like new. It took exactly 2 litres. I ran the car up after the oil changes and let it idel for an hour to double check for leaks, over heating etc. All behaved with the rad fan kicking in nicely as required.
Well the SEAC is now ready for an MOT, however with the current lockdown my preferred local garage is closed so I'll keep fettling for the time being. One job is to modify the seat rails. Due to the roll bar mounts, the rear outer seat bolt was stuck under the chassis mount and is a pain to get at so I'm going to weld a small extension to the seat rail, to move the bolt location away from it's current position by 2". Nearly there.... Cheers.
Well I thought I'd just update this thread to finish it off for now, as the SEAC is now MOTed and taxed for the first time since 2007, and it's getting a daily run out.
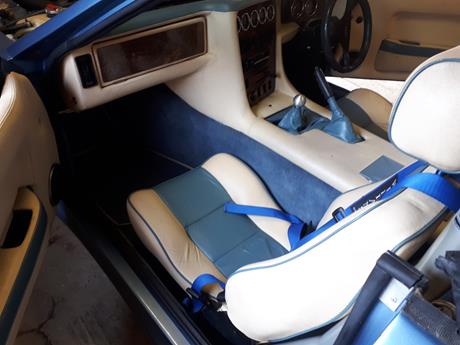
So last few jobs were to sort the seats. Firstly I wanted to modify the rear outer seat runner fastening as it was on top of the roll bar mount and a total pain to access.
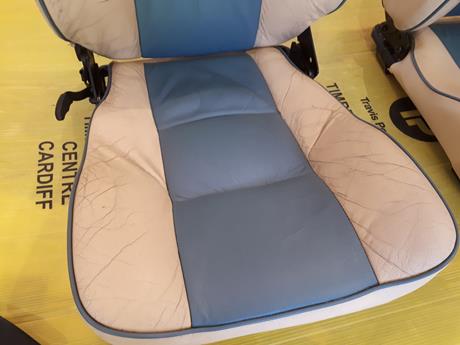
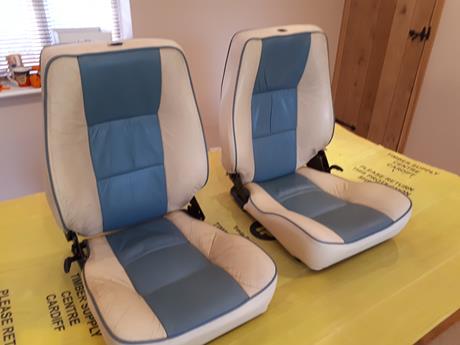
The blue section of the seats were both looking decidedly tired and cracked so I used the Furniture Clinics kit again to clean the seats, fix and seal all the cracks and then very carefully re-colour the blue bits.
Before:

And after. Well pleased with the results.
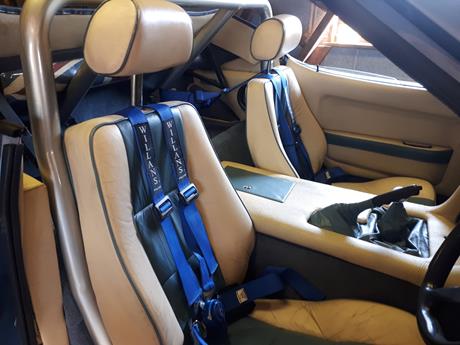
And then the straight forward job of refitting them into the car.
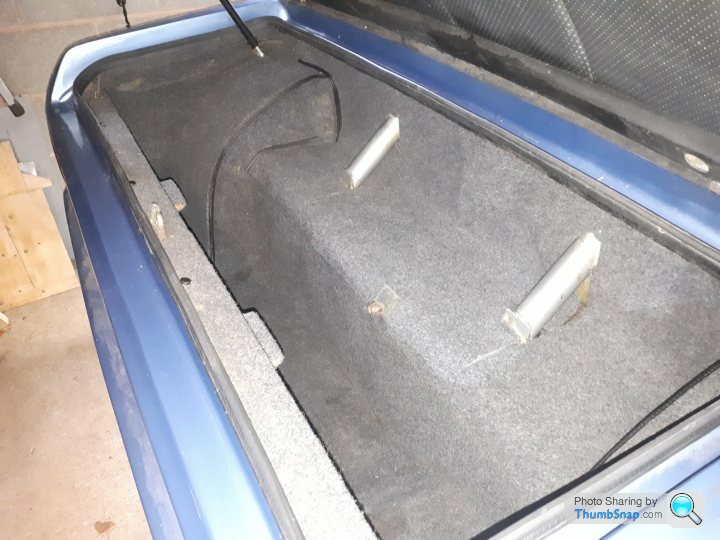
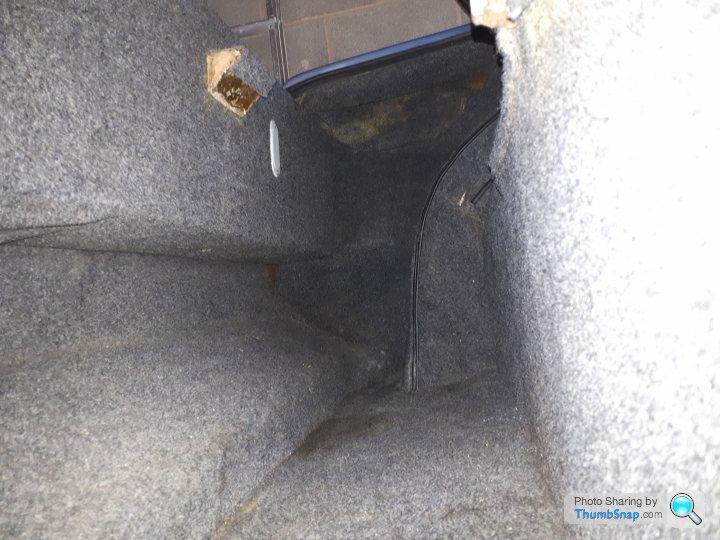
I've refitted the old boot carpet for now, but I will change it for new at some point in the future. All of the interior card liners have been removed at some point in the past to provide more boot space.
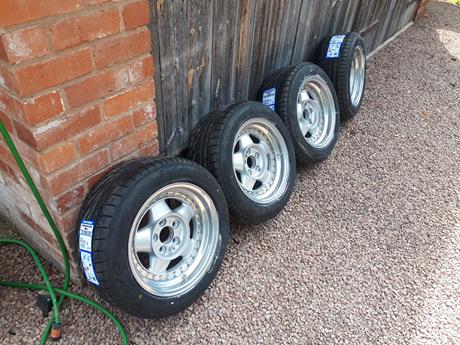
Nearly there. The alloys were tatty so I had them stripped and coated. Rather than going for the usual polished rim and lacquer I went for a chrome look powder coating which hopefully will be more durable. Four new Toyo Proxes TR1's completed the wheels and once fitted the car was dropped down off it's axle stands, where it has been sitting for the last 8 months and driven out of the garage for the first time since I bought the car last September. My lad took the video, so sorry for the aspect change from landscape to portrait!
https://www.youtube.com/watch?v=fZjdquiFgv8
Bonnet was then fitted and a thorough pre-MOT inspection. All good apart from the rear offside wheel which had excessive play in it, so a pair of new rear wheel bearings were ordered. A short crafty drive just out of the village and back was had and this was when I noticed that if I tried a fast gear change or any gear change at high rpm then the synchro crunched. After some investigation I found the gear box remote bushes were shot so new poly bushes ordered up.
Finally the car was handed to my local garage to fit the wheel bearings and remote bushes, because it's easier on their ramps. Work was complete and the car passed its MOT with no advisories. A lengthy hoon down the lanes however and the gearbox synchro issue is still there. I've tried a flush and putting original spec ATF in the box but it's made no difference so at some point I'll have to pull the box out and get it rebuilt. For the time being however it's fine for squirting around as long as I'm a little sympathetic to the gear change. Happy days. Cheers.
So last few jobs were to sort the seats. Firstly I wanted to modify the rear outer seat runner fastening as it was on top of the roll bar mount and a total pain to access.
The blue section of the seats were both looking decidedly tired and cracked so I used the Furniture Clinics kit again to clean the seats, fix and seal all the cracks and then very carefully re-colour the blue bits.
Before:
And after. Well pleased with the results.
And then the straight forward job of refitting them into the car.
I've refitted the old boot carpet for now, but I will change it for new at some point in the future. All of the interior card liners have been removed at some point in the past to provide more boot space.
Nearly there. The alloys were tatty so I had them stripped and coated. Rather than going for the usual polished rim and lacquer I went for a chrome look powder coating which hopefully will be more durable. Four new Toyo Proxes TR1's completed the wheels and once fitted the car was dropped down off it's axle stands, where it has been sitting for the last 8 months and driven out of the garage for the first time since I bought the car last September. My lad took the video, so sorry for the aspect change from landscape to portrait!
https://www.youtube.com/watch?v=fZjdquiFgv8
Bonnet was then fitted and a thorough pre-MOT inspection. All good apart from the rear offside wheel which had excessive play in it, so a pair of new rear wheel bearings were ordered. A short crafty drive just out of the village and back was had and this was when I noticed that if I tried a fast gear change or any gear change at high rpm then the synchro crunched. After some investigation I found the gear box remote bushes were shot so new poly bushes ordered up.
Finally the car was handed to my local garage to fit the wheel bearings and remote bushes, because it's easier on their ramps. Work was complete and the car passed its MOT with no advisories. A lengthy hoon down the lanes however and the gearbox synchro issue is still there. I've tried a flush and putting original spec ATF in the box but it's made no difference so at some point I'll have to pull the box out and get it rebuilt. For the time being however it's fine for squirting around as long as I'm a little sympathetic to the gear change. Happy days. Cheers.
Edited by KKson on Saturday 23 May 14:45
Gassing Station | Wedges | Top of Page | What's New | My Stuff