Dissassembly of Tuscan is complete... what now????
Discussion


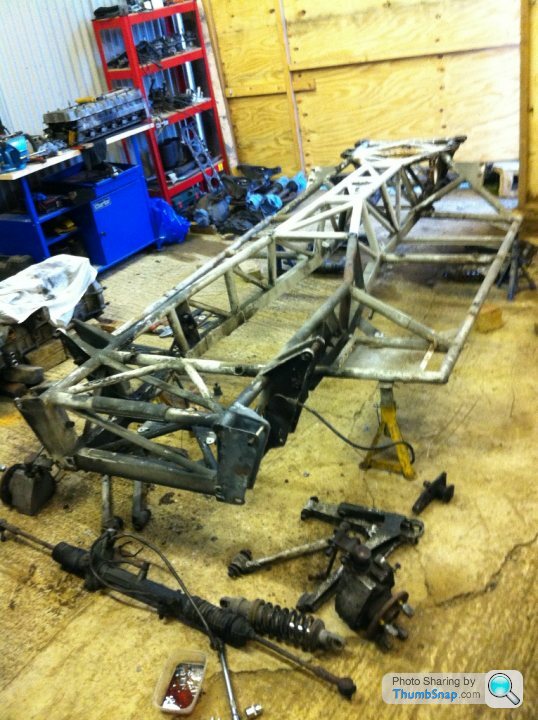
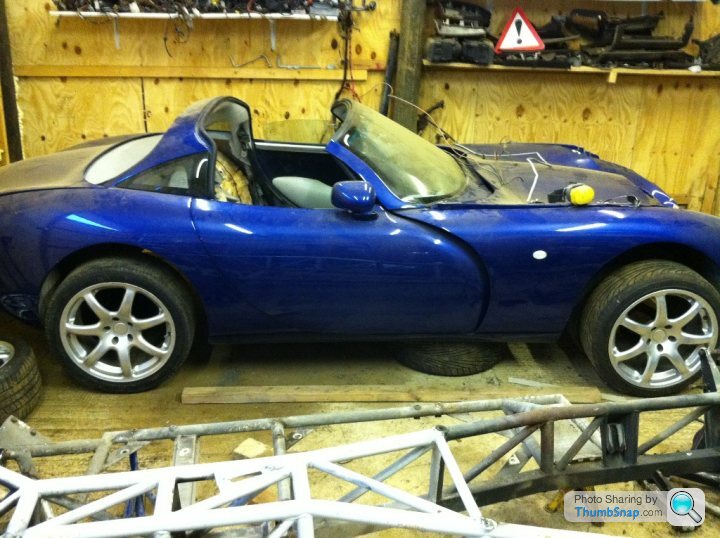
I've now taken my Cad D 2000 year Tuscan appart and now need to clean everything up and restore/replace with new some fo the parts.
What upgrades improvements would you make if you had the chance?
So far my plans are:

What upgrades improvements would you make if you had the chance?
So far my plans are:
- TVR Power Standard rebuild to S/red rose spec
- Stip and Zinc coat chassis and wishbones
- Rebuild Protech shocks
- Fit polybushes all round
- New upgraded clutch and slave cylendar
- Change interior leather colour from grey to grey + black using furniture clinic relocour kit
- Fit Tamora/Sagaris Cluster
- Paint exterior in Lotus Electric Blue/Viper GTS or Red Bull Blue.
- Upgrade performance of the HVAC system
- Bump steer mod (new arm or 8mm raise of rack?)
- Install iPad multimedia interface and high end Audio system
- Heat relective shields in engine bay to cool cabin temps
- Mk2 grill and winglets
- LED taillights and Xenon headlamps
Edited by MPETT on Monday 24th October 22:49
dvs_dave said:
Add to that list Ceramic coat the exhaust manifolds and nearside engine mount bracket. Will reduce heat soak even more and keep engine bay temp down, as well as stopping the engine mount rubber from melting every 5 mins.
Who donyou recconend using and what does it cost? I haven't heard of coating the mount?! Will this work on rubber? I've heard of shields.All great ideas guys and on my radar!! Unfortunately the build costs are on my wife's radar, so have to be reasonable. Base rebuild costs look like £7500. Dream rebuild cost £17000!!!
Off to rt racing to get chassis and wishbones treated!
http://www.youtube.com/watch?v=x8fNUFo-vcA&fea...
Off to rt racing to get chassis and wishbones treated!
http://www.youtube.com/watch?v=x8fNUFo-vcA&fea...
I'd hoped to gte RT racing to look at, repair and paint my chassis. But unfortunatley, the cost just escalated too much for my pocket. See the cost below:
> Bolt kits: £80 pounds
> Wishbone bush kits : £TBC
> 2 hours for the fitting: £100.00 ??
> Shot blasting of chassis and all wishbones £185.00
> Replacement of top tubes where pitted £300.00 6 hrs est
> Remove old bushes from wishbones and prep
up for powder coat £135.00 3 hrs est
> Bead blast, phosphate dip Zink prime and
epoxy powder coat all items & chassis £499.00
This equated to : £1299+vat = £1558.90
So in order to save money I'm going to sand bast the chassis locally and hopfully I can repair the pitted tube (if necessary) and repair the elongated chassis pick up point myself. I should realy get the chassis alignment checked, so perhaps before I paint it, I might take it up to sheffield and get it checked.
I've cleaned up the rear uprights and they don't look too bad. Well they say road grime protects, but in this case it was axle grease that had leaked from the rubber gaitors.
I've also looked at the seats and interior leather, cleaning them as I go. The frame had broken on the driver's bolster, so I had to remove it and I'm going to weld a stronger bracket in place.
Link of the latest tinkering: http://www.photobox.co.uk/album/882129743
Edited by MPETT on Sunday 16th October 23:11

I've just had the chassis and wishbones sand blasted. Got them back and you could see the corrosion forming after just 4 hours. The paint shop gave me a clear paint that seals the metal from the air/preserving its condition. I cut out the corosion that was caused by the proximity to the exhaust manifold then took a look a the wishbone pick up points on the chassis. Upon inspection I identified that there were 2 sets of deformed wishbone mounting points both of which were caused by the wheel being pushed backwards in the impact/accident. I also found a crack between the wishbone mounting plate and the chassis!
What do I do next? I'm not sure I can 100% fix the chassis and get the wisbone mounts fixed and straight. They say a good chassis needs to be within 1mm accurate side to side. Am I being overly perfectionist? I'm also in 2 minds re poly bushes or metalastic. Any thoughts?
The base coat on the wishbones

An example of the bushes condition

The clear coat paint
The chassis rust cut out and replaced
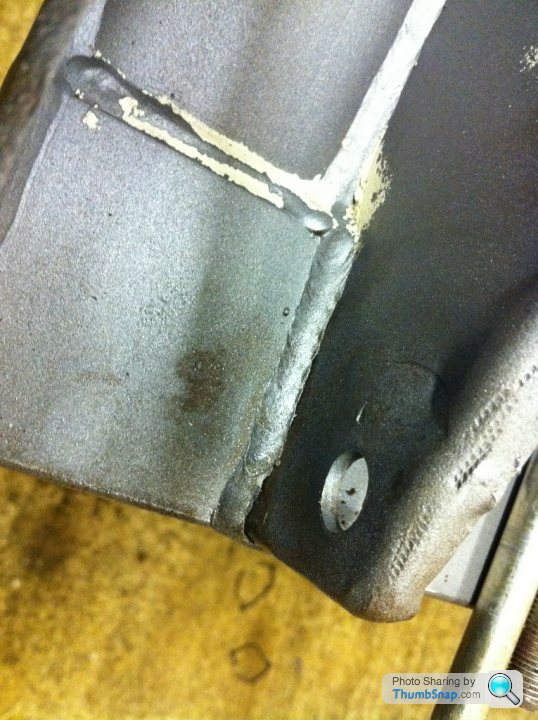
Can you spot the crack in the weld?
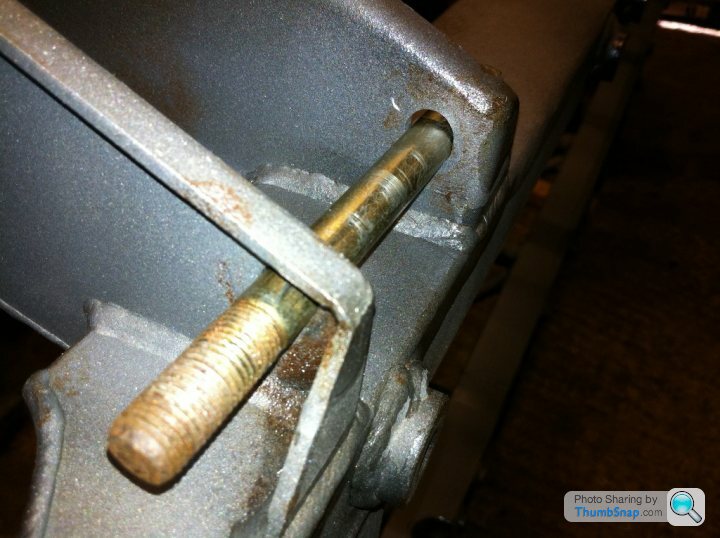
The front pick up point (minus the section of the front pick up point that had stretched)
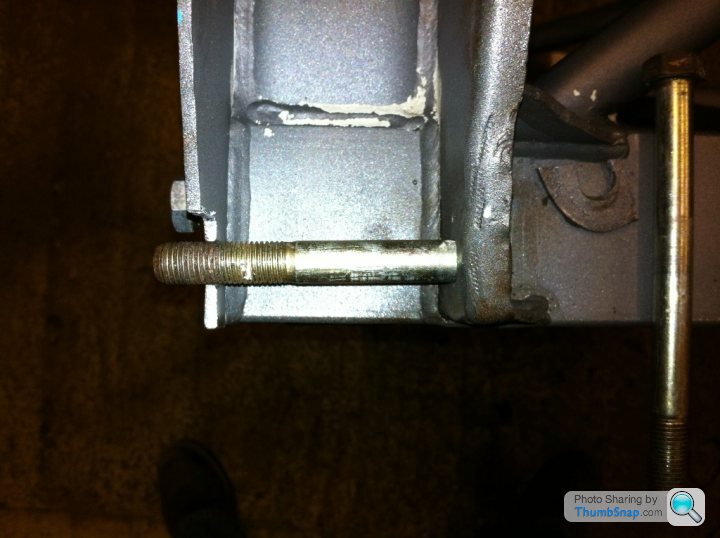
The second front lower wishbone pick up point (stretched bolt hole also)

What do I do next? I'm not sure I can 100% fix the chassis and get the wisbone mounts fixed and straight. They say a good chassis needs to be within 1mm accurate side to side. Am I being overly perfectionist? I'm also in 2 minds re poly bushes or metalastic. Any thoughts?
The base coat on the wishbones
An example of the bushes condition
The clear coat paint
The chassis rust cut out and replaced
Can you spot the crack in the weld?
The front pick up point (minus the section of the front pick up point that had stretched)
The second front lower wishbone pick up point (stretched bolt hole also)
Edited by MPETT on Monday 24th October 22:51
Really? 15mm. I've been trying to digest info re suspension set up (the sports car and kit car suspension and brakes high performance manual) what a mouthful, and that says any more than 3mm difference side to side will make the car impossible to get handling well! The RTRacing jig is meant to be super accurate, so was thinking that might be a necessity for piece of mind whilst the chassis is bare.
Hi guys,
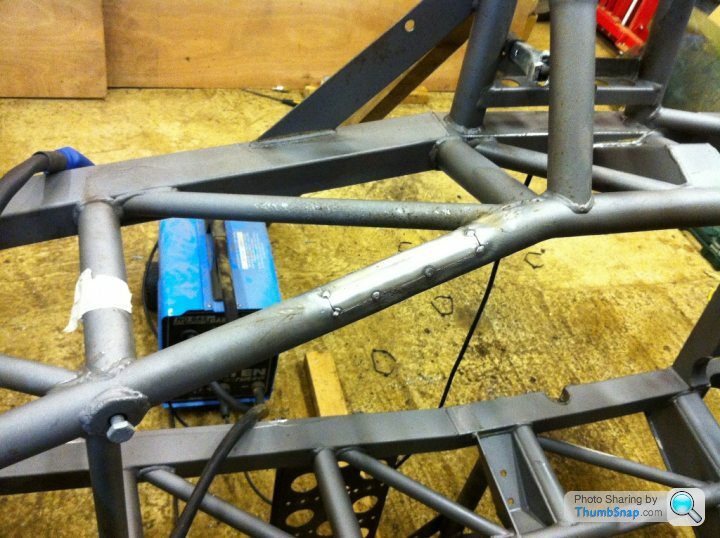
Quick update. Had to make a snap decision and decided to go for the careful measurement and repair route. Having checked the undamaged side and compared it to the accident damaged and repaired side, I concluded that the pick up points were within circa 2mm and that with some metal work a few bits of new plate with bolt holes in them and welded onto the outside of the pick ups, that I would be back in business. Having not had the chance to familiarise myself with my new welder, the welds weren't pretty (always a problem if working against gravity), but they have penetrated properly and will do the job. I've also decided to order standard bushes, rose joint drop links and all new ball joints/track rod ends.
The front lower wishbone mount (front)
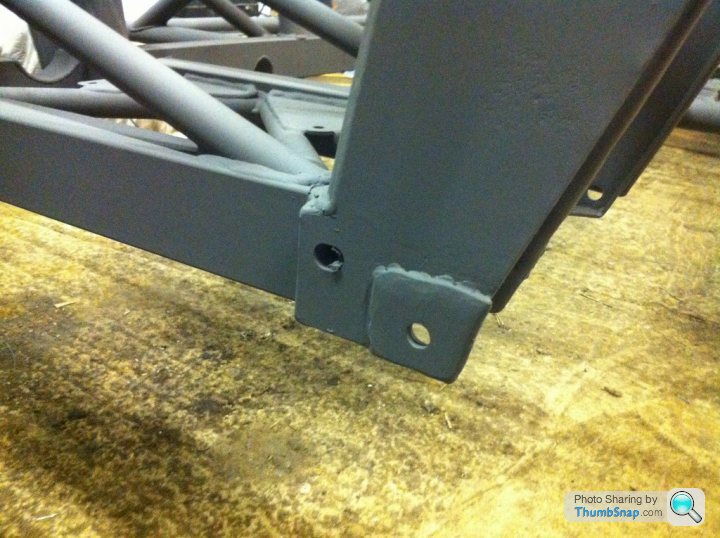
The front lower wishbone mount (rear)

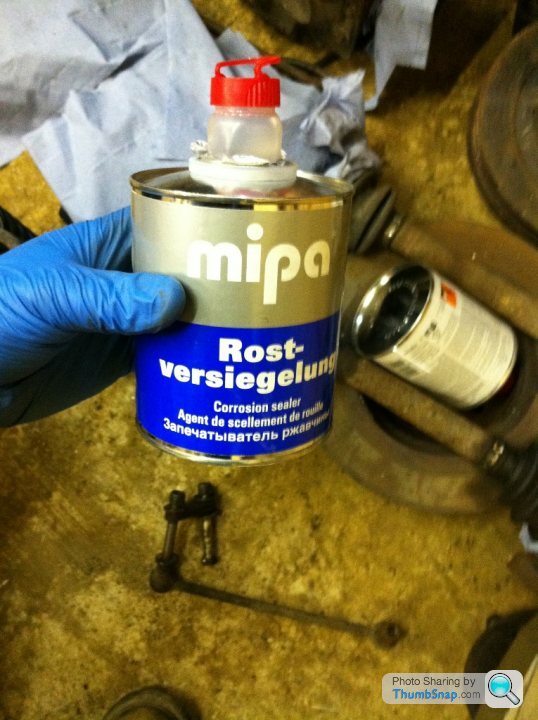
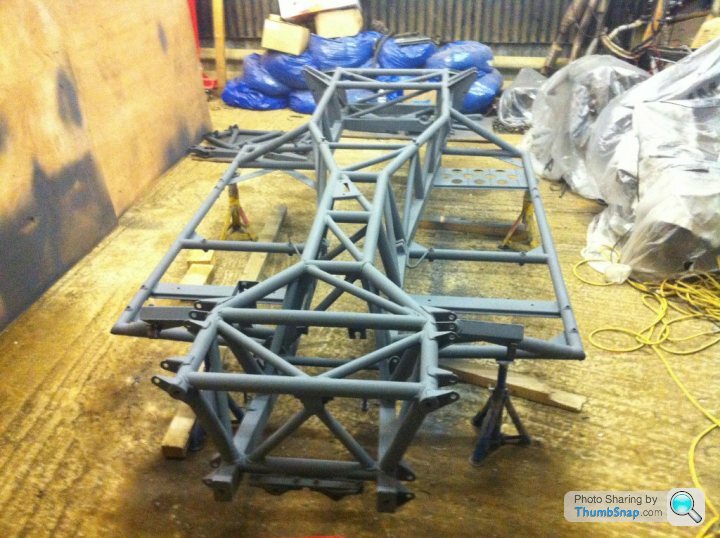
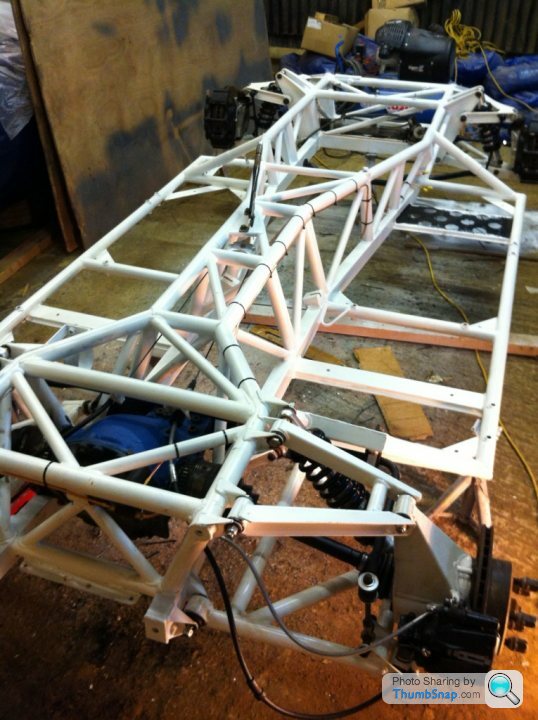
For the chassis protection I was recommended the MIPA range of paints and treatments. The corrosion sealer apparently pulls out any moisture and then seals the metal in a solid coat. I'm then using their 1k etch primer with a normal white top coat. I went on and on about using a Zinc primer, but the chap at the paint shop said that was old hat. Fingers crossed he's right. I don't fancy rebuilding her again for another 15 years! Top coat goes on tomorrow.
Current status:
I've been enquiring about suspension geometry and from what I have read on here and got out of Dom at TVR Power, the standard suspension is just fine if set up right. I had an 04 Tuscan before with the SP spacers. If I can get that level of handling I'll be happy. From what I understand/have been told, the wishbones never changed but they did move the upper ball joint outboard by 10mm and put some extra caster on the uprights. I'm going to get the suspension installed loosely and hang some plub lines from the roof so I can do some static tests to see if my steering rack causes bump steer. There are a number of solutions I've seen/heard of but I suppose it will come down to what I have and how well the rack and wishbone pick up points line up.
I've sent my Protech shocks off for rebuilding. The adjusters had seized on 2 of them, the height adjuster ring had seized on another, requiring a very careful grinding operation, the bodies are fluffy with aluminium oxide and most of the rose joints are corroded. Having said that the shafts looked clean and there was no weeping from the seals, so fingers crossed the £35 per shock quote is accurate!
Quick update. Had to make a snap decision and decided to go for the careful measurement and repair route. Having checked the undamaged side and compared it to the accident damaged and repaired side, I concluded that the pick up points were within circa 2mm and that with some metal work a few bits of new plate with bolt holes in them and welded onto the outside of the pick ups, that I would be back in business. Having not had the chance to familiarise myself with my new welder, the welds weren't pretty (always a problem if working against gravity), but they have penetrated properly and will do the job. I've also decided to order standard bushes, rose joint drop links and all new ball joints/track rod ends.
The front lower wishbone mount (front)
The front lower wishbone mount (rear)
For the chassis protection I was recommended the MIPA range of paints and treatments. The corrosion sealer apparently pulls out any moisture and then seals the metal in a solid coat. I'm then using their 1k etch primer with a normal white top coat. I went on and on about using a Zinc primer, but the chap at the paint shop said that was old hat. Fingers crossed he's right. I don't fancy rebuilding her again for another 15 years! Top coat goes on tomorrow.
Current status:
I've been enquiring about suspension geometry and from what I have read on here and got out of Dom at TVR Power, the standard suspension is just fine if set up right. I had an 04 Tuscan before with the SP spacers. If I can get that level of handling I'll be happy. From what I understand/have been told, the wishbones never changed but they did move the upper ball joint outboard by 10mm and put some extra caster on the uprights. I'm going to get the suspension installed loosely and hang some plub lines from the roof so I can do some static tests to see if my steering rack causes bump steer. There are a number of solutions I've seen/heard of but I suppose it will come down to what I have and how well the rack and wishbone pick up points line up.
I've sent my Protech shocks off for rebuilding. The adjusters had seized on 2 of them, the height adjuster ring had seized on another, requiring a very careful grinding operation, the bodies are fluffy with aluminium oxide and most of the rose joints are corroded. Having said that the shafts looked clean and there was no weeping from the seals, so fingers crossed the £35 per shock quote is accurate!
Just done a quick tot up for the work planned in the next 2 months and I wished I'd not worked it out. I sold my mint 2004 Tuscan for £17,750.
Cat D Tuscan: £7000
Engine Rebuild: £4500 (self fitting)
Clutch: £500
Bushes and chassis rebuild/paint: £1000
Reconditioned shocks: £360
Paint: £2000 est
Carpets: £500
Bodywork repair: £800
Bodywork race car mod: £800
Total= £17460
Awe BOLL*CKS! I've forgot a set of 4 tyres and I haven't even started thinking about the electronic gysmos I wanted to put in!
Any ideas how I can save some cash?? I could try and paint it myself,but that's the bit everyone sees and if that looks pants....
All good points lads. Will have to be careful and save where it makes sense to save and spend where the cost bs. Tome benefit allows. Not sure about rnd rebuild. I know Dom and that warrantee is a BIG draw to his offering. No one else offers this and it's reliability is proven.
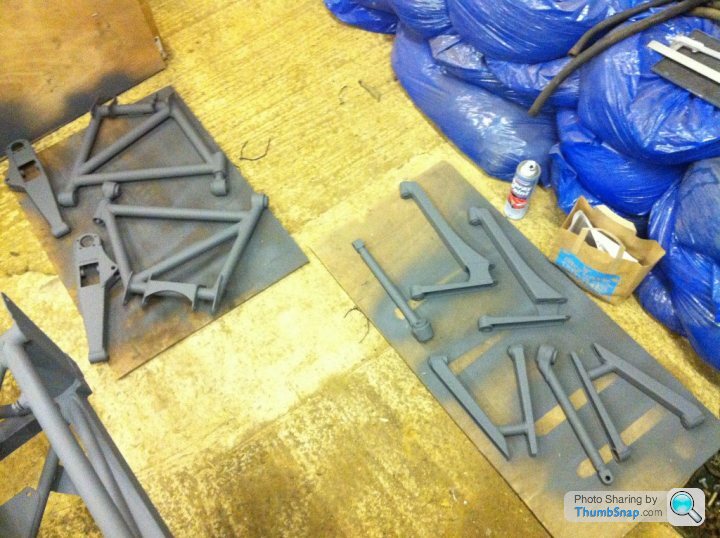
Just been getting the bushes out if the wishbones. Of course in my keenest to get paint on the bare sandblasted metal I have now got to sand down the scratched caused by the battle with the bushes and repaint. I have however found a technique that I will share with everyone on another post that hopefully I will have fully mastered before I fininsh the job resulting in a few non scratched wishbones!
Finally got done more paint so I can finish off painting the chassis! Pics to follow


Walford said:
Would be easy to sort out camber caster KPI bump steer,
I built a 2001 Tuscan (back to its origanal geo) from a salvage car, and was very disapointed when i got it on the road
had to take it back into workshop and sort it out
So What did you do to it? I was thinking about rasiing the rack by 10mm and exchanging the track rod ends for rose joints and artificially rasing the steering arm pivot point. I'm not sure if this would be cheaper than buying and fitting a Straight6 steering arms?I built a 2001 Tuscan (back to its origanal geo) from a salvage car, and was very disapointed when i got it on the road
had to take it back into workshop and sort it out
Any thoguhts welcomed!
Walford said:
First thing i would do is find out which hubs, top wishbone and rack lengh you have got
also would take a springs off set in around 5 deg castor and 1 deg of camber tracking to zero, at ride hieght
and move the hubs up and down 40mm from ride hight and measure track and camber
first with the steering straight ahead and then 10 and 20 deg of lock
Hi Grant,also would take a springs off set in around 5 deg castor and 1 deg of camber tracking to zero, at ride hieght
and move the hubs up and down 40mm from ride hight and measure track and camber
first with the steering straight ahead and then 10 and 20 deg of lock
I think I follow but perhaps a phone call would make this clearer. The floor in my barn ain't that flat so would need some straight edges/angle iron sections.
I'll pm you my number and perhaps we could discuss tonight?
Cheers,
Martin
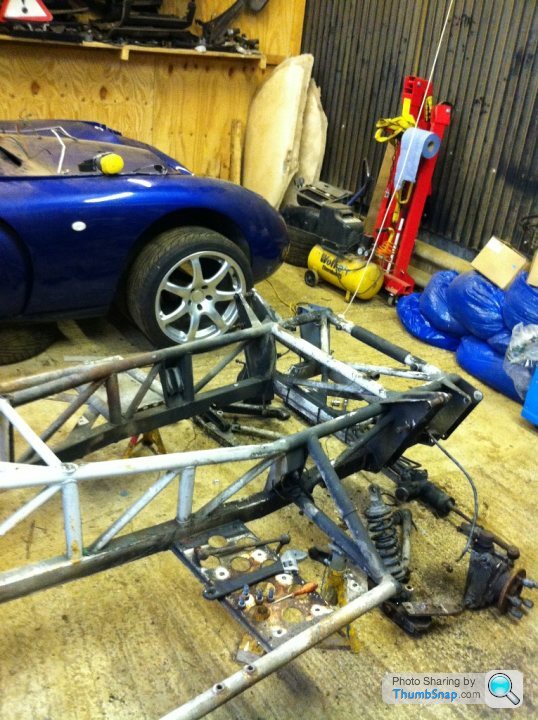
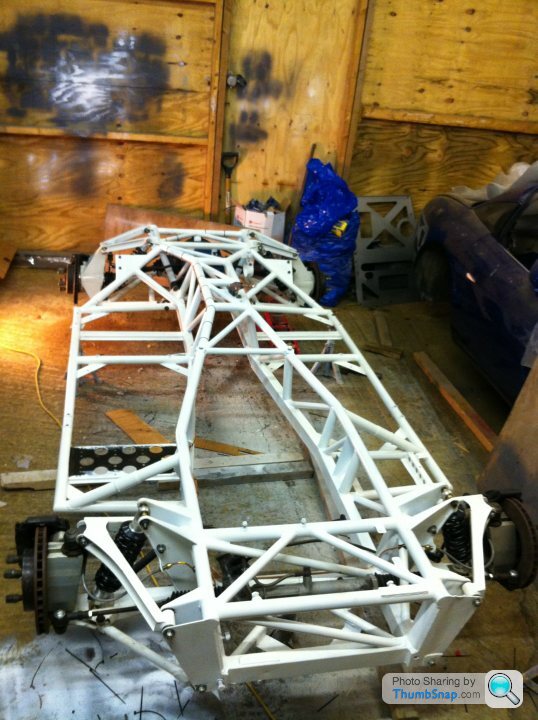
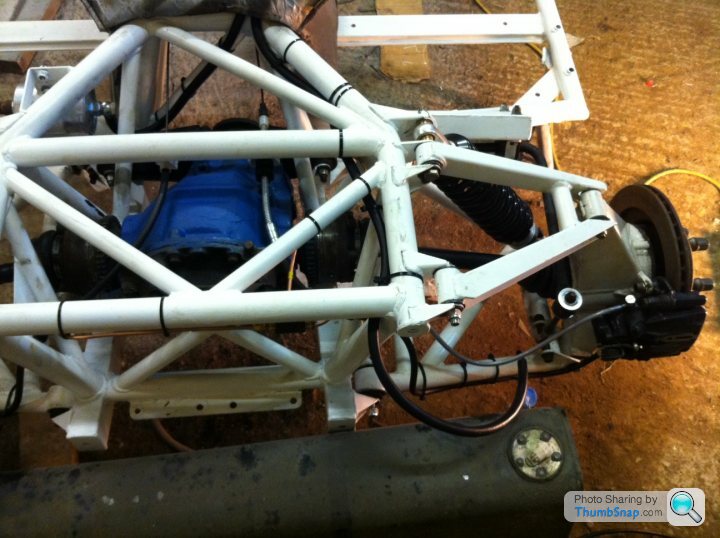
The rolling chassis is almost there! Wishbones all fitted, CV joints cleaned and repacked with grease, diff and driveshafts fitted, new brake lines fitted (I worked with automec (jsmith@automec.co.uk) measured my brake lines, test fitted and documented with pics, so they can now offer a kit for the T-series chassis cars). I just need to fit a new fuel pump and filter, skim the discs, buy new pads and buy/fit new front upper shocker bolts. I figure most of this can be done at a later date, so that I can get the body on and start refitting the wiring.
Some of you may have read my other thread on supension?
http://www.pistonheads.co.uk/gassing/topic.asp?h=0... front suspension facts and experiment
Can anyone else comment on their suspension set up on their pre march 2001 Tuscans or on their pre 2001 Cerberas and what they have done to make the car feel more planted/less nervous? I've fitted 4mm spacers as a halfway house solution to the bump steer issue. This appears to reduce bump steer except in the extremes of nearing max bump and max droop. However, ultimatley I think I will upgrade to the later wishbones, upright ball join position and steering rack/track rods.
I have a few question for the TVR PH community....
Does anyone have any advice re where I can find a new fuel pump and filter?
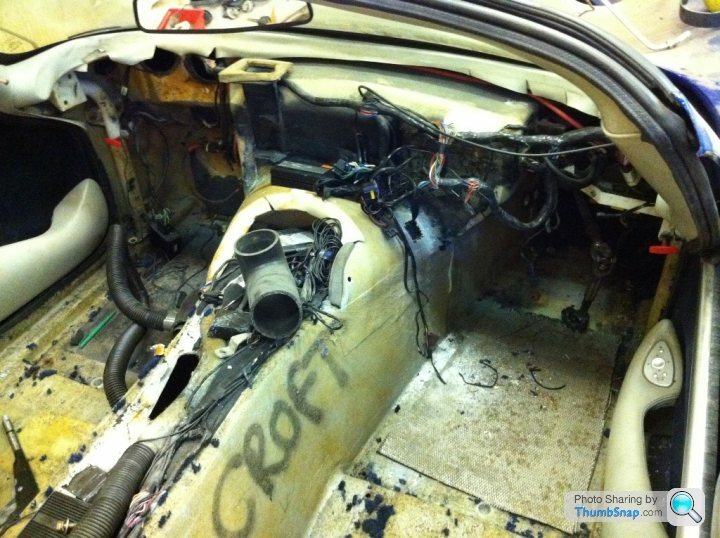
Does anyone have photos of the fuel line routing? I seem to have forgotten to photgrah them when I dissassembled my car!
I was also thinking about the engine rebuild. I figured I could reassemble everything, fit the body, repair and repaint the body and leave the engine and gearbox out. I could then deliver the engine and gearbox to Power and when rebuilt I could deliver the rebuilt car for them to fit the engine into it. Does anyone think this might cause any issues?
All advice, words of caution and encouragement always welcomed!
Cheers,
Martin
Some of you may have read my other thread on supension?
http://www.pistonheads.co.uk/gassing/topic.asp?h=0... front suspension facts and experiment
Can anyone else comment on their suspension set up on their pre march 2001 Tuscans or on their pre 2001 Cerberas and what they have done to make the car feel more planted/less nervous? I've fitted 4mm spacers as a halfway house solution to the bump steer issue. This appears to reduce bump steer except in the extremes of nearing max bump and max droop. However, ultimatley I think I will upgrade to the later wishbones, upright ball join position and steering rack/track rods.
I have a few question for the TVR PH community....
Does anyone have any advice re where I can find a new fuel pump and filter?
Does anyone have photos of the fuel line routing? I seem to have forgotten to photgrah them when I dissassembled my car!
I was also thinking about the engine rebuild. I figured I could reassemble everything, fit the body, repair and repaint the body and leave the engine and gearbox out. I could then deliver the engine and gearbox to Power and when rebuilt I could deliver the rebuilt car for them to fit the engine into it. Does anyone think this might cause any issues?
All advice, words of caution and encouragement always welcomed!
Cheers,
Martin
I've checked the bump steer at straight ahead and a different degrees of lock and it's OK if the suspension doesn't compress too much. The middle 70% of travel gives little bump oversteer/understeer, it's when you go below ride height (droop) and hit large bumps/ corner very hard that the wheel will not be pointing where they should relative to the steering lock you've applied. Solution 1 is to make the suspension very stiff, thereby minimising travel. Solution 2 is to upgrade the suspension, rack and upright to the later specs to get the better geometry.
I've added 4mm to my steering rack height which I think is the best compromise for the standard early geo, but I'm not that happy.
So, if anyone knows where I can get hold of the later upper wishbones, uprights and a later steering rack, please let me know.
If you want a more detailed description of the bump steer work I've been doing, check out my other thread.
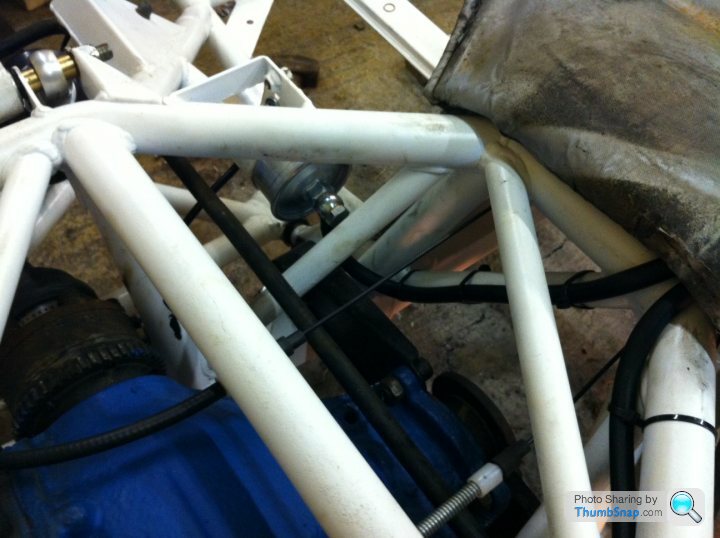
Managed to work the original route out! I'm replacing the 8mm ID hard walled fuel hose with rubber high pressure (8mm ID and 14mm OD) hoses for the fuel pipes from the pump to the injectors and the return to the tank. I am however re-using the original hard pipe that allows the tank to breathe through the carbon canister in the front O/S wing/nose. Just have to check that there is a bit of space between the top of the chassis and the tub so that they don't get pinched up and restrict fuel flow.

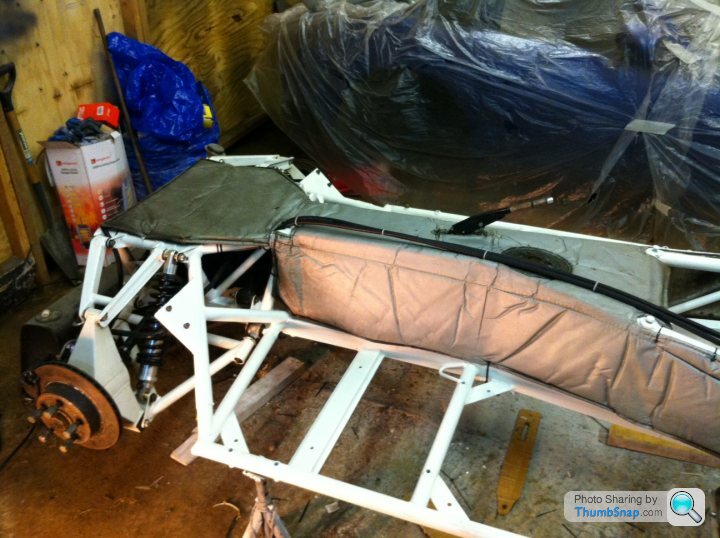
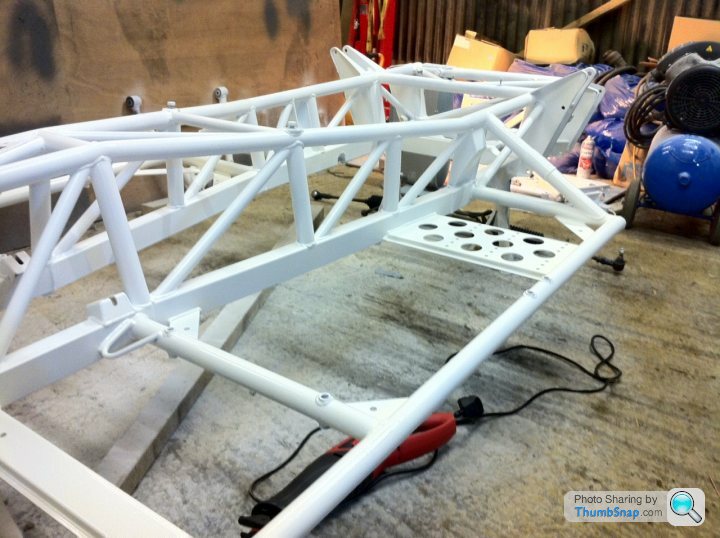
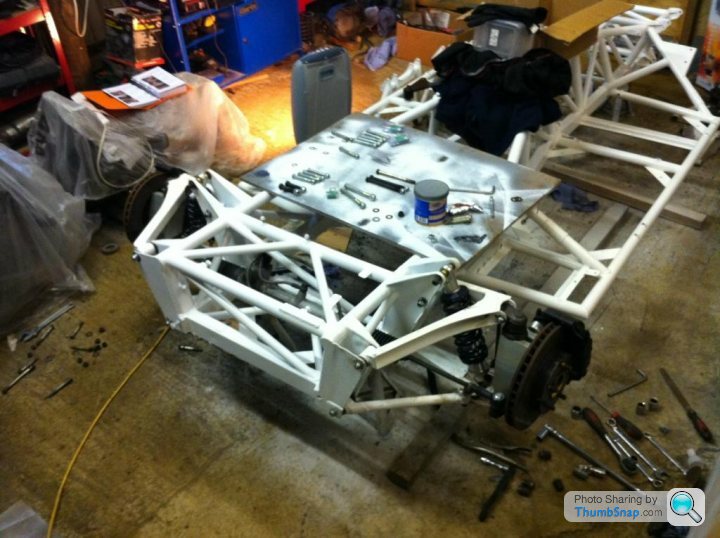
TOUCHDOWN!!! Finally the chassis is done! All bolts torques up, copper slip applied. Fuel lines in place and heat mat cleaned (as best I could). I still need the exhaust heat reflecting pannel. Does anyone know where I can buy some/have any advice?
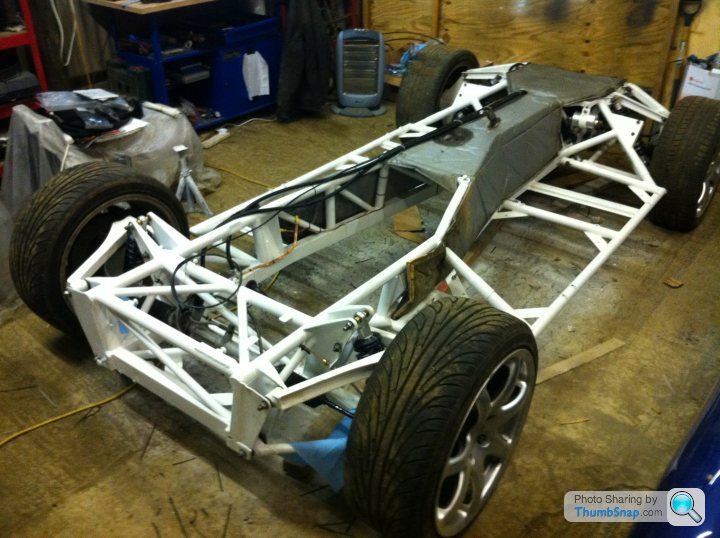
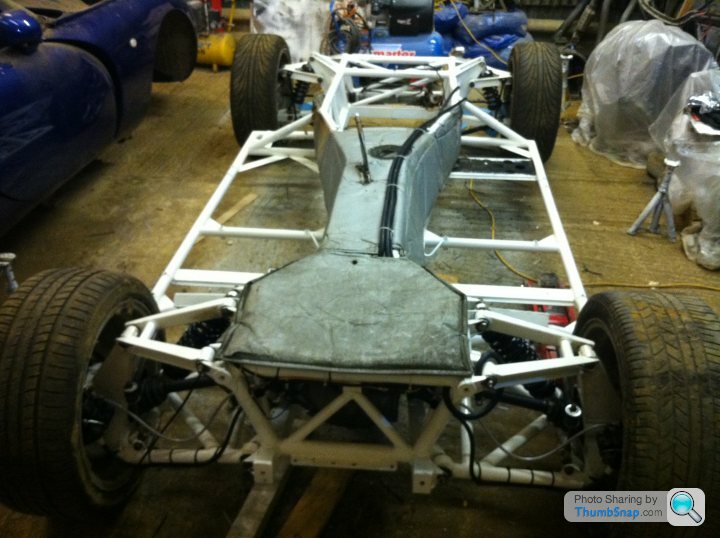
She is now ready for the body to go back on and be sent to plasticman for her repair.
Gonna have to round up the lads to lift the body back on. I had an S body shell for a while and that was a lot lighter than this one! (Apparently they used less layers in the S shells to make them lighter).
She is now ready for the body to go back on and be sent to plasticman for her repair.
Gonna have to round up the lads to lift the body back on. I had an S body shell for a while and that was a lot lighter than this one! (Apparently they used less layers in the S shells to make them lighter).
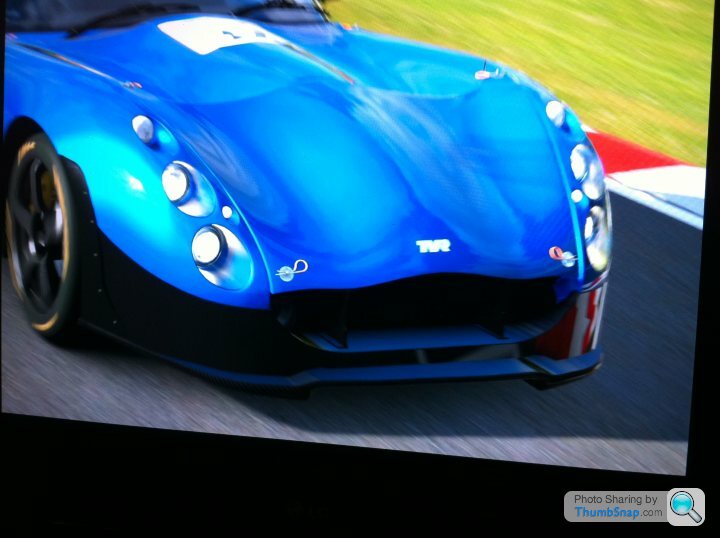
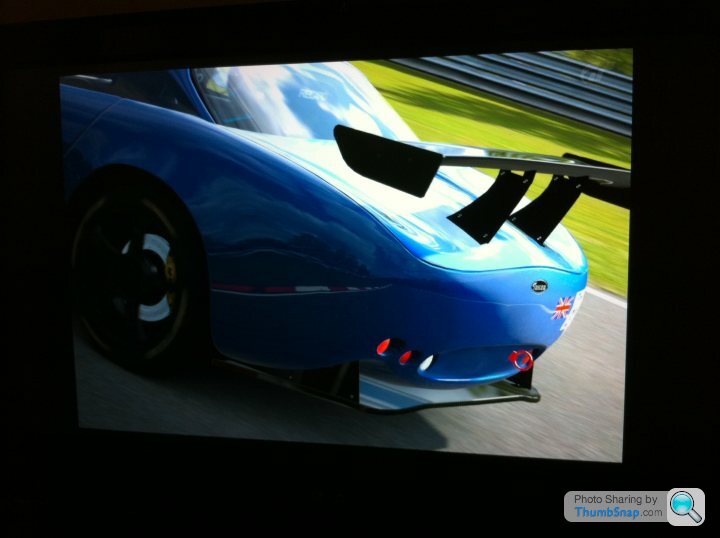
I need your help to choose the front end repair design for me. I love all the designs!! I've started a poll.
http://www.pistonheads.com/gassing/topic.asp?h=0&a...
http://www.pistonheads.com/gassing/topic.asp?h=0&a...
Gassing Station | General TVR Stuff & Gossip | Top of Page | What's New | My Stuff