Tamiya 1:72 Mosquito FB Mk.VI
Discussion


So with renewed enthusiasm after being somewhat drained by the 617 Sqdn. Tornado GR4, it’s time to tackle the next kit on my list: the Tamiya Mosquito in 1:72 scale. I thought starting a build thread would motivate me to at least get on with the preliminary research, but more on that later...

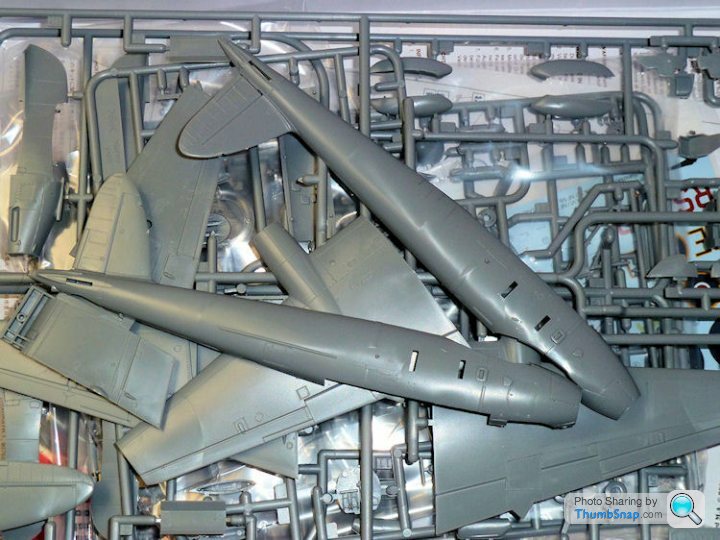
Usual Tamiya quality, looks like little or no filler will be needed, which is a good job in this case...
I also went for the simple Eduard etch set, Master Model brass machine guns, and as an experiment in time saving (ha ha) a set of Eduard pre-cut canopy masks:

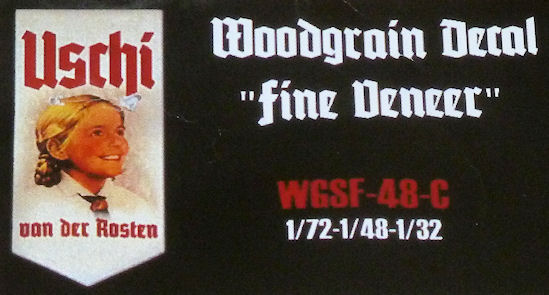
Even though the Mosquito is undoubtedly a beautiful aircraft, in model form I think it can often look a bit bland and “seen one seen them all” –ish. Maybe it’s because of the lack of surface detail to break up the wooden airframe skins, I don’t know. So I’ve decided to finish mine in unpainted form, just a bare wood finish with the appropriate bits finished in aluminium, steel and fabric. I realise that this would never be possible (or extremely unlikely) in real life due to the way the aircraft was assembled and finished, but the idea is to give an impression of the different materials used in construction. I’ve seen a couple of Mosquito models either semi, or completely finished like this, but none are particularly accurate as far as I can tell. Anyway, with all this in mind, I got some Uschi woodgrain decals (bit unsure about the Hitler Youth imagery, but hey ho):
And I’ll be using these in conjunction with the oil paint method of simulating woodgrain on certain features, as I did on my WnW SE.5a here:
...and Vallejo Air Silver (for the ailerons, elevators, nacelles, various fairings and covers), a CDL colour (for the rudder, which was fabric covered), and Vallejo Air Steel (for the forward cockpit armour). The Interior will be painted as normal, as will the propellers.
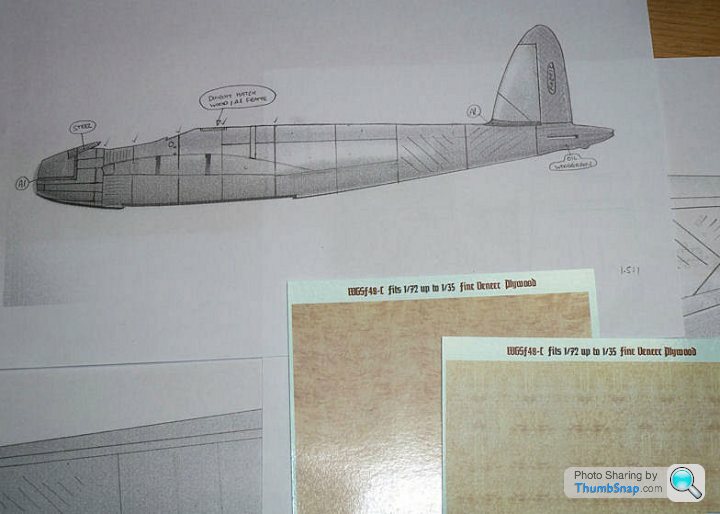
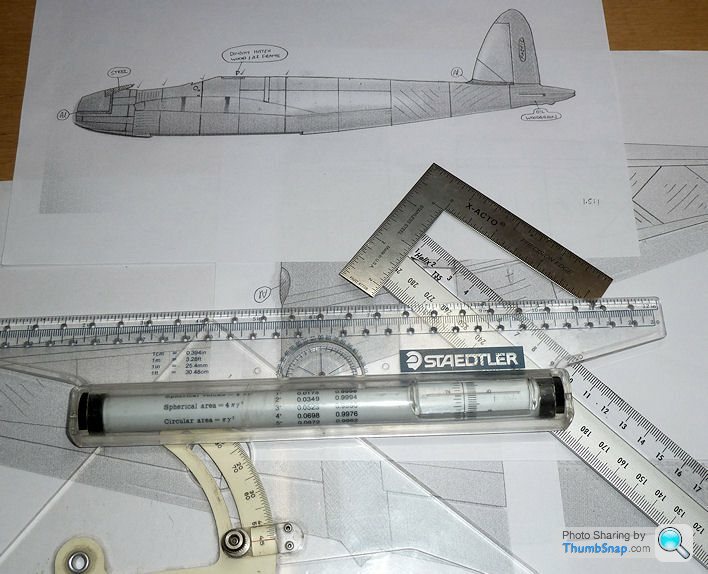
So I’ve made a start by sketching the various panels onto photographs of the kit fuselage and wings. It’s not at all easy to figure out the panel breaks from reference photographs, but I’m getting there. In reality there would be hundreds of white dots all over the skins where the outer ply sheets were screwed and the heads filled, but I’ll not be including these:
Wish me luck!
Usual Tamiya quality, looks like little or no filler will be needed, which is a good job in this case...
I also went for the simple Eduard etch set, Master Model brass machine guns, and as an experiment in time saving (ha ha) a set of Eduard pre-cut canopy masks:
Even though the Mosquito is undoubtedly a beautiful aircraft, in model form I think it can often look a bit bland and “seen one seen them all” –ish. Maybe it’s because of the lack of surface detail to break up the wooden airframe skins, I don’t know. So I’ve decided to finish mine in unpainted form, just a bare wood finish with the appropriate bits finished in aluminium, steel and fabric. I realise that this would never be possible (or extremely unlikely) in real life due to the way the aircraft was assembled and finished, but the idea is to give an impression of the different materials used in construction. I’ve seen a couple of Mosquito models either semi, or completely finished like this, but none are particularly accurate as far as I can tell. Anyway, with all this in mind, I got some Uschi woodgrain decals (bit unsure about the Hitler Youth imagery, but hey ho):
And I’ll be using these in conjunction with the oil paint method of simulating woodgrain on certain features, as I did on my WnW SE.5a here:
...and Vallejo Air Silver (for the ailerons, elevators, nacelles, various fairings and covers), a CDL colour (for the rudder, which was fabric covered), and Vallejo Air Steel (for the forward cockpit armour). The Interior will be painted as normal, as will the propellers.
So I’ve made a start by sketching the various panels onto photographs of the kit fuselage and wings. It’s not at all easy to figure out the panel breaks from reference photographs, but I’m getting there. In reality there would be hundreds of white dots all over the skins where the outer ply sheets were screwed and the heads filled, but I’ll not be including these:
Wish me luck!
johnS2000 said:
I shall be watching this and hoping to learn lots especially as I've got photo etch for 3 different air craft 
Good luck Dr
Ta! I'll be learning too since I've never used woodgrain decals before. A quick test showed that they don't like masking tape at all. The order of how to finish it will be important I think...Good luck Dr
Mutley said:
dr_gn said:
Mutley said:
Sounds promising Doc. Am now looking forward to another super Doc build
Have you been to the DeHavilland museum at London Colney?
I've not been there, but as suggested by someone on BM, I've emailed them asking about a few areas I can't find clear reference images for.Have you been to the DeHavilland museum at London Colney?
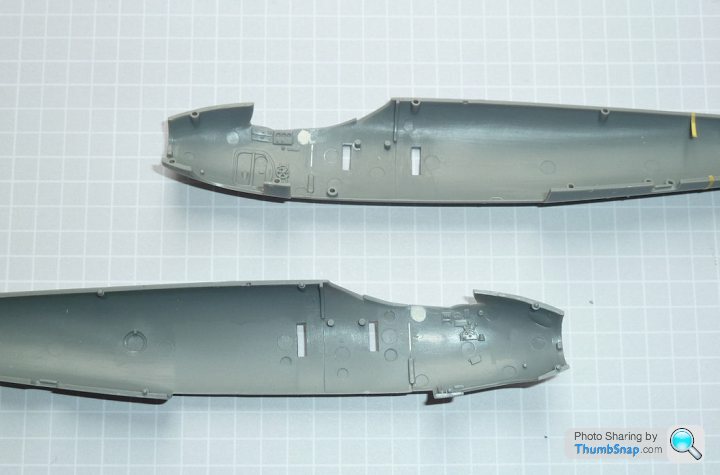
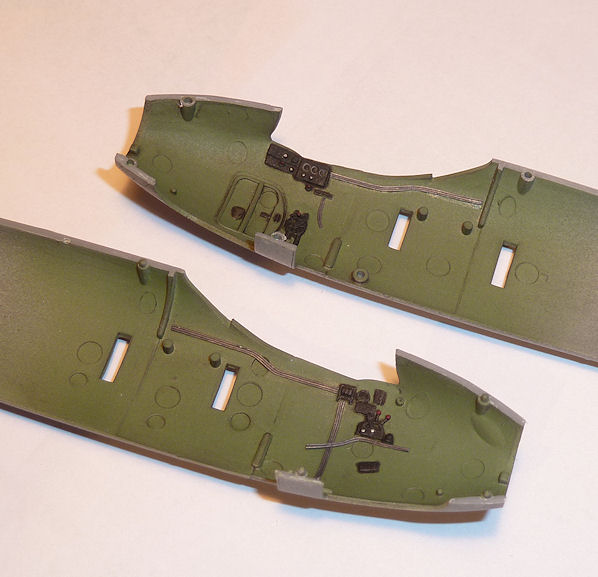
So I made a start on trimming and fitting the main sub-assemblies together. I'll be deviating from the kit assembly plan quite considerably in order to make the woodgrain decal demarcations easier. This is where a perfect fit of the main components is important - no way I can use filler. Since there was a longitudinal split down the fuselage on the real thing, my intention is to finish each half, then join together during final assembly. Time will tell if this was a good idea. At least if the decals don't work first time, I can strip the whole thing and start again with the minimum of hassle.
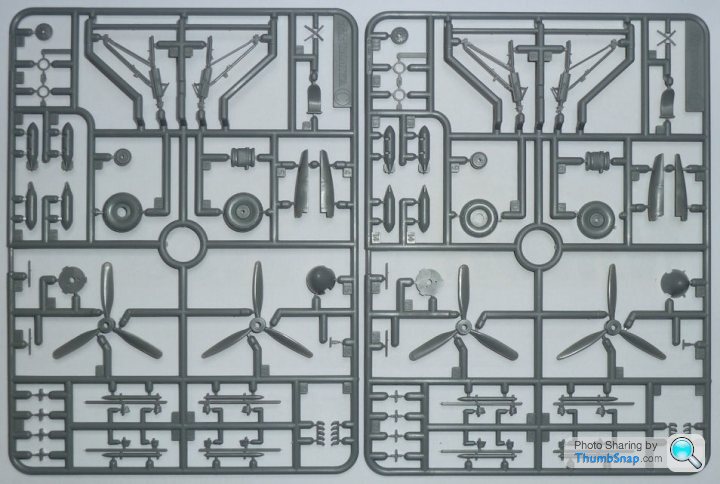
Two identical "C" sprues for each nacelle, strangely they've moulded four identical propellers:
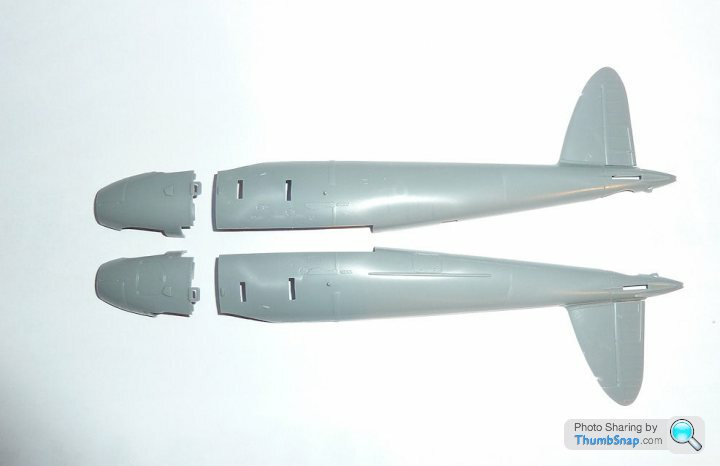
Fuselage halves are split to allow different nose versions. Again, the front sections snap into place leaving little sign of a join:
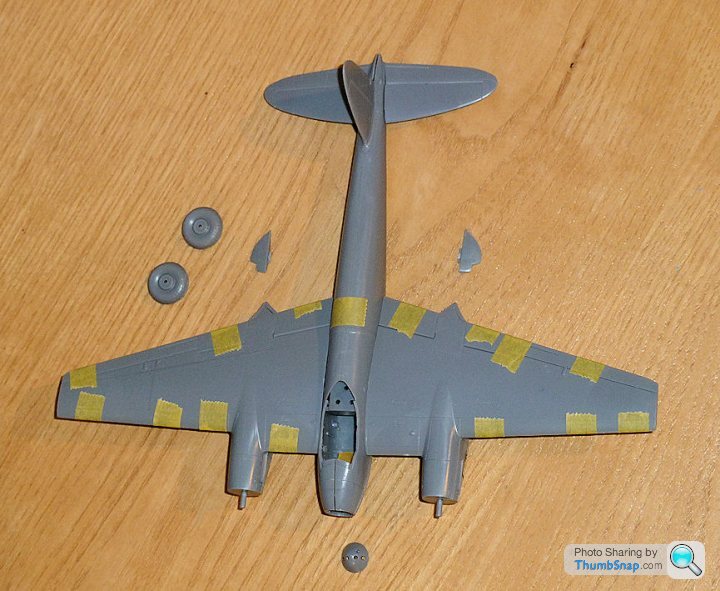
Progress so far - wings, nacelles and nose sections glued together, all taped together dry to check fit:
Two identical "C" sprues for each nacelle, strangely they've moulded four identical propellers:
Fuselage halves are split to allow different nose versions. Again, the front sections snap into place leaving little sign of a join:
Progress so far - wings, nacelles and nose sections glued together, all taped together dry to check fit:
I guess I convinced myself that this wouldn't be that difficult to do. But it actually is.
First off: Do some test pieces for woodgrain decals and oil paints, then compare results.
Decals: Paint and preshade base colours:
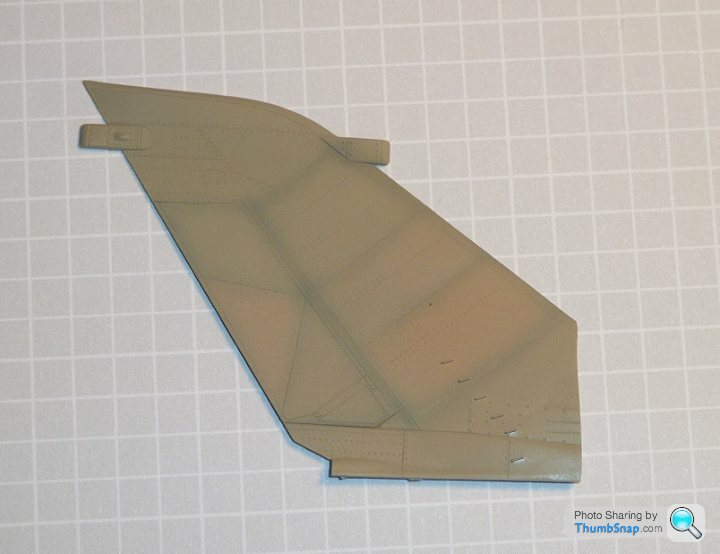
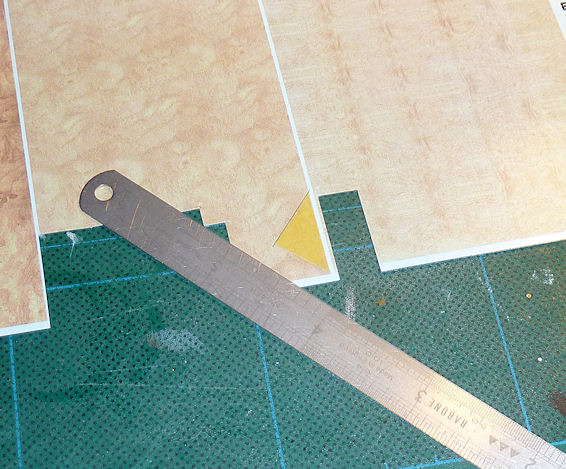
Then cut a mask for the panel:
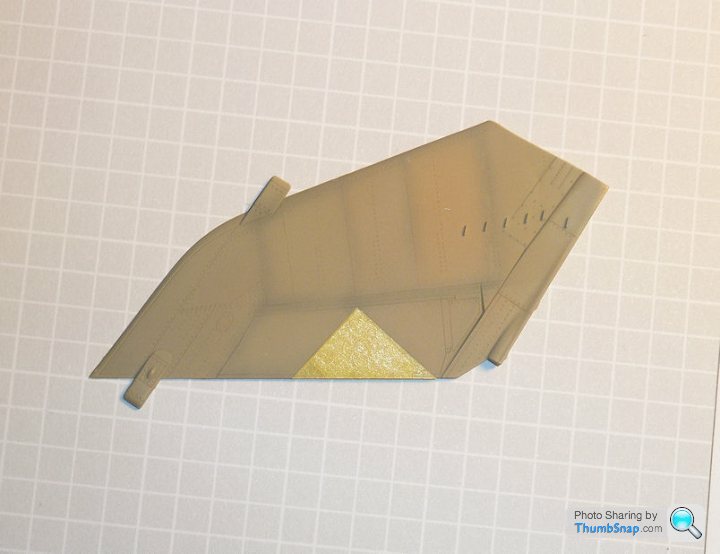
Transfer to the decal paper:
Cut out and apply decal (+repeat):
Oils:
Basecoat, preshade, mask and than add wavy lines of oil paint:
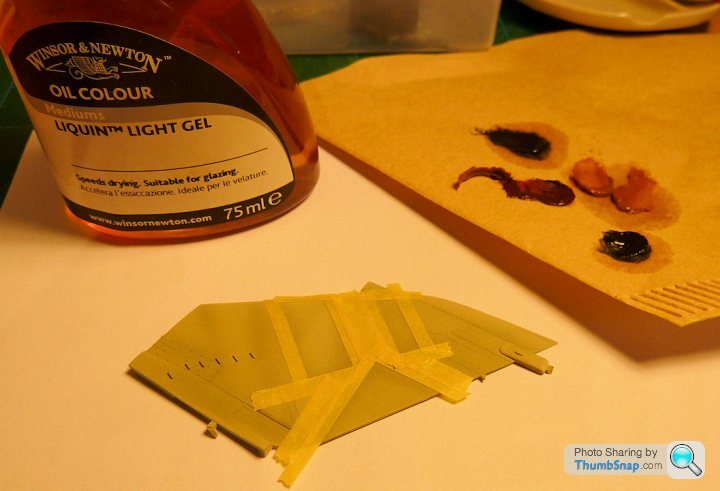
Results:
So the decals tended to blister, and they are not as nice a colour (too pink IMO). The woodgrain effect is very nice, although there is no long grain decals so I can't get the herringbone effect apparent on certain adjacent panels. Alex from UvdR has offered to try and print some long grain to try, so we will see how it goes. One big problem with the decals would appear to be cutting them around small access panels which need to remain base colour (silver). The decals are extremely fragile, so masking and painting these bits last would be a very risky business.
The oil paint method looks nice enough, but takes ages to dry (although I've experimented with W&N Liquin this time to try and speed it up), and again it's a very fragile finish and more masking is needed becasue each panel needs masking and painting individually. However, I've found that small details can be msked over with latex and the oil paint removed very easily, then cleaned up if necessary with white spitit on a fine brush.
So...pros and cons for both methods. I'm erring towards hand painting in oils, but I do like the grain of the decals...
First off: Do some test pieces for woodgrain decals and oil paints, then compare results.
Decals: Paint and preshade base colours:
Then cut a mask for the panel:
Transfer to the decal paper:
Cut out and apply decal (+repeat):
Oils:
Basecoat, preshade, mask and than add wavy lines of oil paint:
Results:
So the decals tended to blister, and they are not as nice a colour (too pink IMO). The woodgrain effect is very nice, although there is no long grain decals so I can't get the herringbone effect apparent on certain adjacent panels. Alex from UvdR has offered to try and print some long grain to try, so we will see how it goes. One big problem with the decals would appear to be cutting them around small access panels which need to remain base colour (silver). The decals are extremely fragile, so masking and painting these bits last would be a very risky business.
The oil paint method looks nice enough, but takes ages to dry (although I've experimented with W&N Liquin this time to try and speed it up), and again it's a very fragile finish and more masking is needed becasue each panel needs masking and painting individually. However, I've found that small details can be msked over with latex and the oil paint removed very easily, then cleaned up if necessary with white spitit on a fine brush.
So...pros and cons for both methods. I'm erring towards hand painting in oils, but I do like the grain of the decals...
Lotus 50 said:
This is going to look amazing when finished, but, at risk of being pedantic (well, OK not "at risk" just being pedantic!) weren't Mosquitos more or less completely covered with fabric over the ply skin before painting? - So in effect wouldn't an unpainted airframe would simply be an off white, linen colour?
Come on..keep up! 
dr_gn said:
I realise that this would never be possible (or extremely unlikely) in real life due to the way the aircraft was assembled and finished, but the idea is to give an impression of the different materials used in construction.
As far as I can tell, the bare surface wood (which whould be peppered with thousands of white dots where the screw heads were filled flush) would be covered with cloth/dope, then given a primer layer, then an aluminised paint for uv protection, then the final paint coats.Lotus 50 said:
Ah, OK, apols read your post too quickly! I think you're right re the finishing. Aside from the light weight the other thing that amazed me about the construction of the skin was the relative thickness of the different woods - a very thin inner and outer skin (can't remember which wood was used for this) with a relatively thick balsa core so the overall skin is quite thick.
Anyway, looking forward to seeing the final result!
I think it was Douglas Fir veneer sandwiching Balsa wood. Exactly the same concept as carbon/foam sandwich in more modern applications: The skins take most of the loads, the low density core keeps them separated giving more stiffness:weight.Anyway, looking forward to seeing the final result!
Edited by Lotus 50 on Sunday 7th June 09:36
Incidentally I still can't find any comprehensive diagrams showing the complete break-down and orientatons of the outer skins, so I'm having to make some assumptions.
Thanks for that ^^ I'll have a read through it later. I'm intrigued by the angle/masking comment. I wonder if it's something to do with getting the right degree of feathering on the demarcations? Mosquitos do seem to have less well defined edges than Spitfires or Hurricanes of the same era.
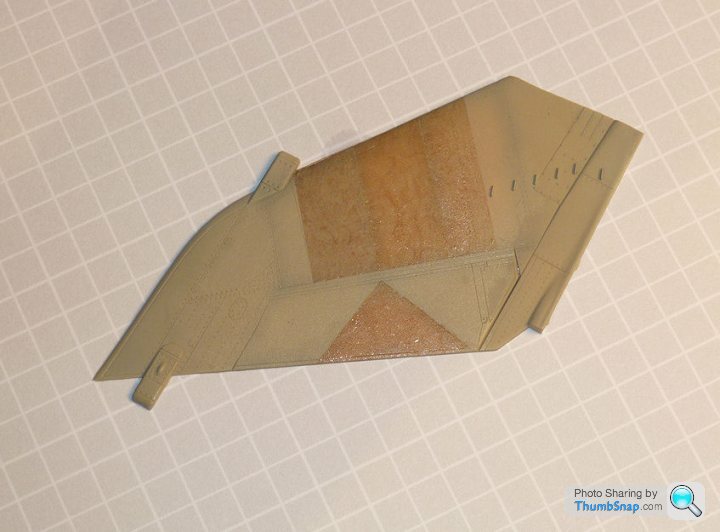
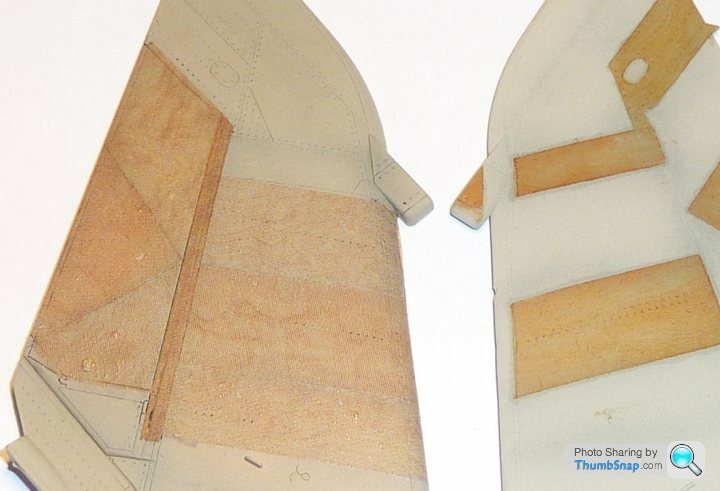
So this illustrates the problems I have with oil paint woodgrain (and why I was keen to try decals):
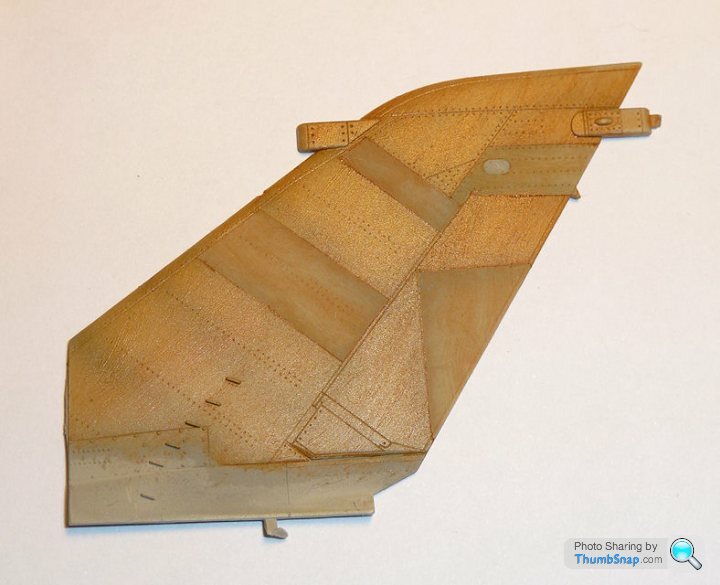
The first panels I did (the lighter ones) were masked off and more oils applied in another direction.
1) It's very difficult to judge the amount of oil paint to remove during the graining process. The second panels are much darker than the first, even though I assumed they'd look similar. As it stands there is too much contrast for my liking.
2) Even though I used Liquin drying medium again, the paint hasn't dried. The first panels went matt within a few minutes, whereas these look like they could take weeks to set, judging by how similar they look to my SE.5a parts did (in terms of sheen). Obviously there can be no masking before the oil is fully cured.
So there you go. I wondered whether to try using enamels instead of oils for the grain, after all its a dissimilar paint to the acrylic basecoat, and has the same thinners, but they dry predictably...so why not? In fact why use oils over enamels in the first place - it's not like oils are widely used in model aircraft modelling to start with?
A long way to go with this one I think.
AER said:
dr_gn said:
Incidentally I still can't find any comprehensive diagrams showing the complete break-down and orientatons of the outer skins, so I'm having to make some assumptions.
This might help some - https://www.facebook.com/pages/Mosquito-Aircraft-R...
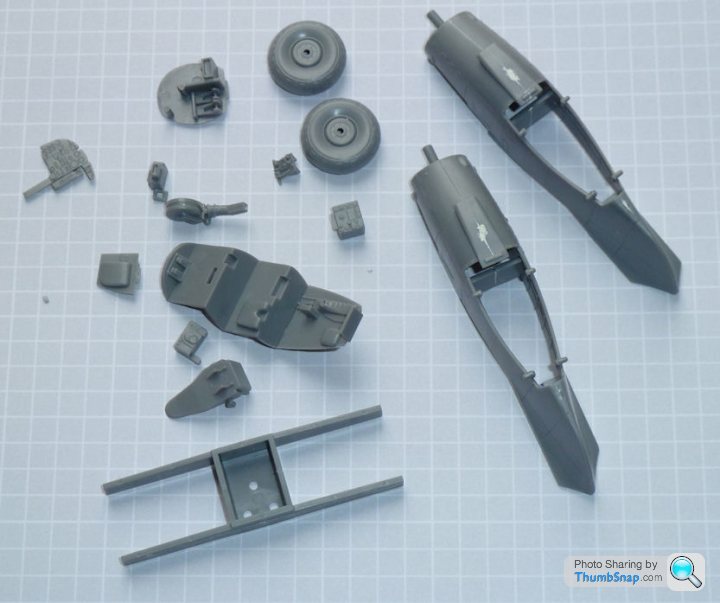
I'm still figuring out the subtleties of woodgrain (Alex from UvdR has been very helpful with this), so in the meantime I made a start on cleaning up cockpit parts and assembling the engine nacelles etc. There are a few ejector pin marks still to fill in the wheel wells, and I'm not sure if the ones in the cockpit are covered by random bits of office furniture or not, but it looks OK so far:
EskimoArapaho said:
4321go said:
It might just be the photo, but those props don't look the same. Each sprue seems to have one broad-chord prop and one with a narrower chord and more pointed tips.
I agree, and my guess: the two different types of propellor are supplied to allow the builder to do either an accurate static model or an accurate in-flight model. Because de Havilland put that clever variable pitch thingummy* in the Mosquito. Dr_gn - I've got half a dozen random photos from the museum - I could email if you like?
* Sort of like an early version of VTEC, right?
Yes, 4321 was right, they are different: Early and late versions. The physical shape of the blade wouldn't change with pitch, each blade just rotates about it's axis.
EskimoArapaho said:
dr_gn said:
Sure, I'd love to see the pics - please pm me and I'll give you my email.
Yes, 4321 was right, they are different: Early and late versions. The physical shape of the blade wouldn't change with pitch, each blade just rotates about it's axis.
PM sent. I thought the photo might be showing the same blade shape just presented at a different angle to the camera. But I sit corrected. Yes, 4321 was right, they are different: Early and late versions. The physical shape of the blade wouldn't change with pitch, each blade just rotates about it's axis.
sad61t said:
Hi dr_gn,
There's a brief shot of a part built Mosquito at a Canadian museum here:
https://youtu.be/ZE8d3ChFuAM?t=17m10s
At about 17:20 it is shown in what looks like bare wood finish, they are using all the actual materials and an authentic manufacturing process. More info here: http://www.ch2a.ca/#!mosquito/c1tsl
Thanks very much - the second link has some great references.There's a brief shot of a part built Mosquito at a Canadian museum here:
https://youtu.be/ZE8d3ChFuAM?t=17m10s
At about 17:20 it is shown in what looks like bare wood finish, they are using all the actual materials and an authentic manufacturing process. More info here: http://www.ch2a.ca/#!mosquito/c1tsl
I'm making progress - just painting all the bits that aren't wwod finish like wheels, cockpit etc., ready to fir onece the airframe is finished, plus doing the same in parallel with the Spitfire.
Bit of progress:
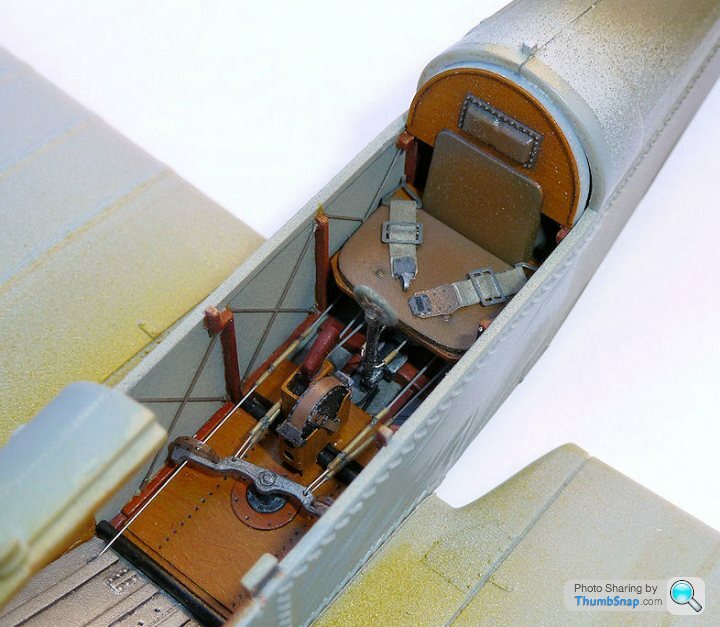
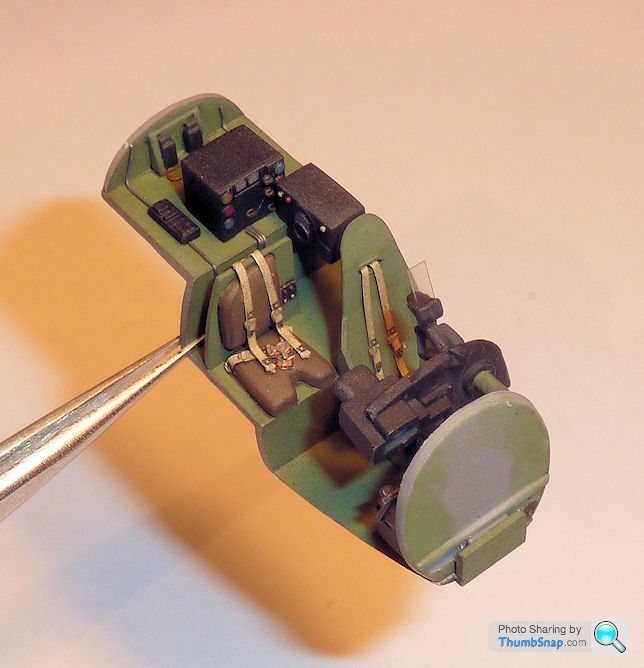
Cockpit partially complete - I added Eduard pre-painted harnesses, since the kit decals look a bit crap:
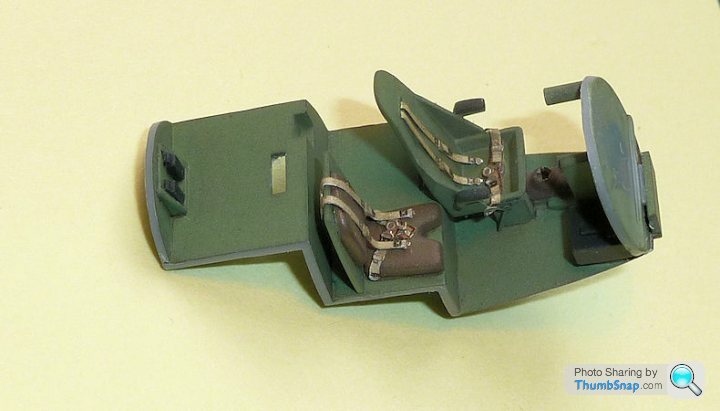
Cockpit sides painted - all the ejector marks will not be seen once complete:
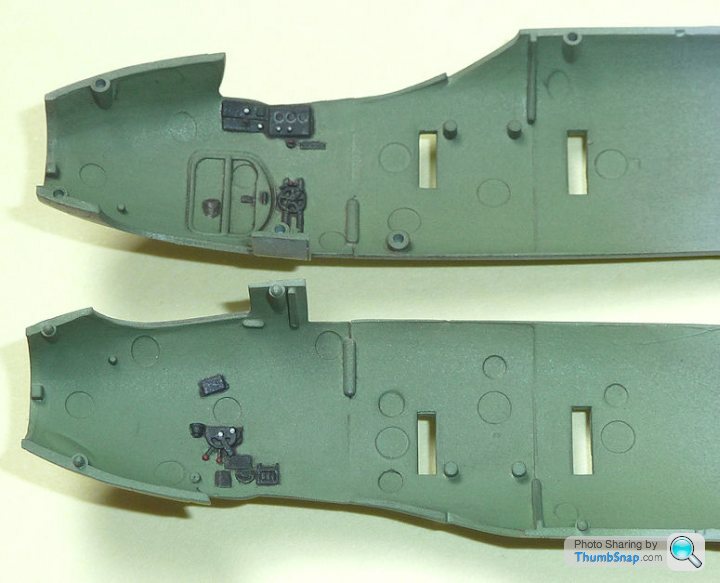
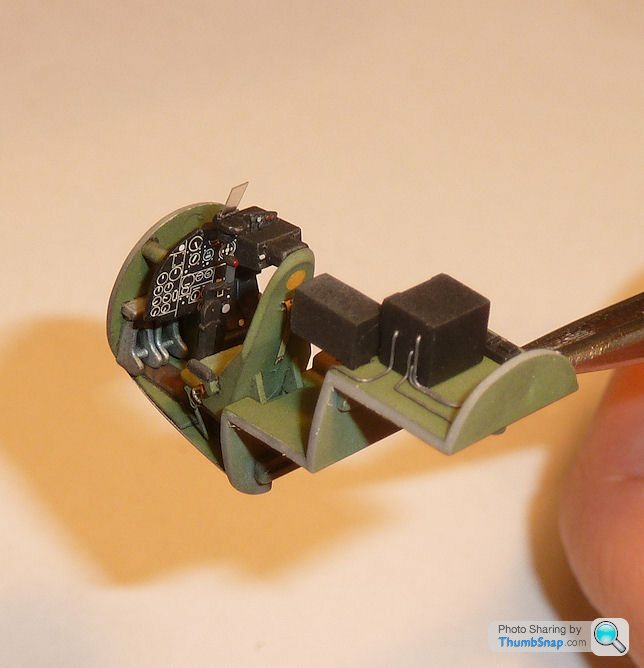
Radio Tx & Rx and electical panels painted:

Just need the instrument panel finishing, and a few wires adding and that will do - it's not a super-detal job.
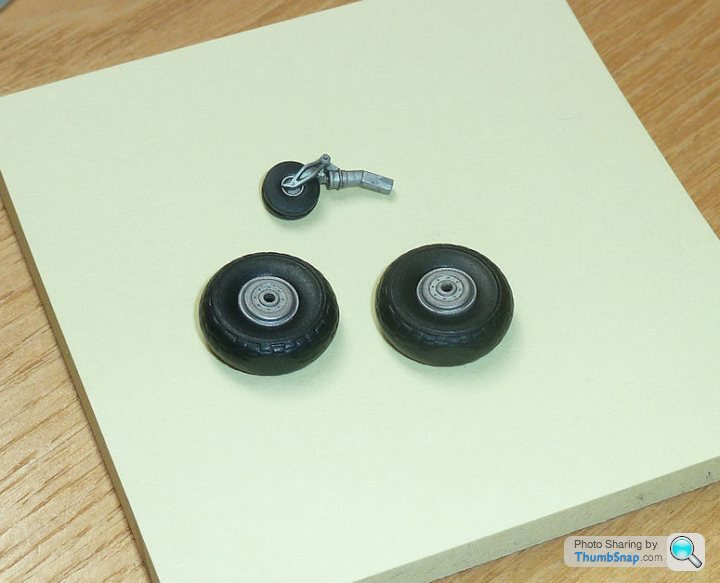
And the wheels (filed some flats on them), which need a coat of matt varnish:
Then get the fuselage assembled...
Cockpit partially complete - I added Eduard pre-painted harnesses, since the kit decals look a bit crap:
Cockpit sides painted - all the ejector marks will not be seen once complete:
Radio Tx & Rx and electical panels painted:
Just need the instrument panel finishing, and a few wires adding and that will do - it's not a super-detal job.
And the wheels (filed some flats on them), which need a coat of matt varnish:
Then get the fuselage assembled...
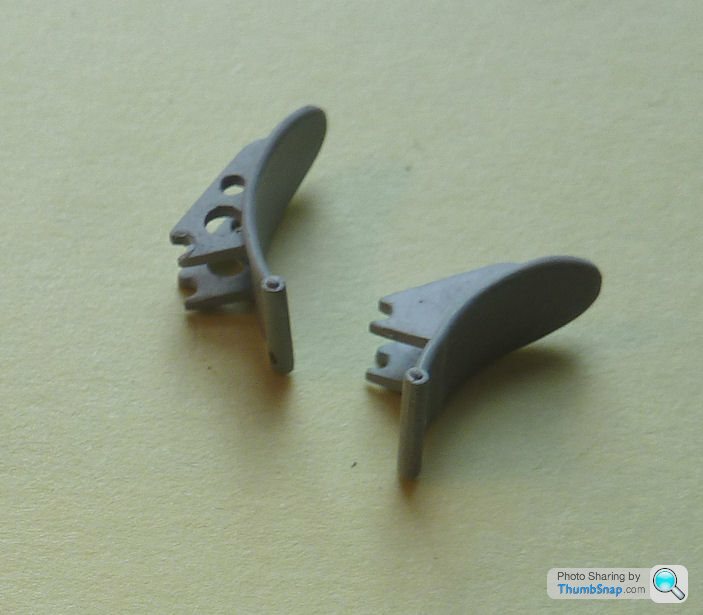
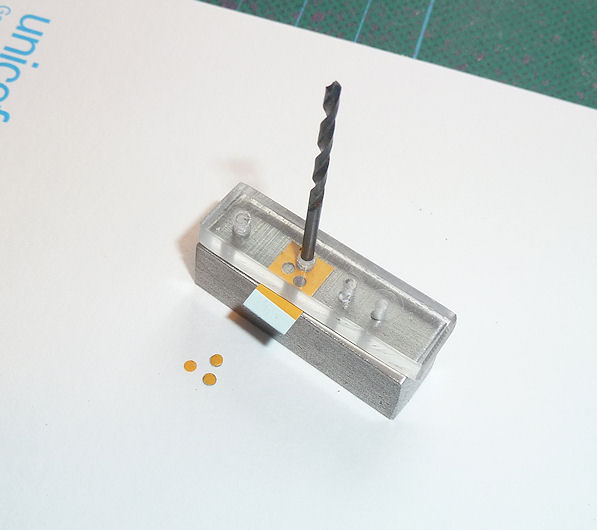
Started to drill out the mudguard brackets in accordance with Eskimo's reference pics:
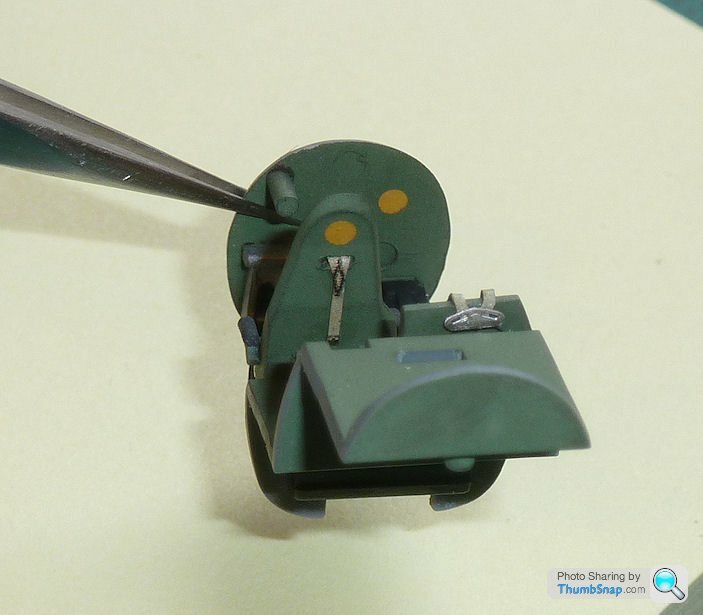
And made a start on the instruments. Good illustration of why aftermarket parts can increase the complexity and duration of a build by several orders of magnitude - the Eduard blind flying instrumet panel didn't have an apaerture for the gunsight to be fitted, and once identified and modified to the extent needed to fit, it looked terrible:
So I've opted to go for the original decal for the main panel, and the Eduard stuff for the peripheral bits. In fact the decal is probably better in this case, since the low-contrast Eduard acetate instruments would be pretty much invisible under the panel cover.
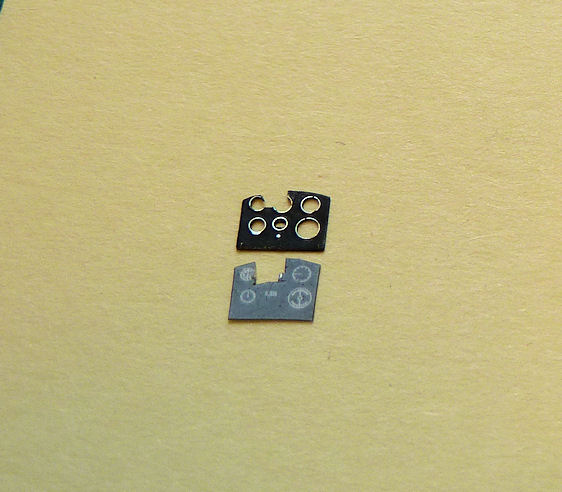
I pressed my home made punch and die set into action again to make some yellow circles for the pilot's seat and bulkhead. There should be one behind the navigator's set too, but it's covered up in this case). I believe the markings are to indicate ferrous or armoured parts within the cockpit, although I think their true function has been lost in the mists of time:
And made a start on the instruments. Good illustration of why aftermarket parts can increase the complexity and duration of a build by several orders of magnitude - the Eduard blind flying instrumet panel didn't have an apaerture for the gunsight to be fitted, and once identified and modified to the extent needed to fit, it looked terrible:
So I've opted to go for the original decal for the main panel, and the Eduard stuff for the peripheral bits. In fact the decal is probably better in this case, since the low-contrast Eduard acetate instruments would be pretty much invisible under the panel cover.
I pressed my home made punch and die set into action again to make some yellow circles for the pilot's seat and bulkhead. There should be one behind the navigator's set too, but it's covered up in this case). I believe the markings are to indicate ferrous or armoured parts within the cockpit, although I think their true function has been lost in the mists of time:

Gassing Station | Scale Models | Top of Page | What's New | My Stuff