Tamiya 1:24 Ferrari F40
Discussion


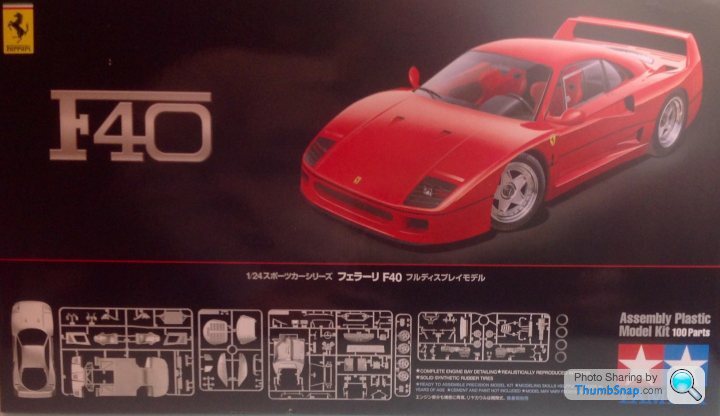
I have really enjoyed my last couple of car builds, so have a few more planned. First on the bench (getting into the lingo) is Tamiyas F40. From first impressions I assume it's an older kit as the quality isn't close to the MX5 I built last. Still looks good though with a fully detailed engine bay and interior.
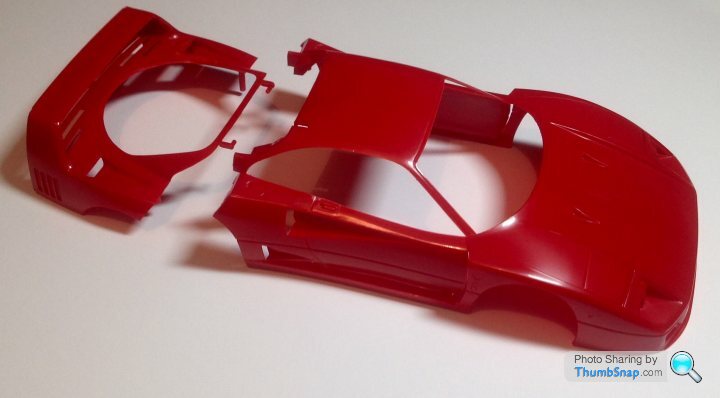
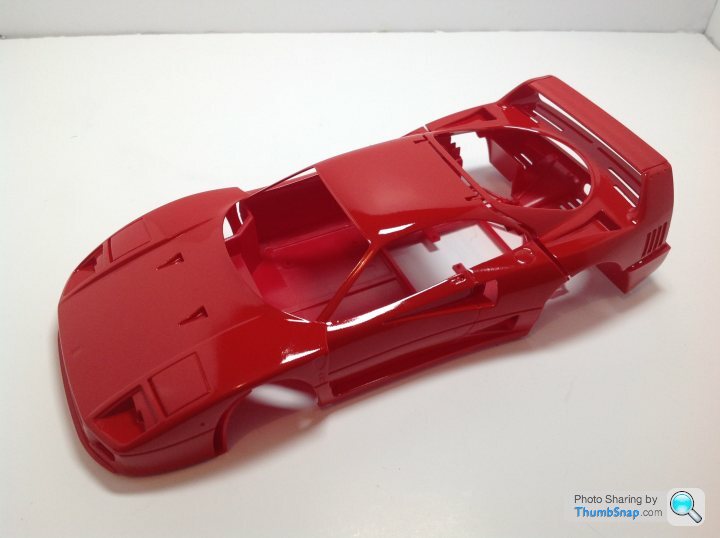
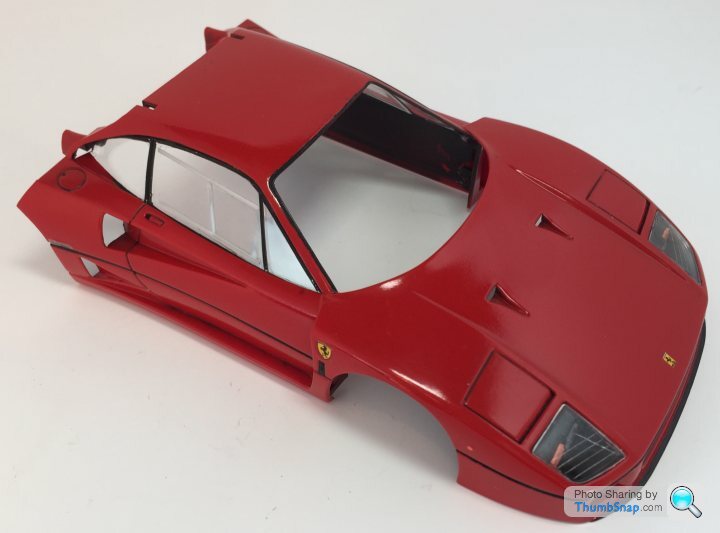
The body comes in two pieces. The rear clam is obviously designed to open and close. I'm not keen on the hinges that enable this to happen, but don't suppose I will notice when it's finished.
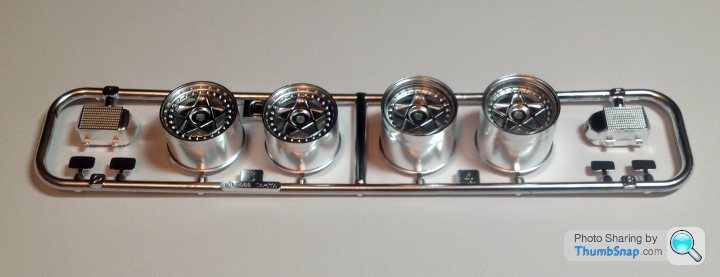
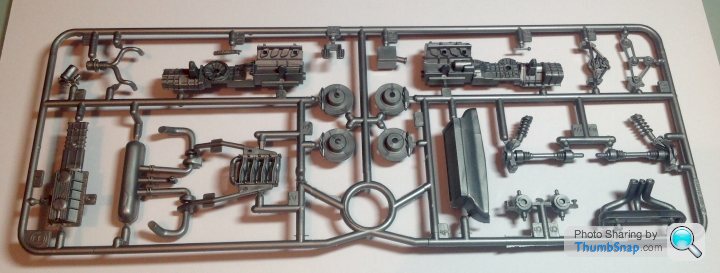
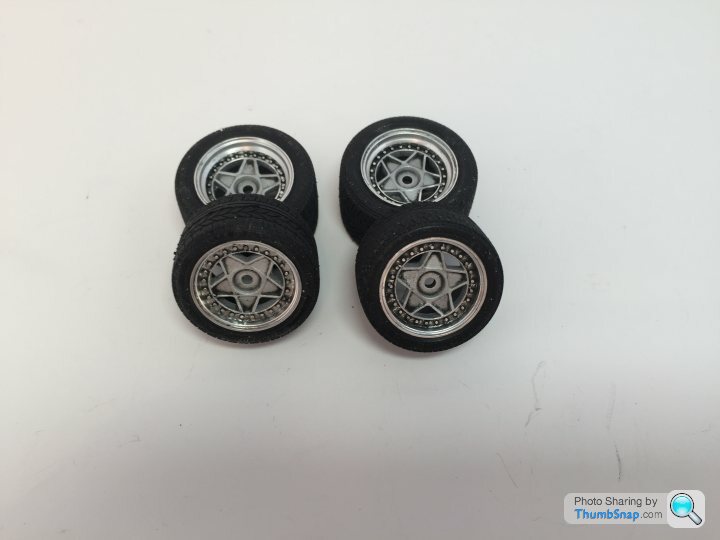
The first sprue up is the chromed parts. As usual for Tamiya down to a high standard. I'm going to have some fun masking the wheels.
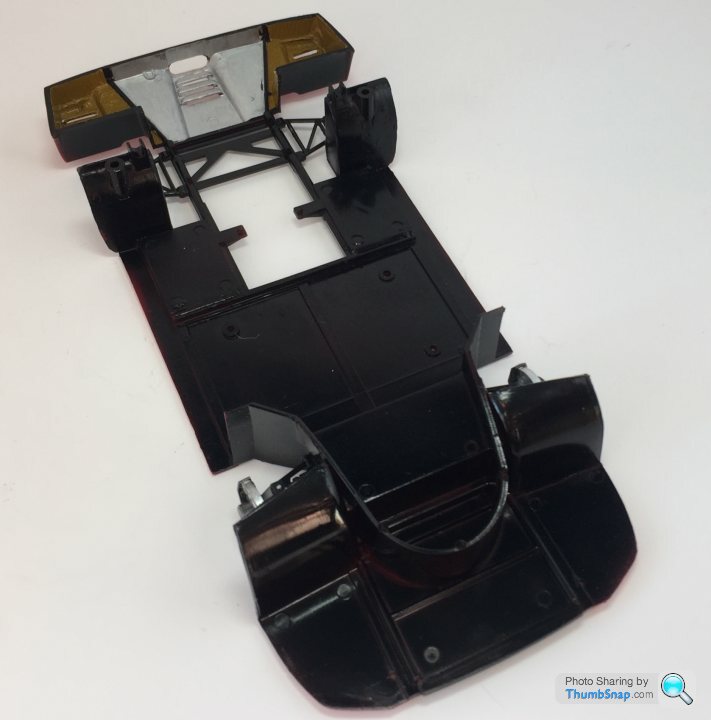
Next is the black sprue containing most of the interior and chassis parts.

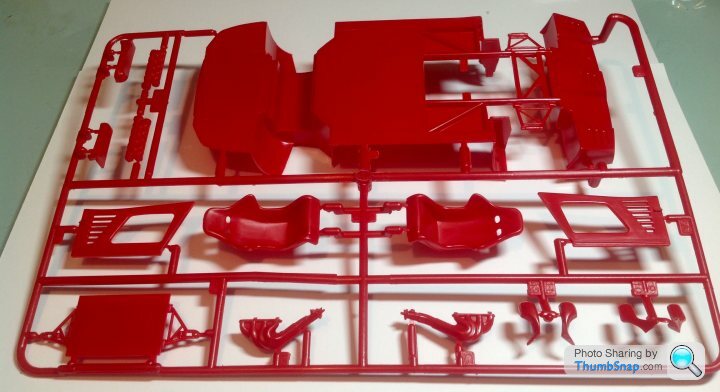
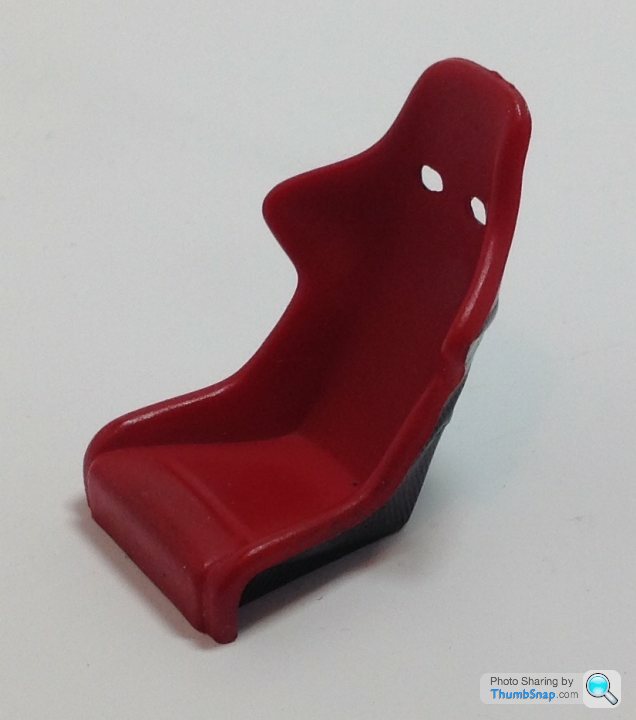
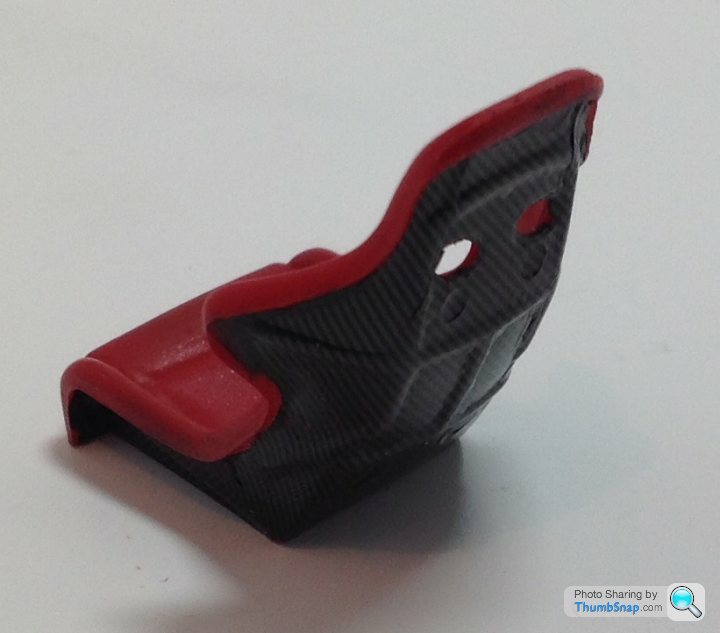
Onto the red sprue with more interior, the seats and the main floor / chassis part. I plan to use red embossing powder to replicate the seat material and carbon fibre decal sheats for the shell and some other interior parts.
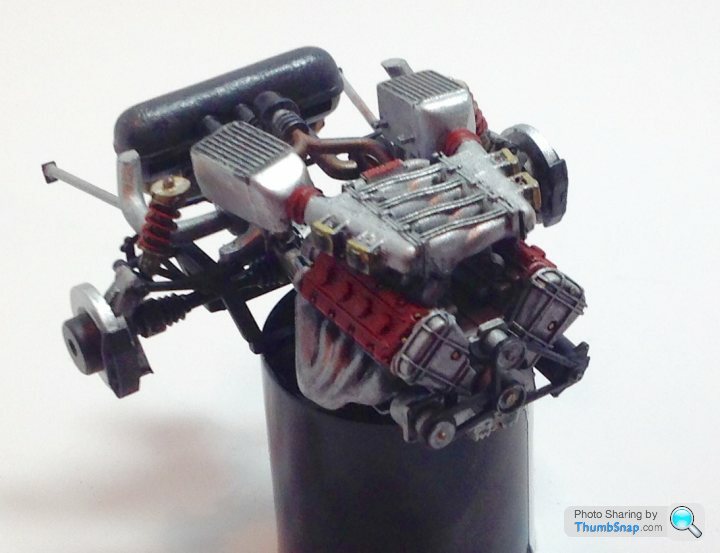
Initially I was alarmed at the exhaust manifolds, but having looked at some pictures of the real thing they are accurate.
The grey sprues basically has all the engine part and the brakes.
Final sprue is the clear parts. Windows, windscreen, headlight covers and the iconic louvred rear engine cover. The bag also contains the decals. I'm leaving it sealed up for now.

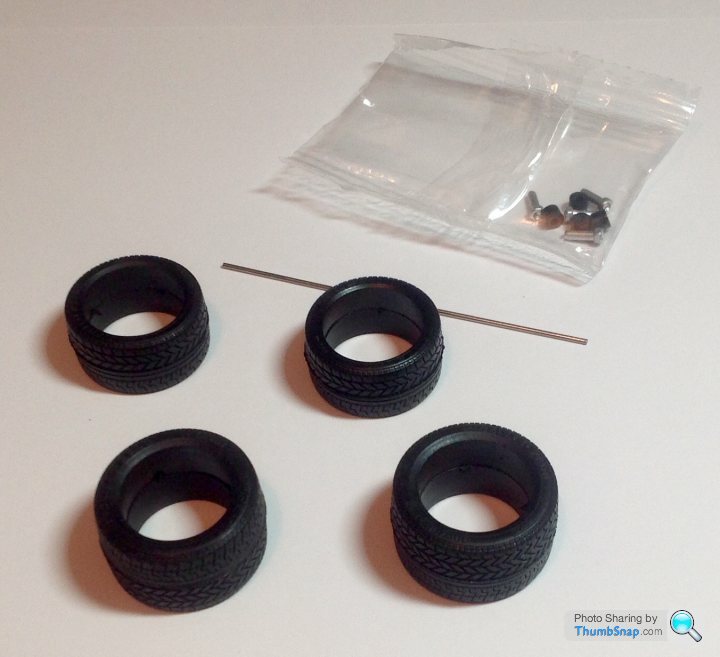
Finally the tyres, a small piece of metal rod a smaller bag with the poly cap and "wheel nuts"
As with the clear parts I will leave these bagged up for now.
So fewer parts than the last couple of builds. I'm going to try and take this one slowly and update the thread regularly.
As always the first thing to do is paint the body.
I'm going to leave it for around a week and try giving it a polish with some autoglym colour restorer as per the recent advice.
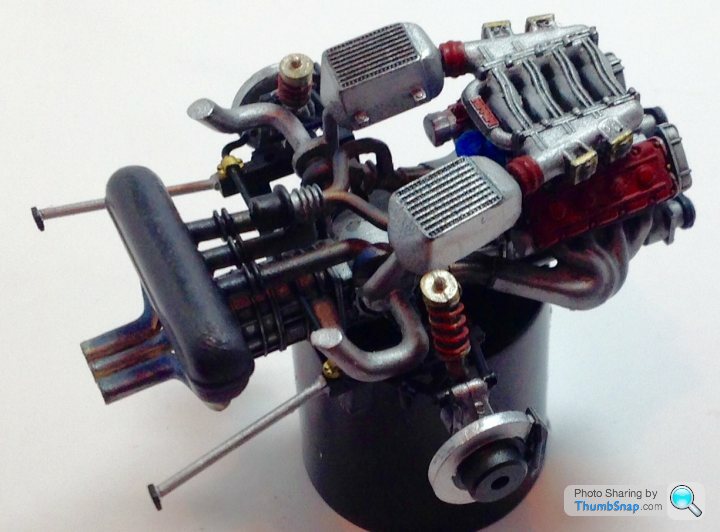
First up in the instructions is the engine. Being an older kit a lot of clean up was required and I still missed a ton of stuff. You won't really be able to see it very well in the final assembly so I'm happy enough with it. I wanted to give the impression of a well used, but well maintained car so have added some weathering to the various bits. As always it looks much better in real life than in the photos.
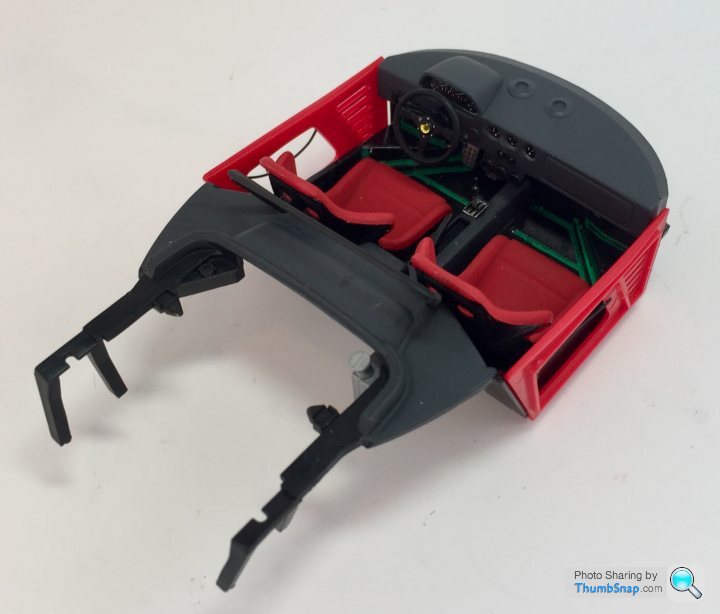
Finally I have started to look at one of the seats. I have used some carbon weave decal sheet for the back and xf7 for the seat (decided against using embossing powder). I used a mix on the front of the cushion to simulate the shiny look from wear. It needs a bit of tidying and I'm going to make some harnesses from masking tape.
I'm going to leave it for around a week and try giving it a polish with some autoglym colour restorer as per the recent advice.
First up in the instructions is the engine. Being an older kit a lot of clean up was required and I still missed a ton of stuff. You won't really be able to see it very well in the final assembly so I'm happy enough with it. I wanted to give the impression of a well used, but well maintained car so have added some weathering to the various bits. As always it looks much better in real life than in the photos.
Finally I have started to look at one of the seats. I have used some carbon weave decal sheet for the back and xf7 for the seat (decided against using embossing powder). I used a mix on the front of the cushion to simulate the shiny look from wear. It needs a bit of tidying and I'm going to make some harnesses from masking tape.
An update...
This has been a bit of a trial. The kit shows how far Tamiya engineering has come over the last couple of decades.
I wouldn't say I hate it, but I will be glad when I've finished it.
First up is the chassis. I used some Kevlar decal sheet to do the inside of the rear bumper
Next a work in progress of the body work
Here's the cockpit. I know the green sealant is massively out of scale and in slightly the wrong place.
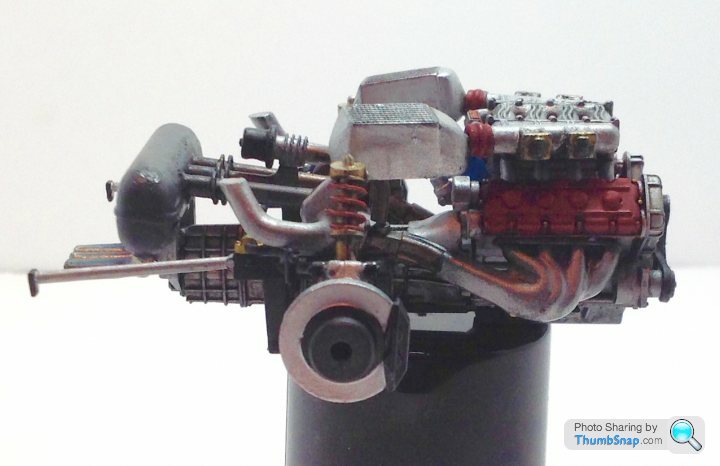
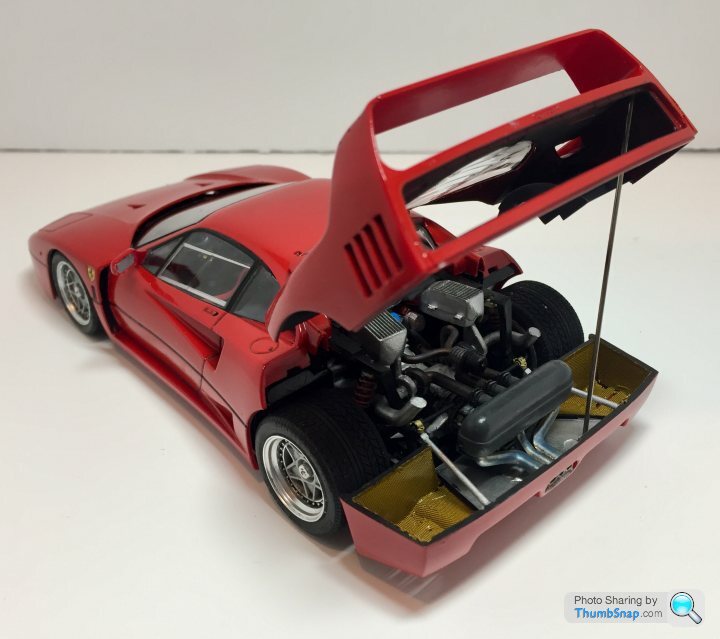
Another engine picture. Now with added HT leads...

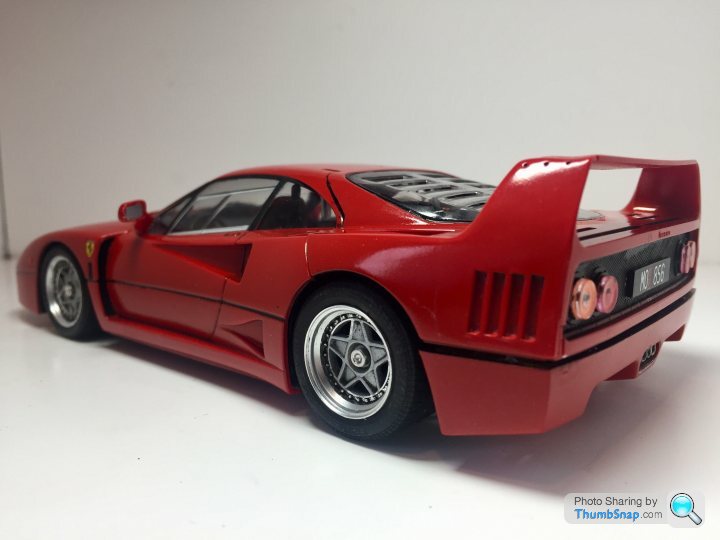
The wheels.
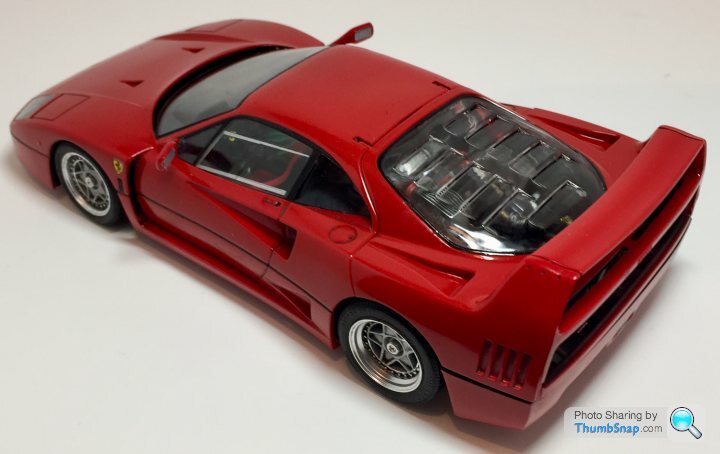
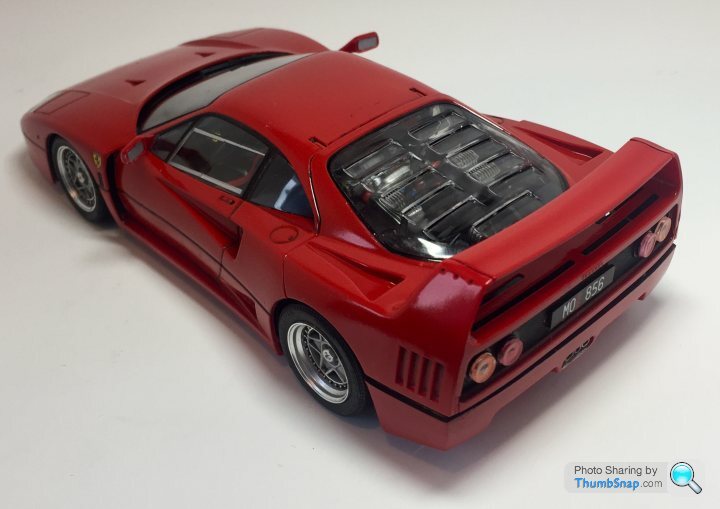
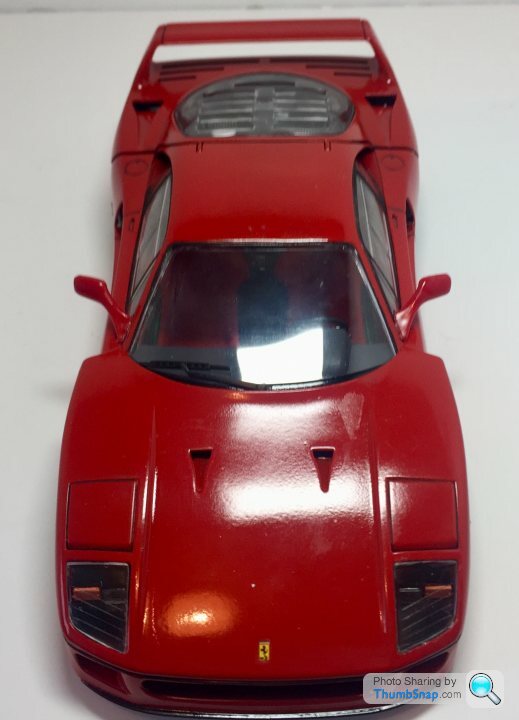
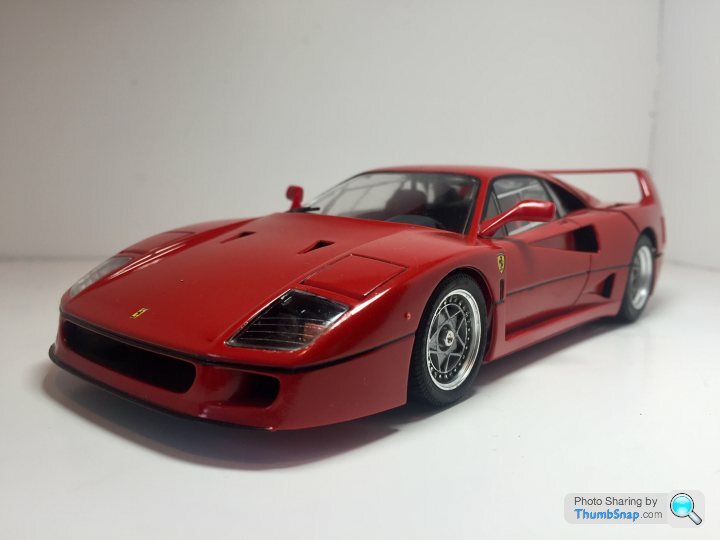
Some shots of the chassis, cockpit, body, engine and rear clam assembled. Only the rear lights and some engine bay detail left to finish

This has been a bit of a trial. The kit shows how far Tamiya engineering has come over the last couple of decades.
I wouldn't say I hate it, but I will be glad when I've finished it.
First up is the chassis. I used some Kevlar decal sheet to do the inside of the rear bumper
Next a work in progress of the body work
Here's the cockpit. I know the green sealant is massively out of scale and in slightly the wrong place.
Another engine picture. Now with added HT leads...
The wheels.
Some shots of the chassis, cockpit, body, engine and rear clam assembled. Only the rear lights and some engine bay detail left to finish


Guiddy said:
Yeah, looks great! What was the challenge?
Well firstly the design of the moulding. Lots of moulding lines everywhere. This just wasn't an issue on the MX5. It requires a lot more fettling of the parts and slows down progress. Also the general engineering of the kit is not a patch on the newer kit. This is mostly down to how well things fit together ands also positive locations when assembling the various parts. A really good example of this is the intercoolers. It took me ages to work out which way they went on and right at the very end of the assembly I realised they weren't quite right. Cue lots of swearing.
Anyways I must be a gluten for punishment because my next project isn't going to be any easier.....
marcosgt said:
Looks good, but why have you weathered the wheels so much?
They don't look like any F40 wheels I've ever seen.
Otherwise, it looks excellent!
M
That's a fair comment. They don't look like any F40 wheels I've ever seen.
Otherwise, it looks excellent!
M
I did originally try the wheels with no wash and the details (split rim bolts) just didn't show up at all. Perhaps I was somewhat heavy handed, but feel it looks better than the unwashed wheels.
dr_gn said:
You could have used a two-tone silver paint finish for the centres and rims (similar to what you've done), and added the bolt heads to the studs, and a valve. It would have added a bit of detail.
No. You could have done that. Unfortunately its beyond the limits of my skills (and quite frankly my eye sight). What would happen is I'd order these minuscule parts. Probably ruin the wheels drilling out the mounded items. If I managed to do that I'd probably lose 10 studs for every one I managed to fit. If by some miracle I managed to get them installed I can more or less guarantee that it would still look worse than it currently does.
I feel I'm getting a little better with each build, but still know my limits.
Thanks for the encouragement though. Sometimes I wonder if it's worth posting or if anyone actually reads these threads.
Enricogto said:
Rob,
excellent result!
Don't take it in the wrong way as you did waaaay better that what I could ever achieve, however there's a couple of extra points beyond the sealant and the wheels that I would change on the model:
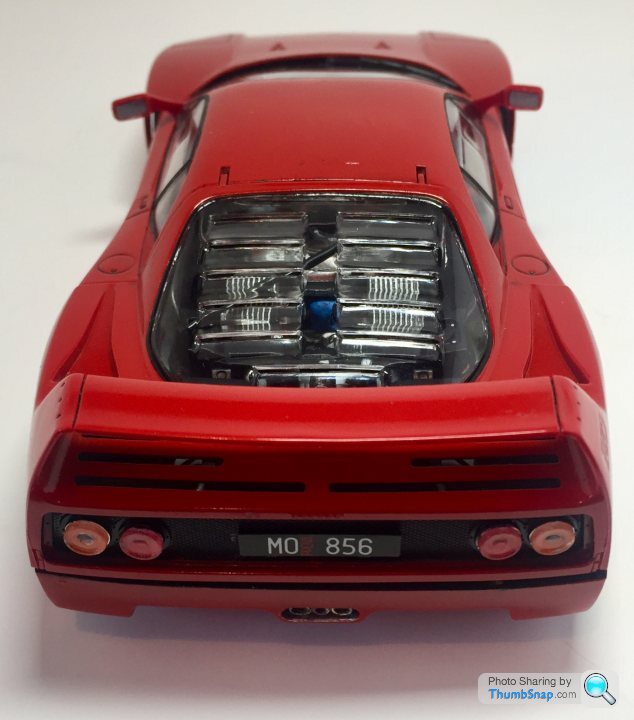
The back box is too dark, in reality it was a much lighter colour (almost sand) and covered by a flat, trapezoidal shaped heat shield. In addition the reg plate is wrong as in those yeas it would have been a square plate with white background and the format (MO00) (XXXX) and a tiny orange PROVA writing.
As said, these are maybe OCD details on an otherwise excellent model!
Thanks for the comments. I spent a bit of time trying to find the right colour for the back box. Most pictures seem to have a straight through system fitted. The only ones I could finds it looked a grey colour. I don't think I will change it now.excellent result!
Don't take it in the wrong way as you did waaaay better that what I could ever achieve, however there's a couple of extra points beyond the sealant and the wheels that I would change on the model:
The back box is too dark, in reality it was a much lighter colour (almost sand) and covered by a flat, trapezoidal shaped heat shield. In addition the reg plate is wrong as in those yeas it would have been a square plate with white background and the format (MO00) (XXXX) and a tiny orange PROVA writing.
As said, these are maybe OCD details on an otherwise excellent model!
I did toy with the idea of adding a heat shield fashioned from bacofoil. I may well add that in.
chunder27 said:
The thing is.
These kits are not really designed to be built to this level of detail, you are going far and above what was designed into this kit when it was produced. Because you can. Which is why the body is red, the interior parts black etc, it is meant to effectively be thrown together by a kid or at best a hobby maker who will spend some time painting the detail parts, not spraying or looking into the nth degree as you have, using real pics as reference etc.
Most people would be happy to go to a level of detail several steps away from what you have done which is anal in the extreme. No offence and I admire your patience and ability. But your level is far beyond what these products are marketed to sell to.
I knew a guy who did similar and would go to these extremes too. HE would spend 30 quid on a kit and then hundreds on special parts to make it better.
But having a pop at the manufacturers for the quality of the plastics and the mouldings is a reflection of you, and the level you are going to, not them.
As I say, I mean no offence, and I imagine mouldings are a lot better now than they were, hence your comparisons with old and new products. but that is because of manufacturing improvements and the like, these are considered as much a toy as a hobby piece and are marketed accordingly, it's why they are sold in toy shops AND model shops. As are the actual costs of manufacturing this, it is a product to make profit after all!
And coming from a manufacturing background as I do, these factors have to be taken into consideration when you are making something for consumers.
Thanks for your comments (I think) but I feel you are mistaken about a few things.These kits are not really designed to be built to this level of detail, you are going far and above what was designed into this kit when it was produced. Because you can. Which is why the body is red, the interior parts black etc, it is meant to effectively be thrown together by a kid or at best a hobby maker who will spend some time painting the detail parts, not spraying or looking into the nth degree as you have, using real pics as reference etc.
Most people would be happy to go to a level of detail several steps away from what you have done which is anal in the extreme. No offence and I admire your patience and ability. But your level is far beyond what these products are marketed to sell to.
I knew a guy who did similar and would go to these extremes too. HE would spend 30 quid on a kit and then hundreds on special parts to make it better.
But having a pop at the manufacturers for the quality of the plastics and the mouldings is a reflection of you, and the level you are going to, not them.
As I say, I mean no offence, and I imagine mouldings are a lot better now than they were, hence your comparisons with old and new products. but that is because of manufacturing improvements and the like, these are considered as much a toy as a hobby piece and are marketed accordingly, it's why they are sold in toy shops AND model shops. As are the actual costs of manufacturing this, it is a product to make profit after all!
And coming from a manufacturing background as I do, these factors have to be taken into consideration when you are making something for consumers.
firstly your comments about the kits being designed to be thrown together. Well that's what Lego is for. These kit provide details of the various paint colours for each part, including sprays for the body colour. They are designed for hobbyists and aren't toys.
The only additional items I've added to this kit are some carbon and Kevlar decals and some ht leads made from electrical wire. Hardly the hundreds of pounds on special parts.
The comments regarding quality were in the main to highlight the improvements in quality from the same manufacturer. For similar products at similar prices. I also understand the reasons for this as I am also from an engineering manufacturing background.
I'm pretty new to modelling, returning after a long break. It's my hobby. I put as much patience as I can manage into my builds. My intent is to improve with each kit. The time spent might seem excessive to some, but I don't see any point rushing.
Look at some of the other build threads. my attention to detail pales into insignificance against the work by the other contributors to this forum. Hopefully I can improve a bit with each build and one day I will get similar results.
Gassing Station | Scale Models | Top of Page | What's New | My Stuff