Airfix 1:72 B-25 New tool
Discussion


My last project was a car so the new one have to be a plane.
This is a really nice kit, with some great detail. At £25 it’s not too expensive either.
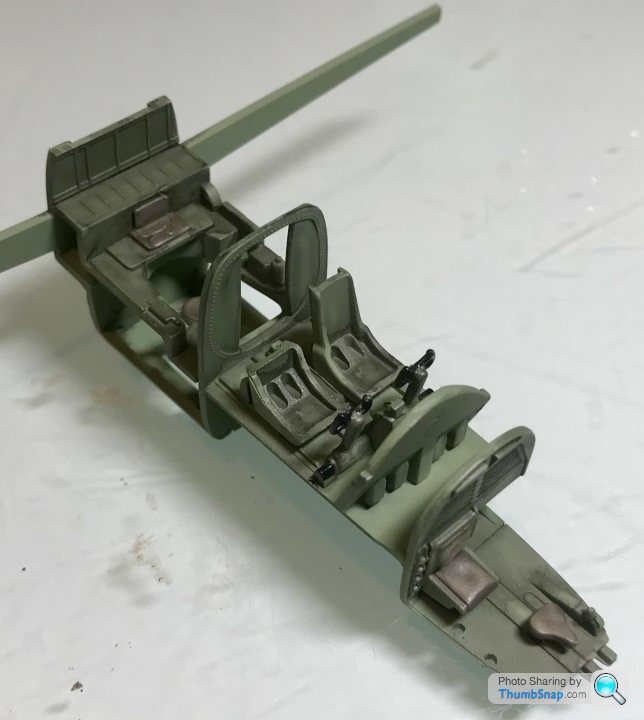
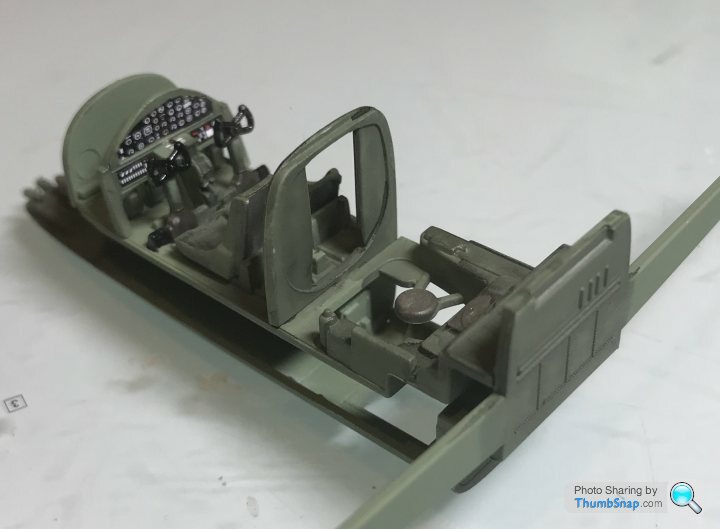
The first stage is to paint and assemble the front cockpit area up to the bomb bay bulkhead.
The only aftermarket parts I’m going to use here are going to be the Eduard canopy masks currently enroute from hannants.
The kit so far goes together really nicely, so I don’t think it’s going to be an overly long build.
This is a really nice kit, with some great detail. At £25 it’s not too expensive either.
The first stage is to paint and assemble the front cockpit area up to the bomb bay bulkhead.
The only aftermarket parts I’m going to use here are going to be the Eduard canopy masks currently enroute from hannants.
The kit so far goes together really nicely, so I don’t think it’s going to be an overly long build.
Well, lots of reviews say they are out of scale and too deep, but by the time they’ve been primed and painted I think they’re no problem.
The surfaces really are beautifully moulded with great attention to detail. The only slight negatives are the Airfix one bag for all sprues issue and the slightly nasty plastic they use. I also think they could charge a few quid extra and throw in some die cut canopy masks though.
Going back to the Tamiya jeep. I would say this would be a much better kit for a first timer or someone getting back into the hobby.
dr_gn said:
Dr Jekyll said:
Is there any easy way to tell a recent tool Airfix from a 1960s relic in a new box? Or do I have to research the individual kit?
Nope, Scalemates gives a timeline of a particular kit though. Make sure you get the right box art and/or kit number!Here is a pic of a section of the fuselage
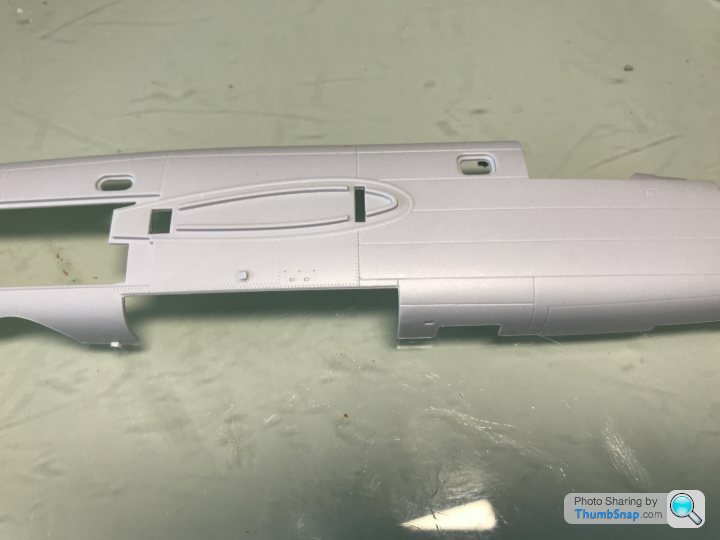
And the upper wing
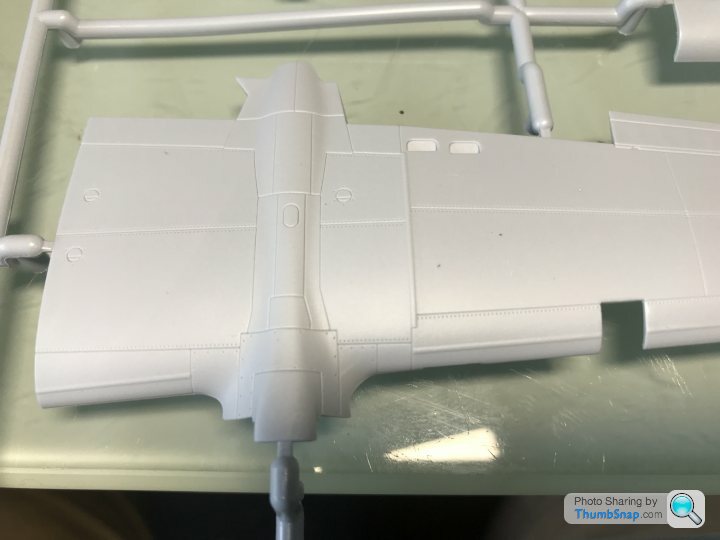
I don’t think they’re overly deep or wide and there is some very fine rivet detail.
Whether you’d see this level of detail at this scale is another question, but for me it’s not too over the top.
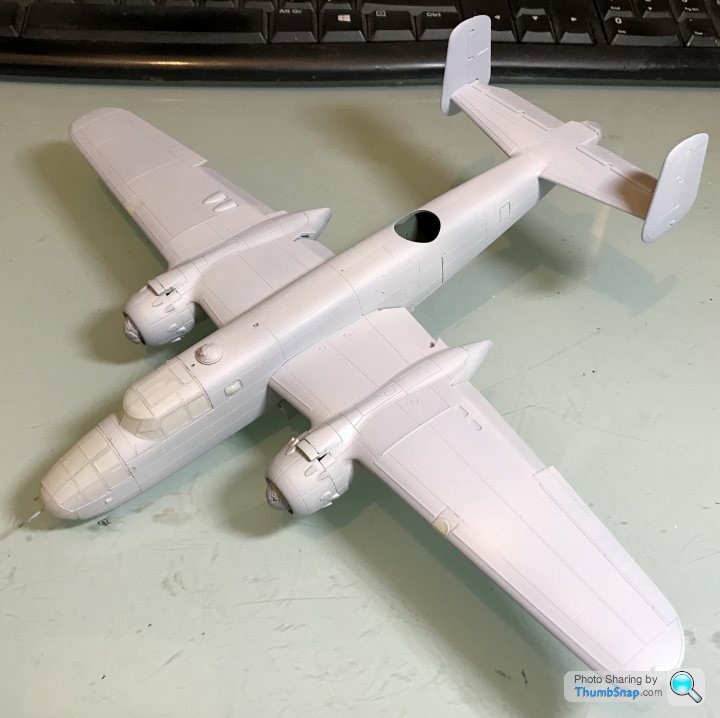
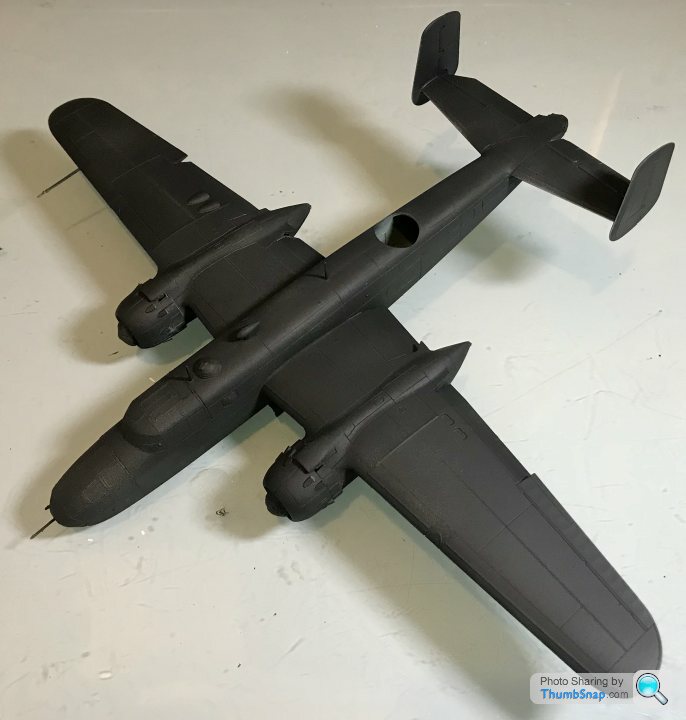
On to a progress update.
I have managed to complete one side of the fuselage.
And the upper wing
I don’t think they’re overly deep or wide and there is some very fine rivet detail.
Whether you’d see this level of detail at this scale is another question, but for me it’s not too over the top.
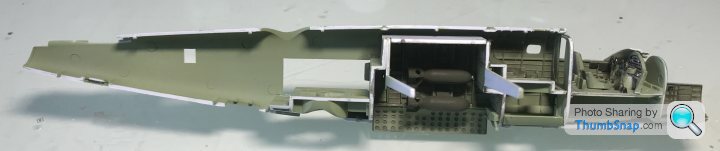
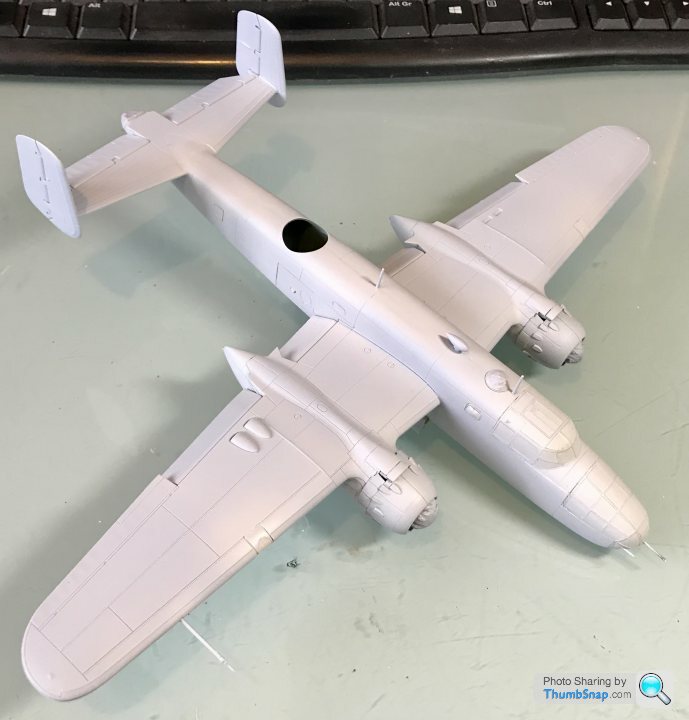
On to a progress update.
I have managed to complete one side of the fuselage.
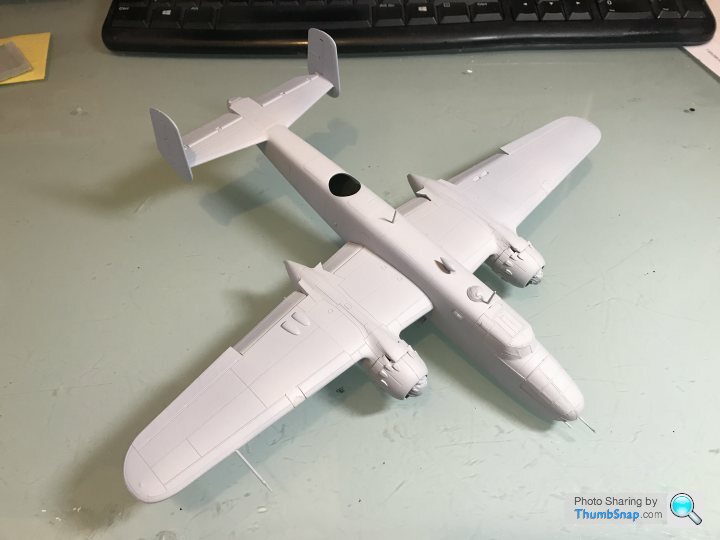
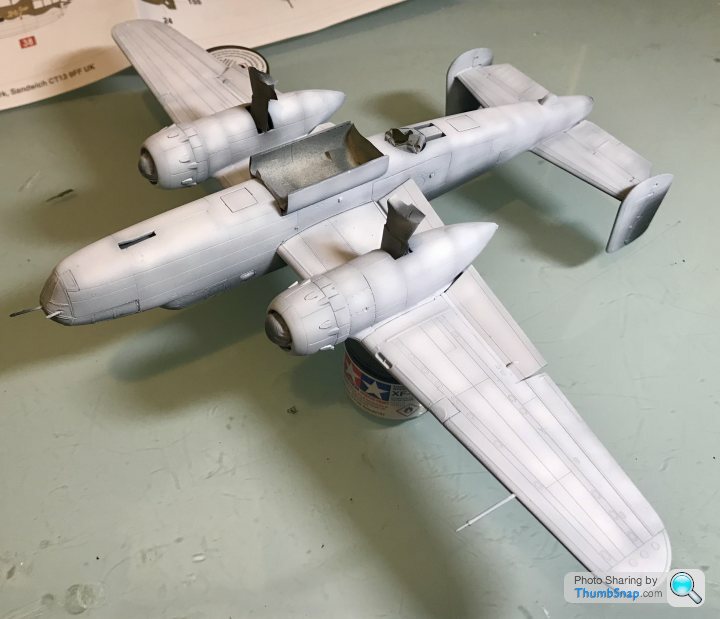
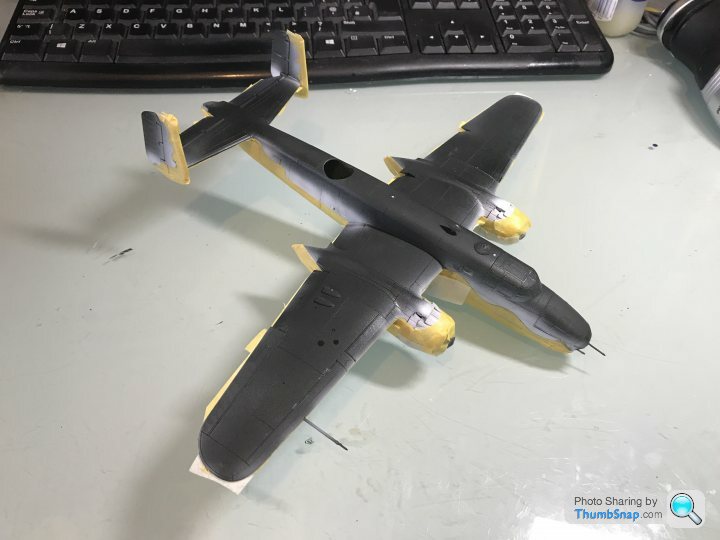
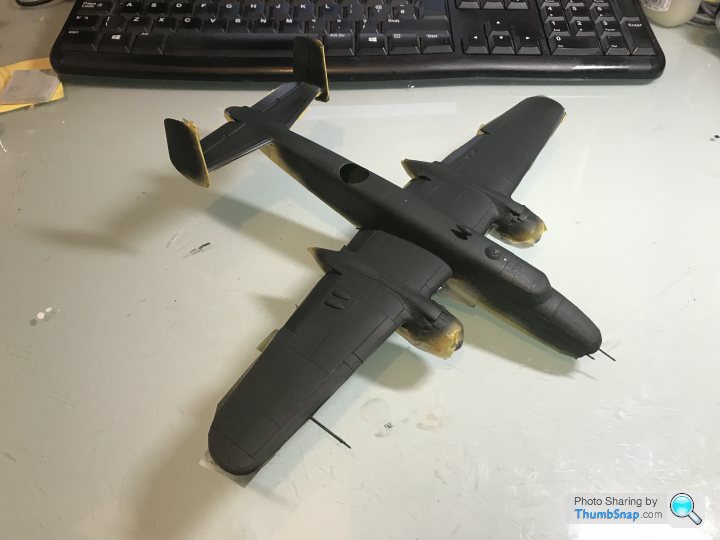
There has been more progress. I hadn’t had a chance to update the thread.

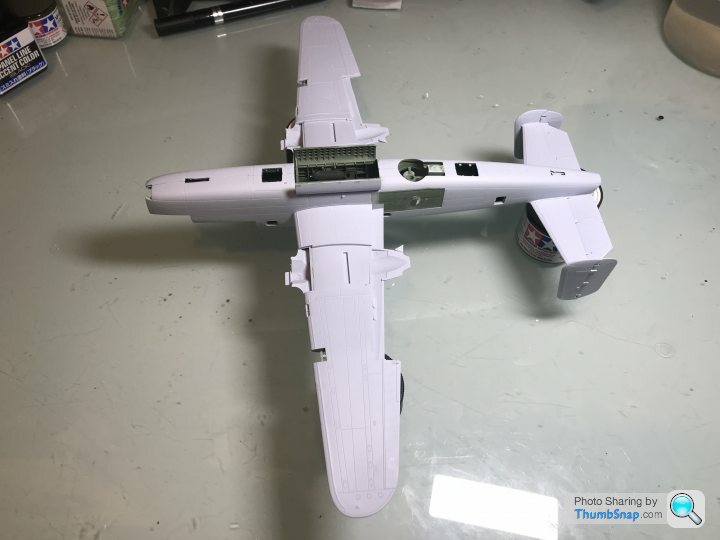
Here’s where things get a bit odd. I like to build the model and paint it before fitting the landing gear, but that’s not possible here. The main gear needs to be painted and assembled to the wings prior to fitting the engine nacelles. This means they will need to be masked prior to painting. A bit of a pain.
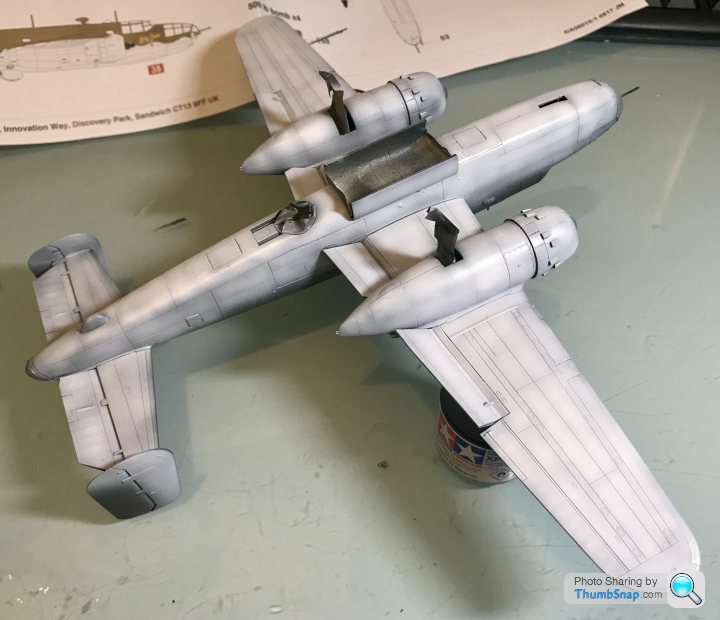
I have actually got as far as painting the engines and assembling the nacelles, but haven’t got any pictures yet. Fitting the cooling flaps to the back of the cowl and assembling with the nacelle has been a bit of a pain as there doesn’t feel like a strong connection point. A bit at odds with the rest of the kit.
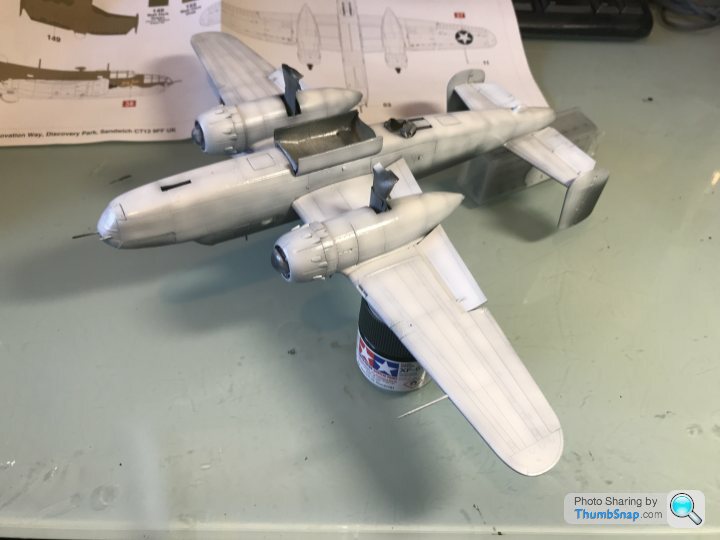
The Eduard mask set also arrived and I have started masking the clear parts. Honestly they’re a god send. I’m not sure how I would have approached it without them.
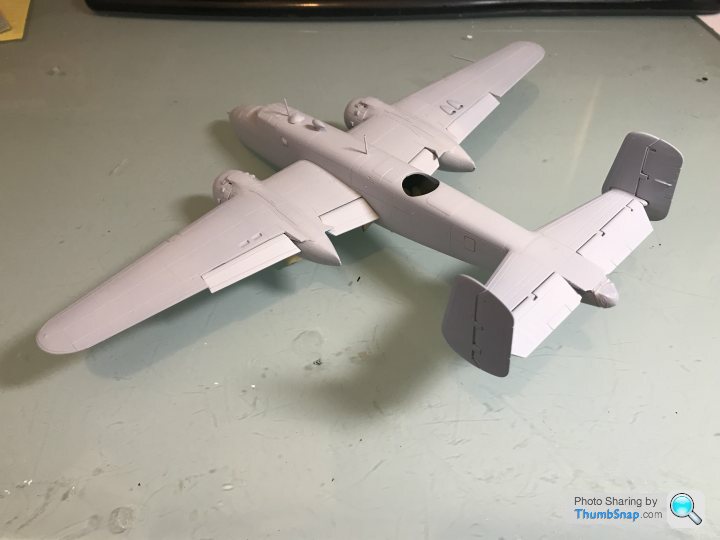
So far it’s still a big thumbs up from me. To the extent that I have my eye on a sea fury as my next build.
Here’s where things get a bit odd. I like to build the model and paint it before fitting the landing gear, but that’s not possible here. The main gear needs to be painted and assembled to the wings prior to fitting the engine nacelles. This means they will need to be masked prior to painting. A bit of a pain.
I have actually got as far as painting the engines and assembling the nacelles, but haven’t got any pictures yet. Fitting the cooling flaps to the back of the cowl and assembling with the nacelle has been a bit of a pain as there doesn’t feel like a strong connection point. A bit at odds with the rest of the kit.
The Eduard mask set also arrived and I have started masking the clear parts. Honestly they’re a god send. I’m not sure how I would have approached it without them.
So far it’s still a big thumbs up from me. To the extent that I have my eye on a sea fury as my next build.
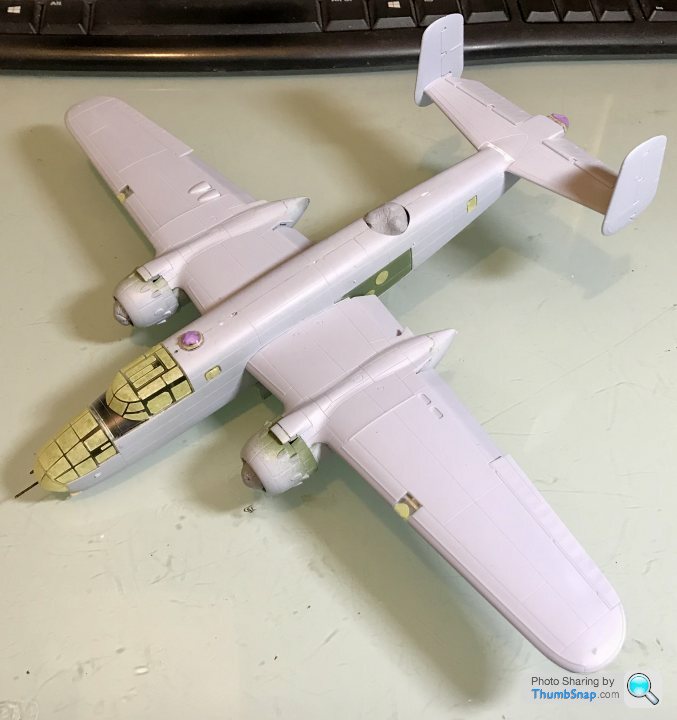
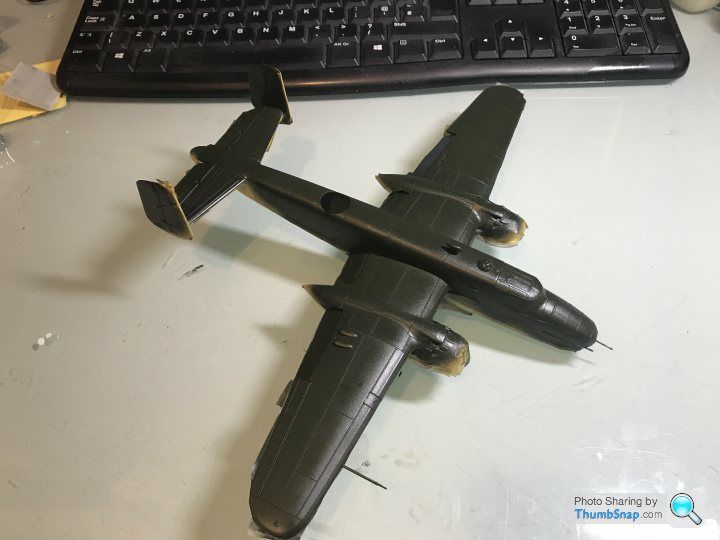
I have spent some time working on the panel joins and getting them as nice as I can manage.
Before
After
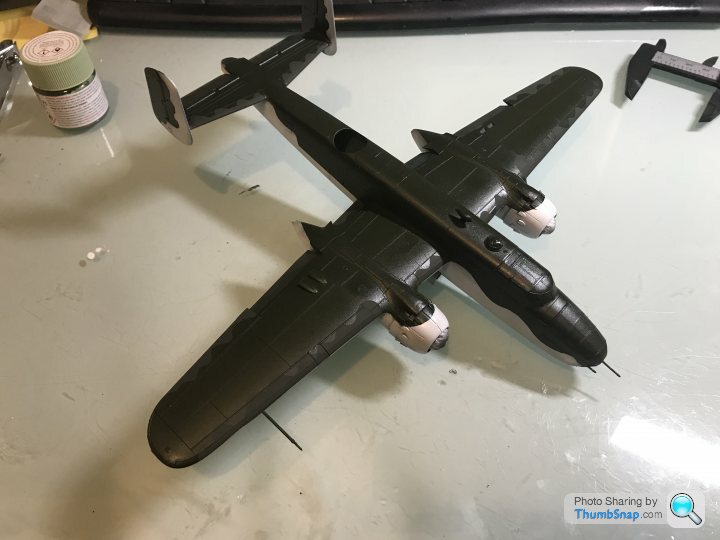
Pre-shading next. Well it was going to be pre-shading, but ended up as just a shadow coat. Helps pick up any imperfections (that’s my excuse)
Onto the main colour scheme. I started with the white bottom half. Using Tamiya XF-1. Starting out with a random pattern, gradually highlighting centres of the panels.
Finally a quick coat of TS-13 to protect everything. I’ll let it go off properly overnight and start masking tomorrow evening.
On reflection the clear coat has highlighted some inconsistencies in the coverage. I will probably address this, clear coat again prior to moving onto the top half.
Before
After
Pre-shading next. Well it was going to be pre-shading, but ended up as just a shadow coat. Helps pick up any imperfections (that’s my excuse)
Onto the main colour scheme. I started with the white bottom half. Using Tamiya XF-1. Starting out with a random pattern, gradually highlighting centres of the panels.
Finally a quick coat of TS-13 to protect everything. I’ll let it go off properly overnight and start masking tomorrow evening.
On reflection the clear coat has highlighted some inconsistencies in the coverage. I will probably address this, clear coat again prior to moving onto the top half.
Progress update. It’s been slow going as a midnight showing of the latest avengers movie left me too tired to think about modelling for a couple of days.
First up was masking.
Next I touched up the black base coat.
On with the colour and a clear coat.
Stencils, decals, Matt varnish and paint masks removed.

Im not 100% happy with it. It’s a bit dark. I think I’m done with the black base method and will use more traditional pre-shading from now on.
This is the part of builds I seem to struggle with. The hard work is done, but my motivation seems to have waned somewhat.
First up was masking.
Next I touched up the black base coat.
On with the colour and a clear coat.
Stencils, decals, Matt varnish and paint masks removed.
Im not 100% happy with it. It’s a bit dark. I think I’m done with the black base method and will use more traditional pre-shading from now on.
This is the part of builds I seem to struggle with. The hard work is done, but my motivation seems to have waned somewhat.
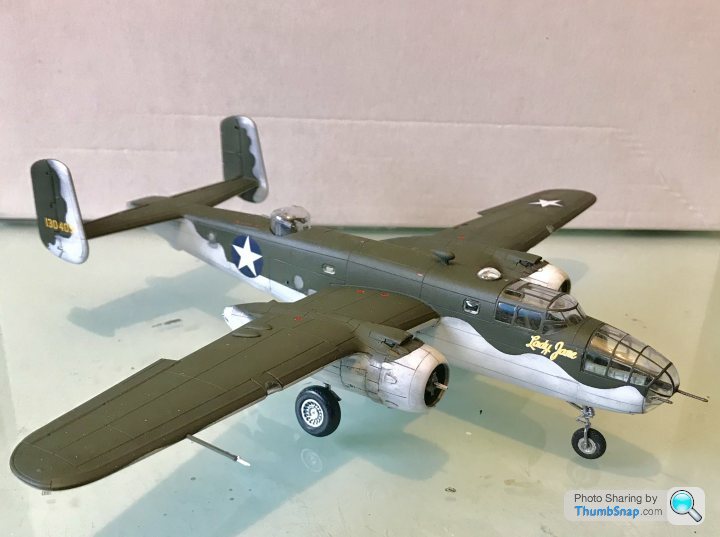
Here. Have a few finished pictures.... well not quite. I need to straighten the wonky nose wheel.
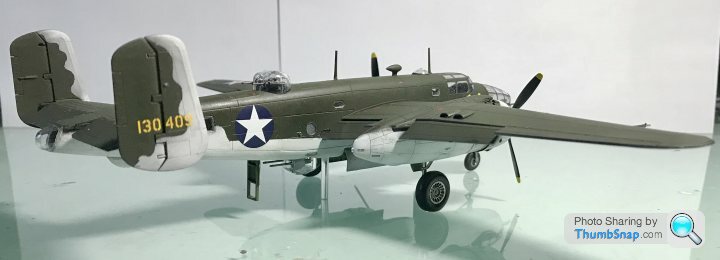
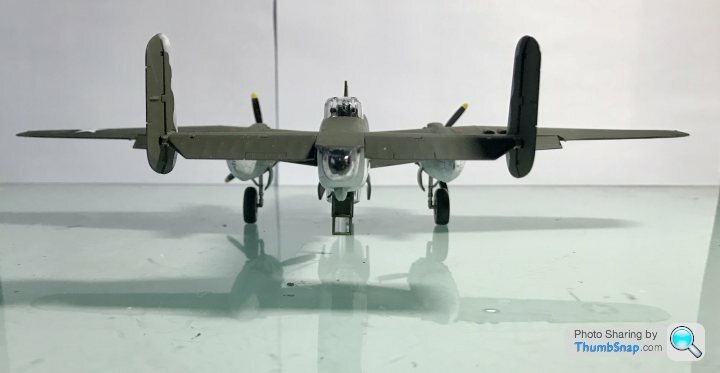

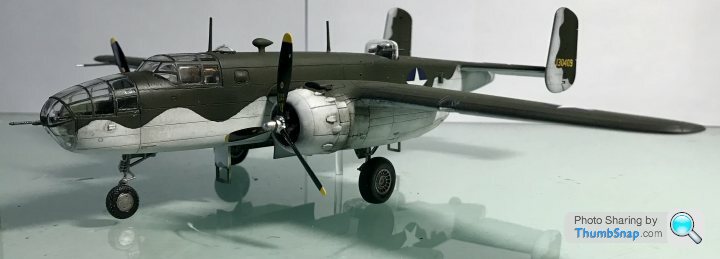
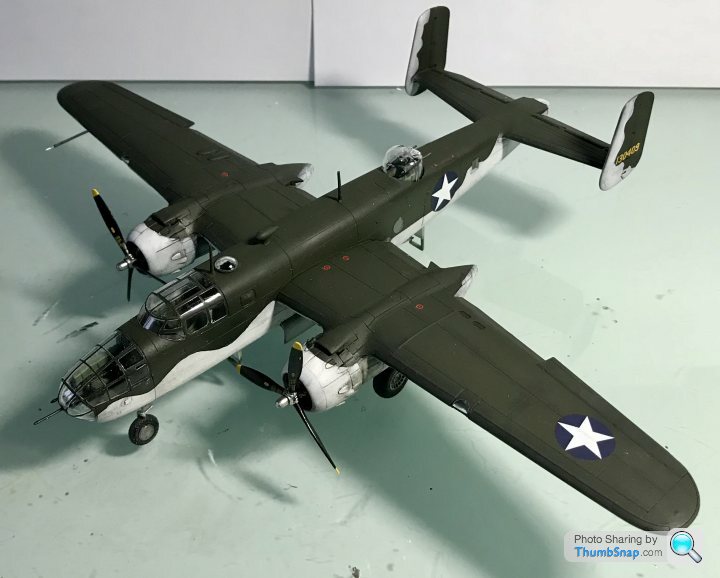

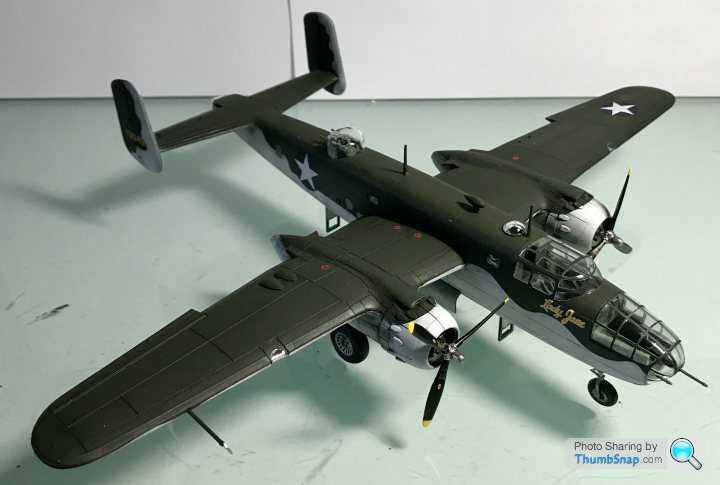
A few niggles, but overall a really nice kit. If Airfix could just do something about the soft, yet somehow brittle plastic they really would be great.
Next project may just be another plane....
A few niggles, but overall a really nice kit. If Airfix could just do something about the soft, yet somehow brittle plastic they really would be great.
Next project may just be another plane....
yellowjack said:
It never ceases to amaze me how different the results of scale model kit building seem to be these days compared to when I was building them as a teenager.
Back then I didn't know what photo-etched alternatives were, I didn't own an airbrush, and my kit basically consisted of an X-acto knife, some paint brushes in various sizes, a growing collection of Humbrol and old Airfix paint in pots, a tube of polystyrene cement and an emery board nicked from my mum.
Now, there are masking kits (we just painted canopy frames with a brush) and masking up paint for spraying. Multi layers of pre shading, and various varnishes to make a better job of attaching decals. The results are pretty damned impressive, really. Night and day better than the results I was achieving at the time, and yet my results were pretty good compared with the standards of the day.
I have a bunch of kits stashed away in boxes, some made (or part built) only a few years ago alongside my boys making their first few kits. Neither of my sons really took to scale modelling, so I stopped building my kits when they lost interest. Now, having seen what some of you chaps are turning out, I'm afraid to say that I'm too embarrassed to dig mine out to continue with them. After all, I only know the "traditional" method of building and painting the models, and have no idea about masking kits, spray painting, pre-shading, and multi-stage gloss/matt varnishes around the fixing of decals.
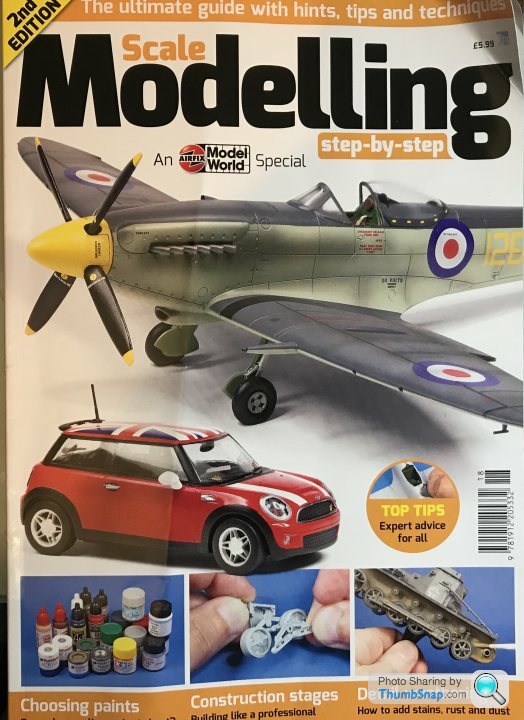
Can anyone recommend a decent book on modern scale modelling techniques and products for one who's last committed foray into the hobby ended in about 1986..?
Sorry if this is the wrong thread on which to ask, but I was prompted into asking by the excellent results achieved on several model builds I've seen on here recently, this B-25 only the latest of them. But still I rarely go into the 'scale models' sub-forum, usually getting my (occasional) fix from the 'What's New' tab instead, as I no longer feel like a "scale modeller", but an interested outsider...
You are actually in the same position as I was at the beginning of last year. I knew I wanted to get back into modelling, so I got an airbrush and compressor for Xmas in 2016. The rest is documented on this forum with the many builds I have completed since. Back then I didn't know what photo-etched alternatives were, I didn't own an airbrush, and my kit basically consisted of an X-acto knife, some paint brushes in various sizes, a growing collection of Humbrol and old Airfix paint in pots, a tube of polystyrene cement and an emery board nicked from my mum.
Now, there are masking kits (we just painted canopy frames with a brush) and masking up paint for spraying. Multi layers of pre shading, and various varnishes to make a better job of attaching decals. The results are pretty damned impressive, really. Night and day better than the results I was achieving at the time, and yet my results were pretty good compared with the standards of the day.
I have a bunch of kits stashed away in boxes, some made (or part built) only a few years ago alongside my boys making their first few kits. Neither of my sons really took to scale modelling, so I stopped building my kits when they lost interest. Now, having seen what some of you chaps are turning out, I'm afraid to say that I'm too embarrassed to dig mine out to continue with them. After all, I only know the "traditional" method of building and painting the models, and have no idea about masking kits, spray painting, pre-shading, and multi-stage gloss/matt varnishes around the fixing of decals.
Can anyone recommend a decent book on modern scale modelling techniques and products for one who's last committed foray into the hobby ended in about 1986..?
Sorry if this is the wrong thread on which to ask, but I was prompted into asking by the excellent results achieved on several model builds I've seen on here recently, this B-25 only the latest of them. But still I rarely go into the 'scale models' sub-forum, usually getting my (occasional) fix from the 'What's New' tab instead, as I no longer feel like a "scale modeller", but an interested outsider...
There are lots of videos on YouTube going through most techniques and the guys on this forum offer a lot of very helpful advice.
When I started my favourite YouTube channel was Andys hobby headquarters. What I found inspiring about his videos is that it all seemed within grasp. He uses simple readily available products to get nice results. The downside is he does mostly armour, but that how I got back into things. If you have a bit of free time take a look at his build videos.
Gassing Station | Scale Models | Top of Page | What's New | My Stuff