Wingnut wings 1/32 sopwith camel
Discussion


The Facebook modelling group I am a member of are doing a group build of WW1 aircraft.
I’ve always wanted to try a wingnut wings kit as they have established a formidable reputation in their relatively short history.
The kit is expensive, but doesn’t disappoint. I’ll post some sprue shots if anyone is interested, but some of the injection moulding is on a par with resin parts. It really is that good.
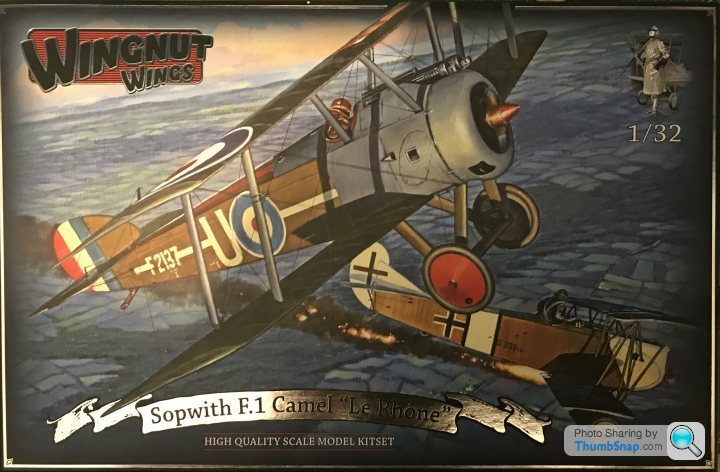
Anyway here’s the box art.
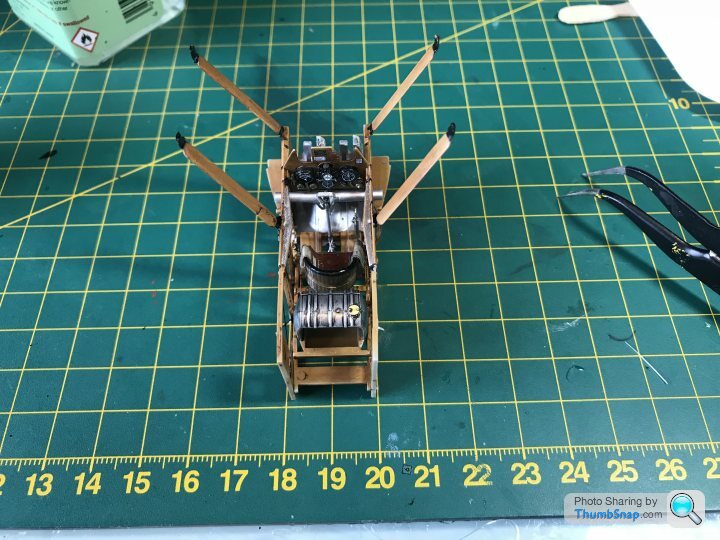
So far I have assembled three parts of the instrument panel. Not bad for three hours work.
This is what I have achieved.
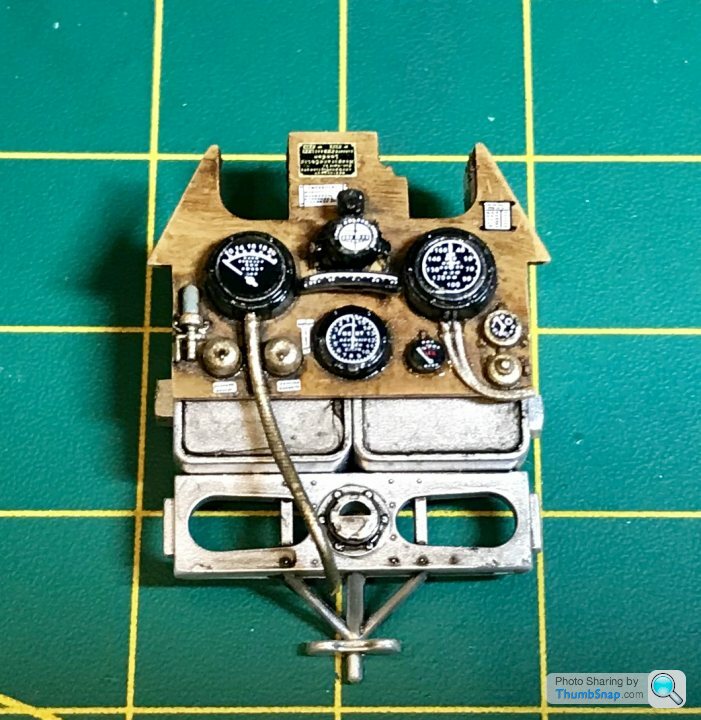
I’m really happy with how the wood effect turned out. I’m going to take my time with this one and see how good I can make it.
I’ve always wanted to try a wingnut wings kit as they have established a formidable reputation in their relatively short history.
The kit is expensive, but doesn’t disappoint. I’ll post some sprue shots if anyone is interested, but some of the injection moulding is on a par with resin parts. It really is that good.
Anyway here’s the box art.
So far I have assembled three parts of the instrument panel. Not bad for three hours work.
This is what I have achieved.
I’m really happy with how the wood effect turned out. I’m going to take my time with this one and see how good I can make it.
A bit more progress over the last couple of days.
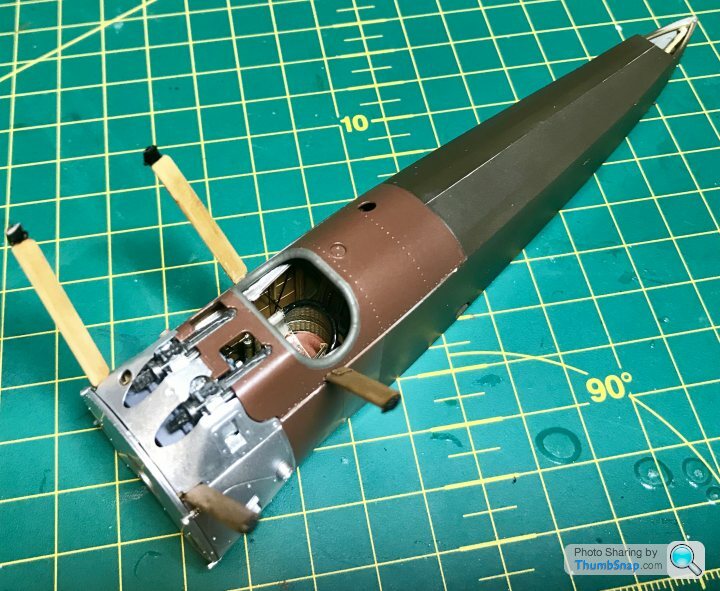
I finished the cockpit and the bodies of the machine guns.
My first real criticism of the kit is the PE on the belts. It’s actually quite thick and difficult to work with. I guess the eduard stuff has spoiled me somewhat.
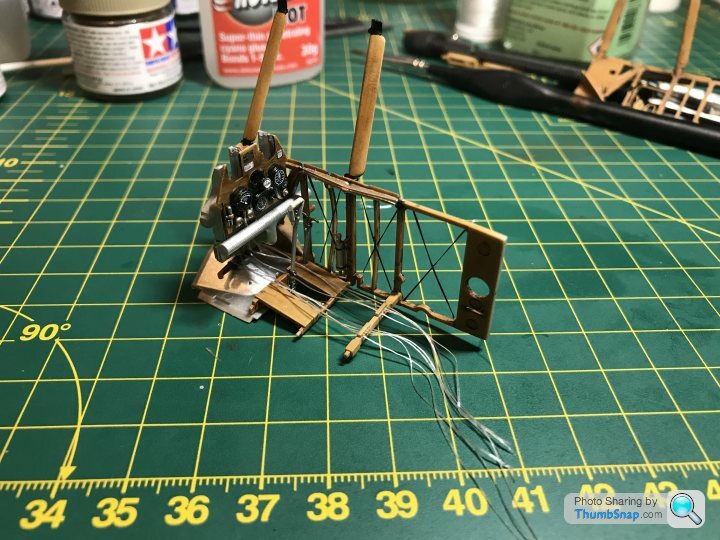
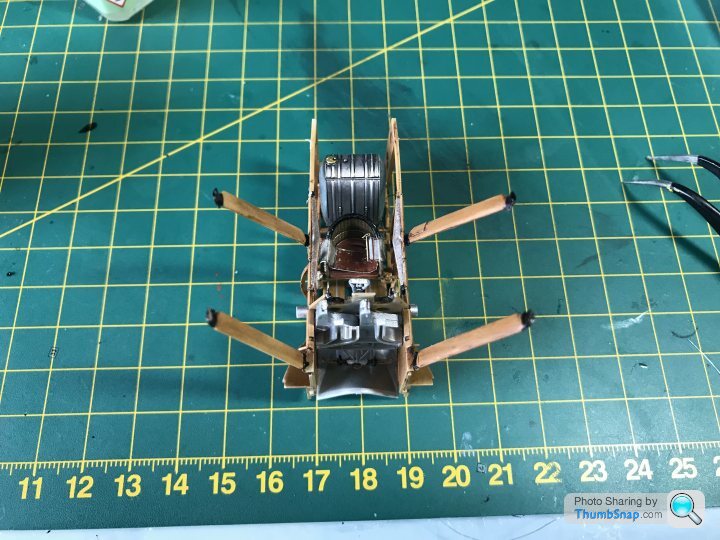
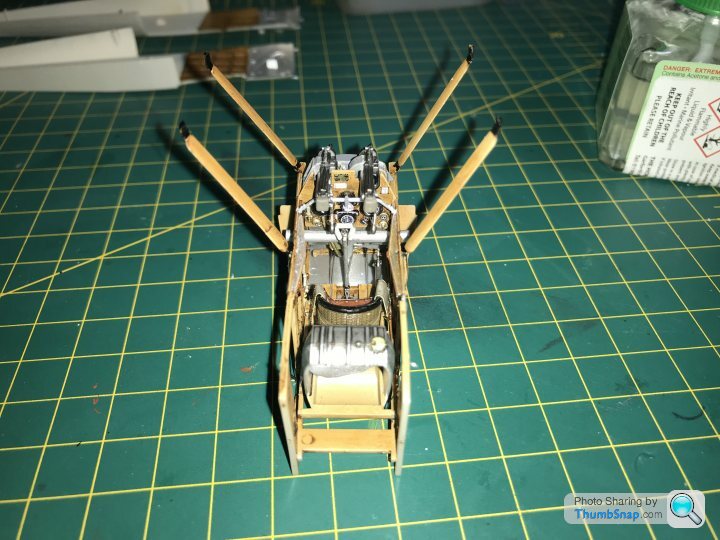
I also started to paint the inside of the fuselage
It’s all going well although it’s not a build that I’m massively enjoying so far. I’m not sure why. I’m hoping that when I get the fuselage assembled that will change.
I finished the cockpit and the bodies of the machine guns.
My first real criticism of the kit is the PE on the belts. It’s actually quite thick and difficult to work with. I guess the eduard stuff has spoiled me somewhat.
I also started to paint the inside of the fuselage
It’s all going well although it’s not a build that I’m massively enjoying so far. I’m not sure why. I’m hoping that when I get the fuselage assembled that will change.
Didn’t think of that thanks.
Going back to my engineering apprenticeship many, many years ago: don’t you anneal brass by quenching in water? I thought it was only ferrous metals that needed to be left to cool. Mind you I can’t remember what I did yesterday let alone nearly thirty years ago...
Going back to my engineering apprenticeship many, many years ago: don’t you anneal brass by quenching in water? I thought it was only ferrous metals that needed to be left to cool. Mind you I can’t remember what I did yesterday let alone nearly thirty years ago...
Thanks for the link. I’m not sure that would have helped though. Annealing would have been the best idea had I thought of it. It’s done now and looks fine.
Going through some of the parts I don’t think you will even be able to see most of the cockpit anyway. I guess it’s all about knowing the detail is there for yourself.
Going through some of the parts I don’t think you will even be able to see most of the cockpit anyway. I guess it’s all about knowing the detail is there for yourself.
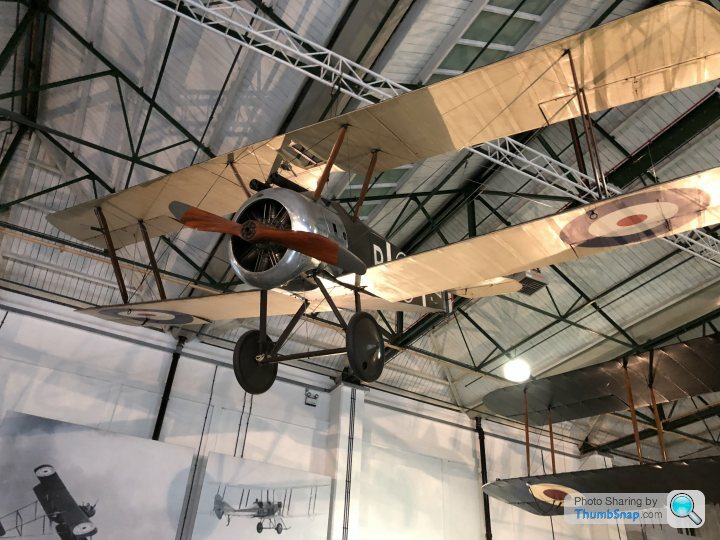
I’ve now,got some ez line. So that is sorted. The instructions mention the possible use of turnbuckles etc. But say that isn’t right for the camel anyway see image below.
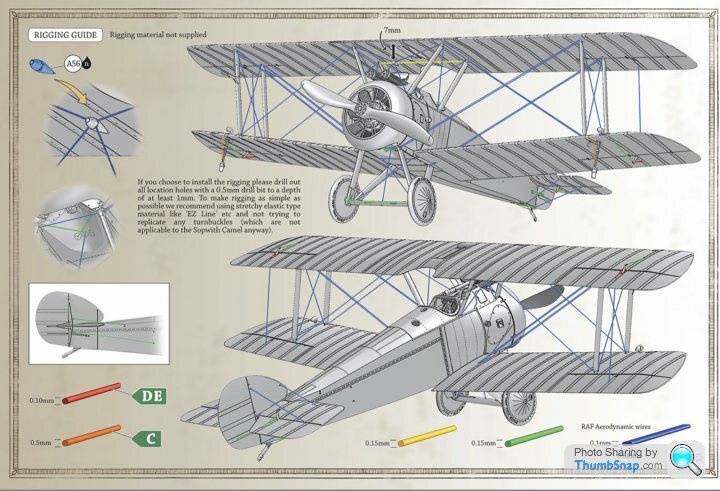
That said I’ve been looking at lots of pictures of camels and in reality some do have turnbuckles.
Here’s the one from the imperial war museum.
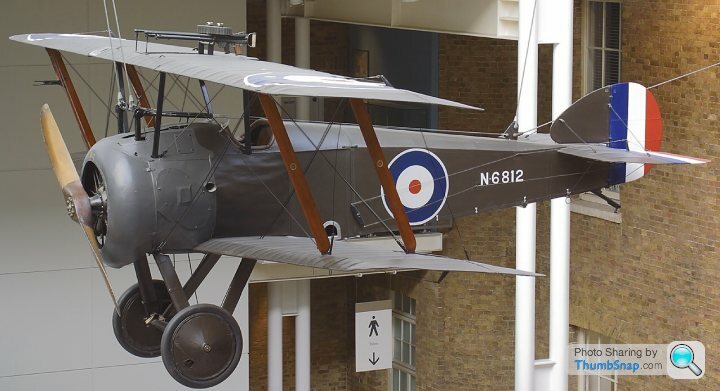
Whilst others don’t
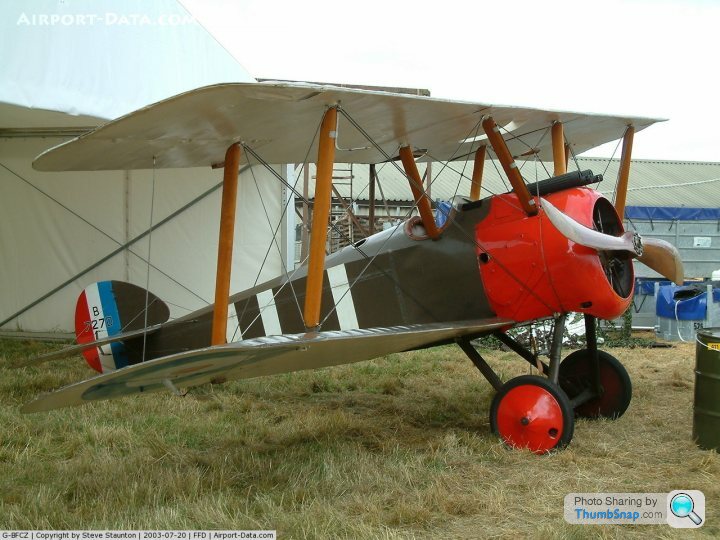
I’m going to try and pop down to Hendon and have a look at theirs.
Ultimately I’ll probably just drill small holes and glue in the ez line.
That said I’ve been looking at lots of pictures of camels and in reality some do have turnbuckles.
Here’s the one from the imperial war museum.
Whilst others don’t
I’m going to try and pop down to Hendon and have a look at theirs.
Ultimately I’ll probably just drill small holes and glue in the ez line.
You’re right of course. I just think those tiny eyelets and trying to thread the rigging through the tube would make my head explode.
Being that it’s my first bi-plane build I’m going with simpler (but potentially riskier) option. I don’t think it will detract from the overall model and anyone who sees it in my office certainly won’t notice.
There’s still time before I get to that stage though (this is the slowest build I think I’ve ever done) so I may change my mind and give it a go.
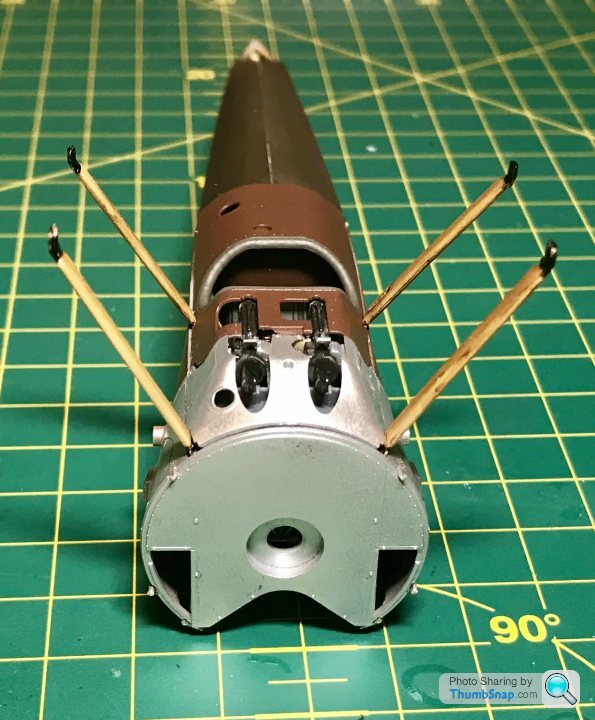
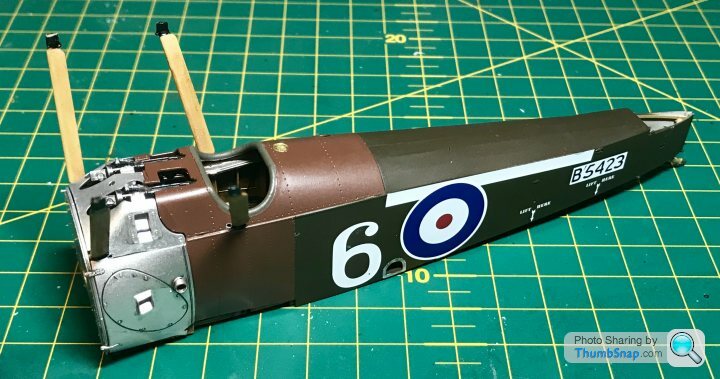
Bit of an update.
Firstly I finished work on the fuselage (or so I thought at least) by assembling everything working on the seam before going through the normal process to add the decals.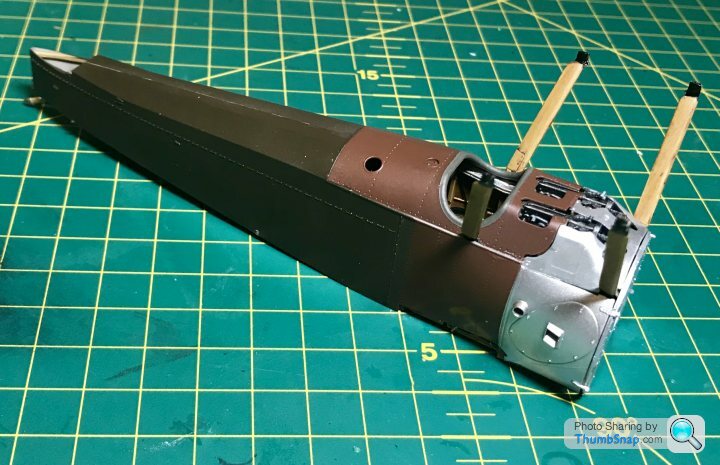

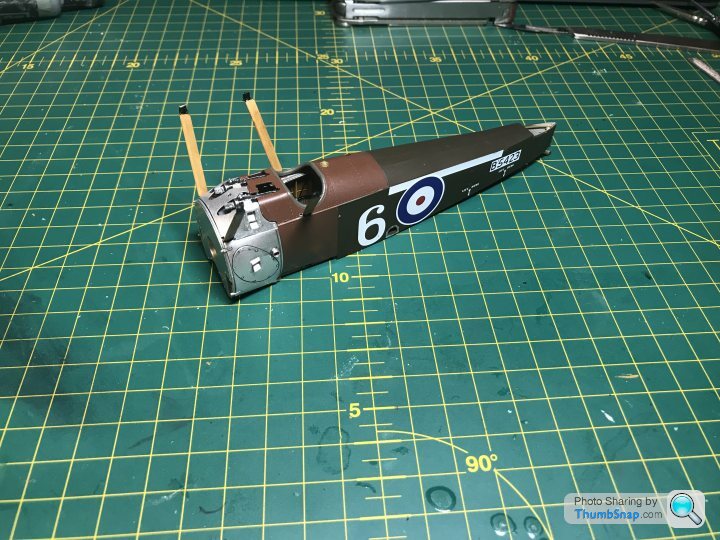
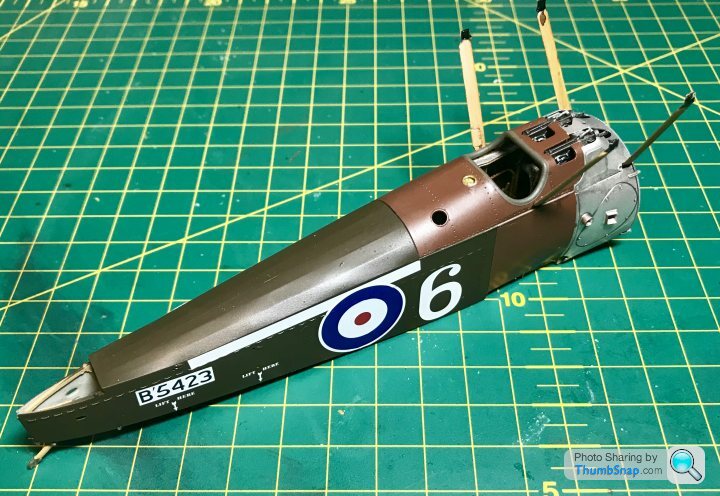
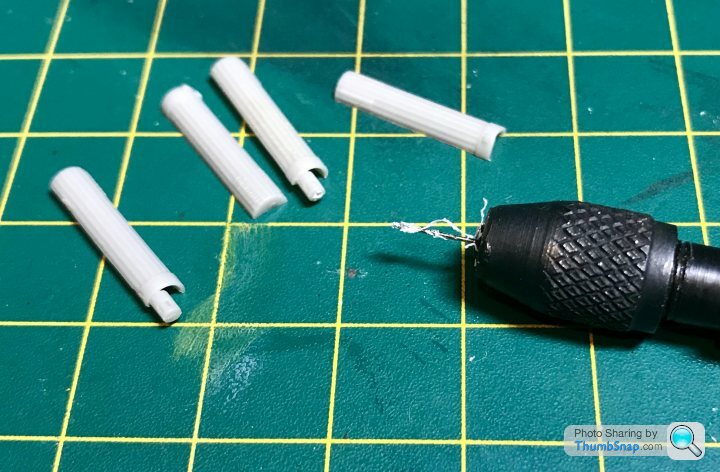
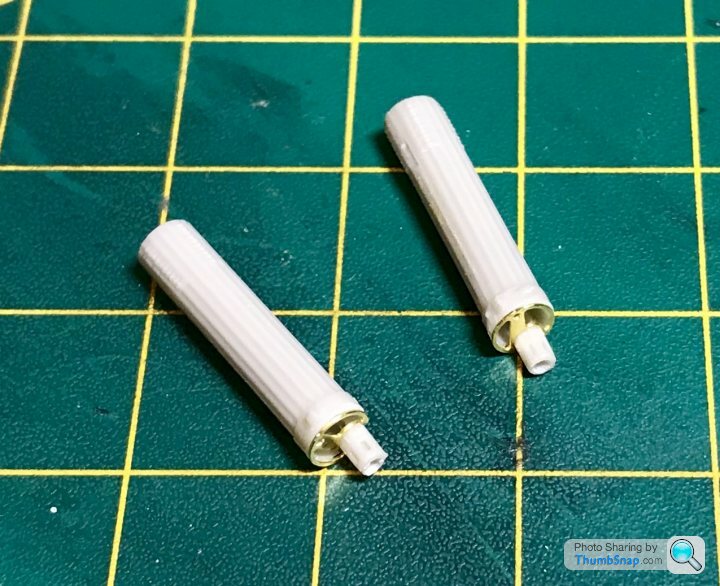
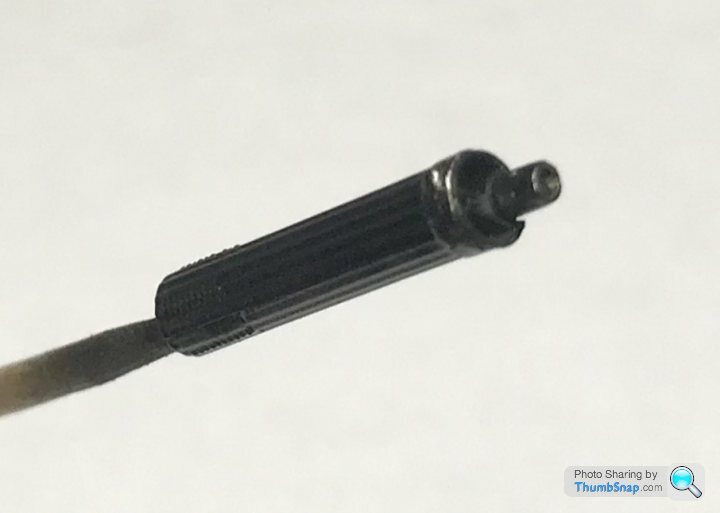
Next I started work on the gun barrels. I drilled out the barrel ends to make it look a little better.
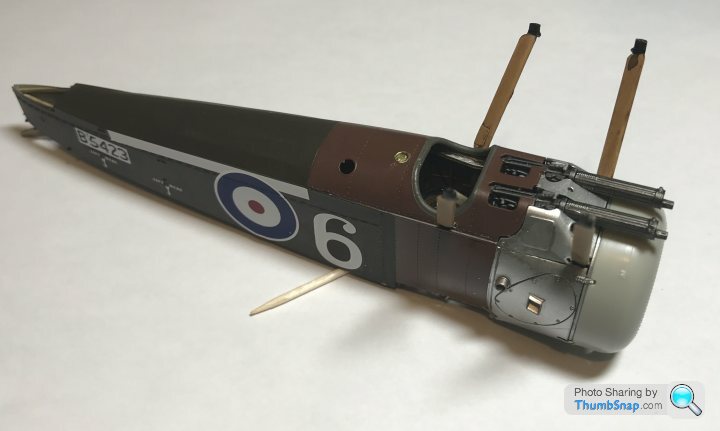
I thought I’d trial fit them to the fuselage.
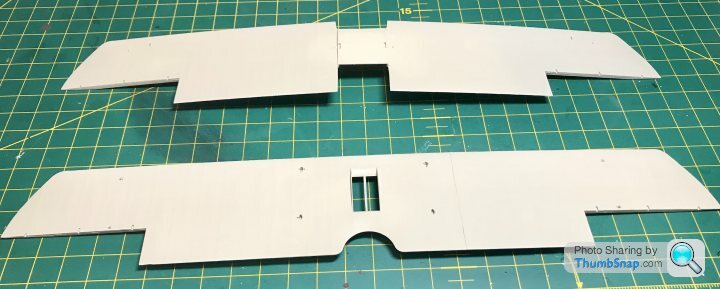
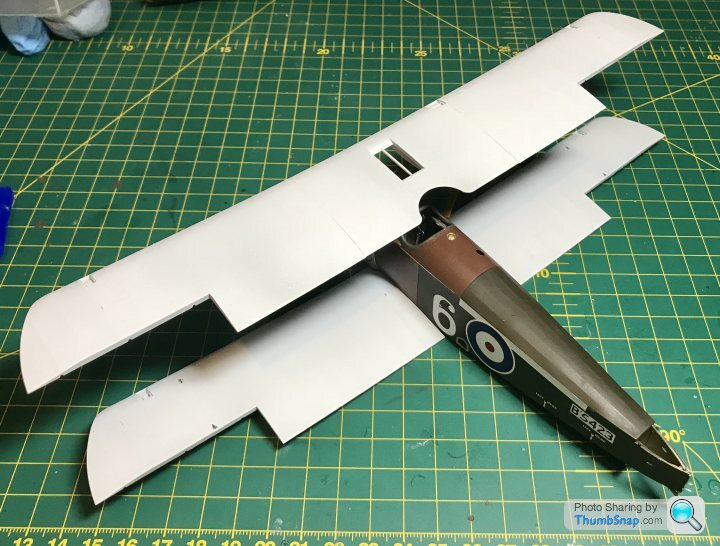
Next onto the wings
First I assembled the top wing from its three parts. This is because there are two different centre sections for different aircraft. It would have been nice if they had just supplied two different wings given the price of the kit.
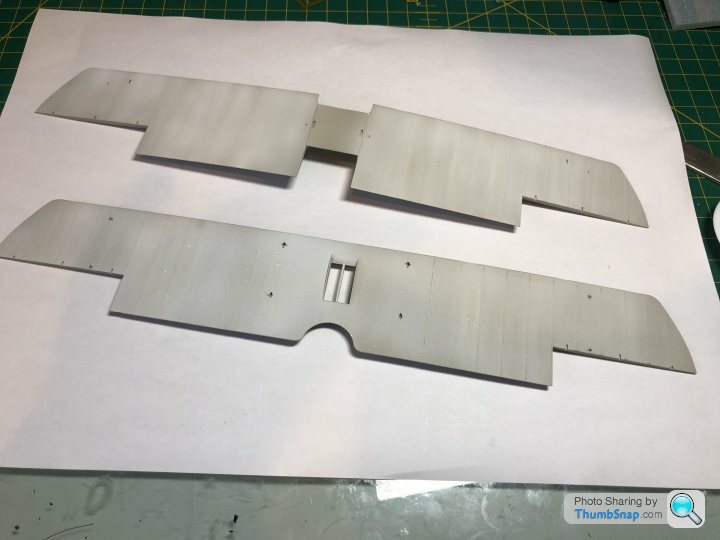
I applied primer and could not resist a trial fit.

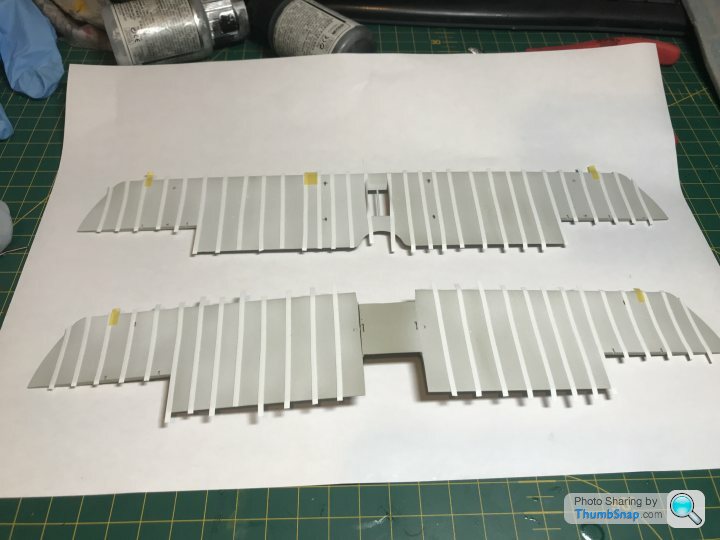
Next up was painting the underside of the wings. I started with a 50:50 mic of white and deck tan. Which I then over sprayed with a thinned down coat of white (probably a mistake)
Next I used the conveniently sized Tamiya flexible masking tape to mask the rib tapes and the undersides of the inspection windows.
The a coat of deck tan.
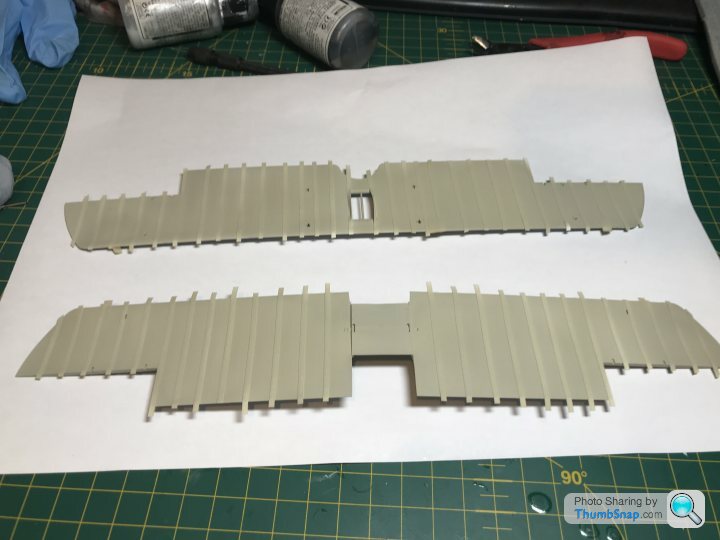
The result was a bit too much contrast.

So I overspray did thinned coats of deck tan and white in parallel with the ribs to tone the effect down and blend everything together a bit. It looks a bit better than in the photos.
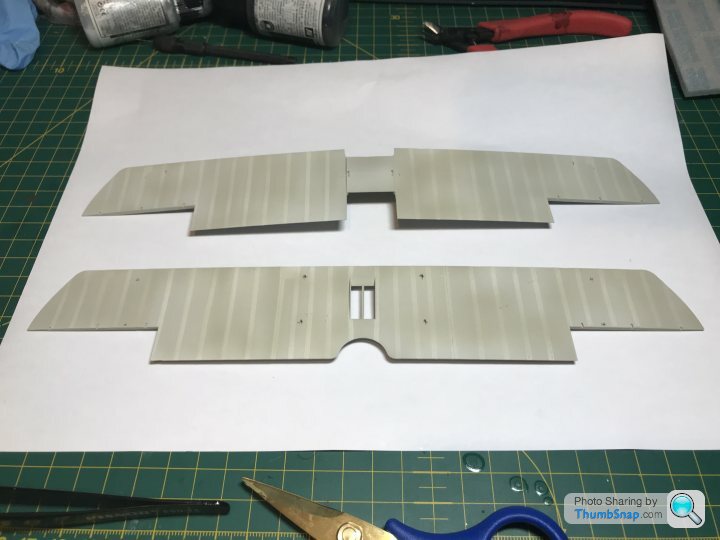
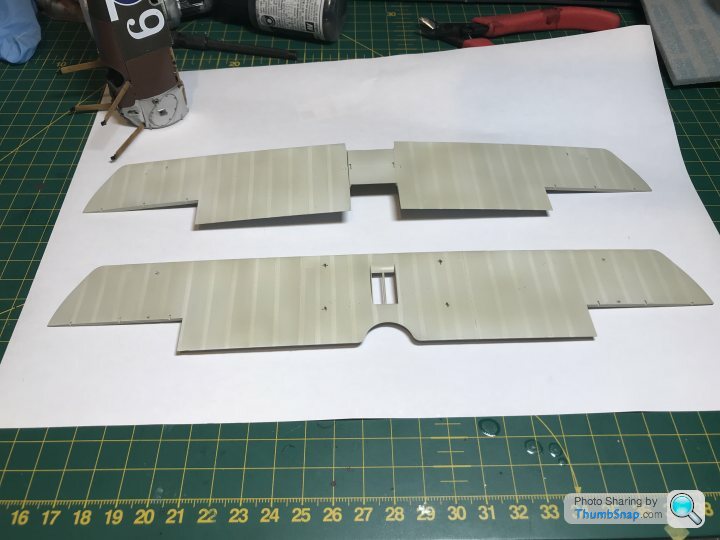
I applied a coat of clear to protect the result before the inevitable masking for the tops of the wings and left it to dry fully.
While that was going on I thought I’d make a start on the engine.
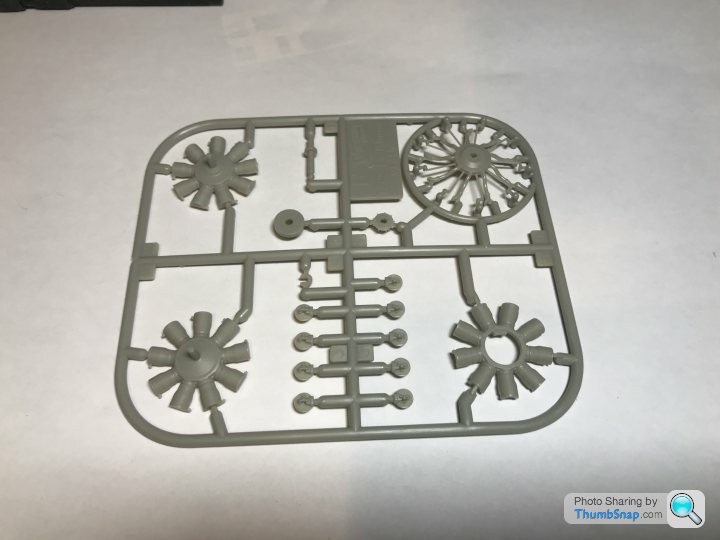
It’s only a few parts and before I thought about it it was more or less done.

As I go through the build one gripe I have about the kit is the complete lack of detailed colour call outs. If you simply followed the instructions a lot of the details wouldn’t get painted correctly. An example is the engine, which if you followed the painting instructions would just be steel colour with copper induction system.
It’s only because I was looking at a Clegert engine at the fleet air arm museum I thought about painting the push rods black and spark plugs white.
The main issue is for the different schemes they only supply a single side view. Consequently I painted the bottom of the fuselage the same green brown as the sides. It should have been the same doped material finish as the wings. So now I have to revisit that.
It’s not all bad news as I wasn’t entirely happy with the seam, so it’s a chance to improve that.
I’ll try and update more regular rather than just dump several days work in one go next time.
Firstly I finished work on the fuselage (or so I thought at least) by assembling everything working on the seam before going through the normal process to add the decals.
Next I started work on the gun barrels. I drilled out the barrel ends to make it look a little better.
I thought I’d trial fit them to the fuselage.
Next onto the wings
First I assembled the top wing from its three parts. This is because there are two different centre sections for different aircraft. It would have been nice if they had just supplied two different wings given the price of the kit.
I applied primer and could not resist a trial fit.
Next up was painting the underside of the wings. I started with a 50:50 mic of white and deck tan. Which I then over sprayed with a thinned down coat of white (probably a mistake)
Next I used the conveniently sized Tamiya flexible masking tape to mask the rib tapes and the undersides of the inspection windows.
The a coat of deck tan.
The result was a bit too much contrast.
So I overspray did thinned coats of deck tan and white in parallel with the ribs to tone the effect down and blend everything together a bit. It looks a bit better than in the photos.
I applied a coat of clear to protect the result before the inevitable masking for the tops of the wings and left it to dry fully.
While that was going on I thought I’d make a start on the engine.
It’s only a few parts and before I thought about it it was more or less done.
As I go through the build one gripe I have about the kit is the complete lack of detailed colour call outs. If you simply followed the instructions a lot of the details wouldn’t get painted correctly. An example is the engine, which if you followed the painting instructions would just be steel colour with copper induction system.
It’s only because I was looking at a Clegert engine at the fleet air arm museum I thought about painting the push rods black and spark plugs white.
The main issue is for the different schemes they only supply a single side view. Consequently I painted the bottom of the fuselage the same green brown as the sides. It should have been the same doped material finish as the wings. So now I have to revisit that.
It’s not all bad news as I wasn’t entirely happy with the seam, so it’s a chance to improve that.
I’ll try and update more regular rather than just dump several days work in one go next time.
Just in case any of you thought I’d given up.
I have spent the last week painting, clear coating, applying decals, masking, removing masking, removing decals with the masking (despite them being clear coated) masking and painting the missing decals, applying wood effects with oil colours.
I have only the control horns left to paint and then it’s on to final assembly and the dreaded rigging.
Seriously though. The decals have been a real pain. In the instructions it categorically states not to use just water. If you do they won’t conform and definitely won’t stick.
I ended up using markfit and micro sol and they still weren’t great.
If I build another Wingnut wings kit I’m probably going to see if I can get some Cartograf ones or better still paint them. A couple on the camel are actually painted.
I think it’s actually in the tips section of their website. The decals are a bit rubbish regardless. The smaller stencils are ok though.
The cowl is painted using valejo metal air paint. The front parts is chrome and the back aluminium. The finish is getting better the more I get used to the paints.
The cowl is painted using valejo metal air paint. The front parts is chrome and the back aluminium. The finish is getting better the more I get used to the paints.
Krikkit said:
Regardless of the tricky bits I think that looks brilliant so far - how did you get the wood effect? Lovely.
Thanks very much.The build is on hold now until I work up the courage to do the rigging. Probably a Saturday afternoon job as the kids and wife will be at birthday parties.
The wood effect is fairly straight forward actually. It’s tamiya desert yellow, then a coat of clear gloss (I used the pledge future for this) once that is well and truly dry (I left it a couple of days to be sure) I painted with burnt umber oil paint, then used a clean flat brush in the direction of the grain. You clean the excess paint off the brush with a cloth or kitchen towel and repeat. Keep doing this until you get the desired effect. A final clear coat seals everything in after a couple of days to dry. Top tip: if you put your oil paint onto an absorbent kitchen towel a lot of the oil wicks into the towel. It’s still easy to work with, but cuts the drying time by several days.
It’s okay for smaller panels, but I’d use decals for larger ones like an Albatros (more on that in the future
 )
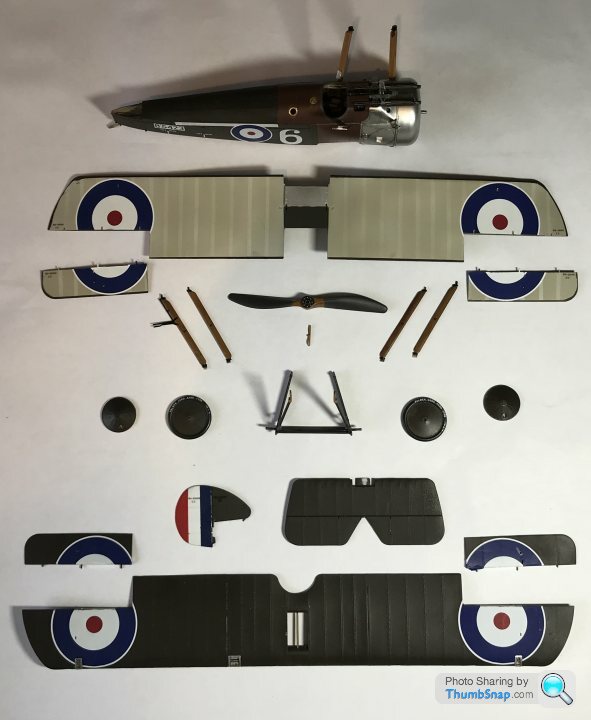
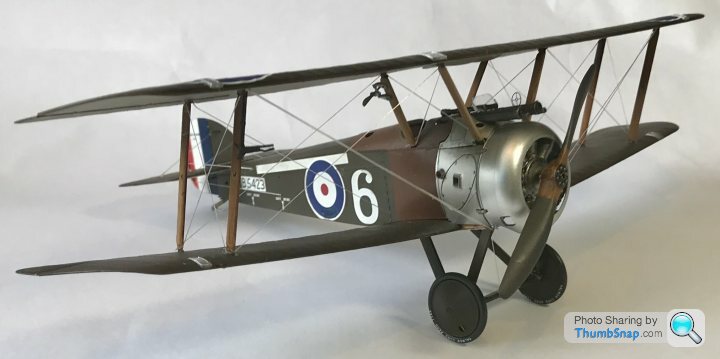
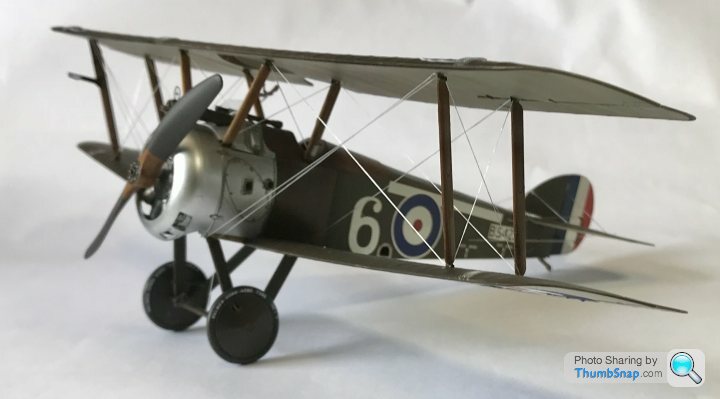
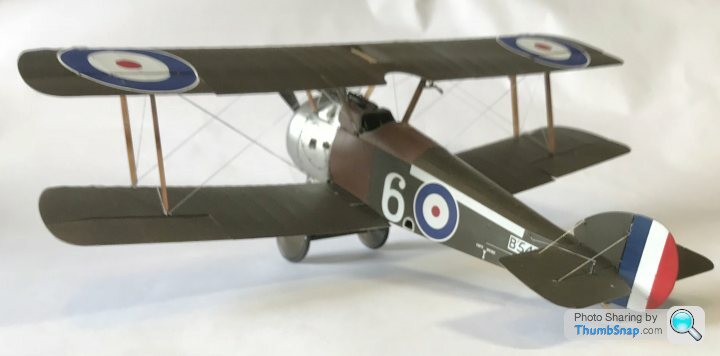
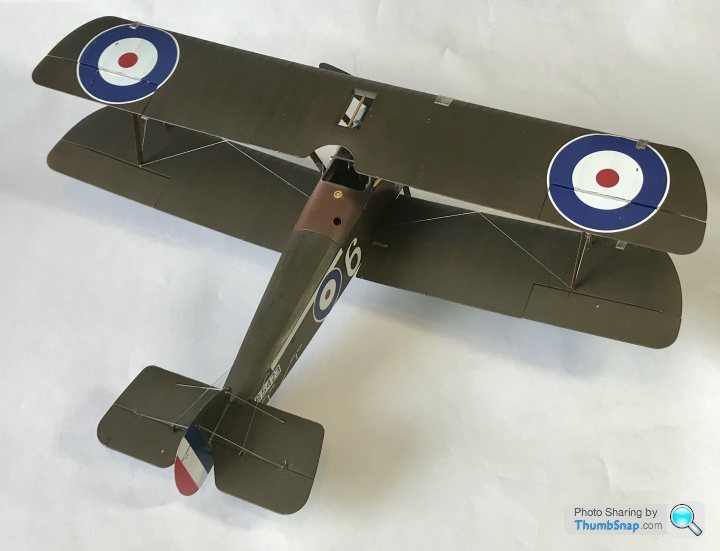
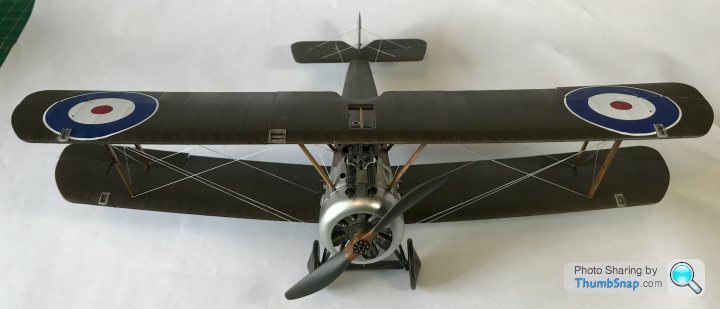
)Finally finished this morning. It’s been a real challenge, as it’s my first biplane.
I have to say I’m pleased. There are plenty of things I would do differently if I had to start over though, but that’s what all this is about. We get better with every build.
Anyway I’d be pleased to hear you comments. Nothing too harsh though please.


I have to say I’m pleased. There are plenty of things I would do differently if I had to start over though, but that’s what all this is about. We get better with every build.
Anyway I’d be pleased to hear you comments. Nothing too harsh though please.
So I went to my second meeting with my local modelling club yesterday. Every two months they have a themed mini competition for the members. Last nights theme was camels... naturally I took this kit along (after a bit of dusting) and cake joint first!
To be fair only seven of us entered, but I’m still pretty chuffed.
We have a club stand at the Milton Keynes show next month and I am thinking about entering the competition there to see how I get on.
To be fair only seven of us entered, but I’m still pretty chuffed.
We have a club stand at the Milton Keynes show next month and I am thinking about entering the competition there to see how I get on.
Gassing Station | Scale Models | Top of Page | What's New | My Stuff