1:72 Airfix Bristol Bulldog
Discussion


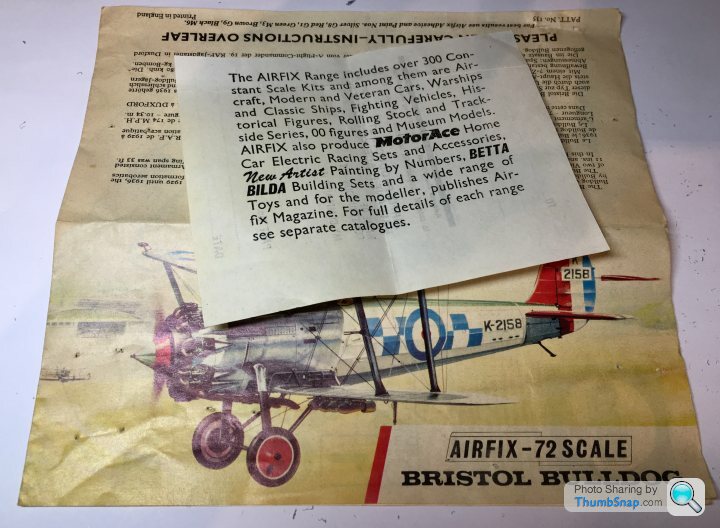
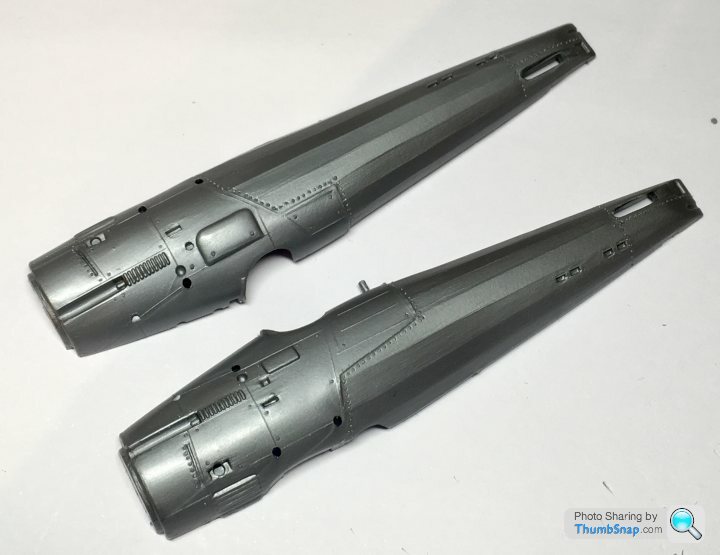
I’m currently struggling with an atrocious Cyber Hobby Helldiver, so I decided to start this Classsic Airfix kit (1969) as some light relief. I picked it up at Telford last year for a few quid. Still a great moulding, particularly the engine and fuselage, it’s going to be re-released soon I believe:

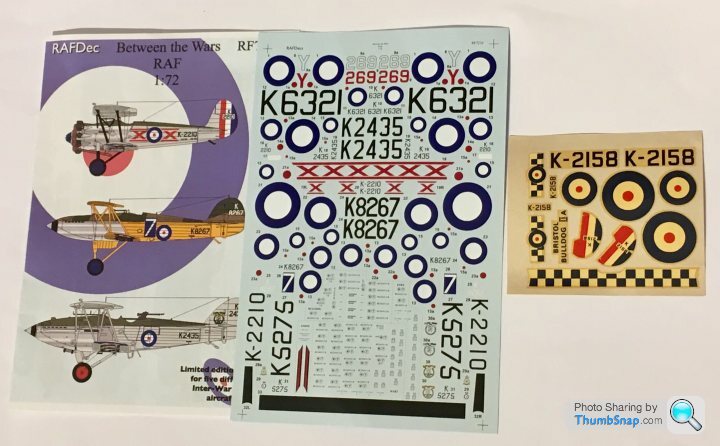
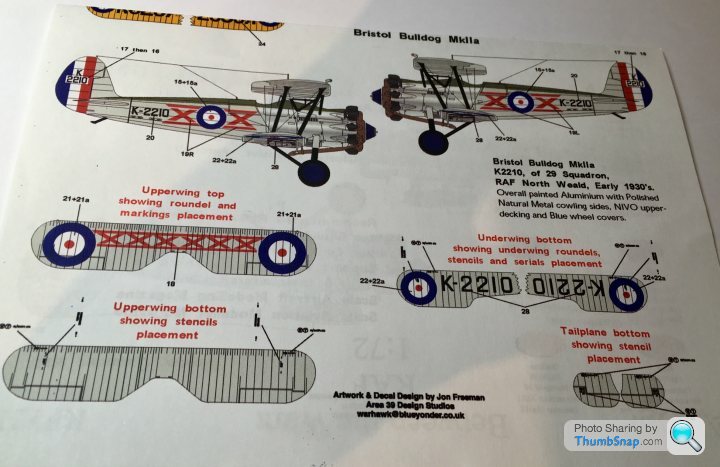
Decals are probably dead, so I got some new ones:
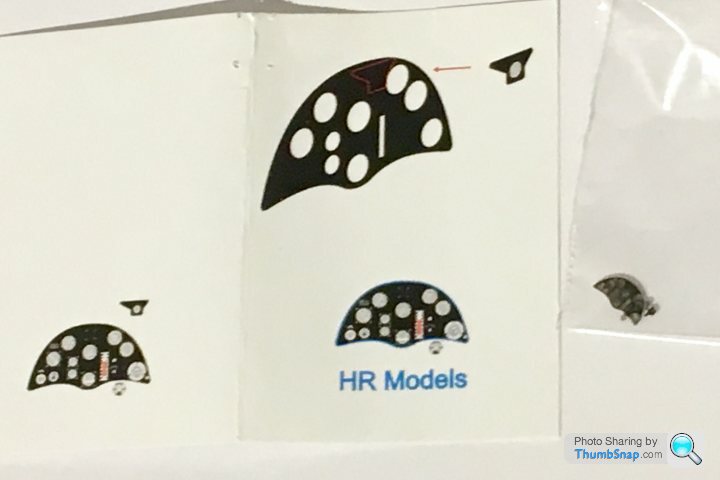
Also got an instrument panel:
Plan is to add a few small refinements, maybe bare metal foil for the forward fuselage, but keep it pretty much standard. Last time I built one of these was in the late ‘70’s, and I still remember it looked pretty good even unpainted.
Decals are probably dead, so I got some new ones:
Also got an instrument panel:
Plan is to add a few small refinements, maybe bare metal foil for the forward fuselage, but keep it pretty much standard. Last time I built one of these was in the late ‘70’s, and I still remember it looked pretty good even unpainted.
Halmyre said:
Out of curiosity, how many projects do you have on the go at any one time? It must be in double figures.
Nearly double figures:Plastic kits - 4
Paper kits - 1
Model engines - 2
Classic cars - 1
General engineering stuff - 1
Just won a Wilesco steam road roller off EBay to restore too
They all get done eventually.
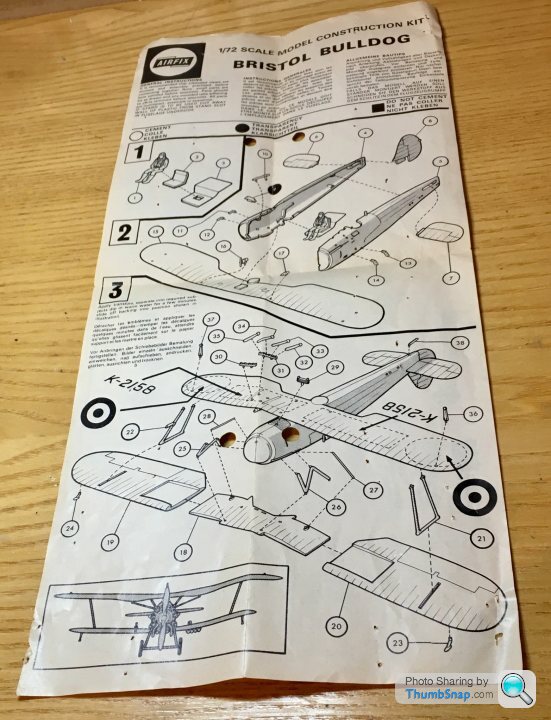
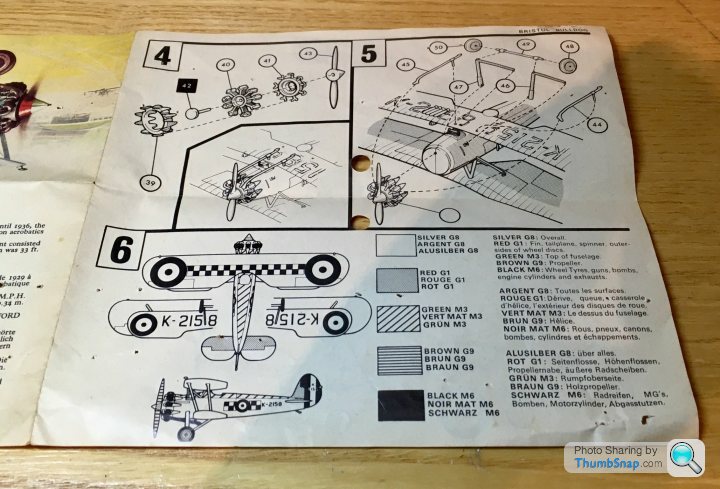
Proper old school instructions (perfectly good):
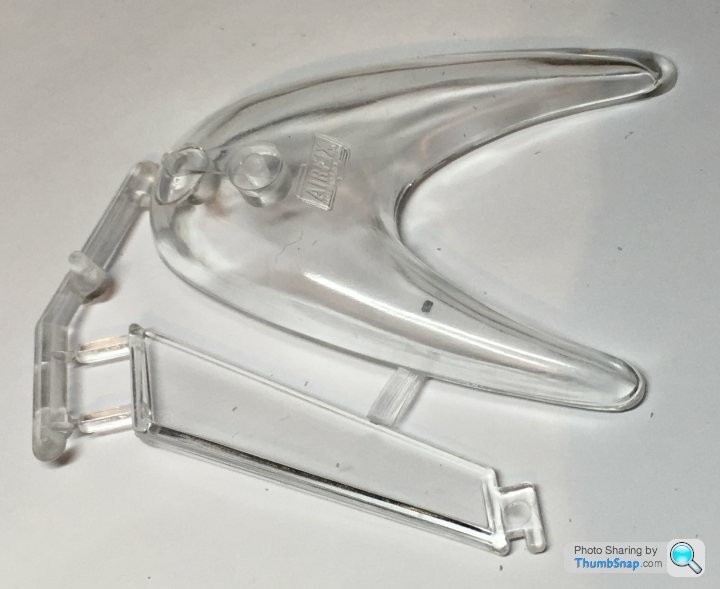
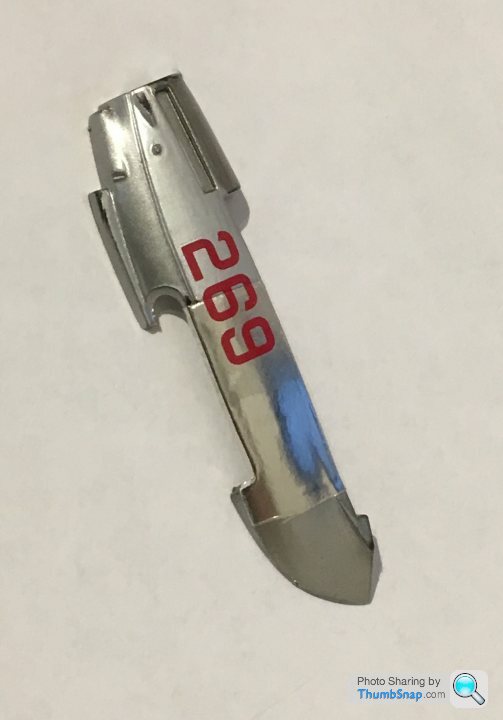
Of course, there’s a stand (which I might use, although the pilot is a bit of a blob):
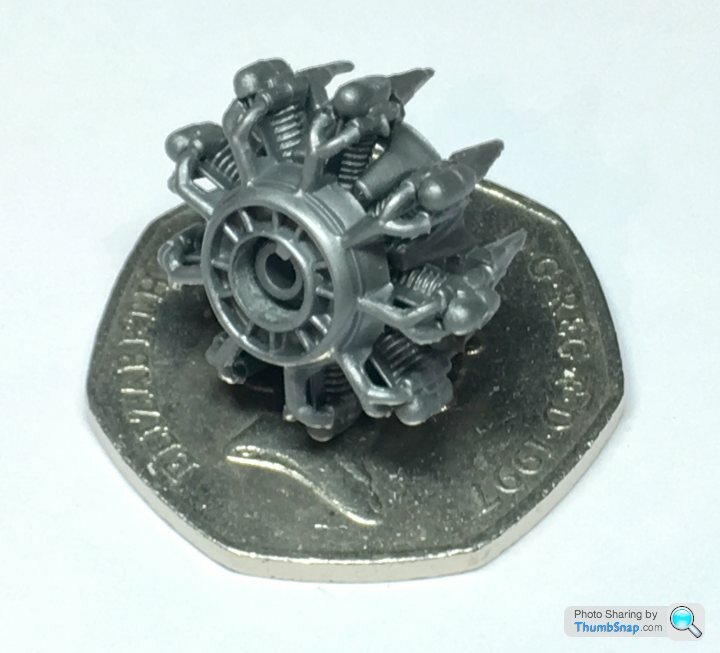
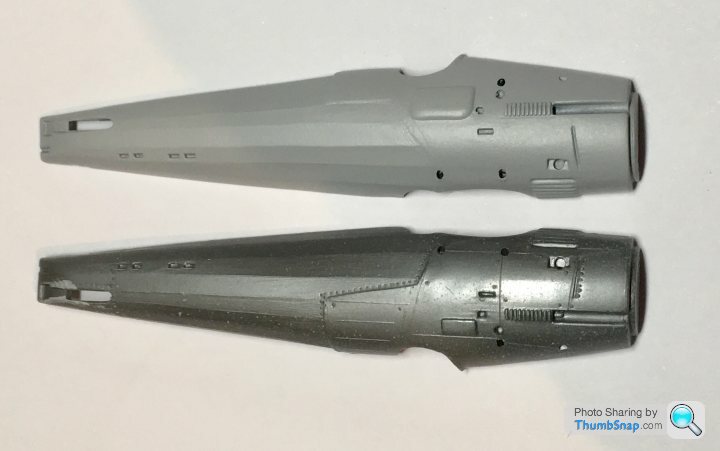
The engine is a highlight of the kit:

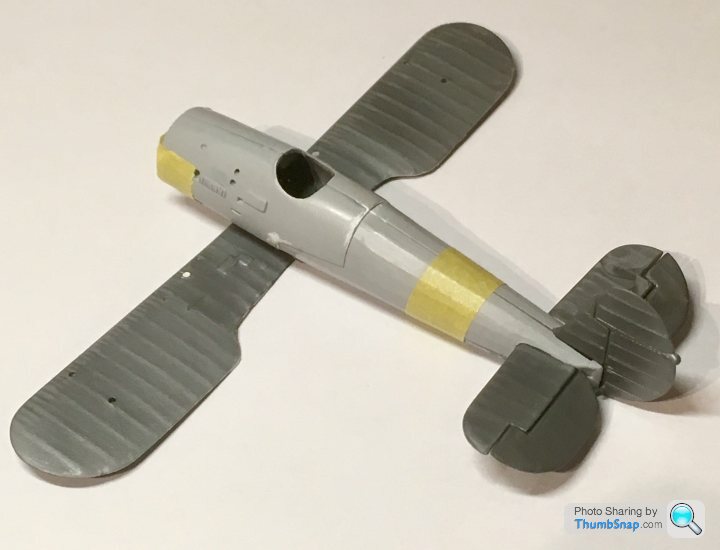
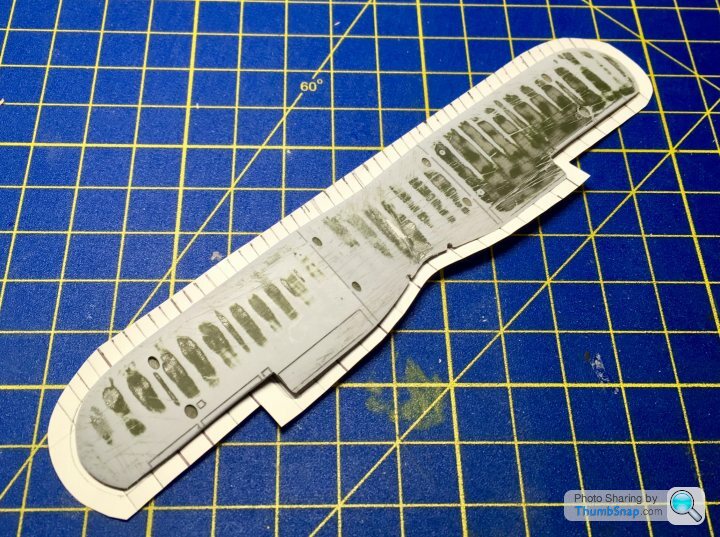
Builds into something easily comparable with modern kits:
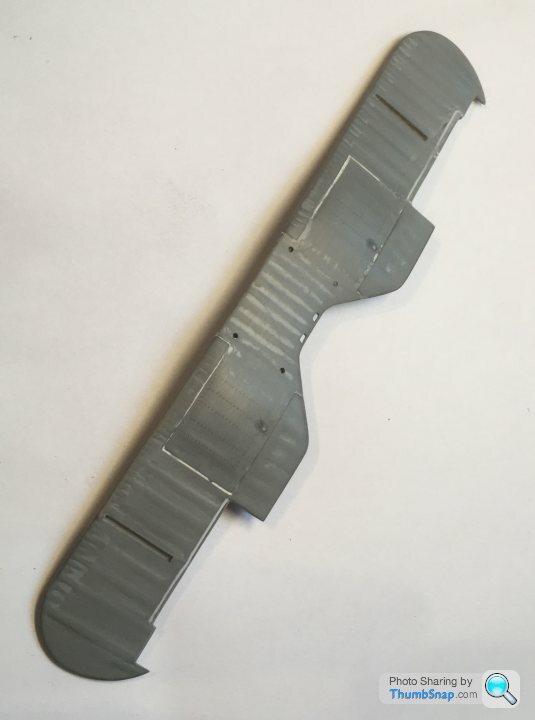
Fuselage also looks good, it features different textures for the aluminium and fabric, fine raised panel lines, stitching and rivets:
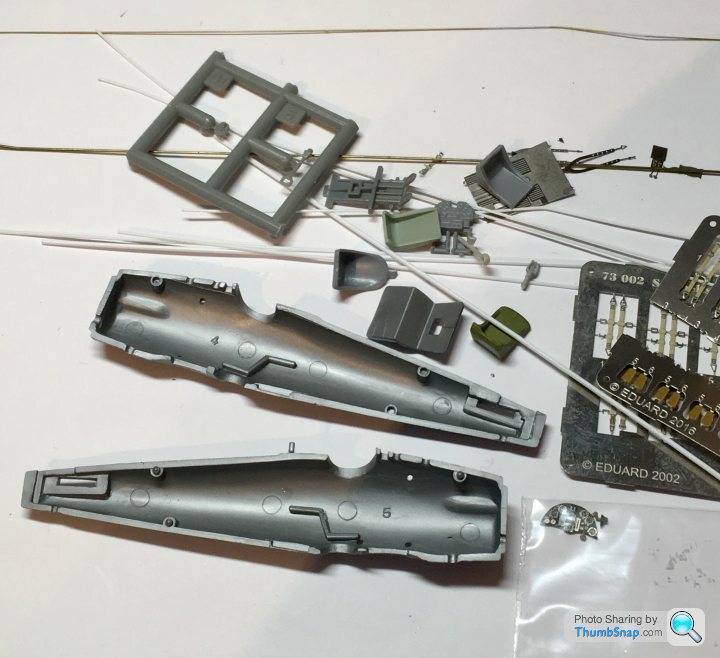
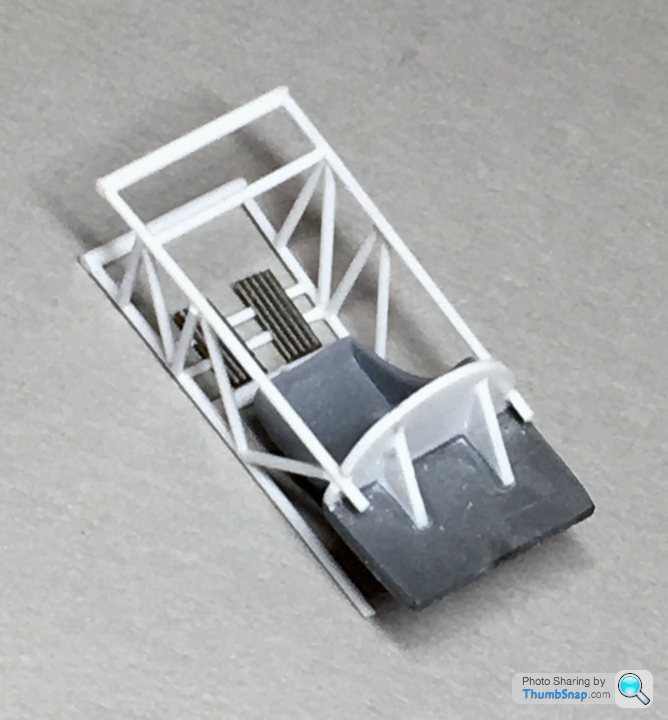
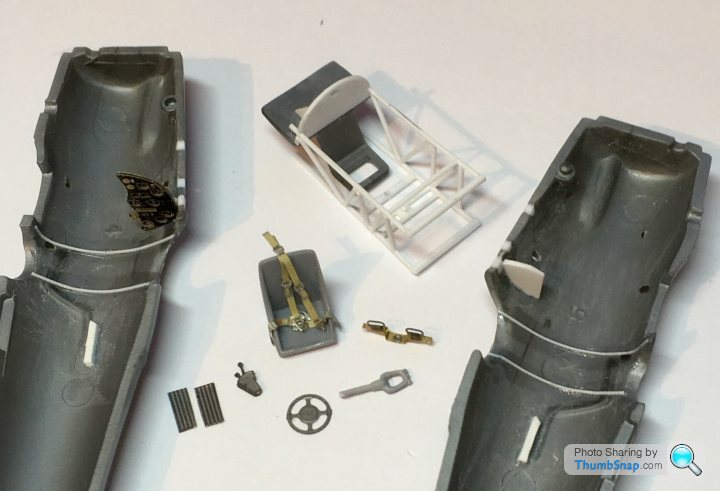
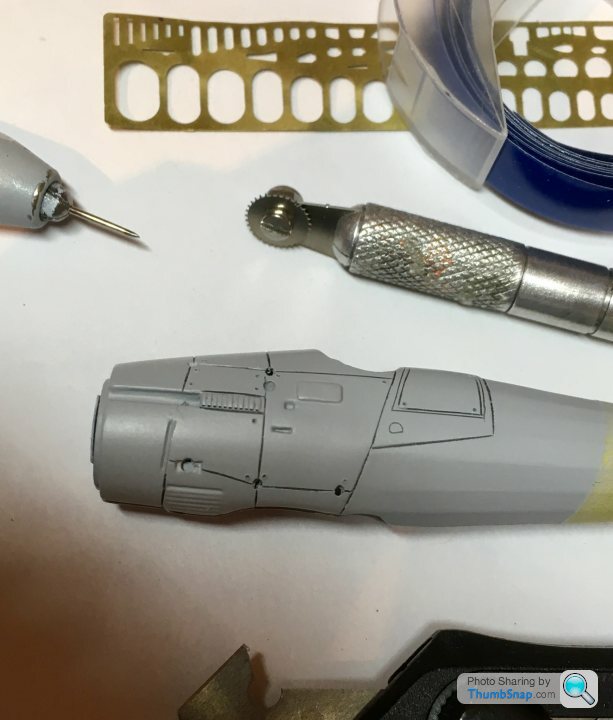
Most of the work will be improving the cockpit I think. Everything else is there, just needs a bit of refinement in places.
Of course, there’s a stand (which I might use, although the pilot is a bit of a blob):
The engine is a highlight of the kit:
Builds into something easily comparable with modern kits:
Fuselage also looks good, it features different textures for the aluminium and fabric, fine raised panel lines, stitching and rivets:
Most of the work will be improving the cockpit I think. Everything else is there, just needs a bit of refinement in places.
The key for me is to use elastic thread (ez-line or similar), then:
1) pre-drill shallow holes for the thread.
2) put a dot of cyano in the hole
3) dip the end of the thread in accelerator.
4) put the thread in the hole.
That way it sticks instantly so you’re not left holding a piece of stretched elastic thread for 10 minutes.
1) pre-drill shallow holes for the thread.
2) put a dot of cyano in the hole
3) dip the end of the thread in accelerator.
4) put the thread in the hole.
That way it sticks instantly so you’re not left holding a piece of stretched elastic thread for 10 minutes.
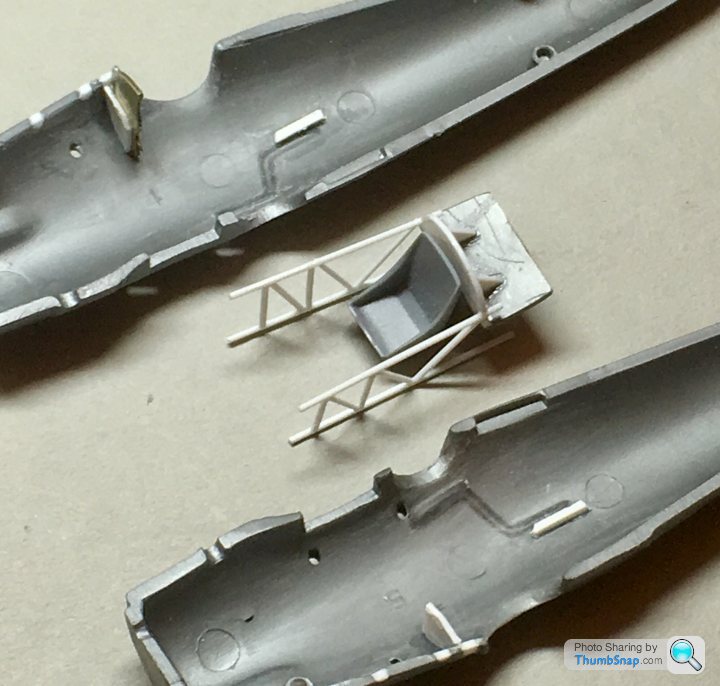
Bit more work on the cockpit - spaceframe just needs detailing with scrap p/e and bits from the spares box:
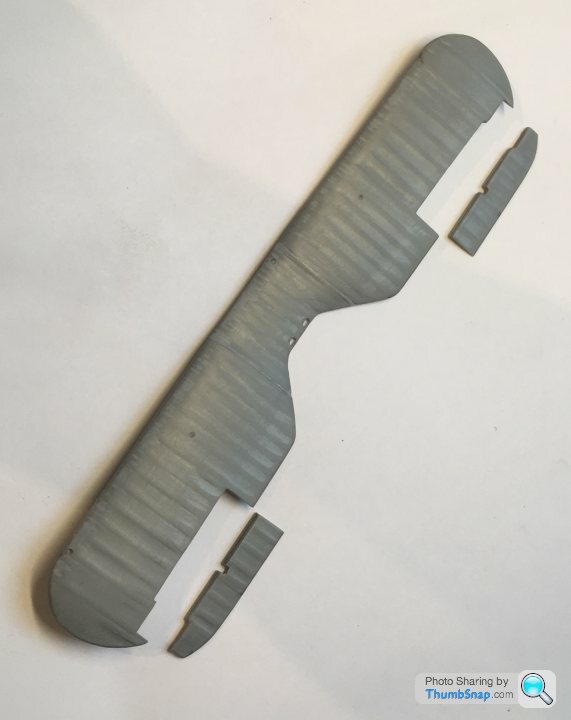
The upper wing is unusual in that it’s in three overlapping pieces. Seemed to fit ok so hopefully there will be no issues later:
 [url]
[url]
It needs thinning a bit, and I’ll probably split the ailerons to add a bit of interest.
The upper wing is unusual in that it’s in three overlapping pieces. Seemed to fit ok so hopefully there will be no issues later:
[url]It needs thinning a bit, and I’ll probably split the ailerons to add a bit of interest.
Edited by dr_gn on Sunday 3rd November 22:05
72twink said:
I see the Bulldog lives on as it’s down for December re-release - good news for all those inspired by your build!
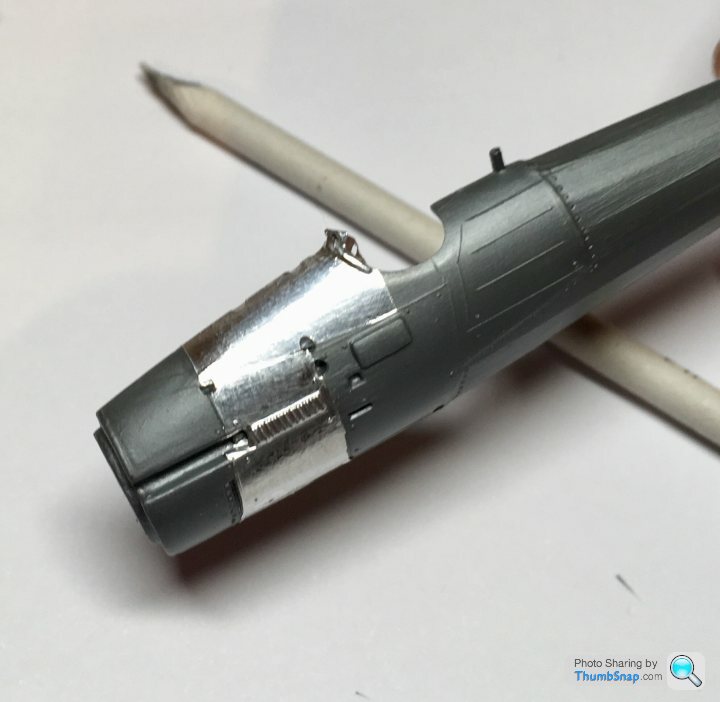
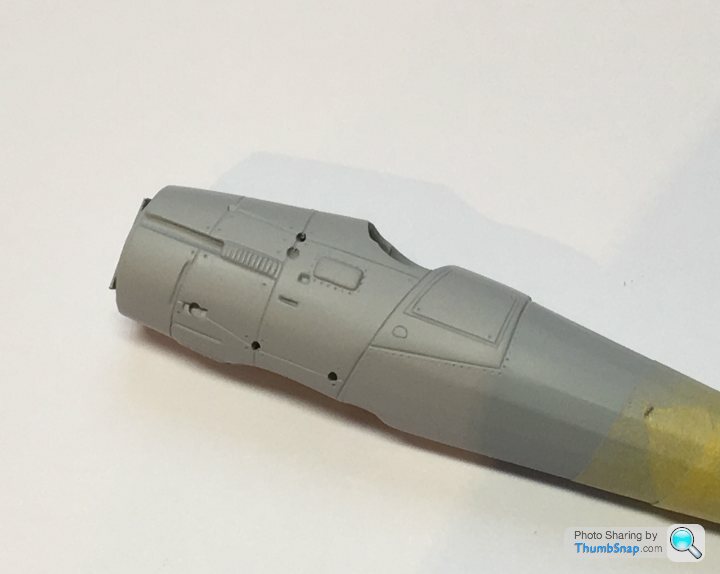
Yes, although I wonder if the moulds are worn, and if so if they’re repaired/upgraded? Mines a very early moulding, and has pretty good detail. It’s also a harder plastic than current Airfix kits, which I prefer to work with.I’ve been experimenting with polished metal finishes for the forward fuselage. One of the latest “amazing, must-have, easy to use” systems is Xtreme metal from AK Interactive. I saw some reviews, so got the black base and polished aluminium. I did a test on an ancient Matchbox Mosquito nacelle. Tried it on bare plastic and Tamiya primed surfaces. I didn’t find it particularly easy to apply, and it didn’t look much like a polished surface to me. I then put some bare metal foil next to it, and applied some Klear, MicroSol and a spare decal:
No contest; for me, if you want bare metal, use real bare metal.
No contest; for me, if you want bare metal, use real bare metal.
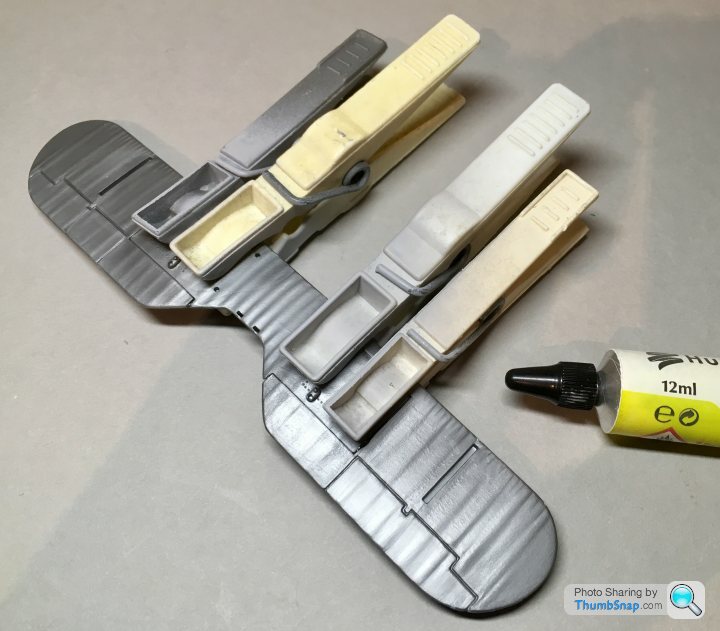
Next experiment is refining the bombs supplied in the kit:
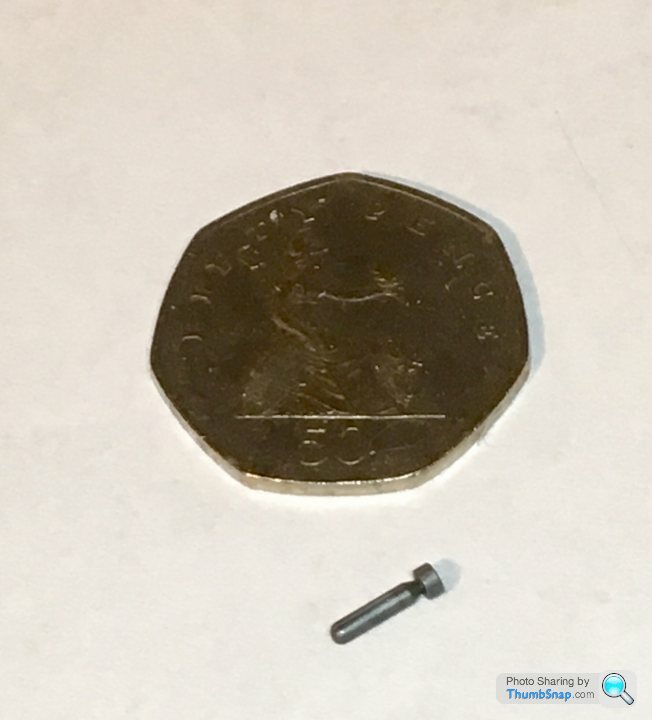
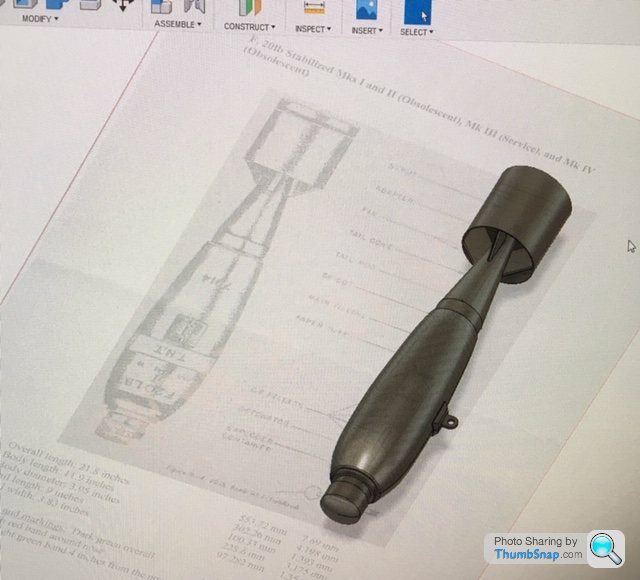
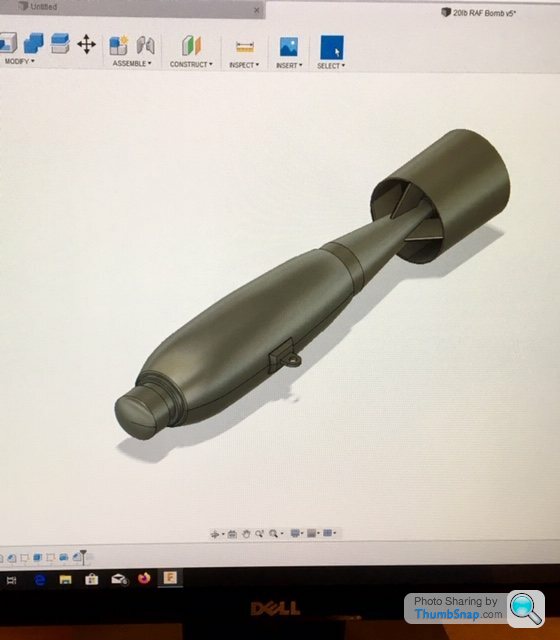
I opted to bin them becasue they are so crude, so I put them aside and filled the bomb rack holes under the port wing. Then I thought I’d see what they should look like, and found what I think is the right bomb in the WW2 Equipment Data website. I eventually decided to model the bomb in CAD, using the original diagrams as a guide within Fusion 360:

A few details to add, and then it will be a good test for a resin 3D printer. If it can print this (at 8 mm overall length), it can print anything...
I opted to bin them becasue they are so crude, so I put them aside and filled the bomb rack holes under the port wing. Then I thought I’d see what they should look like, and found what I think is the right bomb in the WW2 Equipment Data website. I eventually decided to model the bomb in CAD, using the original diagrams as a guide within Fusion 360:
A few details to add, and then it will be a good test for a resin 3D printer. If it can print this (at 8 mm overall length), it can print anything...
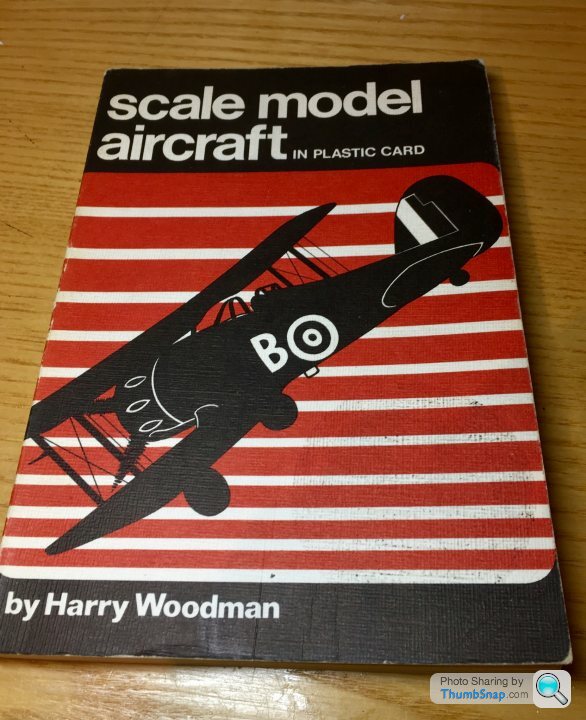
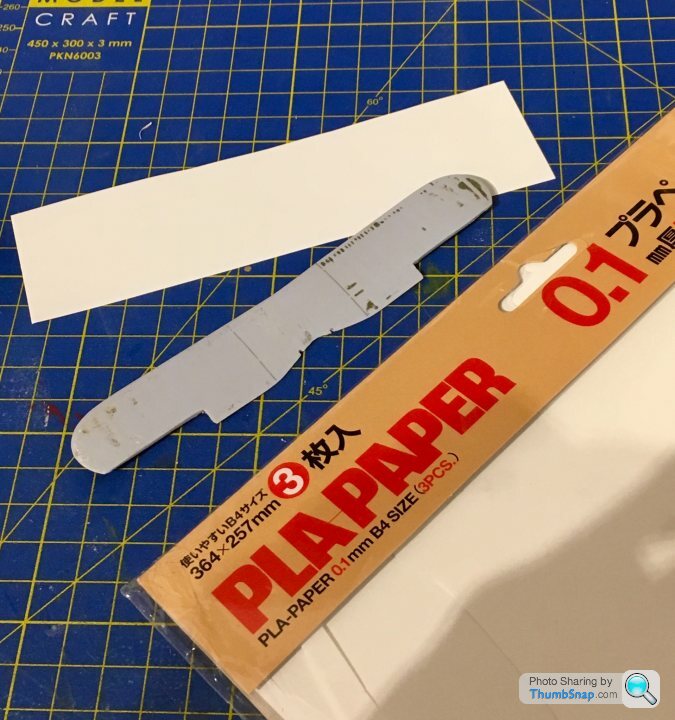
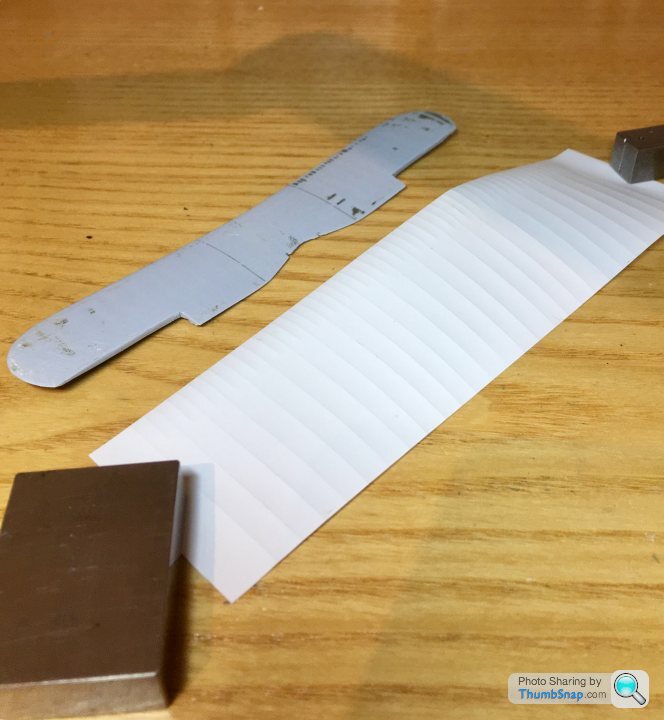
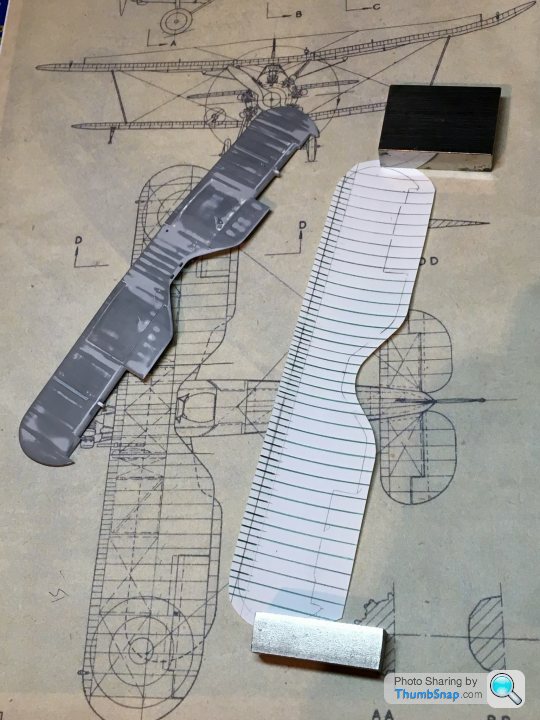
The sanded wing ribs didn’t look right - as if the ribs were about 200 mm wide. I thought I’d experiment with one of Harry Woodman’s favourite techniques - “skinning”, as featured in his classic plastic modelling book:
I had some 0.1 mm Tamiya Pla Paper left over from my home made Tornado canopy, and a spare Airfix Gladiator upper wing:
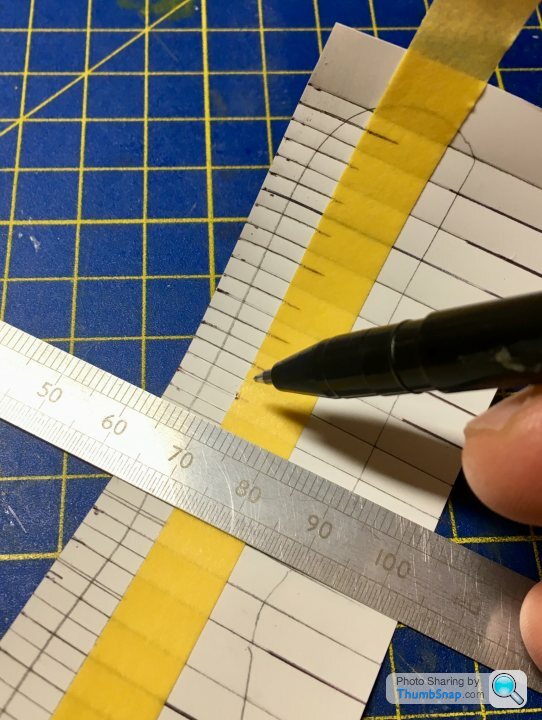
First job is to draw around the outline and pencil in the rib positions:
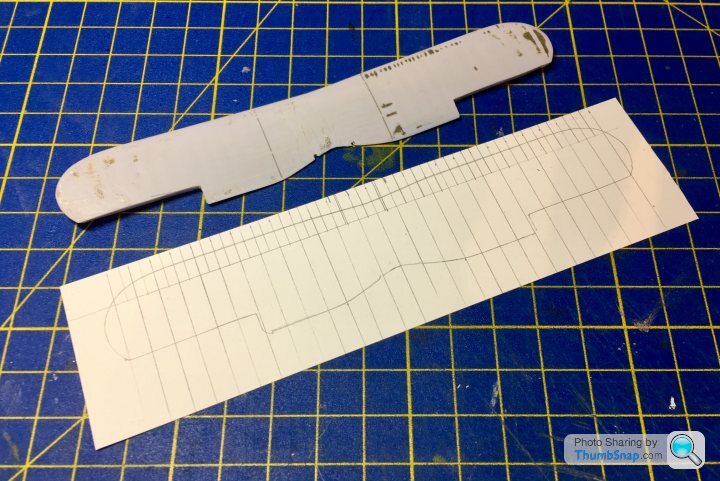
Then lightly go over the lines with a ball-point pen. The tape is there to try and get a consistent edge to the riblets:
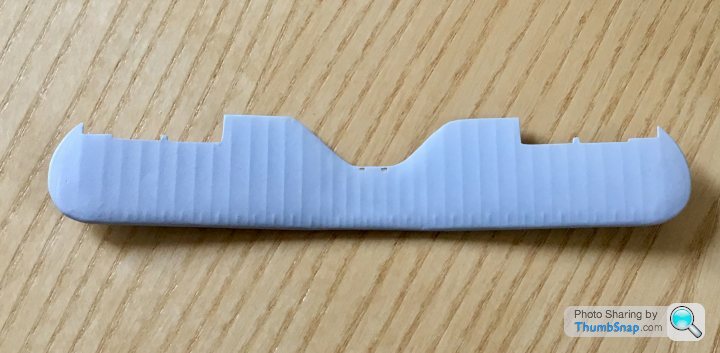
You’re left with a fairly realistic looking wing skin:
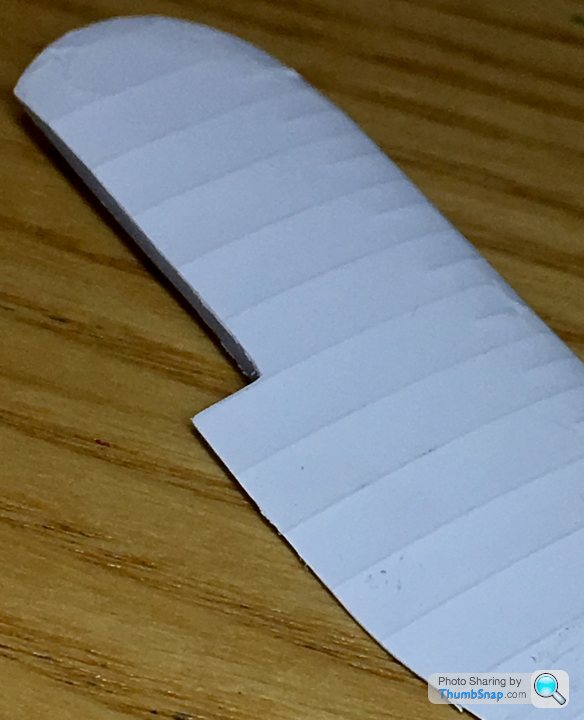
...which is epoxied to the sanded, flat wing, with the edges being attached with poly cement:
The excess paper edges are then sanded away and blended to the periphery of the wing. The result doesn’t look bad for a first attempt:
Still undecided. It’s a risky process. I might experiment further with 0.6 mm strips of Tamiya tape overcoated with Mr. Surfacer instead.
I had some 0.1 mm Tamiya Pla Paper left over from my home made Tornado canopy, and a spare Airfix Gladiator upper wing:
First job is to draw around the outline and pencil in the rib positions:
Then lightly go over the lines with a ball-point pen. The tape is there to try and get a consistent edge to the riblets:
You’re left with a fairly realistic looking wing skin:
...which is epoxied to the sanded, flat wing, with the edges being attached with poly cement:
The excess paper edges are then sanded away and blended to the periphery of the wing. The result doesn’t look bad for a first attempt:
Still undecided. It’s a risky process. I might experiment further with 0.6 mm strips of Tamiya tape overcoated with Mr. Surfacer instead.
Decided to try the skinning on the ‘real’ wing - nothing ventured nothing gained. If it turns out badly in the end, I’ll buy another kit and try something else.
Marking out:
After flatting the tips (still work to be done there - it’s impossible to get the plastic to conform to a compound curve), and a coat of Vallejo primer:
Now for the bottom wing...
Marking out:
After flatting the tips (still work to be done there - it’s impossible to get the plastic to conform to a compound curve), and a coat of Vallejo primer:
Now for the bottom wing...

Gassing Station | Scale Models | Top of Page | What's New | My Stuff