Schumacher CAT XLS build
Discussion


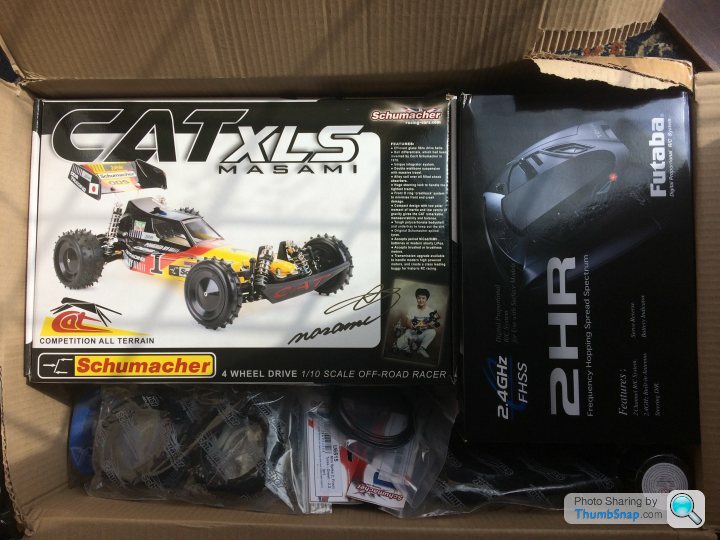
So following on from the "What 4wd buggy" thread, this arrived this morning....
Needed another radio set after donating my old Acoms set to my son.
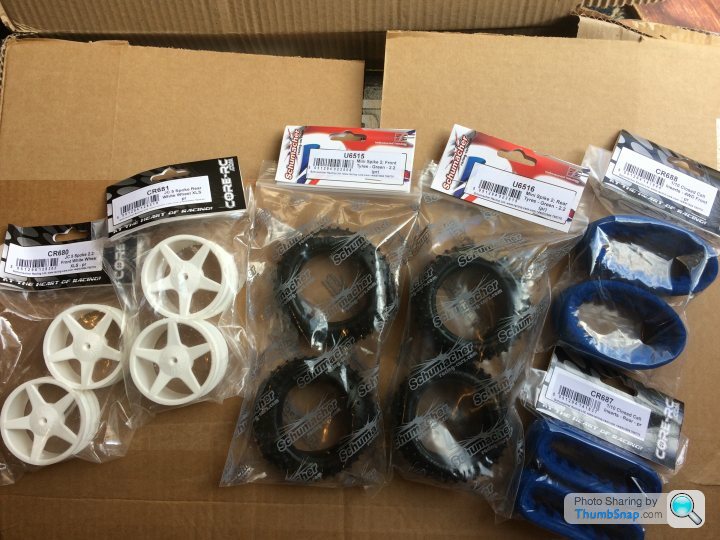
Added a set of more modern 2.2" wheels with suitable tyres so I can keep the 2" spikes for show:
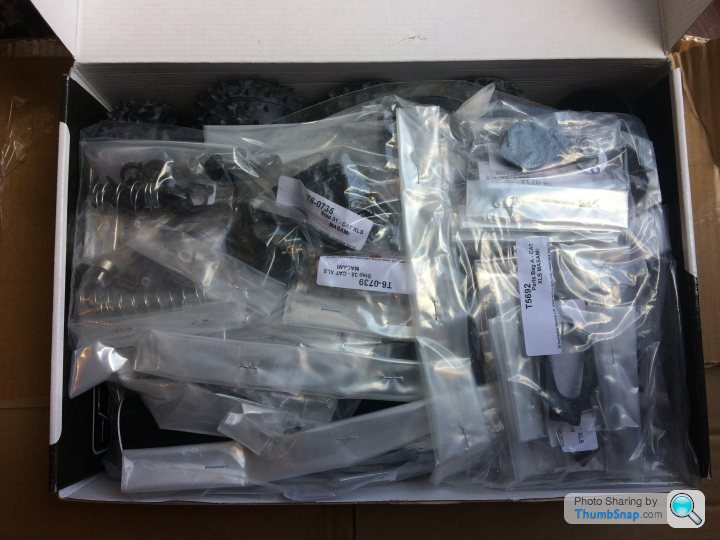
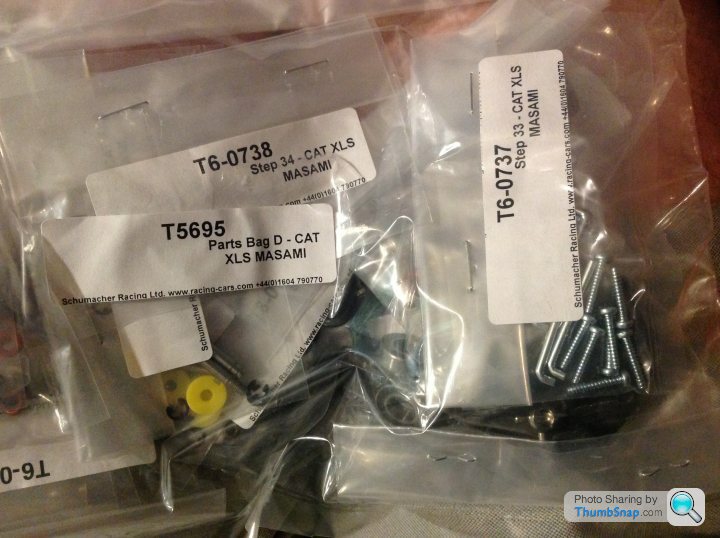
Kit box is so full it bulges and all the bits are individually bagged, somewhat different to a Tamiya RC kit!
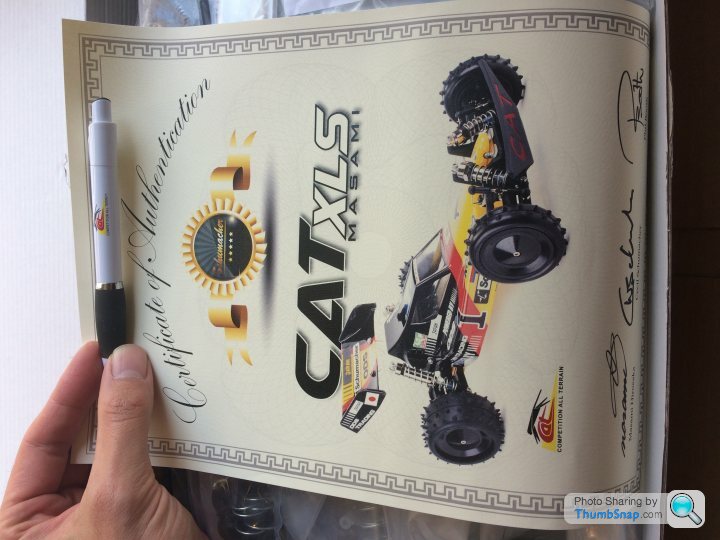
Nice additions are a Schumacher CAT branded pen and a Certificate of authenticity in a carboard tube
Will be building it up with the electronics from one of my old touring cars. Not quite period correct but still 20 years old!
Trinity D4 Copperhead 12x2 mod motor, KO Propo FET servo and a MRT VTrac ESC. Won't be crazy brushless fast but was decent kit back in the day. I have a Hitec metal geared servo back at my parents somewhere if the KO servo proves to be unsuitable, I remember them being slightly fragile. Looks like you can still get spare gear sets though.


Needed another radio set after donating my old Acoms set to my son.
Added a set of more modern 2.2" wheels with suitable tyres so I can keep the 2" spikes for show:
Kit box is so full it bulges and all the bits are individually bagged, somewhat different to a Tamiya RC kit!
Nice additions are a Schumacher CAT branded pen and a Certificate of authenticity in a carboard tube
Will be building it up with the electronics from one of my old touring cars. Not quite period correct but still 20 years old!
Trinity D4 Copperhead 12x2 mod motor, KO Propo FET servo and a MRT VTrac ESC. Won't be crazy brushless fast but was decent kit back in the day. I have a Hitec metal geared servo back at my parents somewhere if the KO servo proves to be unsuitable, I remember them being slightly fragile. Looks like you can still get spare gear sets though.
First impressions- this is going to be a very different build experience to the Tamiya buggy I've just made! Very complex in comparison but that's a good thing imo.
Lots of tiny bearings, c-clips, metal pins, rubber sealed ball races and more drilling, gluing, soldering and thread-locking. Alloy shock bodies are beautifully machined and the gearbox side plates are machined rather than stamped like the originals.
Contrary to some reviews the shell does have overspray film on so that's a bonus. Need to decide on colours quick as the lexan undertray is one of the first things to install.
Good tips, thanks all. Was planning on using a blow torch for the roll bar ends.
Re. The integrator setup, I was having a think about this. I think it comes down to a couple of features he must have considered important- mainly being able to adjust the front:rear torque split. The integrator is averaging the speed of the two rear outdrives and allowing a degree of slip to vary the torque being sent to the front. It also means that you only need one set of reduction gearing between the layshaft and the axles, but can still keep the lower deck free to run a stick battery pack across as the drive belt runs under the chassis (a belt from the layshaft to the front diff would mean having to run saddle pack batteries, or adding another layshaft to run the belt at high level like a Tamiya tao3, heavy and draggy). Presumably the later drum diff setup means a locked 50:50 front rear torque split?
Whether or not it works as intended I'm not too fussed about, I think it's an interesting bit of design and part of the appeal of the kit :-)
Wifeys discovery of a new series of “working mums” on Netflix meant I had a nice quiet hour on this tonight. Got the 2.2” tyres mounted up and did the first couple of steps. Fits all good so far. Undertray taking a while to cut out, it’s quite thick polycarbonate compared to a body shell. Rear transmission housing just assembled loose so I don’t lose the screws.

uncleluck said:
Good stuff. Just struck me how fat this pack looks (enrichpower) Maybe people were trying to fit the 5000’s.
What motor are you going for?
Yes I have the Enrich packs, nice and cheap but still giving 30 min run times on my sons Racing Fighter. £23 for two, can't complain. For the motor it will be my old Trinity D4 12x2 brushed, see first post What motor are you going for?

FredClogs said:
I used to hanker after one of these as a kid, the won all the local races, I had a 2wd Mardave Meteor that could hold its own but wasn't a patch on the Cats and Optima Mids.. Happy days.
I bought my lad a Tamiya Rising Fighter for Christmas wondering if there was still racing clubs about but can't find anything near me. The rising fighter is dog s t, he enjoys slamming it into kerbs though.
I've found a couple of offroad clubs localish to me, (Eden park in Beckenham and the Faversham off road club) all the on road clubs I used to go to have gone though sadly. Doubt I'll take this racing, but the option is there if I want to change a few bits.I bought my lad a Tamiya Rising Fighter for Christmas wondering if there was still racing clubs about but can't find anything near me. The rising fighter is dog s
t, he enjoys slamming it into kerbs though. Think the Rising Fighter is a revamp of the old Fighter Buggy / Mad Bull chassis, remember them from back in the day! friction shocks and a solid rear axle.
Edited by lufbramatt on Thursday 7th May 10:12
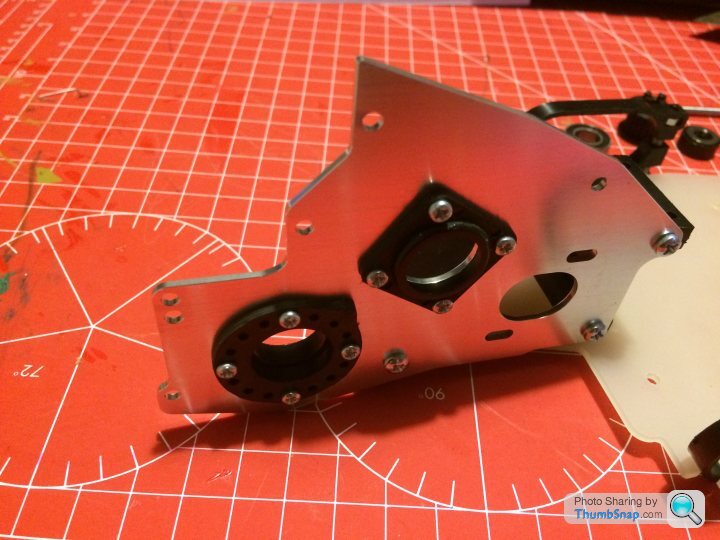
Two more steps tonight, installed the lay shaft bearing housing and one of the rear axle eccentric housings (allows the rear belts to be tensioned). Plastic parts needed a little bit of cleaning up, some very very minor flash around the edges but that’s to be expected with 33+ year old moulds. Might upgrade to the alloy eccentric housings in the future.
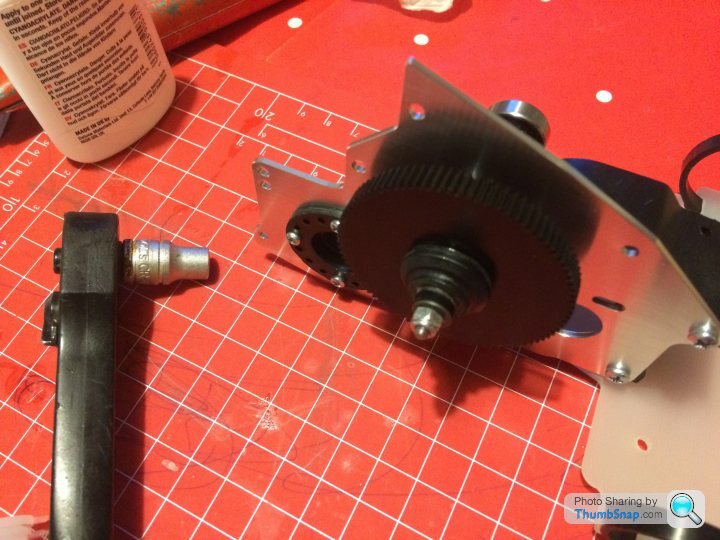
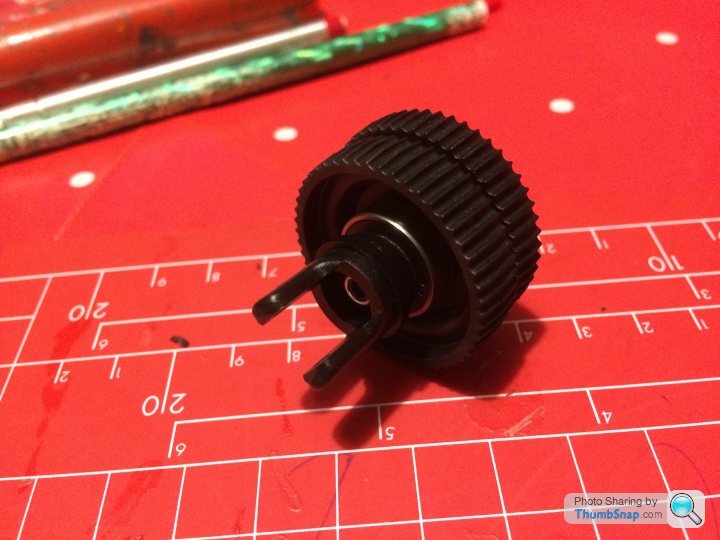
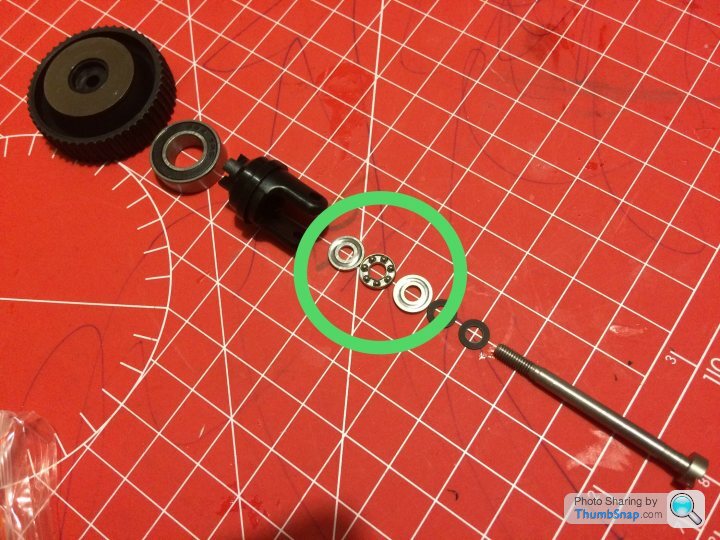
Next stage was building up the lay shaft which forms the rear differential , quite clever design as it’s kind of “inside out” with the balls inside the spur gear and the drive to the left hand pulley passing through the right hand pulley. Little thrust bearing in the middle that has to be made up and filled with moly grease. First attempt was notchy, tracked it down to a couple of very small raised ejector pin marks on the back of the pulleys catching on the ball race seals, easily rectified with a sanding stick.

Next stage was building up the lay shaft which forms the rear differential , quite clever design as it’s kind of “inside out” with the balls inside the spur gear and the drive to the left hand pulley passing through the right hand pulley. Little thrust bearing in the middle that has to be made up and filled with moly grease. First attempt was notchy, tracked it down to a couple of very small raised ejector pin marks on the back of the pulleys catching on the ball race seals, easily rectified with a sanding stick.
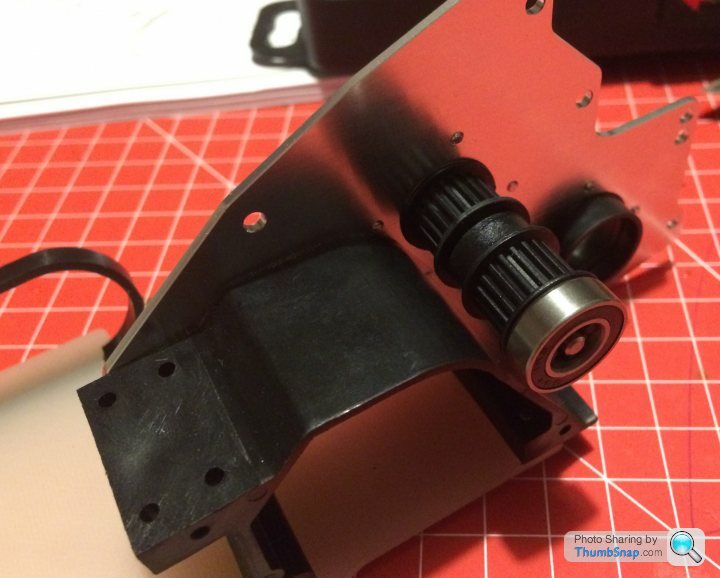
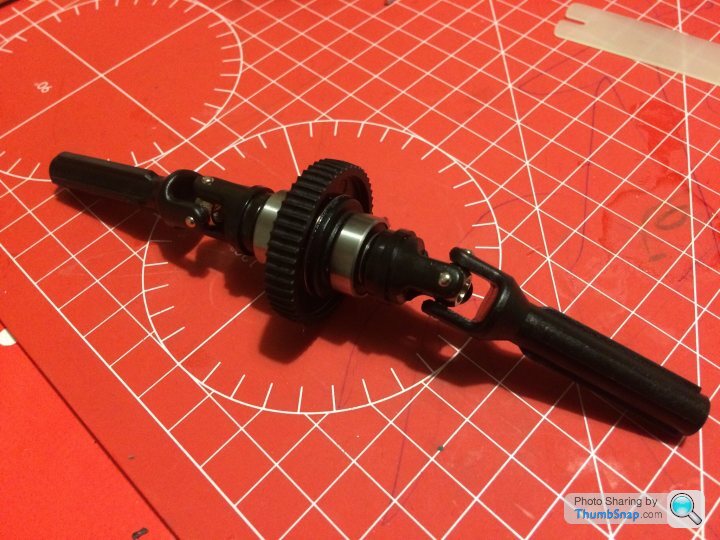
Got the rear gearbox together with the belts. UJ spiders are fun! On the first one you think there’s no way this will ever work but then suddenly it pops in and the rest were easy. Warming the parts defo helps. Driveshafts are made from a hard engineering plastic (probably glass fibre filled acetal) so are very stiff but the diff out drives are softer.
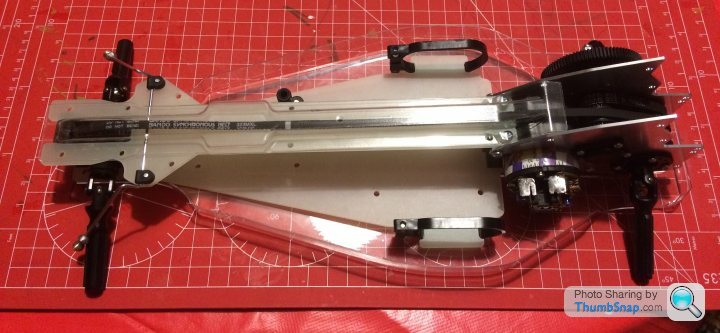
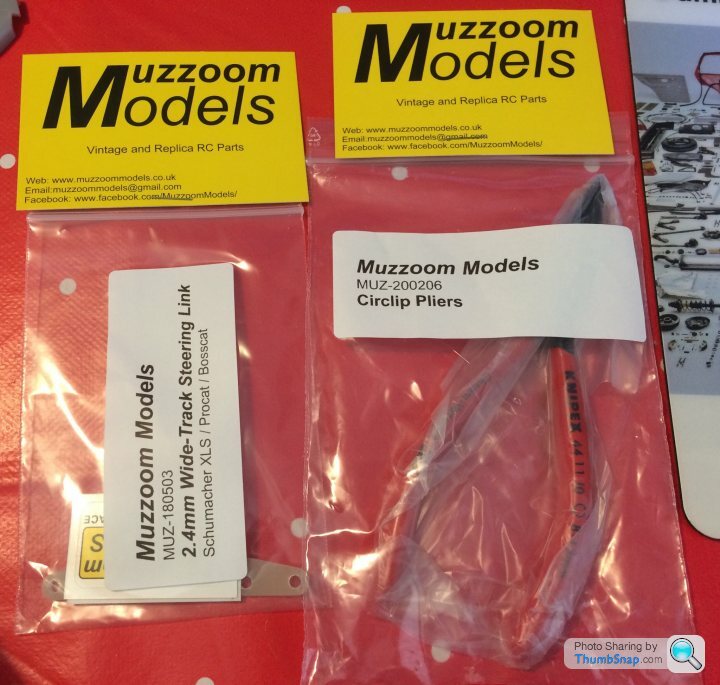
Going to build the top deck with the steering and roll bar before I cut the belt cover out. Want to order the wide track steering link though from Groomi before I do that so will build the front gearbox and diff next. Also realised to need to order a different servo saver as the kit one won’t fit my servo.
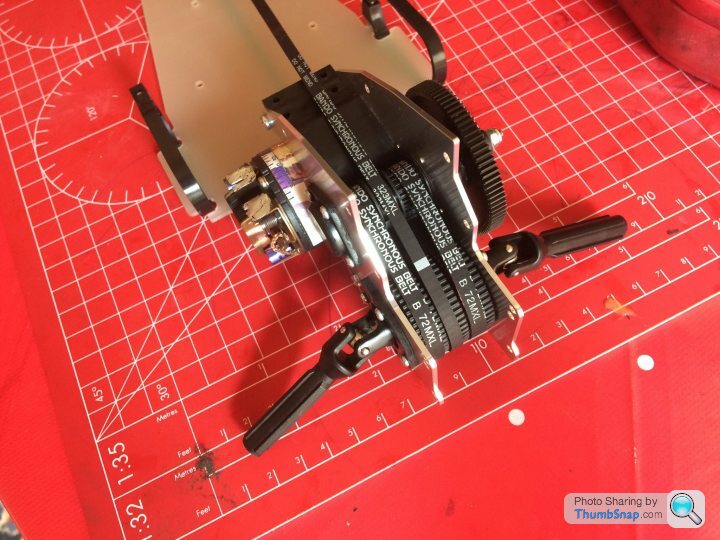
Going to build the top deck with the steering and roll bar before I cut the belt cover out. Want to order the wide track steering link though from Groomi before I do that so will build the front gearbox and diff next. Also realised to need to order a different servo saver as the kit one won’t fit my servo.
Edited by lufbramatt on Saturday 9th May 09:30


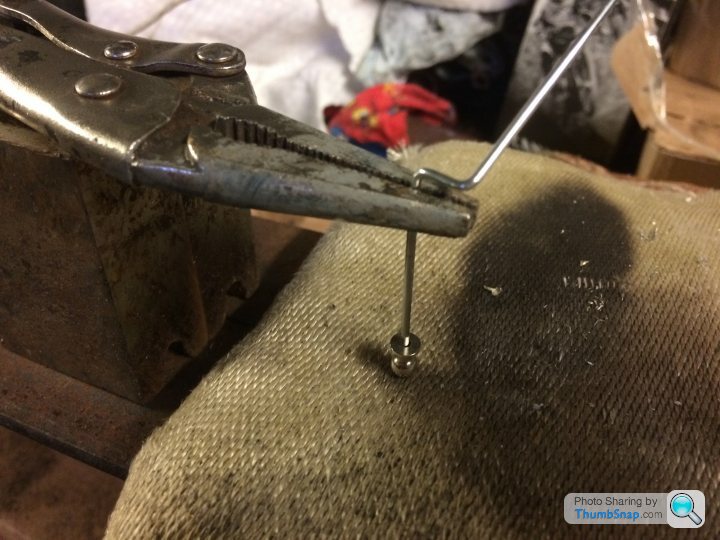
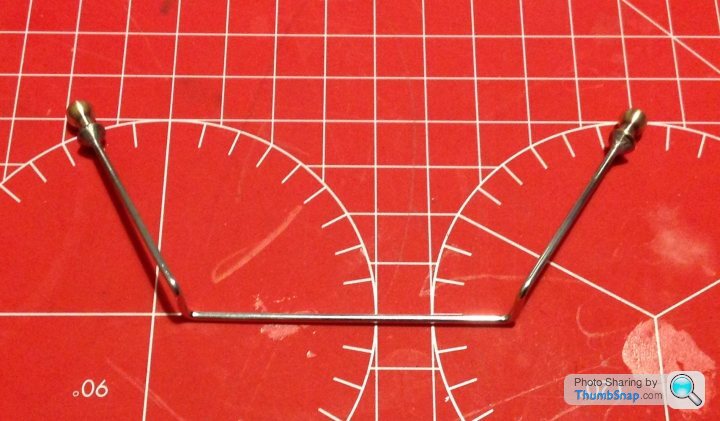
Soldered the ends on the anti roll bar, ended up using a full size blow torch, bit overkill but got the job done! Initially I couldn’t get the (modern) solder to flow into the gap but found some old leaded rosin cored stuff which worked well. Gave the balls a good tug (ooo err...) and they don’t seem to be going anywhere so jobs a goodun.
And assembled in place on the top deck;
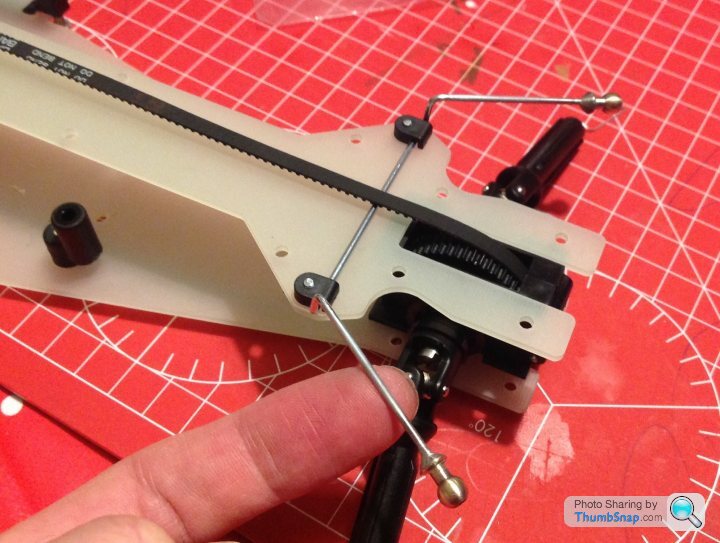
And assembled in place on the top deck;
Good work! I've already been eyeing up some upgrades. The rear alloy transmission spacer/motor housing looks like a good idea to help dissipate heat from the motor. Might get some carbon bits (because bling) and I'll probably make some adjustable upper arms once I can get back in the workshop at work as we have a milling machine. I already blew the £200 budget on the car itself!
Couldn't use mine last night as I've been working on this while the kids are asleep upstairs. But I need to get it out later today to make the slots in the belt guard for the ARB with a cutting disc. I've got some of those scissors and was using a sanding stick to clean up the corners, which worked fine. Just one of those jobs I'm not a fan of!
Gassing Station | Scale Models | Top of Page | What's New | My Stuff