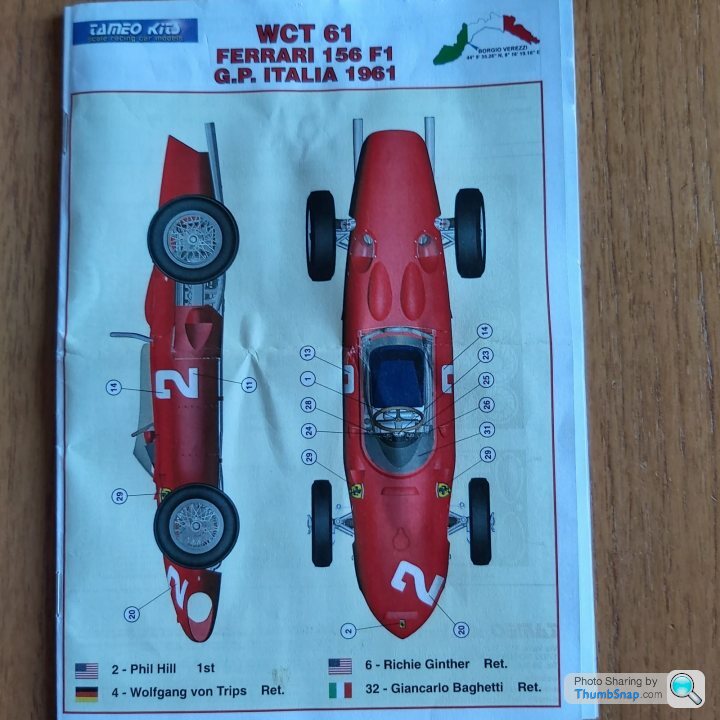
1961 FERRARI 156 SHARKNOSE 1/43
Discussion


Purchased this halfway through the previous Ferrari 500 build recently completed.
Went through the bits and realised i had to change my way of thinking.
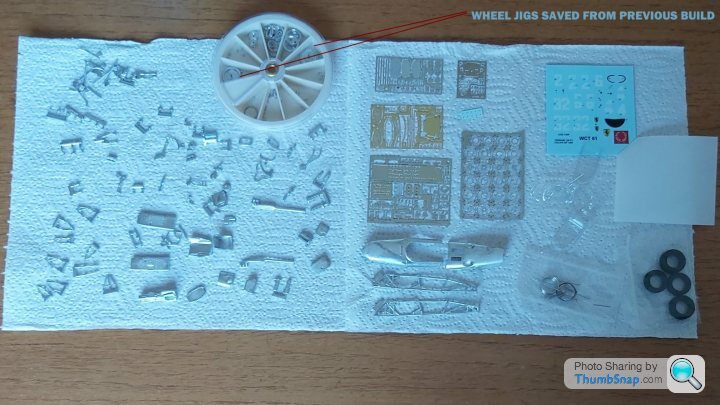
No jig for the wheels, but i had the ones from the previous build which really helped in buiding a wheel and fits. Result.>
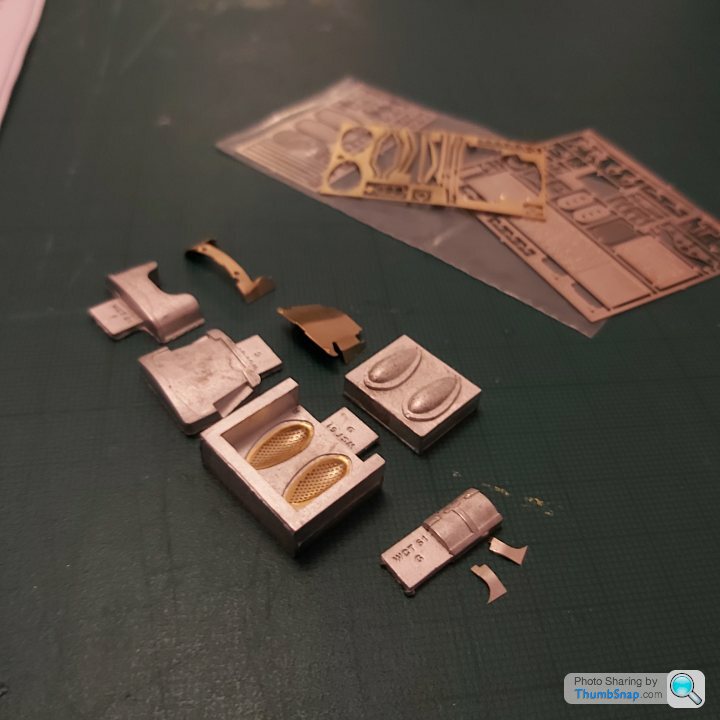
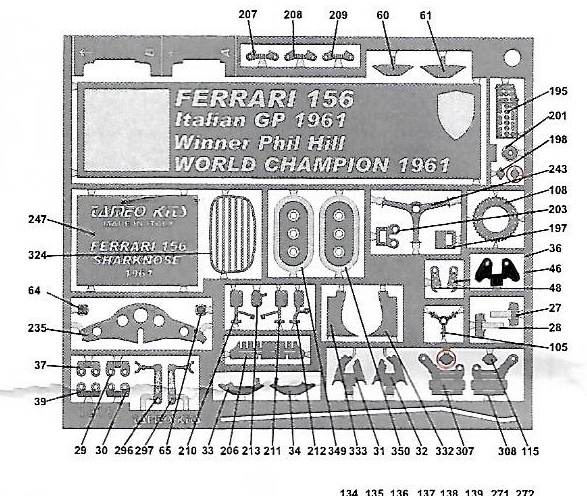
The instructions although numbered and shown on the photo etch, doesnt on the white metal parts and some are so small you can hardly make them out.
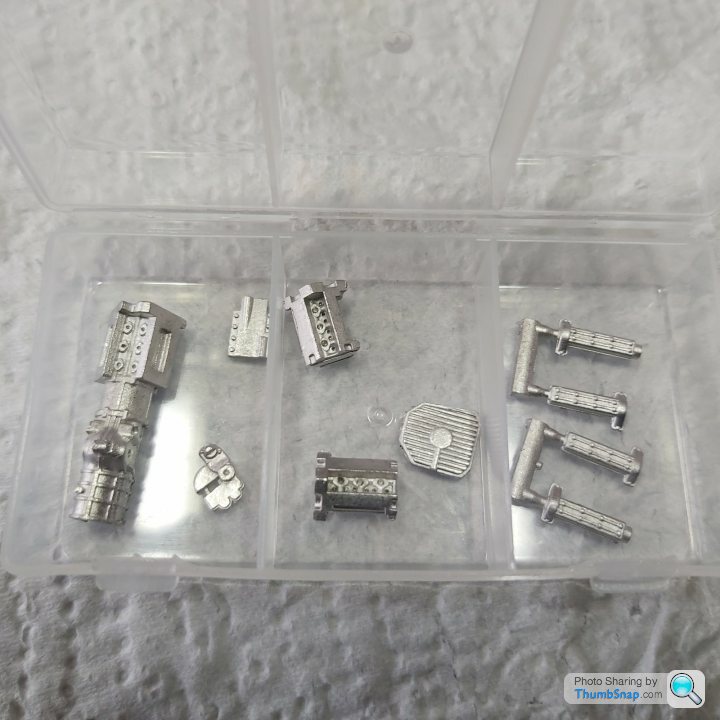
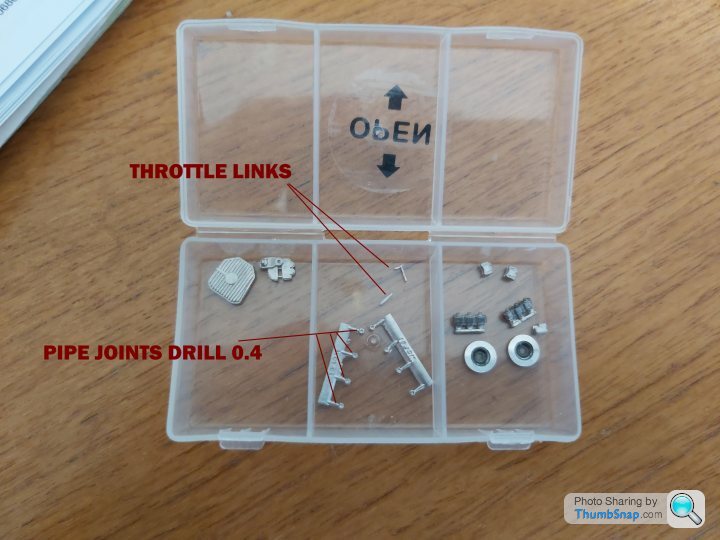
As there are more tiny, tiny bits in this model(60 levels of build). I had to make use of one of my jewellers cases to house the turned ally parts,rivets, wheel parts, brake disks, suspension springs, nickel silver bits etc.
I can hardly see some of the parts even with my magnifying glasses so ive resurected "Big Bertha" double articulated magnifier lamp made by Lightcraft. The lens is approx 8 " in diameter,flourescent lamps either side. salvaged from a scrap bin, years ago.I new i would need it one day.Just need to modify it to clamp to the dining table without marking it otherwise wify,s gonna go nuts.
This kit is going to push me,i think i better get on with it before i get out of practise .
 .
.
 .
.
 .
.
Here goes

Went through the bits and realised i had to change my way of thinking.
No jig for the wheels, but i had the ones from the previous build which really helped in buiding a wheel and fits. Result.>
The instructions although numbered and shown on the photo etch, doesnt on the white metal parts and some are so small you can hardly make them out.
As there are more tiny, tiny bits in this model(60 levels of build). I had to make use of one of my jewellers cases to house the turned ally parts,rivets, wheel parts, brake disks, suspension springs, nickel silver bits etc.
I can hardly see some of the parts even with my magnifying glasses so ive resurected "Big Bertha" double articulated magnifier lamp made by Lightcraft. The lens is approx 8 " in diameter,flourescent lamps either side. salvaged from a scrap bin, years ago.I new i would need it one day.Just need to modify it to clamp to the dining table without marking it otherwise wify,s gonna go nuts.
This kit is going to push me,i think i better get on with it before i get out of practise .
...Here goes
Edited by henryk001 on Tuesday 26th May 15:58
robemcdonald said:
Nutter!
Yes mad times making me do mad things, testing my patience and temper especially when theres limited info on the instructions.Also would have failed at the start if i hadnt had the wheel jigs from the previous build.
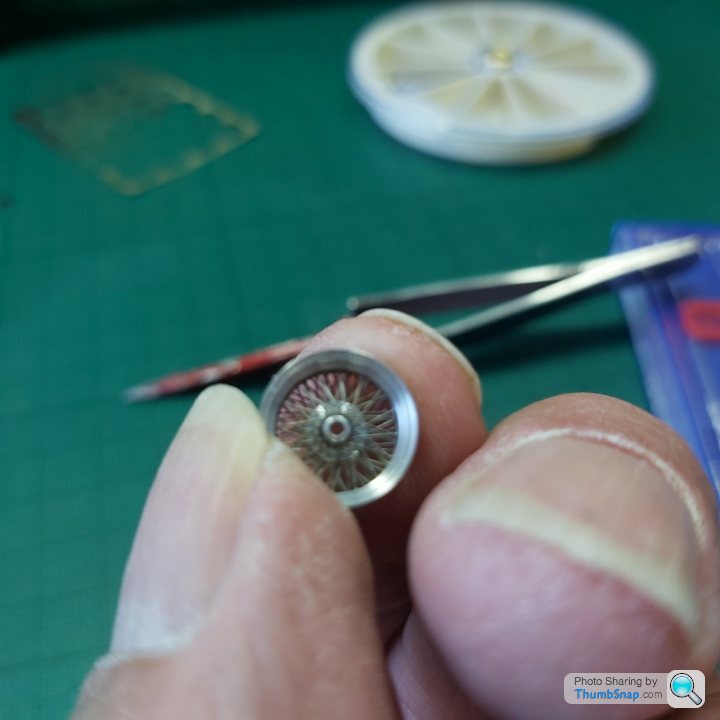
several attempts to put one wheel together before it was correct.Then adding the tyre valves (not included it the kit) drill .25mm adding watchmaker parts will be a charm?.
Ps sent you a email the other day
So have made the 2 rears. Dont ask how long it took. Id be too embarrased to say.
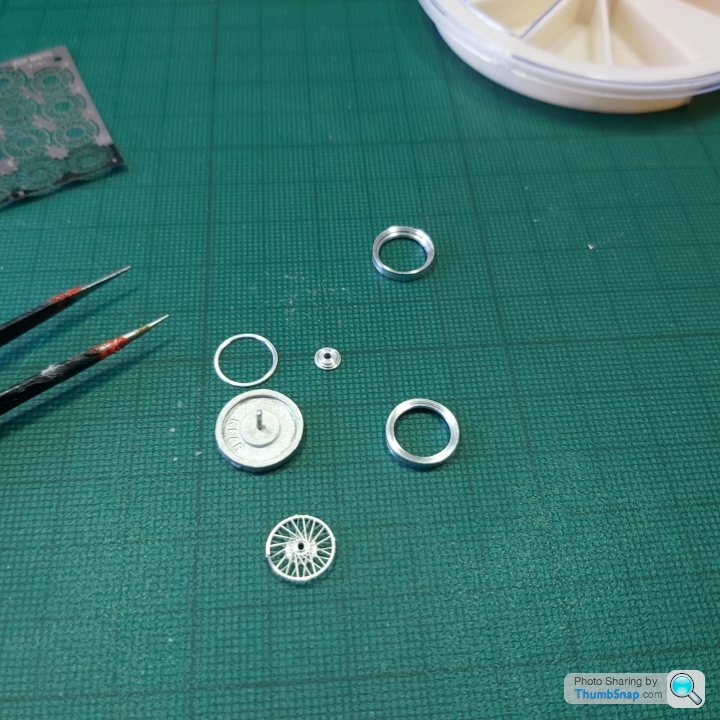
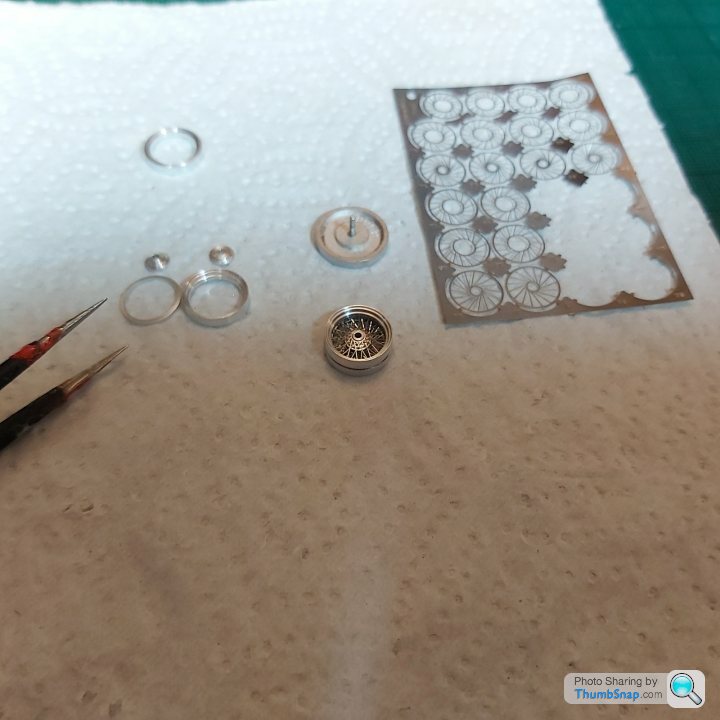
Glad i had the jigs to help assembly, also took time trying to recognise the correct parts to the numbers on the manual. All the PE parts are numbered though.
After a few attempts found the best way was to build up two halves then glue them together using Zap thin for semi assembly of the spokes (3 lots of 2sets) then Zap thin and fast activator to bond the 2 halves together,normally i wouldnt use the activator reason being the assembly of the PE spokes albeit small are still trying to spring the halves apart.Quite amazing to see this happening on such a small assembly, just goes to show how strong real spoked wheels are.
Phew.
 Anyway 2 down 2 to go . Some pics. Hope it helps anyone wanting to have a crack at this.
 .
.
 .
.
[url]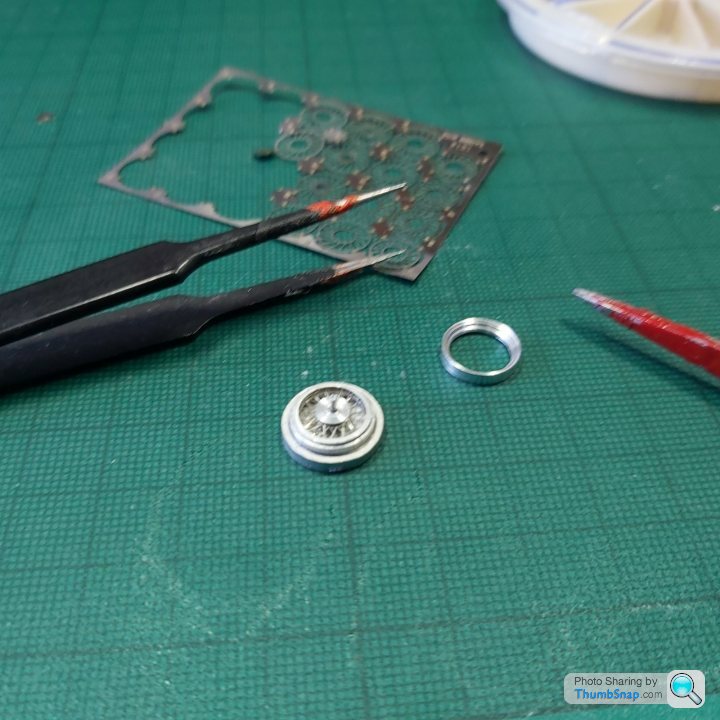 |https://thumbsnap.com/ktjifxu3[/url.
 .
.
 .
.
 .
.
 .
.
Glad i had the jigs to help assembly, also took time trying to recognise the correct parts to the numbers on the manual. All the PE parts are numbered though.
After a few attempts found the best way was to build up two halves then glue them together using Zap thin for semi assembly of the spokes (3 lots of 2sets) then Zap thin and fast activator to bond the 2 halves together,normally i wouldnt use the activator reason being the assembly of the PE spokes albeit small are still trying to spring the halves apart.Quite amazing to see this happening on such a small assembly, just goes to show how strong real spoked wheels are.
Phew.
Anyway 2 down 2 to go . Some pics. Hope it helps anyone wanting to have a crack at this...[url]
|https://thumbsnap.com/ktjifxu3[/url.....

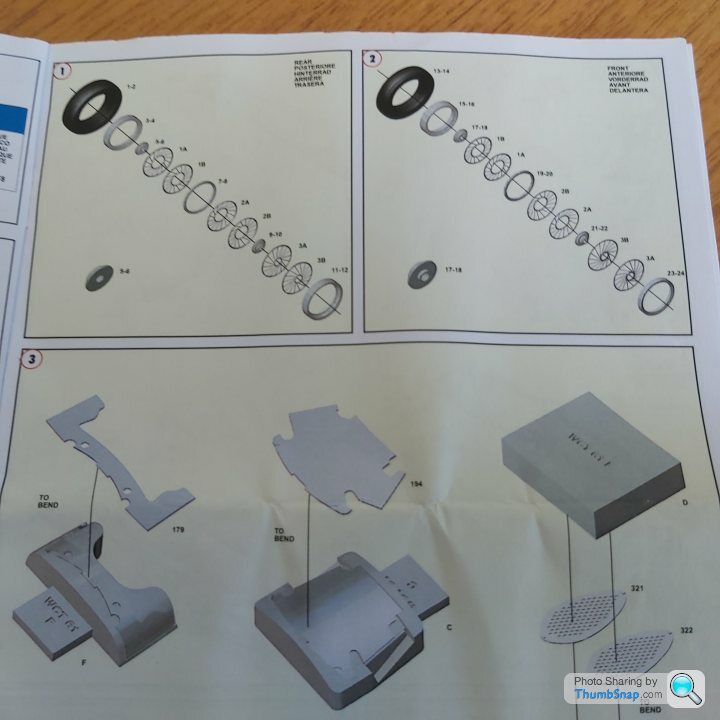
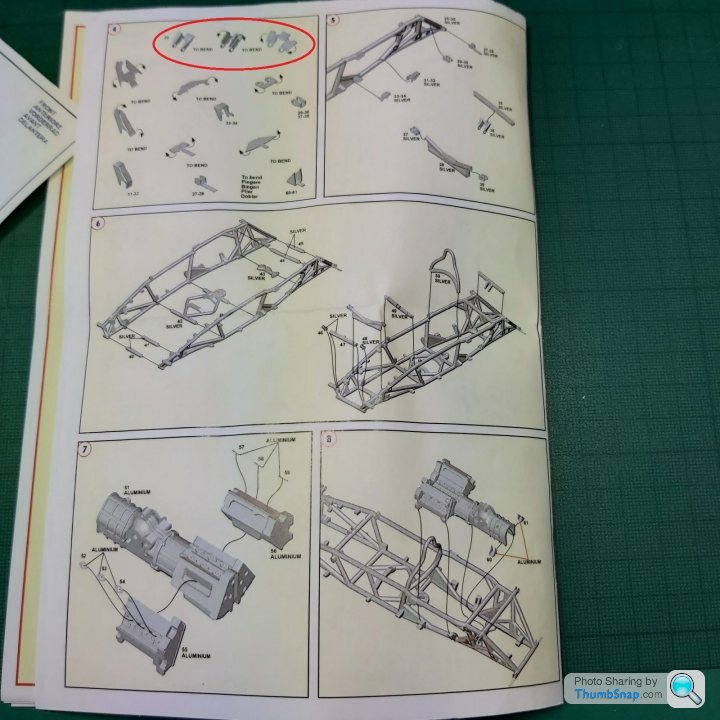
Section 3 has some really nice bending jigs for the brass PE plate parts, a press tool for the air intake grills and a jig for 2 steel peices.
 .
.
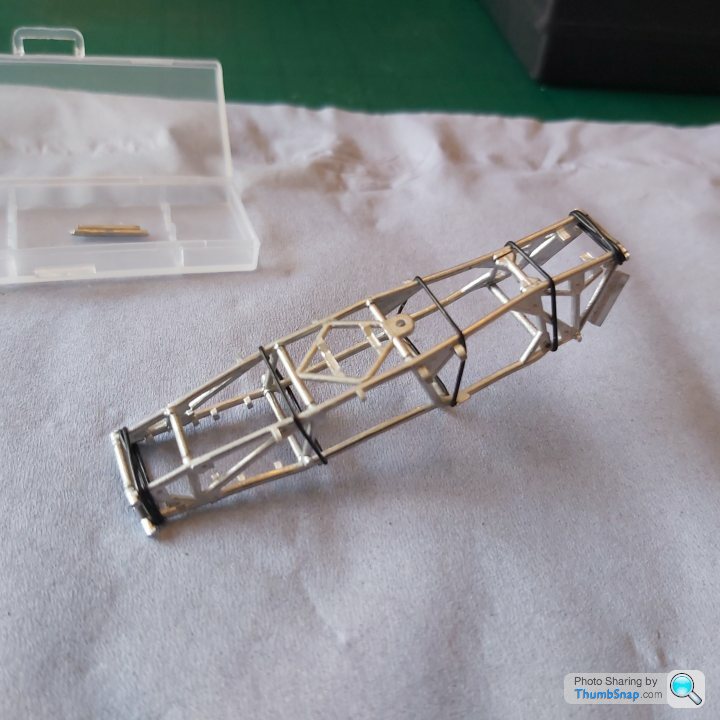
Spending a lot of time cleaning up the parts to make up the chassis at this moment.The main rails are so fragile im going to build in all the parts
on section 6 first to give it some handling strength before i fit the PE brackets parts on sections 4 & 5.
.Spending a lot of time cleaning up the parts to make up the chassis at this moment.The main rails are so fragile im going to build in all the parts
on section 6 first to give it some handling strength before i fit the PE brackets parts on sections 4 & 5.
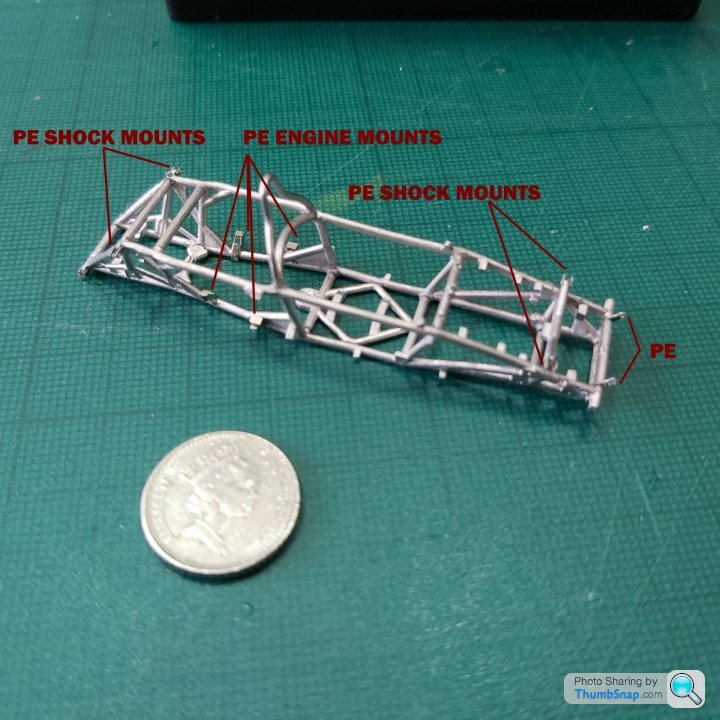
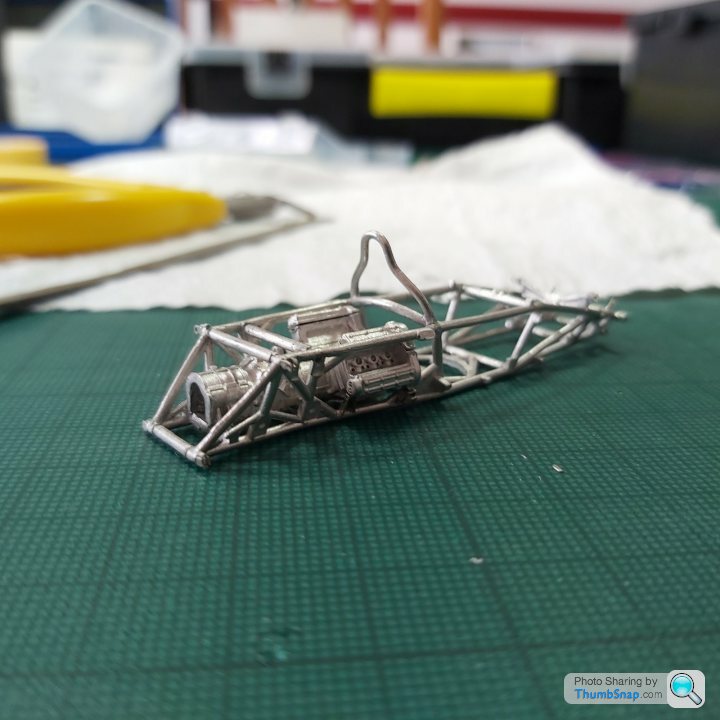
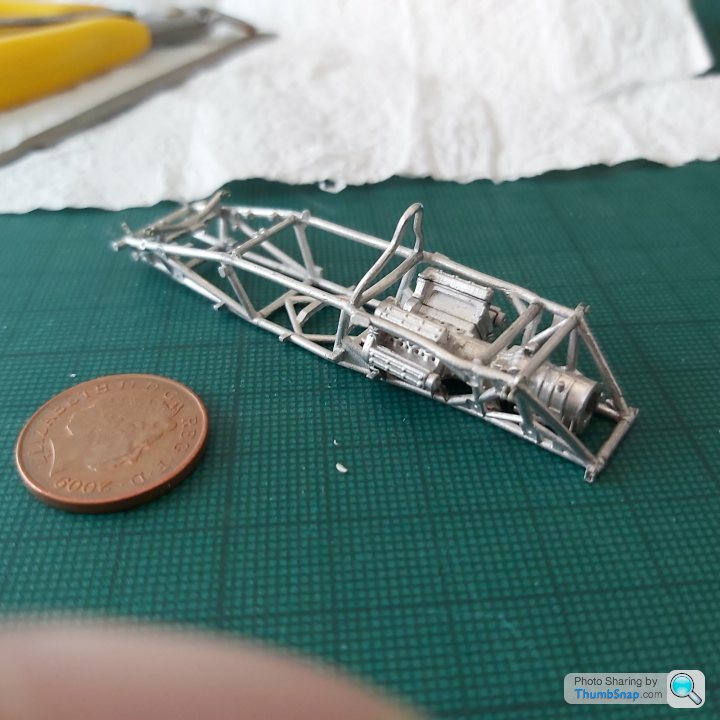
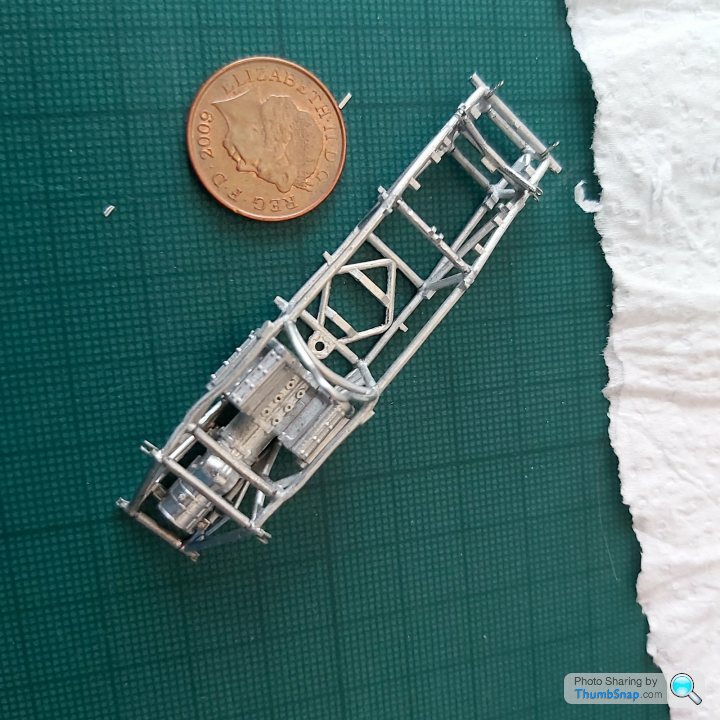
Doing the chassis parts has become quite troublesome. The main rails are so flimsy theres a risk of easily breaking them.
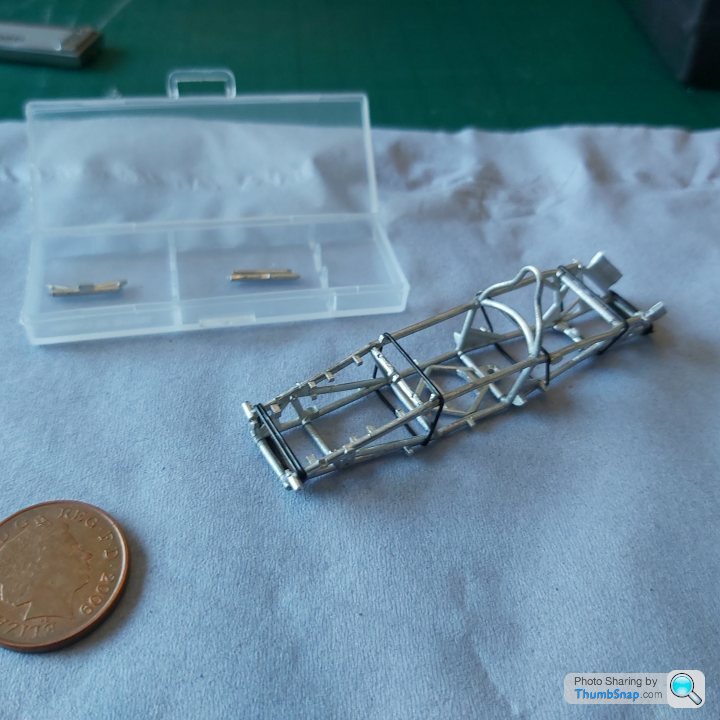
So with most of the casting flash cleaned off decided to glue everything together held in place with my vast assortment of watchmakers o-rings.
Much stronger now and easy to hold. Now just need to carefully clean up before priming.
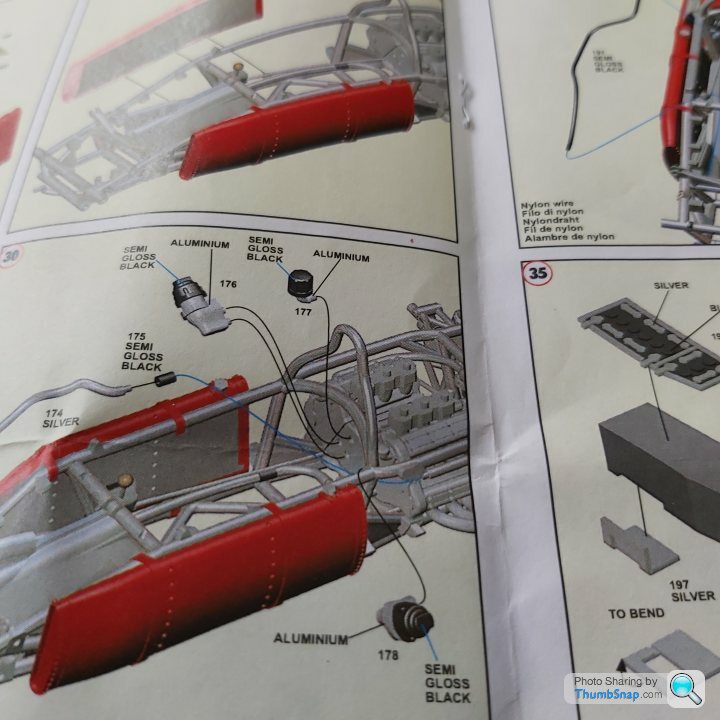
 Stumped at the 1st PE part No36, rear gearbox top mount which snapped as soon as i bent it, so im going to have to aneal the PE and have made a printed template from the instruction sheet to make another one which will allow me to glue it to a piece of PE and then trim.
 .
.
 .
.
 .
.
So with most of the casting flash cleaned off decided to glue everything together held in place with my vast assortment of watchmakers o-rings.
Much stronger now and easy to hold. Now just need to carefully clean up before priming.
Stumped at the 1st PE part No36, rear gearbox top mount which snapped as soon as i bent it, so im going to have to aneal the PE and have made a printed template from the instruction sheet to make another one which will allow me to glue it to a piece of PE and then trim....lufbramatt said:
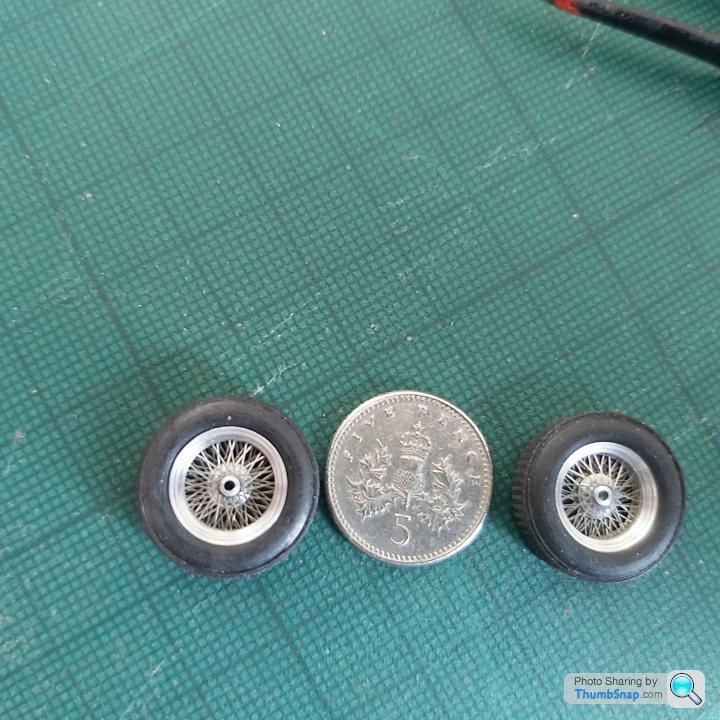
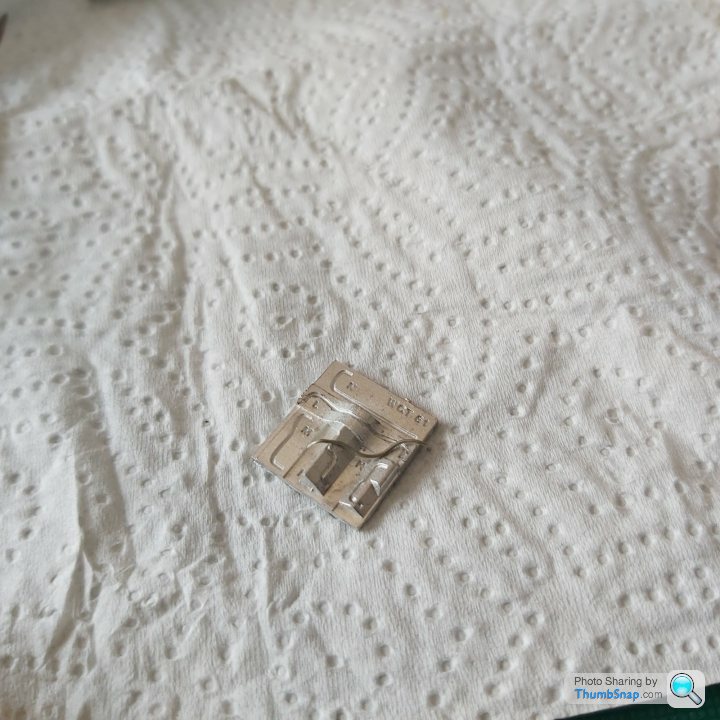
Wheels look fantastic. Not being used to the size of 1/43 cars my jaw hit the desk when I saw them next to the 5 pence piece. amazing.
.Thankyou. Yes and i keep smacking my jaw on the magnifier. This isnt doing my eyesight any good, coupled with now having to make another bracket which snapped when bending, cross section size is about 1mm x 3mm when bent to shape.Ive printed off templates to glue to a piece of PE and then
drill the 2 x 0.7 holes and file the shape with my diamond files.
Still enjoying this very challenging kit

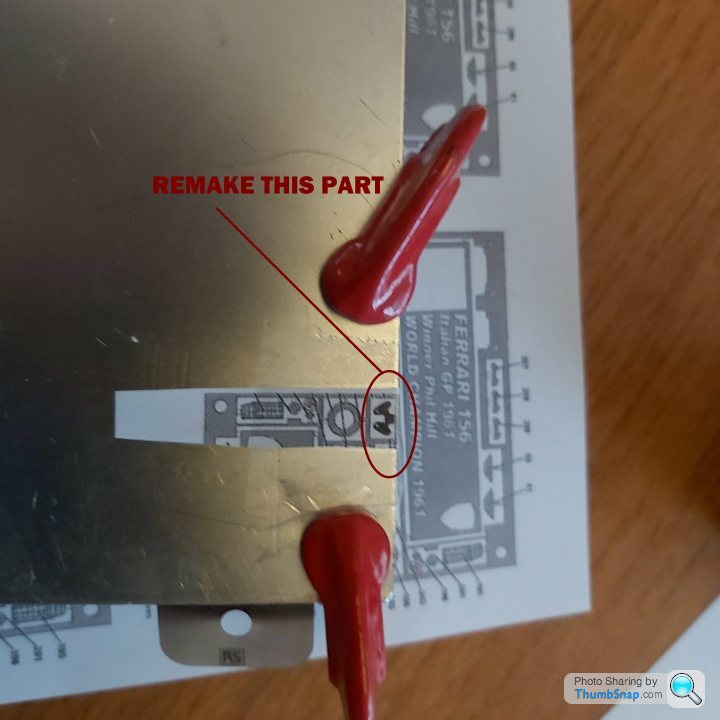
So before i can proceed any further, ive had to remake the gearbox mount bracket that snapped.
 .
.
I sandwiched a 0.005" shim between 2 alluminium plates and selotaped the printed off template onto the ally as a guide.
Drilled the two 0.4mm holes through. Drilled a couple more larger relief holes, cut then used a rotary diamond file to clean the part up.
Bent as per instructions and got a result. Phew.
Now onto all the other PE parts that need to go onto the chassis.
 .
.
Result
 .
.
.I sandwiched a 0.005" shim between 2 alluminium plates and selotaped the printed off template onto the ally as a guide.
Drilled the two 0.4mm holes through. Drilled a couple more larger relief holes, cut then used a rotary diamond file to clean the part up.
Bent as per instructions and got a result. Phew.
Now onto all the other PE parts that need to go onto the chassis.
.Result
.
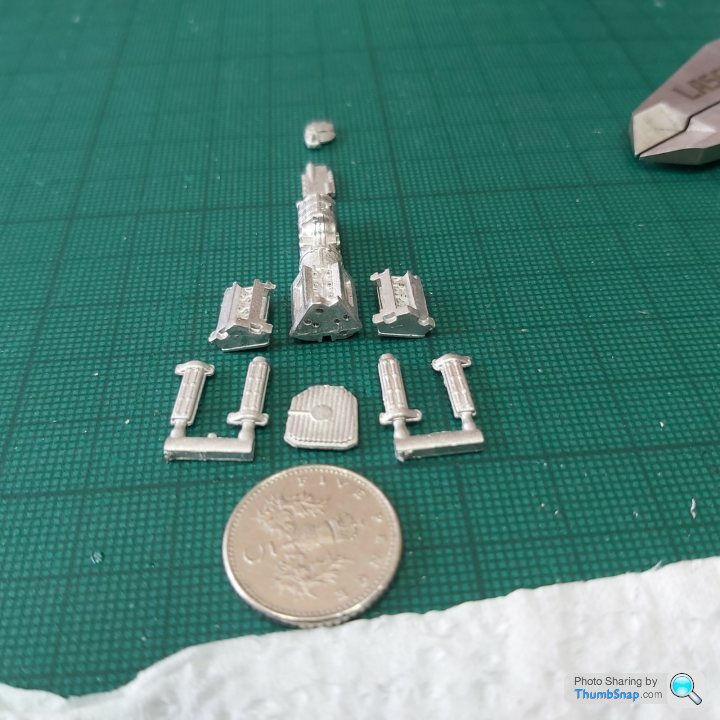
Cleaned up all flash and bumps off the engine and gearbox parts so far.
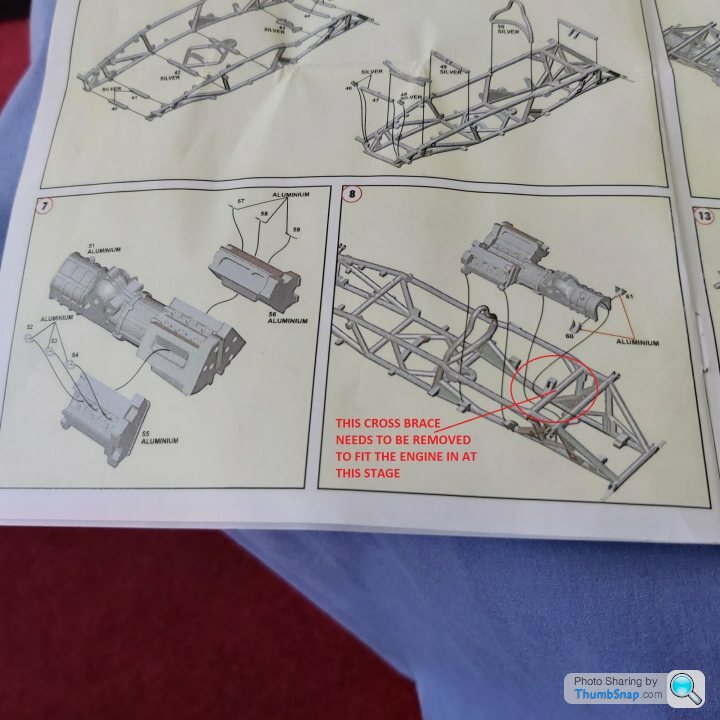
Some lateral thinking with this kit, if you go by the pictures and numbered stages, it will trap any model builder into potentially not being able to complete this model. I spent so much time pre drilling all holes on the engine and gearbox for anything that connects to it, so had to look through every section to see what parts go to it further along after section 7-9. Also drilled the dimples 0.3mm out to allow 12 spark plug leads (not in the kit) to connect to the 2 distributors.
Concidering the chassis and engine are silver and alluminium, thought not to paint those parts as yet or if at all.
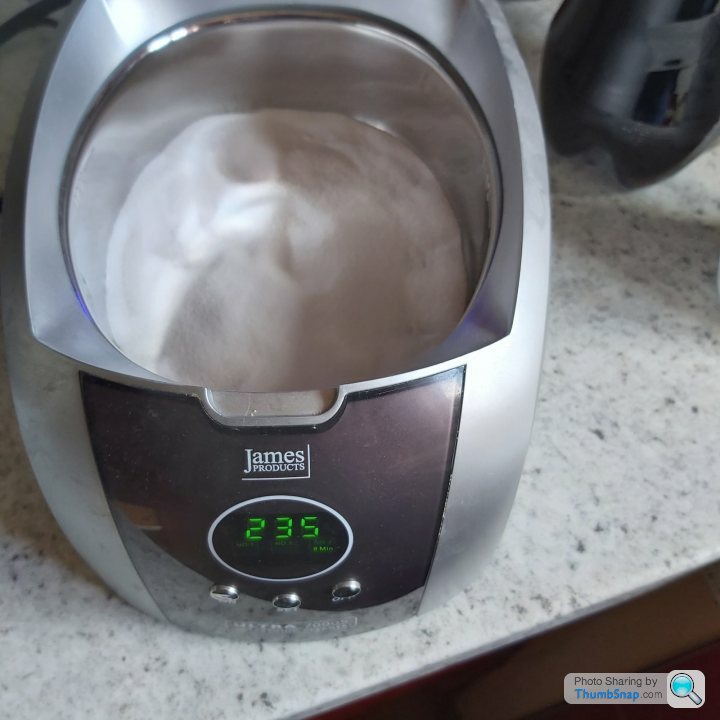
Used my untrasonic cleaner with granulated salt (sharp edges of the salt crystals to bounce around and clean off the soft white metal parts) set to 9 minutes to clean up.
Then washed off with lots warm soapy water.
BEFORE CLEANING
 .
.
 .
.
One big issue found was that its impossible to fit the engine in on stage 8 without removing the rear crossbar first, it came off easily enough.
 .
.
 .
.
Parts Cleaned up very nicely.
 .
.
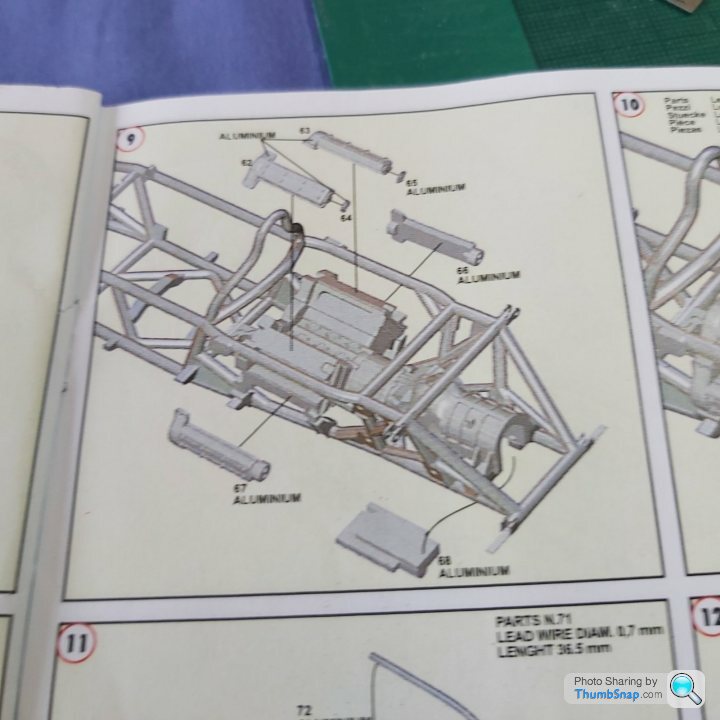
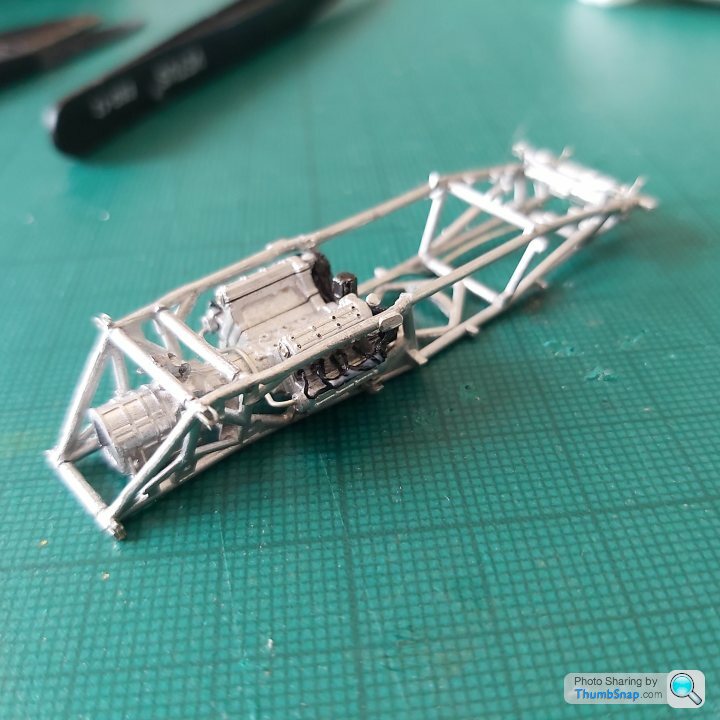
Then assemble to level 9. PE parts water pipes and cam cover end parts yet to fit.
 .
.
 .
.
 .
.
Im going to add extra wiring, tubing and brake lines on this model, found some good detail photos on the interweb.
Some lateral thinking with this kit, if you go by the pictures and numbered stages, it will trap any model builder into potentially not being able to complete this model. I spent so much time pre drilling all holes on the engine and gearbox for anything that connects to it, so had to look through every section to see what parts go to it further along after section 7-9. Also drilled the dimples 0.3mm out to allow 12 spark plug leads (not in the kit) to connect to the 2 distributors.
Concidering the chassis and engine are silver and alluminium, thought not to paint those parts as yet or if at all.
Used my untrasonic cleaner with granulated salt (sharp edges of the salt crystals to bounce around and clean off the soft white metal parts) set to 9 minutes to clean up.
Then washed off with lots warm soapy water.
BEFORE CLEANING
..One big issue found was that its impossible to fit the engine in on stage 8 without removing the rear crossbar first, it came off easily enough.
..Parts Cleaned up very nicely.
.Then assemble to level 9. PE parts water pipes and cam cover end parts yet to fit.
...Im going to add extra wiring, tubing and brake lines on this model, found some good detail photos on the interweb.
dr_gn said:
Good progress again...
I keep looking at the 1:43 156/85 my Dad got me for the Christmas after going to Silverstone for F1 stuff in 1985. I built it the best I could, but...it's not great. Always had a soft spot for the car ever since. This thread has pushed me to investigate further; turns out Tameo are now on their third iteraton of that kit. I'm sorely tempted, but I just can't justify it at £90. Also a Western Kits 1:43 Tyrrell P34 prototype my Dad built soon after its release in 1975. It's pretty crude, falling to pieces and completely the wrong blue, but how I'd love to build another...and there's one on EBay.
Anyway as you were - the more I see of your great work with these Ferraris, the more I want to have a go. too much WIP though.
..I keep looking at the 1:43 156/85 my Dad got me for the Christmas after going to Silverstone for F1 stuff in 1985. I built it the best I could, but...it's not great. Always had a soft spot for the car ever since. This thread has pushed me to investigate further; turns out Tameo are now on their third iteraton of that kit. I'm sorely tempted, but I just can't justify it at £90. Also a Western Kits 1:43 Tyrrell P34 prototype my Dad built soon after its release in 1975. It's pretty crude, falling to pieces and completely the wrong blue, but how I'd love to build another...and there's one on EBay.
Anyway as you were - the more I see of your great work with these Ferraris, the more I want to have a go. too much WIP though.
All it needs is some research,time and a lot of patience of which you have prooved your more than capable of. You know you want to

Fast forward to level 30 to make up the distributors with additional wiring whilst the chassis is still quite naked.If i dont put these additional details on it will bug me.
Then back to finish of to end of level 11.Fit home made gearbox mount,pipe, water pump and nut. Its starting to get a bit fiddly now.
 .
.
 .
.
OIL PIPE JIG
 .
.
 .
.
 .
.
Just need to fit the distributors, connect the ignition wires up and finally run a bead of crystal clear to represent the lead tube that would fit on top of the rocker cover and paint it alluminium.
Then onto 12 onwards. Cheers
Then back to finish of to end of level 11.Fit home made gearbox mount,pipe, water pump and nut. Its starting to get a bit fiddly now.
..OIL PIPE JIG
...Just need to fit the distributors, connect the ignition wires up and finally run a bead of crystal clear to represent the lead tube that would fit on top of the rocker cover and paint it alluminium.
Then onto 12 onwards. Cheers
Evangelion said:
henryk001 said:
Evangelion said:
My God.
If anyone wonders why i no longer build kits ... this is why.
Interesting. Please elaborateIf anyone wonders why i no longer build kits ... this is why.
(When I was building these things for a living, I would deliberately quote high prices for single-seaters, to put people off.)
I see you built models for a living,are there any on the "show us your models" section
2 sMoKiN bArReLs & Matt Cup.
Thankyou for your comment, much appreciated.
Ooops i see there was a red angry smilie on here, sorry i thought i was clicking on the thumbs up icon which is right next to it
Thankyou for your comment, much appreciated
.Ooops i see there was a red angry smilie on here, sorry i thought i was clicking on the thumbs up icon which is right next to it
Edited by henryk001 on Friday 12th June 14:09
Edited by henryk001 on Friday 12th June 14:10
Edited by henryk001 on Friday 12th June 14:11
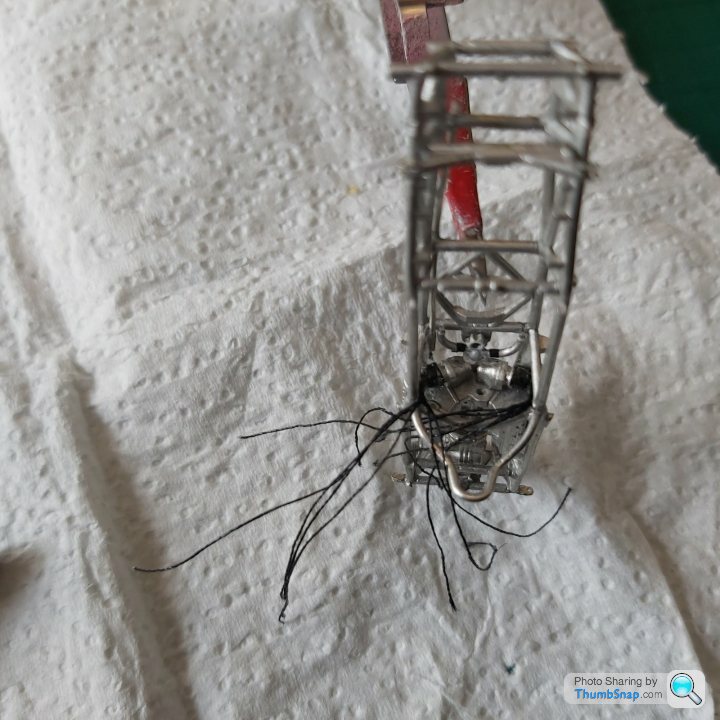
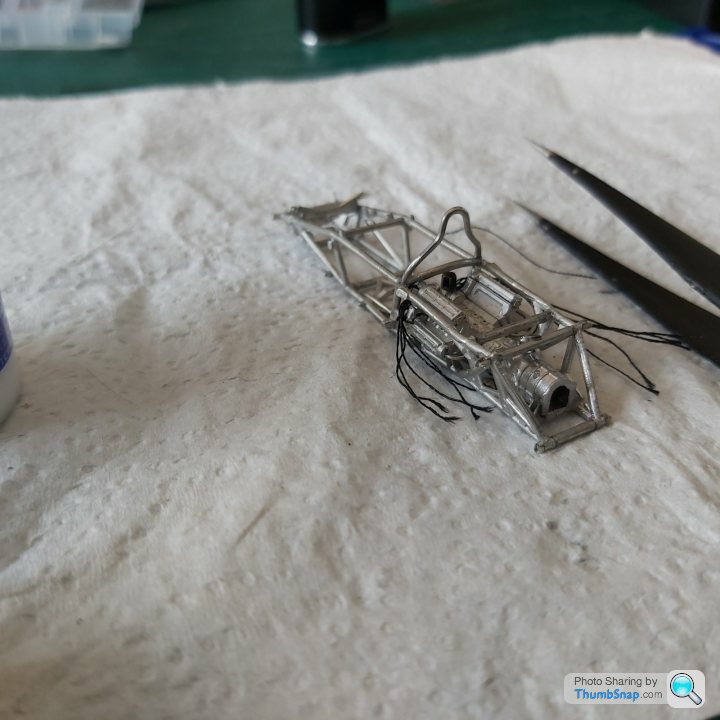
Right or wrong, decided to add the wiring to this kit as i feel it would be better to have it than not.
Took ages to sort out and plan to do.
Decided to take the rollbar off at the end as its getting in the way. I can put it back on later.
Used Micro crystal klear to coat the strands of silk thread to help the threads from fraying when cut.
Fitted the distributors, oil filter and oil filler spouts + PE glands.Then seperated the strands and transferred across.
Once cut to length and connected up, ran a bead of Crystal clear along the wires glued to the rocker cover as i cant make a tapered wiring harness that small.It will have to do.
Painting them alluminium (prefference was to leave it all black), but that wouldnt be historically correct,some touching up later should be ok.
 .
.
 .
.
 .
.
 .
.
 .
.
 .
.
 .
.
 .
.
 .
.
Finish off level 12 and onto 13. Cheers
Took ages to sort out and plan to do.
Decided to take the rollbar off at the end as its getting in the way. I can put it back on later.
Used Micro crystal klear to coat the strands of silk thread to help the threads from fraying when cut.
Fitted the distributors, oil filter and oil filler spouts + PE glands.Then seperated the strands and transferred across.
Once cut to length and connected up, ran a bead of Crystal clear along the wires glued to the rocker cover as i cant make a tapered wiring harness that small.It will have to do.
Painting them alluminium (prefference was to leave it all black), but that wouldnt be historically correct,some touching up later should be ok.
.........Finish off level 12 and onto 13. Cheers
2 sMoKiN bArReLs said:
This is fantastic work! Really enjoying it (and am somewhat envious speaking as a ham fisted twerp  )
)
Thankyou for your encouraging & kind comments. I must say that at 1/43rd scale and only my 2nd build at this scale, i too am feeling very ham fisted. Its taking a age just to do one thing.The amount of times ive dropped a part or its pinged off somwhere and oh the expletives ive used is more and more prevelent. Am i still enjoying this?. Well yes so far)First of all, apologies if anyone reading this thread for the poor photos,really hard to get a good focus on these small parts.
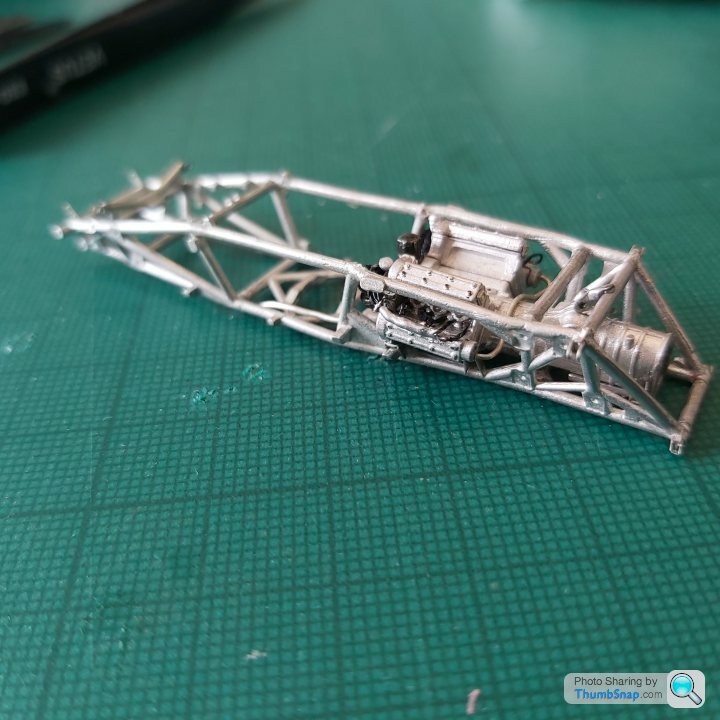
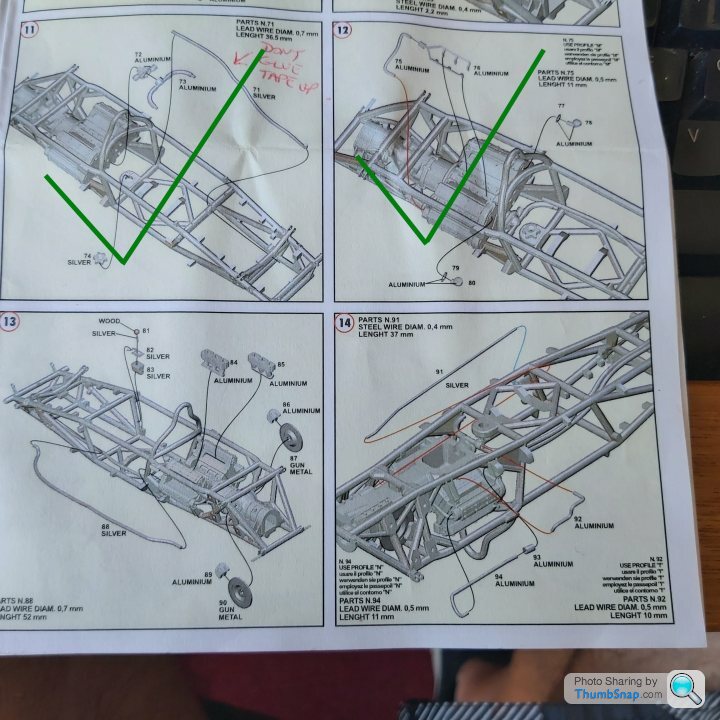
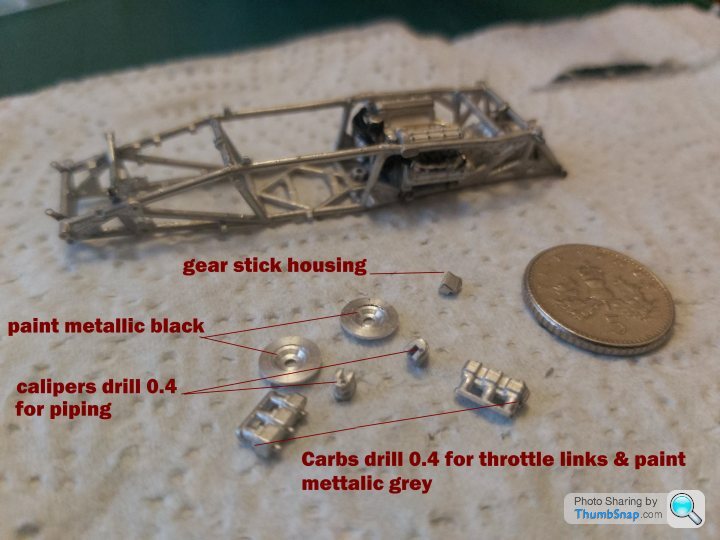
Level 13 to 14 prep for the bits i need to fit.2 rear turned alluminium disks, brake calipers(which all 4 looked the same) but when i meaured the difference between the thickness fronts 0.48mm & rear 0.38 disks could have stumped me if i assumed they where the same. Not in the instructions decided to drill the calipers 0.4 for copper wire brake lines and drilled 0.4 ends of carbs for throttle linkages and throttle cable im adding.
 .
.
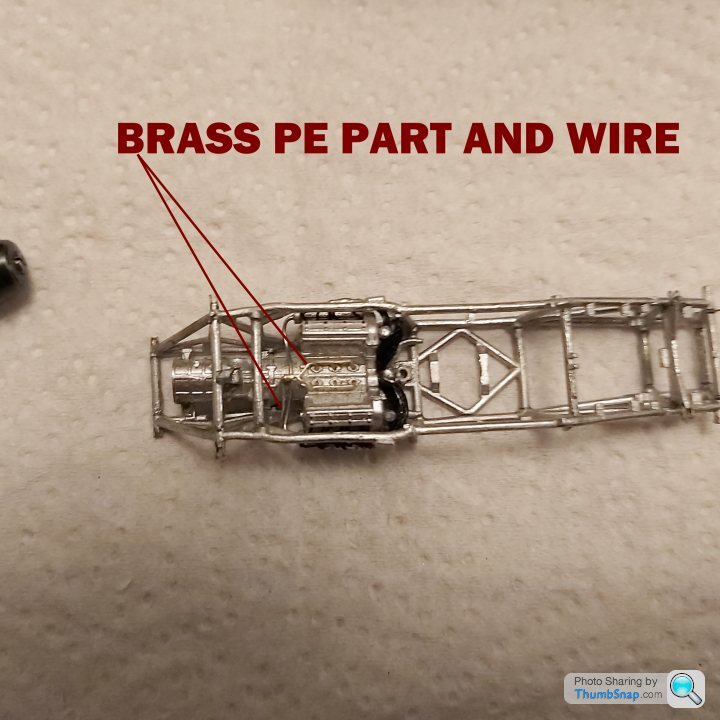
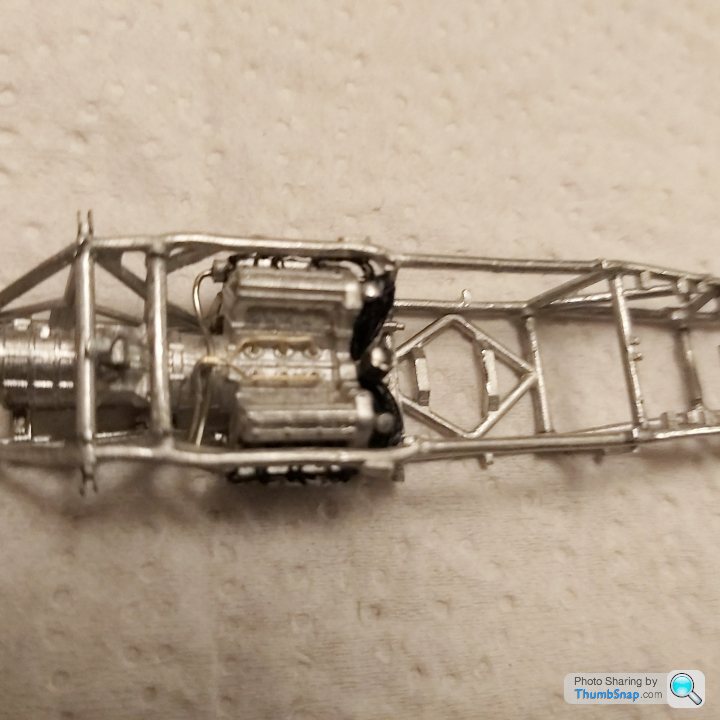
Taking ages to do just one thing, the central oil distribution pipe (Brass PE) and 0.5mm wire to top cam rocker took ages, just picking the pe up with tweezers distorted it coupled with 6 pronges to manipulate to go into the holes was a task in itself, but i got there in the end.
 .
.
 .
.
 .
.
 .
.
Seems to be dragginbg on a bit,realising im going to have to jump back and forth on a few levels EG not fit the tanks,panels and roll bar till the end otherwise holding the model whilst building will surely damage the paint.Would have got on a bit quicker if the scale was up to 1/24th or 1/12th.
Cheers for now
Level 13 to 14 prep for the bits i need to fit.2 rear turned alluminium disks, brake calipers(which all 4 looked the same) but when i meaured the difference between the thickness fronts 0.48mm & rear 0.38 disks could have stumped me if i assumed they where the same. Not in the instructions decided to drill the calipers 0.4 for copper wire brake lines and drilled 0.4 ends of carbs for throttle linkages and throttle cable im adding.
.Taking ages to do just one thing, the central oil distribution pipe (Brass PE) and 0.5mm wire to top cam rocker took ages, just picking the pe up with tweezers distorted it coupled with 6 pronges to manipulate to go into the holes was a task in itself, but i got there in the end.
....Seems to be dragginbg on a bit,realising im going to have to jump back and forth on a few levels EG not fit the tanks,panels and roll bar till the end otherwise holding the model whilst building will surely damage the paint.Would have got on a bit quicker if the scale was up to 1/24th or 1/12th.
Cheers for now
Gassing Station | Scale Models | Top of Page | What's New | My Stuff