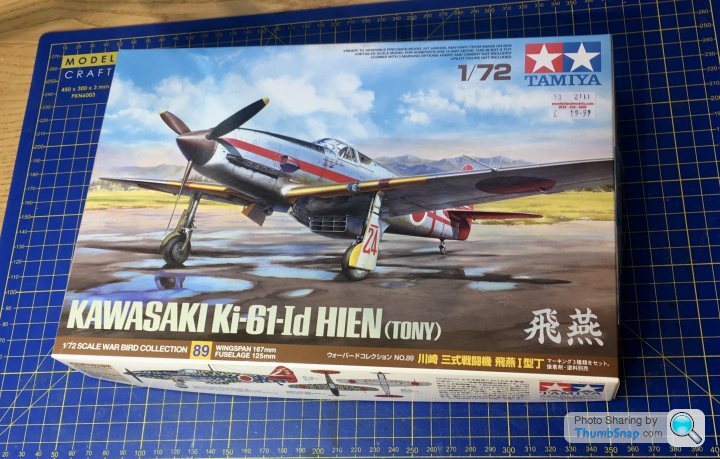
Tamiya 1:72 Kawasaki Ki-61 “Hien”
Discussion


Every time I go on holiday and end up at an aircraft museum, I get inspired to build model aircraft again. Last week was no exception, so despite having a couple of (non aircraft) kits on the go already, I raided the stash and got out an Airfix Swordfish, and this Tamiya Ki-61:
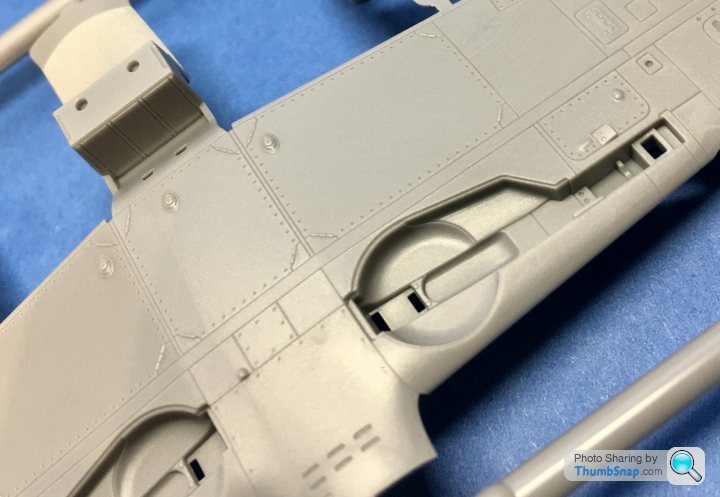
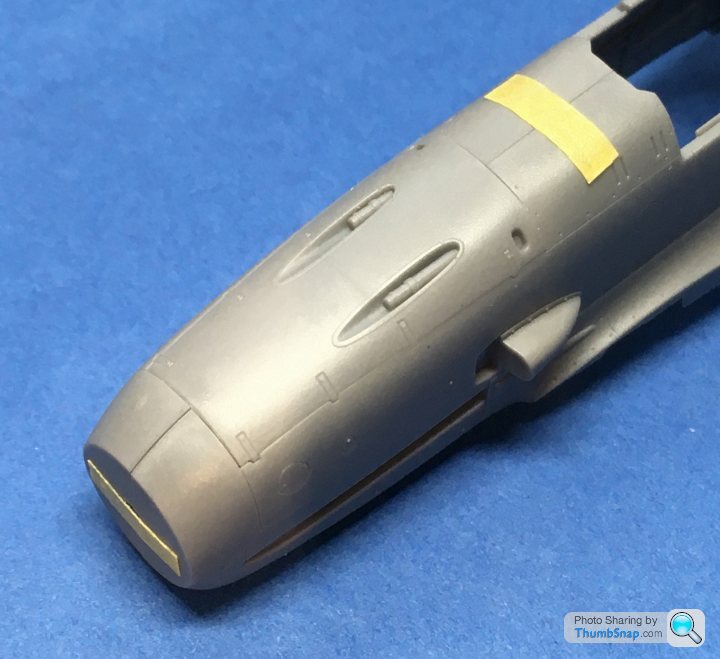
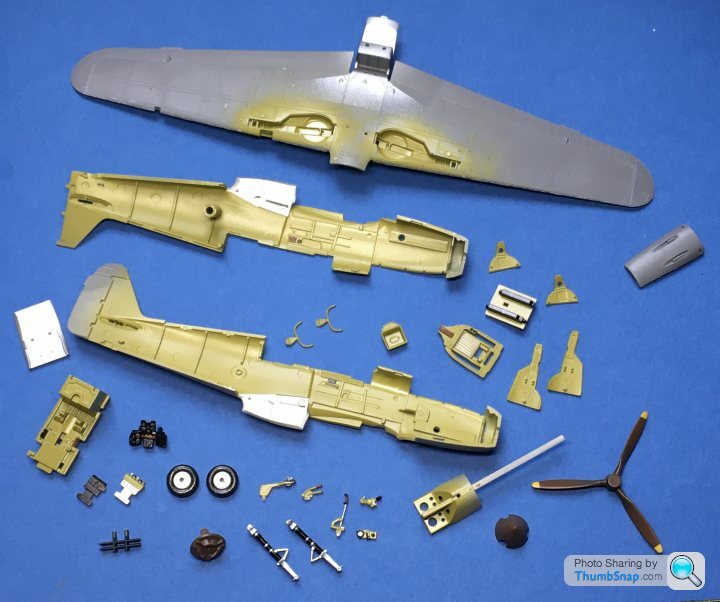
As with the Tamiya Zero I built recently, this new-tool kit is astonishingly good. Surface detail is second to none:

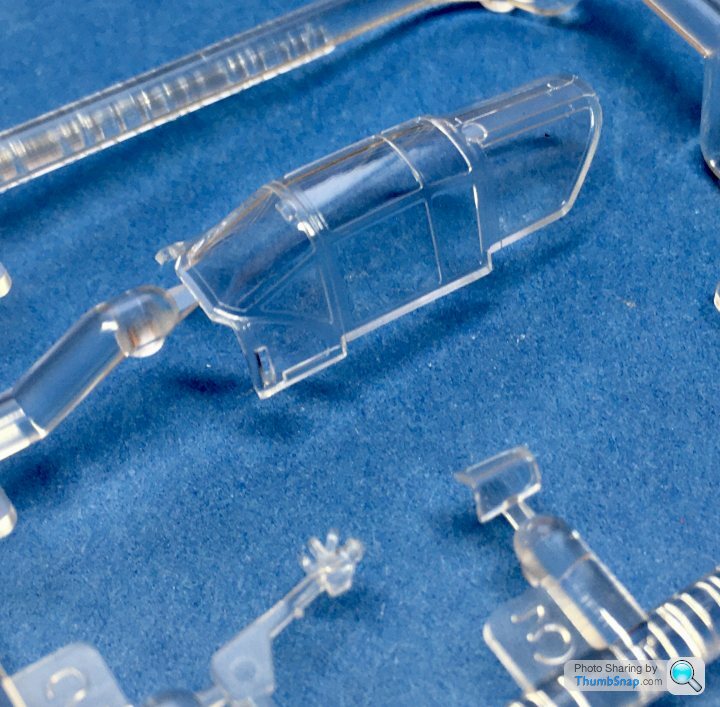
Transparent parts are crystal clear:
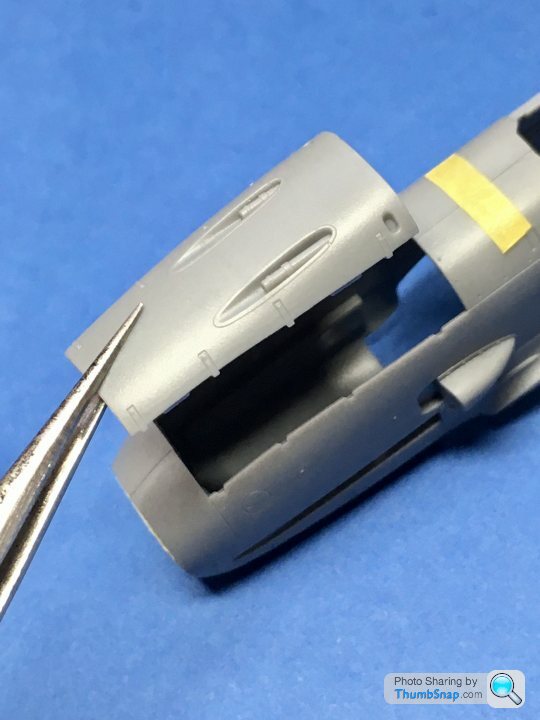
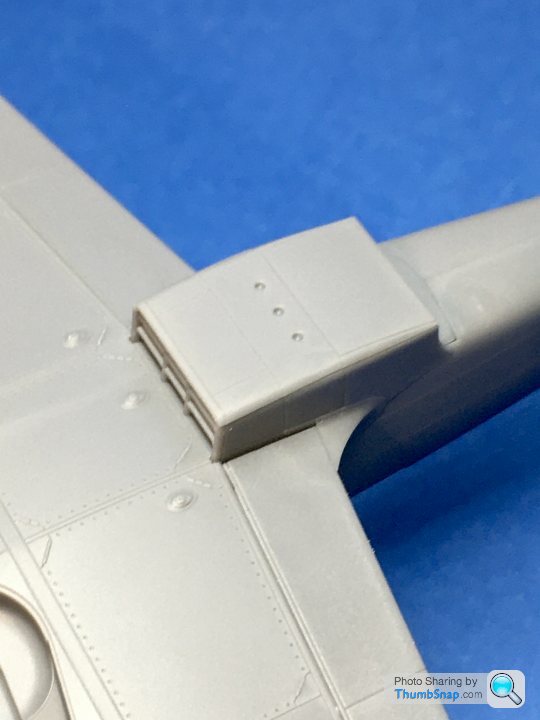
And the fit of the parts can only be described as perfect; these assemblies were just dropped into place dry as a test-fit:


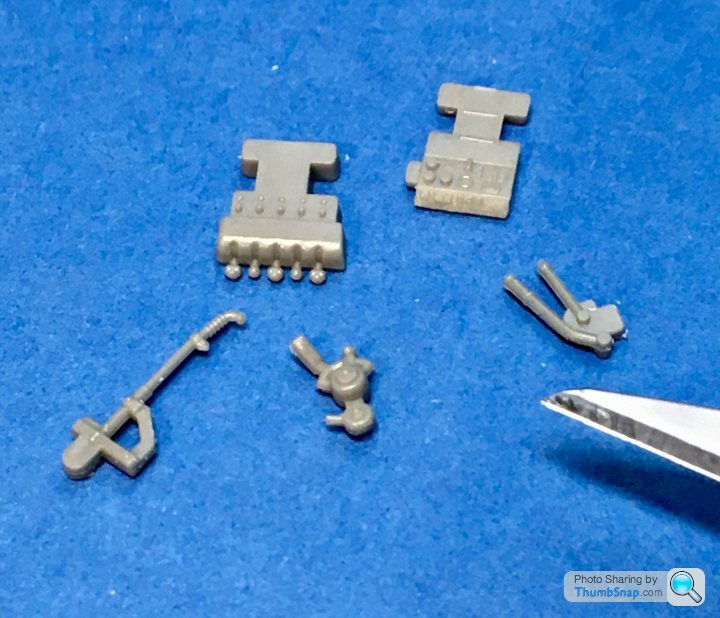
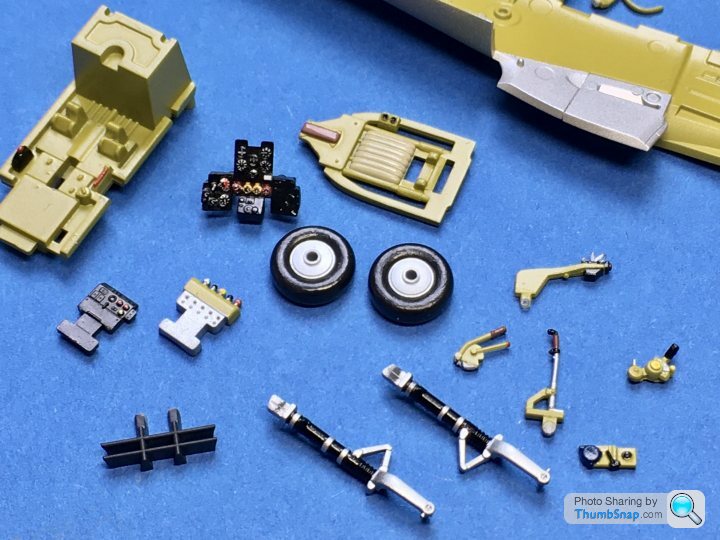
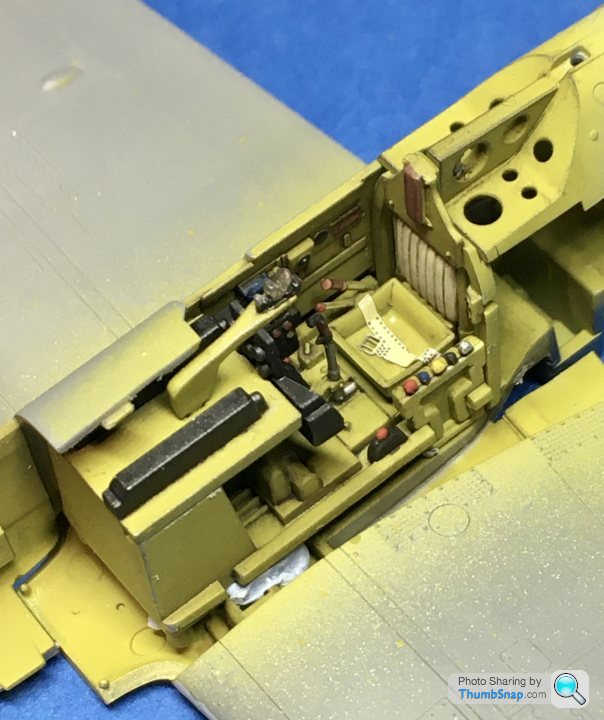
Some of the cockpit components approach resin in terms of fidelity:
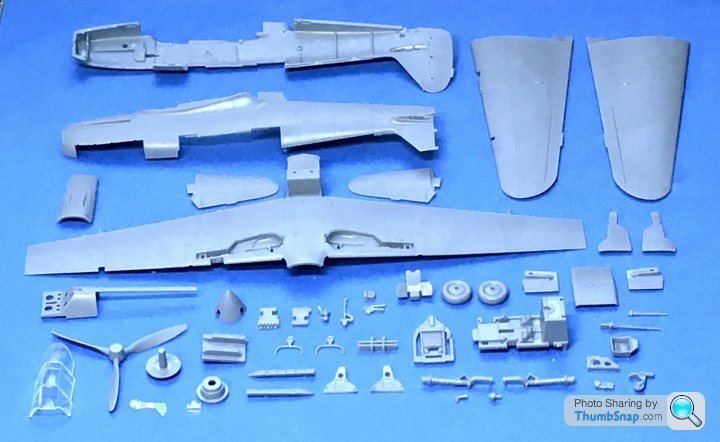
And despite the levels of detail, it’s not a complicated kit: there are only 50 parts:
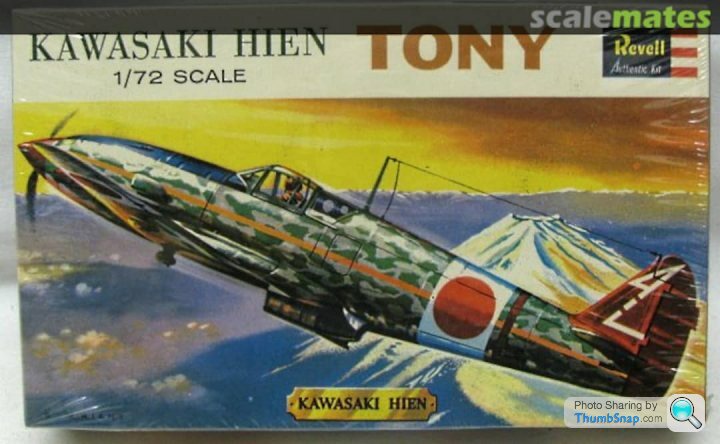
I’ve never built a Ki-61 before, but always fancied having one after seeing the old Revell box art when I was a little kid:
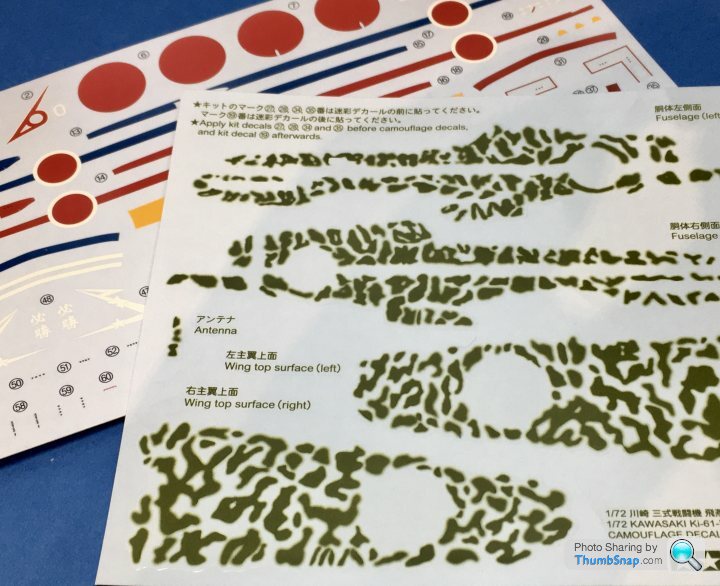
I want to finish it in that scheme, so I got the Tamiya mottle decals as well:
The Ki-61 was one of the few non-radial engined Japanese fighters of WW2, using a license built version of the Daimler-Benz DB-601. It will go nicely with my Airfix Bf-109 E4, and Italeri Macchi 202, both of which used similar DB-601 or derivative engines.
As with the Tamiya Zero I built recently, this new-tool kit is astonishingly good. Surface detail is second to none:
Transparent parts are crystal clear:
And the fit of the parts can only be described as perfect; these assemblies were just dropped into place dry as a test-fit:
Some of the cockpit components approach resin in terms of fidelity:
And despite the levels of detail, it’s not a complicated kit: there are only 50 parts:
I’ve never built a Ki-61 before, but always fancied having one after seeing the old Revell box art when I was a little kid:
I want to finish it in that scheme, so I got the Tamiya mottle decals as well:
The Ki-61 was one of the few non-radial engined Japanese fighters of WW2, using a license built version of the Daimler-Benz DB-601. It will go nicely with my Airfix Bf-109 E4, and Italeri Macchi 202, both of which used similar DB-601 or derivative engines.
tangerine_sedge said:
Is there a reason why the top of the fuselage is part of the rear cockpit and not molded to the fuselage sides? It looks odd and more complicated than necessary. My only thoughts are that there are options to enable an open canopy or a limitation to the slide mold?
Edited to add : it looks like a great kit though
It's to replicate the panel line detail on the actual aircraft, without needing filler. So the 'spine' part gives the smooth profile along the top, with the panel line joints slightly further round. Then it abrubtly changes to a top joint towards the tail. If Tamiya Extra Thin cement is used, it will result in excactly the right joint details in that area. It wouldn't really work on a kit with less than perfect joints between parts though.Edited to add : it looks like a great kit though
BTW, there isn't an open canopy option in the kit.

Evangelion said:
I wouldn't bother with the decals, as I'm quite looking forward to hand spraying the mottle pattern. all good practice!
Thing about practice it you get it wrong a lot, and I’d rather not practice on a Tamiya kit! Large decals on surfaces with compound curves and especially with a lot of surface features aren’t always easy to apply either. These are supplied as complete fuselage sides and complete wing surfaces.I’ll be masking and spraying the yellow wing stripes and propeller tips though - they’re also supplied as decals.
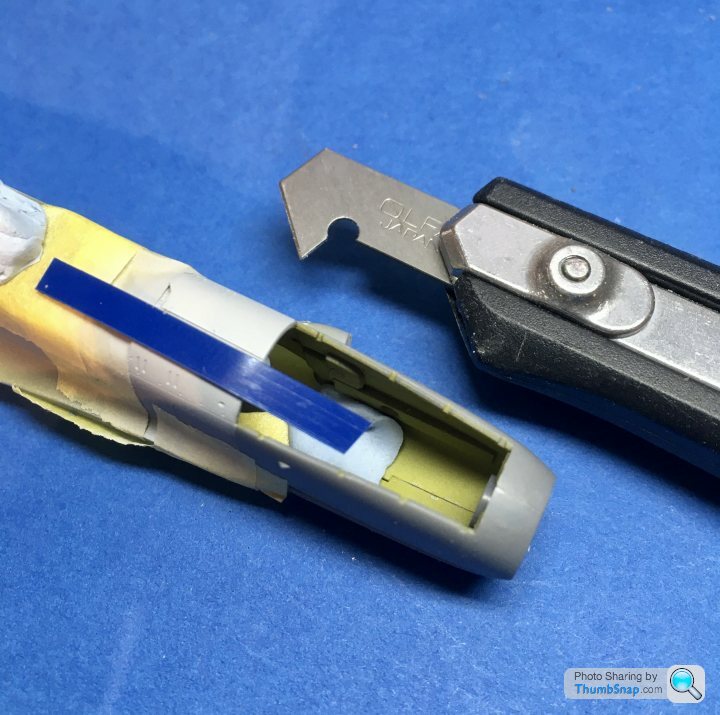
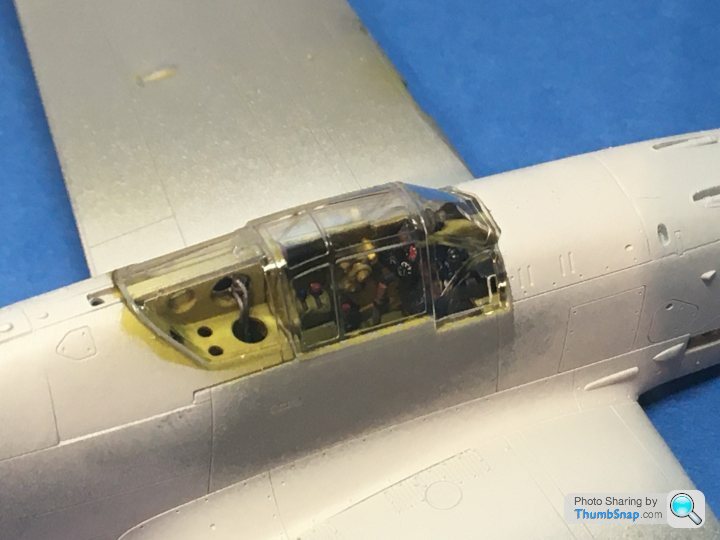
I applied a dark wash and some powders to highlight the moulded detail. I also added some p/e lap belts to replace the decal - they always look a bit naff:


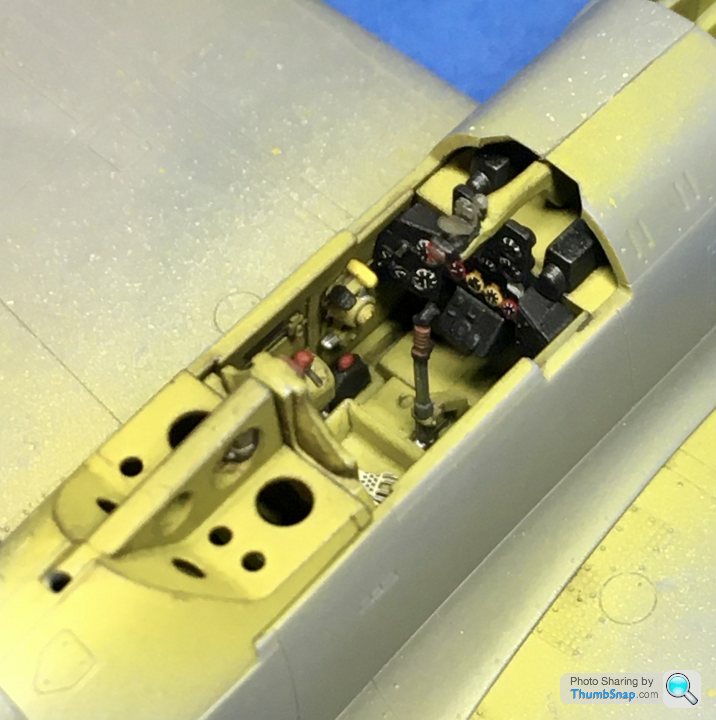
I suppose I could have done more work on the cockpit, but once the canopy is in place, any finer detail would be pretty much invisible. The Zero had more cockpit parts, but had an open canopy option. I think Tamiya got the level of detail right for this one:
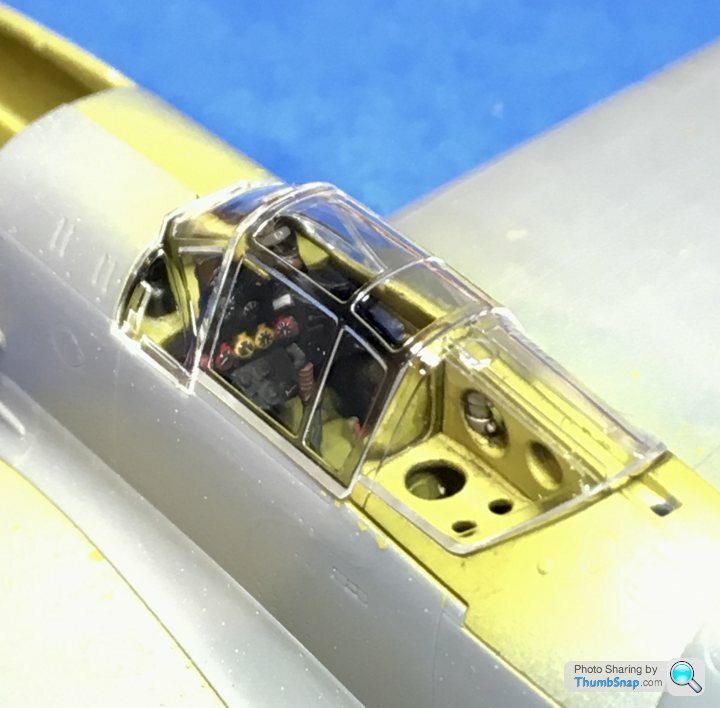

I suppose I could have done more work on the cockpit, but once the canopy is in place, any finer detail would be pretty much invisible. The Zero had more cockpit parts, but had an open canopy option. I think Tamiya got the level of detail right for this one:


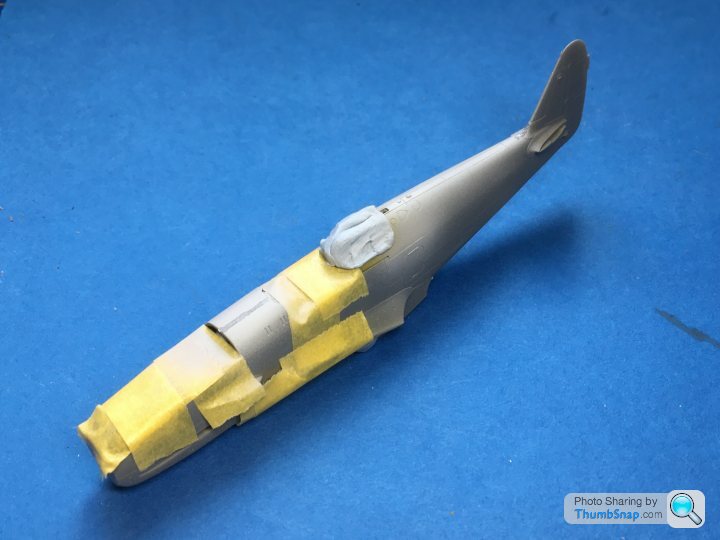
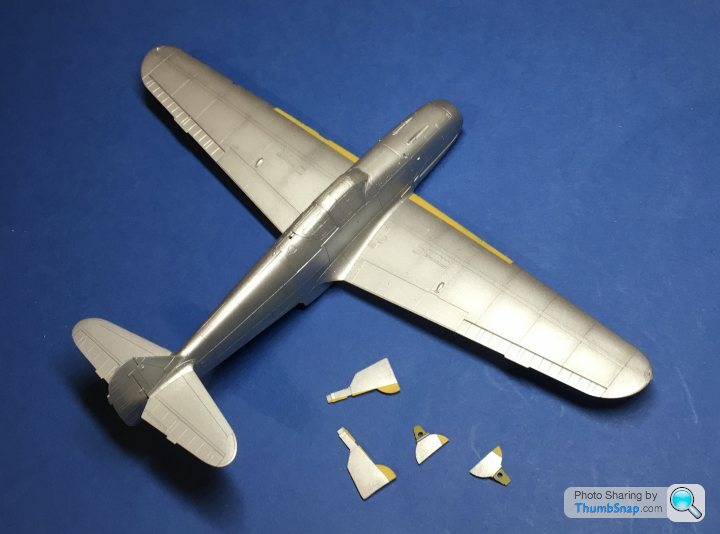
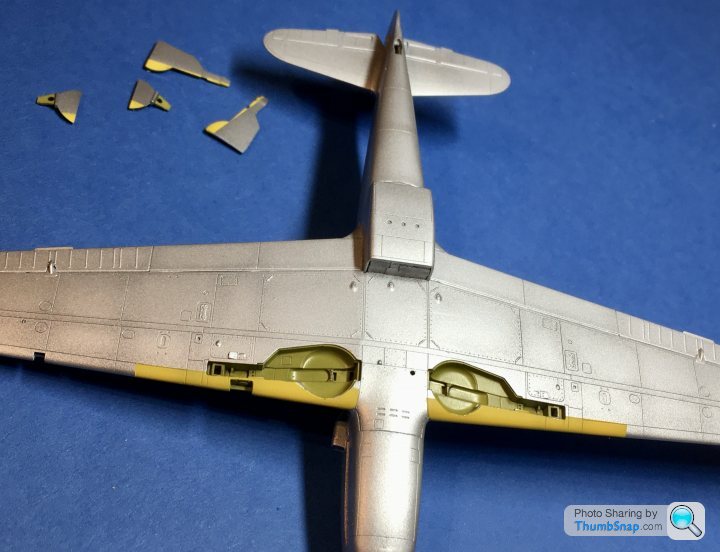
Re-scribed the lower fuselage panel lines lost due to flatting the surfacer. And reinstated the upper fuselage ones:
Also added the six fasteners shown on the plans, but not present in the model:
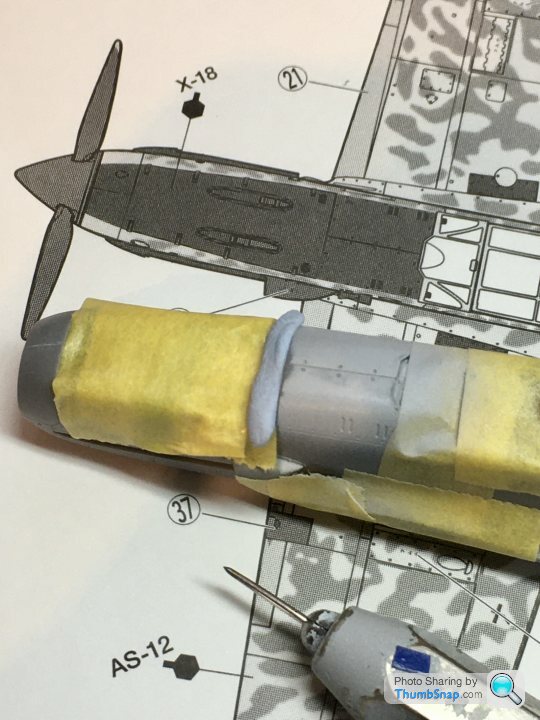
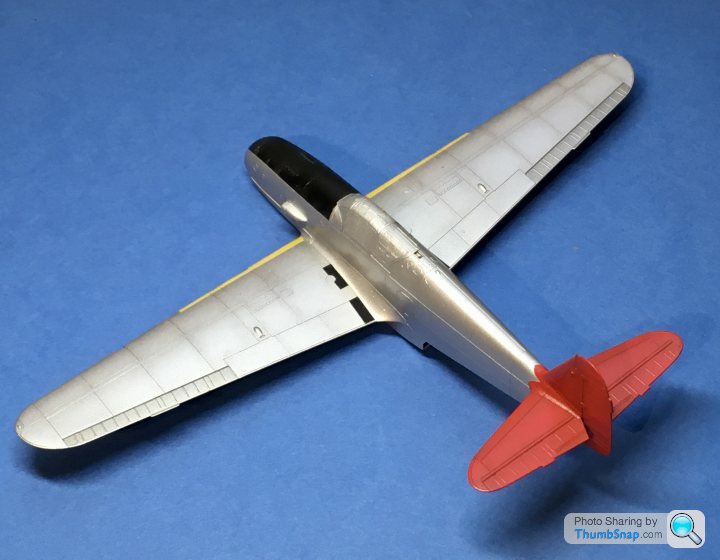
And got the cockpit assembly, wing, tailplanes and gun cover fitted:
and made a start on painting the tail wheel:

Also added the six fasteners shown on the plans, but not present in the model:
And got the cockpit assembly, wing, tailplanes and gun cover fitted:
and made a start on painting the tail wheel:
snowen250 said:
I built one of these and used the mottle decals. They behaved very, very well. Even over the curves and lumps etc.
Simon
Thanks, that's good to know. Did you apply the roundels etc after the camo? In a lot of photos, the roundels aren't centered in the gaps in the camo. I notice some stencil decals should be applied before the camo.Simon
Interesting it says to use enamel paint for the green blotches. I assume it means for airbrushing, to reduce the chance of spattering.
snowen250 said:
dr_gn said:
Thanks, that's good to know. Did you apply the roundels etc after the camo? In a lot of photos, the roundels aren't centered in the gaps in the camo. I notice some stencil decals should be applied before the camo.
Interesting it says to use enamel paint for the green blotches. I assume it means for airbrushing, to reduce the chance of spattering.
From memory i did all the camo decals, let them set for 24 hours, then did the insignia. I remember the way the decal fitted around the carb intake was for instance, excellent.Interesting it says to use enamel paint for the green blotches. I assume it means for airbrushing, to reduce the chance of spattering.
Feel free to put some pictures up on here.
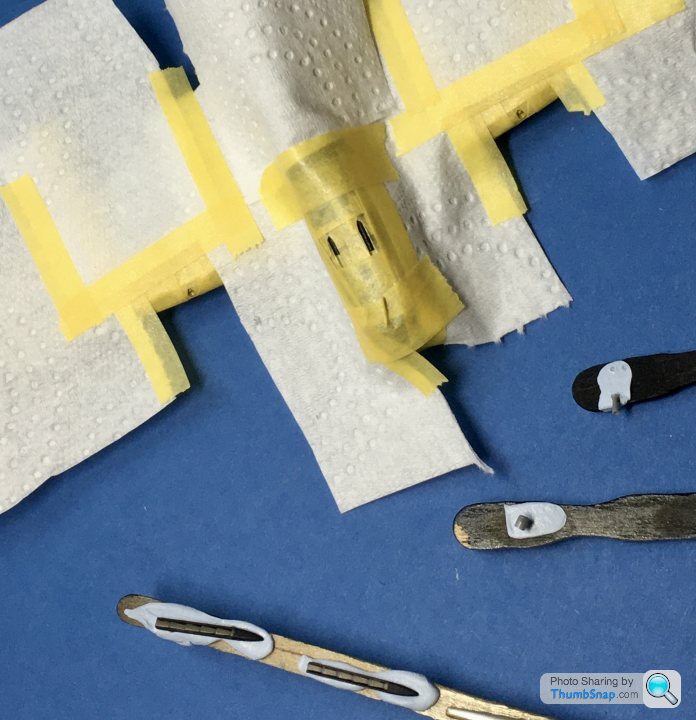
After adding a few lead wire air pipes and instrument wires, I fixed the canopy in place with Formula 560 PVA:
And got an Eduard mask set, which saves a lot of time. Seems like the tape is thinner than the Tamiya stuff, which is another advantage:
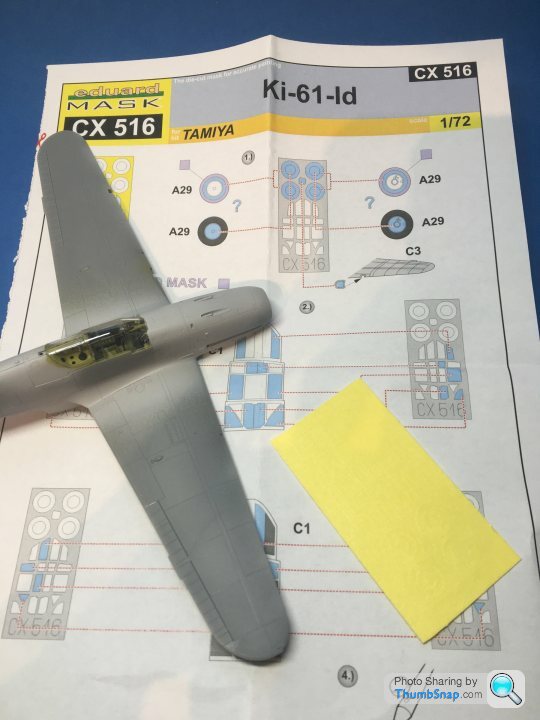
As with most Eduard Masks I’ve used, some needed quartering to get a perfect fit:
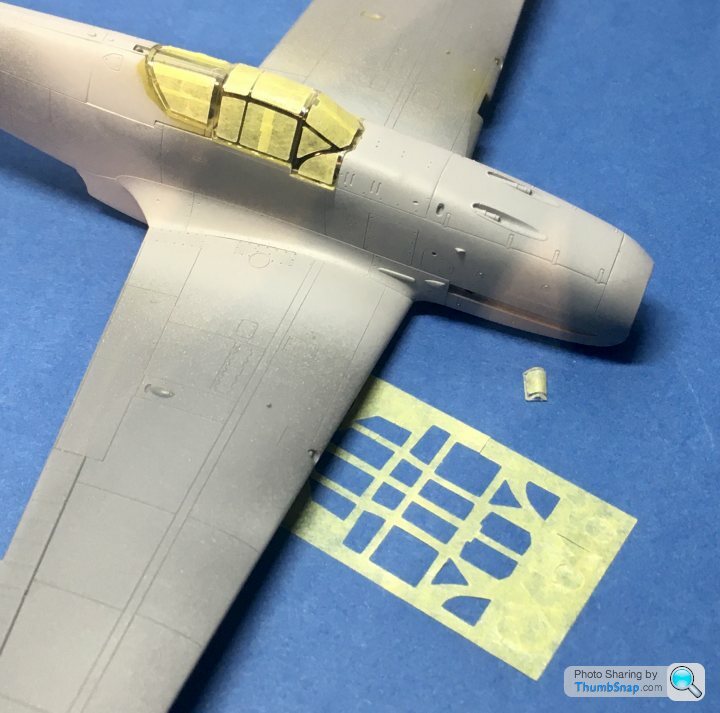
Used Blu-Tack to mask the wheel wells and landing light aperture:
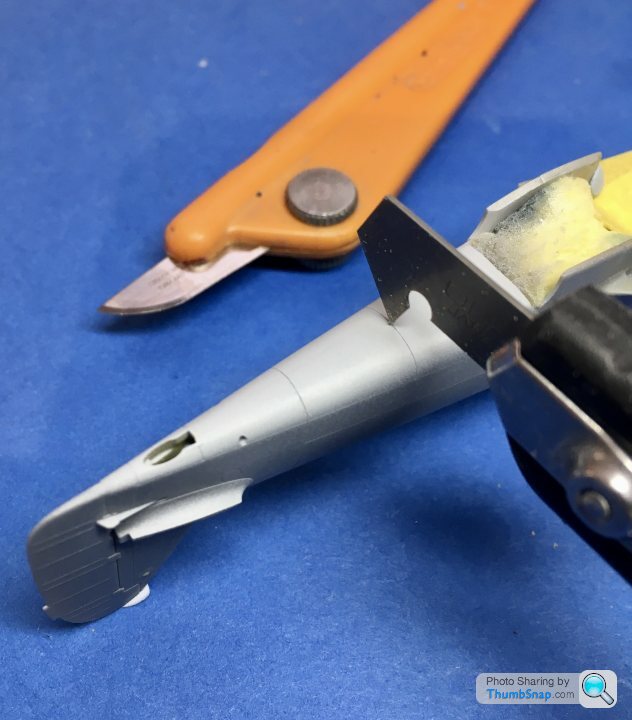
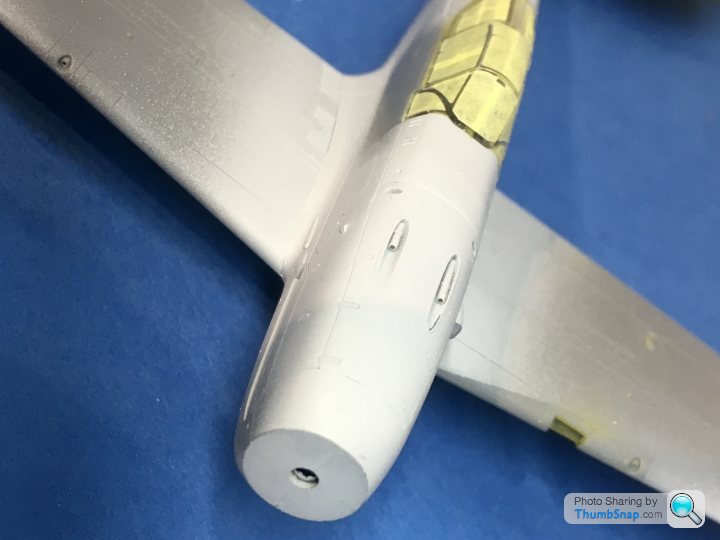
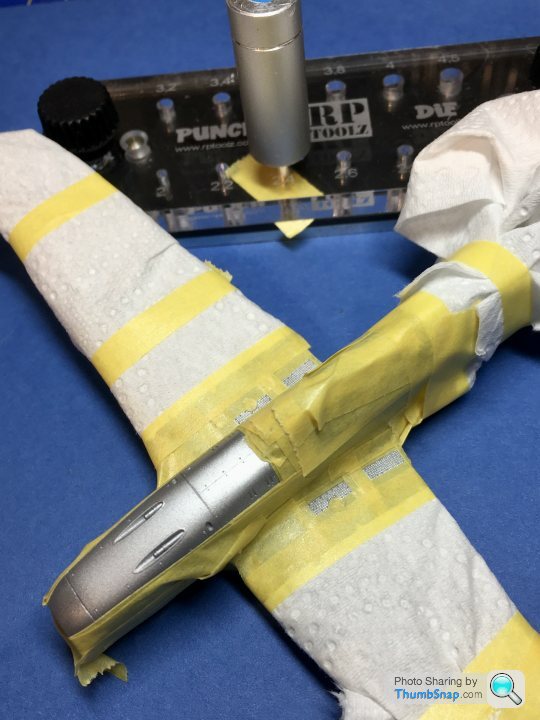
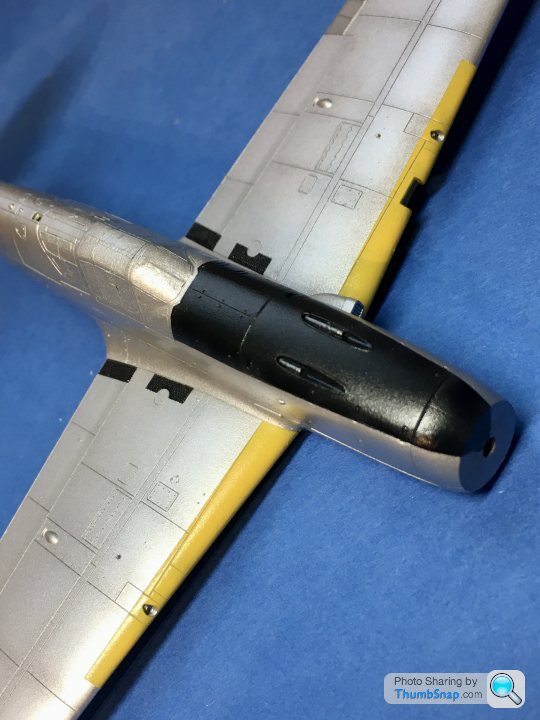
I also drilled out the machine gun and cannon barrels to 0.3mm :

The cowl guns are staggered in order to facilitate ammunition feed and discharge, just like the Bf.109 (although they aren’t derivatives of the German guns).
And got an Eduard mask set, which saves a lot of time. Seems like the tape is thinner than the Tamiya stuff, which is another advantage:
As with most Eduard Masks I’ve used, some needed quartering to get a perfect fit:
Used Blu-Tack to mask the wheel wells and landing light aperture:
I also drilled out the machine gun and cannon barrels to 0.3mm :
The cowl guns are staggered in order to facilitate ammunition feed and discharge, just like the Bf.109 (although they aren’t derivatives of the German guns).
All set for painting:
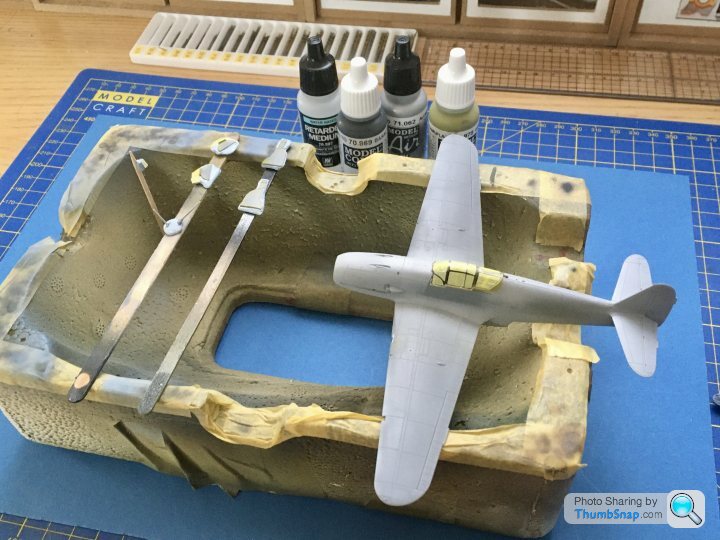
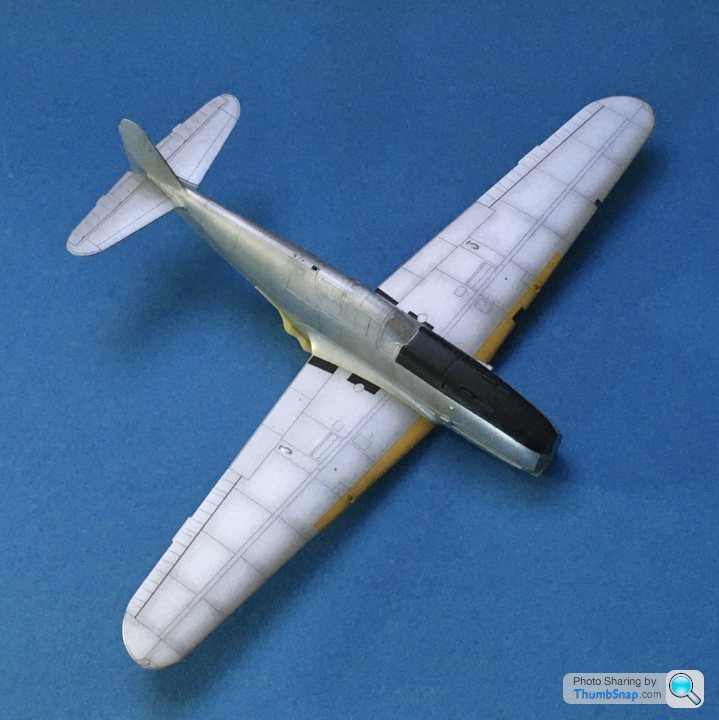
First sprayed the canopy frames with interior colour, then a couple of coats of Vallejo Air Aluminium:
Pre-shaded with Vallejo Basalt Grey:

Then over sprayed with several coats of thinned Aluminuim, and a protective coat of Klear:
Once that’s hardened I’ll mask for the red tail feathers, yellow leading edge strips, steel (coloured) ailerons and the black anti-dazzle panel in front of the windscreen.
First sprayed the canopy frames with interior colour, then a couple of coats of Vallejo Air Aluminium:
Pre-shaded with Vallejo Basalt Grey:
Then over sprayed with several coats of thinned Aluminuim, and a protective coat of Klear:
Once that’s hardened I’ll mask for the red tail feathers, yellow leading edge strips, steel (coloured) ailerons and the black anti-dazzle panel in front of the windscreen.
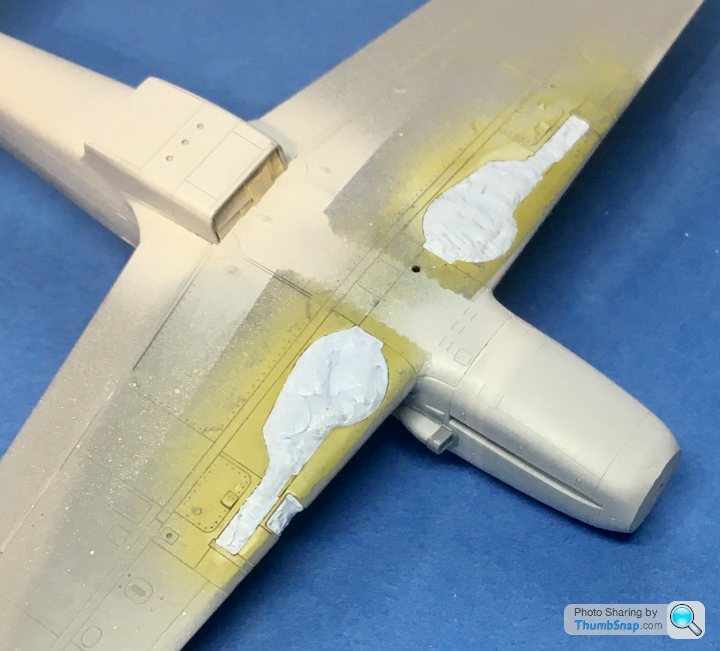
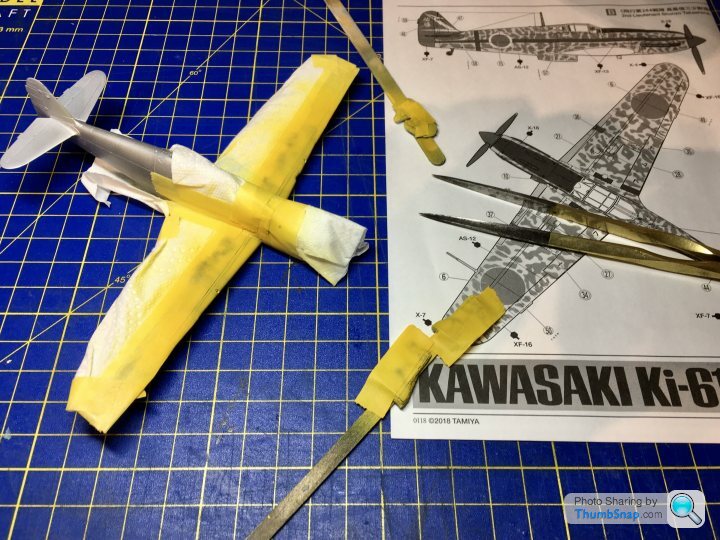
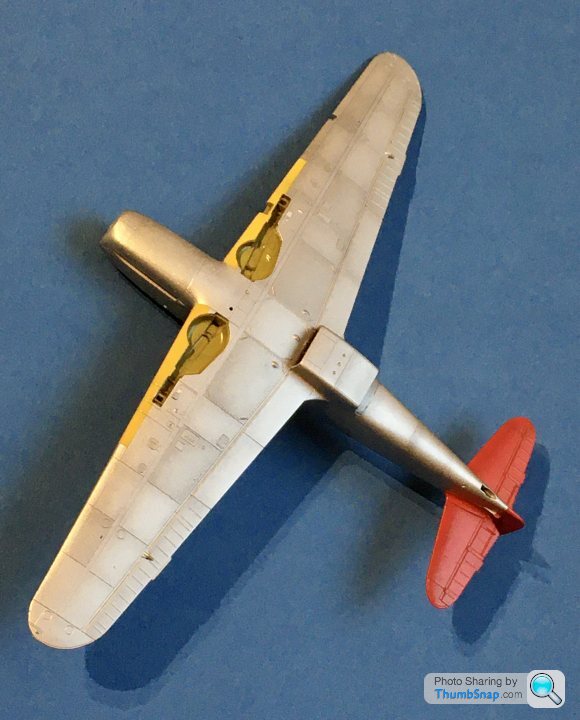
Masked the leading edge strips and u/c doors. I tried to do it as close to the 1:1 plan as I could, because the camo decals have to fit around them. Time will tell if it was accurate enough...Then sprayed yellow, pre-shaded with Basalt Grey:
Looks ok, a bit of correction needed around one of the wheel wells though:
Looks ok, a bit of correction needed around one of the wheel wells though:
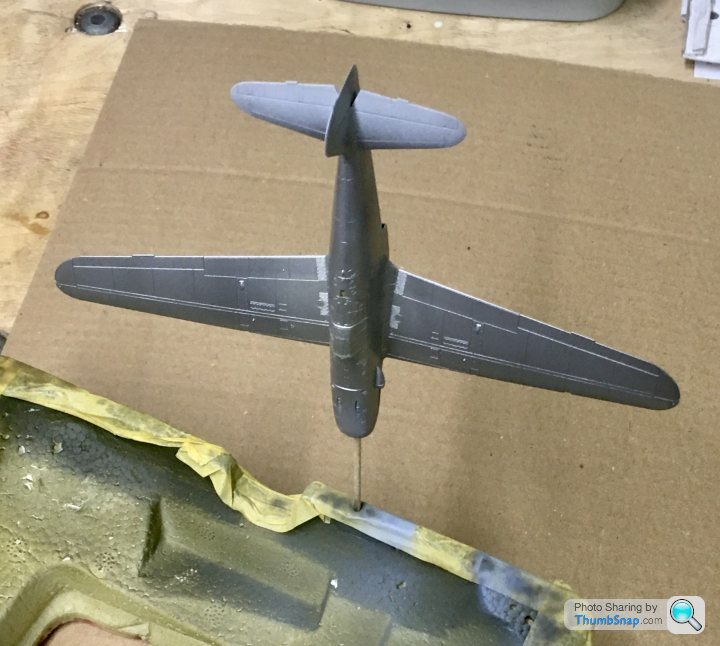
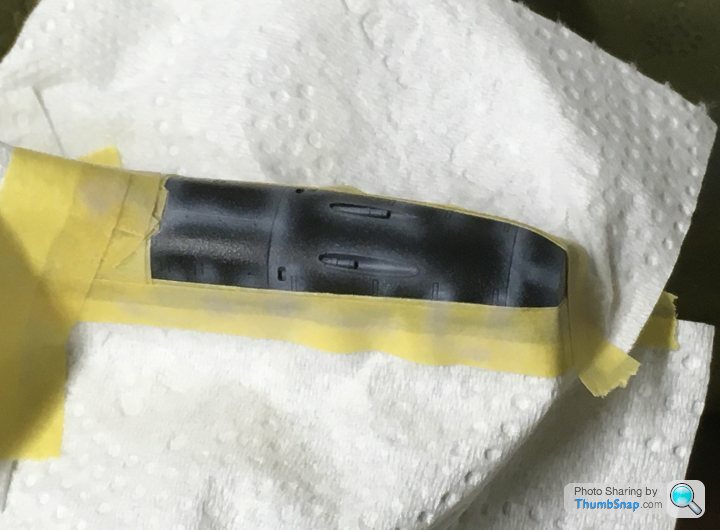
Next up masking for the anti-glare and wing walk panels:
Black mixed with a touch of light brown to take the edge off, and pre-shaded with light grey:
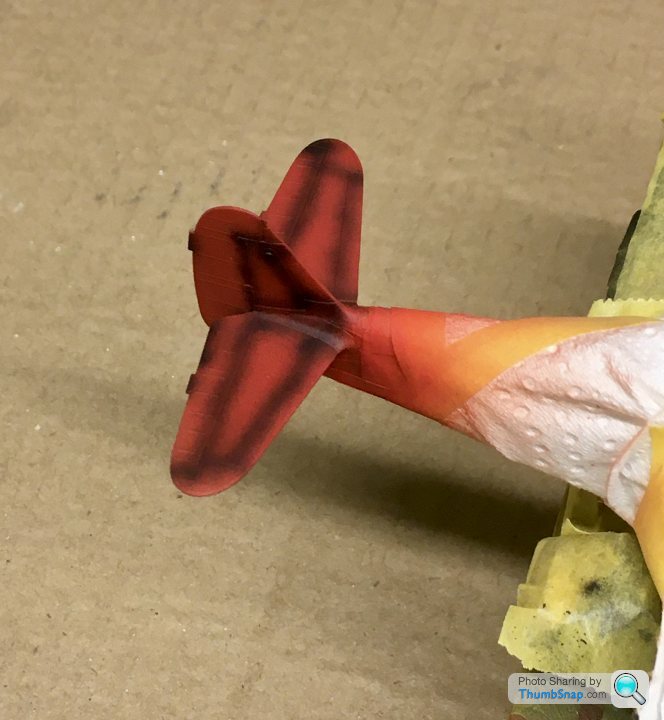
Then masked the tail feathers:
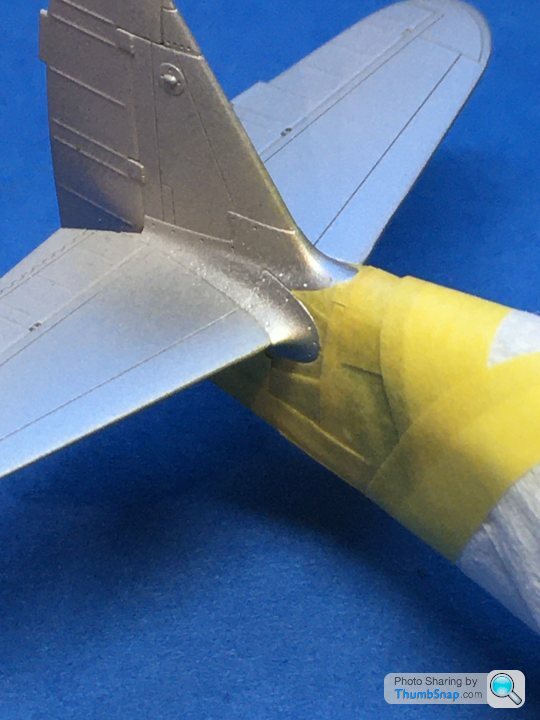
Sprayed Tamiya matt red with NATO black preshading:
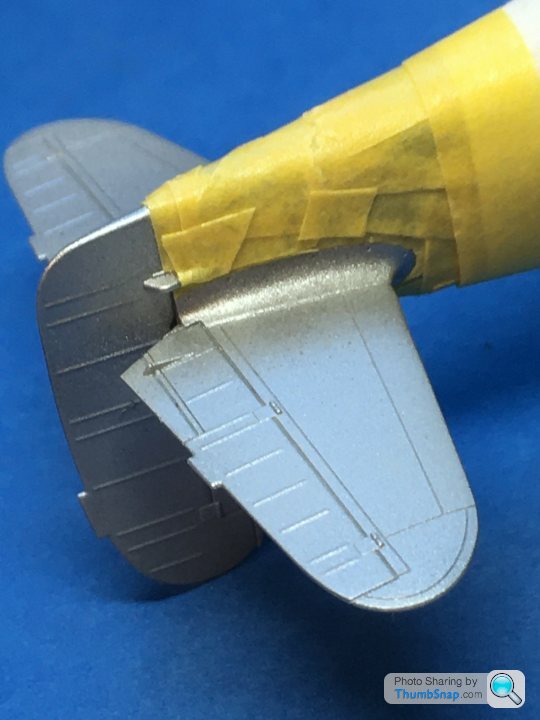
And then masked the ailerons and some random panels on the un-camo’d undersides. The topsides will have more than enough going on with the preshading and green blotches at this scale.

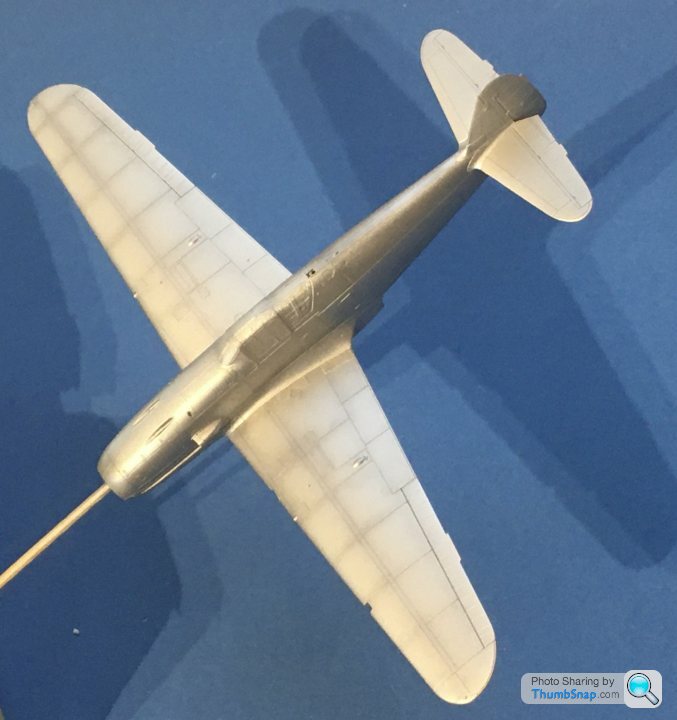
Rather than use another solid metallic, I used thin coats of Tamiya Smoke to give a subtle tone difference:
Next job I think is to mask and airbrush the gun muzzles, add some stencil decals then give everything a dark wash.
Black mixed with a touch of light brown to take the edge off, and pre-shaded with light grey:
Then masked the tail feathers:
Sprayed Tamiya matt red with NATO black preshading:
And then masked the ailerons and some random panels on the un-camo’d undersides. The topsides will have more than enough going on with the preshading and green blotches at this scale.
Rather than use another solid metallic, I used thin coats of Tamiya Smoke to give a subtle tone difference:
Next job I think is to mask and airbrush the gun muzzles, add some stencil decals then give everything a dark wash.
robemcdonald said:
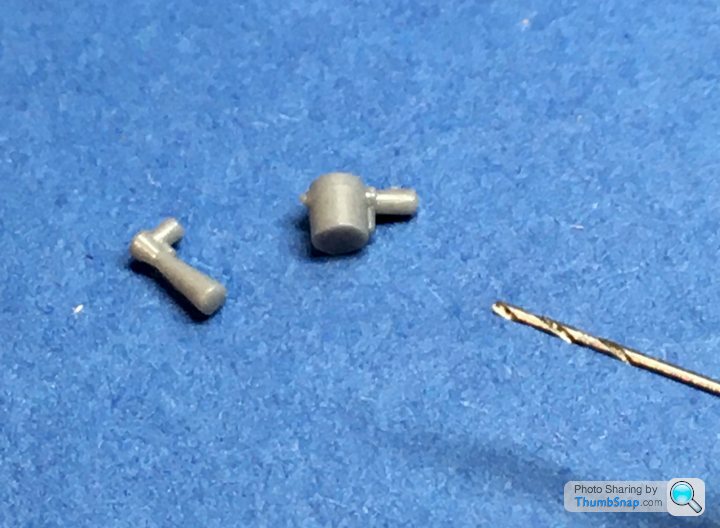
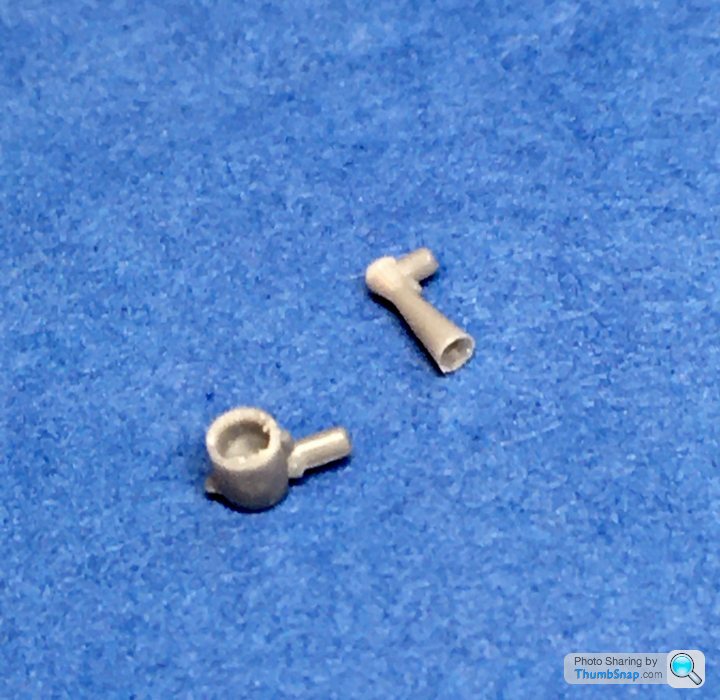
Looking superb (as expected) I’m interested to see how you are going to mask the gun muzzles. From memory they are little four point Can’t get my head around how you’d do that at 1/48 let alone 1/72.
Thanks! Might not work out, in which case the brushes would see some use. Thing is on fine details like guns - which have some moulded detail - airbrushing gives a thinner finish.
robemcdonald said:
dr_gn said:
Thanks!
Might not work out, in which case the brushes would see some use. Thing is on fine details like guns - which have some moulded detail - airbrushing gives a thinner finish.
You do know you’re allowed to use decals right?Might not work out, in which case the brushes would see some use. Thing is on fine details like guns - which have some moulded detail - airbrushing gives a thinner finish.
Gassing Station | Scale Models | Top of Page | What's New | My Stuff