First Build Thread - Card AT-AT
Discussion


Having been amazed at the skills of some contributors on here, I am going to be brave and post a build - it gives me more incentive to finish.
The model is a free download from here www7a.biglobe.ne.jp/sf-papercraft/sf/at-at.html which means instructions are pictures and Japanese. 10 sheets of A4 printed onto 160gsm card.

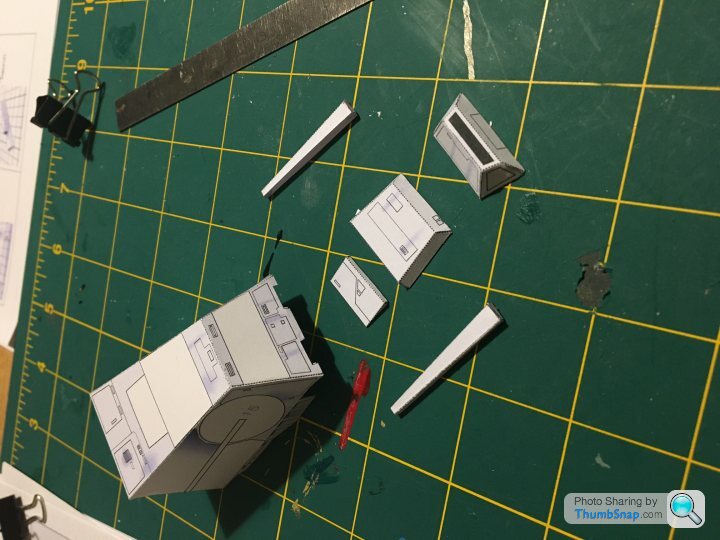
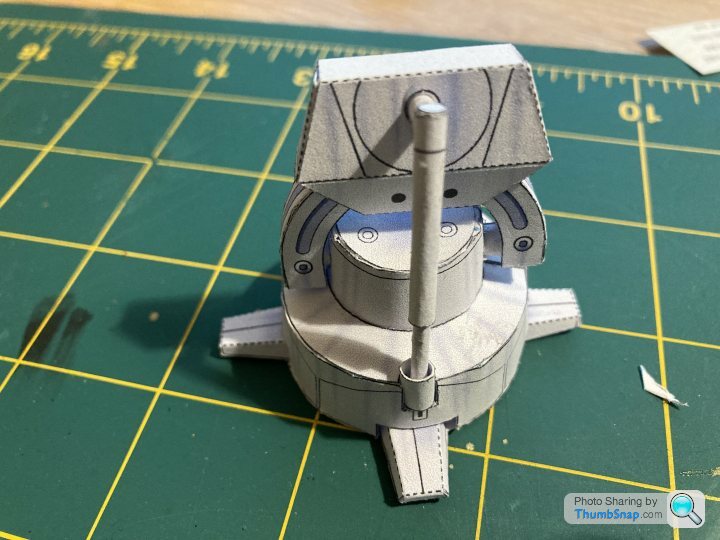
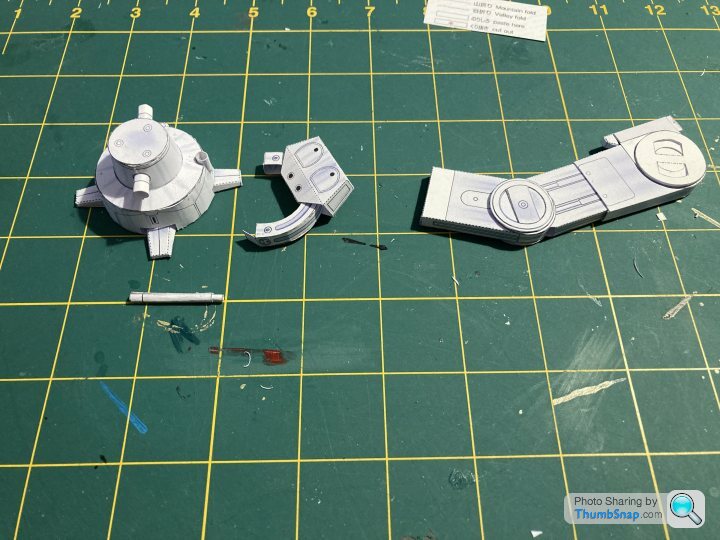
First parts together and more ready to glue onto the "head"
The model is a free download from here www7a.biglobe.ne.jp/sf-papercraft/sf/at-at.html which means instructions are pictures and Japanese. 10 sheets of A4 printed onto 160gsm card.
First parts together and more ready to glue onto the "head"
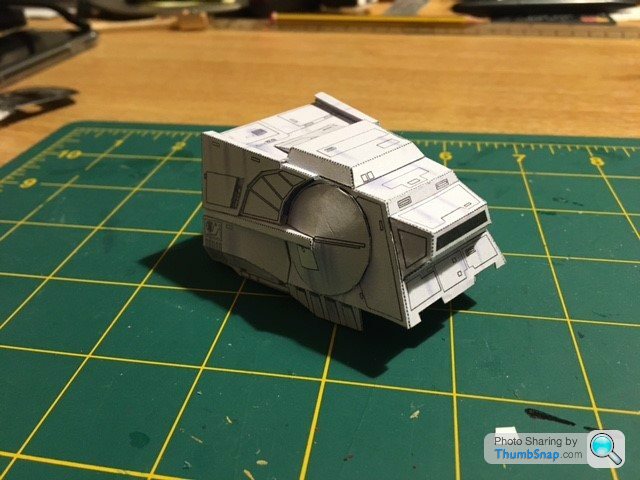
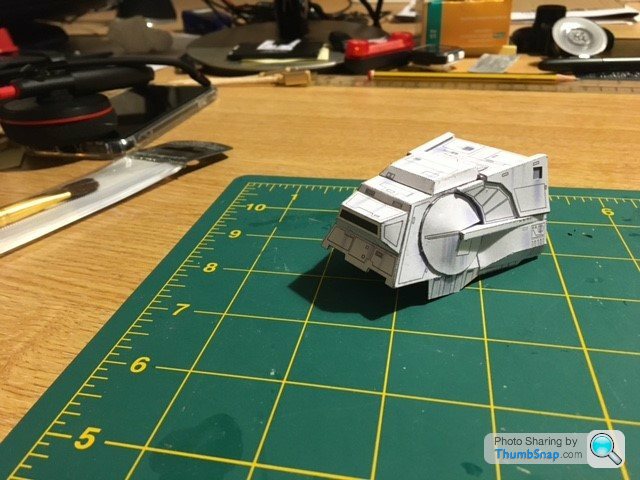
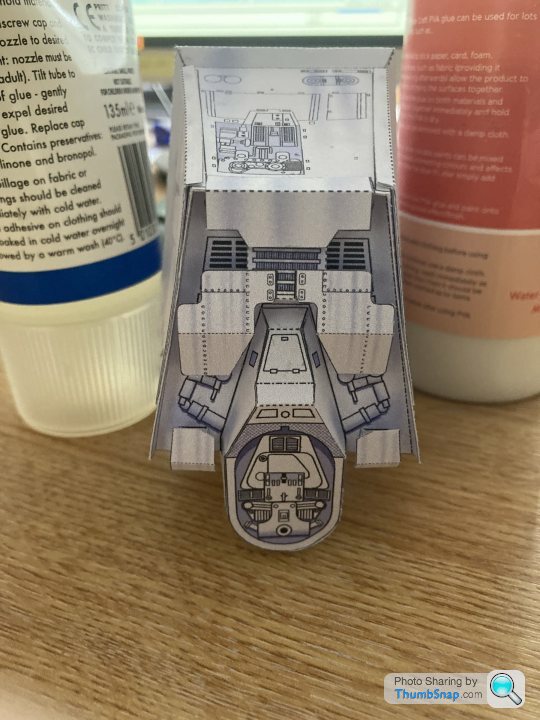
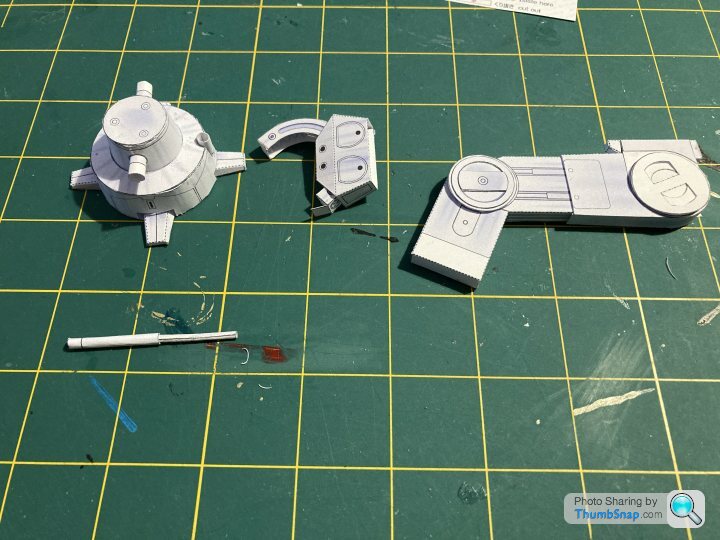
Update on progress, "head" almost complete, just the blasters to do and then on to the "body"
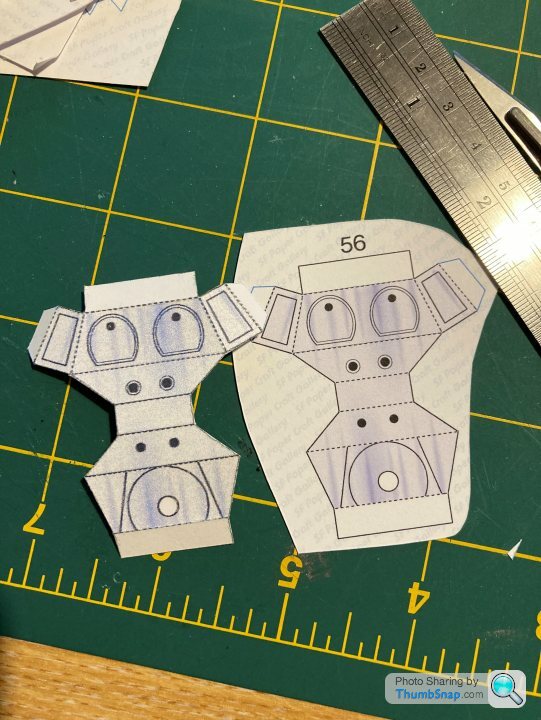
Must be more precise in future, one of the long horizontal pieces you can see on the sides was a little wider than it should be so I had to enlarge the slot in the flattened cone so it would fit over it. One is also slightly higher than the other which the cones emphasize although it is more obvious in the pictures than with the model.
At least there are plenty of offcuts to practice with the pens before I go anywhere near the model with them.
Some progress over the last week, just hadn't got around to posting here.
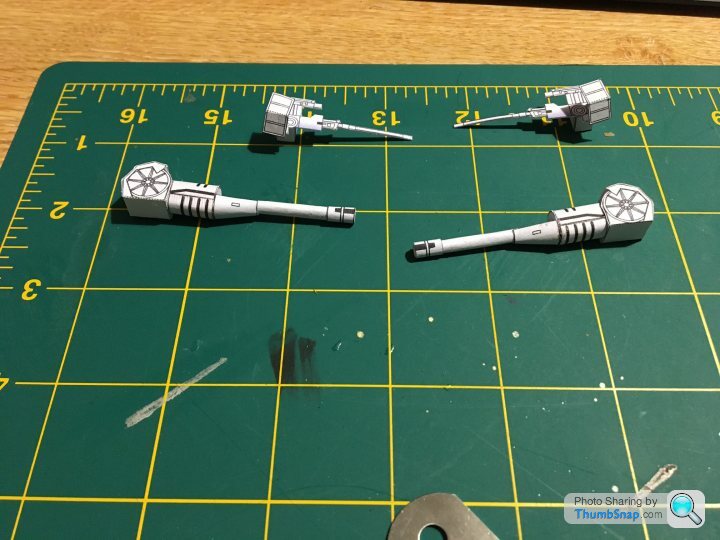
Blasters assembled, two parts in the small ones, five in the large ones
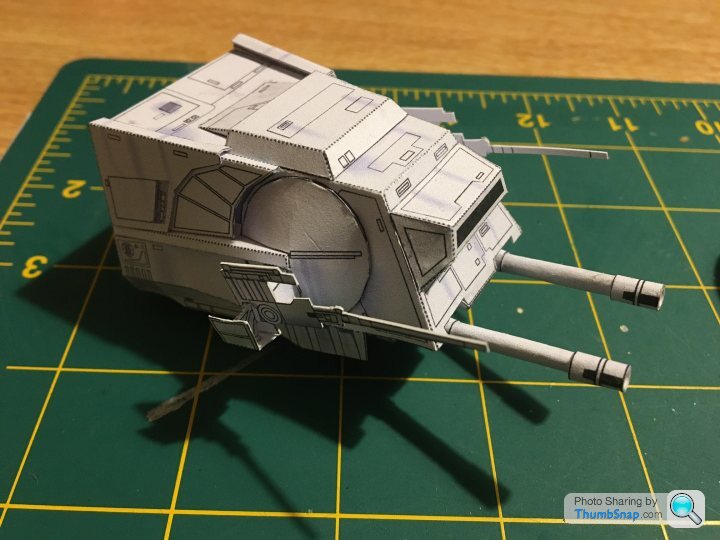
Fixed to the Head (should call it the crew cabin)
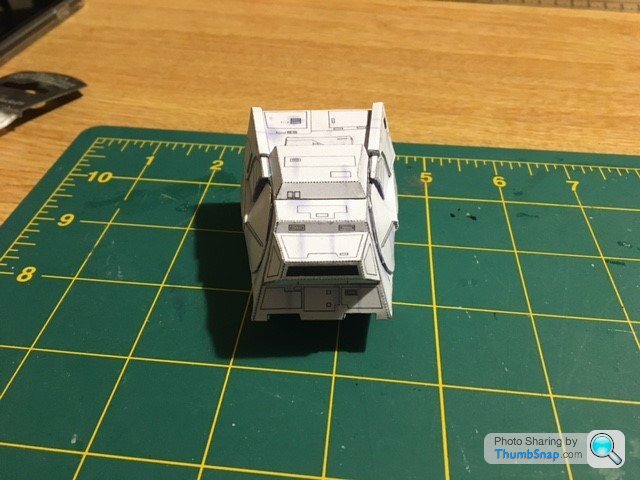
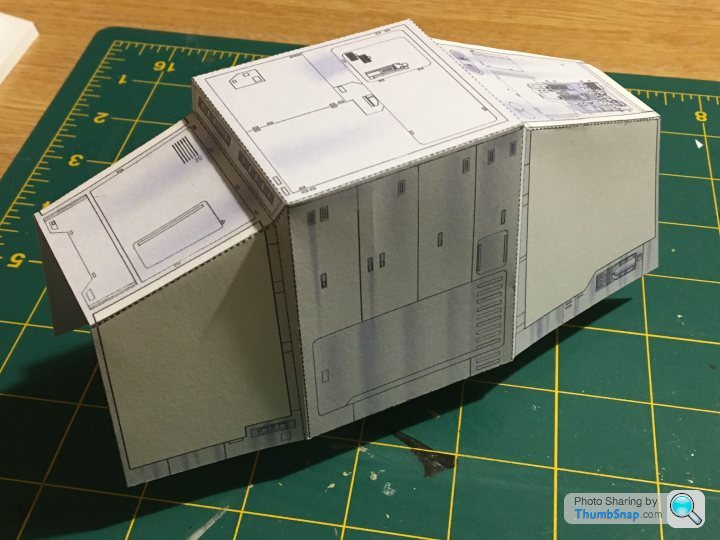
Started assembly of the body, main part, harder than it looks as it is one piece.
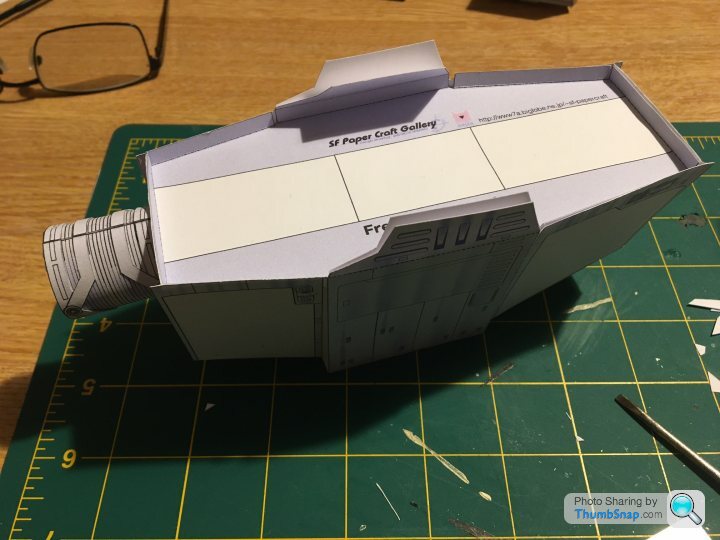
Bottom of body and stiffener

needed to adjust some of the folds so it now fits in place - dry fitted for now
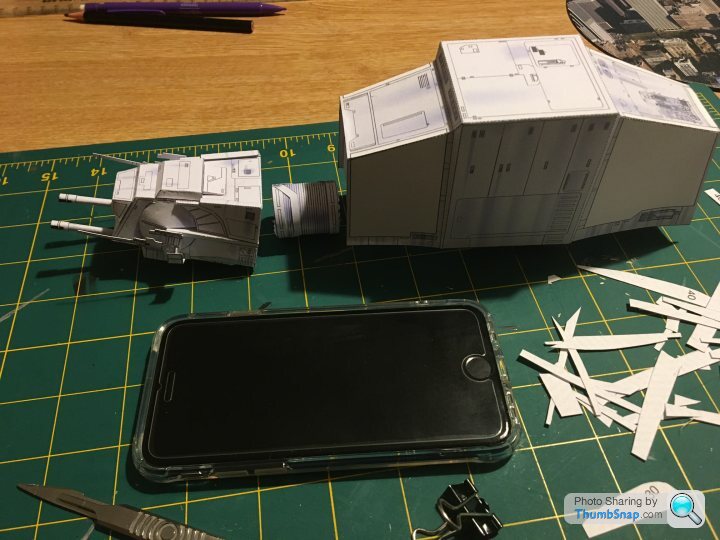
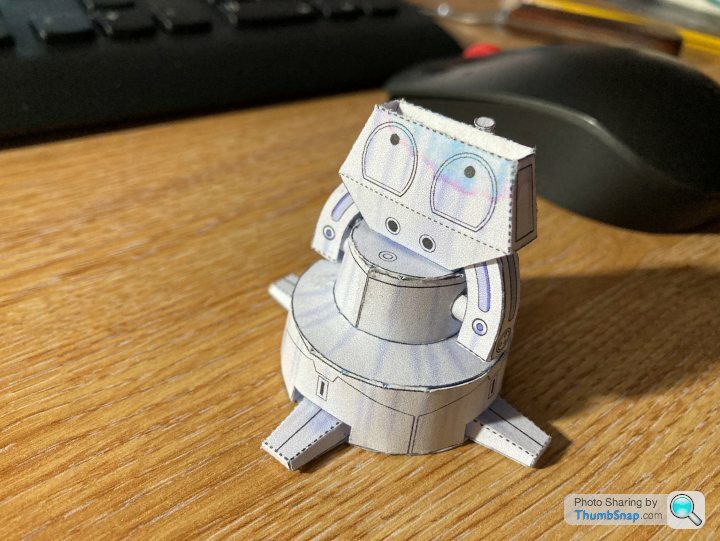
Head and body- it is bigger than I thought it would be - Iphone-s for scale.
Generally we are our own worst critics and knowing I will be showing you lot what I am producing is making me more careful (e.g. now trying to cut down the outside of the black line instead of just following it).
Blasters assembled, two parts in the small ones, five in the large ones
Fixed to the Head (should call it the crew cabin)
Started assembly of the body, main part, harder than it looks as it is one piece.
Bottom of body and stiffener
needed to adjust some of the folds so it now fits in place - dry fitted for now
Head and body- it is bigger than I thought it would be - Iphone-s for scale.
Generally we are our own worst critics and knowing I will be showing you lot what I am producing is making me more careful (e.g. now trying to cut down the outside of the black line instead of just following it).
Edited by IJWS15 on Monday 25th January 20:25
Standard office printer paper is normally 80 gsm - it is very flexible and loses shape easily with most PVA type glues but with care it does work, just not very well. I did building Smart convertible a while ago in 80gsm but gave up, printed it out again on 120 and will try again - it has some more complex curves..
This is done on 160 gsm printed on a laser printer, it would probably be OK on 120. I have somewhere a model to build of a Victorian ship (as in Australian State of Victoria) where the instructions say that some is to be printed on 200gsm, some on 160gsm and some on 120gsm.
I buy the paper from an office outlet (Staples?) in packs of 200/250 sheets. In comparison to plastic kits the paper is cheap.
Edited by IJWS15 on Thursday 28th January 14:36
All the little bits on the body now
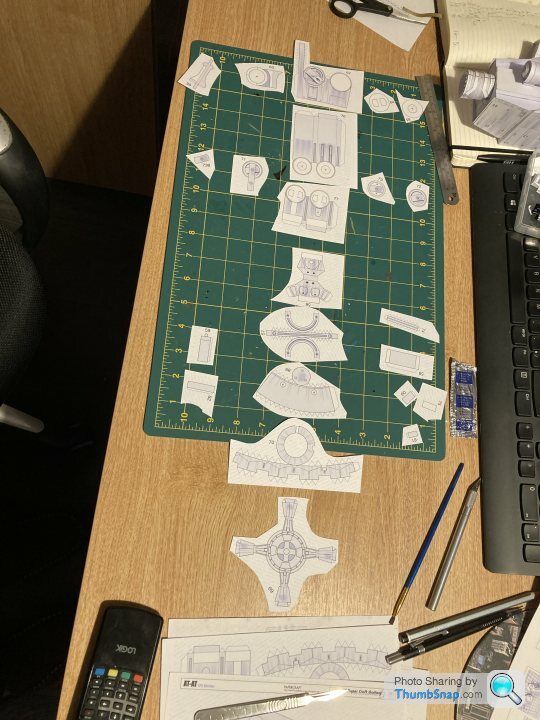
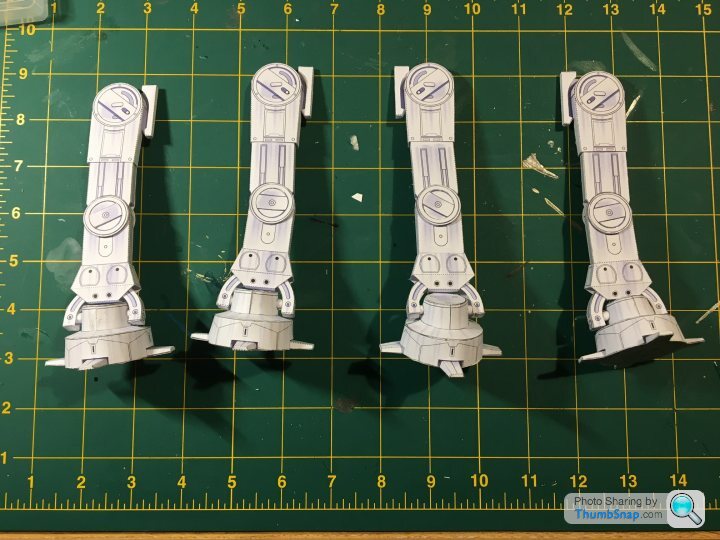
Starting on the legs, this is going to be tedious as there are four to make and these are the parts of one, so far I haven't worked out where they all go - since taking the photo I realised that the second and third large pieces are the wrong way round. When finished the joints should articulate. For scale it is an A3 cutting mat.
I have lots of links to free downloads for card models, anyone interested in a list or aren't we allowed to do that.
Some to start you off
paper-replika.com (indonesia based)
https://www.epson.jp/sponsor/nakajima/craft/nsx201...
It is a pig to make- I learned a lot of the "don'ts" on it. There is also an artic tractor and trailer in the same scale, the trailer uses loads of card, it is about 2 feet long.
https://www.papershipwright.co.uk/product/hmvs-cer... - Cerberus is available free, most of the others are ££.
Need to start the other laptop up to find the others.
I have generally found them by googling card model or paper model
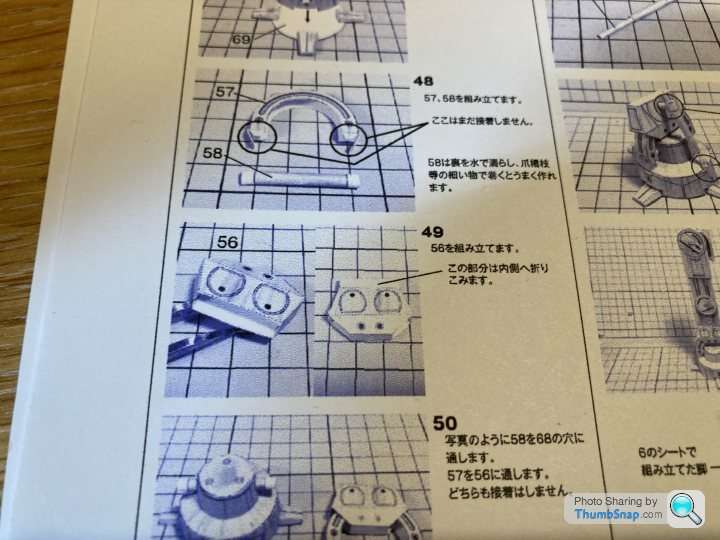
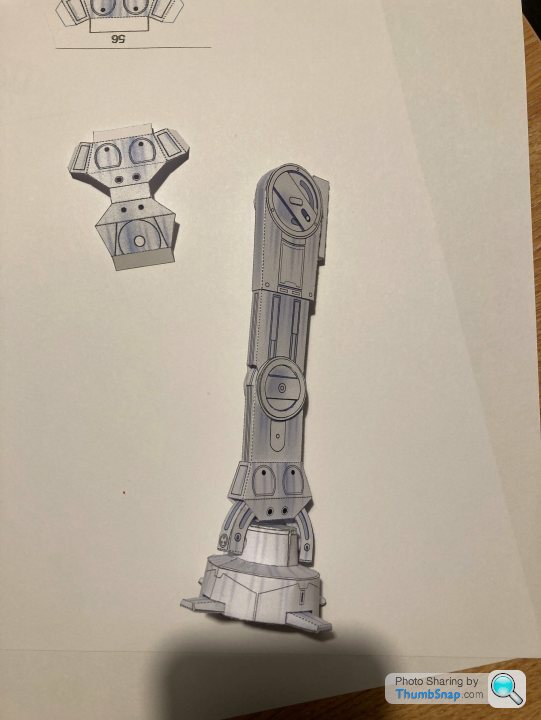
Hit an issue and been trying to puzzle it out - these two parts are supposed to go together but it would leave a white band showing........

His blog didn't help, even with Google Translate as it is more about how he developed the model than guidance on how to build it. The instructions, being pdf, don't allow me to copy text from them.
Eventually this picture in the instructions at stage 49 resolved it, The two flaps at the top of the bit that looks like a face should be folded inside and not glued together leaving a gap that the other part fits into, at least I have only made one leg up. New scalpel blade needed tonight.
Mine as it stands
Some more web-sites including a direct link to an assortment of Nakajima racing NSXs
http://www.ss42.com/pt-cars.html
https://www.epson.jp/sponsor/nakajima/craft/nsx201...
https://www.epson.jp/sponsor/nakajima/craft/ Yes you really can put the cars in the trailer – it is that big. Some cars are more complex to build than others . . .
http://www.ne.jp/asahi/paper-m/yasu/2art_w/e_f1_li... - F1 cars about 5” long, quite tricky but no issues with tobacco sponsors.
http://www7a.biglobe.ne.jp/~sf-papercraft/sifi.htm...
http://www.visualspicer.com/store.html - not free
http://www.tomtom-net.de/resources/cardmodel/cardm...
I have built one of the NSXs, the tractor and trailer and one of the Asahi F1 cars.
Thought about the scalpel and decided to try dampening it to soften the glue, it worked but also put a watermark into the sides . . . .
I would see it. Copied the part from the second leg on my dot matrix which didn't work too well, even when i had the intensity right:
That wasn't good enough. Being a download all you need to do is print another copy. Same printer as used for the copy but looks far better and comparable with the laser printed version done in the office. Here it is installed - copied version on the left.
Now there are another three to do.
At least it isn't another seven like the Bismarck's turrets :-)
And then there were two.
Showing the articulation . . . .
You will have to take my word for it but the photos are the same leg with joints in different positions:
Working from the left
- the pin through the top of the foot is (not very) loose in the top of the foot.
- The "ram" which sits between the foot and the "ankle" (the part that looks like a face) extends as the ankle moves. Don't glue the little flap on the foot to the bottom of the small cylinder on the rhs of the foot that the ram sits in or it stops the ram pivotingfloating.
- The half ring part is loose in the "ankle" and will also rotate on the pin through the foot when assembled.
- The knee articulates as can be seen
- the white disk at extreme left, at the top of the leg, rotates in relation to the leg and is the part which fixes to the body.
Not sure whether the two ends of the leg are to be glued in or if they are supposed to be loose to allow the leg to change length. One of these joints is separate and is where the white part below the knee pushes in to the topp of the ankle, the other is assempled dry half way down the thign, Will see how it works out when the legs are fitted before I glue them
Just 2 more to do - opposite hand
Gateway to plastic models.....
The card models started as something to do in the evening when away from home for work.
I do have some 1/20 F1 cars to build. So far they are OOB builds and still relearning from building afvs in my teens. Other half doesn’t want anything military in the house.
Too cold to spray paint in the garage at the moment.
It is actually the 1/20 F1 cars I have always wanted to build, remember looking at them in Beatties in Sheffield when I was at university over 40 years ago couldn't afford them then kits (£10ish in 1978 IIRC and that kept me in food and beer for a week!)
Anyway back to the AT-AT - there are now four
On the first ones I had difficulties with the cylinders, it is very difficult to keep them straight and parallel,consider that the narrowest is rolled around a 0.5mm drill. On the last leg I cut them oversize by about 5mm, rolled them, then trimmed them to size - worked a lot better and less distortion.
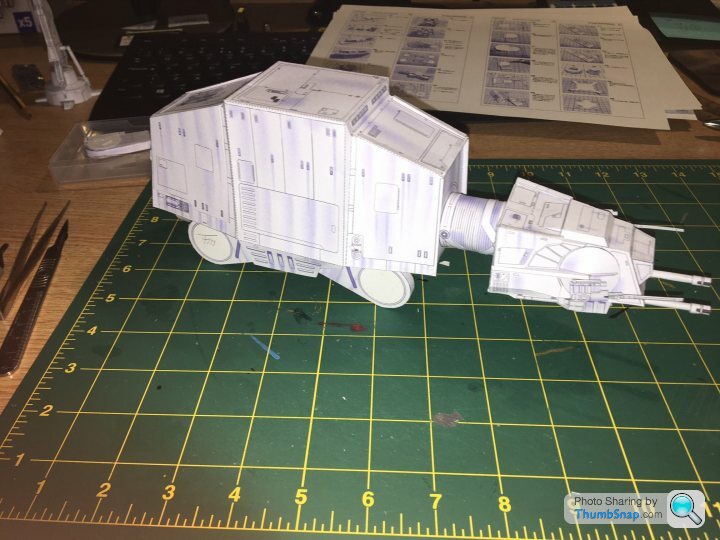
Head fitted
Legs fitted. all joints articulate as intended, quite pleased with it.
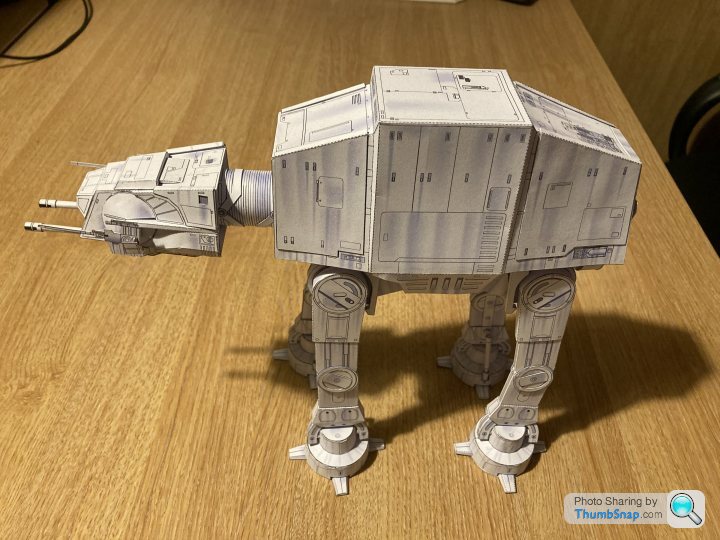
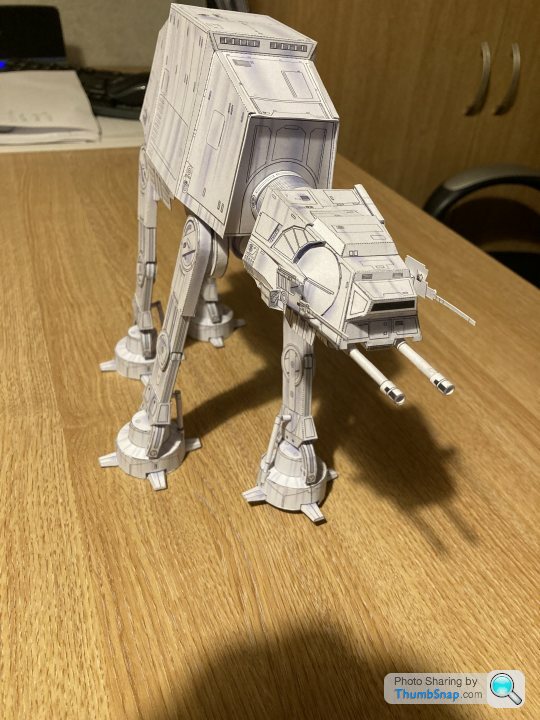
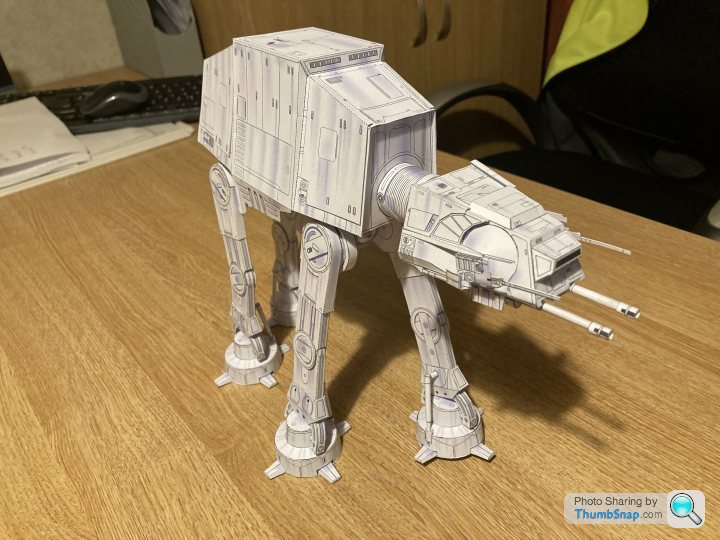
Wife's reaction was "so you can clear up now . . . . " little does she know.
Anyway back to the AT-AT - there are now four
On the first ones I had difficulties with the cylinders, it is very difficult to keep them straight and parallel,consider that the narrowest is rolled around a 0.5mm drill. On the last leg I cut them oversize by about 5mm, rolled them, then trimmed them to size - worked a lot better and less distortion.
Head fitted
Legs fitted. all joints articulate as intended, quite pleased with it.
Wife's reaction was "so you can clear up now . . . . " little does she know.
I had printed the Paper-Replika smart car but when I got it out it was on 80gsm paper so, after trying a wheel and giving up, reprinted that on 120gsm. Not quite as good printed on an inkjet but will keep me occupied until it is warm enough in the garage to respray the Lotus 79 body.
I graduated in 1981 and haven't been back very often. Did they still have the railway running around just above head height when you frequented the store?
Must learn to spell.
I graduated in 1981 and haven't been back very often. Did they still have the railway running around just above head height when you frequented the store?
Must learn to spell.
Edited by IJWS15 on Tuesday 23 February 08:34
Gassing Station | Scale Models | Top of Page | What's New | My Stuff