Airfix 1:72 Vulcan B.2
Discussion


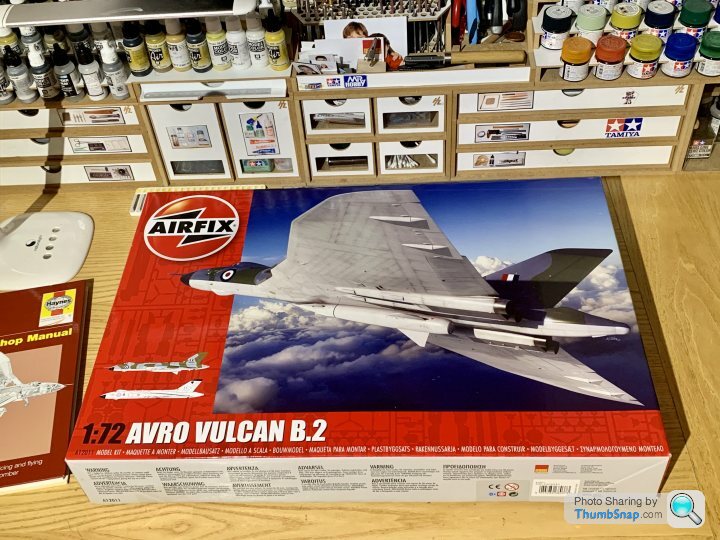
The Telford Scale Model World show had a positive effect on my motivation to build models, so I thought I’d make a start on the Vulcan. I believe this is a new-tool released this year:
The last four-engined bomber I built was Airfix’s Dambusters Lancaster:
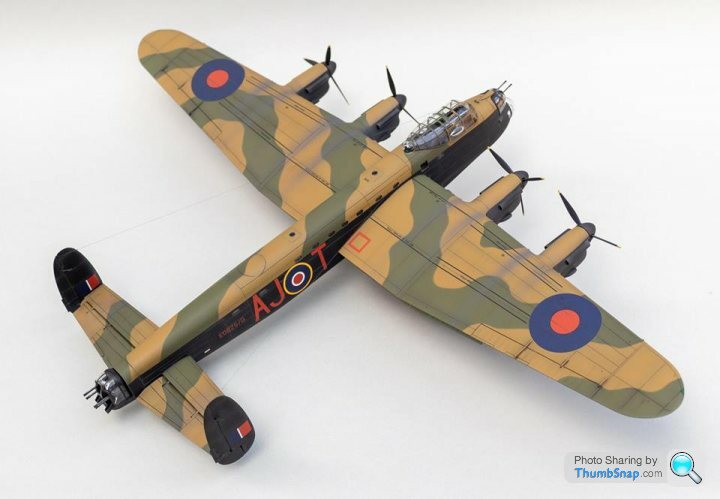
Turned out well enough, and the Vulcan should go nicely with it. Only about 10 years between the first flights of both Avro types. Amazing really.
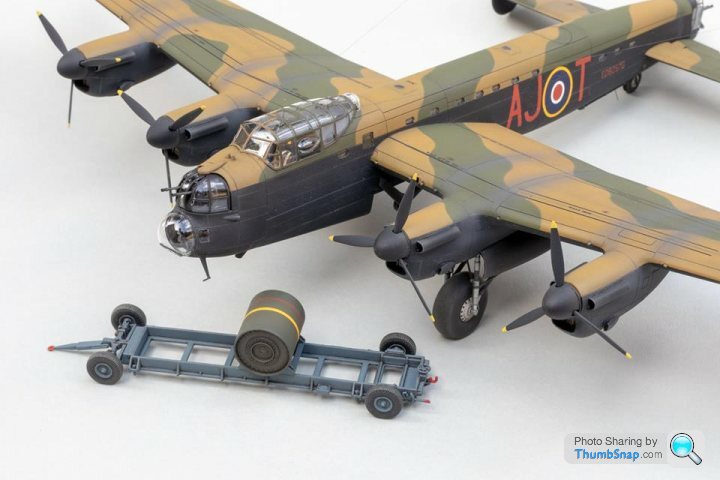
The Lancaster was almost 100% OOB, with only Eduard seatbelts added as far as I remember. This Vulcan will be the same - possibly without any extras at all since the belts are moulded-in, and the cockpit is barely visible anyway. Eduard do some u/c and bomb bay sets for this Vulcan, but I think since this was a prize from Airfix, for an Airfix model, it would be nice to build it totally as Airfix intended. Plus it will be a much quicker build that way, and I want to just enjoy the simple pleasure of piecing it together without going down the almost endless detail rabbit hole.
Plan is to build it with the bomb doors open, 21 bombs loaded, and with the Blue Steel missile displayed next to it on a trolley. I might end up CADing a trolley up and printing it, because I can’t find one online. A trolley would have been a nice addition to the kit, as with many other of the larger Airfix kits past and present.
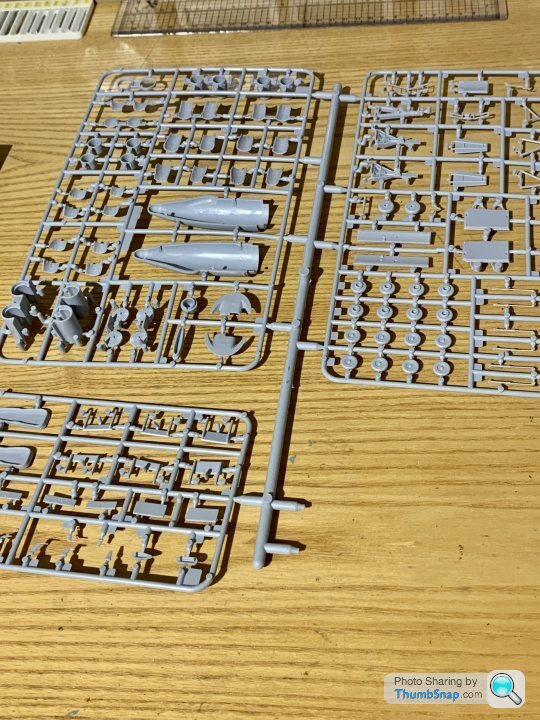
Anyway, first impressions, as with the Lancaster, is that there’s a hell of a lot of plastic in the box:
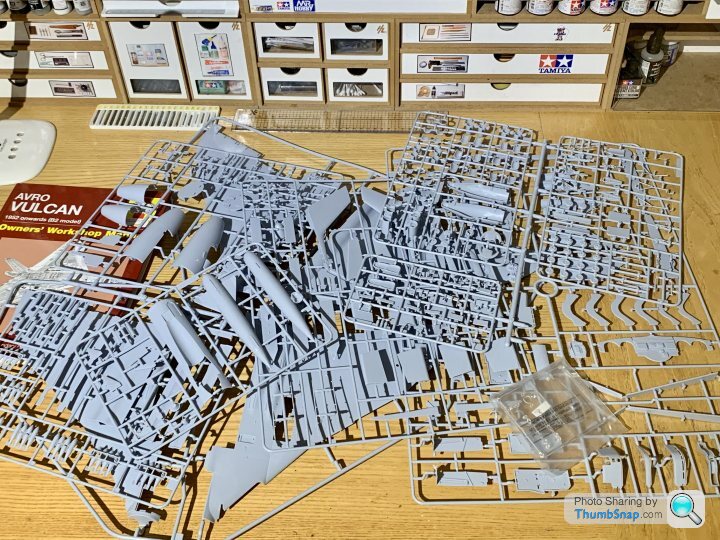
It all seems to be there, and I can’t see any moulding faults. Panel lines still seem to be relatively large, and surface detail slightly soft, at least compared with many of the later Tamiya or Eduard kits, but, as with the Lancaster, not really an issue considering the size of the model. I was a bit concerned by this missing section of sprue, but I can’t see any missing parts after a quick look through the instructions. Maybe it’s for another version yet to be released:
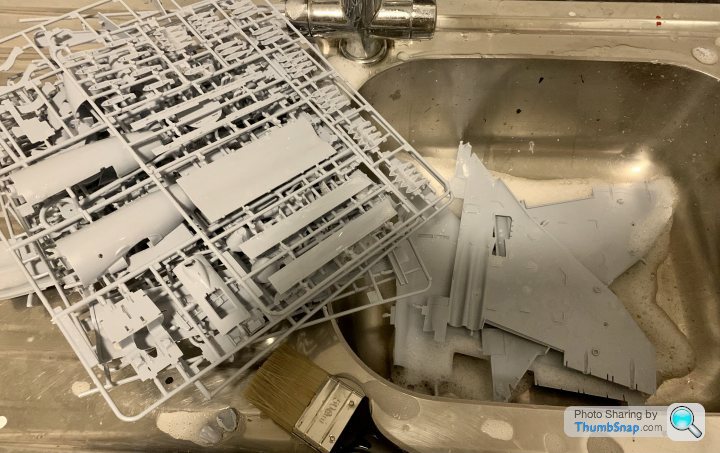
I don’t usually wash sprues in detergent, but I sometimes have trouble with acrylics lifting with masking tape. Given the areas to be masked on this, I wanted to take every opportunity to de-grease the plastic:
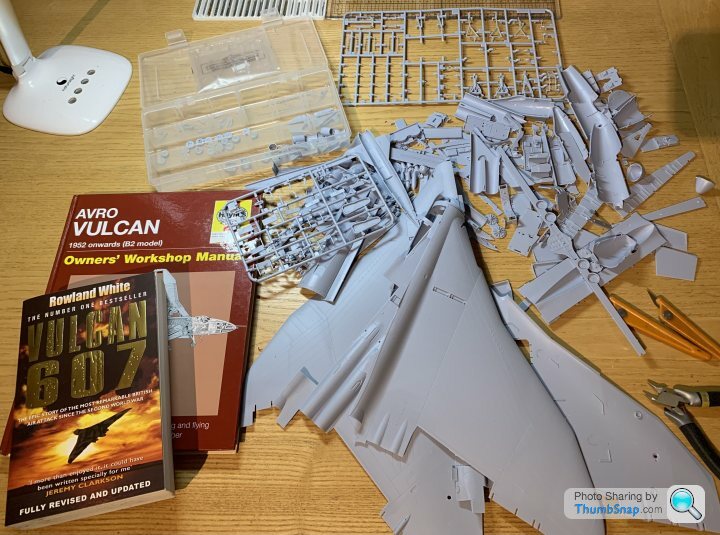
Then began removing parts from the sprues ready for clean-up. There’s no flash, but past experience with this plastic led me to leave the very small parts in-situ until I need them - less chance of them snapping. Also dug out my Haynes book and Vulcan 607 for a bit of inspiration;
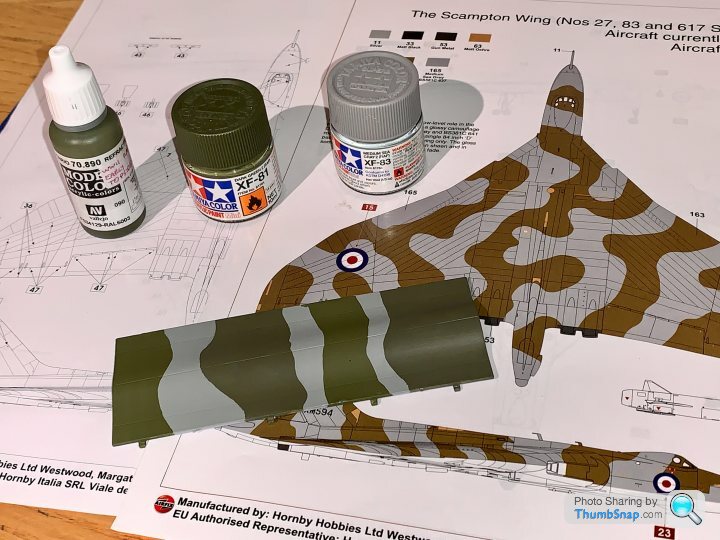
Also made a start on paint selection. Seems like I’ve already got some Tamiya pots in stock, but not sure about the green. I also tested my go-to Vallejo Reflective Green (used on all my WW2 RAF aircraft). Not sure about it - I’ll look at it them daylight. I think the ‘60’s RAF green may have been more brown than the WW2 shade (according to the IPMS Stockholm chart), in which case Tamiya is the better one. I always find paint shades a bit tedious, but it wants to at least be close.
Next job is to complete part clean-up. So far so good.
The last four-engined bomber I built was Airfix’s Dambusters Lancaster:
Turned out well enough, and the Vulcan should go nicely with it. Only about 10 years between the first flights of both Avro types. Amazing really.
The Lancaster was almost 100% OOB, with only Eduard seatbelts added as far as I remember. This Vulcan will be the same - possibly without any extras at all since the belts are moulded-in, and the cockpit is barely visible anyway. Eduard do some u/c and bomb bay sets for this Vulcan, but I think since this was a prize from Airfix, for an Airfix model, it would be nice to build it totally as Airfix intended. Plus it will be a much quicker build that way, and I want to just enjoy the simple pleasure of piecing it together without going down the almost endless detail rabbit hole.
Plan is to build it with the bomb doors open, 21 bombs loaded, and with the Blue Steel missile displayed next to it on a trolley. I might end up CADing a trolley up and printing it, because I can’t find one online. A trolley would have been a nice addition to the kit, as with many other of the larger Airfix kits past and present.
Anyway, first impressions, as with the Lancaster, is that there’s a hell of a lot of plastic in the box:
It all seems to be there, and I can’t see any moulding faults. Panel lines still seem to be relatively large, and surface detail slightly soft, at least compared with many of the later Tamiya or Eduard kits, but, as with the Lancaster, not really an issue considering the size of the model. I was a bit concerned by this missing section of sprue, but I can’t see any missing parts after a quick look through the instructions. Maybe it’s for another version yet to be released:
I don’t usually wash sprues in detergent, but I sometimes have trouble with acrylics lifting with masking tape. Given the areas to be masked on this, I wanted to take every opportunity to de-grease the plastic:
Then began removing parts from the sprues ready for clean-up. There’s no flash, but past experience with this plastic led me to leave the very small parts in-situ until I need them - less chance of them snapping. Also dug out my Haynes book and Vulcan 607 for a bit of inspiration;
Also made a start on paint selection. Seems like I’ve already got some Tamiya pots in stock, but not sure about the green. I also tested my go-to Vallejo Reflective Green (used on all my WW2 RAF aircraft). Not sure about it - I’ll look at it them daylight. I think the ‘60’s RAF green may have been more brown than the WW2 shade (according to the IPMS Stockholm chart), in which case Tamiya is the better one. I always find paint shades a bit tedious, but it wants to at least be close.
Next job is to complete part clean-up. So far so good.
r159 said:
It’s weird how the green ages to an almost bronze colour on many of the museum Vulcans, restored aircraft such as 558 have a real deep green…maybe a trip to Doncaster is in order…
Some pictures here I took during a tour a few years ago:https://www.pistonheads.com/gassing/topic.asp?h=0&...
I’ve tried on a Tornado model to match paint with the real thing, but it’s a big hassle, and in the end I was looking at the wrong type of grey anyway…ended up doing it how I thought it should be by memory and it was fine. It’ll be lightly pre-shaded too, and Matt, not gloss, so it’s not really a big deal I guess.
mcdjl said:
CanAm said:
dr_gn I hope you enjoy building this one OOB, but we all know you'll be sorely tempted to make 'just a few little improvements' here and there. 
I'm glad someone else said it first!These are the two greens in daylight:
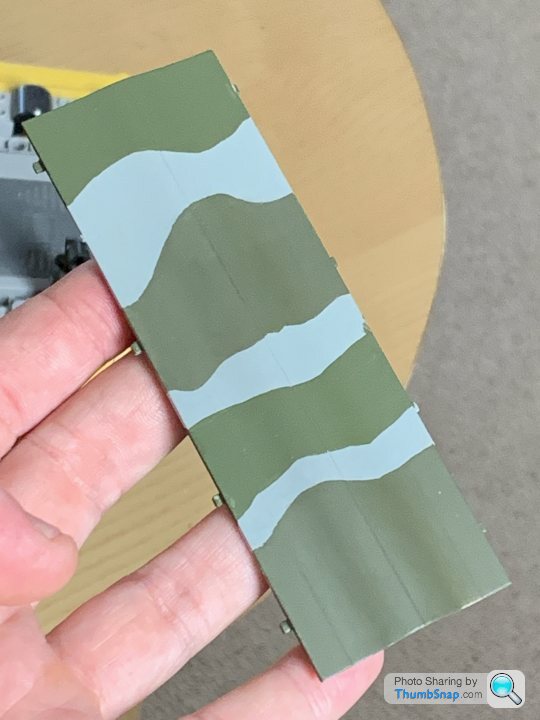
I keep changing my mind based on memories and ancient photos of Vulcans at the 70’s Finningley air shows, and other pictures in books. They’re probably both equally right (or wrong) depending on year and weathering. I’m inclined to go with the lighter (Vallejo Reflective Green), which will darken slightly with pre-shading. I’m happy with the grey.
I keep changing my mind based on memories and ancient photos of Vulcans at the 70’s Finningley air shows, and other pictures in books. They’re probably both equally right (or wrong) depending on year and weathering. I’m inclined to go with the lighter (Vallejo Reflective Green), which will darken slightly with pre-shading. I’m happy with the grey.
eccles said:
dr_gn said:
These are the two greens in daylight:
I keep changing my mind based on memories and ancient photos of Vulcans at the 70’s Finningley air shows, and other pictures in books. They’re probably both equally right (or wrong) depending on year and weathering. I’m inclined to go with the lighter (Vallejo Reflective Green), which will darken slightly with pre-shading. I’m happy with the grey.
Having worked on many military aircraft over the years, from the grey/green camouflage of the 70's/80's , through air defence grey up to the tactical green era the one thing that has stood out is how quickly the matt colours fade and get dirty.I keep changing my mind based on memories and ancient photos of Vulcans at the 70’s Finningley air shows, and other pictures in books. They’re probably both equally right (or wrong) depending on year and weathering. I’m inclined to go with the lighter (Vallejo Reflective Green), which will darken slightly with pre-shading. I’m happy with the grey.
I used to work on aircraft fresh out of the paint shop they get dirty even before delivery back to the RAF. By the time you've done ground runs and air tests and fixed a few inevitable oil leaks they are far from mint!
Sometimes you'd get an aircraft back in a couple of months for repairs or mods and the thing would be filthy and faded already.
I'm pretty sure you could have a fairly wide range of colours for the grey/green and they'd all be correct!

r159 said:
dr_gn said:
By the way, does anyone happen to have reference images of a Blue Steel trolley that I can scale for CAD/3D printing? Thanks.
There is one on a trolley at the Newark Air museum under Vulcan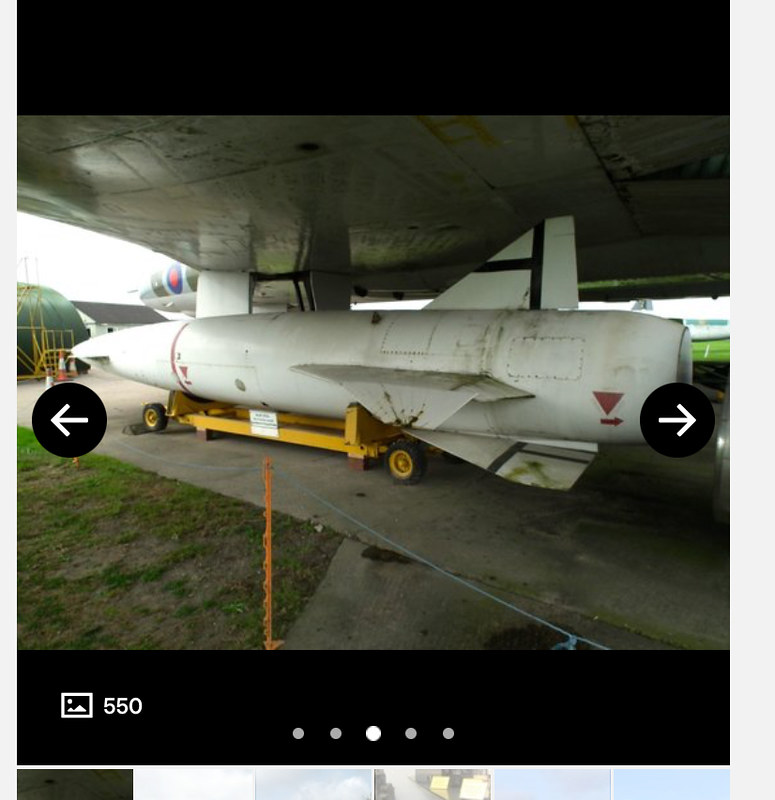
Perhaps the Newark version is just for display, or for inert versions - it doesn’t look as substantial.
There’s apparently an AEC Matador Blue Steel transporter to be released soon in 1:72, but it’s very expensive.
ETA *Mandator
Edited by dr_gn on Friday 19th November 22:52
The trolleys seem pretty randomly used on the Vulcan. Anyway, I’ll deal with that later.
Made some progress with the build; Cockpit structure needed a couple of ejector pin marks filling:

Seems to fit well in the nose halves:

I’m I bit of an abrasives connoisseur, and these Infini Ultra Precision sticks I picked up from Telford are the best I’ve used:
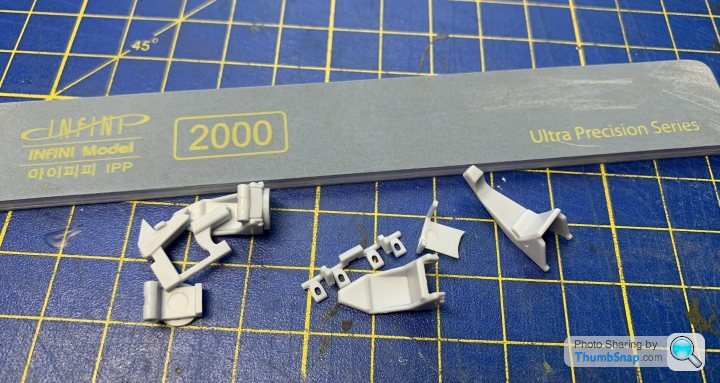
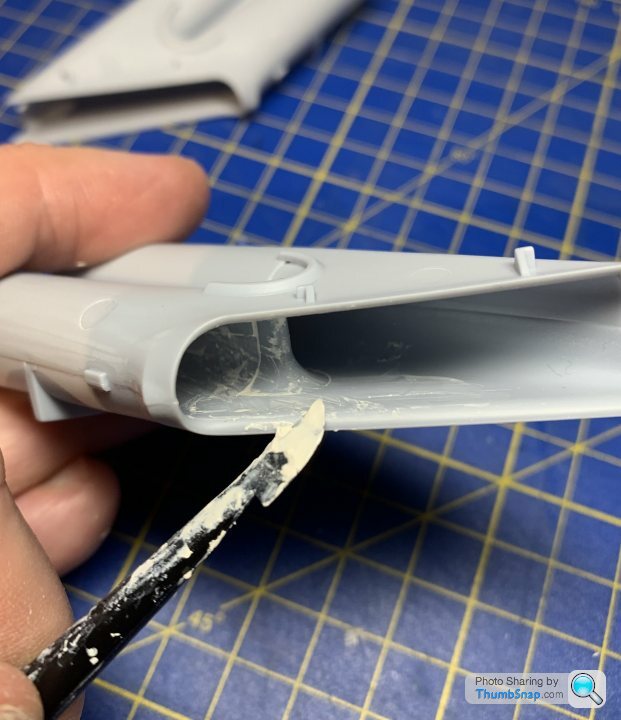
Also made a start on the bomb bay, and spars:

I’m assuming for open bomb doors, these tabs should be removed. Instructions don’t seem to indicate that, but too late now, I’ve cut them off:
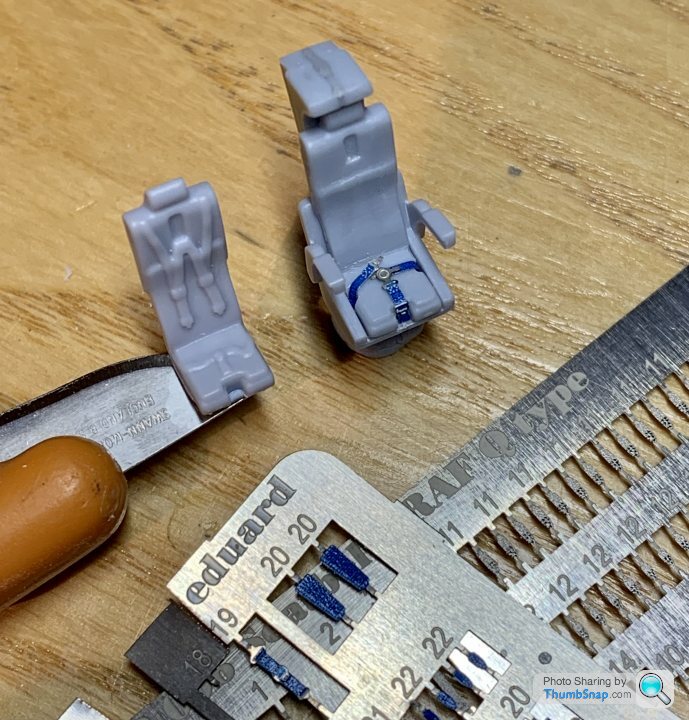
I opted to use some Eduard p/e belts after all; the moulded ones are a bit soft, and if anything at all will be visible through the windscreens, it’s them:

Talking of the windscreen, I noticed mine’s got a flaw in it:

So I’ve sent some images to Airfix and asked for another one. Hopefully they’re not all like that. If they are, I found a clear resin version online, which also has a central windscreen wiper.
So this is current progress:

It’s going together very well so far, it’s nice to just build to make the best of a standard kit and not bother about too much additional stuff.
The cockpit area of a Vulcan is very complicated, and I was thinking a series of 1:48 or 1:24 sectioned noses (like the WnW Lancaster) would look great as stand-alone models. The V-bombers, as well as most WW2 bombers would make a great theme, and injection-moulded plastic would be enough to give great detail at those scales. Resin and p/e would take them to another level.
Next job: assemble the intakes and exhausts, but now it’s time for James Bond at the cinema.
Made some progress with the build; Cockpit structure needed a couple of ejector pin marks filling:
Seems to fit well in the nose halves:
I’m I bit of an abrasives connoisseur, and these Infini Ultra Precision sticks I picked up from Telford are the best I’ve used:
Also made a start on the bomb bay, and spars:
I’m assuming for open bomb doors, these tabs should be removed. Instructions don’t seem to indicate that, but too late now, I’ve cut them off:
I opted to use some Eduard p/e belts after all; the moulded ones are a bit soft, and if anything at all will be visible through the windscreens, it’s them:
Talking of the windscreen, I noticed mine’s got a flaw in it:
So I’ve sent some images to Airfix and asked for another one. Hopefully they’re not all like that. If they are, I found a clear resin version online, which also has a central windscreen wiper.
So this is current progress:
It’s going together very well so far, it’s nice to just build to make the best of a standard kit and not bother about too much additional stuff.
The cockpit area of a Vulcan is very complicated, and I was thinking a series of 1:48 or 1:24 sectioned noses (like the WnW Lancaster) would look great as stand-alone models. The V-bombers, as well as most WW2 bombers would make a great theme, and injection-moulded plastic would be enough to give great detail at those scales. Resin and p/e would take them to another level.
Next job: assemble the intakes and exhausts, but now it’s time for James Bond at the cinema.
CanAm said:
dr_gn said:
I opted to use some Eduard p/e belts after all; the moulded ones are a bit soft, and if anything at all will be visible through the windscreens, it’s them:
I knew it! But, as you say, it's the only really visible part of the interior, and it's a huge improvement on the moulded belts.
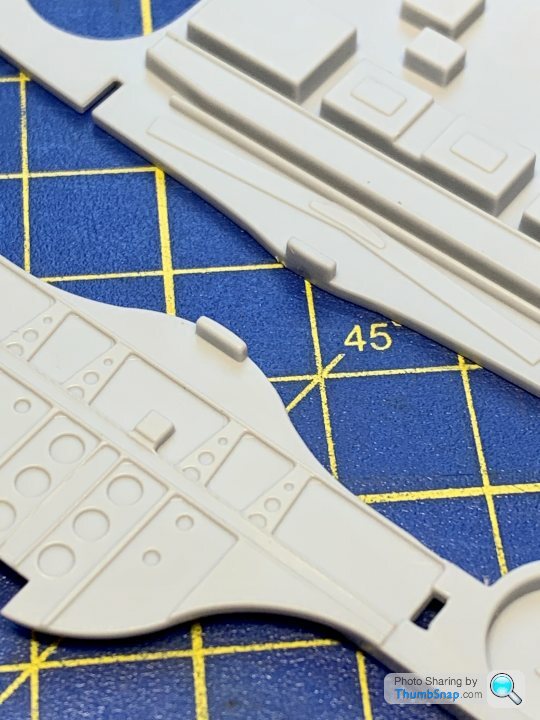
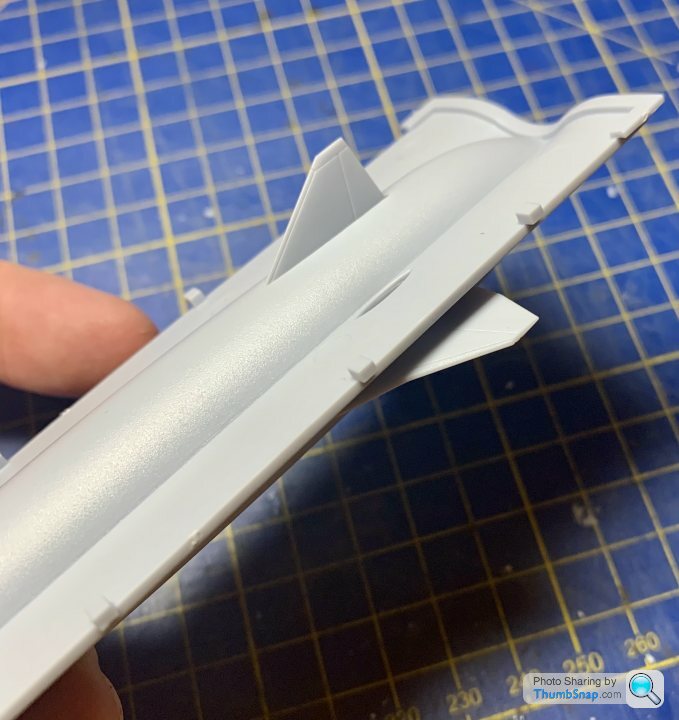
Continued today cleaning up parts and assembling a few things. Fin halves and top:

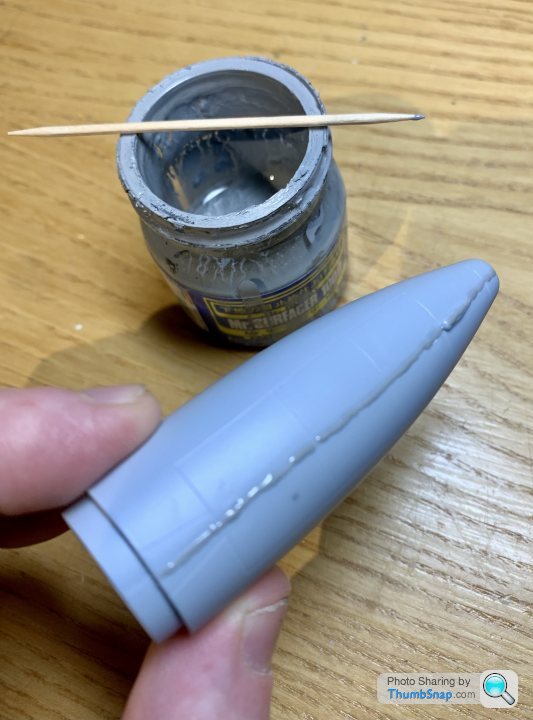
Tail cone; I’ve put some surfacer along the joint which should flat back nicely. Strange how the panel lines there are barely noticeable, doubt they’ll hold a wash. I’ll have to repair the lost detail of the braking chute and ECM glycol system access panels, but it will be tricky to get them the same as the existing ones:
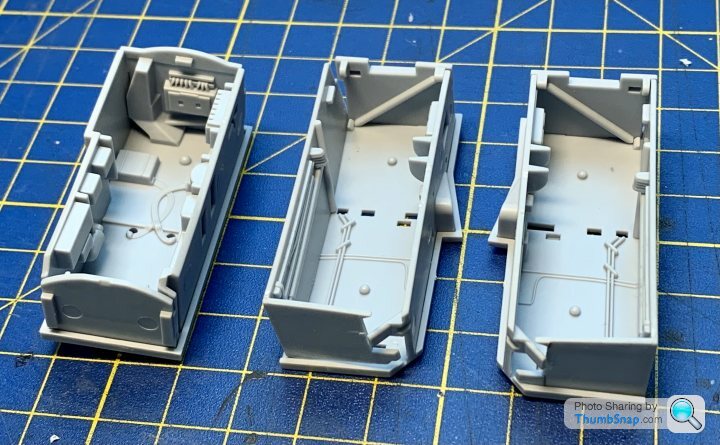
I nearly glued the u/c bays together, but thought better of it. They will be easier to detail paint as they are. Here they are balanced together:
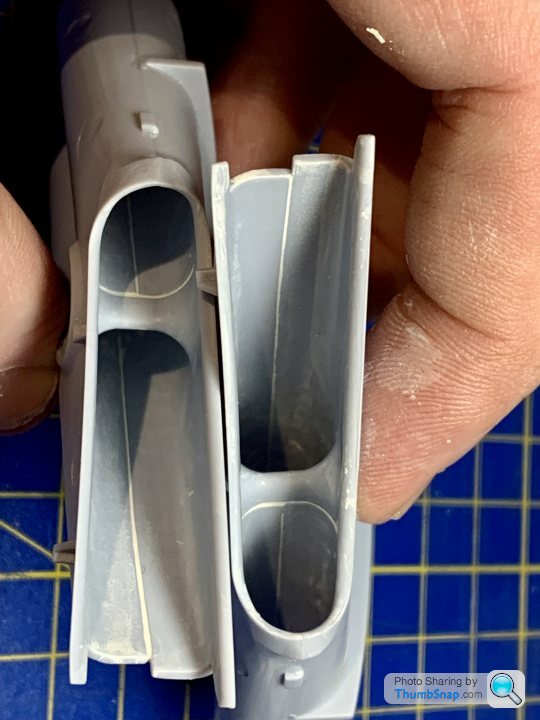
V-bomber model intake smoothing seems a popular pastime, these are in three parts, and the fit is good, although they’ll need some Milliput smearing around them and flatting, which should be fun:


The ECM fairings for between the engines were in two parts, one plain, the other has the Red Shrimp jammer domes:

Final thing today was starting the exhausts. Two sets are provided, the longer 200 series aren’t used:

so I began assembling the shorter 301 series versions. A nice touch is embossing all the parts do you don’t get mixed up:

The tailpipes comprise three parts per side, which are supposed to be assembled using a spectacle-like jig:

The joins needed quite a bit of filler, and the ridged inner pipe joins are difficult to fill and smooth neatly. Can’t help thinking it’s a complex way of doing it - would have been easier to make them tubular assemblies rather than with three longitudinal joints. Perhaps it was a production issue that prevented it:
Still need to put a guide coat of primer on, I think there’s a lot more fettling to do yet:

Apart from that, a few 1mm holes needed drilling for the engine ECM fairings and the vent pipes that exit at the rear of them:

That’s it for this evening, hopefully get the jet pipes finished tomorrow when the filler has set. Enjoying it so far.
Tail cone; I’ve put some surfacer along the joint which should flat back nicely. Strange how the panel lines there are barely noticeable, doubt they’ll hold a wash. I’ll have to repair the lost detail of the braking chute and ECM glycol system access panels, but it will be tricky to get them the same as the existing ones:
I nearly glued the u/c bays together, but thought better of it. They will be easier to detail paint as they are. Here they are balanced together:
V-bomber model intake smoothing seems a popular pastime, these are in three parts, and the fit is good, although they’ll need some Milliput smearing around them and flatting, which should be fun:
The ECM fairings for between the engines were in two parts, one plain, the other has the Red Shrimp jammer domes:
Final thing today was starting the exhausts. Two sets are provided, the longer 200 series aren’t used:
so I began assembling the shorter 301 series versions. A nice touch is embossing all the parts do you don’t get mixed up:
The tailpipes comprise three parts per side, which are supposed to be assembled using a spectacle-like jig:
The joins needed quite a bit of filler, and the ridged inner pipe joins are difficult to fill and smooth neatly. Can’t help thinking it’s a complex way of doing it - would have been easier to make them tubular assemblies rather than with three longitudinal joints. Perhaps it was a production issue that prevented it:
Still need to put a guide coat of primer on, I think there’s a lot more fettling to do yet:
Apart from that, a few 1mm holes needed drilling for the engine ECM fairings and the vent pipes that exit at the rear of them:
That’s it for this evening, hopefully get the jet pipes finished tomorrow when the filler has set. Enjoying it so far.
audikentman said:
dr_gn said:
By the way, does anyone happen to have reference images of a Blue Steel trolley that I can scale for CAD/3D printing? Thanks.
If you 3D print these up I'm sure there are plenty on here (including me) who would buy 1 off you. Looks like there's a metal one (the low profile simple looking version) available in 1:72, but Hannants have currently got it listed at £32.40...sod that.
IJWS15 said:
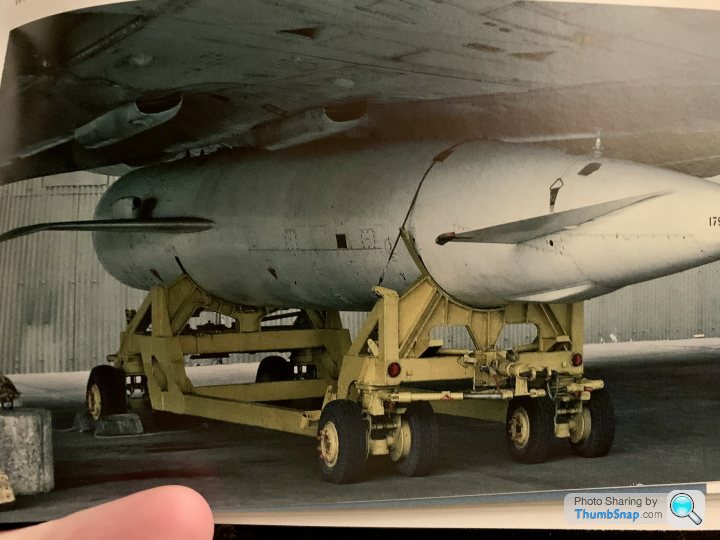
I have Tim McClelland's book on the Vulcan and it has a photo of what appears to be the smaller trolley shown above, the larger trolley has a number plate so is probably to move the missile between sites.
There is also a photo of the handling vehicle . . . must find time to scan them for you.
Thanks, much appreciated. There is also a photo of the handling vehicle . . . must find time to scan them for you.
The vehicle looks really cool: AEC Mandator? There's a 1:72 version due for release, but it's very expensive. I think the more robust version of the trolley would be good to model.
Spent a satisfying evening fettling and part assembling undercarriage components; the assemblies seem pretty comprehensive:
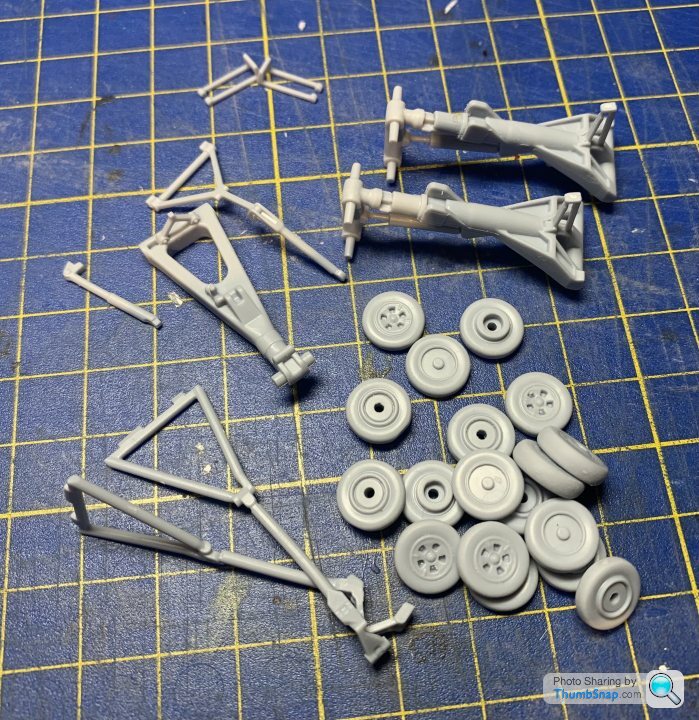
Some of the tyres seem like they’re pre-flatted, but others don’t. The instructions don’t indicate any particular orientation so I don’t know.
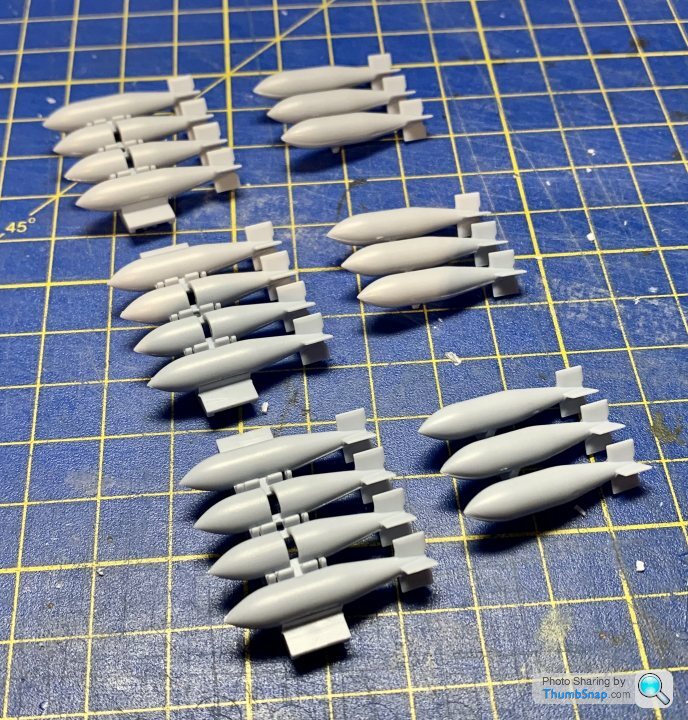
Then the 21 bombs:
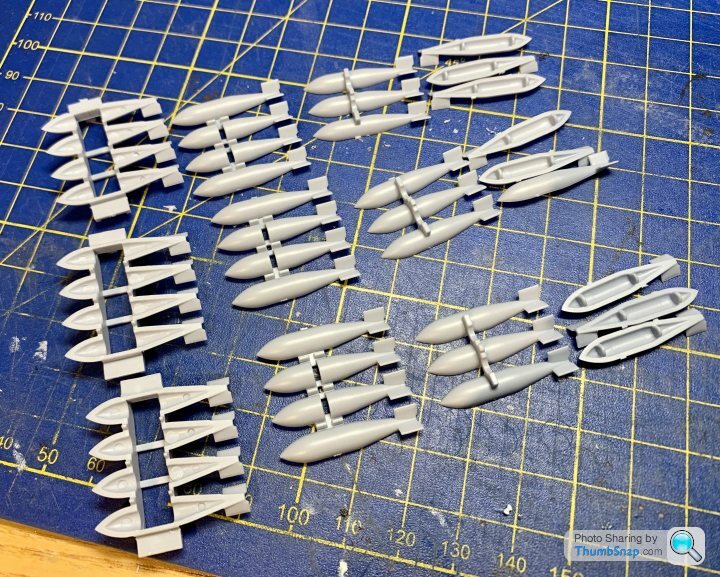
Went together ok, but it’ll be fun flatting the seams.
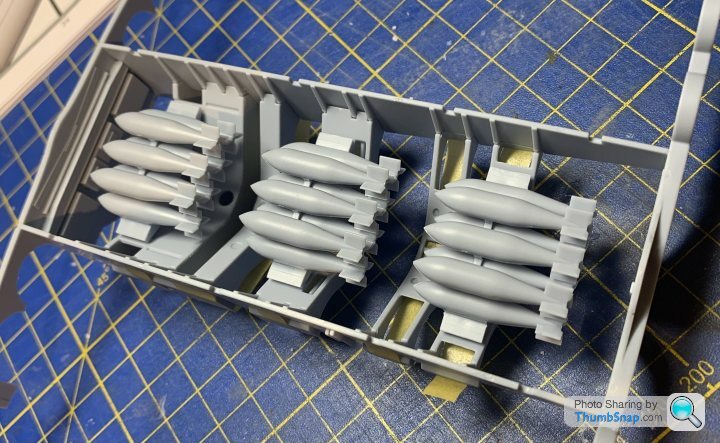
The assemblies are a good fit in the bay, in fact they clip in:
Assembled some of the Blue Steel missile, I used the bomb bay fairing supplied to hold the upper fin in position while the glue set:

The engine bulge vents are separate, and are a nice fit in their recesses:
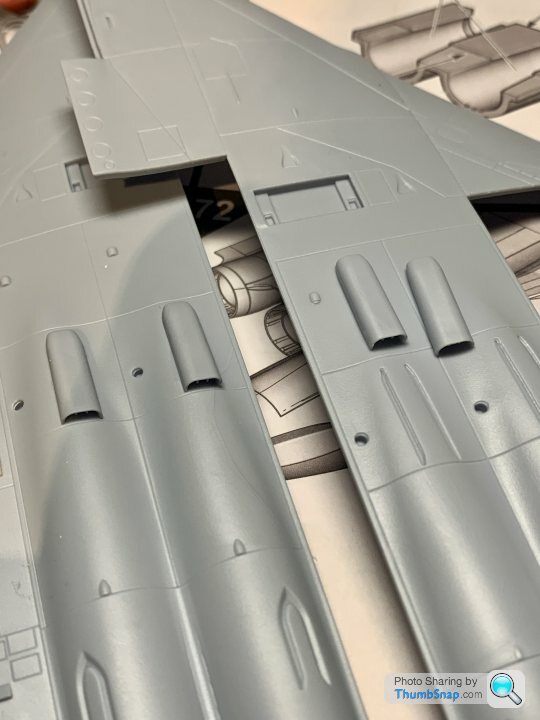
The result is pretty good, and saves a lot of hollowing out and boxing in of moulded-in ducts:

Then had a break after knocking over the liquid cement and subsequently getting a massive headache from the fumes. Luckily no parts were in the way. Then made a start on filling the intake seams with Milliput:
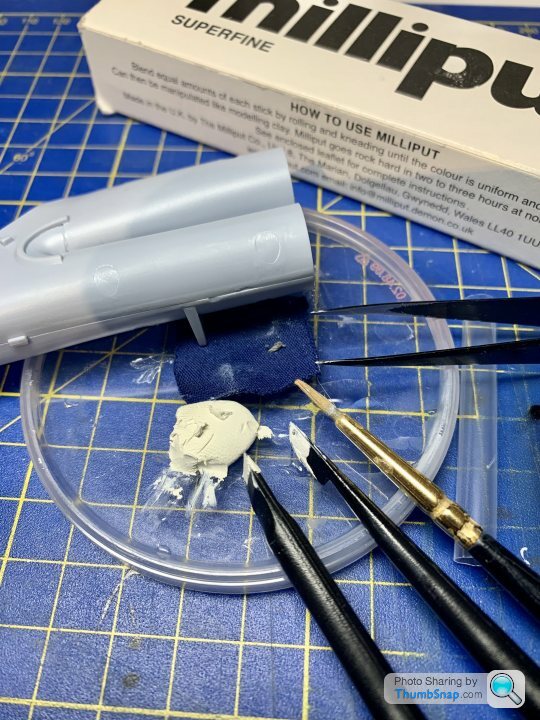
I bought a set of sculpting tools from Telford, my old set were worn out. They are perfect for smoothing the Milliput, especially if a drop of water is added. I cleaned up any solid excess using a wetted paintbrush, and glasses cleaning cloth (which doesn’t shed fibres):
This is the result:
Still a way to go with them, I’ll probably make a sponge-backed wet-and-dry tool to blend everything together, then do a primer guide coat at some point.
So that’s it for tonight:

I always sleep better knowing that Milliput is setting.
Some of the tyres seem like they’re pre-flatted, but others don’t. The instructions don’t indicate any particular orientation so I don’t know.
Then the 21 bombs:
Went together ok, but it’ll be fun flatting the seams.
The assemblies are a good fit in the bay, in fact they clip in:
Assembled some of the Blue Steel missile, I used the bomb bay fairing supplied to hold the upper fin in position while the glue set:
The engine bulge vents are separate, and are a nice fit in their recesses:
The result is pretty good, and saves a lot of hollowing out and boxing in of moulded-in ducts:
Then had a break after knocking over the liquid cement and subsequently getting a massive headache from the fumes. Luckily no parts were in the way. Then made a start on filling the intake seams with Milliput:
I bought a set of sculpting tools from Telford, my old set were worn out. They are perfect for smoothing the Milliput, especially if a drop of water is added. I cleaned up any solid excess using a wetted paintbrush, and glasses cleaning cloth (which doesn’t shed fibres):
This is the result:
Still a way to go with them, I’ll probably make a sponge-backed wet-and-dry tool to blend everything together, then do a primer guide coat at some point.
So that’s it for tonight:
I always sleep better knowing that Milliput is setting.
anonymous said:
[redacted]
Thanks DV8 - no plans to put a door in there. Must admit though, I might now watch Thunderball again - I’ve got it on DVD. Found this interesting - especially the full-sized mock-ups which are still there under water in the Bahamas…https://jamesbond.fandom.com/wiki/Avro_Vulcan
Nice to hear you actually worked on Vulcans, they are amazing aircraft, and to get a tour of 558 while it was still airworthy was brilliant. If you have any Blue Steel trolley references that would be great, although they might have been obsolete when you were involved?
Might not get anything done tonight - COVID booster at lunchtime is having adverse effects…
This is brilliant: I've got a reply from the Airfix spares department about the faulty windscreen: They say they're "confused", and seem to be questioning my story of the kit being a competition prize, because they don't know of any recent competitions. This is despite an article all about it (complete with photo) currently being on the first page of their website blog...
That's right guys: I guessed the kit's batch codes and made up a cover story just to get a free windscreen that's probably worth a few pence
That's right guys: I guessed the kit's batch codes and made up a cover story just to get a free windscreen that's probably worth a few pence
Yertis said:
dr_gn said:
This is brilliant: I've got a reply from the Airfix spares department about the faulty windscreen: They say they're "confused", and seem to be questioning my story of the kit being a competition prize, because they don't know of any recent competitions. This is despite an article all about it (complete with photo) currently being on the first page of their website blog...
That's right guys: I guessed the kit's batch codes and made up a cover story just to get a free windscreen that's probably worth a few pence
Did you send them the little white form with an ad on the back for Dick Emery's Airfix Club? That's right guys: I guessed the kit's batch codes and made up a cover story just to get a free windscreen that's probably worth a few pence
(I did this for some short-shot F111 parts and was sent a complete new kit in return = delighted customer.)
no. It's all on that there interweb these days.Sounds like they're sorting out a new windscreen now, so all good.
eccles said:
Found another picture of a Blue Steel trolley from a book about RAF ground equipment (yes, someone actually wrote a book about it! ). Looks to be a transit or maintenance type of trolley rather than a loading type.
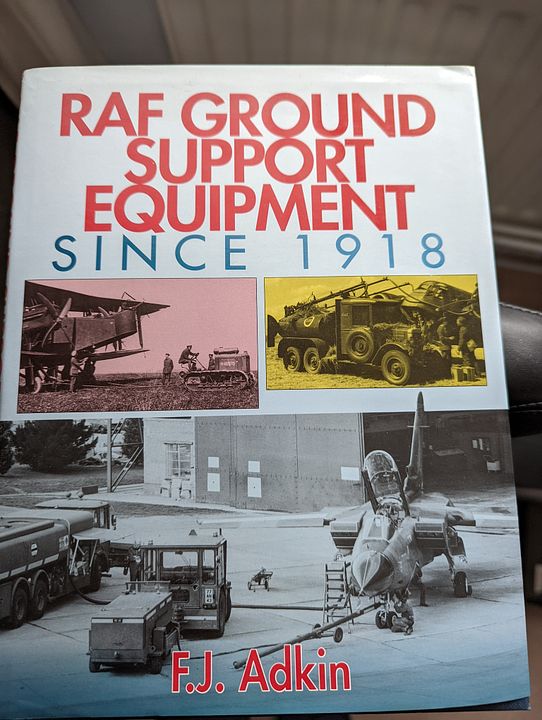
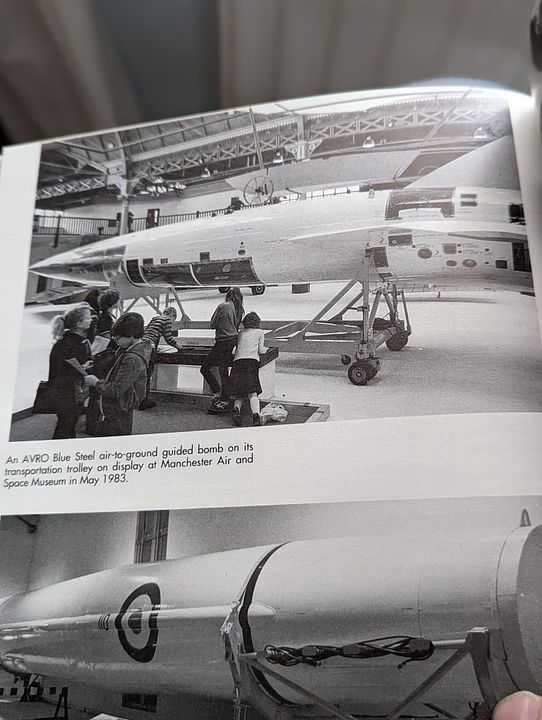
Thanks for that - another type of trolley. I think as well as there being several for the missile, depending on whether it was for transport and fitting to the aircraft or just moving around a hangar or factory, there were more versions for other types of aircraft. There were also inert missiles and live missiles, so I guess there may have been trolleys that were more or less robust depending on that as well. ). Looks to be a transit or maintenance type of trolley rather than a loading type.Gassing Station | Scale Models | Top of Page | What's New | My Stuff