Airfix 1:72 Spitfire Mk.I
Discussion


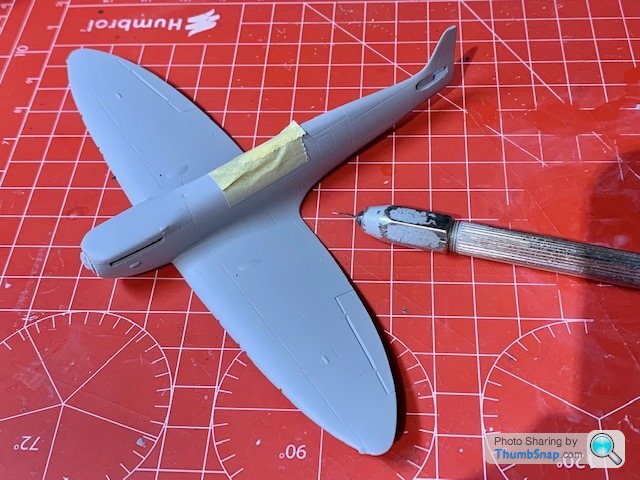
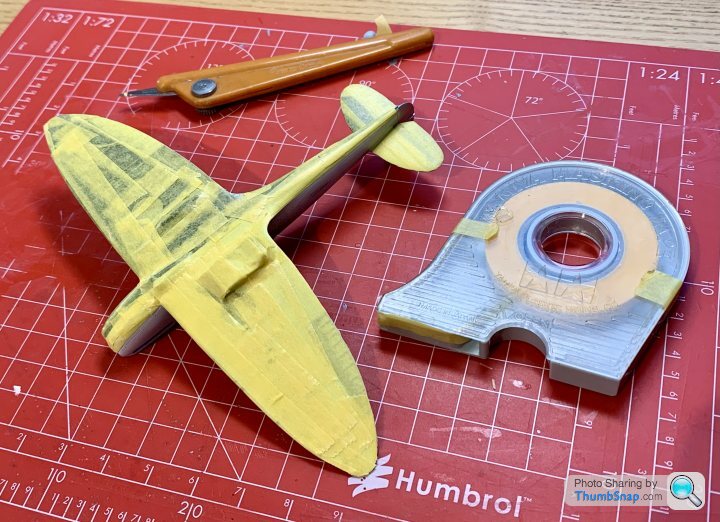
Bit of a retrospective build thread...I wanted an early Spitfire, and was aware that in the past, Airfix did a Mk.I/Mk.IIa which included extra (early version) parts in addditin to their Mk.Ia mouldings. These included a flat canopy, 2-bladed propeller and rod aerial mast (and of course different decals. They seemed hard to find, but after a forum request, someone sent me all the additional parts and decals for the Mk.I, so all I needed was a commonly available Mk.Ia kit. I picked one up locally for about £8. I'll need to make up a two-pronged pitot-static head, but that'll be about it I think.
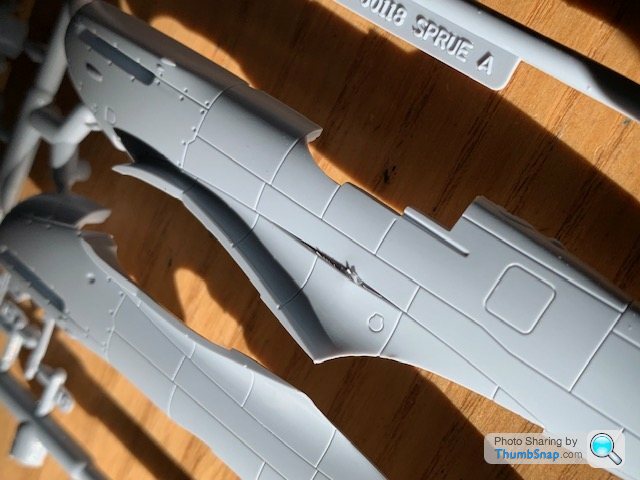
I started one of these kits about 10 years ago, but almost immediately threw it in the bin becasue of the laughably deep panel lines and fastener holes:
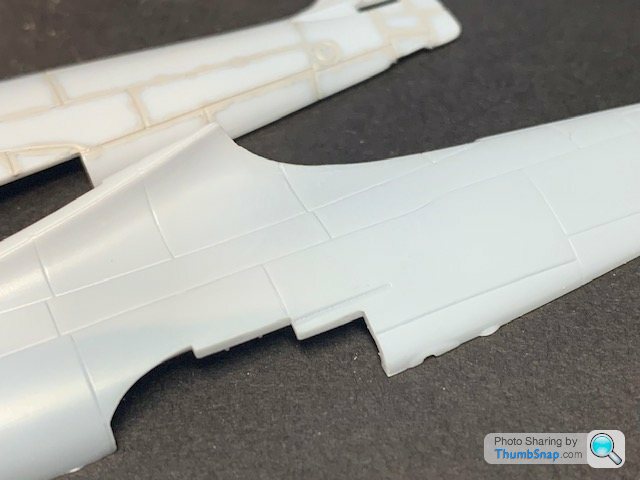
This time I've accepted it (mainly becasue I can't find one from another manufacturer), and am experimenting with reducing the panel line depths. It'll never be up to modern standards (or even 1970's Matchbox standards for that matter), but it will have to do.
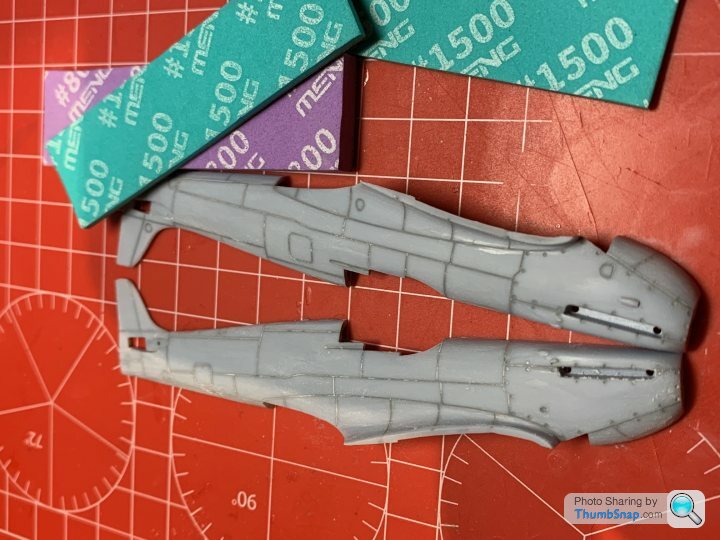
First job was to paint Mr.Surfacer 1000 into all the panel lines:
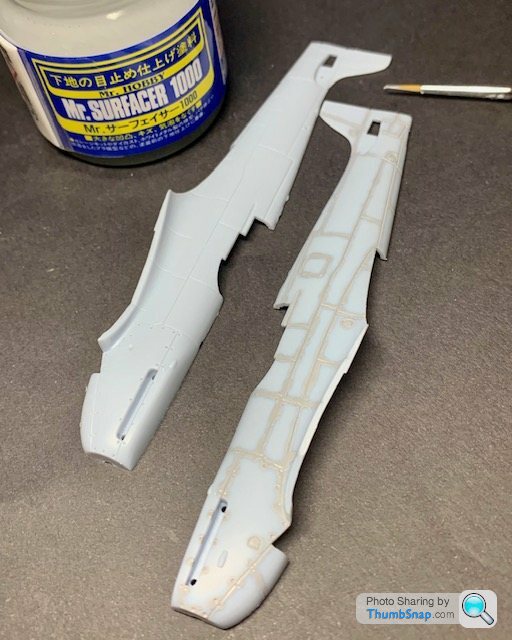
and once set, removed the excess with IPA:
This was repeated three times on all airframe surfaces, followed by a levelling wash of IPA (this shows how bad they really are):
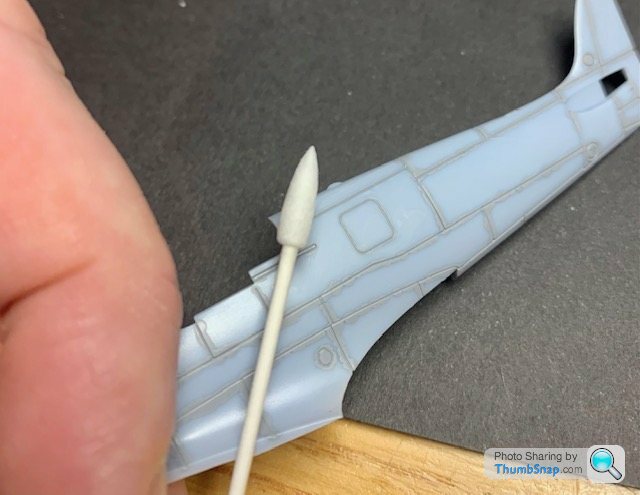
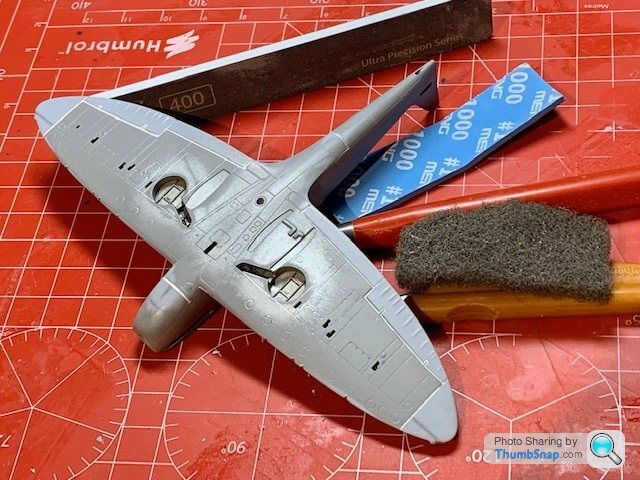
Then, once set, I wet-sanded the whole thing with abrasive sponges to try and take the rounded edges off the top of the lines:
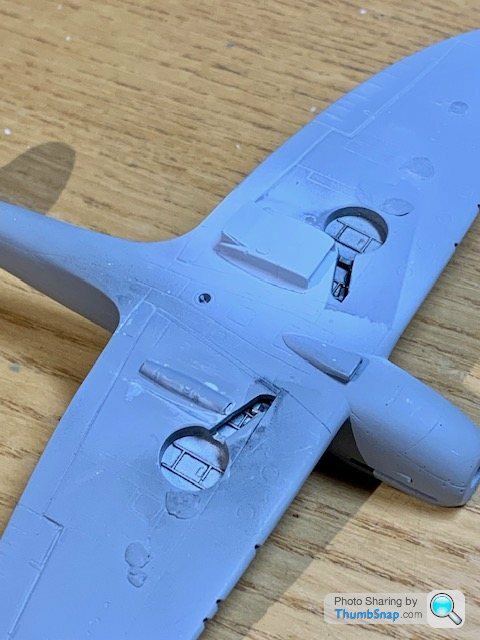
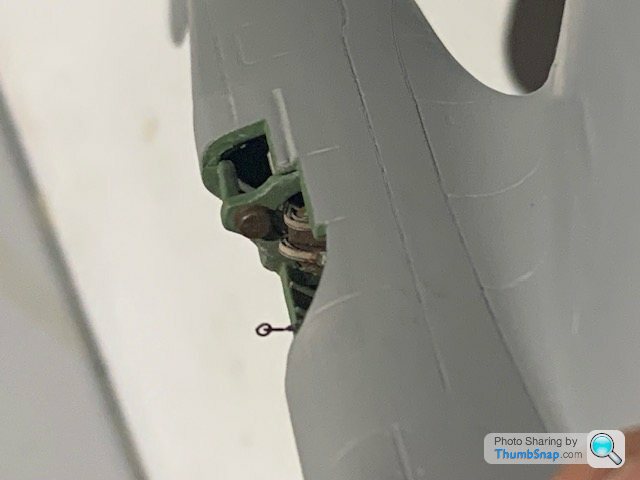
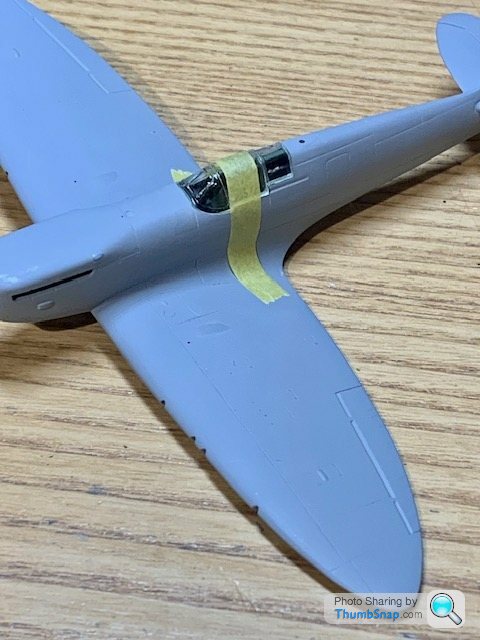
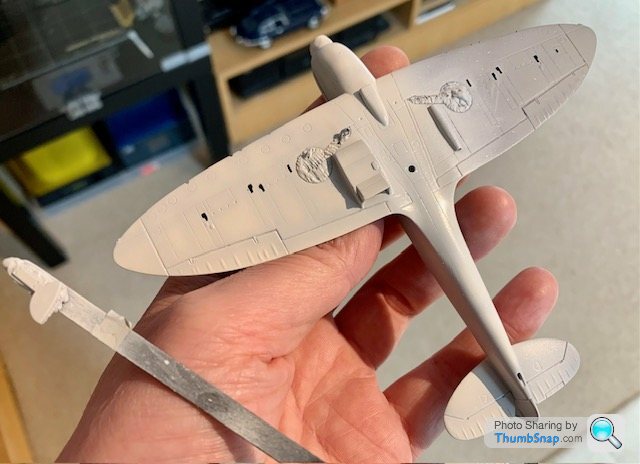
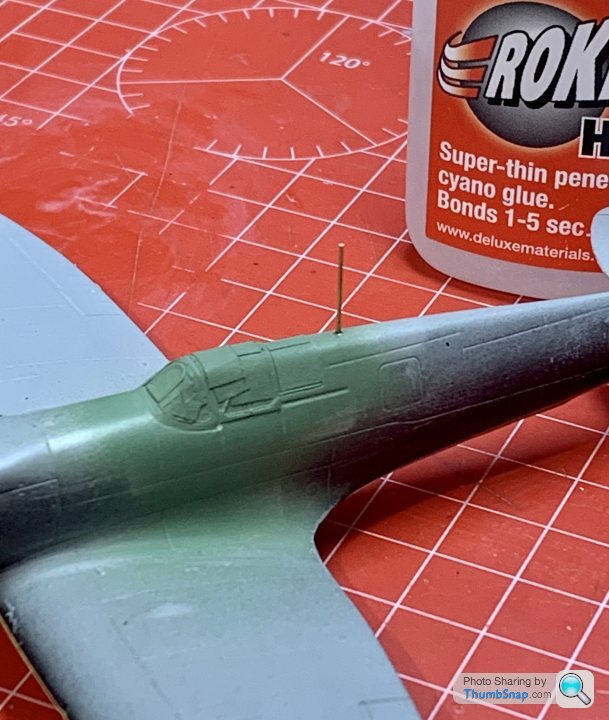
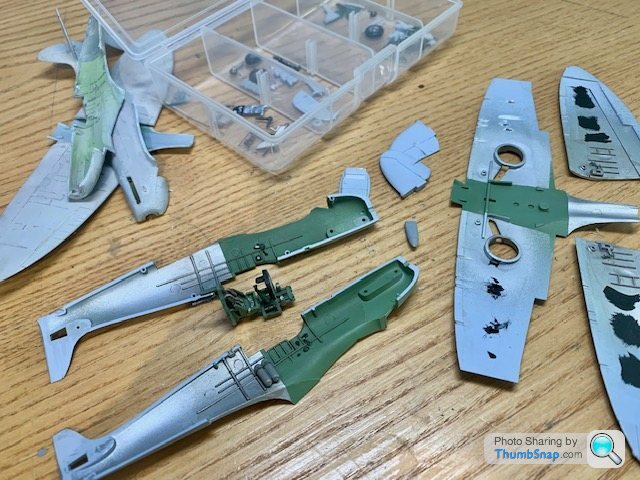
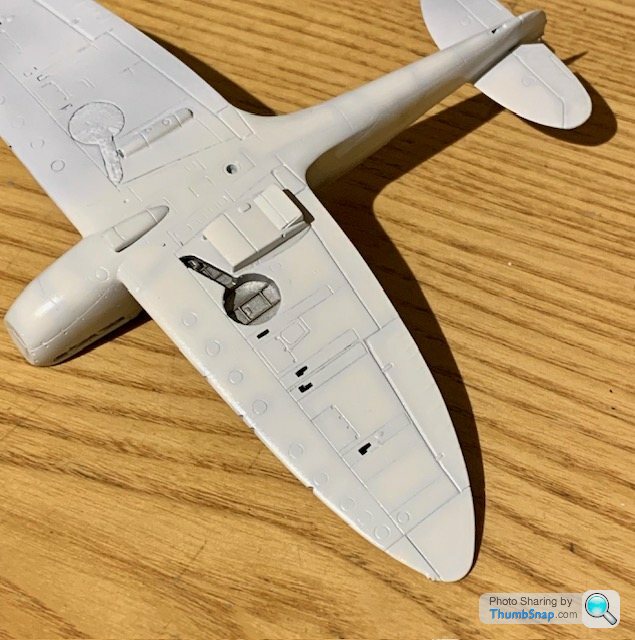
Then moved onto the interior (OOB apart form an Eduard early RAF harness):
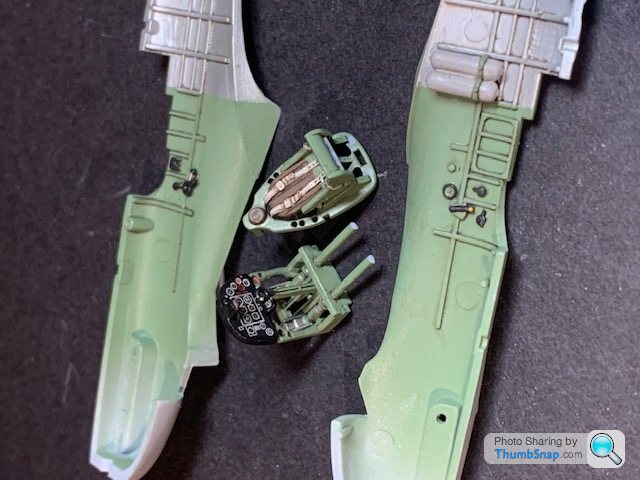
Then closed it all up and filled all the gaps. I also punched out a plasticard disc to reduce the depth of the circular tank filler aperture, and eliminate some tricky filling in the base:
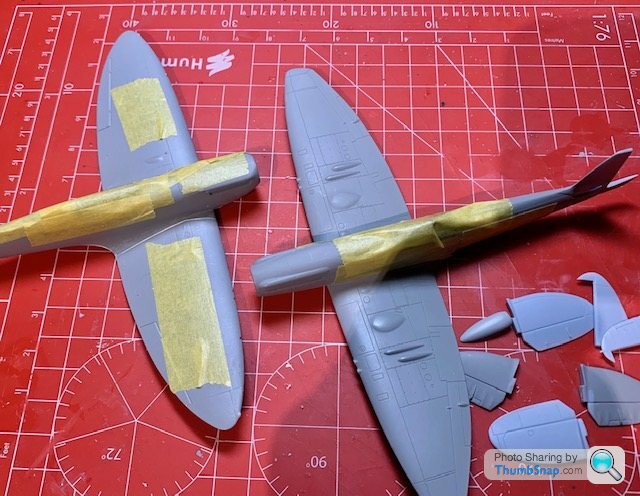
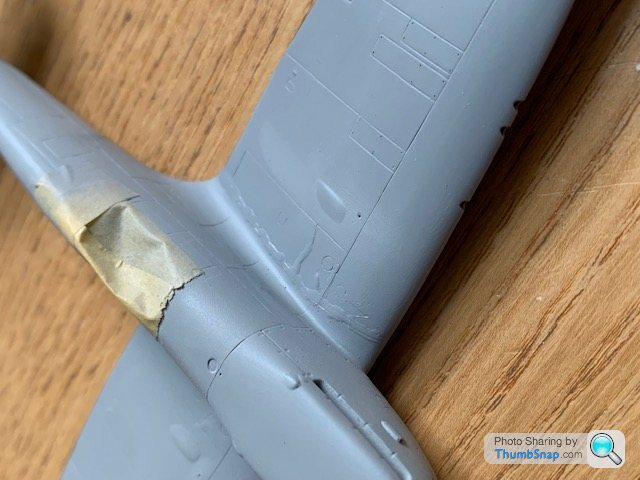
Then got the wings on:
and applied the first guide coat of primer:
Quite a bit of further corrective work required. Here it is pre-primer with the Airfix Mk.22 I'm building, which is pretty much at the same stage:
So that's it up to date so far.
I started one of these kits about 10 years ago, but almost immediately threw it in the bin becasue of the laughably deep panel lines and fastener holes:
This time I've accepted it (mainly becasue I can't find one from another manufacturer), and am experimenting with reducing the panel line depths. It'll never be up to modern standards (or even 1970's Matchbox standards for that matter), but it will have to do.
First job was to paint Mr.Surfacer 1000 into all the panel lines:
and once set, removed the excess with IPA:
This was repeated three times on all airframe surfaces, followed by a levelling wash of IPA (this shows how bad they really are):
Then, once set, I wet-sanded the whole thing with abrasive sponges to try and take the rounded edges off the top of the lines:
Then moved onto the interior (OOB apart form an Eduard early RAF harness):
Then closed it all up and filled all the gaps. I also punched out a plasticard disc to reduce the depth of the circular tank filler aperture, and eliminate some tricky filling in the base:
Then got the wings on:
and applied the first guide coat of primer:
Quite a bit of further corrective work required. Here it is pre-primer with the Airfix Mk.22 I'm building, which is pretty much at the same stage:
So that's it up to date so far.
Thanks both.
Ladders said:
Just doing one of these myself as well!
Can’t imagine mine will turn out as good as your though
TBH this is a bit of an experiment, so it might not turn out as I wanted. The alternative was to fill the panel lines with dissolved sprue, flat back and re-scribe. Anyway, time will tell I guess.Can’t imagine mine will turn out as good as your though
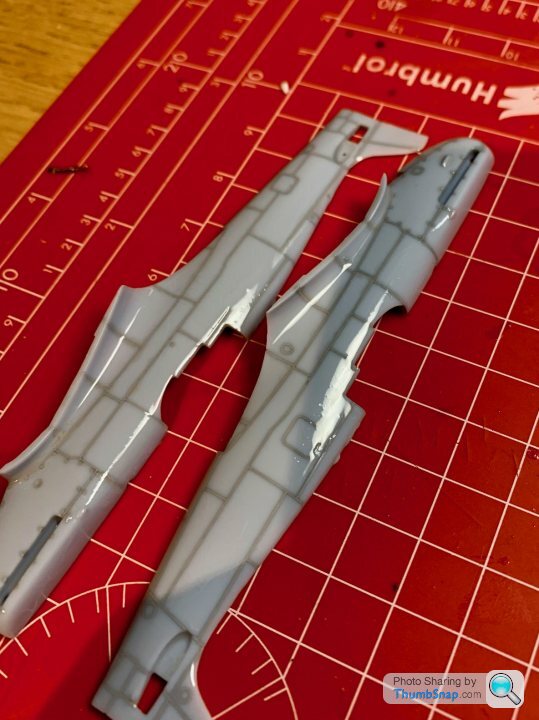
This one is taking a lot of work, especially re-scribing. Part of the problem is that some of the smaller details have got sanded away, but the main issue is that the Surfacer-filled trenches are wider than the much more refined re-scribed details:
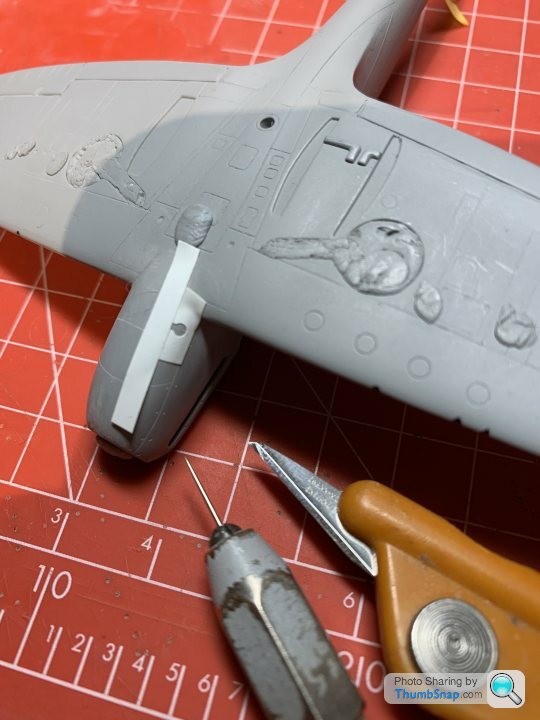
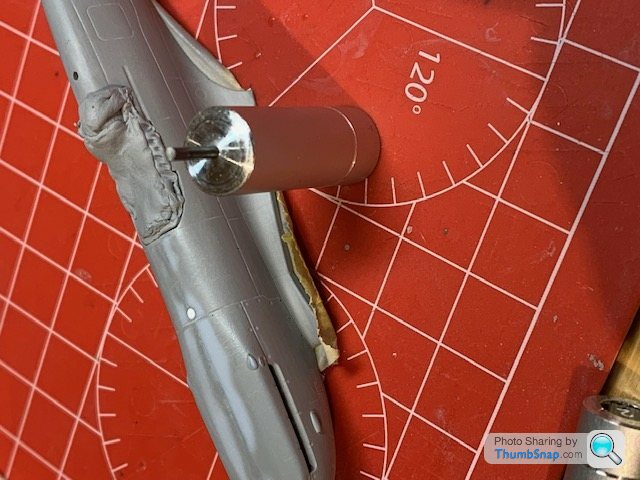
Some of the parts are badly mis-shapen like the two-piece supercharger intake, which took a lot of dissolved sprue and profiling to get right:
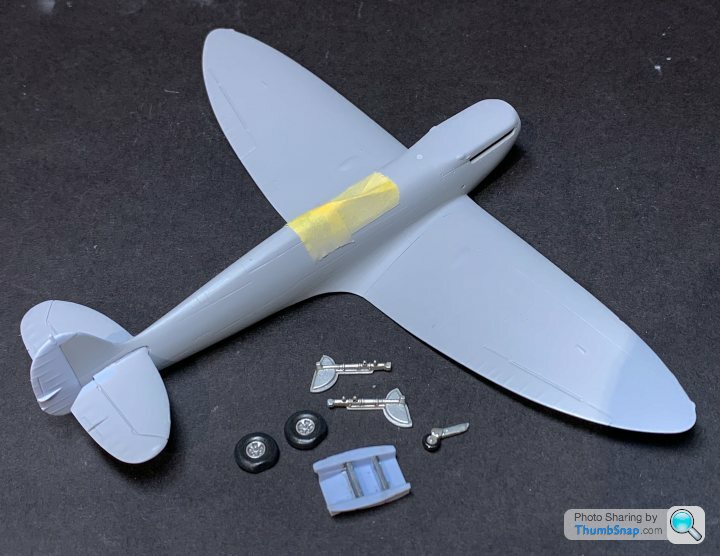
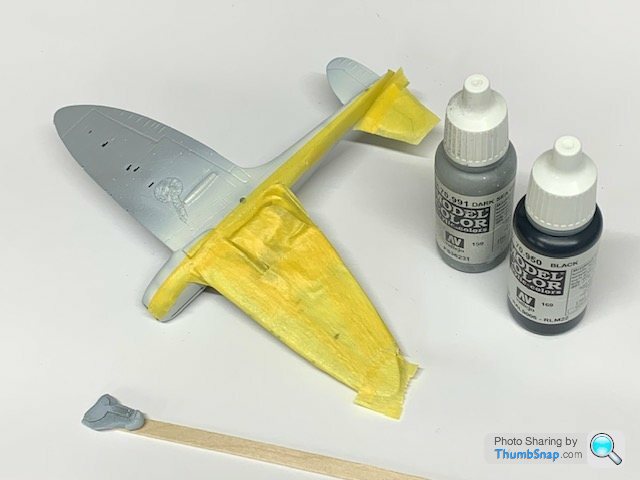
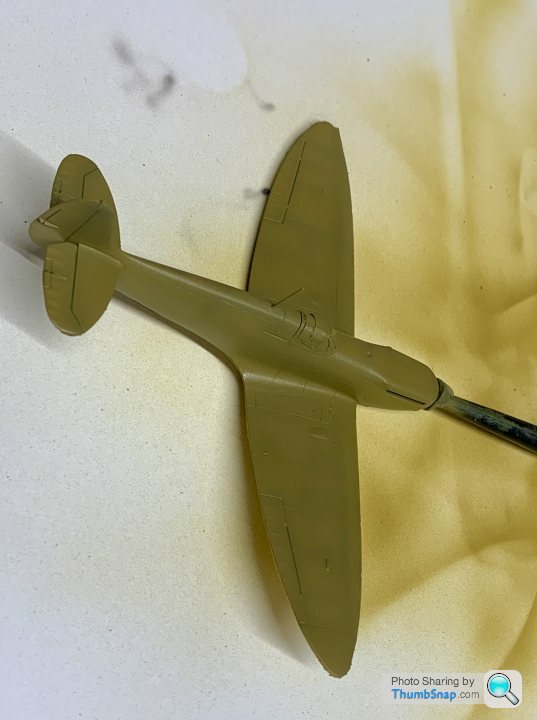
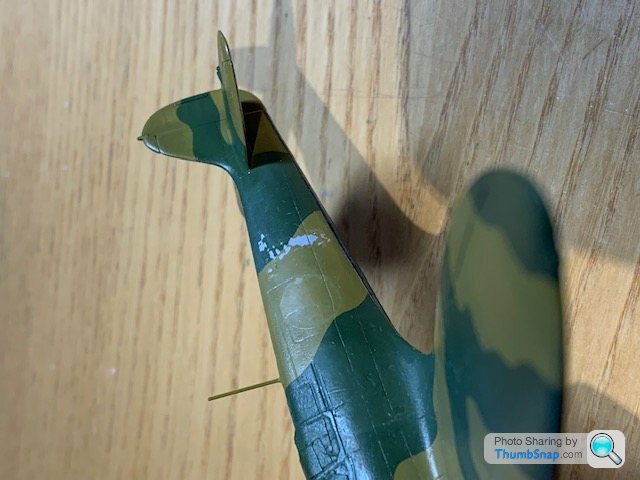
Anyway, got the tailplanes and rudder fitted, also some detail painting of smaller parts (I might paint the inner wheel covers underside colours to add some contrast there). A bit more surface detail fettling to do before getting some paint on. I hope the camo and pre-shading will cover the multitude of corrective sins.
Some of the parts are badly mis-shapen like the two-piece supercharger intake, which took a lot of dissolved sprue and profiling to get right:
Anyway, got the tailplanes and rudder fitted, also some detail painting of smaller parts (I might paint the inner wheel covers underside colours to add some contrast there). A bit more surface detail fettling to do before getting some paint on. I hope the camo and pre-shading will cover the multitude of corrective sins.
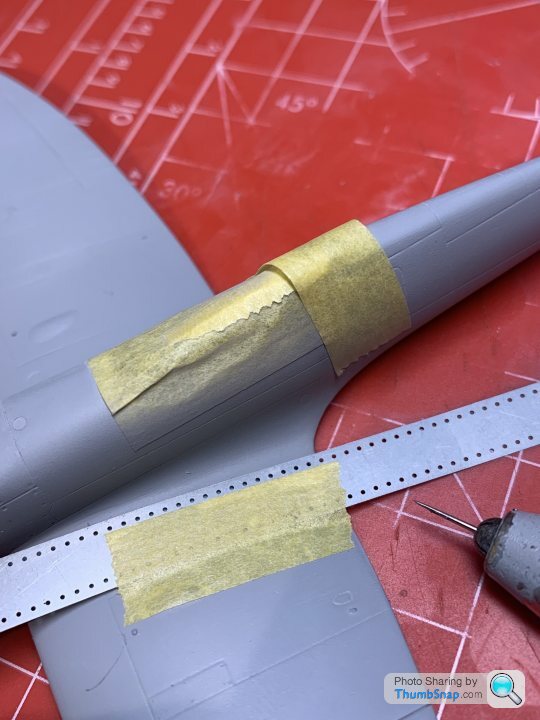
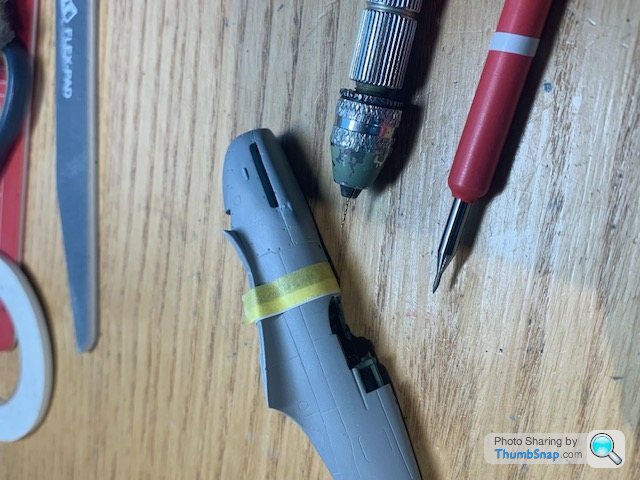
Thinned the massively oversized radiator housing edges:

and opened up the intake on the port engine cover:

I noticed that my re-scribing of the panel lines at the filled wing root had got lost under primer...again, so re-scribed...again. This resulted in wavy lines, so I'm having to fill and re-ecribe...again:
This must be the seventh or eighth attempt at getting this right. I'm currently building three Airfix kits: Vulcan, Spitfire 22 and this thing. I can honestly say that these, along with the Swordfish I finished before begining the Vulcan, have pretty much put me off modelling altogether. I've not finished a kit since starting the Vulcan in 2021 - varying degrees of quality issues on all four of them (at least for anyone who likes things to be right). It's absolutely demoralising.
and opened up the intake on the port engine cover:
I noticed that my re-scribing of the panel lines at the filled wing root had got lost under primer...again, so re-scribed...again. This resulted in wavy lines, so I'm having to fill and re-ecribe...again:
This must be the seventh or eighth attempt at getting this right. I'm currently building three Airfix kits: Vulcan, Spitfire 22 and this thing. I can honestly say that these, along with the Swordfish I finished before begining the Vulcan, have pretty much put me off modelling altogether. I've not finished a kit since starting the Vulcan in 2021 - varying degrees of quality issues on all four of them (at least for anyone who likes things to be right). It's absolutely demoralising.
Ladders said:
Way more detail than mine!
Wasn't even going to buy a model but found what I thought was just a Newsagents in Midhurst, and discovered a 'secret' upstairs level absolutely full of models! So felt I 'had' to purchase something
Must have been years since I did one this small, and actually enjoyed not having to stress about the details and just paint it. Mostly with Vallejo model air.
Looks good. I mainly use Vallejo paints, Air for metallics and Model Colour for everything else.Wasn't even going to buy a model but found what I thought was just a Newsagents in Midhurst, and discovered a 'secret' upstairs level absolutely full of models! So felt I 'had' to purchase something
Must have been years since I did one this small, and actually enjoyed not having to stress about the details and just paint it. Mostly with Vallejo model air.
I’ve not added much detail apart from a harness and the sight so far. I’ll add some undercarriage indicator rods and brake pipes, but that will be about it. All the work in this one is in reducing the crazy panel line depth and trying to re-scribe the filled joints. It remains to be seen if it looks any better in the end.


Ladders said:
Looking good! How do you manage to work on it in such detail, do you use a magnifier to view while working on it?
Thanks. To be honest there's not much detail in this one; it was just a bit of an experiment in reducing panel line depth. It remains to be seen what it looks like in the end.My eyesight is deteriorating, so I have to use magnifying lenses for close work these days, whether its plastic models or model engineering.

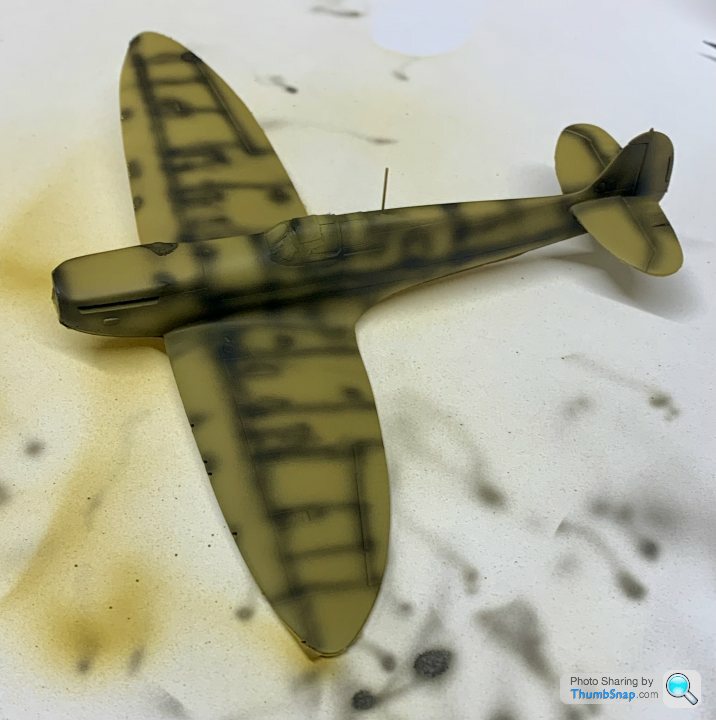
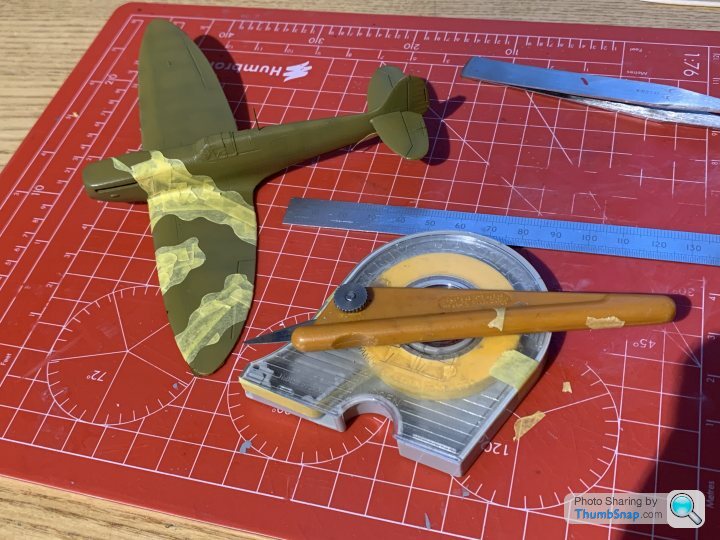
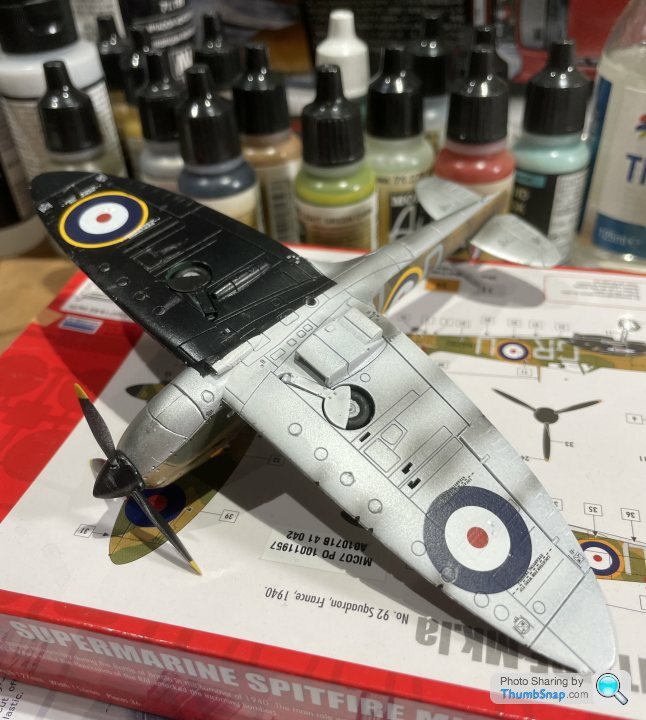
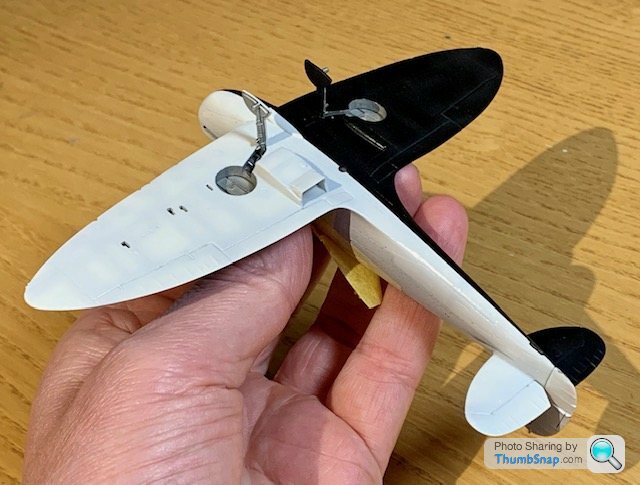
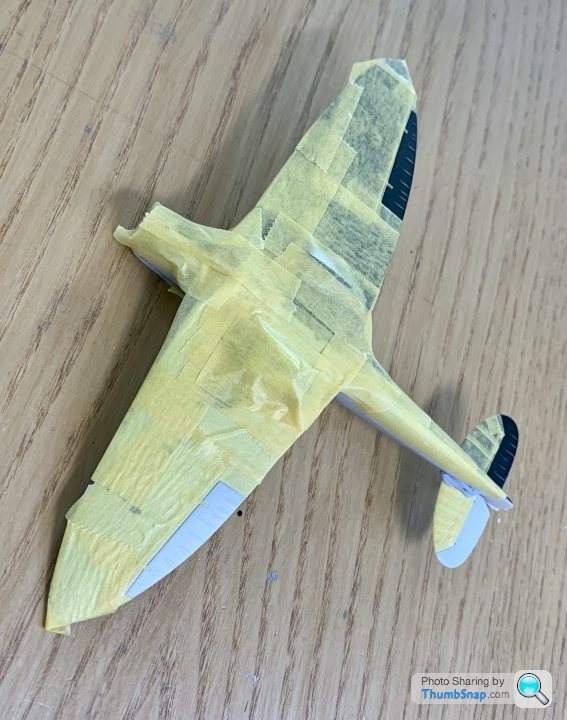
Masking complete:
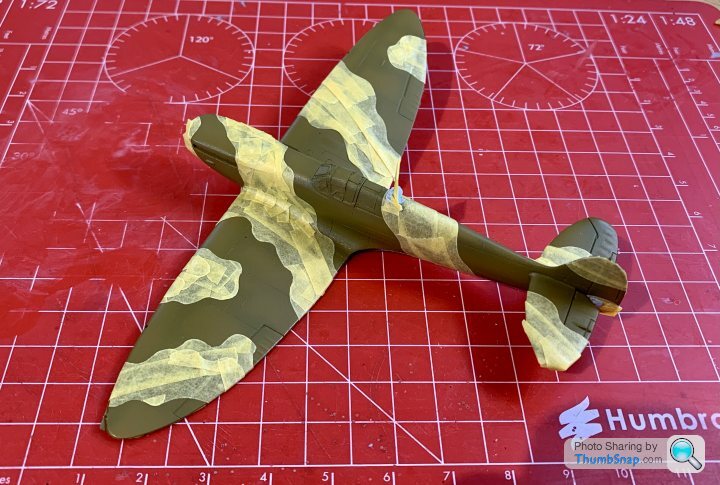
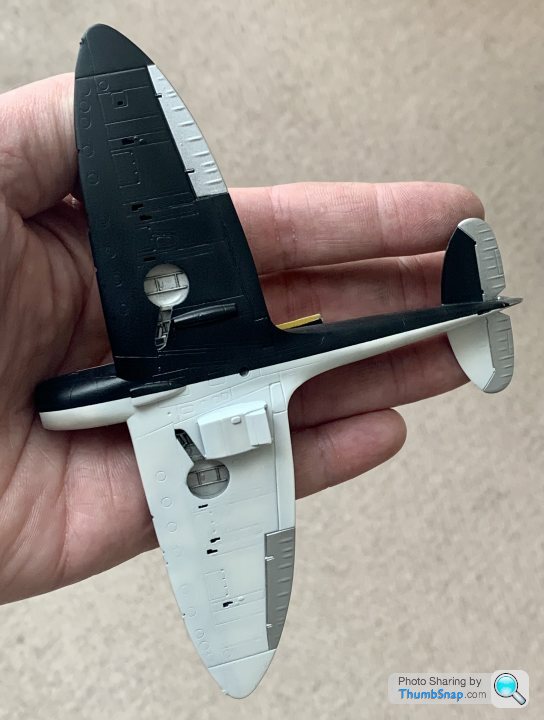
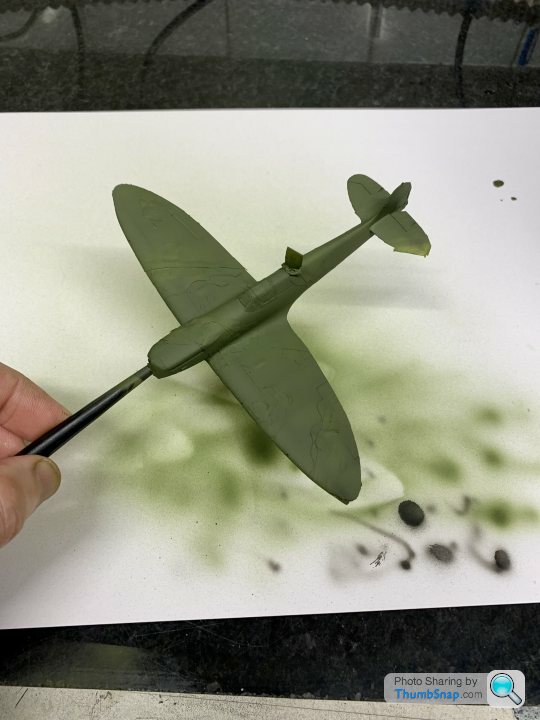
Pre-shaded Dark Green:
Masking removed:
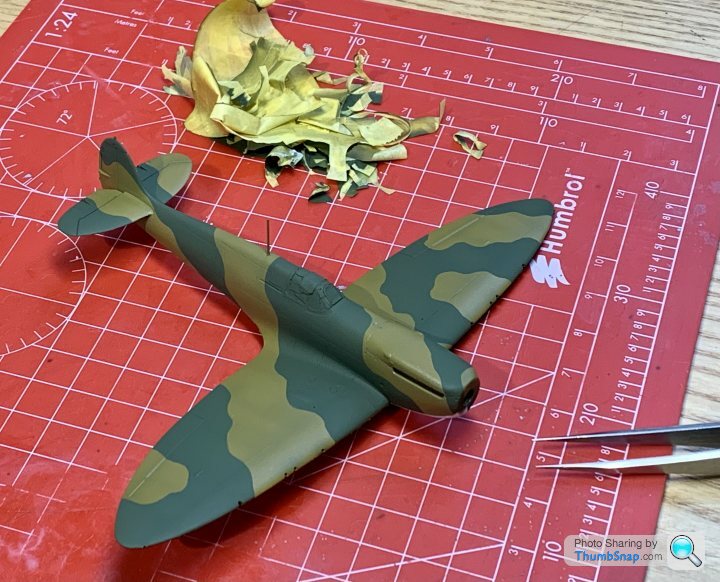
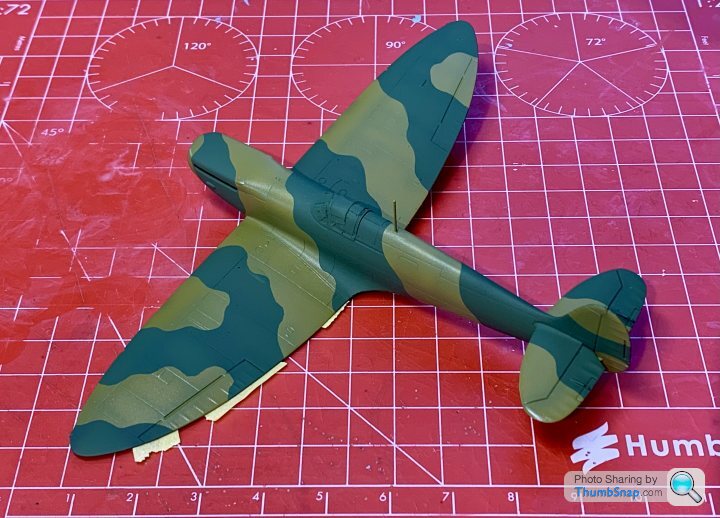
Now for a few of the inevitable corrections such as missing some brown on the tailplane, and some minor overspray.
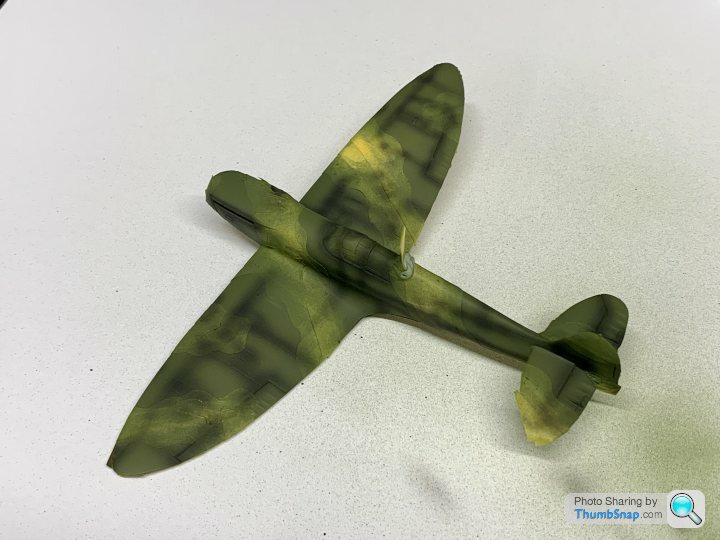
I think all the demarcations are in about the right places, but I’m not pretending it’s 100% accurate. I always tend to think that RAF camo doesn’t look consistent in terms of proportions of brown/green, and how wavy the lines are on one wing vs. the other, but looking at photos it seems to be pretty much the way it often was.
Pre-shaded Dark Green:
Masking removed:
Now for a few of the inevitable corrections such as missing some brown on the tailplane, and some minor overspray.
I think all the demarcations are in about the right places, but I’m not pretending it’s 100% accurate. I always tend to think that RAF camo doesn’t look consistent in terms of proportions of brown/green, and how wavy the lines are on one wing vs. the other, but looking at photos it seems to be pretty much the way it often was.
wisbech said:
Already posted on another Spitfire model thread but build quality on some spitfires was pretty bad, panel gaps etc galore. They were banged out by the thousands and didn’t need to have a long service life. We are probably a bit misled as the survivors have been lovingly restored/ rebuilt
.
Thanks, yes I realise that they may have looked a bit agricultural after a few weeks, but at 1:72 it's sometimes difficult to get the balance between true scale and what you think you should see..
The the old issue. Decals. The Airfix ones have a lot of carrier film, perfect for silvering issues. I've also heard thay can be tempremental:
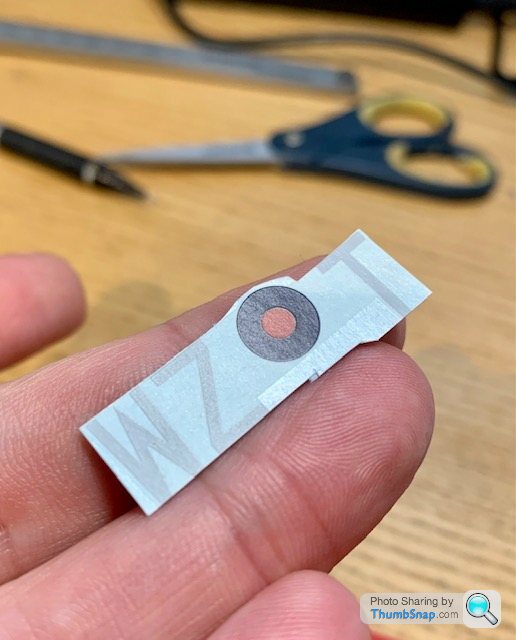
To reduce the chances of silvering, and also to stagger the codes so they fitted better to the rear fuselage upper/lower paint demarcations, I cut them up as close to the printed parts as I could. The applied them using a dot of Klear under, and Microset over.
Once dry, this was the result on some of them:
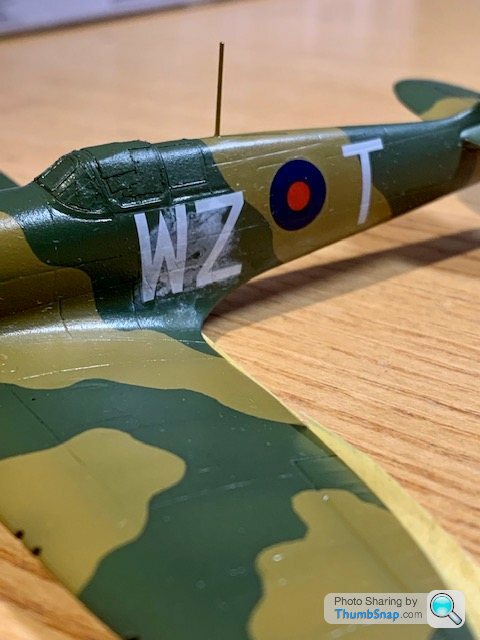
Of course, the Microset had done it's job, making clean removal impossible:

So, yet another model that's going to need hours and hours more work - if indeed it's even possible to get back to the paint finish I want.
I've never seen an effect like that using Klear and Microsol. No idea what happened. I'll try to flat the damaged paint back and re-do it, but I find acrylics are very soft and difficult to correct. If I wasn't demoralised enough with modelling before this, I certainly am now...
To reduce the chances of silvering, and also to stagger the codes so they fitted better to the rear fuselage upper/lower paint demarcations, I cut them up as close to the printed parts as I could. The applied them using a dot of Klear under, and Microset over.
Once dry, this was the result on some of them:
Of course, the Microset had done it's job, making clean removal impossible:
So, yet another model that's going to need hours and hours more work - if indeed it's even possible to get back to the paint finish I want.
I've never seen an effect like that using Klear and Microsol. No idea what happened. I'll try to flat the damaged paint back and re-do it, but I find acrylics are very soft and difficult to correct. If I wasn't demoralised enough with modelling before this, I certainly am now...
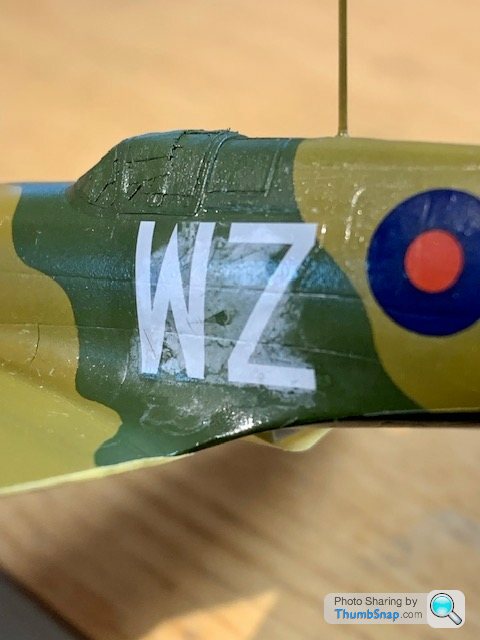
I've tried to correct the paint, but it's clear that there's just no way it will be right.
So unfortunately this will join the only other model I've given up on since 2008 - in the bin with the other Airfix Spitfire Mk.1a. There's no way I'm going through all the panel line filling again with another one. Seems you really can't polish a turd.
So unfortunately this will join the only other model I've given up on since 2008 - in the bin with the other Airfix Spitfire Mk.1a. There's no way I'm going through all the panel line filling again with another one. Seems you really can't polish a turd.
So to directly contradict my previous post, I did get another Spitfire. I found the oldest one I could on EBay in the hope of the mouldings being a better starting point than the previous one. That hope lasted until opening the box:
Good old Airfix.
Anyway, I also got some more decals from a forum, and I've gone through the same process of filling the panel lines as before. I've used the original interior, which I managed to salvage:
I'm now in the process of re-scribing the detail lost on assembly (if anything, the fit with this one was worse than the last):

Four months on from the last disaster, I'm not convinced this one will be any better, but got to at least try.
Good old Airfix.
Anyway, I also got some more decals from a forum, and I've gone through the same process of filling the panel lines as before. I've used the original interior, which I managed to salvage:
I'm now in the process of re-scribing the detail lost on assembly (if anything, the fit with this one was worse than the last):
Four months on from the last disaster, I'm not convinced this one will be any better, but got to at least try.
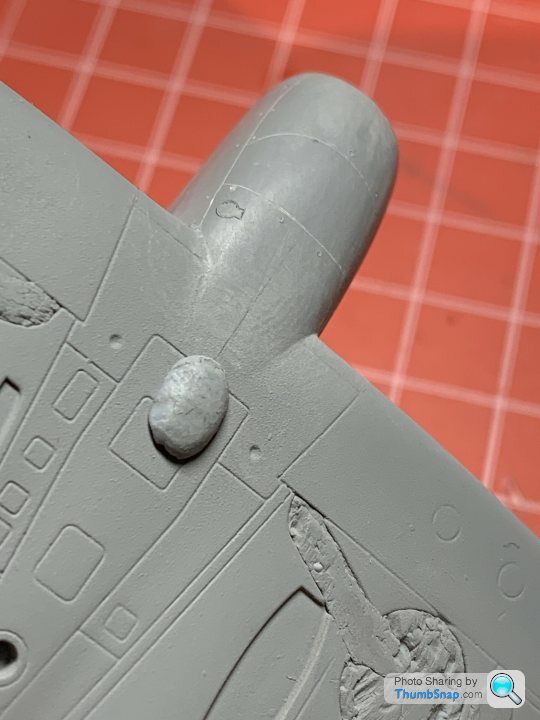
Slow but sure progress now on the re-scribing. I've had to recreate the small oblong bumps from Tamiya Pla-paper though (as I did on the last version). They got lost when refining the wing fillet joints:
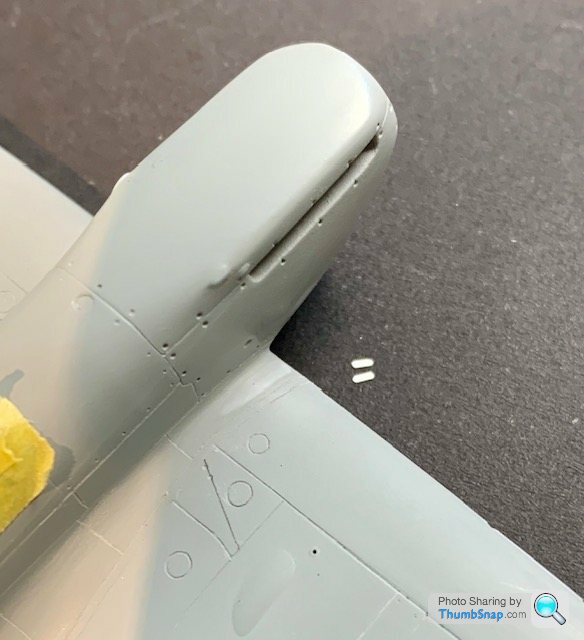
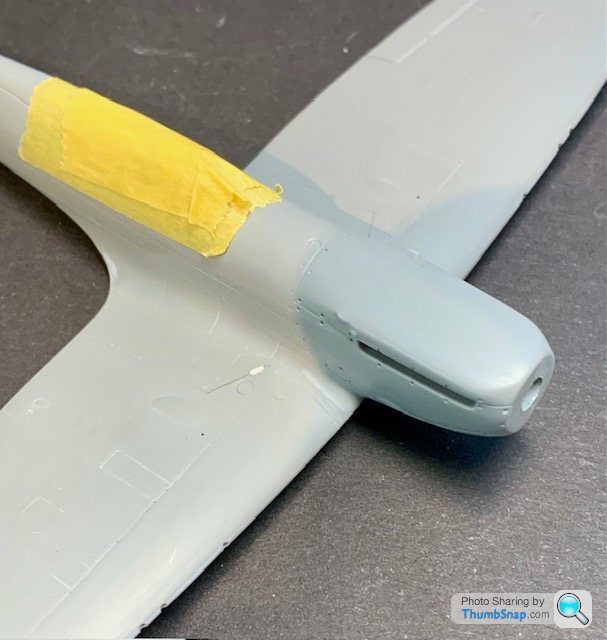
Looking at the above, it shows just how mch more work I've got to do to get the bullet-hole cowling fasteners to be consistent. Pffff.
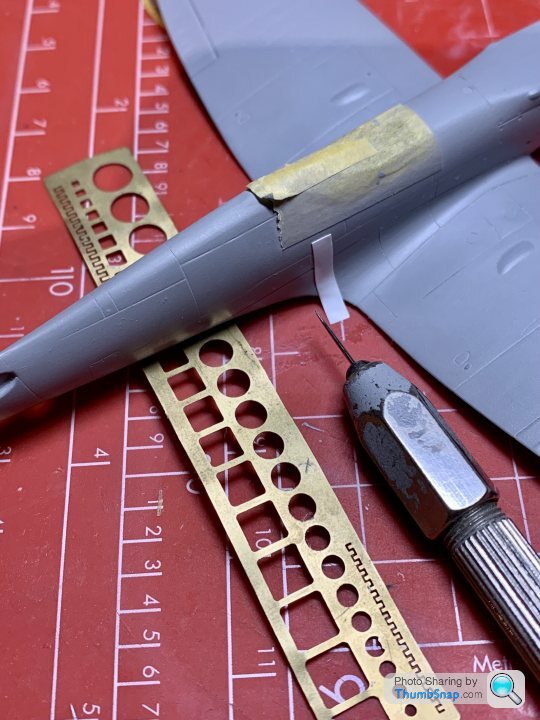
Also made some gun barrels from brass tube:
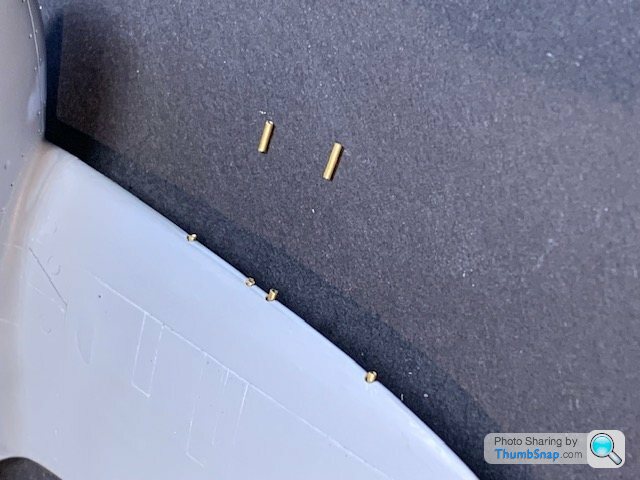
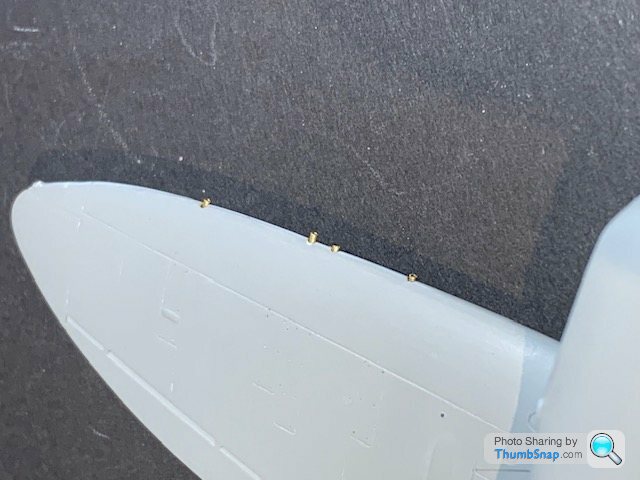
If I actually get to fit these I'll be very happy, becasue that will mean it's finished to an acceptable standard...
Looking at the above, it shows just how mch more work I've got to do to get the bullet-hole cowling fasteners to be consistent. Pffff.
Also made some gun barrels from brass tube:
If I actually get to fit these I'll be very happy, becasue that will mean it's finished to an acceptable standard...
Edited by dr_gn on Saturday 23 September 14:22
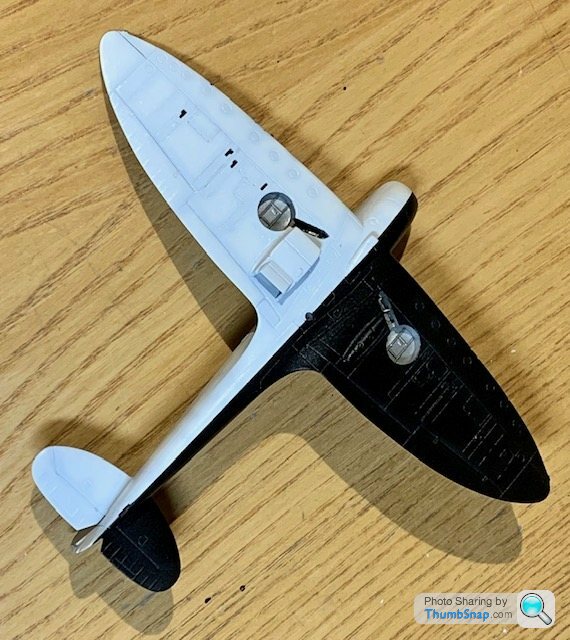
Slow, slow progress repeating all this. I've painted the undersides black and white again; at least I got to experiment with thinning the Tamiya grey pre-shade with Lacquer thinners, which does seem to make much finer lines possible, with reduced spattering:


The Klear has obscured the pre-shade on the black, but hopefully it will make an appearance again once it's got a final matt coat on.
The Klear has obscured the pre-shade on the black, but hopefully it will make an appearance again once it's got a final matt coat on.
Gassing Station | Scale Models | Top of Page | What's New | My Stuff