Some Models (reposts - moved from other forums)
Discussion


Here's something a bit different:
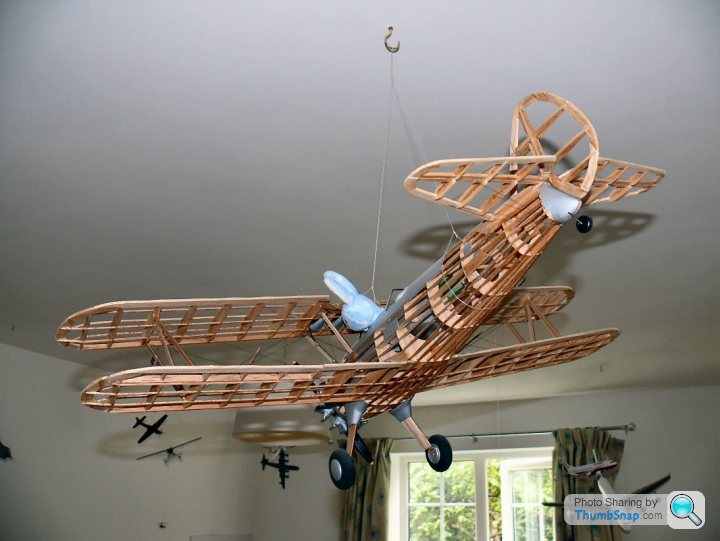
It's a Guillow's Stearman rubber powered free-flight model made of balsa and vac formed plastic. I left it uncovered and varnished it. I think it looks good. It's hanging in my son's room hence the rabbit pilots. I would love to build one of the large scale WW1 aircraft kits (wood/metal) but they are too expensive, so this will have to do!
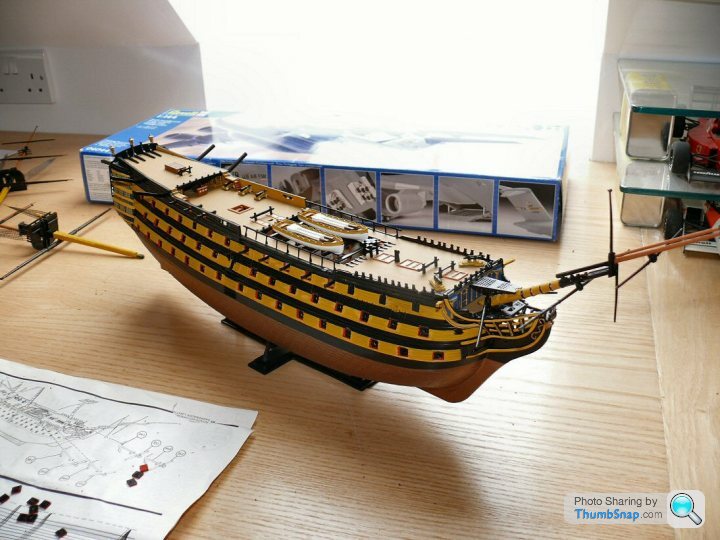
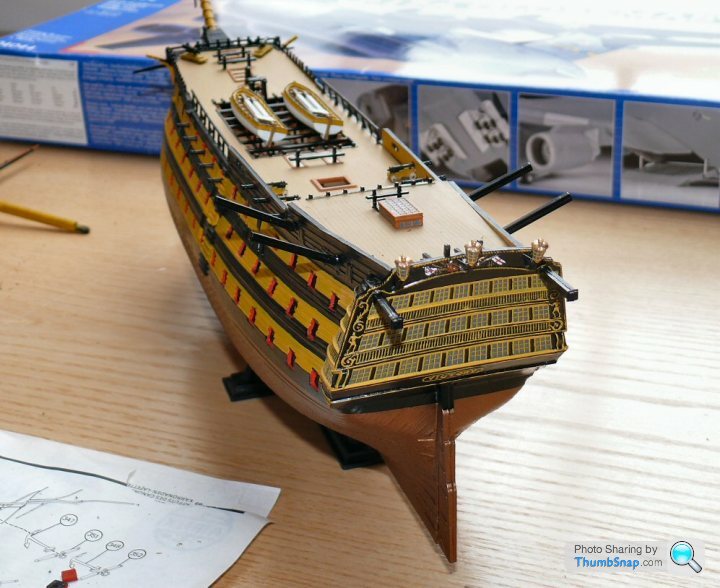
Here is current work in progress, it's an Airfix HMS Victory. Just needs the colours toning down, cannon & ports finishing, masts and rigging. Started it in February, it is a rubbish kit, a nightmare to build and paint:
Cheers,

It's a Guillow's Stearman rubber powered free-flight model made of balsa and vac formed plastic. I left it uncovered and varnished it. I think it looks good. It's hanging in my son's room hence the rabbit pilots. I would love to build one of the large scale WW1 aircraft kits (wood/metal) but they are too expensive, so this will have to do!
Here is current work in progress, it's an Airfix HMS Victory. Just needs the colours toning down, cannon & ports finishing, masts and rigging. Started it in February, it is a rubbish kit, a nightmare to build and paint:


Cheers,
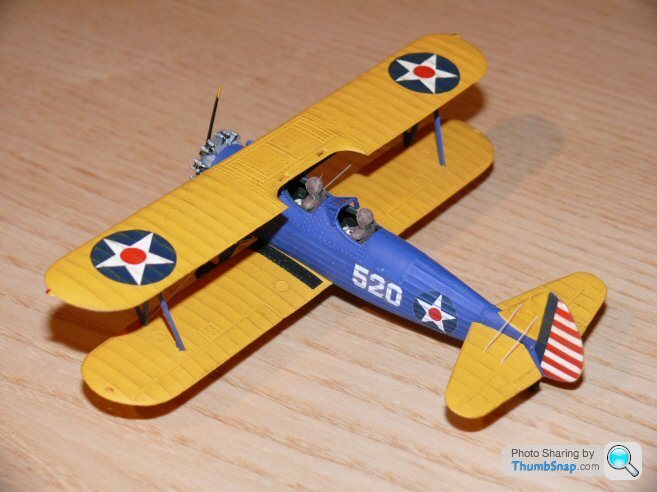
I have a soft spot for Frog models. My Dad used to get me them and they were always a bit special. These days I like Revell and Tamiya. The first couple of models I ever built (with help!) were a Revell Stearman and an SE5a, when I was about 4. I recently managed to get hold of the original '60's kits off EBay and built them again. Here are a few of my best efforts:
SE5a

Stearman
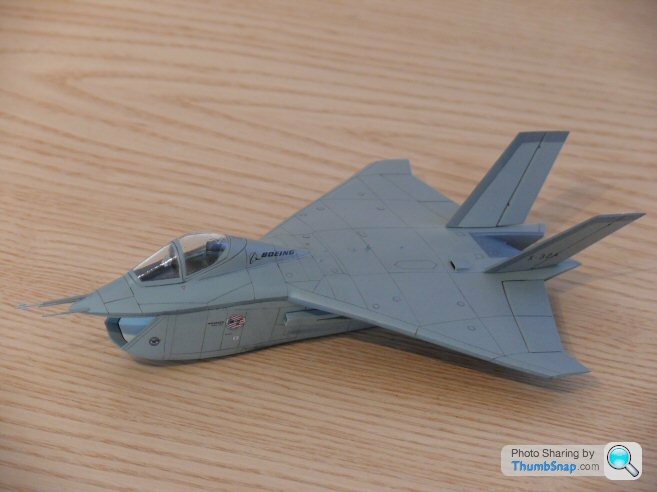
Boeing X32A
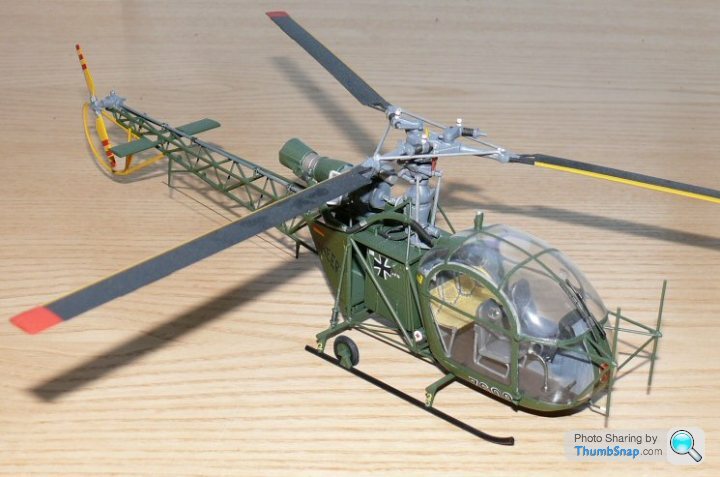
Lama
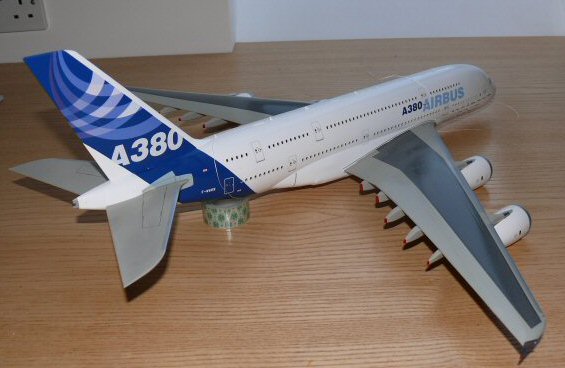
A380
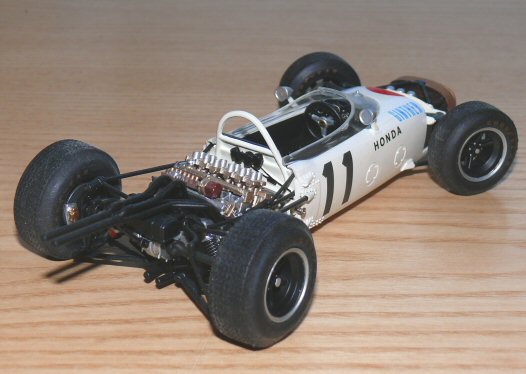
Honda
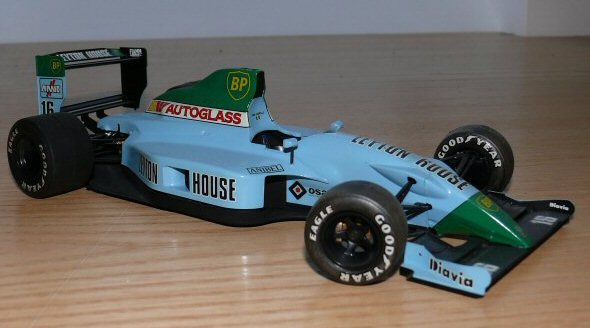
Leyton House
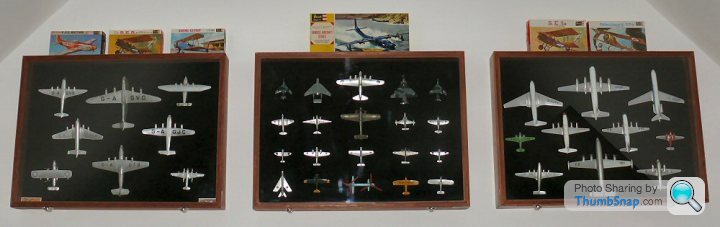
And something you might appreciate more: over the years I collected a lot of old 'Dinky Toys' Aircraft and refurbished them (made my own decals too where necessary). I made some dispaly cases and hung them in my office. The 1930's flying boats in the left case look the best I think. The models date from 1934 (DH Leopard Moth) to 1965 (Javelin, Caravelle etc). Not worth a great deal because I have refurbished most of them.
Cheers.
SE5a

Stearman

Boeing X32A

Lama

A380

Honda

Leyton House

And something you might appreciate more: over the years I collected a lot of old 'Dinky Toys' Aircraft and refurbished them (made my own decals too where necessary). I made some dispaly cases and hung them in my office. The 1930's flying boats in the left case look the best I think. The models date from 1934 (DH Leopard Moth) to 1965 (Javelin, Caravelle etc). Not worth a great deal because I have refurbished most of them.

Cheers.
Edited by dr_gn on Saturday 20th June 23:05
Edited by dr_gn on Sunday 28th June 17:55


Red Firecracker said:
dr_gn said:
Red Firecracker said:
Any more pics of the Dinky aircraft? There's some quite rare examples in there I think.
Any particular ones?Don't underestimate the value of well restored Dinky models.
The Empire Flying Boat 'Centurion' (60r) I have dated from 1937 - 1939, and has a plastic roller underneath rather than the later brass. It also has the hole in the upper fuselage for the 'gliding game'.

It was in very bad condition with the Mazak badly fatigued:

I filled the cracks with body filler and superglue and reprofiled the nose. The new decals were home made, and it had a new prop. I had another post-war version which was in better condition, but I swapped it for something else.

The Singapore Flying Boat 60h (1936) is a straight respray, new props and new home made decals. It was possibly originally pale green, but it was in such a terrible state when I got it, it was hard to tell.

The Flying Boat (1945 - 49) is just a respray:

One of the hardest to restore was the Sud Aviation Caravelle:

I had to make a complete new set of waterslide decals for it. Not easy!

It's interesting (kind of) to see the Dinky Comet and Caravelle side by side; the real Caravelle used the Comet forward fuselage and cockpit. I wonder if Dinky used a Comet front-end spliced onto a Caravelle rear end? The fronts look identical. The restored aircraft are mostly painted with Halfords Aluminium or Appliance gloss white spray cans. Some, like the Shetland flying boat, Ensign class airliner (1939 - 40) and Sea Vixen I left in original condition because they were 50/50 in terms of needing restoration.
Cheers.
Edited by dr_gn on Monday 29th June 21:38
Red Firecracker said:
Nice work, especially the Caravelle.
In a perverse kind of way I quite enjoy working on the really badly decayed Dinkys. To my mind if a model gives its owner more pleasure by being in mint but restored condition, that's absolutely fine. I have refused to restore a couple in the past though.
That's how I see it: They are just ornaments and they obviously look better restored. I didn't pay more than a few pounds for most of them and had some fun seeing what I could do with them.In a perverse kind of way I quite enjoy working on the really badly decayed Dinkys. To my mind if a model gives its owner more pleasure by being in mint but restored condition, that's absolutely fine. I have refused to restore a couple in the past though.
BTW, if you ever want a copy of the Caravelle decals .dwg file let me know. I know the colours on the photo I posted look very bright - they are not as bad in reality.
Cheers,
Eric Mc said:
Sounds complicated.
Eric,It's not complicated - just takes some time to get right (for me at least!). Rather than me write out the procedure, have a look at this link:
http://www.hannants.co.uk/search/?FULL=EC119
I use Autocad to draw my own decals rather than scan them. The paper is available transparent (good for lettering) or white (good for most other things). It is also very good for fine straight lines, or borders of areas that require sharp outlines: simply spray on the colour you want, seal it and cut out with a scalpel. no masking required, and it will be a perfect match to the other paint on the model.
I built a model of a DHC-2 Beaver floatplane that I had a trip in once, and did all the decals myself - I'll post a pic sometime.
Cheers,

Red Firecracker said:
Eric Mc said:
Sounds complicated.
Depends on the subject.To use an example from your recent thread;
for the larger decals it would basically be squares, rectangles, circles and text. The text is easy, the squares/rectangles are easy and the circles are easy. If you can draw them in a graphics prog (even the one built into Word) you can print them. The other way of getting white is to use white backed decal paper instead of clear. Obviously the text is a bit tricky to print, only really viable on an ALPS.
As an example, all the decals on these models;

were printed on an Epson inkjet. You can also clear coat them with our old friend Johnsons Klear.
Cheers,
Eric Mc said:
Bad news - it's being discontinued in the UK. The last stocks are being snapped up bny modellers.
Better stock up then:http://tinyurl.com/lwdc5r
Red Firecracker said:
dr_gn said:
Eric Mc said:
Bad news - it's being discontinued in the UK. The last stocks are being snapped up bny modellers.
Better stock up then:http://tinyurl.com/lwdc5r
It's a floor polish made by Johnsons and they're withdrawing it/changing the formula. Alternatives are being actively sought throughout the various modeling communities!
dr_gn said:
Eric Mc said:
Sounds complicated.
Eric,It's not complicated - just takes some time to get right (for me at least!). Rather than me write out the procedure, have a look at this link:
http://www.hannants.co.uk/search/?FULL=EC119
I use Autocad to draw my own decals rather than scan them. The paper is available transparent (good for lettering) or white (good for most other things). It is also very good for fine straight lines, or borders of areas that require sharp outlines: simply spray on the colour you want, seal it and cut out with a scalpel. no masking required, and it will be a perfect match to the other paint on the model.
I built a model of a DHC-2 Beaver floatplane that I had a trip in once, and did all the decals myself - I'll post a pic sometime.
Cheers,

Here's the real thing (now sadly destroyed):

Cheers,
Eric Mc said:
I'm impressed.
It's very easy to do: basically sprayed overall white, painted leading edges and fuselage top, the rest are decals. That model was a strange one: the entire fuselage was transparent, and it was up to the builder to mask the appropriate window configuration. It was the only model of a DHC-2 floatplane I could find. Can't remember the manufacturer. The model would beneftit from some highlighted panel lines, and maybe satin varnish rather than gloss.One thing I would say about the decal film is that it took some experimentation with printer settings to get the right amount of ink on the paper without 'beading'. Also, if you're doing roundels on white paper they can be tricky to cut around neatly: get it wrong and you'll get ragged white edges!
Cheers,
Eric Mc said:
Airfix do a 1/72 Beaver but as far as I know it's a British Army landplane version only.
Hobbycraft do an Otter and Matchbox/Revell do a Twin Otter - both in 1/72.
Yup, Hobbycraft was the one:Hobbycraft do an Otter and Matchbox/Revell do a Twin Otter - both in 1/72.
http://www.hobbylinc.com/htm/hcc/hcchc1674.htm
Here's the wierd fuselage:
http://www.modelingmadness.com/scotts/viet/dhc2pre...
Edited by dr_gn on Wednesday 1st July 10:46


Eric Mc said:
I wouldn't have the patience for all that rigging.
That's a tiny proportion of what is on the real thing! The vast majority of the fittings that the lines secure to are not present in this kit, so there is nowhere to tie off the ends of the rigging lines.It is what it is though: best of a bad job!
Cheers,
Gassing Station | Scale Models | Top of Page | What's New | My Stuff