Insulating a dormer house
Discussion


I live in a 4 bedroom dormer style house and the upstairs can be bloody freezing at times. There appears to be a real lack of insulation up there so I am planning when the weather gets better to start ripping out some of the walls / ceilings (parts 4 and 5 in the image below) and insulate behind them. There seems to be plenty of insulation in the loft but the walls have nothing behind them.
(My house is slightly different to this pic in that the roof starts at the top of the ground floor so the entire upstairs is in the roof).

Some questions:
1) Not sure whether to overboard the ceilings or just rip them down. Either way, I assume I'd just put up some celotex / kingspan insulation, cover with plasterboard, then get them skimmed? How thick would it need to be for it to be effective?
2) With regards to ripping out the walls (shown in point 4 on the pic) and insulating behind them, I suppose celotex / kingspan would be the best thing again and just fitting between the joists/studs? Or should I also put a load of rockwool in the floors behind those walls?
3) As the bedrooms are all split by stud walls upstairs, is it worth putting insulation in those walls or just stick to the outside walls?
4) Anyone know when the best deals on insulation are? I remember seeing deals in the sheds for about £3 a roll of the rockwool type insulation, they now seem to be about £30. Obviously I'm going to need a lot if I'm going to do this so want to keep it as cheap as possible.
Sorry for all the questions, always lived in well insulated new builds before, and never had to think about this kind of thing...
(My house is slightly different to this pic in that the roof starts at the top of the ground floor so the entire upstairs is in the roof).
Some questions:
1) Not sure whether to overboard the ceilings or just rip them down. Either way, I assume I'd just put up some celotex / kingspan insulation, cover with plasterboard, then get them skimmed? How thick would it need to be for it to be effective?
2) With regards to ripping out the walls (shown in point 4 on the pic) and insulating behind them, I suppose celotex / kingspan would be the best thing again and just fitting between the joists/studs? Or should I also put a load of rockwool in the floors behind those walls?
3) As the bedrooms are all split by stud walls upstairs, is it worth putting insulation in those walls or just stick to the outside walls?
4) Anyone know when the best deals on insulation are? I remember seeing deals in the sheds for about £3 a roll of the rockwool type insulation, they now seem to be about £30. Obviously I'm going to need a lot if I'm going to do this so want to keep it as cheap as possible.
Sorry for all the questions, always lived in well insulated new builds before, and never had to think about this kind of thing...
Edited by JohnStitch on Monday 27th January 14:28
I know a bloke that does most of the jobs on my house (carpenter by trade, but can pretty much apply himself to most things). My plan is to take 2 weeks off work, employ him for those 2 weeks on a day rate, then blitz the place, which will give me the opportunity to learn stuff from him too.There's loads of other jobs to do too, but this one is my priority. As the quality of the plastering on those walls is of questionable quality then it gives me a good excuse to rip them out and start again.
If this job reduces my heating bills I'll be happy!
If this job reduces my heating bills I'll be happy!
-Pete- said:
I also wondered about the space under the floorboards through which the wind whistles thanks to vents in the soffits. Our floors (3) are cold, is there anything I can do to limit the airflow without causing problems?
Our floors are cold too - Last year we upgraded our heating system from a one pipe to a two pipe system, and while the floorboards were up in our main bedroom the breeze coming through the floor was unbelievable. I would also be interested to know the answer to this one - i.e. can I just stuff the ends of each joist in the floor with rockwool? Or will that cause issues?Thanks for the answers on here chaps, it's coming in very useful - Would be good to know if anyone knows of any good deals to be had on this stuff too...

Thread resurrection - Got all the work booked in for September, so am now trying to source all the materials.
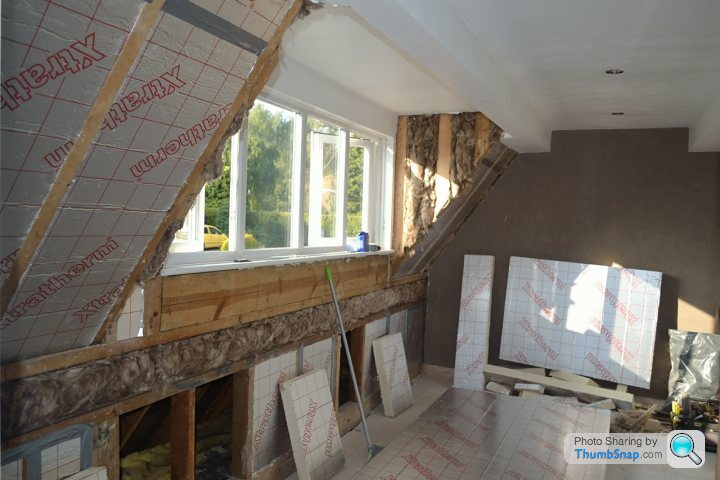
Does anyone know if Xtratherm is any good in comparison to Celotex? Seems to be quite significantly cheaper, just wondered if that was just because it's not such a well known brand, or if it is an inferior product in comparison.
And does anyone know where I can get a good price on 100mm rockwool type insulation? I remember seeing this stuff on offer at 3 quid a roll a year or two ago, now it's around £30. Gonna need quite a few rolls...
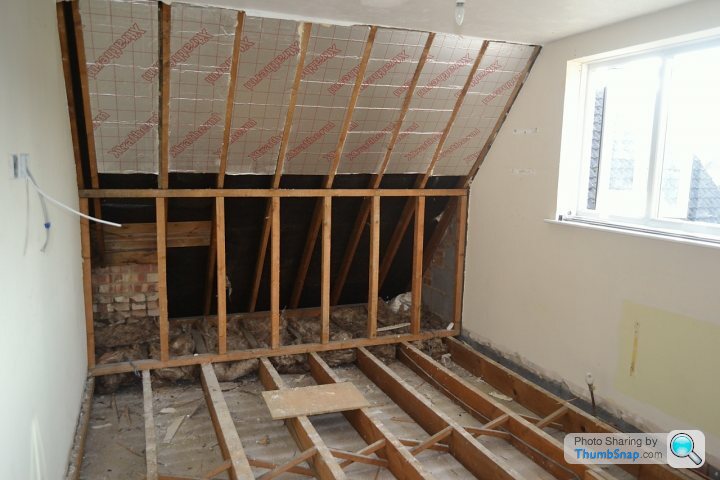
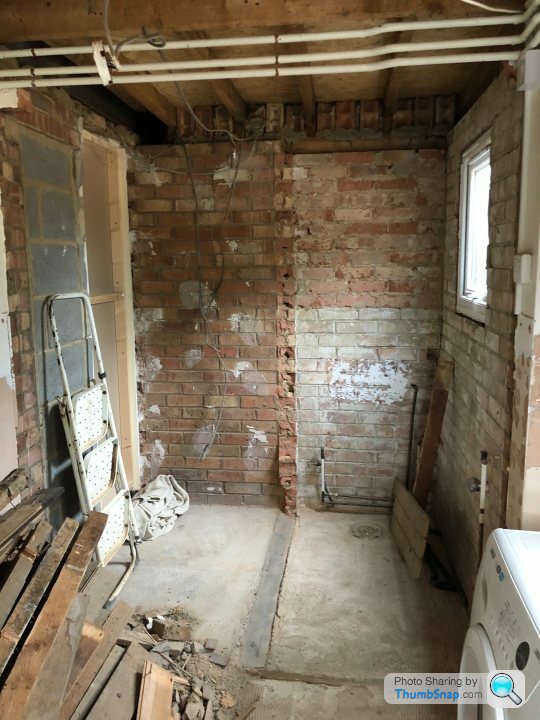
Not sure if anyone's interested, but the renovations started today and as suspected there was literally no insulation in the older part of the house....apart from this little bit lol
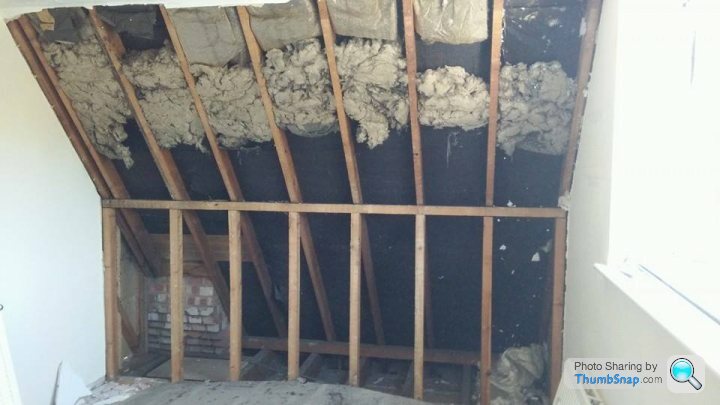
I'm sure that thin stripe made the world of difference. I have a feeling our house was the last to be built on this street, so maybe the builders ran out of insulation and just couldn't be bothered to get more. Every other house owner on this street says how hot their upstairs is. Ours is bloody freezing, and this is why!
More pics here...

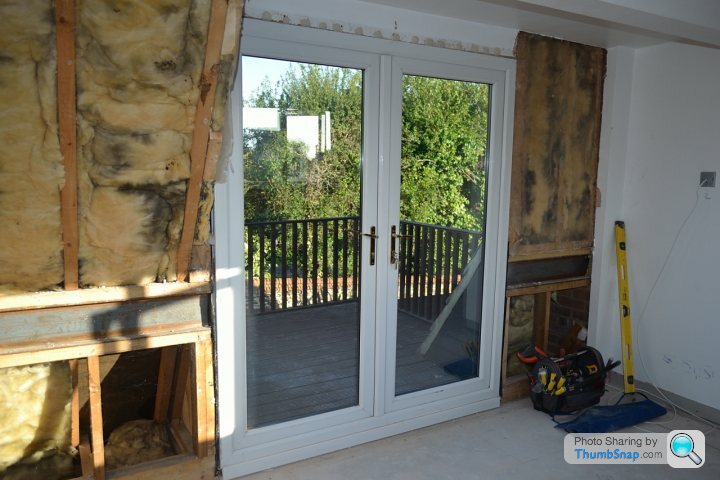
The newer part of the house has more insulation in it, but not brilliant, this is all being ripped out and replaced with Celotex + rockwool in the eaves

So next stop, is all the floors up and replaced, insulate everywhere and reboard, next week plastering, following week all new woodwork fitted, then decorated and carpeted, then back to normal hopefully, and a winter of a warm upstairs with gas bills that are less than £45-50 per week, fingers crossed.
I'm sure that thin stripe made the world of difference. I have a feeling our house was the last to be built on this street, so maybe the builders ran out of insulation and just couldn't be bothered to get more. Every other house owner on this street says how hot their upstairs is. Ours is bloody freezing, and this is why!
More pics here...
The newer part of the house has more insulation in it, but not brilliant, this is all being ripped out and replaced with Celotex + rockwool in the eaves
So next stop, is all the floors up and replaced, insulate everywhere and reboard, next week plastering, following week all new woodwork fitted, then decorated and carpeted, then back to normal hopefully, and a winter of a warm upstairs with gas bills that are less than £45-50 per week, fingers crossed.
Yep, all being done Andy. Electrician is here now, scratching his head as there's some very strange electrics going on. What started as a load of extra sockets is ending up as pretty much a whole rewire. CAT6 is routed up to the loft ready to drop down into each room too. Was hoping I'd find some goodies under the floor, so far we have a man utd magazine from 1986, an Enid blyton magazine from 1953, and a letter to a previous owner from 1968. No jewellery yet 
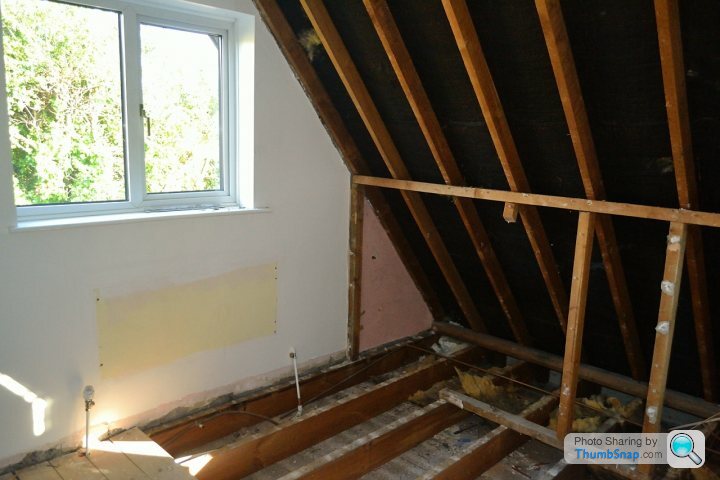
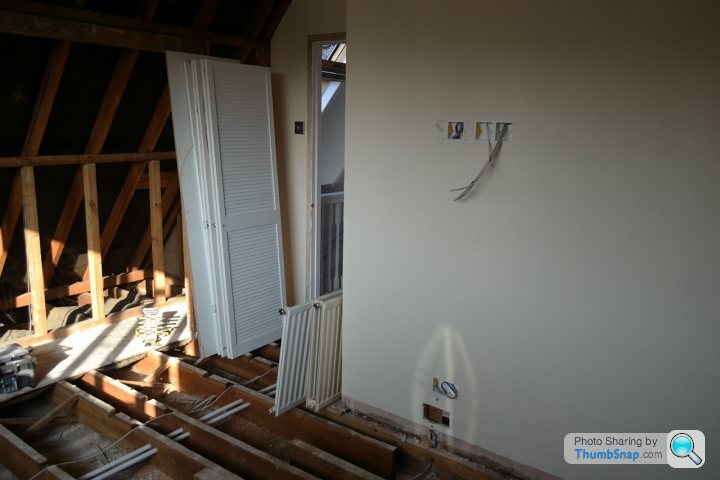
Day 2....Floors are all up and the insulation is starting to go in, filling up the floors of the eaves to the joins with the vertical walls, then celotexing the rest
The state of this dormer is shocking. You can see the outside all around the cheeks as the lead flashing leaves a lot to be desired. This will be sorted out in the Spring when we get the chimney repointed and have scaffold up. Meanwhile lots of clear silicone and expanding foam is our friend. Not really the right way to do it, but will do in the short term. It's a very steep pitched roof and so far have had no water ingress (fingers crossed), so hopefully if we block it up it'll last until we have the scaffold. The amount of wasps nests I have found is ridiculous - thankfully they have all been dead...
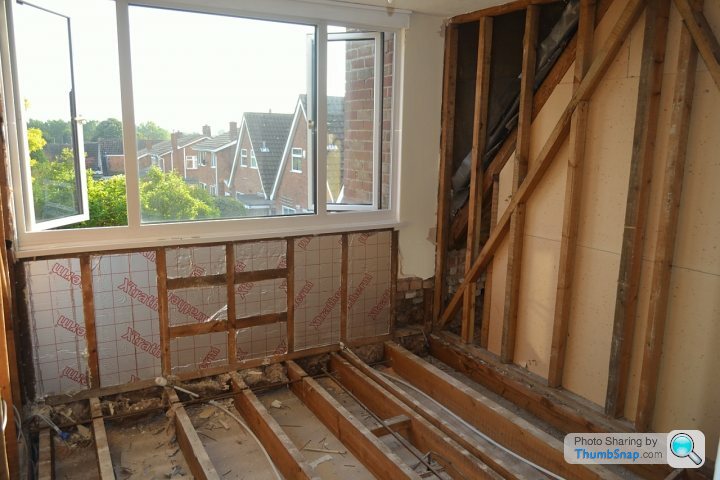
First fix electrics also gone in today, with pretty much a rewire - lots of alterations seem to have been made in the past by previous owners leaving us with 2 ring mains upstairs, 2 downstairs, and lots of other strange business inbetween. Also the all important CAT6 cables are now fed to each room (2 to each), along with Coax aeriel cable.

Tomorrow, more of the same, getting everything insulated, reinstating the flooring, then plasterboarding to be ready for plasterers next week...
The state of this dormer is shocking. You can see the outside all around the cheeks as the lead flashing leaves a lot to be desired. This will be sorted out in the Spring when we get the chimney repointed and have scaffold up. Meanwhile lots of clear silicone and expanding foam is our friend. Not really the right way to do it, but will do in the short term. It's a very steep pitched roof and so far have had no water ingress (fingers crossed), so hopefully if we block it up it'll last until we have the scaffold. The amount of wasps nests I have found is ridiculous - thankfully they have all been dead...
First fix electrics also gone in today, with pretty much a rewire - lots of alterations seem to have been made in the past by previous owners leaving us with 2 ring mains upstairs, 2 downstairs, and lots of other strange business inbetween. Also the all important CAT6 cables are now fed to each room (2 to each), along with Coax aeriel cable.
Tomorrow, more of the same, getting everything insulated, reinstating the flooring, then plasterboarding to be ready for plasterers next week...
DoubleSix said:
As it’s been resurrected... what happened after Day 2 John??
Since then we’ve pretty much refurbed the entire house, added an extension, and now finishing off the garden - for a house that I thought only needed a lick of paint, it’s been quite expensive! Worth it though - I did take photos of the entire process so can upload some of them here if people want to see them....maxest said:
Yes please!
Right, where do I start - will have to give a rather condensed version as got hundreds of pics, and lots of work has happened in the 5 years since we started. Might split this by room, separate post for each, in order of what we did (sorry if this gets a bit pic heavy, and there might be a lot of references to the shockingly bad work that previous owners had done!):Living Room
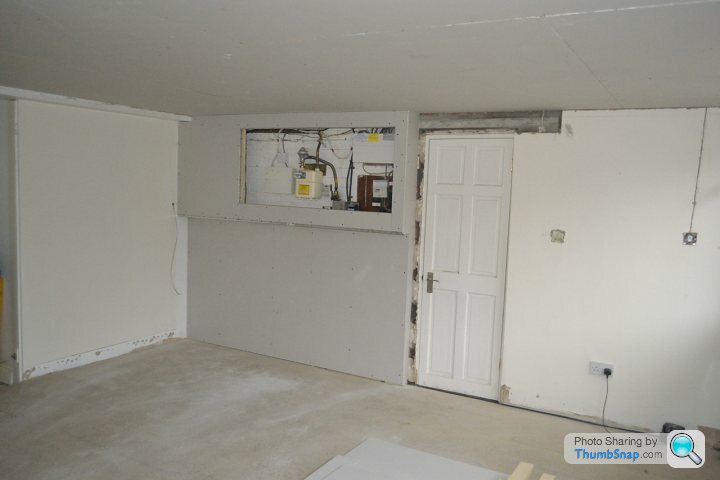
So the original house was a 3 bed detached, 60's dormer style 'chalet' house with an attached double garage. The previous owner decided that he would convert that double garage to a living room and knock through to the hallway. Good idea, and gave the house a lot more room, unfortunately he decided to bodge it. When we moved in the floor in this room seemed to bounce, and was about 5 inches higher at one end than at the other. We pulled this up and found that he'd laid 2 laters of celotex on top of each other then just laid the tongue and groove boards on top. No joists, not attached to anything. The ceiling was also sagging a bit so we ripped the whole lot out and started again:
Unfortunately this garage also housed the electric / gas meters and the consumer unit, so we built some boxing around those accessible by flush doors. We also replaced the lintel above the door that accessed the hallway as it didn't seem to have been done very well.
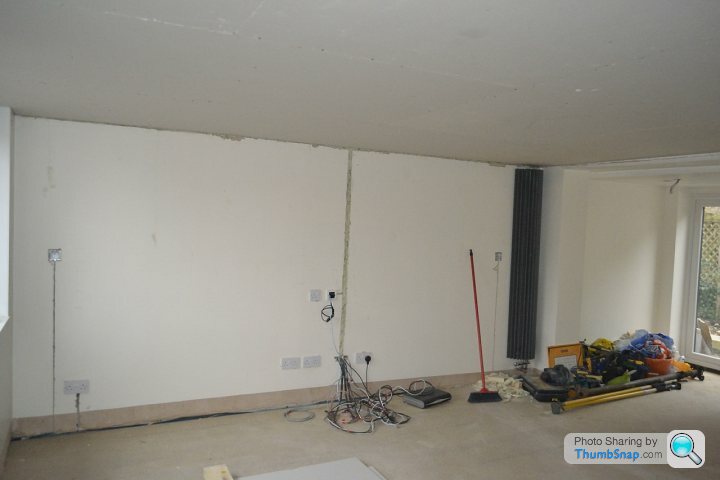
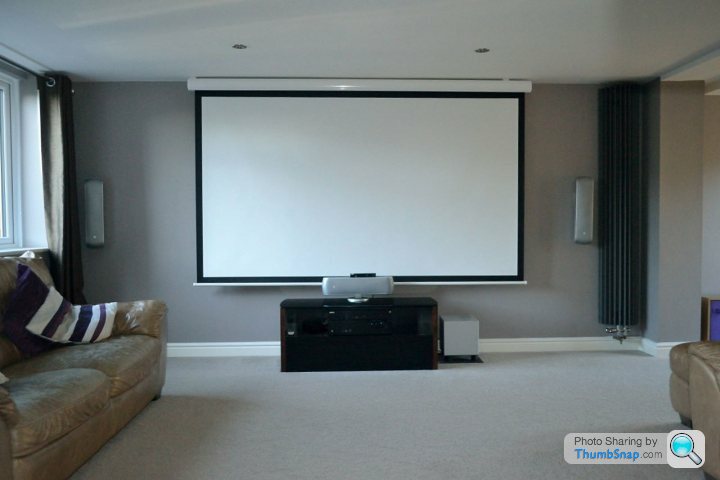
This is a nice size room (about 7m at it's longest by about 5m).I always wanted a room with a projector installed so this gave me the perfect opportunity to wire it up, running all the necessary cabled above the false ceiling and down the wall to the screen/TV/AV gear
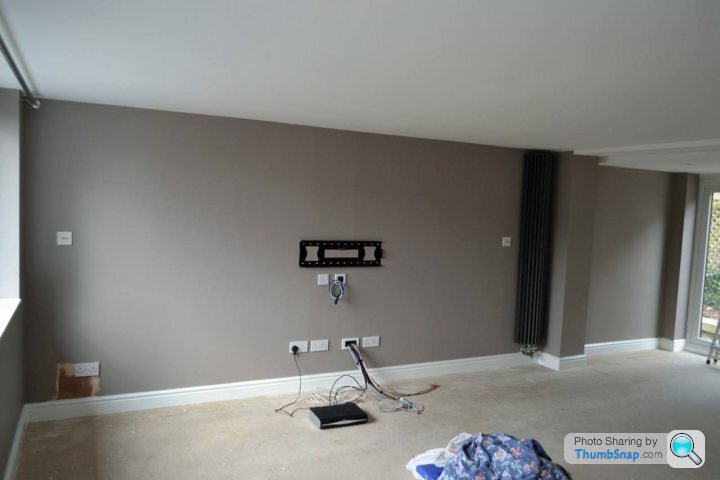
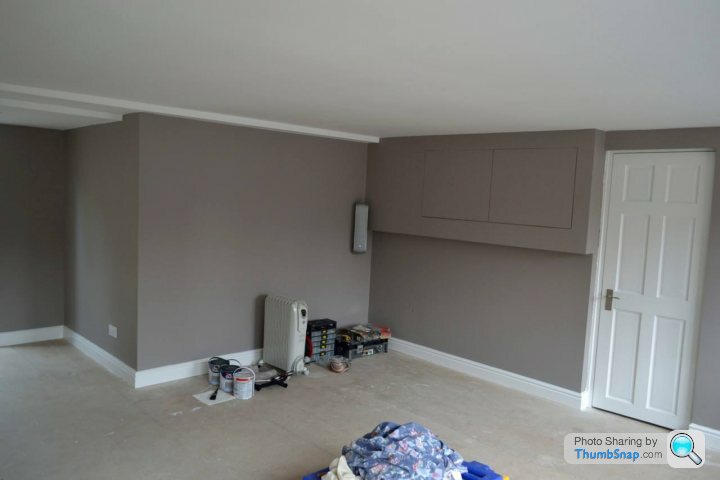
Ultimately the room ended up like this (been decorated a few times since mind):
Edited by Joyrider1 on Sunday 6th October 15:53
Next on the list was the Chimney
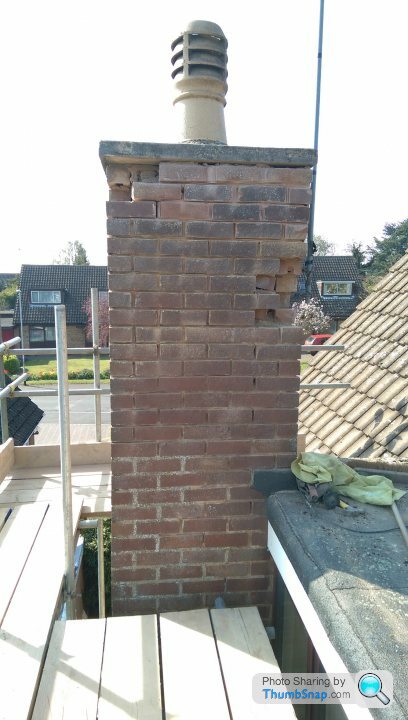
The survey that we had done before we bought the house said that the chimney would need repointing - It wasn't wrong - the mortar was just falling out of it like dry sand - I'm a bit paranoid in this house when we get the storms/gales in the winter as we get a right battering from the winds on the side of the house that has the chimney so wanted it sorted. Scaffold went up and it turned out that there were 9 completely loose bricks at the top that you could just take out of the stack!
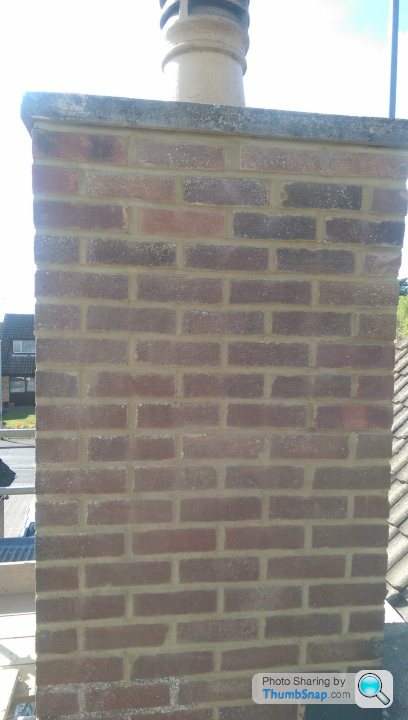
So glad we had this done, I could then sleep at night knowing that my daughters bedroom was less likely to have a chimney crash through it
The survey that we had done before we bought the house said that the chimney would need repointing - It wasn't wrong - the mortar was just falling out of it like dry sand - I'm a bit paranoid in this house when we get the storms/gales in the winter as we get a right battering from the winds on the side of the house that has the chimney so wanted it sorted. Scaffold went up and it turned out that there were 9 completely loose bricks at the top that you could just take out of the stack!
So glad we had this done, I could then sleep at night knowing that my daughters bedroom was less likely to have a chimney crash through it
Edited by Joyrider1 on Sunday 6th October 17:43
During those storms I would tend to start pacing around the house checking for leaks and whatnot (seemed to become a regular pastime for me in that first year or so of being here!) - So one day as I'm looking about I thought I'd see what I could demolish in the Dining Room
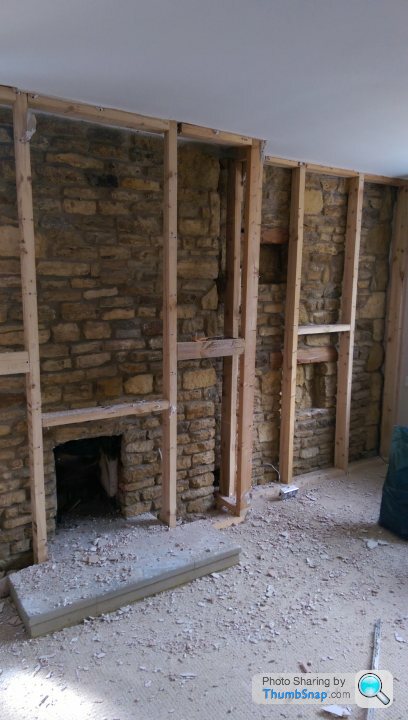
This room had the strangest fireplace - the original fireplace was there, however in front of that had been built the wonkiest stud wall, with another fireplace (and concrete hearth) placed in front of it. I was dying to see what was behind it so took a hammer to it:
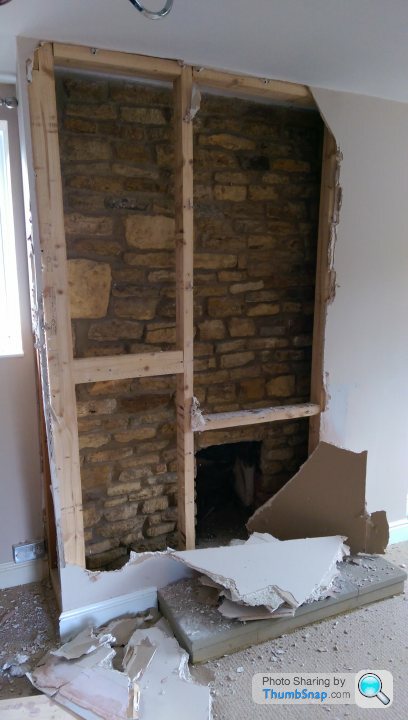
There appeared a stone wall behind it - and it kept on going, right to the end of the wall. It seems that the previous owners cats could get behind that stud wall through the fireplace and had used it as a toilet for god knows how long - piles of cat s t all along it, must've stunk when they were fresh - It was absolutely minging - thank god we've cleared that out!
To start with I thought it was a bit 70's and thought I'd want to get rid of it - but we kept it, and had a wood burner installed once this room was completed.
Next stop was to pull up all the Marley tiles on the floor and tackle another stud wall at the other end of the room (which separated this room from the kitchen - it was originally open plan)
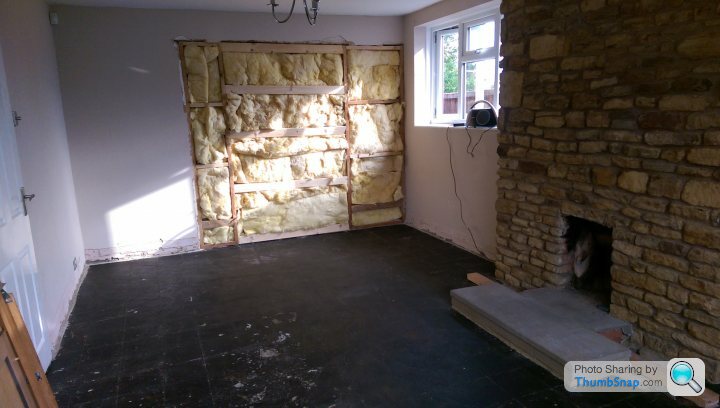
Look at the quality of that stud work! Needless to say this was ripped out and replaced, this time without Stevie Wonder doing it. We also replaced all the skirting / door architrave / door / skimmed the walls and ceiling. You can also see how much of the room we lost to that stud work around the fireplace. It was at least a foot and a half into the room, plus that hearth
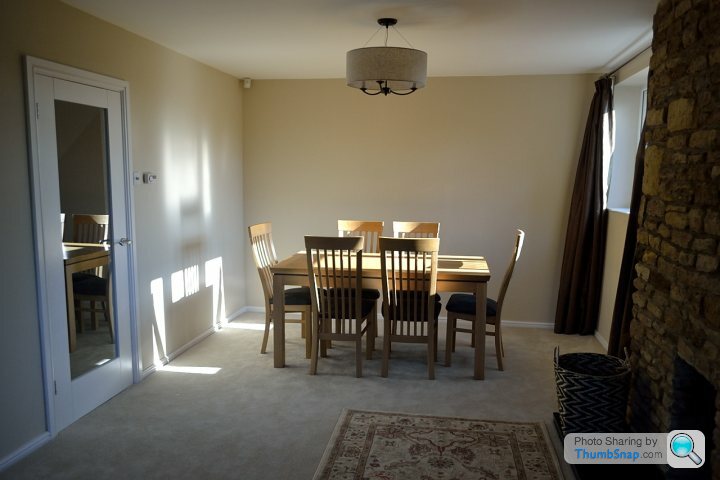
Anyway, the room was completed, woodburner installed in the stone wall, the top end of the room being used a dining room, the other end as a 'snug'
This room had the strangest fireplace - the original fireplace was there, however in front of that had been built the wonkiest stud wall, with another fireplace (and concrete hearth) placed in front of it. I was dying to see what was behind it so took a hammer to it:
There appeared a stone wall behind it - and it kept on going, right to the end of the wall. It seems that the previous owners cats could get behind that stud wall through the fireplace and had used it as a toilet for god knows how long - piles of cat s
t all along it, must've stunk when they were fresh - It was absolutely minging - thank god we've cleared that out! To start with I thought it was a bit 70's and thought I'd want to get rid of it - but we kept it, and had a wood burner installed once this room was completed.
Next stop was to pull up all the Marley tiles on the floor and tackle another stud wall at the other end of the room (which separated this room from the kitchen - it was originally open plan)
Look at the quality of that stud work! Needless to say this was ripped out and replaced, this time without Stevie Wonder doing it. We also replaced all the skirting / door architrave / door / skimmed the walls and ceiling. You can also see how much of the room we lost to that stud work around the fireplace. It was at least a foot and a half into the room, plus that hearth
Anyway, the room was completed, woodburner installed in the stone wall, the top end of the room being used a dining room, the other end as a 'snug'
This work on the dining room then seemed to spill out into the Hallway
This was a weird room - had an odd staircase with randomly spaced spindles that weren't in any kind of track - First thing we did was rip that out and replaced it - The stairs are dogleg stairs and have an enormous amount of space underneath - However none of it was open apart from a small understairs cupboard so out came the hammer to the plasterboard, and we put in some flush cupboard doors at one end, split the space into 2 and kept the other end open for an indoor dog kennel. Yes, you heard that right. She's got lighting and everything in there.
Here's the actual cupboards:
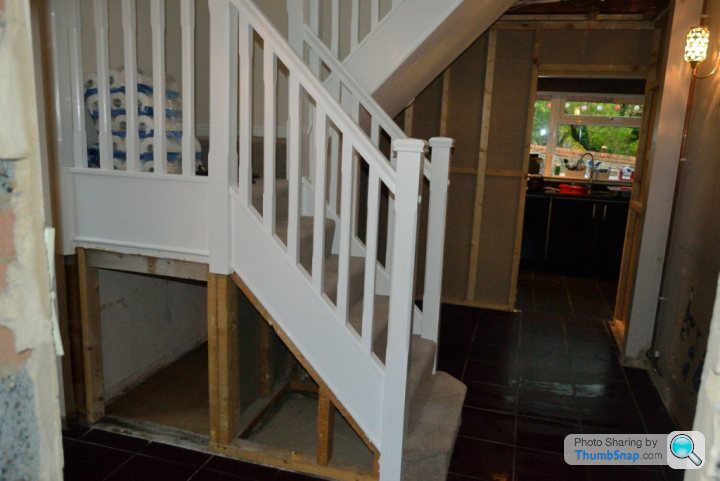
The start of the dogs house:
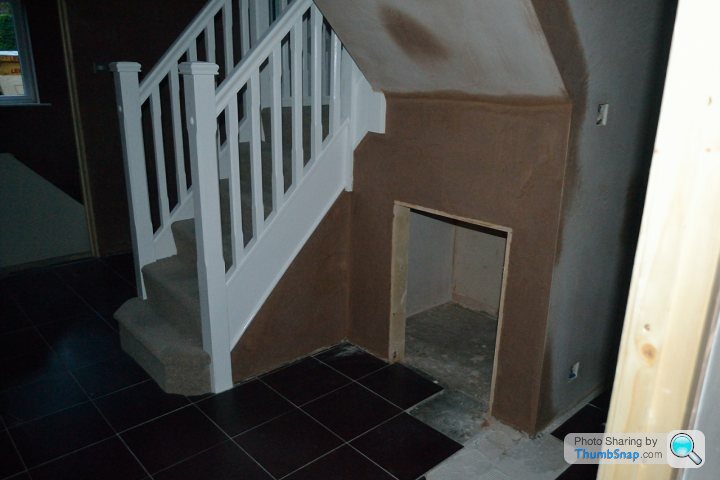
Meanwhile, we found that the floor tiles were in fact wall tiles. Horrible brown things, that weren't laid flat (hey, why would they be in this house). So these came up, and out came all the plasterboard bits (the reason why we went so overboard on this place was that the plasterwork was abysmal, and it was good to know what was behind everything. There was also a shortage of electrical sockets everywhere (usually only 1 per room) so we could get all this done at the same time).
Anyway, we ended up with this:
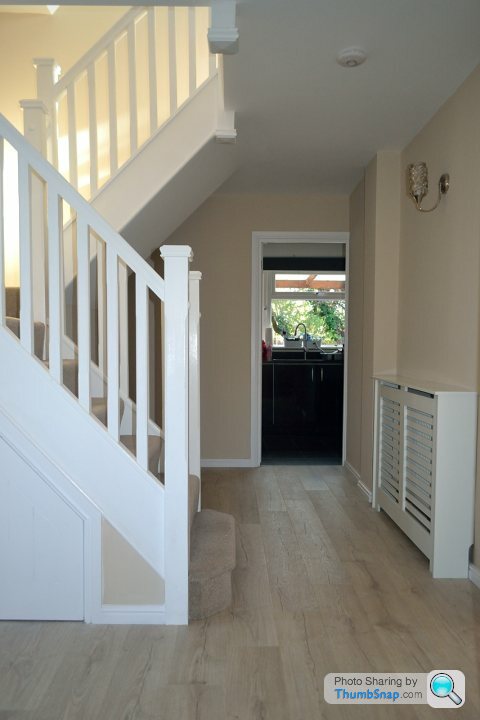


This was a weird room - had an odd staircase with randomly spaced spindles that weren't in any kind of track - First thing we did was rip that out and replaced it - The stairs are dogleg stairs and have an enormous amount of space underneath - However none of it was open apart from a small understairs cupboard so out came the hammer to the plasterboard, and we put in some flush cupboard doors at one end, split the space into 2 and kept the other end open for an indoor dog kennel. Yes, you heard that right. She's got lighting and everything in there.
Here's the actual cupboards:
The start of the dogs house:
Meanwhile, we found that the floor tiles were in fact wall tiles. Horrible brown things, that weren't laid flat (hey, why would they be in this house). So these came up, and out came all the plasterboard bits (the reason why we went so overboard on this place was that the plasterwork was abysmal, and it was good to know what was behind everything. There was also a shortage of electrical sockets everywhere (usually only 1 per room) so we could get all this done at the same time).
Anyway, we ended up with this:
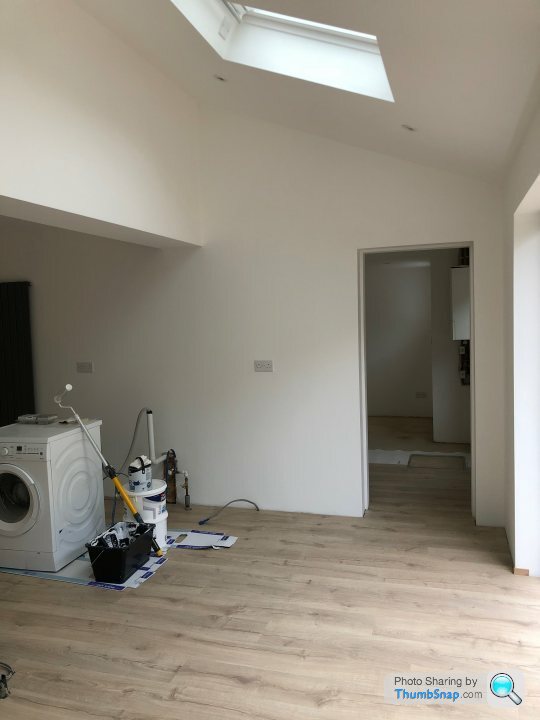
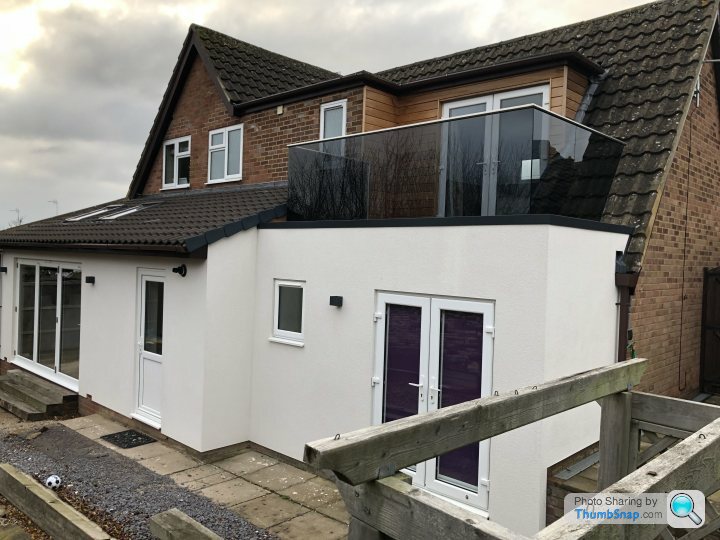
We left the Study alone, but now it was time to tackle the Kitchen / Utility Room - This was the job I was dreading - The utility room was made up of what was once a couple of coal sheds out the back of the house, which a previous owner had built around and integrated to the house as a utility room. VERY badly. It was awful - lots of exposed pipework that didn't go anwhere, freezing cold with single skinned wall in the downstairs toilet, an industrial kitchen unit with stainless steel worktop that was too big for the room so you couldn't open the back door or the toilet door properly. It was embarrassing to let anyone go out there. This had to go - and whilst doing so we wanted to double the size of the kitchen (was previously about 12 metres by 3, so quite long, but narrow - and very black - black units, black worktops, and black wall tiles on the floor! - yep, just like the hallway - awful). As part of this extension we decided to also replace the balcony that the idiot previous owner had built himself out of timber and decking boards. Again, awful.
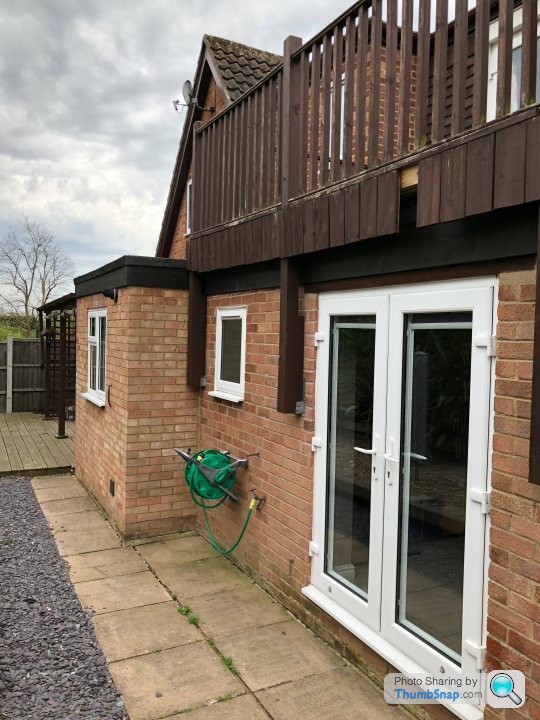
So this is what we started with - The kitchen is on he left, with the utility room being the square block sticking out, then the ridiculous balcony sitting on the flat roof behind it (back of the living room):
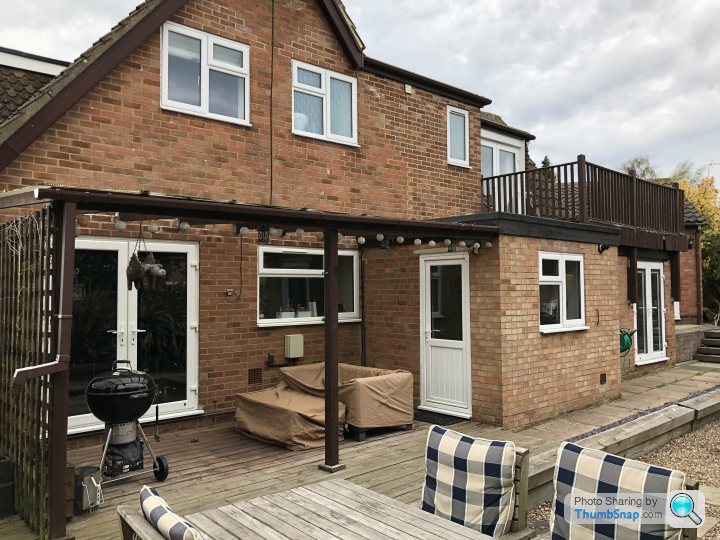
A close up of the lovely balcony - I didn't like to go out on it, it didn't feel safe - it wasn't:
The build started, squaring off the kitchen and joining up the utility room:
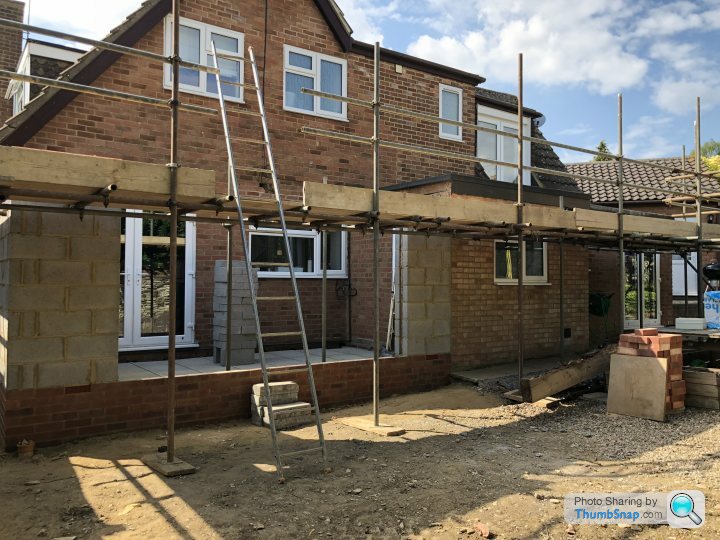
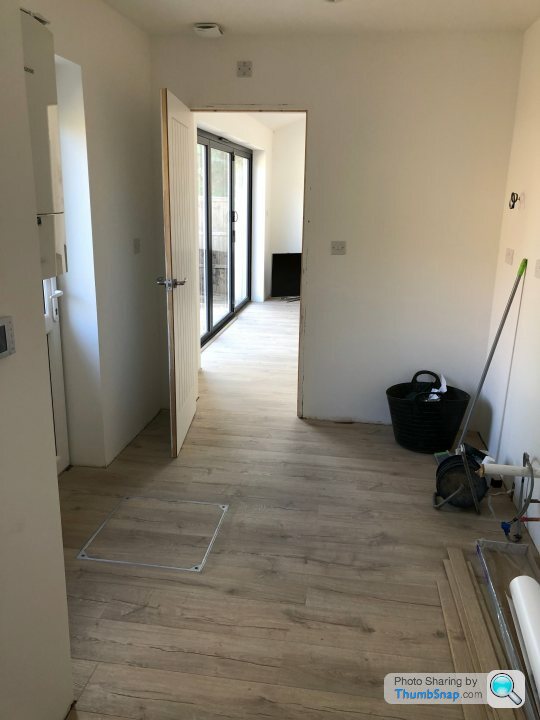
Utility room started to be knocked out - removal of the downstairs toilet, and starting to make good everything that was wrong with it - Quite a lot in the end, The builders found there was water leaking underneath it from the mains, so the concrete slab floor came out and was replaced once the leak was fixed. So glad that was found! There's also an inspection cover in that room for the drains so that had to be raised and have a proper lid put on it (it wasn't practical to move it outside).
Hipped roof going on:
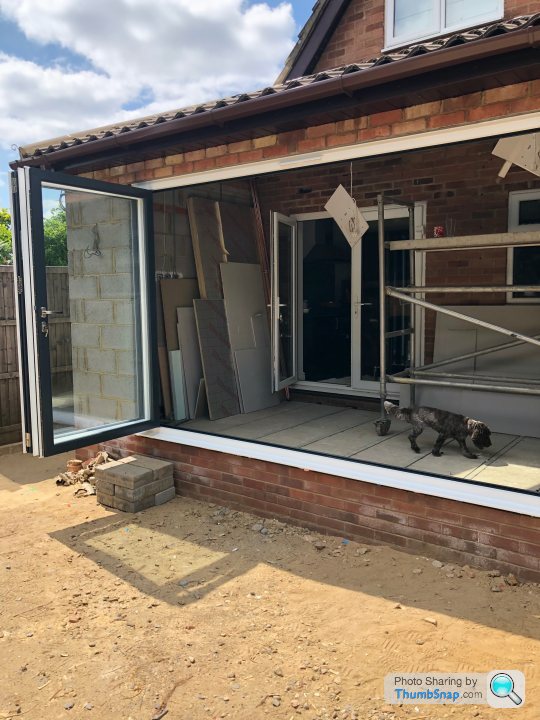
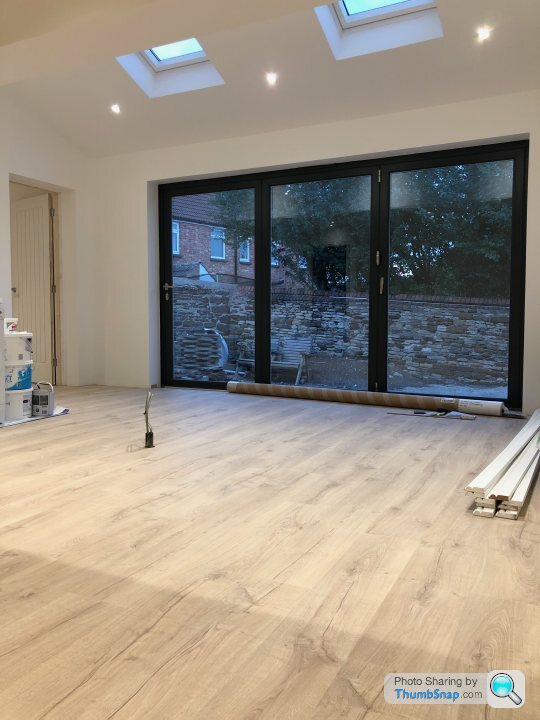
3.5m Schuco bi-folds in - these are white on the outside to match the existing windows, but in a graphite grey colour inside - really pleased with these
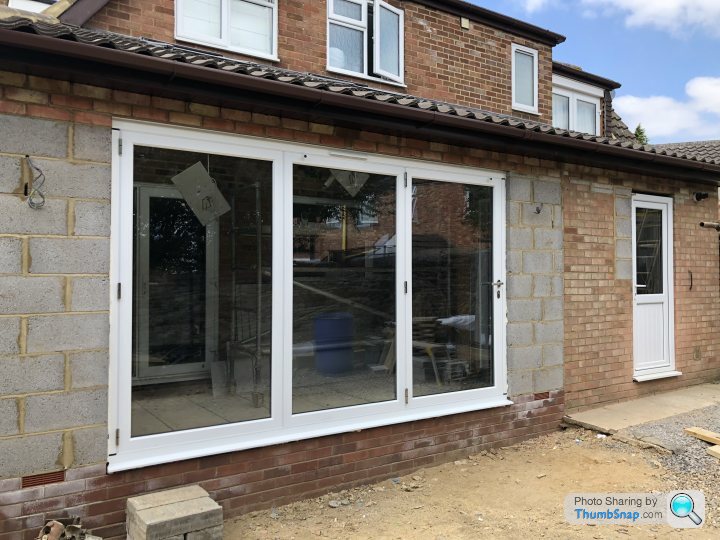
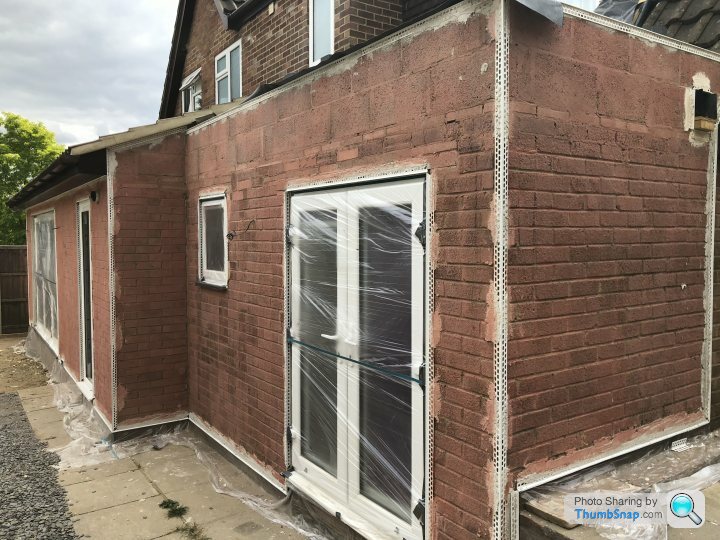
Rather than having a number of different types of brick on the outside (the house has been added to a few times over the years) we decided to render the lower half of the house in Monocouche - here's the walls being prepped:
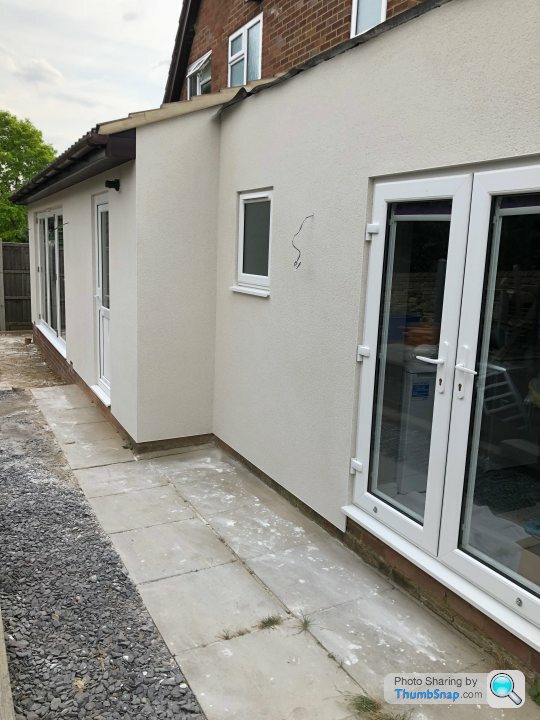
And the finished article - This has made such a difference to the back of the house - would like to do the front in the same, but need funds to replenish after all this work!:
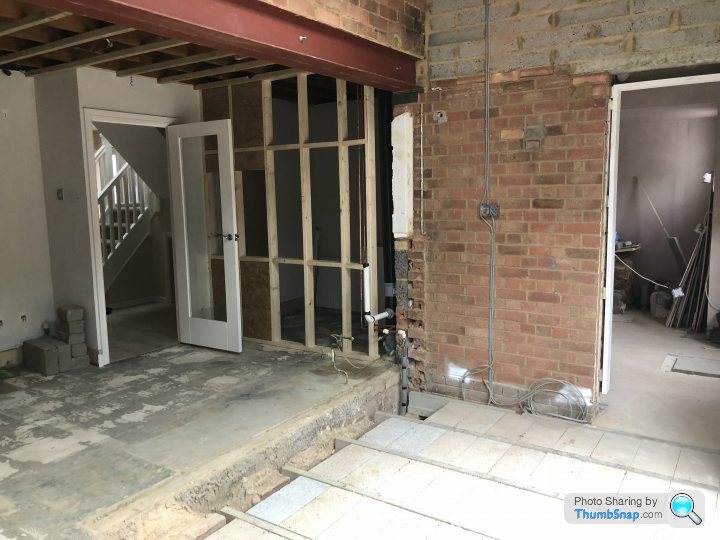
Next came the knock-through of the kitchen - This also gave us the opportunity to put a new downstairs cloakroom in (where the stud is in the pic). This was the end of the kitchen that had the door to enter the old utility room - New entrance to utility room on the right of the pic. It was at this time that the soil pipe was uncovered - and found to have been leaking (which was nice). It was also asbestos, so had that removed and all new pipework put in:
We finally ended up ready to install the kitchen / utility units:
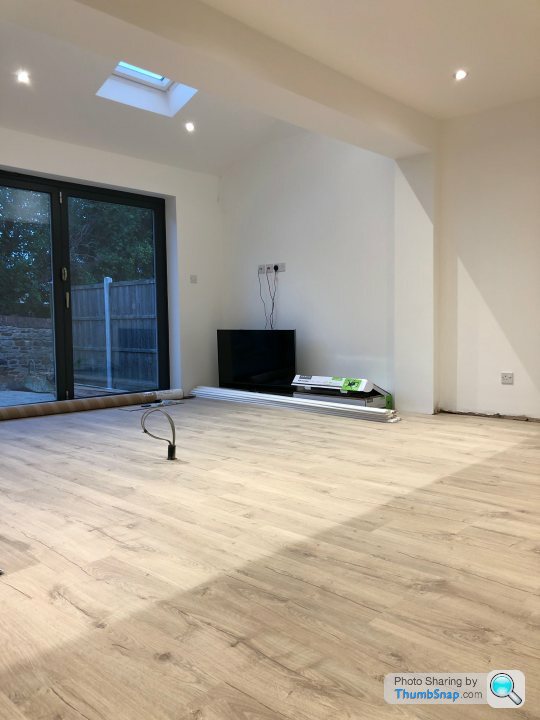
View from end of utility room towards kitchen (SO pleased with how this room turned out, gave us so much more room):
So this is what we started with - The kitchen is on he left, with the utility room being the square block sticking out, then the ridiculous balcony sitting on the flat roof behind it (back of the living room):
A close up of the lovely balcony - I didn't like to go out on it, it didn't feel safe - it wasn't:
The build started, squaring off the kitchen and joining up the utility room:
Utility room started to be knocked out - removal of the downstairs toilet, and starting to make good everything that was wrong with it - Quite a lot in the end, The builders found there was water leaking underneath it from the mains, so the concrete slab floor came out and was replaced once the leak was fixed. So glad that was found! There's also an inspection cover in that room for the drains so that had to be raised and have a proper lid put on it (it wasn't practical to move it outside).
Hipped roof going on:
3.5m Schuco bi-folds in - these are white on the outside to match the existing windows, but in a graphite grey colour inside - really pleased with these
Rather than having a number of different types of brick on the outside (the house has been added to a few times over the years) we decided to render the lower half of the house in Monocouche - here's the walls being prepped:
And the finished article - This has made such a difference to the back of the house - would like to do the front in the same, but need funds to replenish after all this work!:
Next came the knock-through of the kitchen - This also gave us the opportunity to put a new downstairs cloakroom in (where the stud is in the pic). This was the end of the kitchen that had the door to enter the old utility room - New entrance to utility room on the right of the pic. It was at this time that the soil pipe was uncovered - and found to have been leaking (which was nice). It was also asbestos, so had that removed and all new pipework put in:
We finally ended up ready to install the kitchen / utility units:
View from end of utility room towards kitchen (SO pleased with how this room turned out, gave us so much more room):
Edited by Joyrider1 on Sunday 6th October 16:56
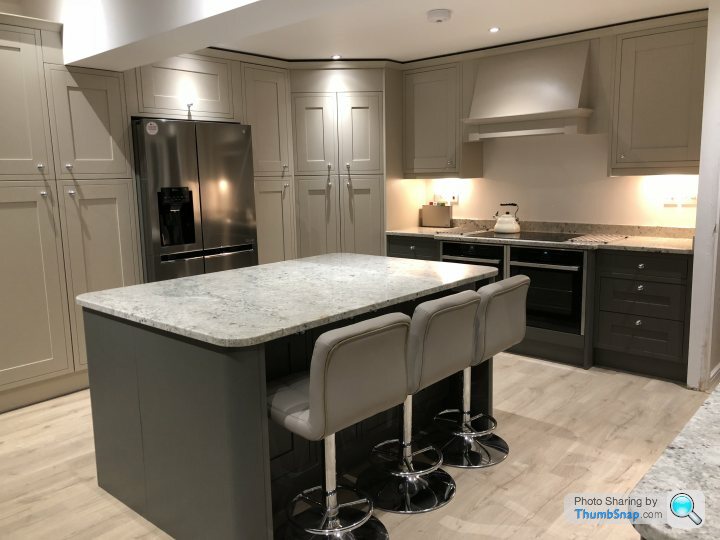
Kitchen / Utility installed - first time I've ever had a brand new kitchen and was great to design it and have it built to our spec - In hindsight I'd have put an overhang on the end of the island to fit another stool or two underneath - oh well):
Utility (dog also seems to have a bed in here too):
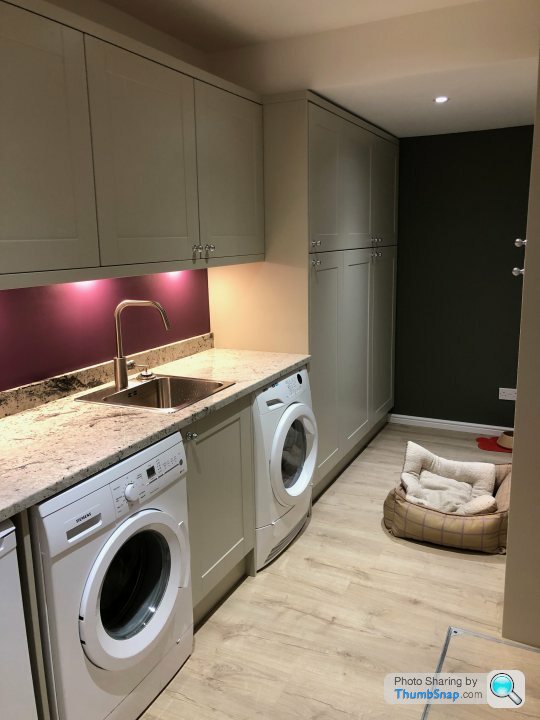
Utility (dog also seems to have a bed in here too):
Edited by Joyrider1 on Sunday 6th October 17:42
Next up was the Balcony:
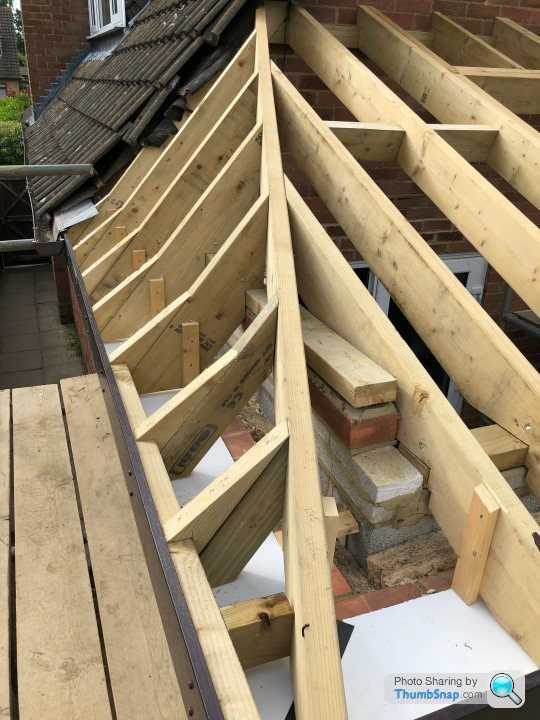
According to the structural engineers we had to increase the size of the joists under the flat roof - We actually had steels put in to support the balcony instead (can't remember why now, but there was a good reason for it, something to do with the existing structure of the house anyway):
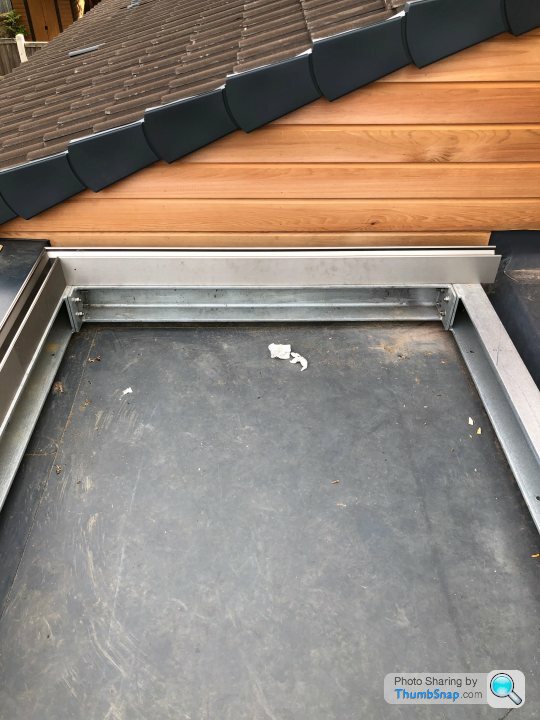
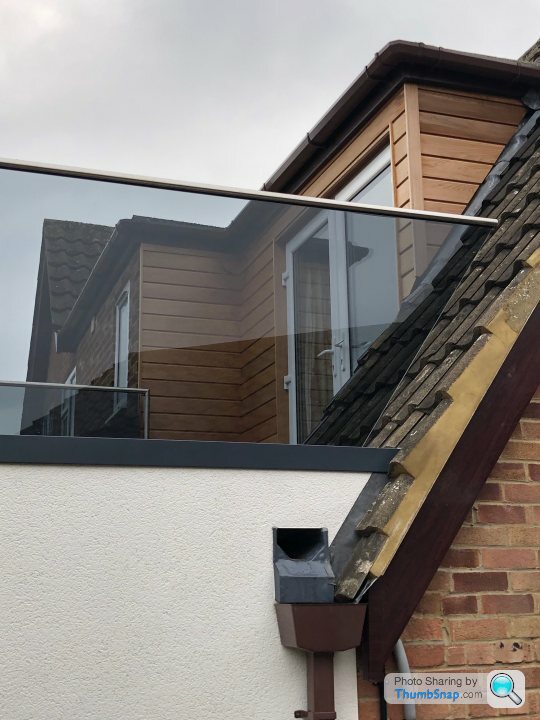
As we are in a dormer chalet style house and are therefore in the roof, part of the roof structure was taking up floorspace that could have been utilised by the balcony - So we had the roof taken away and replaced the horrible 70s concrete tile cladding things with cedar - This made a huge difference and really works well with the rendered walls below. We also used composite decking as the flooring:
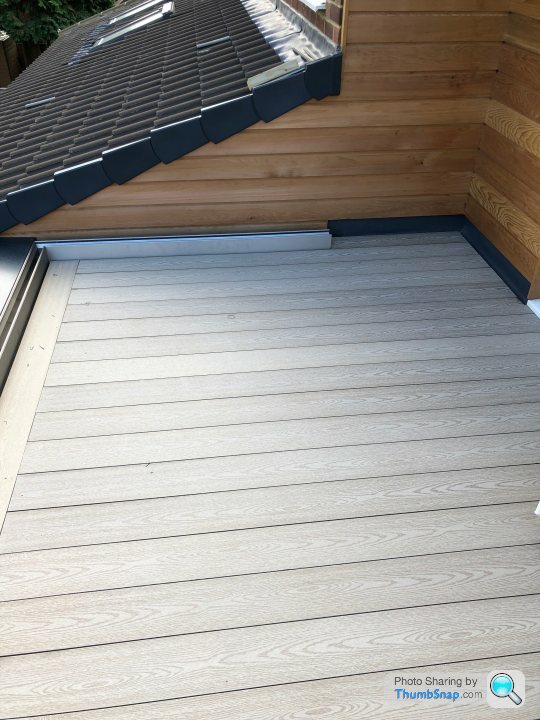
View from the outside (really pleased with how this turned out):
According to the structural engineers we had to increase the size of the joists under the flat roof - We actually had steels put in to support the balcony instead (can't remember why now, but there was a good reason for it, something to do with the existing structure of the house anyway):
As we are in a dormer chalet style house and are therefore in the roof, part of the roof structure was taking up floorspace that could have been utilised by the balcony - So we had the roof taken away and replaced the horrible 70s concrete tile cladding things with cedar - This made a huge difference and really works well with the rendered walls below. We also used composite decking as the flooring:
View from the outside (really pleased with how this turned out):
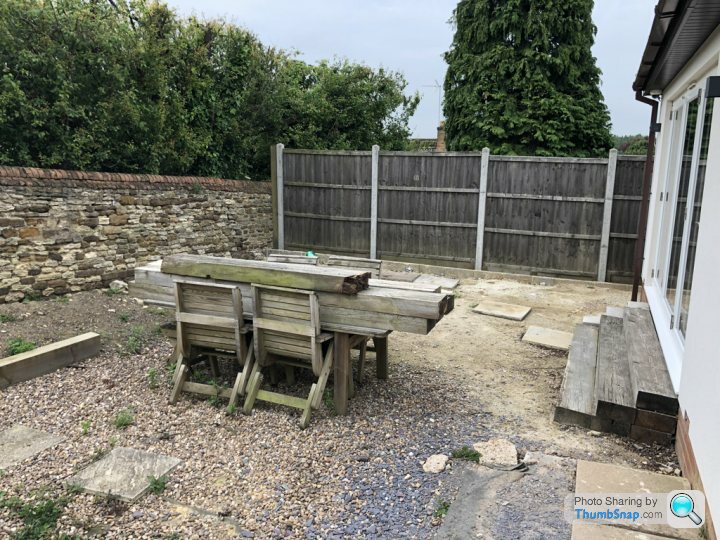
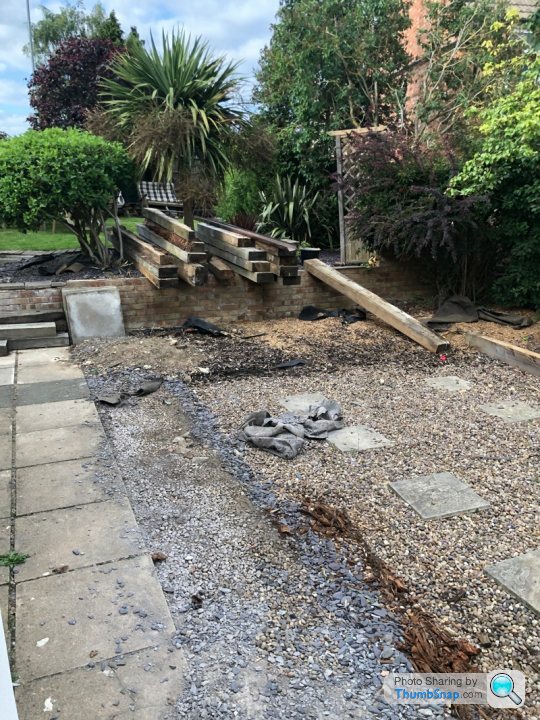
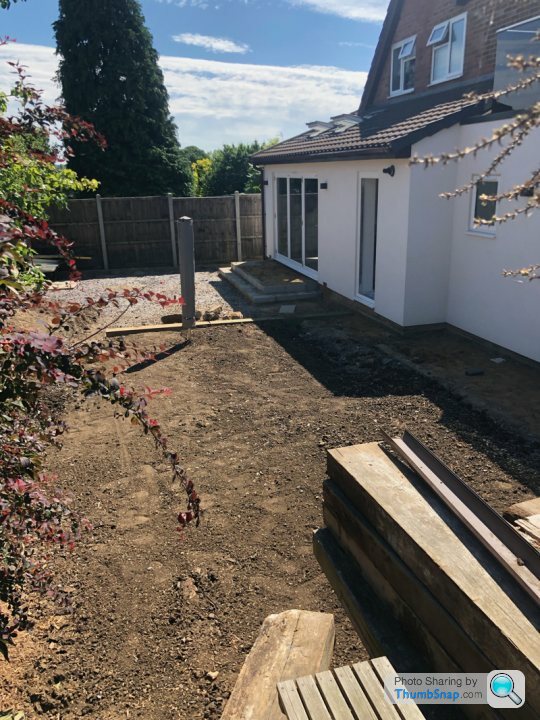
Finally it was time to tackle the garden - the last thing for us to do (fingers crossed). This is a work in progress but is getting there. Here's what we started with once the extension had finished (yes, there's a lot of sleepers in the second pic - we had 24 in total in this garden - some really weird design that previous owners had done which rendered most of the garden unusable:
This is the lower end of the garden, cleared, flattened, and steps built outside of the bi-folds, ready for slabbing:
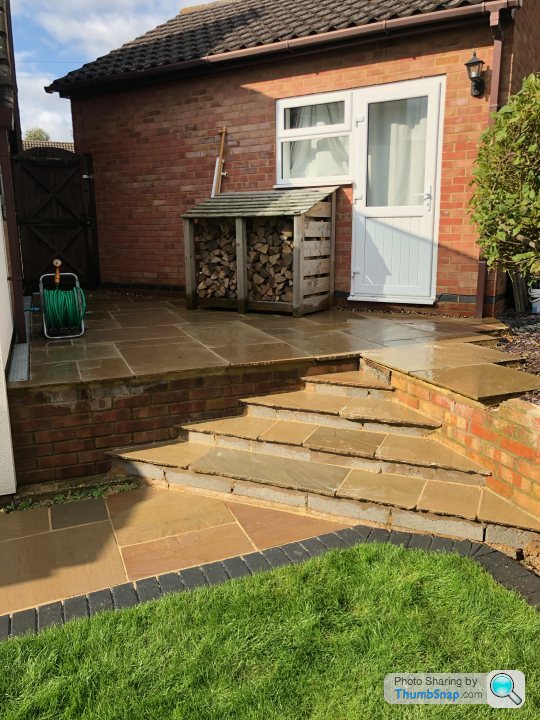
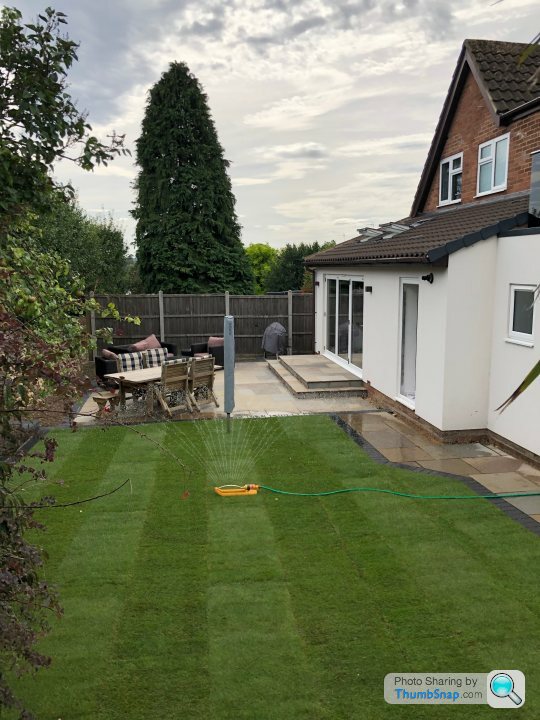
Most of slabs down and turf laid - all of the exposed brickwork around the bottom of the house, in front of all the steps, and along that wall crossing the middle of the garden will be tiled when I get around to it. This should tie it all in together and finish it off. The grouting between the slabs has since been done using a natural EasyJoint type product:
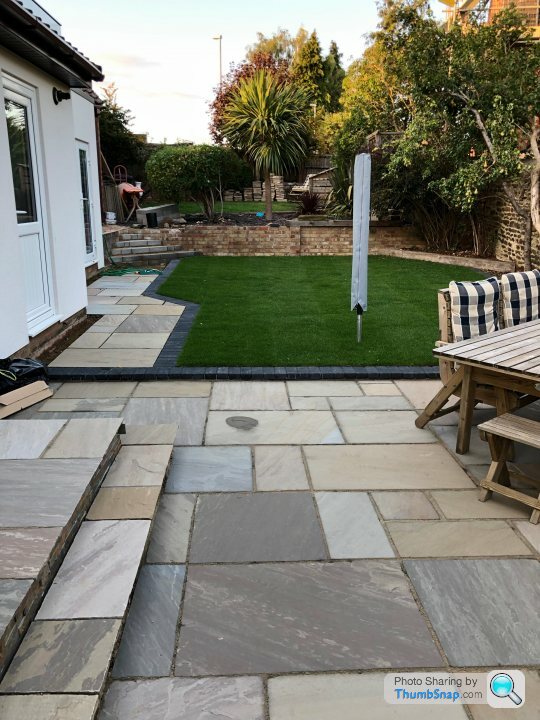
Testing out the lighting:
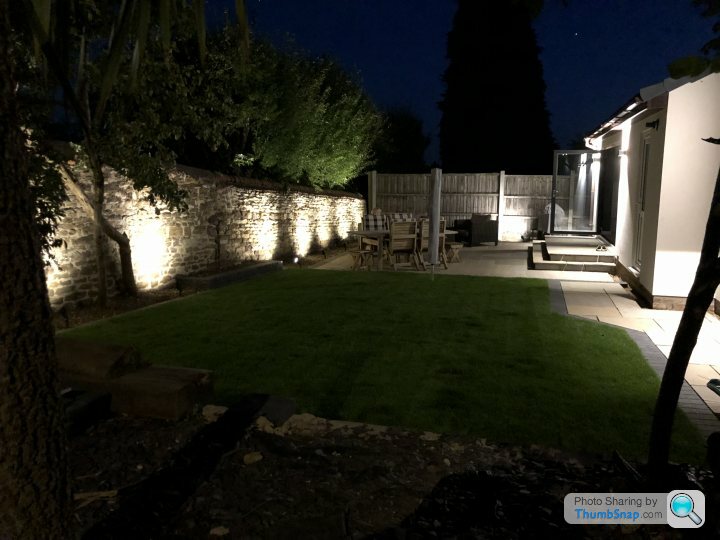
That's about it for now - just need to finish off the tiling, and get the upper part of the garden done, but that can wait until next year now.....
Hope that didn't bore you too much...needless to say this house is 100% better than it was when we bought it - and it's been 7 years in the making overall, doing things when we can, but now we can sit back and enjoy it. It's a far cry from when we started looking at just insulating it, and I was definitely naive in thinking that it only needed decorating when we bought it
This is the lower end of the garden, cleared, flattened, and steps built outside of the bi-folds, ready for slabbing:
Most of slabs down and turf laid - all of the exposed brickwork around the bottom of the house, in front of all the steps, and along that wall crossing the middle of the garden will be tiled when I get around to it. This should tie it all in together and finish it off. The grouting between the slabs has since been done using a natural EasyJoint type product:
Testing out the lighting:
That's about it for now - just need to finish off the tiling, and get the upper part of the garden done, but that can wait until next year now.....
Hope that didn't bore you too much...needless to say this house is 100% better than it was when we bought it - and it's been 7 years in the making overall, doing things when we can, but now we can sit back and enjoy it. It's a far cry from when we started looking at just insulating it, and I was definitely naive in thinking that it only needed decorating when we bought it
Edited by Joyrider1 on Sunday 6th October 17:40
princeperch said:
"pulled this up and found that he'd laid 2 laters of celotex on top of each other then just laid the tongue and groove boards on top. No joists, not attached to anything"
now I like a bodge as much as the next bloke but that really is taking things to the next level. At least you didnt get any drafts under that bit of the floor eh.
That wasn't the best bodge......now I like a bodge as much as the next bloke but that really is taking things to the next level. At least you didnt get any drafts under that bit of the floor eh.
Gassing Station | Homes, Gardens and DIY | Top of Page | What's New | My Stuff