Discussion


I have recently started playing around with wood, and have built a couple of things that I think have turned out OK. I enjoy the design process and figuring out the problems that inevitably arise. However, I am still very much the noob, so I thought I'd ask the PH hive mind - what are your toptips? What are the must have tools? What are the unlikely but ever-so-useful tools? Are there good websites with (very) easy projects?
And of course, any thread is useless without pics, so can we see what you've been building?
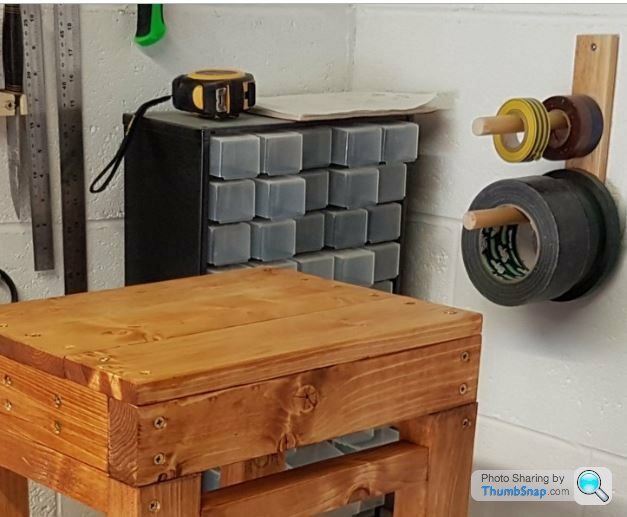
I'll start with my pretty basic but unbelievably sturdy step-stool, so you can all point and laugh.

And of course, any thread is useless without pics, so can we see what you've been building?
I'll start with my pretty basic but unbelievably sturdy step-stool, so you can all point and laugh.
robbieduncan said:
Brave! Posting a picture with your screwdrivers out of order!
They are in order! L-> R we have Philips small and large, then four flatheads in increasing size. Having them all in ascending size would have the large philips in the middle of the flatheads, and that would make my teeth itch!
jas xjr said:
That looks great. Must be very satisfying to make something like that.
I would look at using some plug cutters,at least you can do that retrospectively.
As with most things, practice makes perfect, plus the opportunity to buy more tools
Thank you! Yep, I'm finding it very satisfying, and it's just fun learning something entirely new. So many tools out there that I have no idea what they're for, or how you'd use them. Will look up plug cutters! I would look at using some plug cutters,at least you can do that retrospectively.
As with most things, practice makes perfect, plus the opportunity to buy more tools

A little while ago, elderly neighbour of mine had asked me to fix her bird feeder. I did, but the whole thing was pretty rotten, and it wouldn't last much longer, so I decided to build her a replacement. It would be a more interesting project than the stool, as it had to be effective, but also look good.
I looked a few designs online, and also went to a couple of garden centres to steal ideas.
I saw one arrangement for the stand that looked interesting - and also pretty straightforward to construct, so I 'borrowed' it!
I also invested £7 in a mitre box, made it so much easier!
Anyhows, it turned out like this...

The neighbour was very pleased with it, and a couple of days later put a card through my door, which had in it a £20 book token! There was no need, but it was a nice touch. It seemed only right to get a suitable thing, so I bought the Collins Complete Woodworker's Manual by Jackson and Day, a large tome full of good stuff! I've only dipped into it so far, but have already learnt a whole bunch of useful stuff!
It also gave me ideas for my next project - more on that later!
I looked a few designs online, and also went to a couple of garden centres to steal ideas.
I saw one arrangement for the stand that looked interesting - and also pretty straightforward to construct, so I 'borrowed' it!
I also invested £7 in a mitre box, made it so much easier!
Anyhows, it turned out like this...
The neighbour was very pleased with it, and a couple of days later put a card through my door, which had in it a £20 book token! There was no need, but it was a nice touch. It seemed only right to get a suitable thing, so I bought the Collins Complete Woodworker's Manual by Jackson and Day, a large tome full of good stuff! I've only dipped into it so far, but have already learnt a whole bunch of useful stuff!
It also gave me ideas for my next project - more on that later!
Cheers for all the replies about useful tools, I've been having a huge amount of fun researching and working out what bits would be most useful - as uncinqsix says I'll be trying to add just what tools I need for each project.
And so, the current project. I've (far too) many books at home, and was using standard sized, cheap-but-decent bookcases from Argos. I decided that a custom built one would fit the available space better, plus have more room on its shelves. It would also be a relatively straighforward project, albeit the largest , by some considerable margin. I wanted it to be a proper job as well, not just bodged together like my step-stool at the start of the thread, so maybe it was time to go shopping for tools..
First off, I needed to get smooth and accurate 90^ cuts, so I invested in this Sliding mitre saw, which I see has just increased in price by £20 since I bought mine! I love the thing, it makes quick, accurate and smooth cuts, and is very easy to use. A future project will be to build a stand for it.
In all previous projects I'd just used screwed together butt joints, but here I needed something a tad better, and decided to use what I later discovered were called housing joints. At first I thought I could carve the trenches using the mitre saw, but the depth of cut was pretty uneven. So I started looking at routers. Looking on Amazon they seem to start at £55 or so, for brands that I've never heard of. But then I found this Bosch at a great price! After a little bit of practice I was able to make really nice clean trenches for the shelves to sit in.
Whoever mentioned pocket hole jigs, (which I had to look up as I'd never heard of them) thank you! Brilliant little device, really easy to use, and exactly what I needed for much better looking joints! Kreg Pocket Hole Jig
Other stuff I've been finding useful - clamps! Don't know how I managed before, they make it so much easier!
Anyhows, this is how it is this morning, I just need some ply to form the back and job's a good'un!
SeeFive, you're not wrong about it being addictive and rewarding! All the time spent in the workshop just feels so 'right'. Pottering away with the tunes going, designing, solving problems, creating. It's just great!
And I've already had my first build request - a friend wants me to make her a coffee table.
And I've already had my first build request - a friend wants me to make her a coffee table.
LtD , that's bloomin' lovely, your boys must be chuffed! Actually, you must be pretty chuffed as well! And thank you for sharing; I want this thread to be for everyone to show what they're up to to give inspiration to others!
How did you make the panels for the cupboards and the desktop? I've heard you can use biscuits to do this, and that that method produces a pretty strong union. I'm sure there are numerous other ways to do it though!
How did you make the panels for the cupboards and the desktop? I've heard you can use biscuits to do this, and that that method produces a pretty strong union. I'm sure there are numerous other ways to do it though!
Loving that space PR! I'll post up some pics of my (tiny) workspace in a bit; but first - my first large project is finished!!!! 

I'm super chuffed with how it's come out, I am really happy! Just this one project has taught me a huge amount. Probably my biggest lesson though is don't rush. Chill out and enjoy the process, it's easier to take a little bit off than put a little bit back on!!


I'm super chuffed with how it's come out, I am really happy! Just this one project has taught me a huge amount. Probably my biggest lesson though is don't rush. Chill out and enjoy the process, it's easier to take a little bit off than put a little bit back on!!
Cheers PR!
Now this has evolved into a 'show-us-your-shops' as well as 'show-us-your-projects' thread, well, it'd be rude not to!
I bought my place just over 2 years ago, and one of the big selling points was the garage and workshop. Very rare to have such facilities in my price bracket, it was virtually a no-brainer to buy it. This is what it looked like when I first saw it...

It turned out that my car didn't actually fit in it though...
So, the wall came down and the paint came out..


To quote Steve Guttenburg in the film Police Academy - "It fits, damn thing fits!"
Roll on two years, and the clutter is accumulating!

It's not a massive space, 2.8m by 2.8m, but it's enough. Does mean good organisation is needed though!

The biggest improvements were the white paint and the LED battens, which turned it from a dungeon to a bright space. Other mod-cons include Wi-Fi! The TP-Link powerline somehow manages to connect with the ones in the house, which means I can run an Amazon Echo plugged into the stereo and stream from Spotify.

I am not by nature the most organised of people, but I find in the shop that everything has its proper place and I always know where everything is. Decent storage space and a label machine help though!
With the house not having a huge amount of storage space, one of my first projects was to gain more. The old workshop room had a ceiling, so I extended from that and built a ladder for easy access. It's only 2 or 3 extra square meters of space, but it makes a big difference..


I love how the place is constantly evolving as I find different uses for it..
Now this has evolved into a 'show-us-your-shops' as well as 'show-us-your-projects' thread, well, it'd be rude not to!
I bought my place just over 2 years ago, and one of the big selling points was the garage and workshop. Very rare to have such facilities in my price bracket, it was virtually a no-brainer to buy it. This is what it looked like when I first saw it...
It turned out that my car didn't actually fit in it though...
So, the wall came down and the paint came out..
To quote Steve Guttenburg in the film Police Academy - "It fits, damn thing fits!"
Roll on two years, and the clutter is accumulating!
It's not a massive space, 2.8m by 2.8m, but it's enough. Does mean good organisation is needed though!
The biggest improvements were the white paint and the LED battens, which turned it from a dungeon to a bright space. Other mod-cons include Wi-Fi! The TP-Link powerline somehow manages to connect with the ones in the house, which means I can run an Amazon Echo plugged into the stereo and stream from Spotify.
I am not by nature the most organised of people, but I find in the shop that everything has its proper place and I always know where everything is. Decent storage space and a label machine help though!
With the house not having a huge amount of storage space, one of my first projects was to gain more. The old workshop room had a ceiling, so I extended from that and built a ladder for easy access. It's only 2 or 3 extra square meters of space, but it makes a big difference..
I love how the place is constantly evolving as I find different uses for it..
mgtony said:

I turn all empty draws upside down so I don't waste time ratching through them. In fact, only a couple of draws in that one have anything in, I should really stick it in the loft out of the way...
paulrockliffe said:
That looks good. I was going to point out that if you'd gone against wisdom and done your pocket screws on the outside in the corner they wouldn't be seen, but then I saw they're covered by the DVDs anyway.
Thank you! On the first iteration of this (which I buggered up..) I had the pockets holes on the outside, and I didn't like the way it looked. Fortunately I had to redo the side panels after making a bloody stupid elementary measurement mistake, so I could hide them on the inside. paulrockliffe said:
If you wall-mount your shelves, put them up high and hang a small ladder off the end you'll get some bonus space underneath.
You know, I would have never considered doing that. Good idea, ta! 
Mark Benson said:
Those tables are lovely Mark. Great workshop as well! 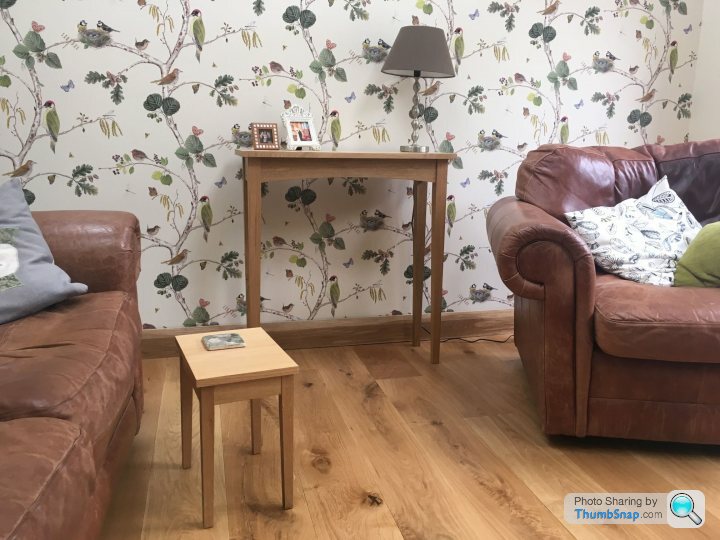
geeks said:
We have the same chopsaw! Excellent bit of kit for the money, nice purchase!
I am super chuffed with it. It works really well, and feels like a tool worth three times the price!Edited by Schmeeky on Tuesday 11th June 14:09
Just made what I feel is a big step in this new hobby - I've just constructed my first wood only, no screws joint! 
I know that's small beer tomost of all of you folk, but I'm just chuffed that it all lines up and I still have all my fingers!


I used a biscuit cutter on my router, which made it quite difficult to see exactly where I was cutting. Any tips to help with this?
I know that's small beer to
I used a biscuit cutter on my router, which made it quite difficult to see exactly where I was cutting. Any tips to help with this?
Great stories!
My own little project, learn-to-build-a-coffee-table-without-using-screws is coming on well, I'm learning stuff every single step of the way.

Things wot I have learnt -
Clamps. Clamps are the most useful things to have about, they're like have 3 more sets of arms!
Wood glue. Creates an impressively strong bond. And is great fun peeling it off your hands after!
Biscuits. Makes a quite straightforward but strong joint.
My own little project, learn-to-build-a-coffee-table-without-using-screws is coming on well, I'm learning stuff every single step of the way.
Things wot I have learnt -
Clamps. Clamps are the most useful things to have about, they're like have 3 more sets of arms!
Wood glue. Creates an impressively strong bond. And is great fun peeling it off your hands after!
Biscuits. Makes a quite straightforward but strong joint.
First off, thank you for all this advice. It's much appreciated!
I didn't know endgrain-to-endgrain gave a weak joint - that's something new learned!
paulrockliffe said:
Looks good, how have you joined your mitres? If you've not used biscuits I'd think they'll open up over time because you've fixed end-grain to end-grain which is a very weak glue-only join.
I did use biscuits, I got a biscuit cutter for my router, and am trying to use it for as many things as possible!! I didn't know endgrain-to-endgrain gave a weak joint - that's something new learned!paulrockliffe said:
The difficult bit with a mitred frame like that is that for all the joints to close perfectly they need to be all exactly 45 degrees and all the pairs exactly the same length too. You should watch some Youtube vidoes on shooting boards for mitres, it's not difficult to make one and it's generally worth making the effort to finish the mitres off that way.
Yup, I found this, my joints aren't perfect. They do feel strong though. But I agree would be much better if closed. Will follow your advice and have a You Tube session!paulrockliffe said:
The main issue I'd expect with your design is with wood movement in the top, you should have a google of Breadboard ends, how they work and why and you'll understand what I mean. If your mitres are strong enough then the wood can move without cracking the mitres, but not if you then fill the hole with boards with no scope for movement.
This is fascinating - movement of wood was something I'd never even considered!! I've had a quick google, and yikes! I really don't think I have the skills yet to do mortices or dovetails. But T&G I could maybe achieve.. paulrockliffe said:
I'm not saying this to be critical, because what you've done looks really good, but because you clearly want to learn and I think these are good pointers for things you'll benefit from learning about.
All your help is very much appreciated, and I'll take any amount of criticism! One thing I've found, every thing I learn shows me just how much more there is to learn. I am very much enjoying myself though, it's been a while since I've thrown myself into something totally new! The Moose said:
OP: great thread!
I've learnt so much from all the good folk on this here thread already, and the desire to improve and make better stuff is inspired by all these talented guys making beautiful benches, cunning cat-storage systems, and wonderful wood storage houses!
My playing in the workshop is going to take a back seat for a little bit - after being out of work for a little while, I start an exciting new job tomorrow!
A little advice needed here....
A while ago while my mother was cleaning her oven shelves she managed to get some of the caustic stuff on her oak kitchen doors. It had done quite a bit of damage before she noticed it.
My MO to fix it was to dremel out the dead sections of wood, then fill with a paste made of oak sawdust and wood glue. I'd seen this done on The Repair Shop, so hoped it would work...
However, when I turned up this morning it looked terrible, the infilled sections way way darker than I was hoping....
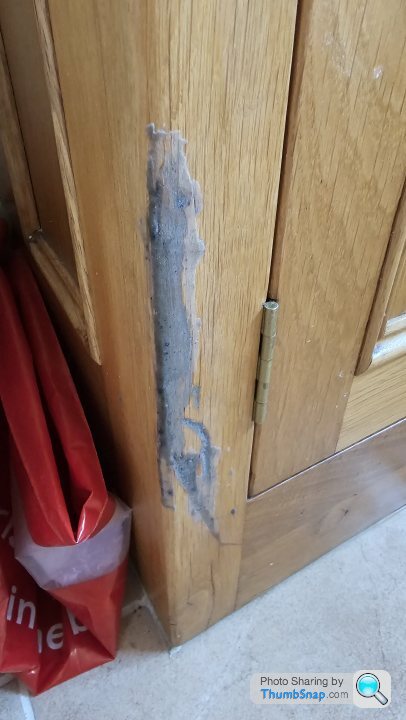
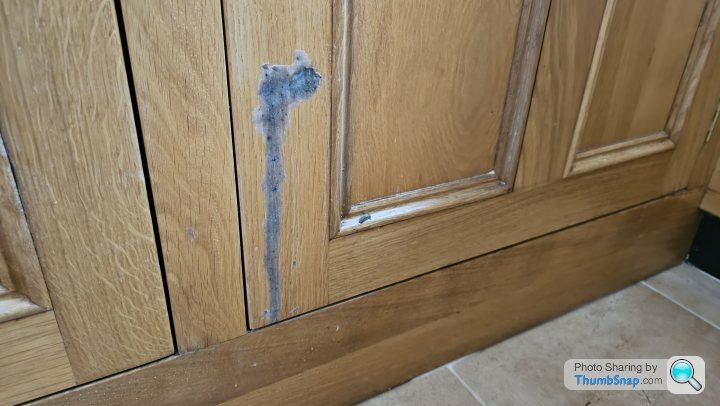
What can I do to turn this around, short of cutting out and replacing sections, which is many levels above any woodworking skills I may or may not have!
A while ago while my mother was cleaning her oven shelves she managed to get some of the caustic stuff on her oak kitchen doors. It had done quite a bit of damage before she noticed it.
My MO to fix it was to dremel out the dead sections of wood, then fill with a paste made of oak sawdust and wood glue. I'd seen this done on The Repair Shop, so hoped it would work...
However, when I turned up this morning it looked terrible, the infilled sections way way darker than I was hoping....
What can I do to turn this around, short of cutting out and replacing sections, which is many levels above any woodworking skills I may or may not have!
Gassing Station | Homes, Gardens and DIY | Top of Page | What's New | My Stuff