DIY 10” Dobsonian Mount
Discussion


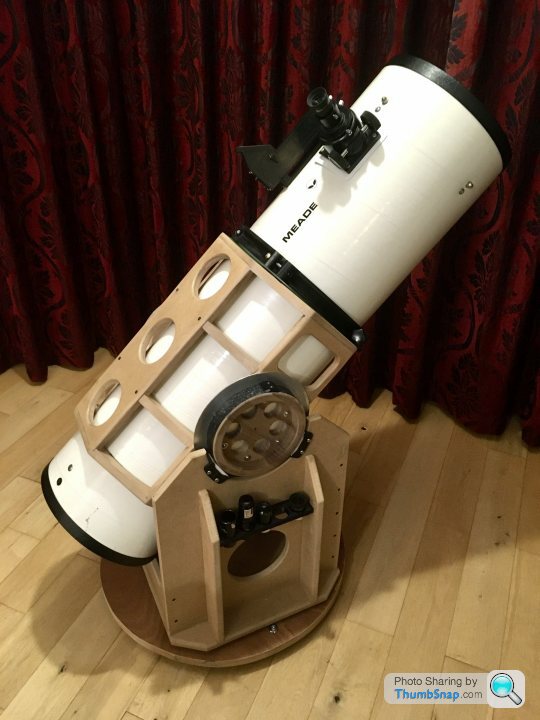
I bought a Meade 10” Starfinder second hand back in 1997, but never really used it because of the hopeless equatorial mount which vibrated at the slightest touch, and had huge stiction issues. It didn’t even track properly. I therefore decided to take the plunge and design and make a Dobsonian Mount.
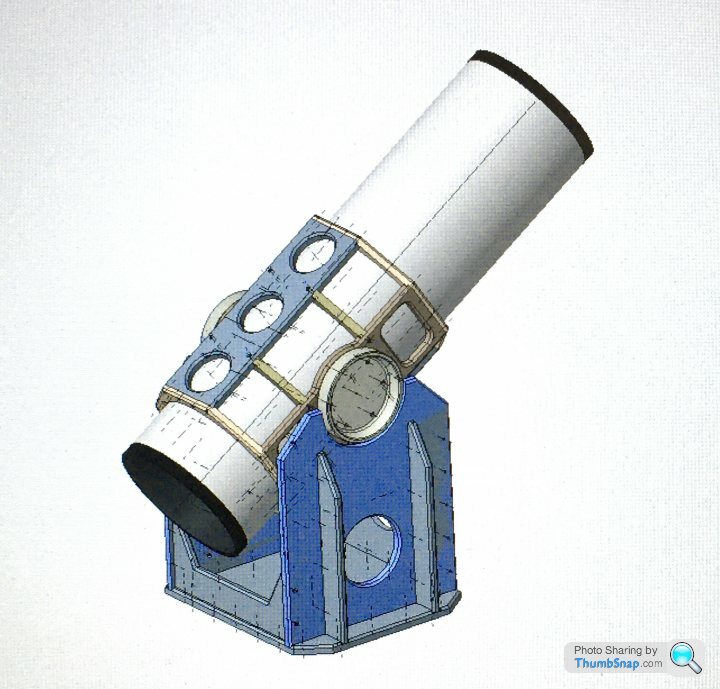
Started by reading a few astronomy websites and gathering some info. Then got a spec together and fired up the CAD:
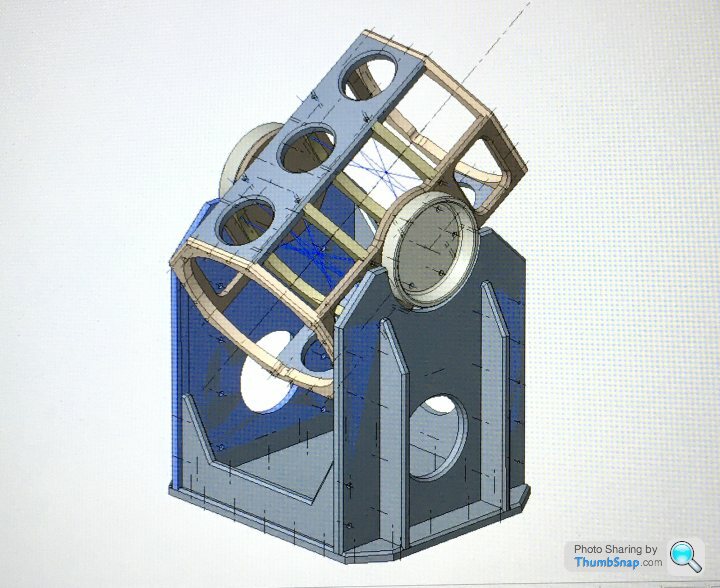
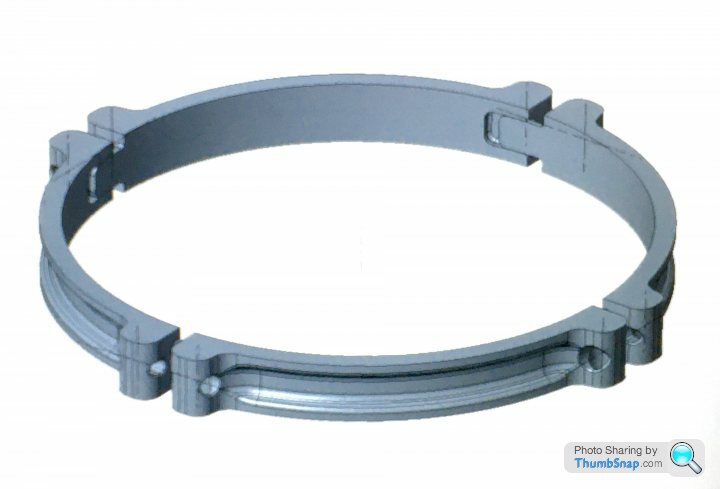
One of the biggest problems was getting or making an inexpensive large diameter tube clamp, that stops the OTA falling through the cage, and allows balance point adjustment. Between starting the design and actually making it, I’d got an FDM 3D printer, so it was a very easy task to design and print one, incorporating some standard parts off Amazon. I had to make it in four identical quadrants due to printer bed size:
A friend has a home made CNC router, so I exported the CAD to 2D, and he cut all the parts from MDF:
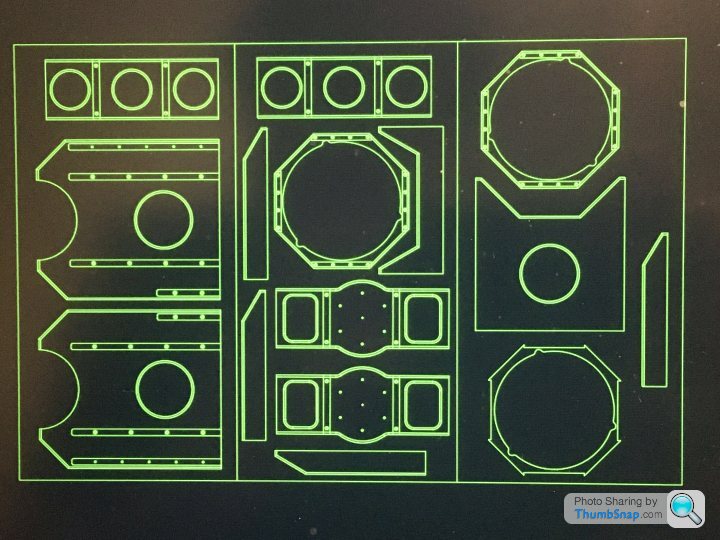
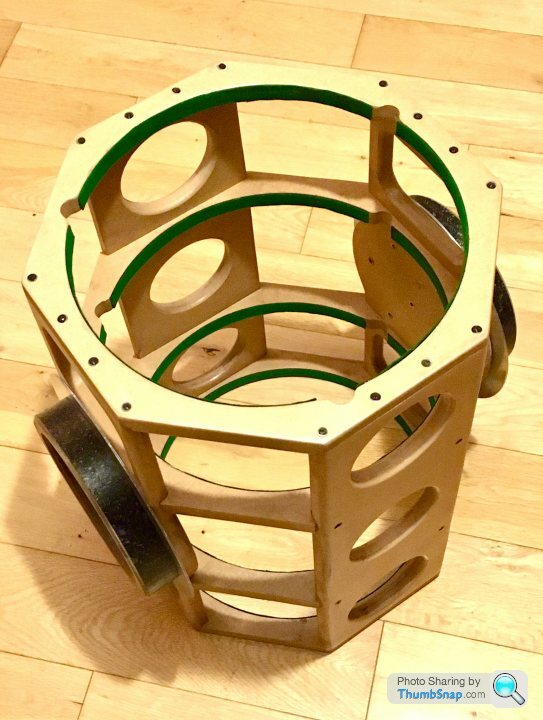
I designed it to be self-jigging, and it all slotted together with a bit of sanding and some wood glue and screws. I then sprayed it with three coats of exterior satin varnish.
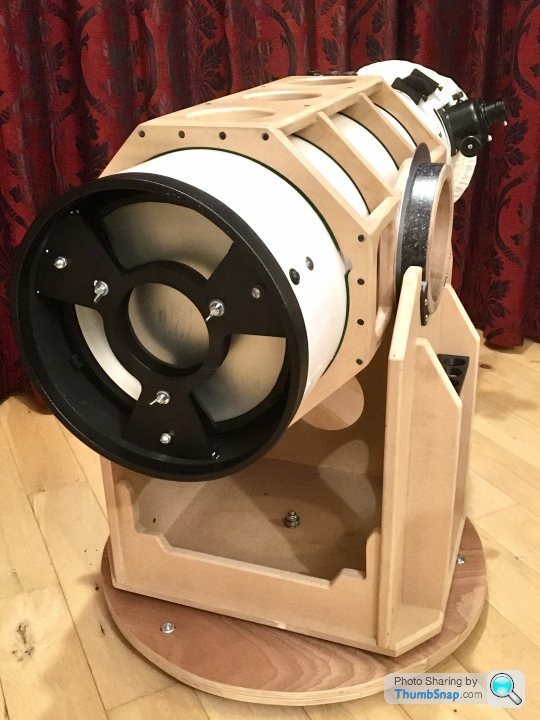
I lined the cage with some old snooker table baize to make the action of turning the tube nice and smooth. I’ve since added a ring of baize to the face of the cage for the printed tube ring to seat on:
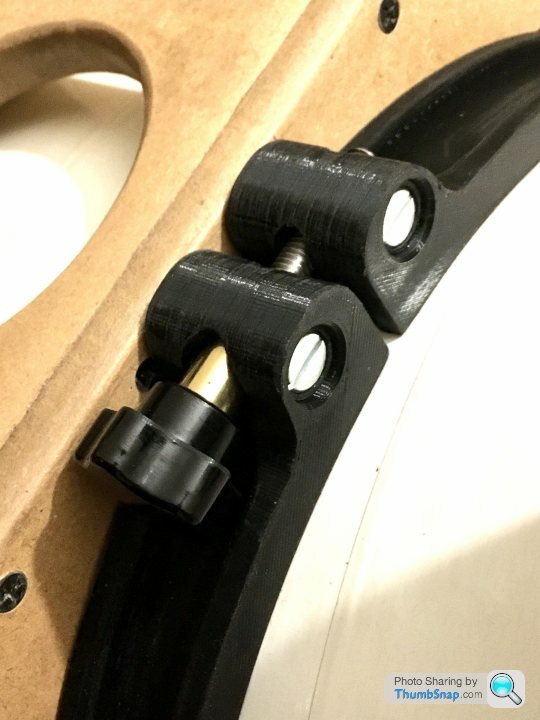
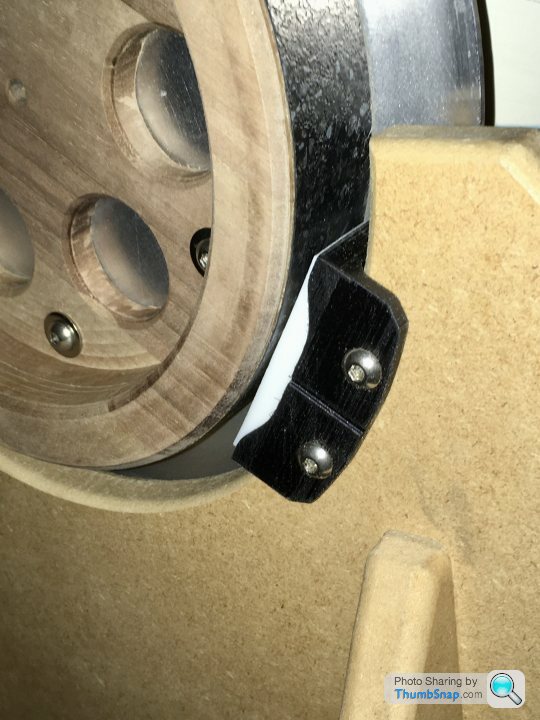
He also routed the other problem items - the elevation trunnions - from hardwood blocks. They just needed a final flick on the lathe to ensure they were true, then I glued textured Formica edging around them to reduce stiction. I also printed some retainers to go over the ends of the edging to prevent it ever springing off. The Formica runs on machined Teflon blocks mounted in printed retainers:
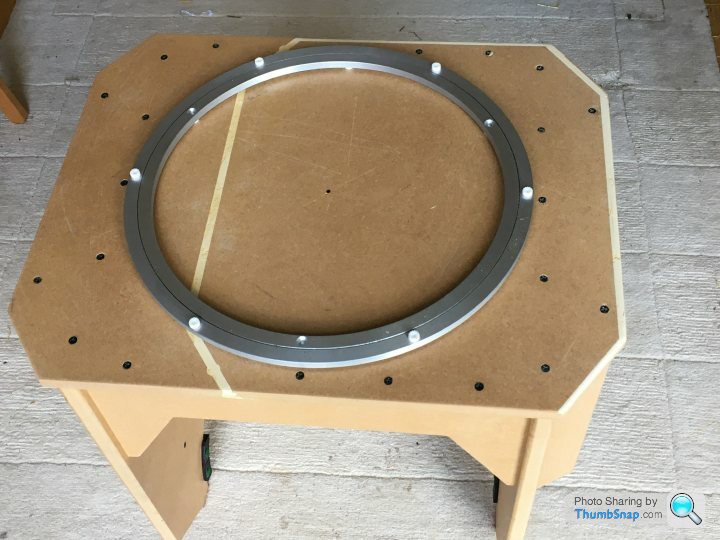
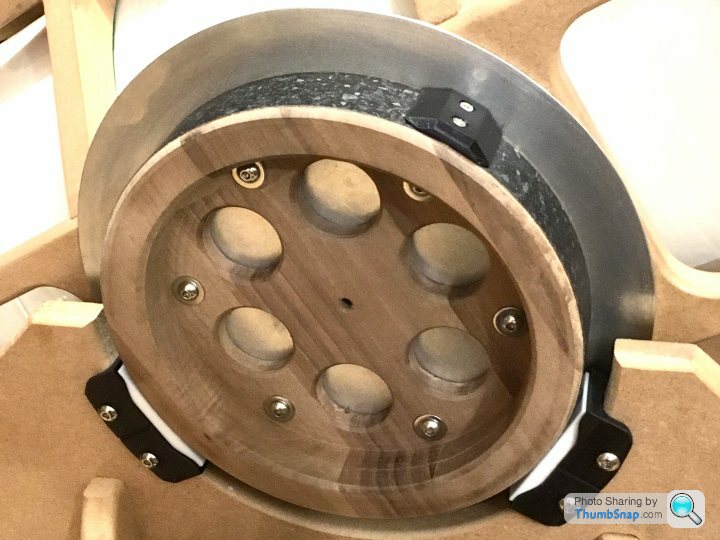
Used a cheap ball-raced lazy Susan slew bearing for azimuth:
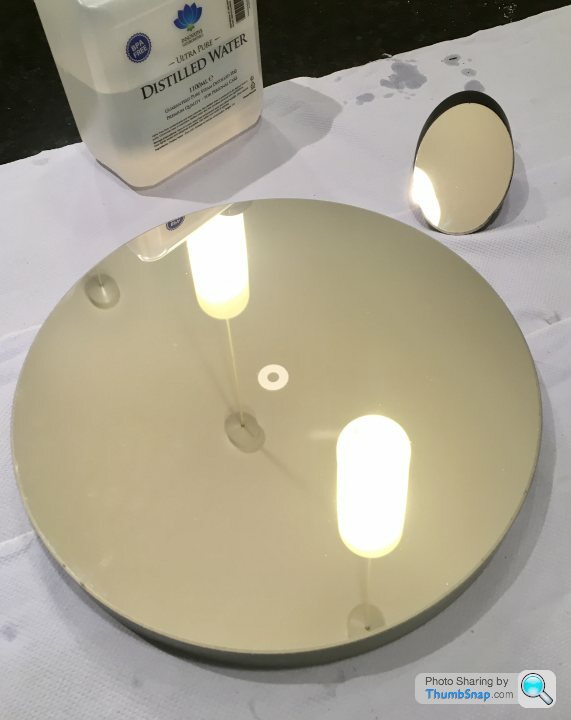
Then I washed the mirrors, which were a bit grubby. Rinsed with distilled water, they look a lot better:

Id previously painted the inside of the tube matt black, and also fitted a much better quality focusser to replace the rather sketchy plastic original:

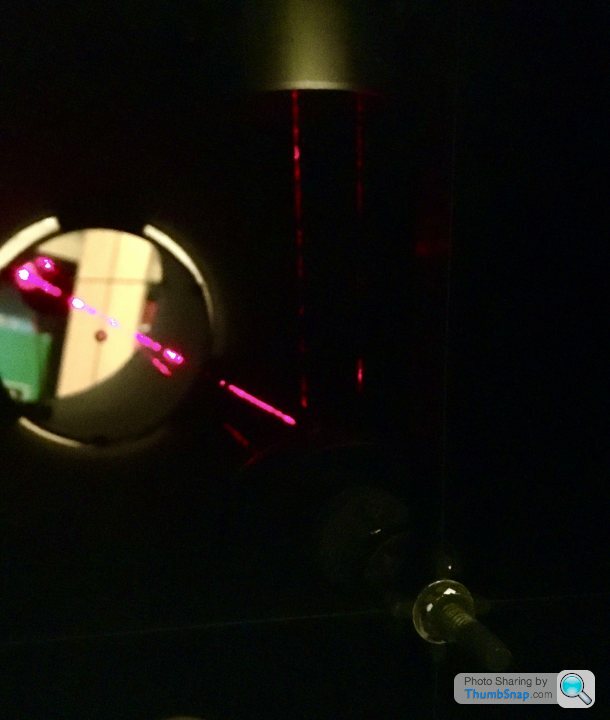
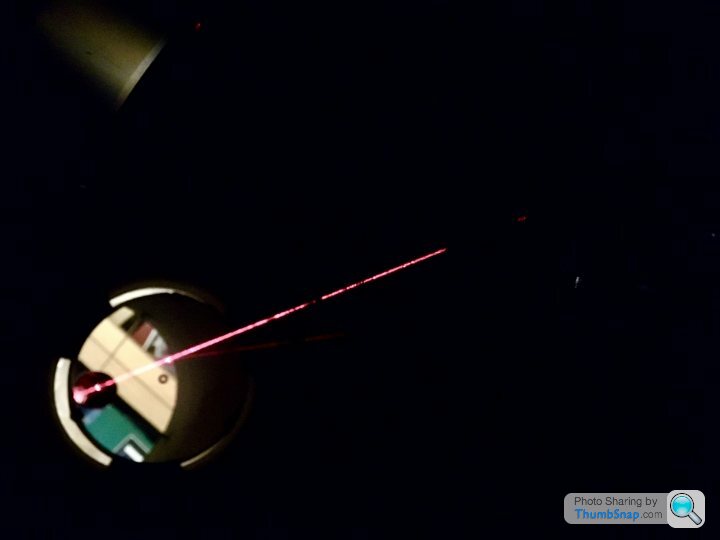
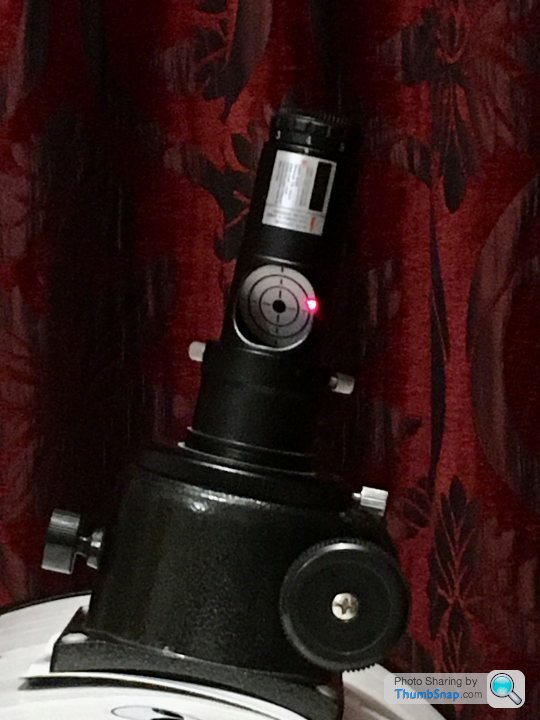
I got a laser collimator, which was good fun to use, especially when I put a snuffed candle in the tube to generate some smoke. Kids loved turning the adjusters and watching the beam move about until it was bang on:
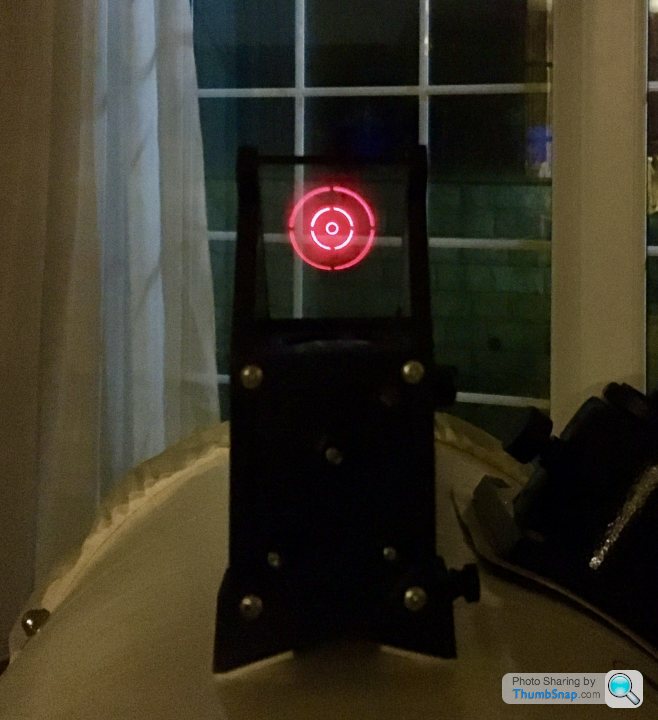
The Telrad still worked on its existing battery after at least 15 years in storage. I did treat it to a new one though:
Made a base from two 12mm ply sheets glued and screwed together. I would have used 1” ply, but couldn’t source any locally, and didn’t want to travel without good reason, so I made do with what I could carry within walking distance of home. Then put three adjustable feet on it from Amazon, and secured it to the lower mount with an M10 stud, thrust bearing and nylon nut.
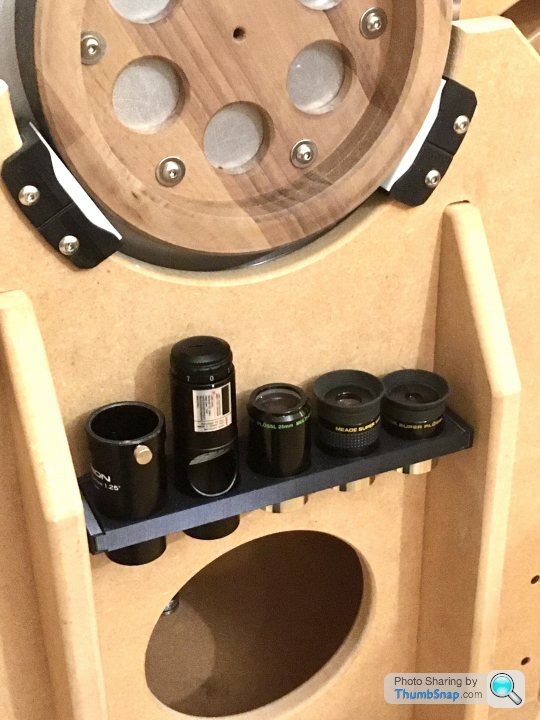
Printed a quick eyepiece rack, and that’s it:
So every year for about the past 5 years I’ve been saying “I’ll get this done for February and get some use out of it in the clear winter nights” At last it’s done, now for the clear night...
Ultimate goal is astrophotography, so the current w.i.p. Is a motorised equatorial wedge table. Should get about an hour of tracking out of it.
Started by reading a few astronomy websites and gathering some info. Then got a spec together and fired up the CAD:
One of the biggest problems was getting or making an inexpensive large diameter tube clamp, that stops the OTA falling through the cage, and allows balance point adjustment. Between starting the design and actually making it, I’d got an FDM 3D printer, so it was a very easy task to design and print one, incorporating some standard parts off Amazon. I had to make it in four identical quadrants due to printer bed size:
A friend has a home made CNC router, so I exported the CAD to 2D, and he cut all the parts from MDF:
I designed it to be self-jigging, and it all slotted together with a bit of sanding and some wood glue and screws. I then sprayed it with three coats of exterior satin varnish.
I lined the cage with some old snooker table baize to make the action of turning the tube nice and smooth. I’ve since added a ring of baize to the face of the cage for the printed tube ring to seat on:
He also routed the other problem items - the elevation trunnions - from hardwood blocks. They just needed a final flick on the lathe to ensure they were true, then I glued textured Formica edging around them to reduce stiction. I also printed some retainers to go over the ends of the edging to prevent it ever springing off. The Formica runs on machined Teflon blocks mounted in printed retainers:
Used a cheap ball-raced lazy Susan slew bearing for azimuth:
Then I washed the mirrors, which were a bit grubby. Rinsed with distilled water, they look a lot better:
Id previously painted the inside of the tube matt black, and also fitted a much better quality focusser to replace the rather sketchy plastic original:
I got a laser collimator, which was good fun to use, especially when I put a snuffed candle in the tube to generate some smoke. Kids loved turning the adjusters and watching the beam move about until it was bang on:
The Telrad still worked on its existing battery after at least 15 years in storage. I did treat it to a new one though:
Made a base from two 12mm ply sheets glued and screwed together. I would have used 1” ply, but couldn’t source any locally, and didn’t want to travel without good reason, so I made do with what I could carry within walking distance of home. Then put three adjustable feet on it from Amazon, and secured it to the lower mount with an M10 stud, thrust bearing and nylon nut.
Printed a quick eyepiece rack, and that’s it:
So every year for about the past 5 years I’ve been saying “I’ll get this done for February and get some use out of it in the clear winter nights” At last it’s done, now for the clear night...
Ultimate goal is astrophotography, so the current w.i.p. Is a motorised equatorial wedge table. Should get about an hour of tracking out of it.
Edited by dr_gn on Sunday 31st January 00:37
blinkythefish said:
This is excellent.
My wife wanted a 'scope for Christmas and insisted on an equatorial mount, despite not wanting to do any photography. Nothing I could say would persuade otherwise.
I think you have just inspired me to try building an additional Dobsonian Mount and thus providing the best of both worlds.
Thanks. They're pretty simple once you know where to get the right bits.My wife wanted a 'scope for Christmas and insisted on an equatorial mount, despite not wanting to do any photography. Nothing I could say would persuade otherwise.
I think you have just inspired me to try building an additional Dobsonian Mount and thus providing the best of both worlds.
Tried it out on Monday - works fine, but the collimation is still a bit off. Might add a "Dob Knob" as well.
cwis said:
dr_gn said:
Thanks. They're pretty simple once you know where to get the right bits.
Tried it out on Monday - works fine, but the collimation is still a bit off. Might add a "Dob Knob" as well.
I'm guessing you did a star test? Bit more accurate than the laser normally.Tried it out on Monday - works fine, but the collimation is still a bit off. Might add a "Dob Knob" as well.
Have a go at barlowed laser collimation if you're happy with the position of your secondary:
https://www.obsessiontelescopes.com/learning_cente...
Apologies if this is teaching granny to suck eggs but I'd never heard of the technique until recently!
I'll try the Barlowed laser method. Couple of things that aren't clear - is the paper mask inside the barlow, ie sandwiched when you put the laser in the socket, or is it on the bottom end of the Barlow? I think it's pretty clear it's the latter, but worth asking.
Also, it says:
"Put just the laser in the focuser and be sure the beam hits the dot on the secondary"
What dot?
To be honest the last bit of the article is a s clear as mud to me:
"Also after you have aligned the primary with the barlowed laser, you should remove the barlow (or Paracor) and recheck the secondary mirror. Put just the laser in the focuser and be sure the beam hits the dot on the secondary and the exact center of the primary mirror. Don't worry about the primary. After the beam hits the exact center of both mirrors then do the barlowed laser method to finalize the primary alignment."
cwis said:
dr_gn said:
Thanks for that - collimation and secondary offset and all that just confuses me (despite multiple attempts to educate my by folks on various FB groups).
I'll try the Barlowed laser method. Couple of things that aren't clear - is the paper mask inside the barlow, ie sandwiched when you put the laser in the socket, or is it on the bottom end of the Barlow? I think it's pretty clear it's the latter, but worth asking.
Also, it says:
"Put just the laser in the focuser and be sure the beam hits the dot on the secondary"
What dot?
To be honest the last bit of the article is a s clear as mud to me:
"Also after you have aligned the primary with the barlowed laser, you should remove the barlow (or Paracor) and recheck the secondary mirror. Put just the laser in the focuser and be sure the beam hits the dot on the secondary and the exact center of the primary mirror. Don't worry about the primary. After the beam hits the exact center of both mirrors then do the barlowed laser method to finalize the primary alignment."
It's not particularly clear! Here's the procedure in different words from scratch:I'll try the Barlowed laser method. Couple of things that aren't clear - is the paper mask inside the barlow, ie sandwiched when you put the laser in the socket, or is it on the bottom end of the Barlow? I think it's pretty clear it's the latter, but worth asking.
Also, it says:
"Put just the laser in the focuser and be sure the beam hits the dot on the secondary"
What dot?
To be honest the last bit of the article is a s clear as mud to me:
"Also after you have aligned the primary with the barlowed laser, you should remove the barlow (or Paracor) and recheck the secondary mirror. Put just the laser in the focuser and be sure the beam hits the dot on the secondary and the exact center of the primary mirror. Don't worry about the primary. After the beam hits the exact center of both mirrors then do the barlowed laser method to finalize the primary alignment."
Set up the secondary first - don't worry about offsets, just get it so the laser spot hits the middle of the doughnut on the primary. Secondary sorted.
Now you look at the target on the laser diagonal and fiddle with your primary mirror knobs until the return from the primary goes back and hits the middle of the secondary (again) and then the middle of the target (where the laser is). Primary sorted in relation to secondary.
Job done with collimation with the laser.
The additional barlow step:
Paper mask goes on the back of your barlow lens - stick the laser in the front of it instead of in the focusser and shove the barlow in the focusser. The lens makes the laser beam diverge after passing through the hole in the paper mask, and it gets wider as it bounces off the secondary and is an inch or so wide once it hits the primary.
This means you have a nice spotlight on the doughnut - the shadow of which is reflected back up the tube, off the secondary and onto the paper mask.
And it doesn't matter if the laser is not pointing exactly down the focusser, or if the focusser is not pointing exactly at the centre of the secondary mirror either, as long as the spot is wide enough to illuminate the doughnut.
You can either look at the paper directly, obliquely up the focus tube, or just look at the primary mirror and see it reflected in the reflection of the secondary.
Move the primary mirror adjustment knobs unill the shadow of the doughnut on the paper mask is concentric to the mask. This means the primary and secondary are collimated to one another and the focus tube.
So basically the paper mask allows even finer adjustement of the primary? I assume this because you've already adjusted it previously with the laser. I get why you'd want to do this because of the imperfect centralising of the laser in the collimating tool. I have checked this roughly by turning the tool in a V-block and noting the movement of the dot on a wall. It's actually not bad at all.
I suppose either method assumes the donut on the primary is perfectly centred!
Thanks very much for that - appreciated.
BTW this is the view down the focuser after I've mechanically aligned everything as best I can by taking measurements and making card centering templates etc.
Taken with an iphone through a focuser cap with a small hole drilled in the centre, using the lathe.
The phone is aligned well - any tiny radial movement causes a shadow to the edge of the frame.
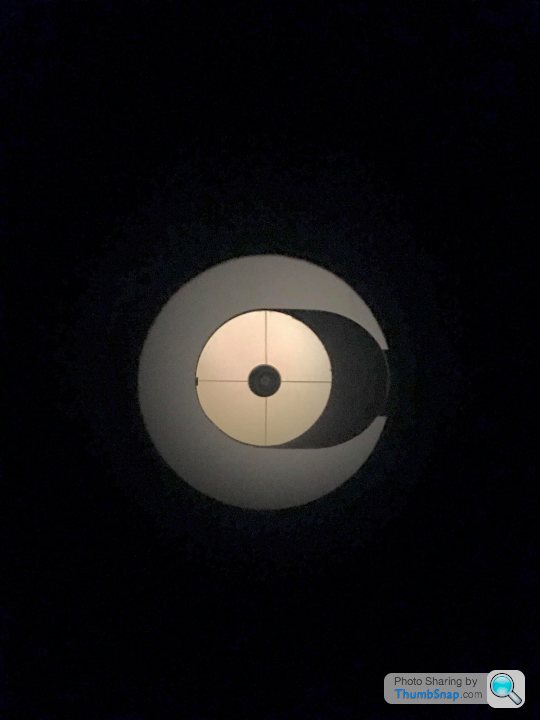
Even though I can only see one of the three primary retainers, consensus is it's good enough to do a star test and take it from there.
Taken with an iphone through a focuser cap with a small hole drilled in the centre, using the lathe.
The phone is aligned well - any tiny radial movement causes a shadow to the edge of the frame.
Even though I can only see one of the three primary retainers, consensus is it's good enough to do a star test and take it from there.
cwis said:
dr_gn said:
So basically the paper mask allows even finer adjustement of the primary? I assume this because you've already adjusted it previously with the laser. I get why you'd want to do this because of the imperfect centralising of the laser in the collimating tool. I have checked this roughly by turning the tool in a V-block and noting the movement of the dot on a wall. It's actually not bad at all.
I suppose either method assumes the donut on the primary is perfectly centred!
Thanks very much for that - appreciated.
Exactly right on all counts. I have a crappy cheap laser and if you spin it in the focusser the spot moves in a 1/2 inch diameter circle on the primary. I should collimate it I suppose - I've dug the silicone out of the adjuster holes...I suppose either method assumes the donut on the primary is perfectly centred!
Thanks very much for that - appreciated.
So I use a Cheshire to sort out the secondary and do initial primary adjustment, and then finish off with the laser barlowed.
Is there any way of taking an image of the star test diffraction rings with an iphone?
cwis said:
dr_gn said:
Great, thanks.
Is there any way of taking an image of the star test diffraction rings with an iphone?
Good question! I've got a Samsung S7 which I suppose is roughly equivalent. I've never tried - as you know you need to use an eyepiece that gives 1.6x magnification of the diameter of your telescope in mm.Is there any way of taking an image of the star test diffraction rings with an iphone?
I've got a couple of Newtonians - a 130mm and a 254mm - so I would want 203x mag in the 130 or a 3mm eyepiece (It's an F5 scope) and 406x in the 254 - also a 3mm eyepiece as it's also an F5.
I haven't got one - I have a 4mm and I use that but already at that magnification (163 or 326 depending on the scope) the image is pretty dim. Not sure whether the camera is sensitive enough without a long exposure and any kind of atmospheric moment would then blur the diffraction rings...
You could try with an artificial star and miss out on this movement? That could work! Just get an LED torch, wrap it in tin foil with a pinhole in it and shove it at the end of your garden!
I'll give the torch thing a go when it stops raining. The diffraction rings I say the other night were pretty distinct and concentric, but punctuated by a load of "noise" - spikes and wobbles all over the place. I assumed it might be poor optics but others said it's just poor seeing. The star was about 50 degrees elevation, and there was some high level haze coming and going at the time.
Cheers.
marksx said:
That's a great build! I'd love a big dob but just don't have the space.
Struggle to find a home for my old 5" flex tube dob
Mines currently living in a corner of what we jokingly refer to as the dining room. Stored with the tube vertical it doesn’t take too much room up.Struggle to find a home for my old 5" flex tube dob
cwis said:
Well you did ask....
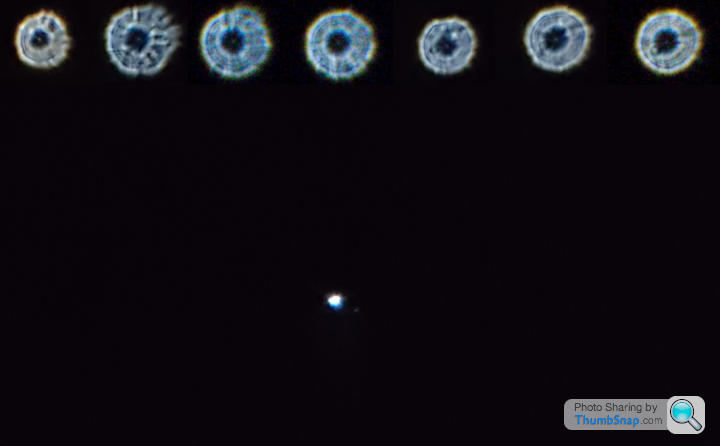
Clear night last night - fairly good seeing but a little windy in the upper atmosphere. I thought I'd have a go at getting pics of the diffraction patterns.
So here we have Polaris Aa and it's dim companion Polaris B - their dimmer third companion is not visible. I think it's in the Airy disk of Polaris Aa.
Above are the best diffraction patterns when you move extra-focus I got - ISO800 with 1/30 second exposures on my Samsung S7.
I think you can just see the Airy disk around Aa - broken because of the wind, and the disturbance in the diffraction patterns on mainly the right hand side are also caused by the wind. Interestingly the wind was from left to right in the images and it looks like it makes the patterns flap like a flag!
To the eyeball they are concentric but I was having difficulty getting my phone in the middle of the light cone from the eyepiece...
This is the best resource I've found on collimation, exit pupil, focus tips (I didn't know there was a right way to focus) etc etc.
https://www.handprint.com/ASTRO/ae3.html
It's also got some nice example generated diffraction patterns. Apparently the little dot in the centre is called the Poisson spot. Who knew?
Thanks for that - I’ll digest the article later. Some of the patterns I’m getting look very much like the ones you posted. I’m waiting for another clear night.Clear night last night - fairly good seeing but a little windy in the upper atmosphere. I thought I'd have a go at getting pics of the diffraction patterns.
So here we have Polaris Aa and it's dim companion Polaris B - their dimmer third companion is not visible. I think it's in the Airy disk of Polaris Aa.
Above are the best diffraction patterns when you move extra-focus I got - ISO800 with 1/30 second exposures on my Samsung S7.
I think you can just see the Airy disk around Aa - broken because of the wind, and the disturbance in the diffraction patterns on mainly the right hand side are also caused by the wind. Interestingly the wind was from left to right in the images and it looks like it makes the patterns flap like a flag!
To the eyeball they are concentric but I was having difficulty getting my phone in the middle of the light cone from the eyepiece...
This is the best resource I've found on collimation, exit pupil, focus tips (I didn't know there was a right way to focus) etc etc.
https://www.handprint.com/ASTRO/ae3.html
It's also got some nice example generated diffraction patterns. Apparently the little dot in the centre is called the Poisson spot. Who knew?
Edited by cwis on Thursday 11th February 10:28
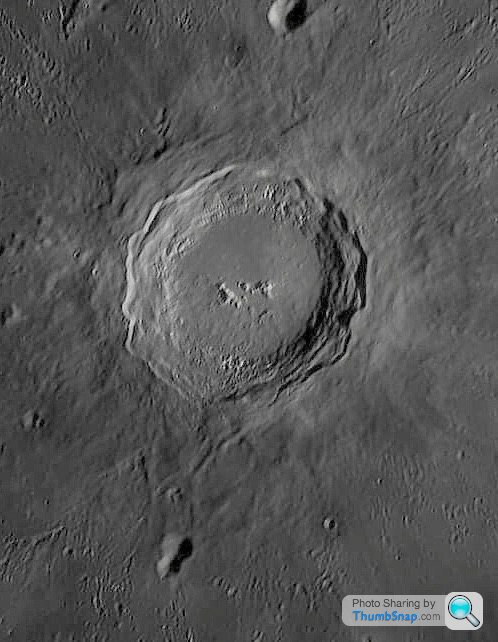
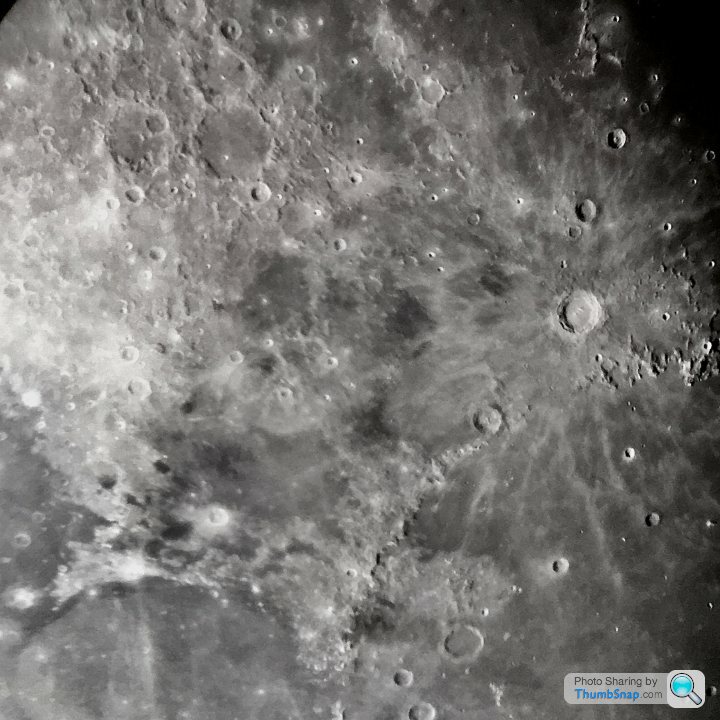
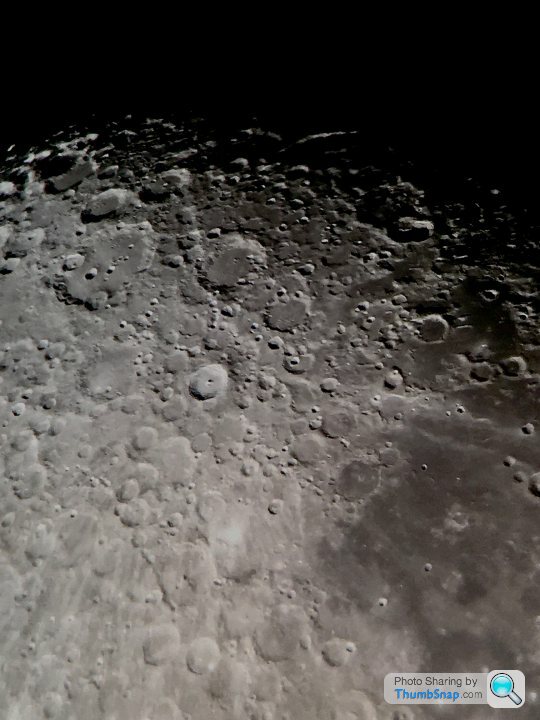
cwis said:
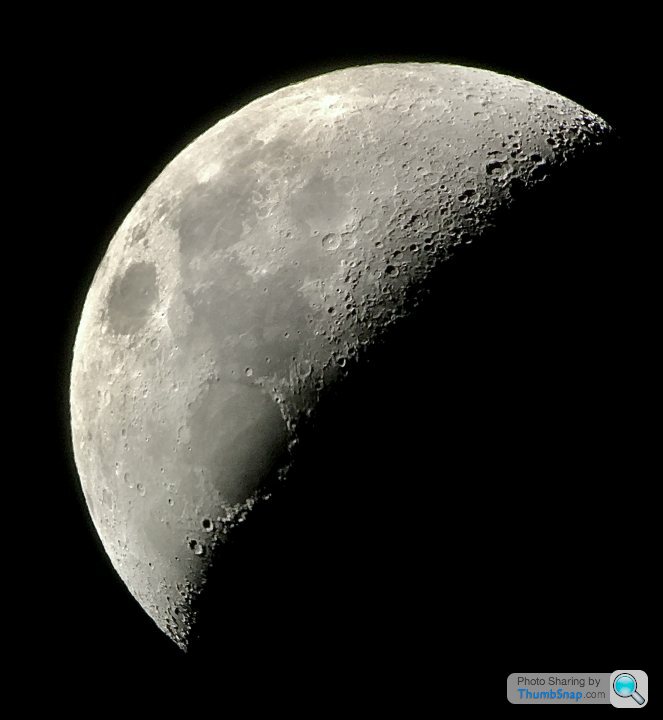
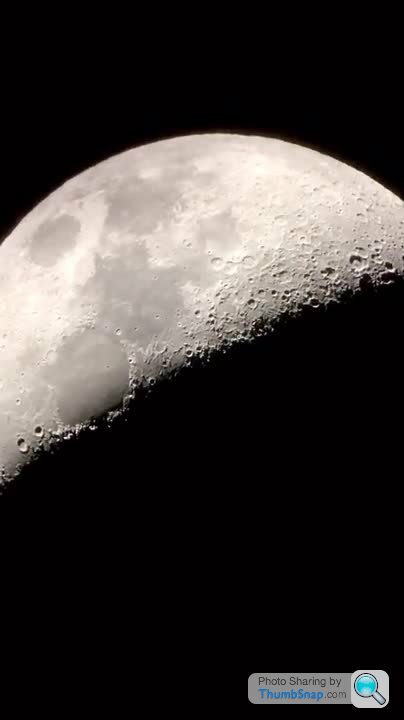
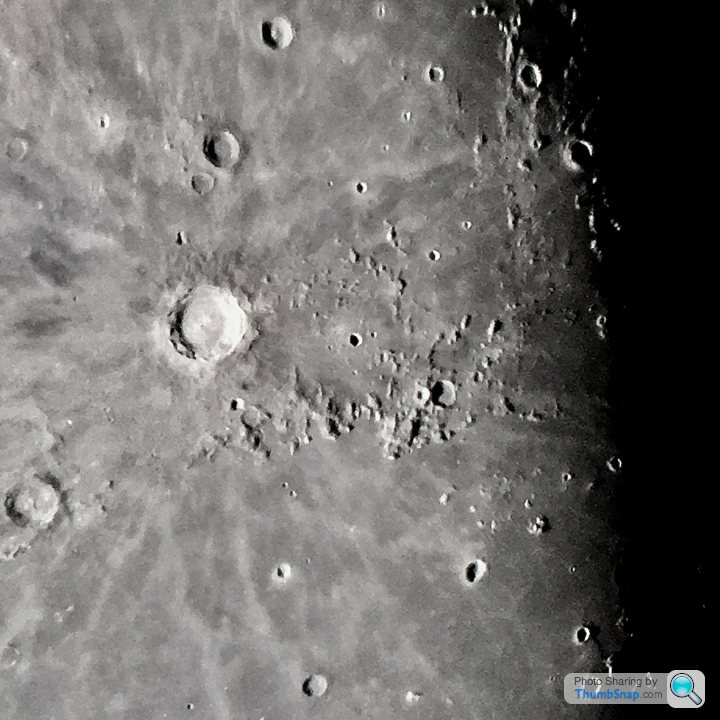
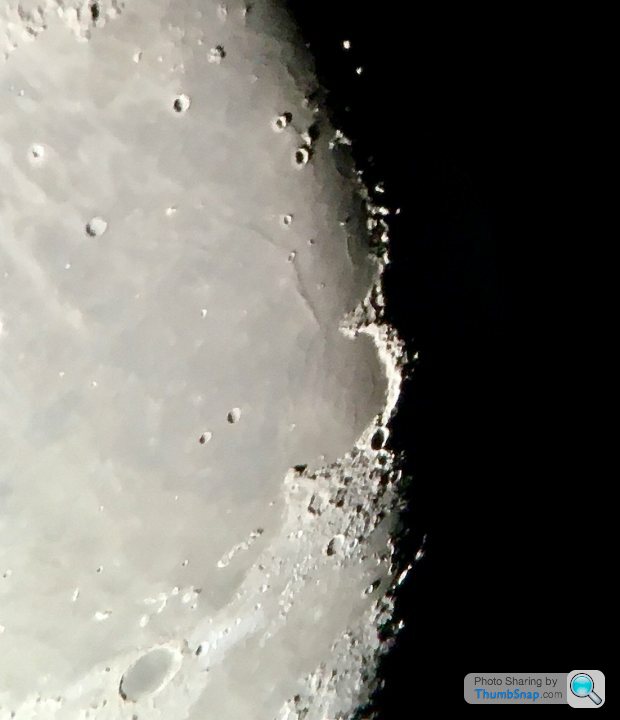
From the crispness of that moon shot I'd say you've pinned down collimation then!
Pretty good seeing last night - glad you took advantage. It's been a while...
Yep, I did a star test too, and visually filtering out the moving stuff from the constant stuff, I think the optics are good condition, and the rings are pretty much concentric. I doubt I could adjust them any better - might be different, but not better. Pretty good seeing last night - glad you took advantage. It's been a while...
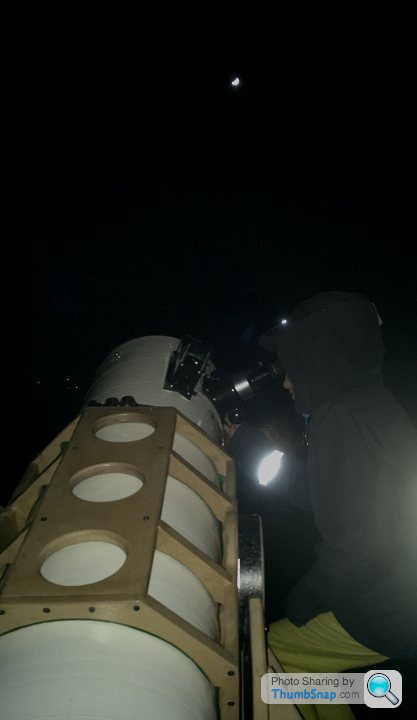
Strange how the reaction is the same no matter who looks at the Moon for the first time through a telescope - "Oh wow" - even though everyone has seen thousands of much better photos and videos of it over the years in books or TV or online.
Gassing Station | Science! | Top of Page | What's New | My Stuff