Another re-build project
Discussion


Hey guys,
You've probably noticed i've been littering the forum with questions and looking for advice for a while so thought i'd share my progress (albeit slow), im starting to get somewhere but theres so many jobs to do its taking longer than expected! here are some (poor) pics of things so far!


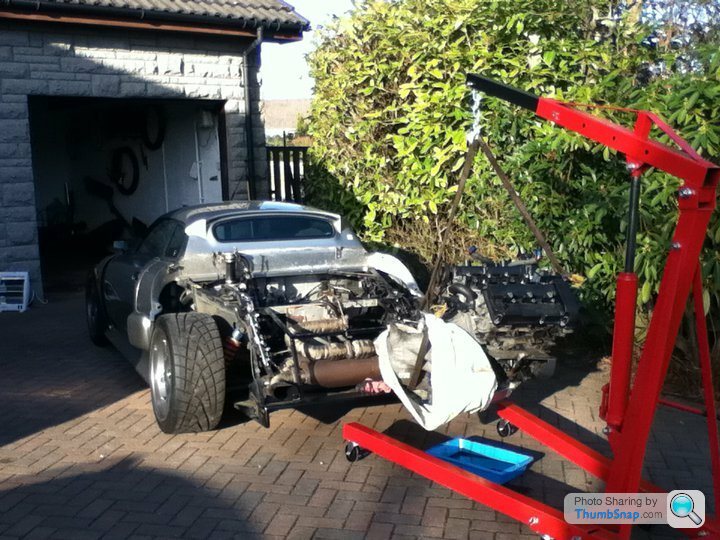
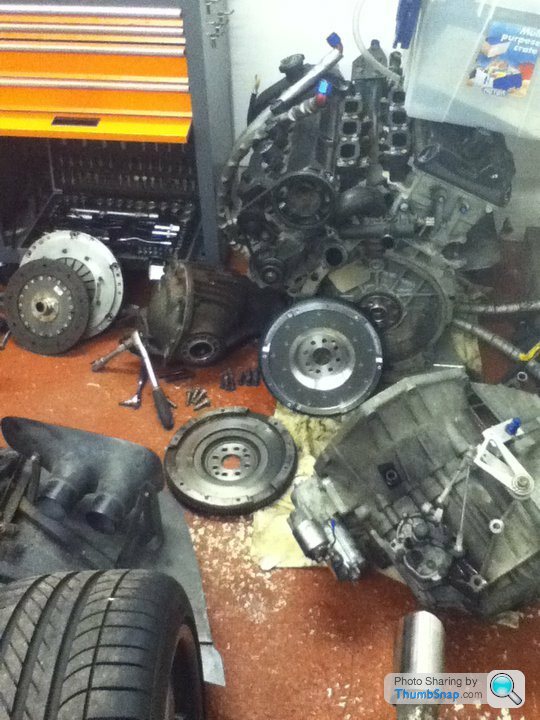


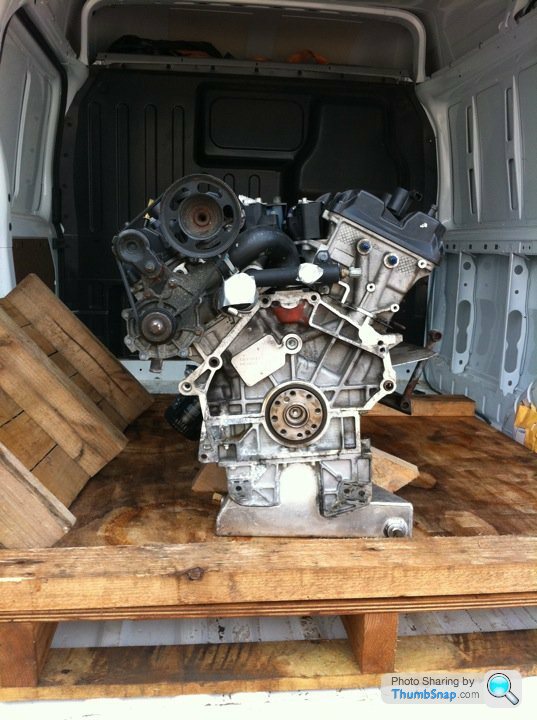
Engine is off next week to have new bearings, springs, gaskets, bolt and stud kit, cams done and head work, very excited!
Graham
You've probably noticed i've been littering the forum with questions and looking for advice for a while so thought i'd share my progress (albeit slow), im starting to get somewhere but theres so many jobs to do its taking longer than expected! here are some (poor) pics of things so far!
Engine is off next week to have new bearings, springs, gaskets, bolt and stud kit, cams done and head work, very excited!
Graham
Edited by hollowpockets on Monday 28th March 09:42
correct jeff, sadly I can't be much more help, I'm offshore today but will get a close up pic on my return, only fitted the mirrors when I took the car off the road so not sure how they will be vibration and vision wise. I imagine not as good as standard but aerodynamics and aesthetically they will be an improvement 
R0162 said:
Is there any way of moving the wing mirrors up slightly, the main downside of the stock wing mirrosr is that they disturb the air flow over the rear wheel arches, i think if you look at Adrians car he has lifted them up and out, but i could be wrong
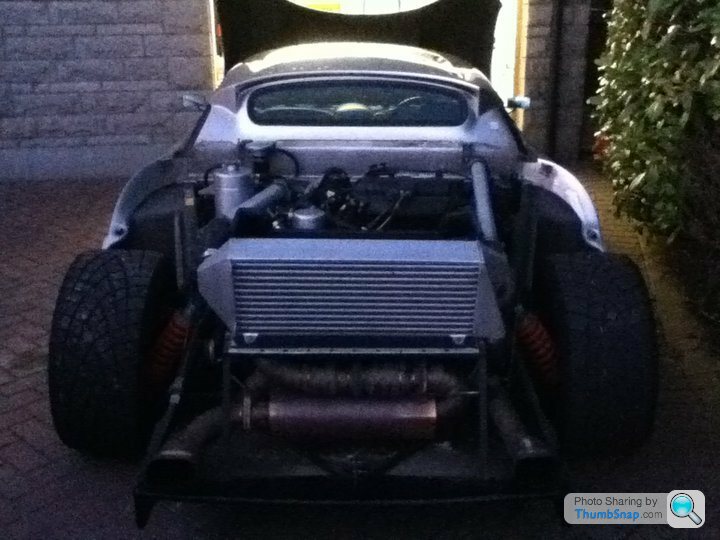
The standard mirrors do, these wee spa mirrors are so small I doubt they'd affect air over the rear arch/side pod. Adrian fitted very expensive carbon F430 mirrors I believe. I guess you could make a base plate to mount them higher but it would look untidy, simply bolting them to the original holes as I've done keeps it all neat and light.Heres some more pictures showing progress, only remaining jobs are to re-fit the powder coated floor, wire up the gearbox oil pump and put the engine back in (piece of cake)
goodbye...
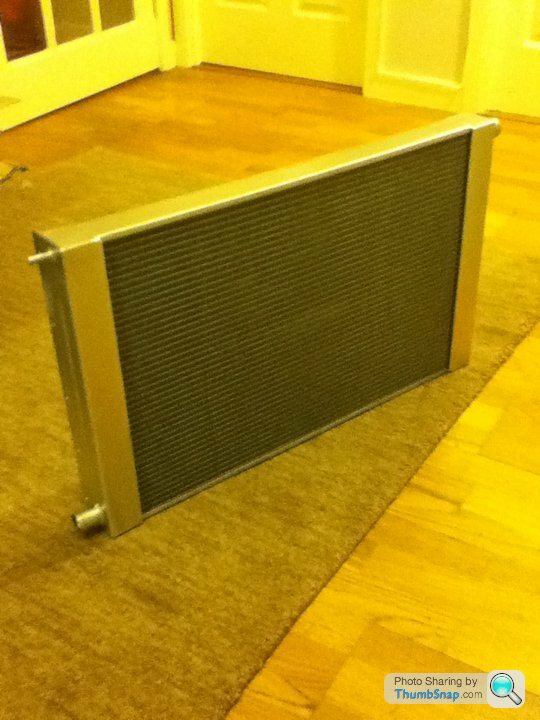
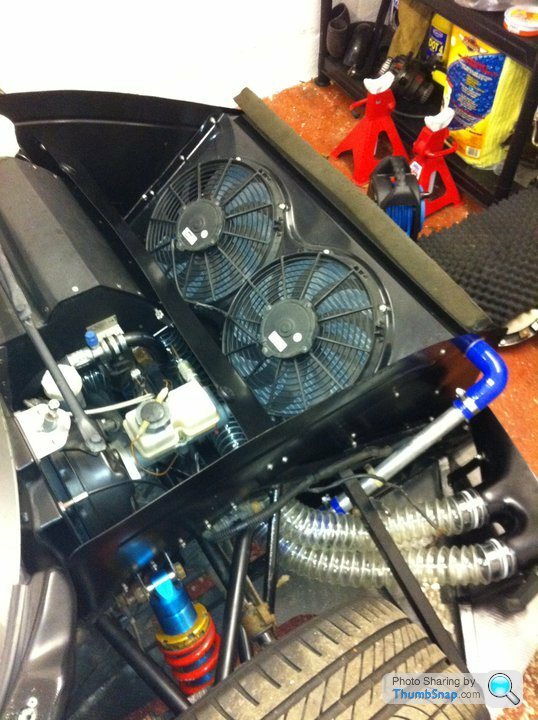
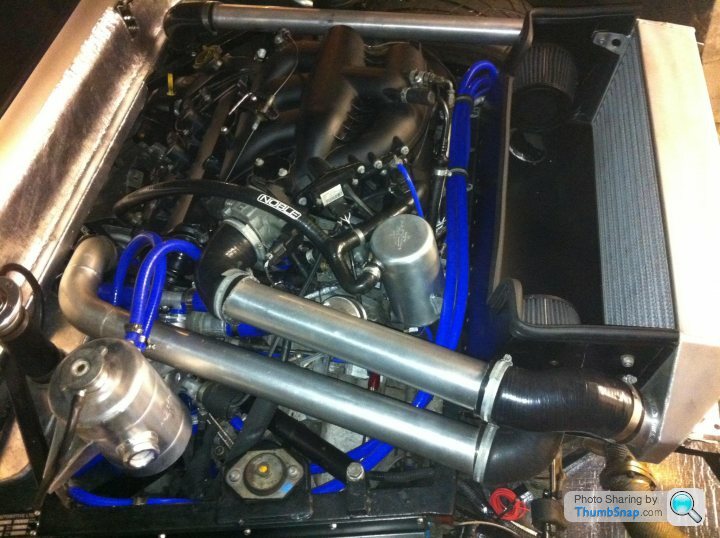
new rad, silicone hoses and air ducts, tunnel cooling mod done...

Back from mountune, bores honed, new piston rings, couple of pistons re-faced.

cams re-profiled to same spec as Grant and a couple others have i believe.

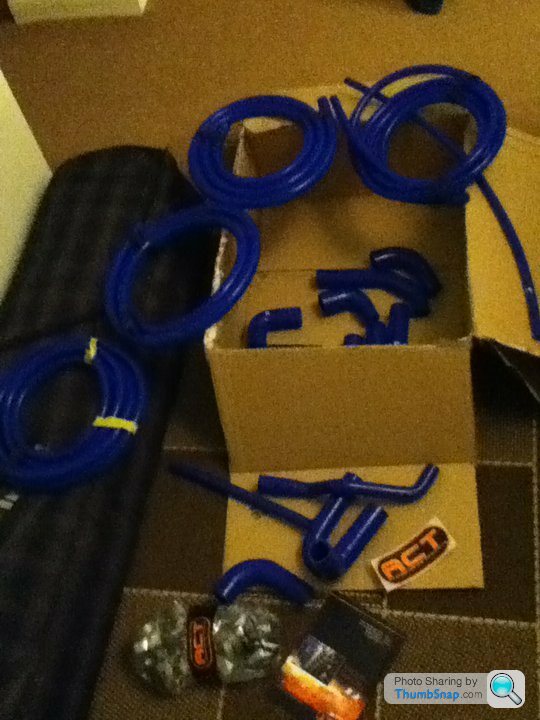
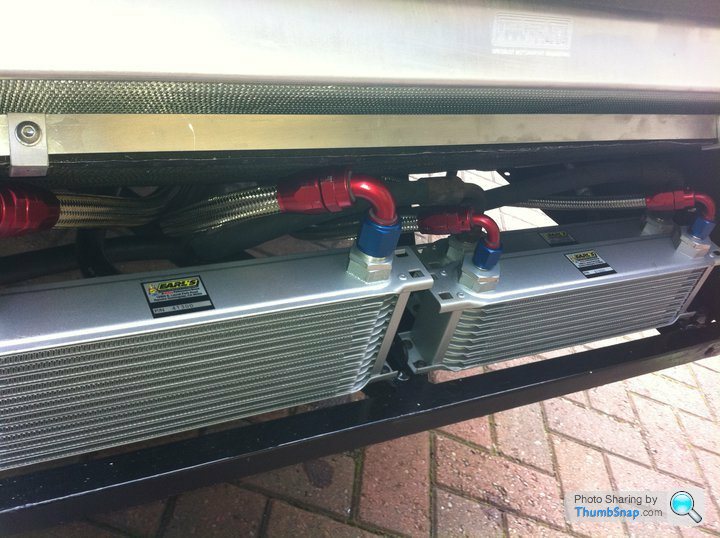
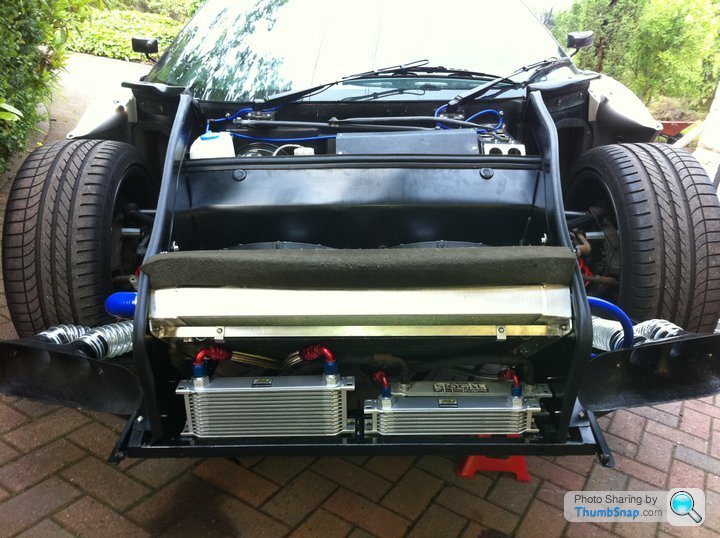
new 13 row engine -10 fittings, 10 row gearbox, 7 row power steering coolers, both -6 fittings. I welded stainless steel angle brackets on to the front cross member with indifferent welding rods and painted them black to look part of the chassis as standard
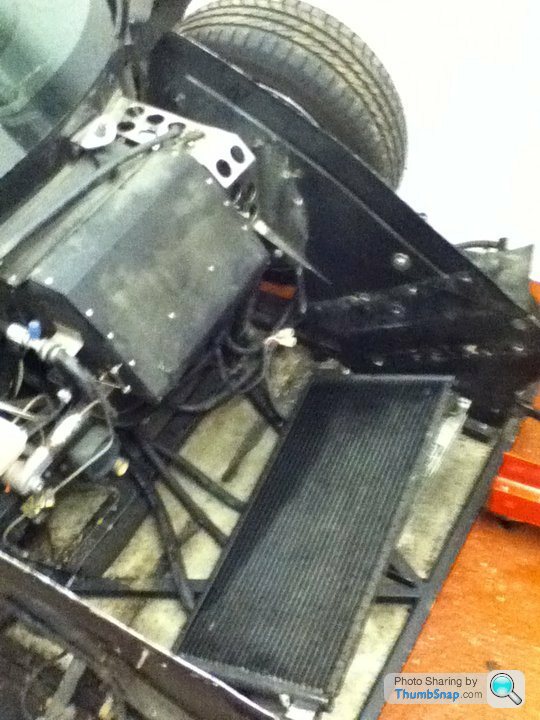
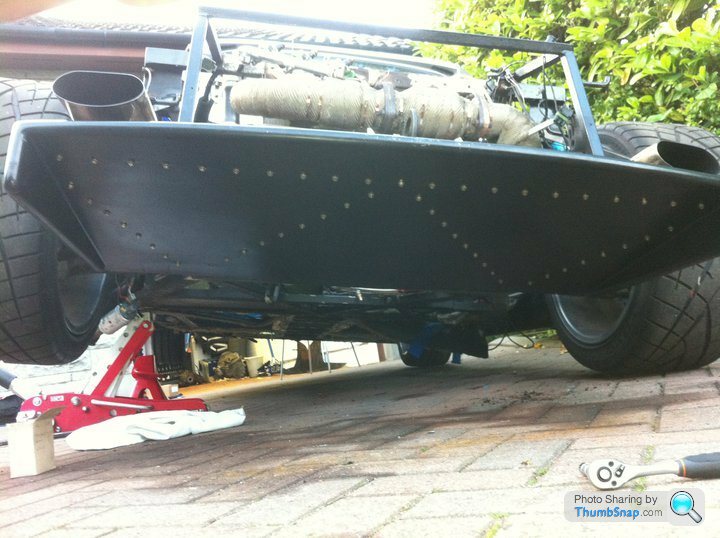
starting to refit the floor (diffuser will be changed for alloy one with vanes though now) using the same method as DavidMT on his old M400 with the closed cell neoprene and stainless A2 type self drilling screws 4.6 x 16mm, holes all pre-drilled out to 4.0mm
Rear end all cleaned up and re-painted

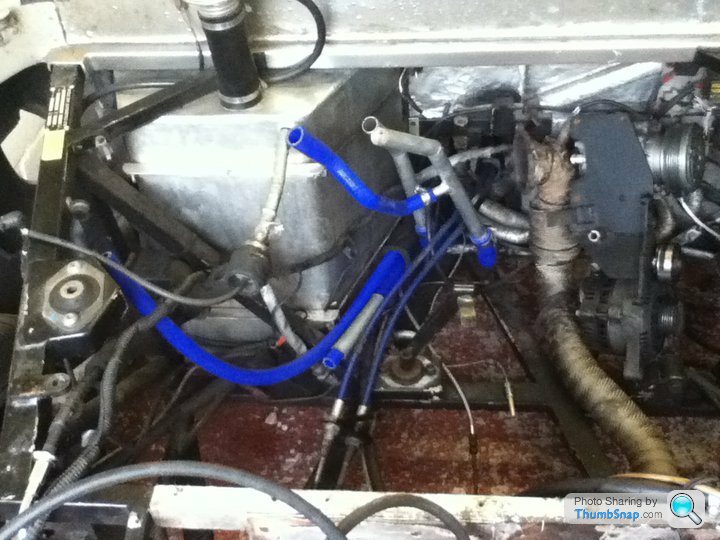
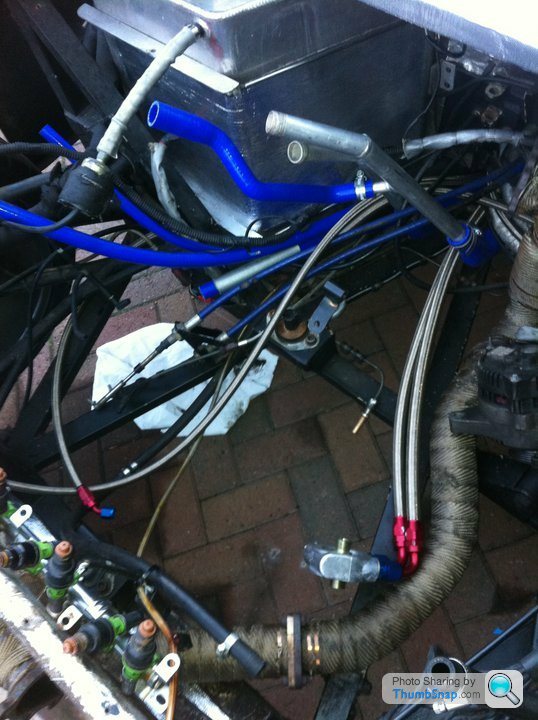
Hoses all ready to connect, it doesn't show here but have wrapped the fuel tank and covered the bulkhead and the shield infront of the exhaust with fresh heat shielding
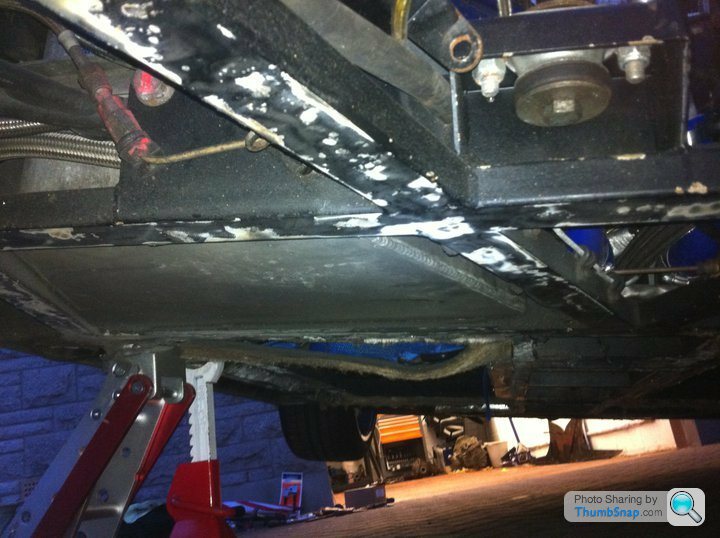
cleaned floor ready to repaint
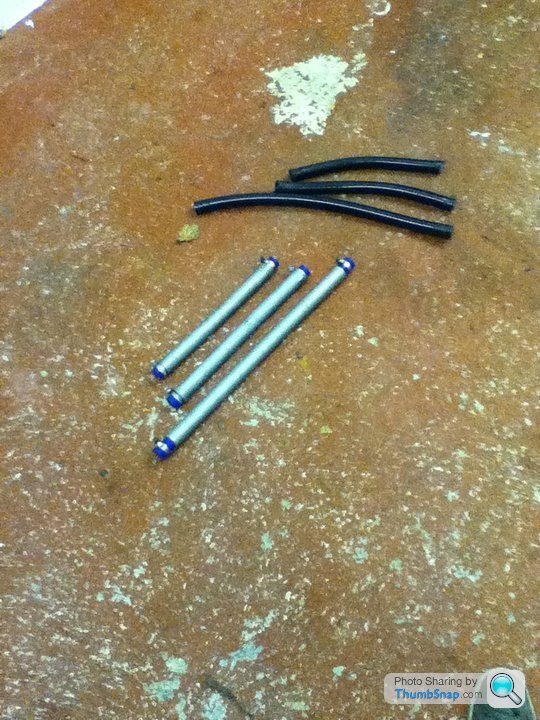
before changing the gearbox/steering coolers, washer hoses all replaced for nice blue ones, new nautillus air horn still to pop in though.
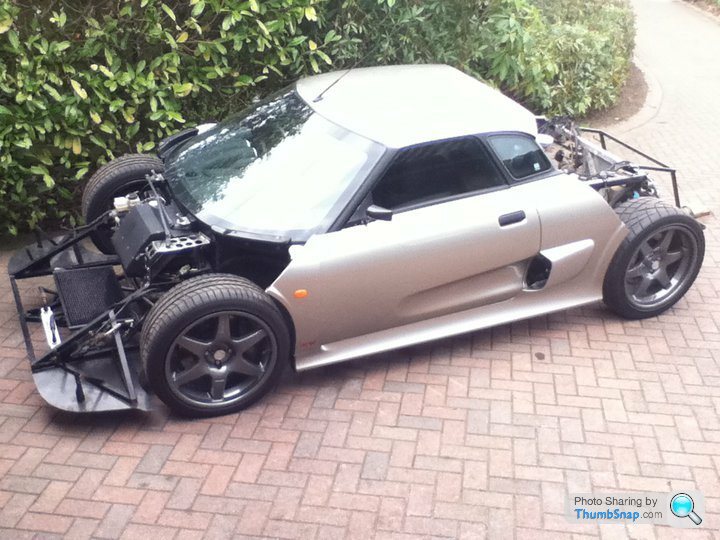
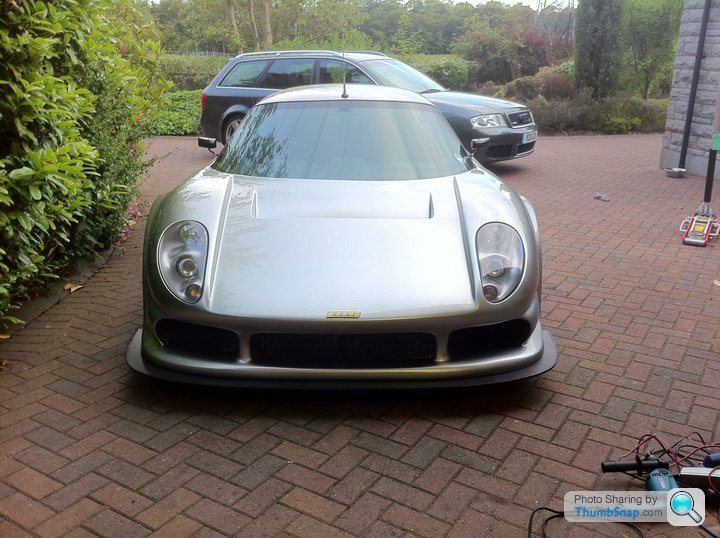
clam back on, front finished...
provisionally booked in with Trevor for re-mapping on the 30th july, very excited to get the beast going again, should get my engine back in one piece from the head shop in a week or so then my new 'afterburner' lights from Graham and its good to go!
goodbye...
new rad, silicone hoses and air ducts, tunnel cooling mod done...
Back from mountune, bores honed, new piston rings, couple of pistons re-faced.
cams re-profiled to same spec as Grant and a couple others have i believe.
new 13 row engine -10 fittings, 10 row gearbox, 7 row power steering coolers, both -6 fittings. I welded stainless steel angle brackets on to the front cross member with indifferent welding rods and painted them black to look part of the chassis as standard
starting to refit the floor (diffuser will be changed for alloy one with vanes though now) using the same method as DavidMT on his old M400 with the closed cell neoprene and stainless A2 type self drilling screws 4.6 x 16mm, holes all pre-drilled out to 4.0mm
Rear end all cleaned up and re-painted
Hoses all ready to connect, it doesn't show here but have wrapped the fuel tank and covered the bulkhead and the shield infront of the exhaust with fresh heat shielding
cleaned floor ready to repaint
before changing the gearbox/steering coolers, washer hoses all replaced for nice blue ones, new nautillus air horn still to pop in though.
clam back on, front finished...
provisionally booked in with Trevor for re-mapping on the 30th july, very excited to get the beast going again, should get my engine back in one piece from the head shop in a week or so then my new 'afterburner' lights from Graham and its good to go!
Edited by hollowpockets on Monday 4th July 10:10
NickyTwoHats said:
Yes...you should. Please :-)
I'd love to and had considered the idea of trying something similar but I live up in Aberdeen so it's not very convenient for the majority, also if I moved south I'd loose out on my offshore job which I kinda need to keep me in nobles and beer tokens!Mr GC1 is building my light units, much to his dismay I opted to go for a different (larger) set of lights than everyone else has tried and it's caused some head scratching but I'm sure Grahams skills will result in a great looking set of rears!
G
 Yeah, what the hell is that???
andygtt said:
Looks like you will be joining the 600bhp club... Do you live in Essex?
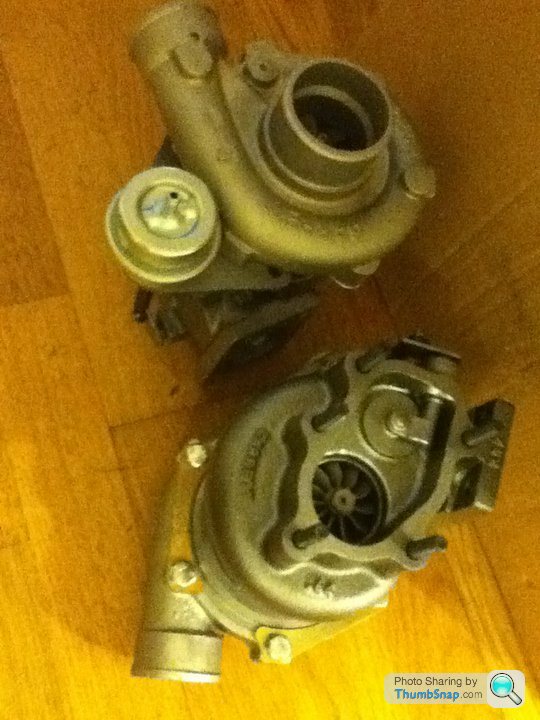
haha no Aberdeen, think I'll be slightly shy of that club, still on the modified T28s so 550+ club for me, can't handle my car being off the road any longer, need to get out and see you guys at some events so the turbo upgrade will wait till next year and my driving skills and 70Kg bodyweight will need to compensate for the extra 50bhp!
Hi guys, just an update on this, the exciting part, oh and the nautillus air horn sounds much better!
Engine in and all connected up with fluids etc, see Tuxman's carbon throttle cable mount
nice gloss black powder coat finish to the floor, re-fitted as done by David.MT to the car now owned by IainRS, with closed cell neoprene tape on the repainted chassis and siliconed round the capeted parts then held in place with the stainless hex A2 bolts 13mm.

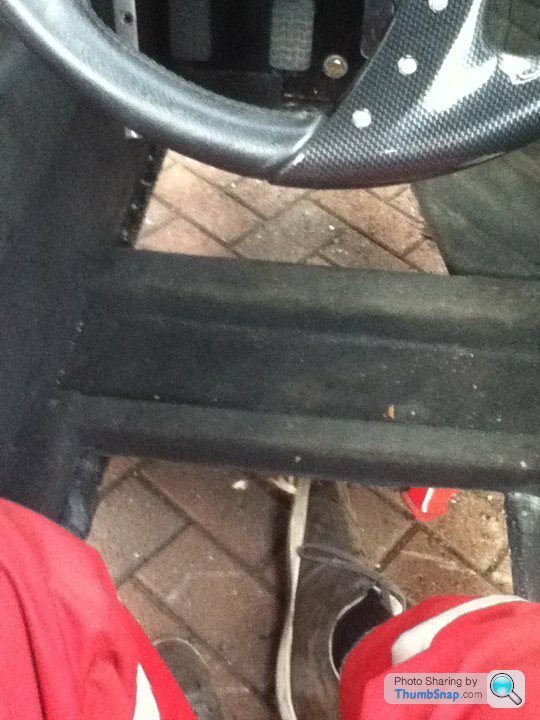
Nothing exciting, just the interior back in place... it put a big smile on my face sitting in that drivers seat again!

Rear end back on
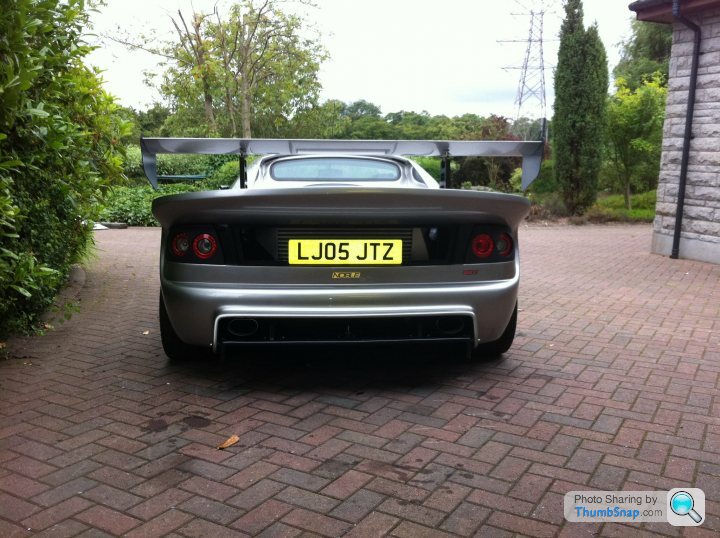
Off to Jetstream on the back of the worst vehicle ive ever driven for 450 miles! reverie gurney added but didnt have time to put the cannards on at this point.

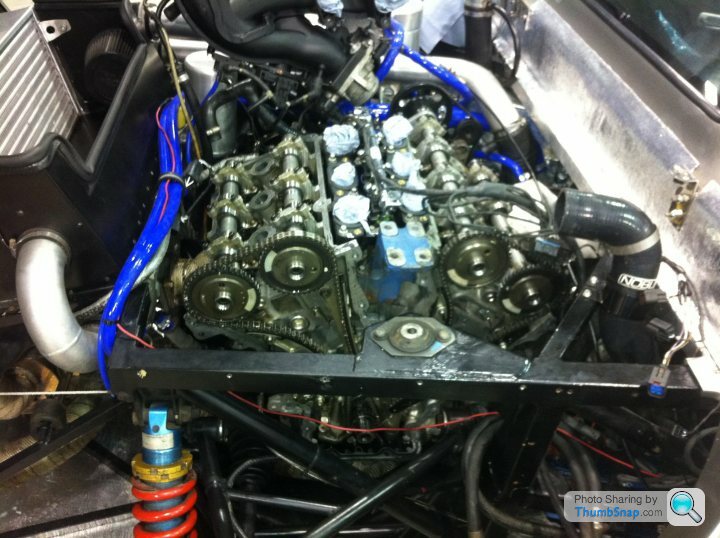
Stripped for the timing change mod, also getting a touch up on the front clam, geo check, few other service checks.
Collecting my car from them once Trevor has blessed it with another re-map as the finishing touch, will post results in the next couple of weeks hopefully.
Thanks to all for advise/help/constructive critisism along the way, hope my posts have interested and been informative for people now and in the future. Hope ive got a good car under me after this and very excited to put some well deserved miles on her over the next couple of years!
Graham
Engine in and all connected up with fluids etc, see Tuxman's carbon throttle cable mount
nice gloss black powder coat finish to the floor, re-fitted as done by David.MT to the car now owned by IainRS, with closed cell neoprene tape on the repainted chassis and siliconed round the capeted parts then held in place with the stainless hex A2 bolts 13mm.
Nothing exciting, just the interior back in place... it put a big smile on my face sitting in that drivers seat again!
Rear end back on
Off to Jetstream on the back of the worst vehicle ive ever driven for 450 miles! reverie gurney added but didnt have time to put the cannards on at this point.
Stripped for the timing change mod, also getting a touch up on the front clam, geo check, few other service checks.
Collecting my car from them once Trevor has blessed it with another re-map as the finishing touch, will post results in the next couple of weeks hopefully.
Thanks to all for advise/help/constructive critisism along the way, hope my posts have interested and been informative for people now and in the future. Hope ive got a good car under me after this and very excited to put some well deserved miles on her over the next couple of years!
Graham
Edited by hollowpockets on Saturday 6th August 12:02
XLRONYX said:
Did you have to drop the oil pan in order to remove the front cover? Or maybe just loosen the bolts and pry it down a little?
How did you remove and re-install the crank pulley? I'm a bit afraid I'll mess it up.
Jeff
Dave at Jetstream done it as i watched, The inlet manifold, front turbo pipe, cam covers, alternator bracket and power steering pump were removed, then the belt and tensioners and crank pulley appeared to be straight forward unbolt and pull off/push on jobs. I know its stating the obvious but just be sure to mark the positions of anything you remove. A different engine builder put the 'spark timing pick up ring' on the end of the crank, in the wrong position even after marking it, thankfully Dave spotted this and turned it round while doing the timing chain adjustment.How did you remove and re-install the crank pulley? I'm a bit afraid I'll mess it up.
Jeff
The sump/oil pan didnt get touched as far as i could see and the oil was sitting just level with the top edge of it so you shouldn't spill much if any at all. Impressive to watch an experienced person do it but i think i could manage (with more time and written instructions
) myself after seeing it done.Gassing Station | Noble | Top of Page | What's New | My Stuff